1
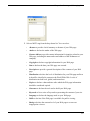
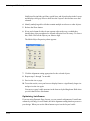
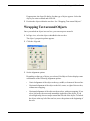
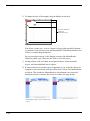
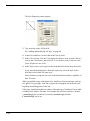
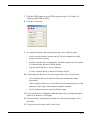
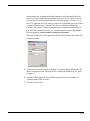
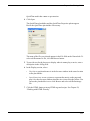
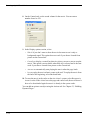
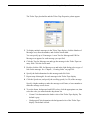
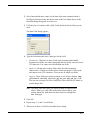
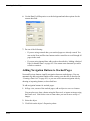
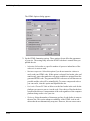
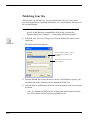
Chapter 15
Adding Tables
•
Vertical determines alignment to the top, middle, or bottom of the cell.
•
Horizontal determines alignment to the left, center, or right of the cell. If the
cell contains text, you can justify it within the cell.
4. Set the cell background. You can use both a color and a picture.
•
To change the cell background color, in the Color field select:
•
Automatic to set the cell background to the color specified for the table.
•
Color to select a background color for the cell from the Color Picker. The
selected color appears in the box to the right of the Color field. To
change the color, click the box and select a new color from the Color
Picker.
•
To change the cell background image, in the Image field, select:
•
Automatic to set the background to the image used by the table.
•
Browse to select an image for the cell background from the Picture File
Open dialog. See “Choosing an Image Format” on page 182. If the
picture is smaller than the cell, the browser tiles the image. If you select
a picture with a transparent color, the background color shows through.
To change the image, click the Browse button to the right of the field.
5. To apply text styles and formatting to cells, click the Format tab. See
Chapter 12, “Designing with Text.”
6. To make the cell a form, select Cell is a form. See Chapter 25, “Designing and
Implementing Forms.”
7. Select Cell is a header to format the cell as a column or row heading. This
makes it easier for people with disabilities to read the table.
You can also add HTML code to a cell. See Chapter 28, “Working with HTML
Directly.”
Sizing Cells
To make a table cell shrink to fit the content in the cell:
1. Right-click in the cell you want to size.
2. Select Fit Cells from the shortcut menu.
227