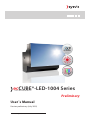
1
ecCUBE®-LED-1004 Series EYEVIS REAR PROJECTOR LINE Preliminary User´s Manual Version preliminary (July 2015) Technical changes reserved. EC-LED-1004 Series 2 Additional Support For additional support for eyevis products, please contact: SER VICE SU PPORT As at: July 2014 eyevis GmbH Hundsschleestrasse 23 D-72766 Reutlingen Germany Phone: +49 (0)7121-4 33 03-0 Fax: +49 (0)7121-4 33 03-22 Hotline: +49 (0)7121-4 33 03-290 (netPIX & eyeCON) Hotline: +49 (0)7121-4 33 03-291 (Cubes & Displays) web: www.eyevis.de e-mail: [email protected] service: [email protected] Copyright © 2014 eyevis (Gesellschaft für Projektions- und Großbildtechnik mbH). All Rights reserved. )) eyevis user document If this document is sold with software that includes an end user license agreement, this document as well as the software described within it shall be provided under licence and may only be used or duplicated according to the terms of the licence. No part of this documentation may be reproduced, stored in databases or transferred in any form – electronically, mechanically, on recording media or in any other way – without prior written consent of the eyevis, unless the licence expressly permits this. Please note that the content of this document is protected by copyright, even if it is not sold together with software that includes an end user licence agreement. The content of this document is solely informative, can be changed at any time without notice and represents no obligation on the part of the eyevis. eyevis assumes no responsibility or liability for any errors or inaccuracies that may appear in this document. eyevis, the eyevis logo and eyeCON are trademarks or registered trademarks of eyevis Deutschland. All other trademarks are the property of their respective owners. User Manual EC-LED-1004 Series 3 Table of Content Sicherheit / Safety 5 About this Product 13 Transport, Storage, Unpacking 14 Unpacking������������������������������������������������������������������������������ 14 Delivery Contents 15 Packaging������������������������������������������������������������������������������ 15 Product Overview 17 The EC-Lcontrol Software47 Setup of the EC-Lcontrol Software ���������������������������������� 47 Starting the EC-Lcontrol software������������������������������������ 47 The start page at a glance�������������������������������������������������� 48 The menu bar������������������������������������������������������������������������ 49 The setting area�������������������������������������������������������������������� 51 Adjusting the colours with EC-Lcontrol�������������������������� 54 Operation58 Cleaning and Care 58 Housing and backplane������������������������������������������������������ 17 Cleaning intervals���������������������������������������������������������������� 58 Projector�������������������������������������������������������������������������������� 18 Cleaning the screen surface ���������������������������������������������� 59 Assembly / Installation 21 Mounting the basement ���������������������������������������������������� 21 Mounting the Cube housing���������������������������������������������� 24 Cleaning the housing���������������������������������������������������������� 59 Cleaning the optic���������������������������������������������������������������� 59 Malfunctions and Troubleshooting 60 Mounting the projection unit�������������������������������������������� 25 Typical problems������������������������������������������������������������������ 60 Earthing the cube wall�������������������������������������������������������� 27 Possible causes of malfunctions and problems ������������ 61 Installing the projector ������������������������������������������������������ 27 Cabling the cubes���������������������������������������������������������������� 29 Warranty Terms and Conditions 62 Addressing the cubes - Cube iD���������������������������������������� 30 Duration and Validity of Warranty������������������������������������ 62 Rotation Switches���������������������������������������������������������������� 30 Proof of Purchase ���������������������������������������������������������������� 62 Network���������������������������������������������������������������������������������� 31 Warranty Service or exchange during Warranty Period62 Adjusting the focus�������������������������������������������������������������� 32 Warranty Exclusions������������������������������������������������������������ 63 Adjusting the geometry������������������������������������������������������ 33 Reaction Time������������������������������������������������������������������������ 63 Adjusting the mirror������������������������������������������������������������ 34 Advised Procedure for raising a Claim���������������������������� 64 Configuration35 General information on the configuration programs�� 35 The eyeDevice Setup Software 36 Starting the eyeDevice Setup software �������������������������� 36 The Load/Save area�������������������������������������������������������������� 37 The selection area���������������������������������������������������������������� 37 The Parameter area�������������������������������������������������������������� 38 Establishing Communication via eyeDevice Setup������ 39 Settings of the parameter area ���������������������������������������� 41 Version preliminary | July 2014 Legal and other Claims ������������������������������������������������������ 64 Limitations of Liability�������������������������������������������������������� 65 Appendix66 Appendix: Technical Specifications���������������������������������� 66 Environmental conditions�������������������������������������������������� 68 Index69 4 EC-LED-1004 Series Revision History Version Date Page / Section 1.0 2014-07 All Description Specification first issued. User Manual EC-LED-1004 Series 5 Sicherheit / Safety Zu dieser Anleitung Lesen und beachten Sie diese Anleitung. In ihr stehen wichtige Informationen zum Produkt. Beachten Sie insbesondere alle Sicherheits- und Warnhinweise. Bewahren Sie diese Anleitung sorgfältig auf! Verwendete Warnhinweise ACHTUNG Kennzeichnet eine Gefahr, die zur Beschädigung oder Zerstörung des Produkts führen kann. Das allgemeine Warnsymbol kennzeichnet eine Gefahr, die zu Verletzungen oder zum Tod führen kann. Im Textteil wird das allgemeine Warnsymbol in Verbindung mit den nachfolgend beschriebenen Warnstufen verwendet. VORSICHT Kennzeichnet eine Gefahr, die zu leichten oder mittleren Verletzungen führen kann. WARNUNG Kennzeichnet eine Gefahr, die zum Tod oder zu schweren Verletzungen führen kann. GEFAHR Kennzeichnet eine Gefahr, die unmittelbar zum Tod oder zu schweren Verletzungen führt. Verwendete Symbole ► Kennzeichnet einen einzelnen Handlungsschritt oder mehrere Handlungsschritte, jedoch ohne feste Abfolge. 1. 2. 3. Kennzeichnet ein Folge von Handlungsschritten, deren vorgegebene Reihenfolge eingehalten werden muss. Kennzeichnet ein Resultat von Handlungsschritt(e). ) ) NOTE: Informationen über bestimmte Merkmale oder Eigenschaften. ) ) TIP: Tipps für die beste Ausübung. Version preliminary | July 2014 6 EC-LED-1004 Series Sicherheitshinweise In diesem Kapitel finden Sie allgemeine Hinweise für einen sicheren Umgang mit dem Produkt. ►► Lesen Sie diese Sicherheitshinweise sorgfältig und befolgen Sie alle darin beschriebenen Anweisungen. Vor konkreten Gefahren werden Sie zusätzlich in den nachfolgenden Kapiteln durch farbige Warnhinweise immer dann gewarnt, wenn die Gefahr unmittelbar besteht. Bestimmungsgemäße Verwendung Der ESP mit LED-Projektionsengine dient zur visuellen Wiedergabe von Inhalten im industriellen Bereich. Betreiben Sie das Produkt nur in erlaubter Installationslage. Für weitere Informationen siehe Kapitel „Unerlaubte Installation“ auf Seite 19. Verwenden Sie das Produkt nur in trockenen Räumen. •• •• •• Beachten Sie die zulässigen Umweltbedingungen. Für weitere Informationen siehe Kapitel „Anlage: Technische Daten“ auf Seite 53. Qualifikation des Aufstellers Installation und erste Einstellungen sollten nur von qualifiziertem Servicepersonal oder autorisierten Fachhändlern durchgeführt werden. Allgemeine Hinweise ►► Beachten Sie unbedingt alle Warnhinweise auf den Komponenten und in dieser Bedienungsanleitung. ►► Beachten Sie unbedingt alle Anweisungen zum Betrieb und Nutzung unserer Systeme. ►► Beachten Sie alle lokale Vorschriften zum Aufbau und Betrieb von Anlagen, unter die unsere Systeme fallen. Stromanschluss ►► Verwenden Sie nur das von uns zur Verfügung gestellte Netzkabel. ►► Schließen Sie das Netzkabel Ihres Geräts nur an geerdete Steckdosen sicher und korrekt an. ►► Schließen Sie niemals mehrere Geräte an die gleiche Steckdose an. ►► Berühren Sie das Netzkabel niemals mit feuchten Händen, wenn Sie den ►► ►► ►► ►► Stecker und die Steckdose miteinander verbinden. Vermeiden Sie übermäßiges Verbiegen oder starke Zugbelastung des Kabels. Stellen Sie keine schweren Gegenstände auf dem Kabel ab. Ziehen Sie den Netzstecker niemals bei eingeschaltetem Gerät aus der Steckdose. Um im Notfall das Gerät komplett vom Stromnetz trennen zu können, müssen Sie den Netzstecker aus der Dose ziehen. Deshalb muss der Netzstecker jederzeit leicht erreichbar sein. Beanspruchen Sie Steckdosen, Ausgänge und Kabel nicht über ihre zulässige Kapazitätsgrenze. Verwenden Sie keine unzulässigen Verlängerungskabel. User Manual EC-LED-1004 Series 7 ►► Installieren oder betreiben Sie das Gerät niemals unter Umgebungs- bedingungen, die von denen der technischen Spezifikation abweichen. Hierzu zählen vor allem dauerhafte hohe Luftfeuchtigkeit, Regen, zu nahe an Wasser, Feuer, Heizungen und Öfen oder dauerhafte Aussetzung von direktem Sonnenlicht oder ähnlichem. Abweichende Betriebsbedingungen können zu elektrischer Gefährdung, Feuer oder Ausfall des Gerätes führen. Installation ►► Lassen Sie die Geräte durch Ihren Händler professionell aufbauen. ►► Zum Auspacken und zum Bewegen der Geräte sollten Sie mindestens zu ►► ►► ►► ►► ►► zweit sein. Stellen Sie sicher, dass die Geräte stets aufrecht transportiert werden. Verwenden Sie ausschließlich eyevis Untergestelle zum Aufbau der Geräte. Verwenden Sie an Orten mit starken Vibrationen ein entsprechendes vibrationsabsorbierendes Untergestell von eyevis. Installieren Sie die Geräte nicht auf unangemessenen Untergründen, wie z. B. unstabilen Doppelböden oder Gefällen, sondern nur auf stabilen, ebenen Flächen. Installieren Sie das Gerät nicht an Orten mit hohen Temperaturen oder hoher Luftfeuchtigkeit. Für weitere Informationen siehe Kapitel „Anlage: Technische Daten“ auf Seite 53. Halten Sie die Lüftungsöffnungen des Geräts offen. Stecken Sie das Netzkabel erst am Gerät ein, bevor Sie es in die Steckdose stecken, und verlegen Sie das Netzkabel so, dass niemand darüber stolpern kann. Wenn die Verwendung von Verlängerungskabel erforderlich ist, sollte die Nennleistung des Verlängerungskabel mindestens gleichwertig mit der des Geräts sein. Gebrauch ►► Dieses Gerät führt Hochspannung! Stellen Sie sicher, dass Benutzer es nicht ►► ►► ►► ►► ►► ►► Version preliminary | July 2014 selbst öffnen, reparieren oder verändern. Führen Sie keine Gegenstände ins Geräteinnere ein. Berühren Sie bei Gewitter nicht das Gerät, angeschlossene Kabel oder den Netzstecker. Klettern Sie nicht auf den Geräten. Wenn das Gerät über einen längeren Zeitraum nicht verwendet wird, ziehen Sie zur Sicherheit den Netzstecker aus der Steckdose. Verwenden Sie das Gerät niemals mit einem beschädigten Netzkabel, oder wenn das Gerät heruntergefallen oder beschädigt wurde. Warten Sie mit der Inbetriebnahme bis das Gerät von einem qualifizierten Servicetechniker untersucht wurde. Vorsicht: Einige Bauteile des Geräts können während des Betriebs heiß werden. 8 EC-LED-1004 Series Demontage und Lagerung ►► Lassen Sie das Gerät komplett abkühlen, bevor Sie es einlagern. ►► Stecken Sie das Netzkabel und alle weiteren Kabelverbindungen aus, bevor Sie das Gerät bewegen oder demontieren. Entfernen Sie hierbei den Netzstecker nur durch Ziehen am Stecker (und nicht am Kabel) aus der Steckdose. ►► Packen Sie zur optimalen Lagerung das Geräte in die Originalverpackung zurück. ►► Beachten Sie die Umweltbedingungen zur Lagerung. Für weitere Informationen siehe Kapitel „Anlage: Technische Daten“ auf Seite 53. Haftungsausschlüsse ►► eyevis ist nicht haftbar für jegliche Schäden verursacht durch Naturgewalten (wie Erdbeben, Gewitter, etc.), Brände, Handlungen Dritter, Unfälle, vom Besitzer zu verantwortende Fehlbedienungen oder den Gebrauch außerhalb der vorgeschriebenen Betriebsbedingungen. ►► eyevis ist nicht haftbar für eventuelle Folgeschädigungen, wie z. B. Gewinnausfälle, Betriebsunterbrechungen, Datenmodifikation oder Datenlöschung, die durch die Verwendung von eyevis Produkten bzw. deren Ausfall im Betrieb verursacht werden. ►► eyevis ist nicht haftbar für Schäden, die in Folge mangelnder Beachtung der Anweisungen dieser Bedienungsanleitung entstanden sind. ►► eyevis ist nicht haftbar für Schäden die in Folge des Gebrauchs seiner Produkte im Zusammenschluss mit anderen Produkten, Geräten und Software entstehen. ►► eyevis ist nicht haftbar für Schäden, die in Folge unzulänglicher Installation seiner Produkte entstehen. Konformität Das vorliegende Gerät entspricht den folgenden Richtlinien der Europäischen Union: EMV-Richtlinie 2004/108/EC Dieses Gerät entspricht den Anforderungen der Klasse A. Es kann beim Einsatz in Wohngebieten elektromagnetische Störungen (EMI) verursachen. Möglicherweise muss der Besitzer in diesen Fällen auf eigene Kosten angemessene Maßnahmen gegen die EMI-Emissionen ergreifen. Niederspannungsrichtlinie 2006/95/EC 2002/95/EC (vom 27. Januar 2003 Richtlinie des Europäischen Parlaments und des Rates zur Beschränkung der Verwendung bestimmter gefährlicher Stoffe in Elektro- und Elektronikgeräten (RoHS)) 2002/96/EC (vom 27. Januar 2003 Richtlinie des Europäischen Parlaments und des Rates über Elektro- und Elektronik-Altgeräte (WEEE)). •• •• •• •• Die Übereinstimmung mit den Anforderungen wird durch die auf dem Produkt angebrachte CE-Kennzeichnung zertifiziert. Der Hersteller kann nicht für den Betrieb außerhalb der Betriebsbedingungen, wie in dieser Bedienungsanleitung beschrieben, haftbar gemacht werden. Zudem erlöschen hierdurch Ihre Produkthaftungs- und Gewährleistungsansprüche. User Manual EC-LED-1004 Series 9 About this Manual Read and pay attention to this manual. It contains important information on the product. In particular, note all of the safety instructions and warnings. Keep this manual in a safe place! Warnings used NOTICE Indicates a hazard that could lead to damage or destruction of the product. The general warning symbol indicates a hazard that could lead to injuries or death. In the text section, the general warning symbol is used in conjunction with the warning levels described below. CAUTION Indicates a hazard that could lead to minor or moderate injuries. WARNING Indicates a hazard that could lead to death or serious injury. DANGER Indicates a hazard that leads to immediate death or serious injury. Symbols used ► Indicates a single action or multiple actions which do not have to be performed in any specific order. 1. 2. 3. Indicates a set of actions that have to be performed in a specific order. Indicates the result of the action step(s). ) ) NOTE: Information about specific characteristics or properties ) ) TIP: Tips for the best practise Version preliminary | July 2014 10 EC-LED-1004 Series Safety Instructions In this chapter you will find general instructions for the safe handling of this product. ►► Read this safety information thoroughly and follow all the instructions carefully. In the following chapters, warning signs displayed in colour also indicate hazards that are imminent. Intended use The ESP with LED projection engine is intended for visually replaying contents for industrial use. Only operate the product in a Authorised installation position For more information see chapter „Unerlaubte Installation“ on page 19. Only use the product in dry rooms. Observe the permissible environmental conditions. For more information see chapter „Anlage: Technische Daten“ on page 53. •• •• •• Operator qualifications Installation and preliminary adjustments should only be performed by qualified service personnel or authorised service dealers. General information ►► Carefully observe all warnings on the system parts and in this user's manual. ►► Carefully follow all the instructions governing the operation and use of our systems. ►► Observe all the local system installation and operation regulations which our systems are subject too. Power ►► Only use the power cable supplied by eyevis. ►► The power cable must be correctly and securely connected to earthed power outlets. ►► Do not connect multiple devices to the same power outlet. ►► Do not touch the power plug with wet hands when removing or plugging ►► ►► ►► ►► ►► the plug into the outlet. Do not forcefully bend or pull the power plug and do not place any heavy material on it. Do not disconnect the power cable while using the product. To disconnect the device from the mains in an emergency, the plug must be pulled out from the mains socket. The mains plug must therefore be easily accessible at all times. Do not overload outlets and cables above their permissible capacity. Do not use impermissible extension cables. Do not install or operate the device under environmental conditions that deviate from the technical specifications. This mainly includes areas with constantly high humidity levels and in direct proximity to water, fire, radiators or ovens or exposed to direct sunlight or similar. Deviating operating conditions can lead to electric shocks, fire or can cause the device to crash. User Manual EC-LED-1004 Series 11 Installation ►► The devices should be installed professionally by your dealer. ►► When unpacking or carrying the devices, at least two people are needed. Make sure the devices are carried upright. ►► When installing the devices, use the designated basement supplied by ►► ►► ►► ►► ►► eyevis. Use a special vibration absorbing basement from eyevis when using the devices in locations subject to vibration. Do not place the device in an unstable location such as e. g. inappropriate raised floors or inclines. Install on a horizontal, stable surface instead. Do not install the device in areas where the humidity or temperature is high. For more information see chapter „Anlage: Technische Daten“ on page 53. Do not place objects on the device and take appropriate measures to prevent the devices from falling down. Do not block the ventilation holes on the device. Always plug the power cable into the device before plugging it into the outlet and do not locate the device where persons may trip over the cable. If an extension cable is necessary, a cable with a current rating at least equal to that of the device should be used. Use ►► This device operates at high voltages. Never repair, modify or disassemble ►► ►► ►► ►► ►► ►► Version preliminary | July 2014 the device by yourself. Do not insert any objects into the device. If there is thunder or lightning, do not touch the device, cable or power plug. Do not climb onto or stand on the device. If the device will not be used for a long period of time, remove the power plug from the wall outlet for safety. Do not operate the device with a damaged cable or if the device has been dropped or damaged until it has been examined by a qualified service technician. Caution: Some parts of the device may become hot during operation. 12 EC-LED-1004 Series DISASSEMBLY AND STORAGE ►► Let the device cool down completely before storing. ►► Disconnect the power cable and all other cables before moving or disassembling the device. Remove the power plug by pulling the plug (and not the cable) out of the outlet. ►► Pack the device into the original packaging to ensure the best possible storage for the device. ►► Observe the environmental conditions for storage. For more information see chapter „Anlage: Technische Daten“ on page 53. DISCLAIMER ►► eyevis is not liable for any damage caused by natural disaster (such as earthquake, thunder etc.), fires, acts by third parties, accidents, ►► eyevis is not liable for any damage caused by owner's intentional misuse and fault or uses in other improper conditions. ►► eyevis is not liable for incidental damages such as profit loss or interruption in business, data modification or data deletion caused by the use of eyevis products or their operation failure. ►► eyevis is not liable for any damage caused by non-compliance to the instructions described in the user manual. ►► eyevis is not liable for any damage caused by using its products in conjunction with other products, systems and software. ►► eyevis is not liable for any damage caused by the improper installation of its products. CONFORMITY This device complies with the following directives from the European Union: EMC Directive 2004/108/EC This device complies with category A requirements. It can cause electromagnetic interference (EMI) when used in residential areas. The owner may be forced to take suitable measures to prevent EMI emissions at his/her own expense. Low-Voltage Directive 2006/95/EC 2002/95/EC (as of January 27, 2003, Directive of the European Parliament and the Council on the restriction of the use of certain hazardous substances in electrical and electronic equipment (RoHS)) 2002/96/EC (as of January 27, 2003, Directive from the European Parliament and the Council on waste electrical and electronic equipment (WEEE)). •• •• •• •• The compliance with the requirements is certified with the CE symbol labelled on the product. The manufacturer cannot be held liable for the operation of the device outside the operating conditions as described in this user's manual. Any improper operation will also void your product liability and warranty claims. User Manual EC-LED-1004 Series 13 About this Product The eyevis cube of the EC-LED-1004 series is a modular DLP® rear-projection cube with Cluster-LED projection technology. The EC-LED-1004 series cube is a revolutionary development by eyevis and manufactured in Germany. It is especially designed for applications which require a reliable 24/7 operation. Thanks to Cluster LEDs with a higher light output we are able to provide the EC-LED-1004 series as a second generation of our rear-projection cubes with enhanced brightness level. Standard input connection •• 1× Dual-Link DVI Available types: •• •• •• •• Version preliminary | July 2014 EC-xx-LXT-1004: with native XGA resolution 1024 x 768 px EC-xx-LSXT+-1004: with native SXGA+ resolution 1400 x 1050 px EC-xx-LHD-1004: with native full HD resolution 1920 x 1080 px EC-xx-LWXT-1004: with native WUXGA resolution 1920 x 1200 px 14 EC-LED-1004 Series Transport, Storage, Unpacking Unpacking The cube is packaged in a cardboard box. To protect the cube during transportation, the cube is wrapped in foam. The packaging is secured with packing tape. CAUTION Heavy weight and large dimensions of cube Do not attempt to unpack the cube by yourself. Otherwise, this can result in injury and damage to the cube. ►► At least two people are needed to unpack the cube. To unpack the projector: 1. Remove the packing tape. 2. Remove the top cover of the cardboard box. 3. 4. 5. 6. Remove the outer packaging. Remove the protection foam. Remove the cube from the bottom of the cardboard box. Open the package. Storage of packaging ►► Store the original packaging in a safe place. It is the ideal packaging for sending or storing the devices. User Manual EC-LED-1004 Series 15 Delivery Contents Dimensions and technical details may vary depending on the product version. Packaging Cube The exact cube type is indicated on the box: EC-XX-LYY-1004 (XX: screen diagonal in inches, YY: type or resolution standard) 1x rear projection unit, type EC-XX-LYY-1004 (ready-mounted incl. input box and projection engine) 1x power cable 1x RS232 serial cable 1x eyevis cube adjustment software on CD 1x screen cleaner set Covers for service holes to avoid light and dust entering the rear projection unit Tools for adjusting the screen geometry •• •• •• •• •• •• •• •• User Manual Screen box Rear projection screen (ready-mounted on screen basement) Basement (optional) Side basements: (A): Left side basement (B): Right side basement •• •• (A) (B) (B) (A) (C) − (D) 2x (E) (C)−−(F) (D) 2x 2x (G) (E) − (F) Version preliminary | July 2014 1x 2x (G) (H) 10x M10x25 (H) (I1) 10x M10x25 (I2) 2x M6x60 2x (I1) (I3) M6M6x60 2x2xM6x25(I2) 2x2x (I3) (L1) 2x M6x25 (L1) 4x 4x 1x 2x M6 (L2) 16x M8x25 (L2) 16x M8 16x M8x25 Crossbars to connect the side basements (A) and (B): (C) – (F): 4 crossbars (G): 1 crossbar with bore holes (H): 10 M10x25 screws •• •• •• (C) − (D)(A) 16 (B) 2x (E) (C)−−(F) (D) 2x 2x (C) − (D) (G) 2x (E) − (F) EC-LED-1004 Series 1x 2x (E) − (F) (C) − (D) 2x (G) (H) 10x M10x25 2x 1x (G) (E) − (F) 1x 2x Screen adjustment plates for (H) 10x M10x25 (G) (H) 10x M10x25 (I2) 2x M6x60 assembling to crossbar (G): (I1) 2x 1x • • (I1): 2 screen adjustment plates (H) 2x2x 10x M10x25 (I3) M6M6x60 • • (I2): 2 M6x60 screws (I2) 2x2x M6x25 (I1) (I2) 2x M6x60 • • (I3): 2 M6x25 screws, (I1) 2x 2 M6 washers (I3) 2x M6 2x M6x25 (L1) (L2)2x2x (I3) M6M6x60 M6x25(I2) (I1) 2x2x 16x M8x25 Corner plates: 2x4x M6x25 (L2)2x M6 •• (L1): 4 corner plates (L2) 16x M8 16x M8x25 • • (L2):16 M8x25 screws, 4x 16 M8 washers 16x M8x25 4x (L2) (L1) 16x M8 16x M8 (N2) (N1) 16x M8x25 4x (N1) 2x (N2) 2x16x M8 Feet to attach to the corner plates: (N1) (N2) •• (N1): 2 levelling feet 2x 2x •• (N2): 2 levelling feet with eyelets to (N2) 2x (N1) 2x fasten to the floor (N3) 8x M12 8x M12 (L1) (I3) (L1) •• (N3): 8 M12 hexagon nuts, 8 M12 washers 2x (N4) M8 2x 2x 10 2x (N3) 8x2x M12 8x M12 (N3) 8x M12 8x M12 (N4) 2x M8 To fasten to the floor (N4): 2x 2x 10 (N4)(O1) 2x 2x M8 • • 2 hexagon wooden screws 2x 10 (N3) 8x M12 (O2)8x M12 • • 2 M10 dowels 4x M6x60 4x M6x70 (N4)(O1) 2x 2x 10(O2) 2x M8 • • 2 M8 washers (O3) (O1) (O2) 8x M6x70 M6 16x M6 4x M6x60 4x 4x M6x60 4x M6x70 Screws to connect the cubes (O3) (O1)16x M6 (O2) 8x M6 together and to the basements: (O3) 4x M6x60 8x M6 16x M6 4x M6x70 • • (O1): 4 M6x60 screws (O3) 16x M6 8x M6 •• (O2): 4 M6x70 screws •• (O3): 16 M6x60 washers, 8 M6x60 hexagon nuts User Manual EC-LED-1004 Series 17 Product Overview This section provides an overview of the entire product, the individual parts as well as the connection and adjustment elements. ) ) NOTE The illustrations and certain descriptions in this manual may vary due to development process. Housing and backplane 1 2 3 4 5 Fig. 1: Back view of cube interior 1 Backplane cover mirror adjustment 2 Mirror 3 Backplane projector & geometry adjustment 4 Projector 5 Carriage Version preliminary | July 2014 18 EC-LED-1004 Series Projector ) ) NOTE: The illustrations and certain descriptions in this manual may vary due to development process. 1 2 3 8 4 7 5 6 Fig. 2: Front view of projector 1 Optics 2 Service cover for focus adjustment 3 DVI-D Out connector 4 5V mains supply 5 Mains supply 6 Control module 7 Power switch 8 Rotation-Switch for projector addressing User Manual EC-LED-1004 Series Control module 1 DVI-D Dual-Link 2 Mains supply (5V) 3 RS232 OUT (RJ45) 4 RS232 IN (RJ45) 5 LAN (RJ45) 6 LEDs display status 7 DIP-Switcher (Service) 1 2 3 4 5 6 7 Fig. 3: View of the connectors Mains supply 1 1 Mains Supply 2 Fuse 2 Fig. 4: Mains supply Power switch 1 1 Fig. 5: Power On/Off switch Version preliminary | July 2014 Power Switcher On / Off 19 20 EC-LED-1004 Series Status LED Fig. 6: LEDs - display status 1 Power State The power state LED indicates whether power circuit on the board is “online”, that means whether the CPU is powered by 5V standby voltage. 2 Signal State The signal state LED indicates the status of the video signal. If the video signal is connected and valid, the LED lights up green. 3 CPU State The CPU state LED indicates the status of the firmware. Following states are possible: xx Fast blinking (100 ms): CPU initialises xx Slow blinking: (500 ms): CPU is ready xx Off: firmware has crashed 4 Error State The error state LED indicates the error status. During the initialisation procedure the LED will blink together with the CPU state LED in the same frequency. After the initialisation the LED should be off. . ) ) NOTE: After the initialisation procedure the error state LED should be off. Otherwise please check the runtime and startup error buffer for more detailed information Address (ID) switch 1 2 3 1 Left Switch (for value x 100) 2 Central Switch (for value x 10) 3 Right Switch (for value x 1) Fig. 7: Rotation-Switches User Manual EC-LED-1004 Series 21 Assembly / Installation This section describes how to install the cube wall. This includes assembling the basements, setting up the cubes and inserting the screens. Mounting the basement Requirements Check if the floor is suitable for installing a cube wall. Depending on the configuration, the cube wall has to be adjusted to the ground. If you use a raised floor, there has to be a fixed connection of the boards to the supports. Space requirements 1 •• •• •• •• 2 Leave a gap of at least 60 cm to the building wall when installing the video wall. This space is necessary to enable service work and sufficient air circulation. If the video wall is installed on a movable basement, a minimum gap of 10 cm is necessary at the back to allow for sufficient air circulation. Ensure that the distance to the ceiling is at least 15 cm for adjusting the mirror of the projection cube. If the video wall is higher than three metres, it should be secured at the back to the building wall. Please contact our project team for detailed information on wall mounting. 1 Distance to ceiling: 15 cm at least 2 Distance to building wall: 60 cm at least Narrower distances are only possible with rail-mounted basement. Fig. 8: Distances from video wall to building wall and ceiling Version preliminary | July 2014 22 EC-LED-1004 Series Assembling the basement (L2) (L1) 16x M8x25 4x 16x M8 (B) (A) (N2) (N1) 2x (C) − (D) 2x (E) − (F) (G) (for mounting with I1) (H) 10x M10x25 (I1) 2x (I3) 2x (I2) 2x M6x25 2x (N3) 1x (N4) 2x 2x 10 (O1) 4x M6x60 2x M6x60 (O3) 2x M6 8x M12 8x M12 2x M8 (O2) 4x M6x70 16x M6 8x M6 Fig. 9: Single parts for mounting 4. 1. (G) (F) (E) (A) (D) 3. (B) (C) 2. Fig. 10: Mounting the basement User Manual (A) (B) EC-LED-1004 Series (C) − (D) 2x (E) − (F) 2x (G) 1x (H) 10x M10x25 (I1) 2x (I3) (I2) 2x M6x60 2x M6 2x M6x25 (L1) (L2) 16x M8x25 4x 16x M8 (N1) (N2) 2x (N3) (N4) 2x 8x M12 2x 2x 10 (O1) 4x M6x60 (O3) 23 16x M6 To assemble the basement: 1. Connect both side basements (A) and (B) with the five crossbars (C) – (G) using the screws (H). When mounting the upper two crossbars, make sure that the upper front crossbar (G) has two thread holes. Mount this crossbar so that both threads are facing downwards so that the screws can be used later to adjust the screens (see below). 2. Screw the corner plates (L1) into each bottom corner of the basement. Use the screws and washers (L2) provided. 3. Now install the heigh adjustable feet (N1, N2) to the corner plates as illustrated in Fig. 8, step 3. Please observe the correct order of screws, nuts and washers (N3) to ensure that the basement feet are properly secured. 4. Mount the screen adjustment plates (I1) with the screws and washers (I3) to the bottom of crossbar (G) and screw the adjustment screws (I2) into the screen adjustment plates (I1) (see Fig. 8, step 4). 5. Once the basement has been installed, make sure that it is absolutely horizontal when it is in its final position e.g. by using a bubble level. This makes the installation of further basements and the final installation of the cube housings far easier and prevents the individual parts from moving. 8x M12 2x M8 (O2) 4x M6x70 8x M6 Connecting the basements together 33 You have aligned the basements. ►► Connect the basements together before stacking the cubes on top of them. To do this, use the screws (O2) and washers and hexagon nuts (O3) provided. Fig. 11: Connection of basements with optionally front cover Version preliminary | July 2014 16x M8 (N1) 24 (N2) 2x EC-LED-1004 Series 2x Mounting the Cube housing (N3) 8x M12 8x M12 (N4) 2x 2x 10 (O1) 4x M6x60 (O3) 16x M6 2x M8 (O2) 4x M6x70 8x M6 Mounting the cube housing onto the basement 1. Place a housing onto the first basement. Preferably start with the left most (or right most) cube 2. The basement and the cube must be at least connected together at the front bore holes (a) using the screws (O1). For added stability, basements and cubes can be attached additionally on the rear bore holes (b). To do so, remove the spring screws and replace them with the screws provided (O1). a b a b 3. Mount the adjacent cube on the next basement in the same way. 4. Connect the cubes at the points (c) and (d) using the screws fixed into the housing. d c d c User Manual EC-LED-1004 Series 25 Installing large video walls 3 or more cubes in vertical direction CAUTION Risk of injury when installing large video walls When installing large video walls (3 or more cubes in vertical direction), there is a risk of injury resulting from cubes falling or crashing down. ►► Use a crane when installing video walls of 3 or more cubes in vertical direction. ►► If you do not have a crane available, take particular care when lifting the cubes and climbing onto the video wall. ►► Observe the following instructions when installing the video wall. Proceed as follows when installing large video walls: 1. First mount the entire bottommost row onto the basements. 2. Mount the remaining cubes in a stair-like formation. To do this, use the already assembled rows as a platform for lifting the next cube using the handles on the side (see the following illustration). Mounting the projection unit NOTICE Handling of the screens If the screen is handled incorrectly, the screen may be scratched or the housing damaged. ►► Wear (cotton) gloves when installing the screen. ►► Remove the cardboard protections from the screen before mounting it on the cube housing. ►► Lift up the screen carefully and avoid touching the screen surface. ►► Do not hold the screen in the middle of the basement since the screen may break or fall out. Version preliminary | July 2014 26 EC-LED-1004 Series ) ) NOTE: Some of the screens have a steel plate fixed to the bottom edge which is used for adjustment purposes. ►► Mount these screens onto the housings on the bottom most horizontal row of your cube wall. Step 1: Insert the screen 33 Make sure that the screen is free from dirt and dust before you insert it. 1. Unscrew the 4 screws on the rear of the screen until approx. 5 mm of the thread is visible. 2. Hold the screen by its sides so that the four screws point towards the keyholes in the front basement of the cube housing. Observe the bottom and the top of the screen when doing so! 3. Insert the screen into the four longitudinal bore holes on the cube housing. Step 2: Align the screen vertically ►► Use the adjustment screws on the basement. Step 3: Adjust the screen horizontally ►► Carefully push the screen into the correct position. ) ) NOTE: Ensure that there must remain a minimum gap between the screens. Step 4: Fasten the screen securely 33 To secure the screen into position, one person should stand in front of the cube wall and the second person behind the wall. The second person needs a 5 mm hexagon socket to fasten the screws. 1. Start with the cube screens in the centre of the video wall. The person standing in front of the screen should indicate to the other person which of the four screws should be tightened. Target is to have a even flat front surface of the cube wall without exaltantion of single screens or screen sides. 2. Allign the screws carefully. User Manual EC-LED-1004 Series 27 Earthing the cube wall The cube housings have to be daisy chained with the earthing cables provided to guarantee the electrical safety of the cube wall. The earthing cables are preinstalled at the bottom left and right in each housing. To connect the earthing cables: 1. Guide the earthing cables through the circular openings and screw the cable eyelets with the prepared screw to the next housing. 2. Connect all the cube housings together in the same way. 3. Connect the bottom row of cubes to the basements. 4. Finally earth the basements. Installing the projector To install the projector: 1. Remove all screws and objects from carriage. 2. Place carefully the projector in a tilted position on the carriage. 3. Slide the projector carefully to the end point of the carriage. Make sure that the projector is hooked up to the carriage. Version preliminary | July 2014 28 EC-LED-1004 Series 4. Place carefully the projector on the carriage. 5. Secure the projector with 2 screws (Mxx) on the carriage. User Manual EC-LED-1004 Series 29 Cabling the cubes The cubes are connected together via serial cables for control and monitoring of the cubes. The cube wall is connected to the control PC via a RS232 cable. Optionally a connection between cube wall and the control PC is possible via Ethernet cable: ) ) NOTE: The RS232 cable is a 9-pin D-sub extension cable with 1:1 wiring. To cable the cubes together: Use the RS232 data cables provided (9-pin D-sub 1:1 extension cable) and connect each RS232 OUT to RS232 IN like a daisy chain. Proceed according to the following diagram: 1 2 3 4 5 6 7 8 9 To connect the cubes to the control PC: ►► Connect the control PC (RS232 OUT) to projector 1 serial IN (RJ45) via a RS232/RJ45 adapter cable and connect each projector serial OUT (RJ45) to the next projector serial IN (RJ45) via CAT5 cable: RS232/RJ45 1 2 3 Fig. 12: Connecting the control PC to projector via RS232/RJ45 adapter cable ►► Connect the control PC to projector 1 via a CAT5 ethernet cable and the other projectors over serial connection: Ethernet 1 2 Fig. 13: Connecting the projectors to the control PC via ethernet cable Version preliminary | July 2014 3 EC-LED-1004 Series 30 Addressing the cubes - Cube iD To control the cubes and to enable communication, each cube must be allocated with an individual address. The cubes are addressed with consecutive numbers. Looking on front side, the addressing starts on the top left cube of the video wall and continues as shown in the diagram below. 1 2 3 4 5 6 7 8 9 10 11 12 Rotation Switches Setting projector address(ID) Address (ID) 1 2 3 ... 199 ... Switch 1 Switch 2 Switch 3 0 0 0 0 0 0 1 2 3 1 9 9 Fig. 14: Rotation switches User Manual EC-LED-1004 Series 31 Network Settings of projector for network connection. Command COM_LAN_DHCP COM_LAN_GW COM_LAN_IP COM_LAN_SM Description Turn on / off DHCP functionality for LAN LAN gateway IP Device IP address LAN subnet mask Default value OFF 192.168.0.1 192.168.0.11 255.255.255.255 To change the settings for network connection: 1. Open the eyevis Device Setup software. 2. Go to the reports tab. 3. Enter the desired setting into the send field and press the button SEND. ªª The entered setting is sent to the projector. 4. Save the settings by pressing the button SAVE ALL in the main window. 5. Go to the user tab of eyevis Device Setup and press the button READ CURRENT. Syntax of command: Set(Broadcast value;Command;Command value) Example: Set(0;COM_LAN_SM;255.255.255.255) To load a settings for network connection from a file: 33 First must be the files edited with the desired settings. Create a new file or edit the eyevis provided files. 1. Open the eyevis Device Setup software. 2. Go to the reports tab. 3. Press on the button FILE. ªª A window opens to choose a file. 4. Choose the desired setting file and press the button OPEN. ªª The loaded setting file is sent to the projector. 5. Save the settings by pressing the button SAVE ALL in the main window. 6. Go to the user tab of eyevis Device Setup and press the button READ CURRENT. eyevis provided files: Device_IP.txt DHCP_OFF.txt DHCP_ON.txt Gateway_IP.txt Subnetmask.txt •• •• •• •• •• For more information see chapter „Reports“ on page 46. Version preliminary | July 2014 32 EC-LED-1004 Series Adjusting the focus In order to achieve a clear picture on the projection screen, it is necessary to adjust the optical focus of the projection engine. In the case the image on the screen becomes blurred, it is necessary to readjust the focus setting. To adjust the focus, we recommend using an image with suitable content displayed on the screen, e. g. an image with writing in all corners or something similar. You can find appropriate test images on your eyeDevice Setup software CD. To adjust the focus: 1. Remove the four screws that secure the left part of the cover to the focus. 2. Remove the cover. ªª You can now access the inward of the projector. 3. Loosen the adjustment screw (only one or two turns). ªª You can now adjust the focus of the lens by turning the adjustment screw to the left or right. 4. Secure the adjustment screw again in its position once you have made the setting. 5. Close the cover on the projector again using the four screws. lock unlock Fig. 18: Focus setting on the projector User Manual EC-LED-1004 Series 33 Adjusting the geometry The geometry of the cubes must be aligned to one another along the entire video wall. A test grid is used for this purpose. The size, position as well as keystoning and rotation mistakes of the test grid can be adjusted by modifying the carriage that supports the projector. ) ) NOTE: You can find test grids for geometry settings on the eyeDevice Setup software CD. Proceed as follows: 33 A native, static test grid should be projected onto the entire cube wall while the geometry is adjusted. 1. Open the bottom-right cover. ªª The screws on the carriage are now accessible. A B C D E F Use the table below to align the geometry by tightening or loosening the screws A – F on the carriage until a satisfactory geometry is set. Screwing direction Horizontal image position A Vertical image position C Rotation F Image size B Vertical keystone Horizontal keystone Version preliminary | July 2014 D D B E E D E Clockwise Anti-clockwise 34 EC-LED-1004 Series Adjusting the mirror If necessary, remaining geometrical mistakes that cannot be corrected via the carriage have to be corrected using the adjustment nuts on the mirror suspension. ) ) NOTE: To correct keystoning using the mirror screws requires in-depth know-how of the effects as well as experience. For this reason, do not adjust the mirror yourself or only after completing an eyevis training. To correct keystoning on the mirror: 1. Open the top cover. ªª The adjustment nuts are now accessible. X1 X2 Y1 X3 Y2 Z1 Y3 Z2 Z3 Fig. 19: View of mirror suspension with 9 adjustment nuts 2. Turn the screws Z/Y/X(/W) in a clockwise direction. ªª Keystoning is corrected, the right-hand side of the image moves outwards. W3 W2 W1 X2 X1 X3 Y2 Y1 Z1 Z2 Y3 Z3 Fig. 20: View of mirror suspension with 12 adjustment nuts User Manual EC-LED-1004 Series 35 Configuration Two programs and are available to help you configure the cubes: EC-Lcontrol and eyeDeviceSetup software. Both programs are stored on the CD provided. ) ) NOTE: The cubes have to be configured at the DIP switch before they can be commissioned for the first time. General information on the configuration programs Both programs for configuring the cubes are used to perform different tasks: EC-Lcontrol: eyeDevice Setup software: •• Colour adjustment •• Communication between PC and projector •• Status query of cubes •• Generating reports ) ) NOTE: The EC-Lcontrol program is specially developed for adjusting the colour of the eyevis LED cubes. For this reason, use this program for colour adjustments instead of the colour adjustment function in the eyeDevice software. The adjustment for the colours is only possible, if the cubes are connected via serial cable.. Program installation and start The programs do not have to be installed. 1. Simply copy the entire program folder to the desired location you wish on your PC (example C:\Software). 2. Open the relevant .exe file to launch the program. Intelligent user interface Once the connection to the cubes has been established, the programs detect which parts are connected and display the relevant functions on the user interface. The setting parameters are read out from the cubes and displayed in the program windows. Any changes to the settings are saved in the cubes or can be stored in a configuration file on the PC. Version preliminary | July 2014 36 EC-LED-1004 Series The eyeDevice Setup Software eyeDeviceSetup.exe eyevis has developed the eyeDeviceSetup software for setting the cubes/ projectors. The EC-Lcontrol program is used in conjunction with the cubes and ESP projectors for colour adjustment. However, all other settings are programmed with the eyeDeviceSetup software. Starting the eyeDevice Setup software 1. Open the eyeDevice Setup software to configure your video wall. ªª Two types of users are available: a. Administrator: This type is intended for advanced, trained personnel. The password required is available from the eyevis service. Enter the password and confirm with OK. b. User: This is the normal user type (no service settings are possible). Confirm with OK without entering a password. ªª Once the program has been launched, the program interface is displayed: Fig. 21: Interface of eyeDevice Setup software The interface is divided into three areas: 1 Load/Save area To load and save configurations and set the video wall size. 2 Selection area To display the video wall with the projectors. The currently active projector is highlighted. 3 Parameter area Windows with parameters that can be selected with tabs. User Manual EC-LED-1004 Series 37 The Load/Save area In this area of the window, you can load and save configurations as well as determine the size of the video wall. File Configuration Load Loads a configuration file saved on the PC (for example the saved file of the first system configuration). Write Saves a configuration file with the current settings on the PC. Wall Size Projectors internal database Enters the size of the wall: First number: number of vertical columns Second number: number of horizontal rows •• •• Read archive Reads the default settings of the active projector. The factory projector settings can thus be restored at any time. Read current Reads the current settings of the active projector. The settings are then displayed in the parameter area. Save all Saves all the current settings in the projector. The selection area A preview of your wall configuration appears in this part of the screen. A single projector can be selected with the mouse to adjust the settings. If a projector is selected, the current settings can be read by clicking on the Read current button. Fig. 22: Visualising a 4 x 2 video wall To select several projectors, click and hold the left mouse button and mark the area you wish. Version preliminary | July 2014 38 EC-LED-1004 Series The Parameter area The settings are displayed and can be changed in this area of the screen. All settings are segmented in following tabs: User Parameters for adjusting the signal functions. Setup Basic password, projector and scaler settings of the projector. Status Current status information of the projector. Gamma Settings of the individual colours (red, green, blue). Preference Settings of the communication to the projector. Reports All software status messages are collected in this tab. For more information see chapter „Settings of the parameter area“ on page 40. •• •• •• •• •• •• Buttons Two buttons are located in the parameter area: •• Refresh •• Update Refreshes the screen content Reloads the settings from the cube User Manual EC-LED-1004 Series 39 Establishing Communication via eyeDevice Setup This section describes how to establish the communication with the projectors with the help of the eyeDevice Setup software. eyeDeviceSetup.exe ) ) NOTE The illustrations and certain descriptions in this manual may vary due to development process. Establishing communication ►► Open the Preference page. ªª The serial connection via RS232 interface (Use serial port) is selected as standard. To use the serial port: 1. In the Serial Port entry field, select the COM port to which the protector is connected. 2. For the remaining settings, the standard values should match the ones displayed in the screenshot. 3. Press Apply changes to apply the new settings. ªª You can check if the connection is active on the Reports page. Entering the wall size In the Wall size field, you can enter the number and layout of the projectors: 1. In the first window, select the number of columns, which is 2 in the example above. 2. In the second window, select the number of rows, which is 2 in the example above. Version preliminary | July 2014 40 EC-LED-1004 Series Reading the configurations 1. Mark the projector you want in the wall view. You can select several projectors at once: Click and hold the left mouse button in a field and mark the relevant area. 2. Click on Read current... ªª The data of the selected projectors are displayed in the view window. Saving the configuration Once you have adjusted all the settings, you can save the configuration in a file on the PC. 1. Click on Write.... 2. Select the target location and file name and click on OK. Load the configuration You can load adjustments from a file which is saved on the PC. 1. Click on Load.... 2. Select the location and name of the desired file and click on OK. User Manual EC-LED-1004 Series 29 The Parameter area The settings are displayed and can be changed in this area of the program window. User In the User menu, you can find various parameters. Buttons Security Setting Refresh Refreshes the screen content Update Reloads the settings from the projector User password Administrators can enter a password for users here when logged in as Admin. Admin password Administrators can change the admin password here when logged in as Admin. 30 Image Service Settings Image Setting EC-LED-1004 Series IMAGE_TEST_IPU_ ENABLE Off = switched off On = switched on IMAGE_TEST_IPU_ DECO Image decoration for testing can be chosen by the user. IMAGE_TEST_IPU_ BG IPU background settings. IMAGE_TEST_IPU_ BG_RED Test image background amount of red colour. IMAGE_TEST_IPU_ BG_GREEN Test image background amount of green colour. IMAGE_TEST_IPU_ BG_BLUE Test image background amount of blue colour. IMAGE_PROJ_ MODE Projection mode IMAGE_TEST_PAT Test image pattern IMAGE_TEST_PAT_ PERIOD Test image number of pattern repetitions IMAGE_TEST_PAT_ WIDTH Test image pattern width IMAGE_ POSITION_H_L Image left offset IMAGE_ POSITION_H_R Image right offset IMAGE_ POSITION_V_D Image bottom offset IMAGE_ POSITION_V_U Image top offset IMAGE_ ORIENTATION Image orientation LED_INTENSITY_ RED_R Red-Red LED intensity value LED_INTENSITY_ RED_G Red-Green LED intensity value LED_INTENSITY_ RED_B Red-Blue LED intensity value LED_INTENSITY_ GREEN_R Green-Red LED intensity value LED_INTENSITY_ GREEN_G Green-Green LED intensity value LED_INTENSITY_ GREEN_B Green-Blue LED intensity value LED_INTENSITY_ BLUE_R Blue-Red LED intensity value LED_INTENSITY_ BLUE_G Blue-Green LED intensity value LED_INTENSITY_ BLUE_B Blue-Blue LED intensity value IMAGE_CONTRAST_ Image contrast red value RED IMAGE_CONTRAST_ Image contrast green value GREEN EC-LED-1004 Series 31 IMAGE_CONTRAST_ Image contrast blue value BLUE COLOR_ WHITEPOINT_X Test image background amount of blue colour. COLOR_ WHITEPOINT_Y Test image number of pattern repetitions COLOR_ WHITEPOINT_L Luminosity Target Value COLOR_ WHITEPOINT_X_ OFF Offset x coordinate value COLOR_ WHITEPOINT_Y_ OFF Offset y coordinate value COLOR_ WHITEPOINT_L_ OFF Luminosity offset value COLOR_ AUTOADJUST_REF Set offset values COLOR_ AUTOADJUST Turn on/off colour auto adjustment CS_FACTORY_RESET Execute a factory reset for the MZ colour sensor values ) ) NOTE: The EC-Lcontrol program is specially developed for adjusting the colour of the eyevis LED projectors. For this reason, use this program for colour adjustments instead of the colour adjustment function in the eyevis Device Setup software. 32 EC-LED-1004 Series Setup In this window, you can see information about device ID, type, IP etc. General Setting DEVICE_ID Device address, set via address board DEVICE_TYPE Specific device name POWER Switch device in standby mode COM_LAN_IP Device IP address COM_LAN_SM LAN subnet mask COM_LAN_GW LAN gateway IP COM_LAN_MAC Device MAX Address (For the following parameter see in user tab) ) ) NOTE: If the projector is running in the DHCP mode, the old IP address is still shown. EC-LED-1004 Series 33 Status In this window, you can call up current status information such as errors, temperature, firmware etc. Image Information Monitoring Maintenance IPU_INPUT_RES_Y Input vertical resolution IPU_INPUT_RES_X Input horizontal resolution IPU_INPUT_V_FREQ Input frequency IPU_OUTPUT_RES_X Output horizontal resolution IPU_OUTPUT_RES_Y Output vertical resolution IPU_INPUT_VALID Indicator whether the input signal is valid DEVICE_STAT_FAN_1 Fan status of fan (controlled by cpu) DEVICE_FAN_GRP_1 Fan speed controlled by cpu DEVICE_STAT_FAN_LAMP Fan status for LED fan controlled by engine 1 = normal mode 0 = error mode DEVICE_STAT_FAN_DMD Fan status of DMD fan controlled by engine 1 = normal mode 0 = error mode DEVICE_FAN_GRP_ ENGINE Fan speed controlled by the engine (DMD, LED fans) DEVICE_TEMP_SCB CPU board temperature in °C DEVICE_TEMP_LED_DRV Driver temperature in °C DEVICE_TEMP_LED_RED Red LED temperature in °C DEVICE_TEMP_LED_ GREEN Green LED temperature in °C DEVICE_TEMP_LED_BLUE Blue LED temperature in °C CTRL_ERROR_STARTUP Startup error codes CTRL_ERROR_RUNTIME Runtime error codes CTRL_ERROR_MESSAGES Turns on / off human readable error messages INFO_VERSION_CPU_FW CPU firmware version INFO_VERSION_IPU_FW IPU firmware version INFO_VERSION_DB Database firmware version CPU_BOOT Switch execution mode of boot loader 34 EC-LED-1004 Series Gamma The Gamma program area gives you full control over the gamma curve of the individual colours (red, green, blue). ) ) NOTE: With the new ESP-LED projectors, the “Gamma” program area is less important. The colours of the ESP-LED projectors are now adjusted using the special “EC-Lcontrol” colour adjustment software. Information on how to work with the colour adjustment software can be found in (see Chapter „Reports“ on page 35) onwards. Preference The communication to the first projector is defined on this page. Communication Settings Use local area network With an Ethernet connection between the PC and the first projector Socket: Standard 7992 First device IP Address: IP address of the connected projector (the first projector) Each device has a network board: With an Ethernet connection when each projector has its own network card. Apply changes: Accepts the new settings •• •• •• •• You can check on the Reports page if the connection is active. Use serial port With an RS232 interface connection between the PC and the first projector (this is the standard communication gateway) Serial Port: COM port used Baud rate: Standard is 115200 Bits: Standard is data = 8, stop = 1 Parity: Standard is None Apply changes: Accepts the new settings •• •• •• •• •• You can check on the Reports page if the connection is active. EC-LED-1004 Series Color analyzer option 35 Probe model Communication port Percentage of tolerance of the measures Display the gradient colour into the gamma page Pattern generator These settings are only relevant for UHP ESP projector (with lamp). Running on machine (name or IP address) Reports All software status messages are collected and can be monitored here. Command sequences can also be generated and sent to a projector. Clear reports Send Deletes all reports Send Sends the command in the Send field to the selected projector. File Selects a previously created file from the file directory. The selected file is added to the Send window and can then be sent to the selected projectors by clicking on Send. ) ) NOTE: Only administrators have the authorisation to send commands (logon with password). Command sequences are used to control the projectors. A separate manual for serial commands is available to show you how to generate command sequences. This can be requested from the eyevis service. For more information see on page 23. 58 EC-LED-1004 Series Operation NOTICE Shocks and vibrations Shocks and vibrations can damage the cube. ►► Protect the cubes from heavy shocks and impacts. NOTICE Switching on the cube after a power failure Switching on the cubes immediately after a power failure can damage the cubes. ►► Wait at least 30 seconds after a power failure before restarting the cube. Cleaning and Care This section describes how to clean the device. Regular and proper cleaning helps to maintain the quality of this device and to protect it from damage. WARNING Dangerous electric voltage inside the device Cleaning the device while connected to the power supply can result in death, severe injury or can damage the device. ►► Always unplug the device from the electrical outlet before cleaning it. ►► Never pull at the cable to unplug the cord. Always grip the jag to unplug from mains. ►► Do not use any fluids inside the cube. Cleaning intervals How often you clean the device primarily depends on the environmental condition. ►► Clean the device if dust has collected on the housing with a dry cloth. ►► Contact your dealer for internal cleaning once a year. User Manual EC-LED-1004 Series 59 Cleaning the screen surface NOTICE Unsuitable cleaning substances Unsuitable cleaning substances can damage the screen surface. ►► Only use the screen cleaner recommended by eyevis to clean the ►► screen. ►► NEVER spray directly on the screen! This may damage the screen compound. ►► If dirt has accumulated on the screen surface, this can be removed by gently rubbing the surface with cotton wool or a soft cloth. If the dirt cannot be removed easily, a small amount of screen cleaner can be used. ►► Do not leave any drops of water on the screen when cleaning. Water should be wiped away immediately with a clean, soft cloth, otherwise the display surface may be damaged. Cleaning the housing NOTICE Unsuitable cleaning substances Never use substances thinners, benzene or abrasive cleaners. They can damage the surface of the housing. ►► Cleaning sprays - Only use the eyeVisor and a damp cloth for cleaning. ►► Wipe the housing over regularly with a soft cloth to keep it clean. Small stains can be removed using a damp cloth and a small amount of mild detergent. Cleaning the optic NOTICE Unsuitable cleaning substances Strong cleaning substances such as thinners, benzene or abrasive cleaners can damage the optic. ►► Never use liquid cleaners or cleaning sprays. Use a damp cloth for cleaning. ►► Do not clean the lens when it is heated. ►► Wipe the lens over regularly with a soft cloth to keep it clean. Small stains can be removed using a damp cloth and a small amount of eyevis special detergent. Version preliminary | July 2014 60 EC-LED-1004 Series Malfunctions and Troubleshooting Before calling your service partner, please check the following table for a possible cause to the trouble you are currently experiencing. ) ) NOTE: The devices may only be opened by specially trained and qualified personnel. Typical problems No picture ►► Make sure that the power cable is plugged in. ►► Check if the cubes's power is OFF or if the cube is in standby mode. ►► Check that the auxiliary equipment is connected properly. ►► Check if the input setting is correct. ►► Check that the signal is suitable. ►► Make sure the DVI signal not contains HDCP ►► Check if the input signal resolution for the input box (without scaler board) is correct. The cube does not start up ►► Check the cable connections between the cube and input box. Blurred picture ►► Check the focus adjustment of the cube. No communication between control PC and cube ►► Check that you have selected the right COM port. ►► Check the COM port settings. ►► Check the serial cable connection for communication. ►► Check the ID setting in the input box. User Manual EC-LED-1004 Series 61 Possible causes of malfunctions and problems CAUTION Smoke or peculiar smells If you continue to use the device when smoke or peculiar smells are coming from the cube housing, it may cause a fire or an electric shock. ►► Immediately remove the power plug from the outlet. ►► Make sure that the device is not smouldering inside and this is going unnoticed. ►► Contact your dealer for inspection. CAUTION Liquids or objects inside the device If you continue to use the device after water, other fluids or objects have been spilled or dropped, this may cause a fire or an electric shock. ►► Immediately remove the power plug from the outlet. ►► Contact your dealer for inspection. CAUTION Damage caused by dropping the device If you continue to use the device after it has been dropped or the housing has been damaged, it may cause a fire or an electric shock. ►► Immediately remove the power plug from the outlet. ►► Contact your dealer for inspection. CAUTION Damaged or hot power cable If you continue to use the device even though the power cable is damaged or becomes hot, it may cause a fire or an electric shock. ►► Immediately remove the power plug from the outlet. ►► Contact your dealer for inspection. Version preliminary | July 2014 68 EC-LED-1004 Series Warranty Terms and Conditions Duration and validity of warranty The specified product is under warranty for 24 months beginning from the date of delivery by eyevis , valid for the European Union. 12 months applies to products that were purchased outside the European Union. Warranty services during the warranty period do not extend the validity period of the warranty. Proof of purchase The sales agreement or the invoice (original invoice with serial number) of the first purchaser must be presented as proof of purchase to claim warranty services. If the customer cannot provide this evidence of purchase, the warranty period is dated back to the date of purchase at the distributor (first supplier) plus one month. Warranty service or exchange during warranty period If the product shows any faults or defects during the warranty period, eyevis provides the following services in compliance with the warranty: Defective On Arrival (DOA) The customer has to inspect each delivery immediately upon receipt. If any packaging is damaged, the customer has to notify his carrier immediately at goods receiving. If a defect is detected at first unpacking (packaging is not damaged), the customer has to notify his specialist supplier (point of purchase) immediately about the defect. Otherwise the product will be treated under usual terms of warranty. Return-to-Base-Warranty (Bring-In Warranty) Defective parts or products must be sent back carriage free to eyevis. In certain circumstances, the product can sent back to the specialist supplier (place of purchase) or to eyevis service center (country of purchase). If the product requires repair under warranty, the customer is responsible for the cost of transportation to eyevis. Eyevis bears only the one-way costs for the reshipment of repaired or exchanged products to the customer. During transit, the goods are at the owner’s risk. Repair and return The defective product has to be sent to eyevis by the customer and is repaired within 21 days. In this case, eyevis bears the costs for required components that may be required or the arising working time, as well as for the costs for reshipment to the customer. Temporary exchange equipment during repair time (only products under warranty) Bring-in warranty. The customer can request a temporary exchange product during the repair time if the product under warranty cannot be repaired within 30 days. Depending on availability, eyevis decides whether the equipment can be replaced. Any costs of a return delivery for the exchange equipment are borne by the customer. User Manual EC-LED-1004 Series 69 Warranty on repairs As a general rule, repairs or replacements do not extend or restart the warranty period. The repaired parts/components will be treated under warranty for 3 months for same kind of problems. Warranty exclusions General exclusions This warranty covers only malfunction due to any defect in material and/or workmanship of a product put into circulation by the eyevis . A guarantee is therefore excluded for any faults and defects beyond the responsibility of the eyevis , particularly in cases of: Improper use, mechanical damages (e.g. marks caused by scratching, pressure or breaking), improper storing or cleaning, transport damages, misuse, or any other reason the customer or a third party is to blame for, especially if the instructions contained in the manual are not adhered to. Display damages caused by the permanent representation of static images (or partially static images). Failures or fluctuations of the electrical mains supply, the air conditioning system, or other environmental conditions. Abnormal operating conditions, including smoke (e.g. cigarette smoke) and dust. Defects caused by normal wear and tear or defects caused by lack of service and maintenance (e.g. cleaning the filter). Act of God, fire, flood, aggressive chemical, aggressive biological activity, event of war, vandalism, accidents, etc. Errors of all kinds of using defective or incompatible accessories. (Not including components delivered from eyevis which are covered by the product‘s warranty). Attempted repair, setting, change, installation, or maintenance by a person not authorized by eyevis . •• •• •• •• •• •• •• •• "Image Sticking" (memory) effect and "Mura" see chapter „Effects in continuous operation of LCDs“ on page 64 Failure of pixel see chapter „Evaluation of Visual Range“ on page 66 Accessories Accessories, such as cardboard boxes, packaging, batteries and other components that are used in connection with this product and that expected to be exchanged are not covered by this warranty. Factory-applied serial number A product that’s serial number is damaged, changed, or removed is no longer covered by this warranty. Reaction time The reaction time to claim a right given by this warranty starts with the customer’s announcement of the claim to eyevis. It is calculated in accordance with the standard service hours of the eyevis (Monday - Friday 6:00 AM to 6:00 PM local German time, except German bank holidays). Version preliminary | July 2014 70 EC-LED-1004 Series Advised procedure for raising a claim Consider the manual before raising a claim See the sections on "Troubleshooting" and in the manual and check whether the problem might be solved on-site before raising a claim referring to this warranty. Prepare necessary information If the problem still exists, the customer should try to get support from a regional eyevis partner. Please prepare the following information: Product identification (model/type) and serial number of the device Date and place of purchase or eyevis order number (e.g. AUF-...) A description of the problem in hand Pick-up address and contact information A description of the requested service •• •• •• •• •• Approval by eyevis After performing an analysis of the faults and damages of the device, eyevis will approve your warranty claim if the necessary requirements are fulfilled. Service code: RMA number In case of a defect, the customer will receive a service code the RMA number. eyevis will prepare the service requested by the customer. Packing The customer has to pack the defective device properly in the original box, to label it as fragile, and to attach the RMA number visibly on the box. eyevis can provide a new original box on request. The customer is liable for damages caused by the use of improper or unsuitable packaging. Transport The customer arranges the transport of the device to eyevis . For more information, please contact eyevis . Costs not covered by warranty defects The eyevis reserves the right to charge the customer for costs incurred due to complaints concerning defects or faults that are not covered by warranty. Legal and other claims There are no other express or implied warranties, representations, or conditions than those stated in this warranty. Other legal or contractual claims, including against the seller of the product, are excluded as far as eyevis has provided service based on this warranty. This warranty does not affect or have influence on other legal guarantee claims or other contractual claims of the customer against the seller of the product. These claims can be made alternatively to the claims referred to in this warranty document. User Manual EC-LED-1004 Series 71 Limitations of liability In cases of slight negligent breaches of duty, the liability of eyevis is limited to the direct, foreseeable, and contract-typical average damage. The slightly negligent breach of minor contractual obligations excludes the liability. eyevis will not be liable for any loss, damage or alterations to third party accessories, hardware or software or programs, data or information stored on any media or any part of the product, no matter how it occurs, or for any loss or damage arising from loss of use, loss of profits or revenue, or for any resulting indirect or consequential loss or damage. The policy sum regarding all requirements of the warranty does not exceed, at discretion of eyevis, the original purchase price of the product or alternatively the costs of substitution of the product. The warranty shall not apply to repairs or service necessitated by normal wear and tear or for lack of reasonable and proper maintenance. As far as the liability of eyevis is excluded or limited, this also applies to the personal compensation liability of its staff, employees, associated employees, agents, and auxiliary persons. The preceding limitations of liability do not apply to the customer’s claims derived from the Product Liability Act and to claims concerning damages to the body or health or in case of the loss of the life of the customer. Version preliminary | July 2014 66 EC-LED-1004 Series Appendix Appendix: Technical Specifications ) EC-LED-1004 Series EC-50-LXT-1004 Description: Digital 50 inch DLP®-rear-projection unit, stackable and addible, for data and video representation Resolution: 1024 × 768 Pixel (XGA/4:3) Brightness: HB Screen: 1105 cd/m2 (max.) / 948 cd/m2 (typ.) ISE Screen: TBD cd/m2 (max.) / TBD cd/m2 (typ.) Image size (W x H): 1000 × 750 mm (ca. 50 inch / ca. 127 cm screen diagonal) Dimensions (W x H x D): 1000 × 980 × 750 mm Weight: ca. 60 kg EC-50-LSXT+-1004 Description: Digital 50 inch DLP®-rear-projection unit, stackable and addible, for data and video representation Resolution: 1400 × 1050 Pixel (SXGA+/4:3) / Chip: DMD-Chip SXGA+ / LVDS 0.95“ Brightness: HB Screen: 1068 cd/m2 (max.) / 917 cd/m2 (typ.) ISE Screen: TBD cd/m2 (max.) / TBD cd/m2 (typ.) Image size (W x H): 1000 × 750 mm (ca. 50 inch / ca. 127 cm screen diagonal) Dimensions (W x H x D): 1000 × 980 × 620 mm Weight: ca. 60 kg EC-70-LSX-1004 Description: Digital 80 inch DLP®-rear-projection unit, stackable and addible, for data and video representation Resolution: 1024 × 768 Pixel (XGA/4:3) Brightness: HB Screen: TBD cd/m2 (max.) / TBD cd/m2 (typ.) ISE Screen: TBD cd/m2 (max.) / TBD cd/m2 (typ.) Image size (W x H): 1400 × 1050 mm (ca. 70 inch / ca. 177 cm screen diagonal) Dimensions (W x H x D): 1400 × 1270 × 750 mm Weight: TBD User Manual EC-LED-1004 Series 67 EC-70-LSXT+-1004 Description: Digital 70 inch DLP®-rear-projection unit, stackable and addible, for data and video representation Resolution: 1400 × 1050 Pixel (SXGA+/4:3) / Chip: DMD-Chip SXGA+ / LVDS 0.95“ Brightness: HB Screen: 553 cd/m2 (max.) / 474 cd/m2 (typ.) ISE Screen: TBD cd/m2 (max.) / TBD cd/m2 (typ.) Image size (W x H): 1400 × 1050 mm (ca. 70 inch / ca. 177 cm screen diagonal) Dimensions (W x H x D): 1400 × 1270 × 750 mm Weight: TBD EC-60-LHD-1004 Description: Digital 60 inch DLP®-rear-projection unit, stackable and addible, for data and video representation Resolution: 1920 × 1080 Pixel (Full HD/16:9) Processing: 1080P / 0.95 inch DMD@LVDS Brightness: HB Screen: 884 cd/m2 (max.) / 759 cd/m2 (typ.) ISE Screen: TBD cd/m2 (max.) / TBD cd/m2 (typ.) Image size (W x H): 1344 × 756 mm (ca. 60 inch / 152 cm screen diagonal) Dimensions (W x H x D): 1344 × 956 × 820 mm Weight: ca. 75 kg EC-70-LHD-1004 Description: Digital 70 inch DLP®-rear-projection unit, stackable and addible, for data and video representation Resolution: 1920 × 1080 Pixel (Full HD/16:9) Processing: 1080P / 0.95 inch DMD@LVDS Brightness: HB Screen: 723 cd/m2 (max.) / 620 cd/m2 (typ.) ISE Screen: TBD cd/m2 (max.) / TBD cd/m2 (typ.) Image size (W x H): 1550 × 872 mm (ca. 70 inch / ca. 177 cm screen diagonal) Dimensions (W x H x D): 1550 × 1132 × 830 mm Weight: ca. 75 kg Version preliminary | July 2014 68 EC-LED-1004 Series General technical specifications Contrast ratio: 1500:1 (max. 5000:1 dynamic contrast) Brightness uniformity: ≥ 95% (SUR25) Input signal: 1x DVI Projection screen: Standard Screen: ISE Screen, other Screen Types available on request (BlackBead Screen, ISE Screen (Improved Screen Element)) Frame: 0.3 mm Power consumption: normal operation: 210 W (typ.) / reduced power mode 120 W / max. 300 W Heat Dissipation: 716 BTU/h (typ.) Median LED Lifetime: >60,000 hrs under normal environmental conditions / L70B50 manufacturer information) (75,000 - 90,000 hrs in ‘Low Power Operation Mode’, i.e. additional 15,000 to 30,000 hrs depending on the amount of power reduction) Software: eyeDevice Setup Software Environmental conditions Temperatur Conditions: •• 10 - 40 °C •• recommended 15 - 25 °C (for Seamless Screens 18 - 25 °C ) •• Storage: 0 - 50 °C Humidity: 0 % – 80 % non-condensing Altitude: 0 – 3000 m Noise level: ≤ 36 dB Options Different screen versions to suit the requirements of different fields of application (viewing angles, brightness uniformity, etc.) Scaler Board (internal split controller) ACT - Auto-Colour Tracking, auto-adjustment of brightness and colours for each display according to the adjusted values EYE-MSP - Matrix-Shading-Processor integrated in cube EYE-MDP - Matrix and Delay Processor integrated in cube EYE-SCP - Shading and Colour Processor integrated in cube EC-MAS - Motorized geometry adjustment via IR remote control or PS2 Network Board Service and Maintenance Contracts Different Basement Options: Standard Basement, Basements on Wheels, Basements on Rails, Anti-Vibration Basements User Manual EC-LED-1004 Series 69 Index A M ADDRESS (ID) SWITCH 20 MAINS SUPPLY ADDRESSING 29 MONITOR ASSEMBLY 21 ADJUSTING 19 33 O C CLAIM COSTS LEGAL LIMITATIONS PACKING RAISING A CLAIM REACTION TIME RMA SERVICE TRANSPORT CONFIGURATION LOADING PROGRAMS READING SAVING CONTROL MODULE 63 63 63 64 63 63 62 63 62 63 34 39 34 39 39 19 D OVERVIEW 17 P PACKAGING PROGRAM INSTALLING STARTING PROJECTOR 15 34 34 18 R RMA 63 S SERIAL NUMBER 62 SETTINGS 40 SOFTWARE 35 DELIVERY CONTENTS 15 STATUS LED 20 DOA 61 STORAGE 14 E T EC-LCONTROL SETUP EYEDEVICE SETUP COMMUNICATION 46 35 38 TECHNICAL SPECIFICATION 65 TRANSPORT 14 U UNPACKING F FAILURE FAILURE OF PIXEL FOCUS ADJUSTING 62 31 G GEOMETRY ADJUSTING 32 32 H HOUSING 17 I INSTALLATION ADDRESSING BASEMENT CABLING EARTHING MOUNTING Version preliminary | July 2014 21 29 21 28 27 21 14 W WARRANTY ACCESSORIES DOA DURATION EXCHANGE EXCLUSIONS SERIAL NUMBER SERVICE VALIDITY 61 62 61 61 61 62 62 61 61 eyevis GmbH Hundsschleestrasse 23 D-72766 Reutlingen Germany Phone: Fax: Hotline: Hotline: +49 (0)7121-4 33 03-0 +49 (0)7121-4 33 03-22 +49 (0)7121-4 33 03-290 (netPIX & eyeCON) +49 (0)7121-4 33 03-291 (Cubes & Displays) web: www.eyevis.de e-mail: [email protected] service: [email protected] Version: preliminary | July 2014 Copyright © 2014 eyevis GmbH. All rights reserved.