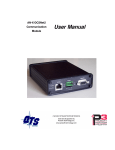
Download 56AMXN/B AutoMax DCSNet/RE RIO Module
Transcript
Rockwell Automation
ControlLogix
AutoMax DCSNet and
AutoMax Remote I/O
Communication Interface
Module
(Cat. No. 56AMXN/B)
User Manual
Page 2 AutoMax DCSNet /RE RIO Module
Important User Information
Solid state equipment has operational characteristics differing from those
of electromechanical equipment. “Safety Guidelines for the Application,
Installation and Maintenance of Solid State Controls” (Publication SGI1.1) describes some important differences between solid state equipment
and hard–wired electromechanical devices. Because of this difference,
and also because of the wide variety of uses for solid state equipment, all
persons responsible for applying this equipment must satisfy themselves
that each intended application of this equipment is acceptable.
In no event will Rockwell Automation be responsible or liable for
indirect or consequential damages resulting from the use or application
of this equipment.
The examples and diagrams in this manual are included solely for
illustrative purposes. Because of the many variables and requirements
associated with any particular installation, Rockwell Automation cannot
assume responsibility or liability for actual use based on the examples
and diagrams.
Rockwell Automation assumes no patent liability with respect to use of
information, circuits, equipment, or software described in this manual.
Reproduction of the contents of this manual, in whole or in part, without
written permission of Rockwell Automation is prohibited.
Throughout this manual we use notes to make you aware of safety
considerations.
Identifies information about practices or circumstances that can lead to
personal injury or death, property damage, or economic loss.
Attentions help you:
•
identify a hazard
•
avoid the hazard
•
recognize the consequences
Important: Identifies information that is especially important for
successful application and understanding of the product.
Microsoft is a registered trademark of Microsoft Corporation.
Windows, Windows 95 and Windows NT are trademarks of Microsoft Corporation.
ControlLogix and Data Highway Plus are trademarks of the Allen-Bradley Company, Inc.
Publication number 56AMXN-UM002A-EN-P November 2002
56AMXN/B AUTOMAX DCSNET/RE RIO MODULE
6
Overview
6
Differences from the 56AMXN/A
7
Hardware Features
9
Other Requirements
9
INSTALLATION
10
Prevent Electrostatic Discharge
10
Set the Switches
10
Prepare the Chassis for Module Installation
Determine Module Slot Location
Insert the Module in the Chassis
11
11
11
Cabling and Termination
12
Software Installation
13
QUICK START
14
DCS Master and Slave
14
Remote I/O Master
14
CONNECTIONS AND TAGS
16
Connections
Listen Only Comm Formats
16
16
Tags
Configuration Tag
I and O Tags
Data Tags
17
17
20
20
CONFIGURING THE MODULE IN RSLOGIX 5000
23
DCS Master or Slave
Adding the Module
Configuring Listen-Only Connections
23
23
25
Page 4 AutoMax DCSNet /RE RIO Module
Remote I/O Master
Using the Configuration Signature
Importing Tags
Configuring Input-Only Connections
26
28
29
29
USING THE DCS CONFIGURATION PROGRAM
32
DCS Bridging
32
USING THE 56AMXN AS A REMOTE I/O MASTER
35
The Configuration Program
35
Procedure
35
AutoConfiguring from the Network
36
Uploading a Configuration from the 56AMXN
36
The Network Tree
36
Remote I/O Tags
38
The Configuration Signature
38
USING THE MSG INSTRUCTION TO ACCESS 56AMXN DATA
39
DCS Data Object
Instance Level Services
39
41
USING DDE/OPC TO ACCESS DCS DATA ON THE MODULE
53
USING THE MONITOR PROGRAM
54
Monitoring DCS Registers
55
Monitoring CLX Registers
56
Monitor Diagnostics
57
The Debug Log
59
The Copy Table
59
Fatal Errors
60
TROUBLESHOOTING
61
Publication number 56AMXN-UM002A-EN-P November 2002
LEDs
NET LED – DCS/RIO Network Status
CLX LED – ControlBus Status
OK LED – Module Health
All LEDs Red
61
61
61
62
62
4-Character Display
62
Using 56AmxnMon for Troubleshooting
63
Reading Diagnostic Counters into the ControlLogix Program
64
Using RSLogix 5000 to Diagnose Problems
General Tab
Connection Tab
Module Info Tab
Backplane Tab
64
64
64
65
66
UPDATING THE FIRMWARE
67
DCS NETWORK UPDATE TIME
68
SPECIFICATIONS
69
SUPPORT
70
56AMXN/B AutoMax DCSNet/RE RIO Module
Overview
This document is a user guide for the 56AMXN/B module, which allows
a Rockwell Automation ControlLogix backplane to communicate with an
AutoMax DCS network or an AutoMax Remote I/O network. The
module can act as a DCS master, a DCS slave or a remote I/O master.
For DCS master or slave operation, the 56AMXN/B uses a specific
RSLogix 5000 56AMXN module profile; for Remote I/O Master
operation, it uses the 1756-MODULE generic module profile.
As a DCS master, the module:
•
Scans up to 55 slave drops
•
Transmits 8 words of broadcast data
•
Maintains standard DCS diagnostic counters
•
Supports up to 8 scheduled connections with the ControlLogix
processor for drop data. Each scheduled connection supports up to 7
drops of input data from slaves to the master and 7 drops of output
data from the master to slaves. The connections can update at RPIs
from 3 to 750 ms.
•
Supports a separate connection for broadcast data, at a fixed update
rate of 3 ms.
•
Allows access to unmapped input, output and diagnostic data using
the Logix MSG instruction or using PCCC messages from RSLinx
and other HMIs
As a DCS slave, the module:
•
Acts as any drop from 1 to 55, with drop depth from 1 to 55, with 32
words of input data and 32 words of output data per drop
•
Receives 8 words of broadcast data from the master
•
Monitors the input and output data on others drops on the network
•
Maintains standard DCS diagnostic counters
•
Supports up to 8 scheduled connections with the ControlLogix
processor. Each connection supports up to 7 drops of slave input
data from the module to the master and 7 drops of output data from
the slave to the master. The connections can update at RPIs from 3
to 750 ms.
As a Remote I/O master, the module:
•
Scans up to 7 drops
AutoMax DCSNet/RE RIO Module Page 7
•
Supports up to 248 words of scheduled output data and 250 words of
scheduled input data
•
Maintains diagnostic counters
As either a DCS master or slave, the module supports bridging, which
means that it can obtain its transmit data for any drop from another
56AMXN module in the same chassis.
You can use a DDE or OPC server, such as RSLinx, capable of accessing
the ControlLogix backplane, to access the DCS data directly on the
56AMXN. The module "emulates" PLC-5 integer files 100-155. Each
file corresponds to a DCS drop.
A watchdog timer is implemented in the module’s hardware. If the
firmware does not kick the watchdog within the timeout period the
watchdog times out and places the module into a safe fatal failure state.
A jabber inhibit timer is implemented in the module’s hardware. If the
network transmitter is on longer than 150% of the longest network frame
time, the jabber inhibit forces the transmitter off and places the module
into a safe fatal failure state.
The module firmware can be updated using ControlFlash.
Differences from the 56AMXN/A
For DCS Master and Slave operation, there is now an RSLogix 5000
56AMXN Module Profile. You configure the module as a 56AMXN in
RSLogix 5000, not using the 1756-MODULE generic module profile.
This results in better diagnostics for the 56AMXN in RSLogix 5000.
The 56AMXN/B can exchange much more scheduled data with the
ControlLogix processor than the 56AMXN/A could.
The DCS Master or Slave configuration data is stored with the RSLogix
5000 program. No separate DCS configuration file or configuration
program is required. It also makes the use of the configuration signature
unnecessary.
Remote I/O configuration is unchanged. You configure the 56AMXN
using the Generic Module profile in RSLogix 5000 and use the
56AmxnRioCfg program to configure the module.
The way the 56AMXN/B handles outputs in program mode and on loss
of connection is different from the way they were handled by the
56AMXN/A.
In DCS master or slave operation, if the ControlLogix was in program
mode, outputs from the 56AMXN/A continued to be updated with the
current values from the ControlLogix. If there was a loss of connection
between the ControlLogix processor and the 56AMXN, outputs held
their last state.
Publication number 56AMXN-UM002A-EN-P November 2002
Page 8 AutoMax DCSNet /RE RIO Module
In remote I/O operation, if the ControlLogix was in program mode, the
56AMXN/A set outputs to 0. If there was a loss of connection, outputs
held their last state
The 56AMXN/B firmware sets the outputs to 0 in program mode or on
loss of connection in DCS Master and Slave and Remote I/O operation.
The 56AMXN/B is backward compatible with the 56AMXN/A.
Applications written for the 56AMXN/A do not require modification to
run on the 56AMXN/B. However if you want existing applications to use
the multiple connection feature of the 56AMXN/B, those applications
must be modified.
The firmware in a 56AMXN/A can be FLASH upgraded to 56AMXN/B
operation. Refer to page 67 for details.
Publication number 56AMXN-UM002A-EN-P November 2002
AutoMax DCSNet/RE RIO Module Page 9
Hardware Features
The following diagram shows the features of the module.
DCSNet / RE RIO
XXXX
NET
CLX
OK
The module has:
•
A label to indicate that it is a scanner for AutoMax DCS and remote
I/O
•
A 4-character scrolling display (XXXX)
•
3 LEDs, labelled NET, CLX, and OK, to indicate the status of the
network, the connection to the ControlLogix processor, and its own
internal state
•
a 9-pin D-shell connector to connect to the DCS or remote I/O
network
•
switches at the top of the module to set the mode of operation and
the drop number and drop depth
The module hardware consists of:
Network
•
Processor – 100MHz IDT MIPS
•
FLASH memory - 1Mbyte (512Kx16)
•
Local RAM - 1Mbyte (256Kx32) 50Mhz synchronous SRAM
•
Shared RAM - 512Kbyte (128Kx32) 20ns asynchronous SRAM
Other Requirements
To use the configuration or monitor programs, you require RSLinx OEM
or above. You cannot use RSLinx Lite.
To use multiple connections, you need RSLogix 5000 version 12.00 or
above.
Publication number 56AMXN-UM002A-EN-P November 2002
Page 10 AutoMax DCSNet /RE RIO Module
Installation
Prevent Electrostatic Discharge
The module is sensitive to electrostatic discharge.
ATTENTION: Electrostatic discharge can damage integrated circuits
or semiconductors if you touch backplane connector pins. Follow these
guidelines when you handle the module:
•
Touch a grounded object to discharge static potential
•
Wear an approved wrist-strap grounding device
•
Do not touch the backplane connector or connector pins
•
Do not touch circuit components inside the module
•
If available, use a static-safe work station
•
When not in use, keep the module in its static-shield packaging
Set the Switches
The module’s mode of operation depends on the settings of the rotary
switches at the top of the module. Before you install the module in the
rack, set the switches as shown in the table.
Drop
Drop
Depth
Depth
AutoMax Network Operation
MSD
LSD
MSD
LSD
0
0
0
0
DCS Master
X
X
Y
Y
DCS Slave Drop XX (1-55), Depth
YY (1-55)
0
0
0
1
RIO Master
Table 1 56AMXN Switch Settings
Any other settings are invalid and result in the module going into
“Thumbwheel test” mode. In thumbwheel test mode, the display shows
the current switch settings. It doesn’t go out of thumbwheel test mode
until you turn off the power and set the switches to valid numbers.
In thumbwheel test mode, the 56AMXN initially displays “Thumb Test
Mode” on the 4-character display, displays the switch settings for 5
seconds, then resumes displaying “Thumb Test Mode”
For DCS slave operation, if the drop number and drop depth are
individually valid but the combination results in invalid drop numbers
(for example, drop number 55, drop depth 2), the module displays an
Publication number 56AMXN-UM002A-EN-P November 2002
AutoMax DCSNet/RE RIO Module Page 11
error message on the 4-character display but does not enter Thumbwheel
test mode.
Prepare the Chassis for Module Installation
Before you install the module, you must install and connect a
ControlLogix chassis and power supply. To install these products, refer
to the installation instructions you received with them.
Determine Module Slot Location
This example shows chassis slot numbering in a 4-slot chassis. Slot 0 is
the first slot and is always located to the right of the power supply. You
can use any size ControlLogix chassis and install the module in any slot.
Figure 1 Chassis Slots
You can use multiple modules in the same chassis.
Insert the Module in the Chassis
This module is designed to be installed or removed while chassis power
is applied.
ATTENTION: When you insert or remove the module while
backplane power is on, an electrical arc can occur. This could cause an
explosion in hazardous location installations. Be sure that power is
removed or the area is nonhazardous before proceeding.
Repeated electrical arcing causes excessive wear to contacts on both the
module and its mating connector. Worn contacts may create electrical
resistance that can affect module operation.
Publication number 56AMXN-UM002A-EN-P November 2002
Page 12 AutoMax DCSNet /RE RIO Module
Figure 2 Inserting the 56AMXN
Cabling and Termination
Use drop cable (612574-36R) and passive tap (M/N 57C380) to connect
the module to the coaxial network cable. This cable turns down and has
a ferrite to reduce EMI. This cable must be used in CE applications. You
can also use drop cable 612403-036R which points up.
The drop cable is a 3-foot long multiconductor cable with 9-pin D-shell
connectors at each end. Connect one end to the connector on the module
and the other end to the passive tap.
The passive tap has two BNC connectors for connection to the coaxial
cables and terminating loads.
Publication number 56AMXN-UM002A-EN-P November 2002
AutoMax DCSNet/RE RIO Module Page 13
The network coaxial cable must be terminated with 75 ohm terminating
loads attached to the taps at the physical ends of the network. There
should be two and only two terminators on the network.
For DCS, the network cable can be RG-59/U or RG-11/U. For remote
I/O, the cable must be RG-59/U.
Software Installation
The 56AMXN is supplied with a CD that includes the configuration and
monitoring programs for the 56AMXN.
RSLinx should be installed before you install the 56AMXN software.
The 56AMXN software requires RSLinx OEM or Professional; it does
not work with RSLinx Lite.
You must delete any previous version of the 56AMXN software before
you can install a new version. Use the Windows Control Panel Add and
Remove Programs to remove the old version.
Insert the 56AMXN CD with the module software and run the program
setup.exe on the CD.
Messages about DTL32.DLL when you install or run the programs
indicate problems with the RSLinx installation. Confirm that you are
have RSLinx OEM or RSLinx Professional (not RSLinx Lite) installed.
Publication number 56AMXN-UM002A-EN-P November 2002
Page 14 AutoMax DCSNet /RE RIO Module
Quick Start
The following sections provide a brief summary of the steps necessary to
get the module running in each mode.
DCS Master and Slave
1. Set the switches on the 56AMXN module and install the module in
the ControlLogix rack.
2. Run RSLogix 5000. If there a choice of RSLogix versions, select
version 12 or above.
3. Create a new file or open an existing file. If necessary, select the
appropriate processor properties.
4. Right click on I/O Configuration Folder, or on the bridge module in
the desired remote chassis in the I/O Configuration Folder, and select
New Module from the menu.
5. Select 56AMXN from the list and click OK.
6. Give the module a name and description and select the slot.
7. Select an appropriate Comm Format. either Master - 56 Drops or
Slave – 56 Drops.
8. Click Next.
9. Select the Requested Packet Interval (RPI) for data update.
10. Click Finish>>
11. Save the program and download it to the ControlLogix Processor.
Remote I/O Master
1. Set the module switches and install the module in the ControlLogix
rack.
2. Connect the module to the remote I/O network. (The 56AMXN must
be connected to the network to read the configuration.)
3. Run the 56AmxnRioCfg program and connect to the module using
RSLinx.
4. Perform an Actions/Auto Config command to read the network
configuration and store it on the 56AMXN.
5. Select File/Export Tags to export the tags to a CSV file.
6. Run RSLogix 5000 and configure the module. Remember to enter
the Configuration Signature (see page 38 for details).
7. Import the tags you exported from 56AmxnRioCfg into RSLogix
5000.
Publication number 56AMXN-UM002A-EN-P November 2002
AutoMax DCSNet/RE RIO Module Page 15
8. You can now write your ladder logic using the tags you imported,
download the program, etc.
Publication number 56AMXN-UM002A-EN-P November 2002
Page 16 AutoMax DCSNet /RE RIO Module
Connections and Tags
Connections
When you add a 56AMXN to the I/O Configuration of a ControlLogix, a
broadcast data connection and from one to eight data connections are
created. The number of connections is determined by the Comm Format
you select when you add the 56AMXN module.
The broadcast connection always updates every 3 ms.
The data connections update at a rate from 3 ms to 750 ms, based on the
RPI selected on the Connection tab for the module entry. All data
connections update at the same rate.
The broadcast connection contains the broadcast data the DCS master
transmits. If the 56AMXN is the DCS master, the ControlLogix writes
to output data in the broadcast connection to send the data to remote
drops. If the 56AMXN is a DCS slave, the ControlLogix reads input
data from the broadcast connection to receive the broadcast data
transmitted by the master.
The data connections contain the drop data. Each data connection
consists of 7 blocks of data. Each block contains the input data and the
output data for one drop. You select which drops are mapped into a
block by writing to the Config (C) tag for the 56AMXN. Input and
output data for different drops can be mapped into the same block. The
same drop cannot be mapped to more than one block. By default the
blocks are mapped to consecutive drops.
The number of drop data tags created depends on the type of connection
you select when you add the 56AMXN to the I/O configuration, for
example, Master – Drops, Master, 14 Drops, Slave – 7 Drops, etc. You
cannot change the Comm Format after you create the module; to change
the Comm Format you must delete the current module and create a new
one.
Listen Only Comm Formats
You can also create a 56AMXN in the I/O Configuration with a listen
only Comm Format. A listen only Comm Format lets the ControlLogix
receive only input data. An owning connection must exist for a listen
only connection to work. The listen only Comm Format must be the
same size as the owning Comm Format or smaller.
A listen only connection has no configuration data. All configuration is
done in the owning connection.
For example, if one ControlLogix uses a Master – 28 Drops Comm
Format to a 56AMXN, another ControlLogix can use a Master – Listen
Only 28 Drops Comm Format to obtain input data from to the same
56AMXN. (It can also use a 7, 14 or 21 Drops Listen Only Comm
Format as well.) The ControlLogix with the listen only Comm Format
Publication number 56AMXN-UM002A-EN-P November 2002
AutoMax DCSNet/RE RIO Module Page 17
will see the same input data as the ControlLogix with the owning Comm
Format, but it will have no configuration or output data tags.
More than one processor can use a Listen Only Comm Format to obtain
input data from the same 56AMXN, as long as an owner exists.
Remote Connections
If you are using a 56AMXN in a remote rack, for example a rack
connected to the rack that holds the processor using ControlNet or
Ethernet, it may be necessary to increase the RPI used to connect to the
56AMXN, as the intermediate network may not have sufficient
bandwidth to support the fastest RPIs, especially for the larger Comm
Formats (Master – 56 Drops, etc). In particular, 10 megabit Ethernet has
insufficient bandwidth to support the 56AMXN/B over a remote
connection.
Tags
Associated with each 56AMXN are several tags.
File
Description
C
Configuration tag
I
Input data for broadcast connection
O
Output tag for broadcast connection
I0 – I7
Input drop data tags
O0 – O7
Output drop data tags
Table 2 56AMXN Tags
The terms input and output are used from the point of view of the
56AMXN. If the 56AMXN is a DCS master, output data is data the
module sends to remote drops; input data is data received from remote
drops. If the 56AMXN is a DCS slave, output data is data it is sending to
the DCS master; input data is data it is receiving from the DCS master or
data other drops are sending to the master.
Configuration Tag
The contents of the configuration tag determine how the drop data maps
into the ControlLogix drop data tags.
Publication number 56AMXN-UM002A-EN-P November 2002
Page 18 AutoMax DCSNet /RE RIO Module
Figure 3 Configuration Tag
The Configuration tag consists of an InputDropMap and an
OutputDropMap section. The number of entries in each section depends
on the Comm Format (Master 7 Drops, Master – 14 Drops, etc.) Each
entry contains 7 blocks.
You write values to each block to tell the 56AMXN which drop’s data
will appear in the corresponding section of the input and output drop data
tags. There is a direct correspondence between the Config tag elements
and the data tag elements. For example, Local:0:C.InputDropMap[4]
corresponds to Local:0:I4, etc.
The configuration tag defaults to having data from consecutive drops.
For example, in the screen capture, InputDropMap[0] determines the
contents of input drop data tag I0, which will contain input data from
drops 1, 2, 3, 4, 5, 6 and 7.
Listen only Comm Formats have no configuration tag since they require
no configuration.
The following tables show the possible values that can be written to the
configuration tag.
DCS Master
InputDropMap Value
Description
0
56AMXN Status/diagnostic registers
Publication number 56AMXN-UM002A-EN-P November 2002
AutoMax DCSNet/RE RIO Module Page 19
InputDropMap Value
Description
1 to 55
Drop data from drops, registers 0 to 31
56
Unused
Any other
Invalid
OutputDropMap Value Description
1 to 55
Drop data to remote drops, registers 32 to 63
56
Unused
Any other
Invalid
DCS Slave
InputDropMap Value
Description
0
56AMXN Status/diagnostic registers
1 to 55
Drop data, registers 32 to 63, from master
-1 to –55
Drop data, slave to master, registers 0 to 31,
from monitored drops
56
Unused
Any other
Invalid
OutputDropMap Value Description
1 to 55
Drop data, registers 0 to 31, from 56AMXN to
master
56
Unused
Any other
Invalid
Duplicate entries in the InputDropMap or OutputDropMap areas are
invalid. The only exception is that there can be multiple blocks marked
as unused (56).
If the configuration tag contains invalid data, the connections to the
56AMXN do not open. The ControlLogix periodically retries the
connections so if you correct the invalid configuration data, the
connections will eventually open.
However, if you change the contents of a valid configuration tag in the
ControlLogix, you must break and remake the connections to the
56AMXN to cause the 56AMXN to use the modified configuration data.
Publication number 56AMXN-UM002A-EN-P November 2002
Page 20 AutoMax DCSNet /RE RIO Module
For example, you can inhibit the connection, then remove the inhibit to
break and remake all connections.
I and O Tags
The I and O tags are associated with the broadcast connection. The
contents vary depending on whether the 56AMXN is a DCS master or
slave.
DCS Master
The I tag contains a single DINT, Fault, which is 1 if no slaves are
connected and is 0 otherwise.
In addition, the fault is -1 (16#FFFF FFFF) if the connection is not
active. This could be because the module is not present, is inhibited, or
was configured incorrectly (wrong slot, missing or incorrect parameters,
etc.)
The O tag consists of the 8 INTs of Data, the 8 words of broadcast data
that the 56AMXN sends on DCSnet.
DCS Slave
The I tag consists of a single DINT, Fault, which is 1 if the master is not
active on the network and is 0 otherwise, and 8 INTs of Data, the 8
words of broadcast data the master is sending on DCSnet.
In addition, the fault is -1 (16#FFFF FFFF) if the connection is not
active. This could be because the module is not present, is inhibited, or
was configured incorrectly (wrong slot, missing or incorrect parameters,
etc.)
There is no O tag for a DCS slave.
Data Tags
Drop data appears in the I0-I7 and O0-O7 data tags. The number of tags
depends on the Comm Format. Each tag consists of 7 blocks. The
contents of each block are determined by the config tag.
The Input tags consist of a DINT Fault and 7 blocks of data. Each block
consists of 32 INTs of drop data.
The Output tags consist of a set of blocks, each of which consists of 32
INTs of data.
For example, if the module is a DCS master in slot 7 and the Comm
Format is Master – 56 drops and you write 30 to
Local:7:C.InputDropMap[4].Block[1] and
Local:7:C.OutputDropMap[4].Block[1], the drop data for drop 30 will
appear in data tags Local:7:I4.Block[1].Data and
Local:7:O4.Block[1].Data.
Input Fault Bits
The following table shows how the bits in the Fault DINT are used.
Publication number 56AMXN-UM002A-EN-P November 2002
AutoMax DCSNet/RE RIO Module Page 21
Bits
Description
0-6
Input mapped drop offline
8-14
Output mapped drop offline
16-22
Monitored mapped drop offline (slave only)
Table 3 Input Fault Bits
Global Status Registers
The 56AMXN diagnostic/status registers can be mapped into one of the
input tags by writing a 0 to the entry in the Configuration tag. They may
provide useful information on the operation of the network.
Registers 4-7 contain the drop status table. The module sets bits to
indicate which drops are exchanging data on the network. Register 4 bit
0 corresponds to drop 0, register 4, bit 1, corresponds to drop 1, and so
on.
The table shows how bits in the drop status table are handled by the
56AMXN in each mode.
Master
Slave
Bits for slave drops are set when
the drops are online, and cleared
if they are offline.
If the 56AMXN is being scanned by
a master, bits for its own active
drops are set. Bits for monitored
drops are set if the drops are online,
and cleared if they are offline.
Bit 0, corresponding to the
master, is always set.
Bit 0 is set if the 56AMXN is being
If you disconnect the network, bit
scanned by a master. and is cleared
0 remains set, all others go to 0.
otherwise.
If you disconnect the network, all
bits go to 0.
Table 4 Drop Status Table
Register 12 contains the 56AMXN drop number. In the DCS master,
register 12 always contains 0.
Register 20 contains the 56AMXN drop depth. In the DCS master,
register 20 always contains 0.
Register 14 contains a running count of messages received.
Register 15 contains receive timeouts. This counter increments when the
module is waiting to receive but no message arrives within a timeout
period.
Publication number 56AMXN-UM002A-EN-P November 2002
Page 22 AutoMax DCSNet /RE RIO Module
Register 16 contains CRC errors. This counter increments when the
module receives a packet with a bad CRC.
Register 17 contains overrun errors. This counter increments when the
module receives a packet that is longer than 272 bytes.
Register 18 contains abort errors. This counter increments when the
module starts to receive a packet but the packet is never completed.
Register 19 contains a running count of messages transmitted.
Offset
Description
4
Drop status, drops 0 – 15
5
Drop status, drops 16 - 31
6
Drop status, drops 32 – 47
7
Drop status, drops 48 – 55
12
56AMXN drop number
14
Messages received
15
Receive timeouts
16
CRC errors
17
Overrun errors
18
Abort errors
19
Messages transmitted
20
56AMXN drop depth
Table 5 Diagnostic Registers
For example, if you set Local:0:C.InputDropMap[4].Block[3] to 0, then
Local:0:I4.Block[3].Data contains the diagnostic counters, in
Local:0:I4.Block[3].Data[0] to Local:0:I4.Block[3].Data[31]
Note: You cannot map the diagnostic counters more than once.
Publication number 56AMXN-UM002A-EN-P November 2002
AutoMax DCSNet/RE RIO Module Page 23
Configuring the Module in RSLogix 5000
You configure the module in RSLogix 5000 to set the module type, how
much scheduled data to transfer and how often to transfer it, and what
data to transfer.
The details of the configuration depend on whether the module is being
used as a DCS master or slave, or as a remote I/O master.
DCS Master or Slave
Adding the Module
To configure the module in RSLogix 5000 for use as a DCS Master or
Slave, you must be offline.
1. If you are creating a new project, select File/New to create a new
project, give the processor a name, and enter the slot it occupies in
the ControlLogix rack.
2. Right click on I/O configuration Folder, or on the bridge module in
the desired remote chassis in the I/O Configuration Folder, and select
New Module…
3. Select a module of Type 56AMXN, Description DCSNet Interface
from the list and Click OK. RSLogix 5000 displays the Module
Properties – Local (56AMXN 2.1) dialog box.
Figure 4 Module Properties Dialog 1
Publication number 56AMXN-UM002A-EN-P November 2002
Page 24 AutoMax DCSNet /RE RIO Module
4. Assign the module a Name and optionally a Description.
5. Set the Slot to match the slot number of the module in the chassis.
6. Select a Comm Format from the list. Select a master or slave
connection.
Choose a Comm Format that is large enough for the anticipated number
of drops on the network. Too small means you can’t map all the data;
too large and you add extra traffic to the backplane. It’s the number of
drops that matters, not the drop numbers, since you map the drop data
tags. For example, if the 56AMXN is a DCS master and the network
contains only drops 1 and 55, these two drops can be mapped using
Comm Format Master – 07 Drops by writing the appropriate values to
the configuration tag for the module.
To change the Comm Format, you must delete the old module and add a
new one with the required size. Any configuration data you’ve entered is
lost when you delete the old module, so if you anticipate the DCS
network will be larger in future, it’s best to select a Comm Format that
allows room for the data in the future network.
7. Click Next > to display the second Module Properties – Local
(56AMXN 2.1) dialog box (same as the Connection Tab in Module
Properties)
Figure 5 Module Properties Dialog 2
8. Set the module RPI. This is how often the module’s scheduled data
is updated in the processor. The value can range from 3.0 to 750 ms.
The default is 3 ms.
Publication number 56AMXN-UM002A-EN-P November 2002
AutoMax DCSNet/RE RIO Module Page 25
The network update time is approximately 3 ms per drop (see page 68).
Keep this in mind when selecting an RPI. There is no point in selecting
an RPI that is much faster than the network update time since the
network data will not update as fast as the RPI. In addition, it just adds
to the ControlLogix backplane traffic.
9. Click Finish >> to complete the module configuration.
10. To configure the drops with which the AMXN will exchange data,
expand the Configuration tag for the 56AMXN and write the config
data. Refer to page 17 for possible values.
11. Save the program and download it to the ControlLogix processor.
Configuring Listen-Only Connections
In a ControlLogix system, multiple processors can receive inputs from a
module. Only one processor can control the outputs.
To configure a listen only connection in RSLogix 5000, you must be
offline.
1. If you are creating a new project, select File/New to create a new
project, give the processor a name, and enter the slot it occupies in
the ControlLogix rack.
2. Right click on I/O configuration and select New Module…
Select a module of Type 56AMXN, Description DCSNet Interface from
the list and Click OK. RSLogix 5000 displays the Module Properties –
Local (56AMXN 2.1) dialog box.
3. Assign the module a Name and optionally a Description.
4. Set the Slot to match the slot number of the module in the chassis.
5. Select a Comm Format from the list. Select a master or slave listen
only Comm Format. Choose a Comm Format size as large as or
smaller than the owning connection.
To change the Comm Format, you must delete the old module and add a
new one with the required Comm Format.
6. Click Next > to display the second Module Properties – Local
(56AMXN 2.1) dialog box (same as Connection Tab in Module
Properties)
Publication number 56AMXN-UM002A-EN-P November 2002
Page 26 AutoMax DCSNet /RE RIO Module
Figure 6 Module Properties 1
7. Set the module RPI. This is how often the module’s scheduled data
is updated in the processor. The value can range from 3.0 to 750 ms.
The default is 3 ms. The listen only RPI should match the RPI for
the owning ControlLogix.
8. Click Finish >> to complete the module configuration.
9. Save the program and download it to the ControlLogix processor.
Remote I/O Master
To configure the module in RSLogix 5000, you must be offline.
1. If you are creating a new project, select File/New to create a new
project, give the processor a name, and enter the slot it occupies in
the ControlLogix rack.
2. Right click on I/O configuration and select New Module…
3. Select a module of Type 1756-MODULE, Description Generic 1756
Module from the list and Click OK. RSLogix 5000 displays the
Module Properties – Local dialog box.
Publication number 56AMXN-UM002A-EN-P November 2002
AutoMax DCSNet/RE RIO Module Page 27
Figure 7 Module Properties Dialog 1
4. Assign the module a Name and optionally a Description.
5. Set the Comm Format to Data – INT – with Status.
6. Set the Slot to match the slot number of the module in the chassis.
7. The Input Assembly Instance should be 1. The size should be large
enough to allow all the data to be passed (or larger). The maximum
size is 250 words. The minimum size is determined by the largest
offset assigned to input data.
8. The Output Assembly Instance should be 2. The size should be large
enough to allow all the data to be passed (or larger). The maximum
size is 248 words. The minimum size is determined by the largest
offset assigned to output data.
9. The Configuration Assembly Instance should be 4. The size should
be 4.
10. The Status Input Assembly Instance should be 5. The size should be
large enough to allow all the data to be passed (or larger). The
maximum size is 250 words. For Remote I/O master operation, set
the size to 1.
11. The Status Output Assembly Instance should be 6. You cannot set
the size.
12. Click Next > to display the second Module Properties – Local dialog
box
Publication number 56AMXN-UM002A-EN-P November 2002
Page 28 AutoMax DCSNet /RE RIO Module
Figure 8 Module Properties Dialog 2
Connection Parameters
13. Set the module RPI. This is how often the module’s scheduled data
is updated in the processor. The value can range from 0.2 to 750 ms.
The default is 5 ms.
14. Click Finish >> to complete the module configuration.
Using the Configuration Signature
The Remote I/O configuration program computes a configuration
signature that is a CRC based on the current I/O configuration. The
purpose of the configuration signature is to ensure that the remote I/O
configuration stored in flash memory on the 56AMXN is the correct one.
Otherwise, your ControlLogix program may be reading from or writing
to incorrect locations.
You enter the configuration signature from the configuration program in
the module configuration data area (Local:slot#:C:Data[0] to
Local:slot#:C:Data[3]) in RSLogix 5000 to ensure that the I/O
configuration on which the ControlLogix program is based matches the
configuration on the module.
If the Configuration Signature in the RSLogix 5000 program doesn’t
match the configuration signature on the module, the module returns a
key segment mismatch error to the ControlLogix when the ControlLogix
processor tries to open a connection to the module.
If the connection is already open and you change the Configuration
Signature in the ControlLogix Configuration data area, it has no effect
Publication number 56AMXN-UM002A-EN-P November 2002
AutoMax DCSNet/RE RIO Module Page 29
until the connection is closed and reopened, for example, by cycling
power, or by removing and reinserting the module.
You can disable Configuration Signature checking by entering FF FF FF
FF in the configuration data for the module in RSLogix 5000.
Refer to page 38 for information on obtaining the value to use for the
configuration signature.
Importing Tags
To import the tags exported from the Remote I/O configuration program:
1. Select Tools/Import Tags…
2. Type or browse in the file name.
3. Make sure Overwrite existing tag with imported tag and Create
tag if it doesn’t exist are both checked.
4. Click Import and RSLogix 5000 imports the tags.
5. Double click on Controller Tags in the Controller Organizer tree
to view the tags.
Configuring Input-Only Connections
In a ControlLogix system, multiple processors can receive inputs from a
module. Only one processor can control the outputs. To configure an
input-only connection to the module:
1. Right click on I/O configuration and select New Module…
2. Select a module of Type 1756-MODULE, Description Generic
1756 Module from the list and Click OK. RSLogix 5000
displays the Module Properties – Local dialog box.
Publication number 56AMXN-UM002A-EN-P November 2002
Page 30 AutoMax DCSNet /RE RIO Module
Figure 9 Module Properties 1
3. Assign the module a Name and optionally a Description.
4. Set the Comm Format to Input Data – INT – With Status
5. Set the Slot to match the slot number of the 56AMXN module in
the chassis.
6. The Input Assembly Instance should be 1. The size should be
large enough to allow all the data to be passed (or larger). The
maximum size is 250 words. The minimum size is determined
by the largest offset assigned to input data.
7. The Output Assembly Instance should be 3. You cannot set the
size.
8. The Configuration Assembly Instance should be 4. The size
should be 4.
9. The Status Input Assembly Instance should be 5. The size should
be large enough to allow all the data to be passed (or larger).
The maximum size is 250 words. For Remote I/O master
operation, set the size to 1.
10. The Status Output Assembly Instance should be 6. You cannot
set the size.
11. Click Next > to display the second Module Properties – Local
dialog box.
Publication number 56AMXN-UM002A-EN-P November 2002
AutoMax DCSNet/RE RIO Module Page 31
Figure 10 Module Properties 2
12. Set the module RPI. This is how often the module’s scheduled
data is updated in the processor. The value can range from 0.2 to
750 ms. The default is 5 ms.
13. Click Finish >> to complete the module configuration.
All connections to the module must have the same lengths and RPIs.
Publication number 56AMXN-UM002A-EN-P November 2002
Page 32 AutoMax DCSNet /RE RIO Module
Using the DCS Configuration Program
The DCS Configuration program was used for the 56AMXN/A to
configure the drop data mapped to scheduled data.
You do not need to use the DCS Configuration program to configure
drops scanned by the 56AMXN/B. Drop configuration is done by
writing to the module’s Configuration tag in RSLogix 5000.
The only purpose for using the configuration program is to configure
DCS bridging.
DCS Bridging
Normally the 56AMXN module gets the data it transmits for any drop
from the ControlLogix output registers mapped to that drop. This is true
whether the module is a DCS master or DCS slave.
The 56AMXN module also supports another method of obtaining the
data it transmits. This method is called bridging. A bridged node obtains
its transmit data for a drop from another 56AMXN module (and
therefore usually from another AutoMax DCS network). The module
from which it obtains the data is called the source module.
Figure 11 DCS Bridging
In the diagram, the module in slot 9 is bridged to the module in slot 4. It
obtains data from Network 1 and transmits in on Network 2.
The data can come from DCS registers from any drop on the source
module.
You can use bridging whether the module is a DCS master or a DCS
slave.
The modules must be in the same rack.
Here’s how it works… When the module is updating the drop before the
bridged drop, it sends a message to the source module for the data. The
reply comes back in time for the module to send out the data when it
Publication number 56AMXN-UM002A-EN-P November 2002
AutoMax DCSNet/RE RIO Module Page 33
updates the bridged drop. If the data was just about to be updated on the
source, the worst case data update time is the scan time on the source
module’s network + 3 ms.
To configure a drop as a bridged drop:
1. Start the configuration program. From the start menu select
Programs/56AMXN/56AmxnDcsCfg
2. Right click on the root of the network tree in the left pane (by
default it says 56AMXN – Drop 00) and select Edit 56AMXN.
Figure 12 56AMXN Drop Number
3. Set the Drop Number and Drop Depth to match the switch
settings on the 56AMXN and click OK.
4. To add drops to the 56AMXN, right click on the root of the
network tree in the left pane and select Add Drop.
Figure 13 Adding a Drop
5. Give the drop a Module Name and set the Drop Address and
Drop Depth. Click OK.
6. To make a drop a bridged drop, right click on the drop in the
network tree and select Properties. The Network Node Properties
dialog box opens.
Publication number 56AMXN-UM002A-EN-P November 2002
Page 34 AutoMax DCSNet /RE RIO Module
Figure 14 Bridging
7. For the Type, select DCS_REG to obtain the data from the
source module's DCS registers
NOTE: the 56AMXN/B does NOT support CLX bridging.
8. Select:
•
the CLX slot the source module resides in, 0-16
•
the drop number of the data to be collected, 0-55
•
the starting register, 00 or 32
9. Click OK.
10. To download the configuration to the 56AMXN, right click on
the root of the network tree in the left pane and select Configure
56AMXN. Select the path to the 56AMXN module and click
OK.
Publication number 56AMXN-UM002A-EN-P November 2002
AutoMax DCSNet/RE RIO Module Page 35
Using the 56AMXN as a Remote I/O Master
As a Remote I/O master, the module:
•
Scans up to 7 drops
•
Supports up to 248 words of scheduled output data and 250 words of
scheduled input data
•
Maintains diagnostic counters
You configure the module using the utility provided. It reads the online
network and stores the network configuration in flash memory on the
56AMXN.
Subsequently, if the online network does not match the configuration in
flash, the module displays an error message on the 4-character display
and does not bring the mismatched drops online.
If the network changes, you must rerun the configuration program and
store the new configuration in flash.
The Configuration Program
You use 56AmxnRioCfg to configure the 56AMXN ControlLogix
AutoMax module as an AutoMax Remote I/O master. 56AmxnRioCfg is
an online configuration tool. The 56AMXN module must be connected
to the Remote I/O network to configure the module.
56AmxnRioCfg reads the network configuration and stores it to flash
memory on the module. It also generates a tag file that you import into
RSLogix 5000 to access the data.
Remote I/O operation assumes that all the data on the remote I/O
network is data you want. Therefore there is no mapping procedure;
56AmxnRioCfg assigns locations in ControlLogix memory for all the
modules it finds on the remote I/O network. If there is too much data to
fit into 248 words of outputs data and 250 words of input data, you must
split the network and use more than one 56AMXN module.
56AmxnRioCfg communicates with the module using RSLinx. You
must have RSLinx OEM or above; you cannot use RSLinx Lite.
When you run the program, it first displays an RSWho window. Expand
the tree to find the path to the 56AMXN module you wish to configure.
Procedure
1. Start 56AmxnRioCfg.
2. Select the path to the 56AMXN module in the RSWho window.
3. Select Actions/Auto Config command to read the network
configuration and store it on the 56AMXN.
4. Select File/Export Tags to export the tags to a CSV file.
Publication number 56AMXN-UM002A-EN-P November 2002
Page 36 AutoMax DCSNet /RE RIO Module
5. Run RSLogix 5000 and configure the module.
6. Import the tags you exported from 56AmxnRioCfg into RSLogix
5000.
7. Enter the Configuration Signature in the configuration data for the
module in RSLogix 5000.
You can now write your ladder logic using the tags you imported,
download the program, etc.
AutoConfiguring from the Network
When you perform an autoconfiguration, the module reads the contents
of the network currently connected and stores it in flash memory on the
module and displays it on the screen.
If the network changes, you must do an Autoconfiguration with the new
network so that the configuration in flash matches the network.
Otherwise, the module will not be able to bring mismatched drops
online.
Uploading a Configuration from the 56AMXN
To upload the configuration from a running 56AMXN module in remote
I/O master mode, run 56AmxnRioCfg and select Actions/Upload Config.
56AmxnRioCfg displays the network tree for the network.
The Network Tree
After you autoconfigure or upload from the module, 56AmxnRioCfg
displays a tree structure that shows the drops on the network.
Publication number 56AMXN-UM002A-EN-P November 2002
AutoMax DCSNet/RE RIO Module Page 37
Figure 15 56AmxnRioCfg
The tree is divided into three main areas:
•
The Configuration Signature
•
ControlLogix Inputs
•
ControlLogix Outputs
You can expand each area to show its contents.
The interpretation of the number or numbers shown after the tree
elements depends on what type of element it is.
For Inputs and Outputs, the number indicates the number of registers of
each type.
For Drops, the pair of numbers indicates the starting ControlLogix offset
and number of registers for that drop.
For Slots, the number indicates the starting ControlLogix offset for the
data for the slot.
For Registers, the number indicates the ControlLogix offset for the data
for the register.
Publication number 56AMXN-UM002A-EN-P November 2002
Page 38 AutoMax DCSNet /RE RIO Module
Remote I/O Tags
56AmxnRioCfg creates a tag file that consists of aliases to data locations.
The format of the alias name indicates the location of the data on the
remote I/O network. The format of each record is:
TYPE,SCOPE,NAME,DESCRIPTION,DATATYPE,SPECIFIER
where
TYPE
Always “ALIAS”
SCOPE
“”, defaults to controller scope
NAME
the name created by 56AmxnRioCfg
DESCRIPTION
Always “” (blank)
DATATYPE
“”, defaults to INT
SPECIFIER
the ControlLogix address for the data
Table 6 Remote I/O Tag Format
The format of the name is AmxRioIn_CLXslot_Drop_Slot_Register for
input data or AmxRioOut_CLXslot_Drop_Slot_Register for output data.
Some examples...
ALIAS,””,”AmxRioIn_16_06_03_022”,””,””,”Local:16:I.Data[88]”
ALIAS,””,”AmxRioIn_16_06_03_023”,””,””,”Local:16:I.Data[89]”
ALIAS,””,”AmxRioOut_16_01_04_16”,””,””,”Local:16:O.Data[0]”
ALIAS,””,”AmxRioOut_16_01_04_17”,””,””,”Local:16:O.Data[1]”
The tag file is a comma-separated variable (CSV) text file. You can edit
the file to change the names or add descriptions before you import the
file into RSLogix 5000. Just remember that if the network changes, you
will have to export and edit a new file.
The advantage of using aliases in your program is that if the network
changes and 56AmxnRioCfg assigns new addresses in the ControlLogix
memory, you just have to export the tags for the new network, import
them into RSLogix 5000and your program will use the correct address.
The Configuration Signature
For Remote I/O master operation, the Configuration Signature is
displayed in the network tree.
Publication number 56AMXN-UM002A-EN-P November 2002
AutoMax DCSNet/RE RIO Module Page 39
Using the MSG Instruction to Access 56AMXN Data
You can use ControlLogix MSG instructions to access data in various
objects on the 56AMXN module.
For example, you can access any data on the DCS network using MSG
instructions to the custom DCS data object.
To use a MSG instruction, you create a tag of type MESSAGE to act as a
control for the MSG instruction and source and destination tags for the
MSG data. You must also enter the path to the 56AMXN module.
Figure 16 MSG Block Format
The tables in the following sections list the values you enter in the MSG
tags to perform the various operations.
DCS Data Object
The 56AMXN module implements a custom DCS Data Object that gives
you access to all the data on the DCS network. You can use MSG
instructions to access the data for any drop connected to the 56AMXN
module, not just the drops that have their data mapped into the scheduled
data of the ControlLogix processor.
The following tables show the attributes, instances and services
supported by the DCS Data Object on the 56AMXN. The combination
Publication number 56AMXN-UM002A-EN-P November 2002
Page 40 AutoMax DCSNet /RE RIO Module
of service, instance, and attribute makes it possible to read or write the
data on any DCS drop.
There are instructions that read and write the data on single drops and
instructions that read and write data on multiple drops.
Note that these instructions allow you to write to areas of the network
memory map that AutoMax would not allow.
If you read or write data that is also mapped into the scheduled data, the
data read or written with the MSG instruction will be overwritten when
the scheduled data updates.
Refer to the ControlLogix documentation for general information on the
object model used in ControlLogix processors.
Instances
The instance is used to distinguish between registers 0-31 and registers
32-63. For example, if the MSG instruction is performing a write, it can
write to only one group of registers or the other, depending on whether it
is a DCS master or DCS slave.
Instance
Description
1
Registers 0-31
2
Registers 32-63
Table 7 DCS Data Object Instances
Attributes
Attributes are used to select the drop the MSG instruction is reading from
or writing to.
Attribute
1-55
Description
Selects the drop number. Note that you enter the
attribute in hex in RSLogix 5000
Table 8 DCS Data Object Instance Attributes
Instance Services
The DCS Data Object supports the following services, which are
described in more detail in the sections which follow.
Service
(hex)
03h
Name
Get Attribute List
Function
Get the data for up to 7 drops
Publication number 56AMXN-UM002A-EN-P November 2002
AutoMax DCSNet/RE RIO Module Page 41
Service
(hex)
Name
Function
04h
Set Attribute List
Set the data for up to 7 drops
0eh
Get Attribute Single
Get the data for a single drop
10h
Set Attribute Single
Set the data for a single drop
32h
DCS Register Raw Write
Write a block of data to the
DCS registers on the 56AMXN
33h
DCS Register Raw Read
Read a block of data from the
DCS registers on the 56AMXN
36h
Write Multiple Drops
Set the data for up to 7 drops
37h
Read Multiple Drops
Get the data for up to 7 drops
Table 9 DCS Data Object Instance Services
Instance Level Services
You use instance level services to read and write register data on DCS
drops. Which data you can write depends on whether the module is a
DCS master or slave.
Get Attribute Single, Service Code 0Eh
Note: for best performance, we recommend you use the Read Multiple
Drops command (page 48), especially if you are reading the data for
more than one drop.
To read the instance level attributes for a single attribute (drop), enter the
following parameters in the MSG instruction tags:
Message
Type
CIP generic
Service Type
Get Attribute Single
Service Code
0Eh (grayed out)
Class (hex)
C4h
Instance
1 for registers 0-31
2 for registers 32-63
Attribute (hex) Corresponds to the drop number, range 0-55. Note that
you enter the attribute in hex in RSLogix 5000
Source
Element
(grayed out)
Source
(grayed out)
Publication number 56AMXN-UM002A-EN-P November 2002
Page 42 AutoMax DCSNet /RE RIO Module
Length (bytes)
Destination
Enter the destination tag name, must be large enough
to hold the data, make it an integer array of size at
least 32 integers
Table 10 DCS Data Object Instance Level Get Attribute Single Parameters
This command can be used to read the DCS data for any drop, including
drop 0. You enter the drop number as the attribute, and use the instance
to select whether you want to read registers 0-31 or 32-63.
The command returns the data in 32 consecutive integers in the
destination tag.
Set Attribute Single, Service Code 10h
Note: for best performance, we recommend you use the Write Multiple
Drops command (page 50), especially if you are writing the data for
more than one drop.
To set the instance level attributes for a single attribute (drop), enter the
following parameters in the MSG instruction tags:
Message
Type
CIP generic
Service Type
Set Attribute Single
Service Code
10h (grayed out)
Class (hex)
C4h
Instance
1 for registers 0-31
2 for registers 32-63
Attribute (hex) Corresponds to the drop number, range 0-55. Note that
you enter the attribute in hex in RSLogix 5000
Source
Element
Enter source tag, make it an integer array of size at
least 32 integers
Source
64 (bytes), but see below for attribute 0
Length (bytes)
Destination
(grayed out)
Table 11 DCS Data Object Instance Level Set Attribute Single Parameters
This command can be used to write the DCS data for any drop, including
drop 0. You enter the drop number as the attribute, and use the instance
to select whether you want to write to registers 0-31 or 32-63. Normally
Publication number 56AMXN-UM002A-EN-P November 2002
AutoMax DCSNet/RE RIO Module Page 43
you would write to registers 0-31 as a DCS slave and to registers 32-63
as a DCS master.
The length for attribute 0 is a special case.
For instance 1, the size must be 12 (6 words). The command writes to
registers 14-19, the diagnostic counters. For example, you could use this
command to clear diagnostic counters.
For instance 2, the size must be 16 (8 words). The command writes to
the broadcast registers (32-39). Normally you would do this only as a
DCS master.
If you write to a register that is also mapped as scheduled data, the values
written by the MSG instruction will be overwritten when the scheduled
data updates.
Get Attribute List, Service Code 3
Get Attribute List is a standard ControlNet service that lets you read
more than one attribute (drop) with a single message. The 56AMXN
also supports a custom service, Read Multiple Drops (see page 48) that
performs the same function but which has a parameter format that makes
it easier to locate DCS network data.
We recommend that applications use Read Multiple Drops rather than
Get Attribute List.
To use Get Attribute List to read the instance level attributes for more
than one attribute (drop), enter the following parameters in the MSG
instruction tags:
Message
Type
CIP generic
Service Type
Custom
Service Code
3
Class (hex)
C4h
Instance
1 for registers 0-31
2 for registers 32-63
Attribute (hex) leave blank
Source
Element
Enter the source tag name
Source
2 + Num of attributes (drops) * 2
Length (bytes)
Destination
Enter destination tag name
Table 12 DCS Data Object Instance Level Get Attribute List Parameters
Publication number 56AMXN-UM002A-EN-P November 2002
Page 44 AutoMax DCSNet /RE RIO Module
In the source tag, the data consists of:
# of attributes
First Attribute #
Second attribute #
And so on.
The reply consists of:
# of attributes
First Attr #
Status for first attribute
Data[32] for first attribute
Second Attr #
Status for second attribute
Data[32] for second attribute
and so on.
The attribute status reflects the status of the drop in the active drop list.
The value if the drop status bit for this drop is 0 (not present) or 1 if the
drop status bit for this drop is 1 (present).
The number of attributes whose data you can read at one time is limited
by the maximum message length of approximately 500 bytes, which
corresponds to a maximum of 7 attributes (drops).
Example
For example, to read registers 0-31 on drops 1, 4 and 7, set up a MSG
instruction with the following parameters:
Message
Type
CIP generic
Service Type
Custom
Service Code
3
Class (hex)
C4h
Instance
1
Attribute (hex) Leave blank
Source
Element
Source tag name
Source
2+3*2=8
Publication number 56AMXN-UM002A-EN-P November 2002
AutoMax DCSNet/RE RIO Module Page 45
Length (bytes)
Destination
Destination tag name
Table 13 Get Attribute List Example
In the source tag, an array of at least 4 integers, we would enter:
3 (number of attributes)
1 (first attribute)
4 (second attribute)
7 (third attribute)
The reply written to the destination tag would consist of:
3 (number of attributes)
1 (status of first attribute, drop 1)
32 integers of data for drop 1
1 (status of second attribute, drop 4)
32 integers of data for drop 4
1 (status of third attribute, drop 7)
32 integers of data for drop 7
Set Attribute List, Service Code 4
Set Attribute List is a standard ControlNet service that lets you read write
the data for more than one attribute (drop) with a single message. The
56AMXN also supports a custom service, Write Multiple Drops (see
page 50) that performs the same function but which has a parameter
format that makes it easier to locate DCS network data.
We recommend that applications use Write Multiple Drops rather than
Set Attribute List.
To use Set Attribute List to write the instance level attributes for more
than one attribute (drop), enter the following parameters in the MSG
instruction tags:
Message
Type
CIP generic
Service Type
Custom
Service Code
4
Class (hex)
C4h
Publication number 56AMXN-UM002A-EN-P November 2002
Page 46 AutoMax DCSNet /RE RIO Module
Instance
1 for registers 0-31
2 for registers 32-63
Attribute (hex) leave blank
Source
Element
enter source tag name
Source
2 + [number of attributes] * 66, see table below
Length (bytes)
Destination
enter destination tag name, it doesn’t matter but it must
be entered.
Table 14 DCS Data Object Instance Level Set Attribute List Parameters
Message format in the source tag
# of attributes
First Attribute #
Data[32]
Second attribute #
Data[32]
etc
Number of Attributes
Length
Element number for Attr
number
1
68
1
2
134
34
3
200
67
4
266
100
5
332
133
6
398
166
7
464
199
Table 15 Set Attribute List – Length and Location
If one of the attributes in the list is 0, the values in the table don’t apply.
Attribute 0 is a special case for lengths.
For instance 1, the size must be 12 (6 words). The command writes to
registers 14-19, the diagnostic counters. For example, you could use this
command to clear diagnostic counters.
Publication number 56AMXN-UM002A-EN-P November 2002
AutoMax DCSNet/RE RIO Module Page 47
For instance 2, the size must be 16 (8 words). The command writes to
the broadcast registers (32-39). Normally you would do this only as a
DCS master.
The maximum message size limits the number of attributes you can write
in a single message to 7.
DCS Raw Write, Service Code 32h
The DCS raw write command can be used to write a block of data to the
DCS data area on the module. You tell it the starting offset and the data
length and it writes the data. This is a very powerful command, use it
carefully!
Enter the following parameters in the MSG instruction tags:
Message
Type
CIP generic
Service Type
Custom
Service Code
32h
Class (hex)
C4h
Instance
1
Attribute (hex) Leave blank
Source
Element
Enter source tag
Source
2 + length of data in words * 2, max 480 (max data
Length (bytes) length = 239)
Destination
Enter destination tag name, not used but must be
entered
Table 16 DCS Data Object DCS Raw Write Parameters
In the source tag
First word
offset in words = drop * 64 + register, range is 0 to 55 *
64 + 63 = 3583
Remaining
words
Data[…]
The module checks that the offset in in range and that the combination of
offset and length is in range. If this is not true, it returns an error.
Publication number 56AMXN-UM002A-EN-P November 2002
Page 48 AutoMax DCSNet /RE RIO Module
DCS Raw Read, Service Code 33h
The DCS raw read command can be used to read a block of data from the
DCS data area on the module. You tell it the starting offset and the data
length and it reads the data.
Enter the following parameters in the MSG instruction tags:
Message
Type
CIP generic
Service Type
Custom
Service Code
33h
Class (hex)
C4h
Instance
1
Attribute (hex) Leave blank
Source
Element
Enter source tag name
Source
4 (offset + length)
Length (bytes)
Destination
Enter destination tag name, must be large enough to
hold the data
Table 17 DCS Data Object DCS Raw Read Parameters
In the source tag
First word
offset in words = drop * 64 + register, range is 0 to 55 *
64 + 63 = 3583
Second word
Length in words, 1 to 230
Read Multiple Drops, Service Code 37h
This command is similar in purpose to Get Attribute List, except that the
layout of the data is more intuitive and makes it easier to locate the data
for a specific drop and register. The format for Get Attribute List is set
by the ControlNet specification and can’t be changed.
Read Multiple Drops does not support drop 0.
Enter the following parameters in the MSG instruction tags:
Publication number 56AMXN-UM002A-EN-P November 2002
AutoMax DCSNet/RE RIO Module Page 49
Message
Type
CIP generic
Service Type
Custom
Service Code
37h
Class (hex)
C4h
Instance
1 for registers 0-31 (master or slave)
2 for registers 32-63 (master or slave)
Attribute (hex) leave blank
Source
Element
enter source tag name
Source
2 + Number of drops * 2
Length (bytes)
Destination
enter destination tag name
Table 18 Read Multiple Drops Parameters
Message format in the source tag
# of drop
First drop #
Second drop #
…
Last drop #
The Reply data consists of
Data for the first drop, 32 words
Data for the second drop, 32 words
…
Data for the last drop, 32 words
up to a maximum of 7 drops
Number of
drops
Minimum destination
size, INTs
1
32
2
64
3
96
Publication number 56AMXN-UM002A-EN-P November 2002
Page 50 AutoMax DCSNet /RE RIO Module
4
128
5
160
6
192
7
224
If you create an array organized as Data[number of drops][32] to hold the
returned data, it makes it very easy to locate the data for each drop and
register.
Write Multiple Drops, Service Code 36h
This command is similar in purpose to Set Attribute List, except that the
layout of the data is more intuitive and makes it easier to locate the data
for a specific drop and register. The format for Set Attribute List is set
by the ControlNet specification and can’t be changed.
If you write data that is also mapped as scheduled data, the data you
write will be overwritten when the next scheduled data update occurs.
Enter the following parameters in the MSG instruction tags:
Message
Type
CIP generic
Service Type
Custom
Service Code
36h
Class (hex)
C4h
Instance
1 for registers 0-31 (slave)
2 for registers 32-63 (master)
Attribute (hex) leave blank
Source
Element
enter source tag name
Source
2 + [number of drops] * 66, see table below
Length (bytes)
Destination
enter destination tag name, not used but must be
entered
Table 19 Write Multiple Drops Parameters
Message format in the source tag:
Data for the first drop in the list, 32 words
Data for the second drop in the list, 32 words
Publication number 56AMXN-UM002A-EN-P November 2002
AutoMax DCSNet/RE RIO Module Page 51
…
Data for the first drop in the list, 32 words
# of drops
First Drop #
Second drop #
…
Last drop #
with up to 7 attributes and data arrays
Note that Write Multiple Drops does not support drop 0
Drops
Source Length
(bytes)
1
68
2
134
3
200
4
266
5
332
6
398
7
464
Nothing is written to the destination tag.
If you create a source tag as an array of dimensions Data[number of
drops + 1][32], it makes it very easy to locate the data for each drop and
register.
Remember that if you change the number of drops you are writing, you
must change the Source Length (bytes) in the MSG instruction and also
the location in the array where you write the number of drops and the
drop numbers.
Example
An application writes data for drops 1, 4, and 7.
Create a source array of name and size Data[4][32]. In Data [4][0] to
Data[4][3] write the values 3, 1, 4, 7 (number of drops, and the drop
numbers). Put the data for drop 1 in Data[0][0] to Data[0][31], the data
for drop 4 in Data[1][0] to Data[1][31], and the data for drop 7 in
Data[2][0] to Data[2][31].
Publication number 56AMXN-UM002A-EN-P November 2002
Page 52 AutoMax DCSNet /RE RIO Module
Create a MSG instruction using the service code, class, instance and
attribute described above. For the source, enter the tag name Data. For
the Source Length (bytes), enter 200 (from the table, we’re writing 3
drops). Enter a tagname for the destination. Finally, on the Connection
tab, type or browse the path to the 56AMXN module.
Publication number 56AMXN-UM002A-EN-P November 2002
AutoMax DCSNet/RE RIO Module Page 53
Using DDE/OPC to Access DCS Data on the Module
You can use a DDE or OPC server such as RSLinx, or any other HMI
capable of accessing the ControlLogix backplane, to access the DCS data
directly on the 56AMXN. The module “emulates” PLC-5 integer files
100-155. Each file corresponds to a DCS drop. For example, if you
create tags to access N102, N102:0 to N102:63 represent Drop 2’s DCS
registers.
The 56AMXN supports Word Range Read/Write, Typed Read/Write,
Read/Modify/Write, and PLC-3 Bit Write messages, with either logical
ASCII or logical binary addressing.
To configure a topic in RSLinx to access data on the 56AMXN:
1. Create a new topic. From the main menu select DDE/OPC/Topic
Configuration. Click New and give the topic a name.
2. Select the Data Source tab, browse the path to the 56AMXN module
and click Apply.
3. On the Data Collection tab, set the Processor Type to PLC-5. Check
Polled Messages and select an appropriate update rate. Leave
everything else unchecked. Click Apply
4. You do not need to set anything on the Advanced Communication
tab.
5. Click Done to complete the topic configuration.
You should now be able to access data using any client capable of
communicating with RSLinx.
If you write to a register that is also mapped to ControlLogix scheduled
data, the value you write will be overwritten when the next scheduled
data update occurs.
Publication number 56AMXN-UM002A-EN-P November 2002
Page 54 AutoMax DCSNet /RE RIO Module
Using the Monitor Program
56AmxnMon is a program that lets you monitor the operation of the
56AMXN ControlLogix AutoMax module and perform maintenance
operations.
56AmxnMon displays:
•
the DCS active station list
•
the standard DCS diagnostic counters
•
ControlLogix backplane diagnostic counters
•
raw DCS registers for any drop
•
raw ControlLogix input, output and status data (56AMXN/A only)
In addition, it can be used to:
•
display the debug log, which consists of messages from the firmware
running on the module
•
clear the debug log
•
copy the contents of the debug log to the clipboard for use by another
application. This is often useful for technical support
•
clear fatal errors and dump the fatal error log to a file for use by
technical support
Publication number 56AMXN-UM002A-EN-P November 2002
AutoMax DCSNet/RE RIO Module Page 55
Monitoring DCS Registers
Select Monitor/DcsRegs to monitor the AutoMax DCS registers on any
drop.
Figure 17 DCS Register Display
Use the Drop listbox to select the drop number to display.
For drops 1-55, registers 0-31 contain the data from the slave to the
master. Registers 32-63 contain the data from the master to the slave.
WARNING! If you change values in the DCS registers, the values on
the module will change. Consider the consequences of changing data on
the DCS network.
You can use 56AmxnMon to change values in DCS registers. Before
you can do this, you must check Allow Edits. You will be asked to
confirm this. If you change values for data that is mapped into
ControlLogix scheduled data, the value you write will be overwritten
when the next scheduled data update occurs.
Publication number 56AMXN-UM002A-EN-P November 2002
Page 56 AutoMax DCSNet /RE RIO Module
By default the register contents are shown in decimal. Uncheck Decimal
to display the register contents in hexadecimal.
DCS registers apply only to DCS master and slave operation. If you
attempt to monitor DCS registers when the module is configured for
remote I/O operation, 56AmxnMon returns an error.
DCS data can also be displayed in RSLogix 5000 using Monitor Tags to
display the appropriate tags.
Monitoring CLX Registers
This function is used only with the 56AMXN/A.
Select Monitor/ClxRegs to display the scheduled data the module is
exchanging with the ControlLogix processor in the ControlLogix Input,
Output and Status tables.
You can use this command to monitor the ControlLogix data in both
DCS and Remote I/O operation.
Figure 18 CLX Register Display
Select Inputs, Outputs or Status from the Area listbox.
Each area contains 256 registers. The dialog displays 100 registers at a
time. Select which group of 100 registers you want using the Ofs list box.
Each column displays 10 consecutive registers.
Publication number 56AMXN-UM002A-EN-P November 2002
AutoMax DCSNet/RE RIO Module Page 57
By default the contents of the registers are shown in decimal. You can
display the contents in hexadecimal by unchecking the Decimal
checkbox.
WARNING! If you change values in the CLX registers, the values on
the module will change. Consider the consequences of changing the data.
You can use 56AmxnMon to change values in CLX registers. Before
you can do this, you must check Allow Edits. You will be asked to
confirm this. If you change values for data that is mapped into
ControlLogix scheduled data, the value you write will be overwritten
when the next scheduled data update occurs.
Monitor Diagnostics
Select Monitor/Diagnostics to display:
•
AutoMax Diagnostic counters
•
ControlLogix Backplane Diagnostic Counters
•
The Active Drop List
Figure 19 Diagnostic Information Display
AutoMax Diagnostic Counters
The AutoMax Diagnostic Counters include:
•
Msg Trans, counts packets successfully transmitted by the module
Publication number 56AMXN-UM002A-EN-P November 2002
Page 58 AutoMax DCSNet /RE RIO Module
•
Msg Recv, counts packets successfully received by the module
•
Recv Timeouts, applies only when the module is the DCS master.
They occur when a reply packet isn’t received within the timeout
period.
•
CRC Errors, counts packets received with CRC errors
•
OverRun Errors, counts packets received that are longer than 272
bytes
•
Abort Errors, increments when the module starts to receive a packet
but the packet is never completed, for whatever reason
AutoMax Diagnostic counters apply to both DCS and Remote I/O
operation.
ControlLogix Backplane Diagnostic Counters
The ControlLogix Backplane Counters include:
Counter
Description
Bad Multicast
CRC
the number of multicast receive CRC errors since the
last power-on or reset
Mcast CRC
Error Threshold
the threshold for entering fault state due to multicast
CRC errors, can be set in RSLogix 5000
Rx Bad CRC
the number of directed receiver CRC errors since the
last power on or reset
Rx Rx Bus
Timeout
the number of receiver bus timeouts since the last
power on or reset
Tx Bad CRC
the number of transmitter bus timeouts since the last
power on or reset
Tx Bus Timeout
the number of transmit bus timeouts since the last
power on or reset
Tx Retry Limit
number of times to retry a frame if a transmit error
occurs
ICP Status
current status of the ICP object on the module
Slot
the module’s rack and slot address
Rack Revision
revision of the primary rack
Rack Serial
Number
serial number of the primary rack
Rack Slot Count number of slots in the primary rack
Table 20 Backplane Diagnostic Counters
AutoMax Diagnostic counters apply to both DCS and Remote I/O
operation.
Publication number 56AMXN-UM002A-EN-P November 2002
AutoMax DCSNet/RE RIO Module Page 59
Active Drop List
The Active Drop List shows which DCS drops are active on the network.
For Remote I/O operation, only drops 1-7 are valid.
The Debug Log
The firmware on the module sends trace messages that indicate its
internal state of operation and show any minor errors it encounters.
These messages are often useful for determining why connections have
errors or for technical support.
To display these messages, select View/Monitor Debug Log. The
messages will be displayed in the main 56AmxnMon window.
To clear the log, select Monitor/Clear Debug Log.
To copy the contents of the Debug Log to the Windows clipboard so that
they can be pasted into another application, select Edit/Select All and
Copy.
Figure 20 Debug Log
The Copy Table
The Copy Table applies only to the 56AMXN/A and not to the
56AMXN/B.
Publication number 56AMXN-UM002A-EN-P November 2002
Page 60 AutoMax DCSNet /RE RIO Module
Fatal Errors
Fatal errors occur when the firmware on the module encounters an
unexpected condition. The module stops scanning, turns all three LEDs
red, displays the fatal error number on the 4-character display, and stores
a fatal error log that indicates the cause of the fatal error.
To clear the fatal error and capture the fatal error log:
1. Cycle power on the module. The 4-character display should show
“FatalErrorCapture required”.
2. Run 56AmxnMon and select the Utils/Fatal Error Capture menu
item.
3. Store the fatal error log to a file. This also clears the fatal error on the
module.
Contact technical support. Provide them with the fatal error log, which
will help diagnose the cause of the problem.
Publication number 56AMXN-UM002A-EN-P November 2002
AutoMax DCSNet/RE RIO Module Page 61
Troubleshooting
LEDs
The 56AMXN module has three LEDs that indicate the state of the
network connection, the connection to the ControlLogix processor, and
the overall module health. These LEDs can be used in conjunction with
the 4-character scrolling display and the monitor program 56AmxnMon
to determine the cause of the problem.
NET LED – DCS/RIO Network Status
The NET LED indicates the status of the network connection. It is green
if the network status is good. If it is red, the following table shows
possible causes.
Operating
Mode
Meaning
DCS Slave
Red if no master is heard or Active or Monitored drops
go offline (1 sec)
DCS Master
Red if no Drops are found or if a Drop goes offline (1
sec)
RIO Master
Red if not all drops in configuration are active, or if
extra drops are found or any other configuration
mismatch exists
Table 21 NET LED
CLX LED – ControlBus Status
The CLX LED indicates the status of communication with the
ControlLogix processor.
Color
Red
Meaning
The module has returned an error, received an error or
refused a connection from the backplane. Start
56AmxnMon and display the debug log to determine
the cause.
Orange
No errors, but no activity
Green
An active connection is open or Bridging is active or
DCS registers are being accessed
Table 22 CLX LED
Publication number 56AMXN-UM002A-EN-P November 2002
Page 62 AutoMax DCSNet /RE RIO Module
OK LED – Module Health
A bicolor OK LED indicates module health. A red LED indicates that
module startup diagnostics have failed or a major module fault such as
watchdog timeout or jabber inhibit has occurred. Green indicates that the
card has passed all power-up diagnostics and is functioning normally.
This LED is red during powerup.
All LEDs Red
If all three LEDs are solid red and the 4-character display shows
something like M#66, this indicates that a fatal error has occurred. Refer
to page 60 for information on clearing fatal errors. If a fatal error occurs,
clear the fatal error, save the file and contact Technical Support.
4-Character Display
The following messages may be displayed on the 4-character scrolling
display.
Message
Description
56AMXN Ver x.xx.xx
The module’s firmware version, displayed at
powerup.
Error: Heard Another
DCS Master
The module is configured as a DCS master
and has heard another DCS master on the
network.
DCS Master
The module is a DCS master. Displayed
during normal operation.
Drop xx OffLine
DCS drop xx has gone offline.
DCS Slave Invalid
Depth 0
The drop number switches are set for a drop
number from 1 to 55 but the drop depth
switches are set to 0.
DCS Slave
Drop+Depth ‘xx’ Too
High
The combination of drop number and drop
depth results in invalid drop numbers (>55).
Check the switch settings.
DCS Slave Drop=xx
Depth=xx Waiting...
The module is configured as a DCS slave with
the drop number and depth displayed, but is
not currently being scanned by a DCS master.
Error: Heard
Duplicate DCS Slave
Drop xx
The module is configured as a DCS slave and
has heard a drop on the network with a drop
number that overlaps one of its active drops.
DCS Slave Drop=xx
The module is configured as a DCS slave, with
Publication number 56AMXN-UM002A-EN-P November 2002
AutoMax DCSNet/RE RIO Module Page 63
Message
Description
Depth=xx
the drop number and drop depth shown.
Displayed during normal operation.
Drop xx Timeout
DCS drop xx has timed out.
Mon Drop xx Timeout
Monitored DCS drop xx has timed out.
Firmware Update...
The firmware on the module is being updated.
Error: Heard Another
RIO Master
The module is configured as a Remote I/O
master and has heard another Remote I/O
master active on the network.
RIO Master
The module is configured as a Remote I/O
master. Displayed during normal operation.
Drop x Config
Mismatch
The configuration for remote I/O drop x in Flash
memory on the module doesn’t match the drop
on the network.
Drop x OffLine
Remote I/O drop x is offline.
RIO FLASH Config
Invalid
The module is configured as a Remote I/O
master and the configuration in FLASH
memory is invalid. Run 56AmxnRioCfg and
configure the module.
Flash Config Drop
Mismatch
Configuration in FLASH is incompatible with
current switch settings
Thumb Test Mode
The module is in thumbwheel test mode. Refer
to page 10 for more information.
Table 23 4-Character Display
Messages are displayed twice, immediately after the error occurs. To see
the message again, cycle power. To determine the cause of the problem,
run 56AmxnMon and display the Debug Log.
Using 56AmxnMon for Troubleshooting
The program 56AmxnMon, described in detail on page 54, can be used
to troubleshoot the 56AMXN module.
If the ControlLogix processor has problems connecting to the module,
RSLogix 5000 shows a yellow triangle above the module in the I/O
Configuration. The module properties Connection Tab also provides
some information as to why the connection failed. For more details, run
56AmxnMon and display the Debug Log. It will show the connection
attempt and the reason the 56AMXN rejected the connection.
If a network error occurs, information will be logged to the Debug Log.
Publication number 56AMXN-UM002A-EN-P November 2002
Page 64 AutoMax DCSNet /RE RIO Module
You can use 56AmxnMon to display the active drop list and the
diagnostic counters for both DCS and RIO network communication, and
diagnostic counters for the backplane communication with the
ControlLogix processor.
To troubleshoot problems with DCS data, you can use 56AmxnMon to
view the raw DCS data coming in to the module from the network for
being sent to the network.
Reading Diagnostic Counters into the ControlLogix Program
For DCS Master or Slave operation, you can map diagnostic counters
into an input data tag. Refer to page 17 for details on how to do this.
You can also use a MSG instruction to read the AutoMax diagnostic
counters into your ControlLogix program.
Use an instance level get attribute single to read data from instance 1,
attribute 0 of the DCS Data object. Refer to page 41 for information on
how to do this.
Using RSLogix 5000 to Diagnose Problems
You display the Module Properties dialog by right clicking on the
module while online with RSLogix 5000. This may help diagnosing
some problems, especially connection errors.
The following information is based on version 12.00 of RSLogix 5000.
General Tab
The Type should be 56AMXN DCSNet Interface.
The Vendor should be Allen-Bradley.
The Name is whatever you set when you configured the module.
The description is whatever you set when you configured the module.
Comm Format and Slot should match what you set when you configured
the module.
Connection Tab
The Inhibit Module checkbox inhibits the module. It should not be
checked for normal operation.
The Major Fault on Controller if Connection Fails While in Run Mode
checkbox causes the module to fault the processor if the connection
between the ControlLogix processor and the module fails.
If there are any problems connecting to the 56AMXN module, there will
be an error message in the module fault area. For example, if the
Publication number 56AMXN-UM002A-EN-P November 2002
AutoMax DCSNet/RE RIO Module Page 65
56AMXN refuses a connection from the processor, an error will be
displayed
Value
Description and possible cause
16#000C
Service request error: Invalid mode or state for service
request.
The 56AMXN is unable to process the request in the
current mode
16#0009
Module configuration rejected. Parameter error.
Invalid or duplicate data in Configuration tag
InputDropMap or Output DropMap
16#0119
Connection request: Module not owned
Listen only Comm Format with no corresponding owner
16#0111
Requested packet interval (RPI) out of range
Invalid RPI value or listen only RPI doesn’t match owner
RPI
Table 24 Connection Errors
For remote I/O operation, if the error indicates that there is a key
signature mismatch, check that the Configuration Signature in the
RSLogix 5000 program has the correct value, or is FF FF FF FF to
disable Configuration Signature checking.
The Inhibit Module checkbox can be used to break and re-establish
connections to the module. For example, it can be used in DCS master
or slave operation to force a reconfiguration after changing the
configuration tag. To break the connection, check Inhibit Module and
click Apply. To re-establish the connection, clear the Inhibit Module
checkbox and click Apply.
Module Info Tab
The vendor should be Allen-Bradley.
The Product Type should be Communications Adapter.
The Product Code should be 56AMXN.
The revision should be 2.1
The Serial number should match the serial number on the module.
The Product Name should be 56AMXN.
The Status section contains information about the connection status,
including:
•
Major fault
Publication number 56AMXN-UM002A-EN-P November 2002
Page 66 AutoMax DCSNet /RE RIO Module
•
Minor fault
•
Internal state
•
Configured
•
Owned
•
Module Identity
The Refresh Button updates the information on the screen.
Backplane Tab
The ControlBus Status shows any backplane faults, or OK if there are no
faults.
ControlBus Parameters
The Multicast CRC error threshold is fixed at 8.
The Transmit Retry Limit defaults to 45 but can be edited.
Chassis
The Chassis area contains information that relates to the chassis, not the
module. It contains the rack Revision, Serial Number, Size, and the
56AMXN module slot number.
Error Counters
These refer to communications across the backplane. They should all be
0.
The Status at the bottom of the screen indicates the status of the
connection to the module.
Publication number 56AMXN-UM002A-EN-P November 2002
AutoMax DCSNet/RE RIO Module Page 67
Updating the Firmware
The card supports firmware and FPGA upgrade across the ControlLogix
backplane using the Rockwell ControlFlash utility.
Install the ControlFlash software from the 56AMXN distribution CD and
run it as you would to update any other ControlLogix module. Refer to
the ControlFlash documentation and help for detailed information on
how to use ControlFlash.
A 56AMXN/A can be upgraded to 56AMXN/B functionality by simply
upgrading the firmware. No hardware changes are required.
Publication number 56AMXN-UM002A-EN-P November 2002
Page 68 AutoMax DCSNet /RE RIO Module
DCS Network Update Time
From the manual for the 57C404B (publication J2-3001-3), the DCS
network update time is given by:
Update time = (DropTime * N) + NewDropTestTime + MessageTime
where
DropTime = the amount of time for a master to send a message and the
slave to respond = 2.99 ms
N = Number of slave drops (physical and virtual)
NewDropTestTime = amount of time for the master to poll an inactive
drop and wait for its response = 2.48 ms assuming no response
MessageTime = amount of time to transfer programming terminal
messages. If the master is sendinga message, this is 2.09 ms. If a slave
is sending a message, this is 3.395 ms.
For example, a network composed of 10 drops which is not messaging
will update each drop with a period of:
UpdateTime = 2.99 * 10 + 2.48 = 32.38 ms
Publication number 56AMXN-UM002A-EN-P November 2002
AutoMax DCSNet/RE RIO Module Page 69
Specifications
The 56AMXN/B is a standard ControlLogix module with the following
specifications:
Parameter
Specification
Module Location
ControlLogix chassis
Function
ControlLogix AutoMax DCS and Remote I/O
module
Description
Processor: 100MHz IDT MIPS
FLASH memory: 1Mbyte (512Kx16)
Local RAM: 1Mbyte (256Kx32) 50Mhz
synchronous SRAM
Shared RAM: 512Kbyte (128Kx32) 20ns
asynchronous SRAM
Maximum Backplane
Current Load
650mA @ +5.1V dc and 75mA @ 24 V dc
from I/O chassis backplane
Power dissipation
5W maximum
Environmental
Conditions:
Operational
Temperature
0-60°C (32-140°F)
Storage Temperature
–40 to 85°C (–40 to 185°F)
Relative Humidity
5-95% without condensation
Shock Unpackaged
30g operational
50g non-operational
Vibration Unpackaged
Agency Certification
(when product or
packaging is marked)
2g from 10-150Hz
Marked for all applicable
directives
Listed Industrial Control
Equipment
Installation Manual
Publication 56AMXN-QS001A-EN-P August
2001
Publication number 56AMXN-UM002A-EN-P November 2002
Page 70 AutoMax DCSNet /RE RIO Module
Support
Local Drive Solutions
Contact Directory
New England
Ph. 508.357.8431
Fax 508.485.5059
Boston MA
Southeast
Ph. 770.277.0277
Fax 770.682.6491
Atlanta GA
Gulf Coast
Ph. 281.233.0300
Fax 281.233.0101
Houston TX
West Coast
Ph. 626.969.7647
Fax 626.334.8320
Los Angeles CA
Eastern
Ph. 732.225.1360
ext. 110
Fax 732.225.7833
Edison NJ
Carolinas
Ph. 704.525.1455
Fax 704.525.9025
Charlotte NC
Midwest
Ph. 630.860.1090
Fax 630.787.0309
Chicago IL
St.
Ph.
Fax
St.
Ohio Valley
Ph: 513.943.1145
Fax 513.943.7438
Cincinnati OH
Great Lakes
Ph. 440.604.8421
Fax 440.604.8437
Cleveland OH
North Central
Ph. 651.633.0540
Fax 651.633.7181
Minneapolis MN
Louis
314.770.0168
314.770.0268
Louis MO
Drive/Systems Headquarters
Ph: 262.512.8636
Fax 262.512.8573
Mequon, WI
If you need to make a return, contact the nearest office to obtain a return
authorization number.
Publication number 56AMXN-UM002A-EN-P November 2002
www.rockwellautomation.com
Corporate Headquarters
Rockwell Automation, 777 East Wisconsin Avenue, Suite 1400, Milwaukee, WI, 53202-5302 USA, Tel: (1) 414.212.5200, Fax: (1) 414.212.5201
Headquarters for Allen-Bradley Products, Rockwell Software Products and Global Manufacturing Solutions
Americas: Rockwell Automation, 1201 South Second Street, Milwaukee, WI 53204-2496 USA, Tel: (1) 414.382.2000, Fax: (1) 414.382.4444
Europe: Rockwell Automation SA/NV, Vorstlaan/Boulevard du Souverain 36-BP 3A/B, 1170 Brussels, Belgium, Tel: (32) 2 663 0600, Fax: (32) 2 663 0640
Asia Pacific: Rockwell Automation, 27/F Citicorp Centre, 18 Whitfield Road, Causeway Bay, Hong Kong, Tel: (852) 2887 4788, Fax: (852) 2508 1846
Headquarters for Dodge and Reliance Electric Products
Americas: Rockwell Automation, 6040 Ponders Court, Greenville, SC 29615-4617 USA, Tel: (1) 864.297.4800, Fax: (1) 864.281.2433
Europe: Rockwell Automation, Brühlstraße 22, D-74834 Elztal-Dallau, Germany, Tel: (49) 6261 9410, Fax: (49) 6261 1774
Asia Pacific: Rockwell Automation, 55 Newton Road, #11-01/02 Revenue House, Singapore 307987, Tel: (65) 351 6723, Fax: (65) 355 1733
Publication 56AMXN-UM002A-EN-P – November, 2002
Copyright © 2002 Rockwell Automation. All rights reserved. Printed in USA.


