1
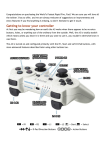
Congratulations on purchasing the World’s Fastest Rapid Fire, Fact! We are sure you will love all
the Arbiter 3 has to offer, and we are always welcome of suggestions on improvements and
extra features if you find anything is missing, so don’t hesitate to get it touch.
Getting to know your controller
At first you may be wondering how on earth the A3 works when there appears to be no extra
buttons, holes, or anything out of the ordinary from the outside. Well, the A3 is totally stealth
which means unless you know it is there and you want to use it, you wouldn’t otherwise know it
was there.
The A3 is turned on and configured primarily with the Sync button and RT trigger, with more
advanced features described later using other buttons too.
Selecting Modes
To select a mode, hold RT and tap & release the Sync button however many times for the
mode you want and then release RT.
So to select Mode 11 you would hold RT, then tap the Sync button 11 times, and then release
RT. The light will flash with each press of Sync, and then when releasing RT will flash back the
number of the mode you are now in (in this case 11 times).
The light doesn’t flash 11 times for 11, or 77 times for 77 as you would be waiting forever. So
what it does is flashes slowly for 10s, and fast for 1s. So 1 slow and 1 fast flash means (10 + 1) =
Mode 11. If you entered Mode 64 it would flash 6 slow and 4 fast.
Quick Enable / Disable
If at any point you want to quickly disable the chip, simply tap Sync button without any other
buttons pressed. The light will flash rapidly several times then go off. The chip is now disabled.
If you were previously in a mode and want to quickly get everything back on, tap Sync again and
it will re-enter where you left off.
Chip Modes
One feature that makes the Arbiter 3 Elite Controllers so powerful (not available on A3 LiTE
controllers) is the ability to totally change its list of modes, effectively making the chip like a
whole new product. For example some chips on the market have modes specifically for Call of
Duty, others a general all-rounder’s, but no other chip has the ability to be all of those in one.
This is what the A3 ‘Chip Select’ is. You can change the A3 into a Specific List of modes that
best suit you!
Master Reset
As the Arbiter 3 has many Features that can be turned on and off and rapid fire speeds and
other timings that can be adjusted by the user sometimes you just want to factory restore the
chip to the beginning in case you forget that is active and what is altered.
To master reset the chip, turn on the controller, hold down X button, tap and release Sync but
keep X held for 6 seconds. After 6 seconds the light will fade in then fade out (pulse). Your chip
is now reset.
LiTE Modes
Arbiter 2 Modes**
1. Ultra Fire
2. Rapid Fire
3. Rapid Fire (3 Burst)
4. Ultra Fire + Drop Shot (LTC*)
5. Drop Shot + Aim (LTC*)
6. Rapid Fire + Drop Shot + Aim (LTC*)
7. Ultra Fire + Jump Shot (LTC*)
8. Jump Shot + Aim (LTC*)
9. Rapid Fire + Jump Shot + Aim (LTC*)
10. User Programming Mode
11. Rapid Fire + Auto-Fast Reload + Aim
12. Dual Trigger
13. Quick Scope (3 Burst)
14. Combi Mode (LT: Rapid Fire, RT: Aim)
Gears of War 3 Modes**
1. Lancer & Scorcher + Fast Reload
2. Retro Lancer + Fast Reload
3. Gnasher + Fast Reload
4. Snub & Boltok + Fast Reload
5. Hammerburst + Fast Reload
6. Sawn Off + Fast Reload
7. Boomshot + Fast Reload
8. Longshot + Fast Reload
9. Torque Bow + Fast Reload
10. User Programming Mode
* LT Cancellation
1. Ultra Fire
2. Auto Aim
3. Rapid Fire + Auto Aim
4. Rapid Fire
5. Combi (LT: Rapid Fire, RT: Auto Aim)
6. Rapid Fire + Auto Aim (5 Shot Burst)
7. Rapid Fire (5 Shot Burst)
8. Rapid Fire + Aim
9. Dual Trigger
10. User Programming Mode
User List (Customizable)**
1.
2.
3.
4.
5.
A
B
X
Y
RB
Rapid Fire + Aim
Drop Shot (LTC*)
Rapid Fire + Drop Shot (LTC*)
Quick Scope Tap Shot
Dual Trigger
** Elite Controllers Only
Customizing User List
The User List comes with 5 modes pre-set. To enter a User List mode is very fast and easy – sort
of like a “Quick List”.
To enter a User List Mode, hold the button for that mode and tap Sync. So for Mode A you would
hold A and tap Sync, keep A held for 1 second then release. Quick, yeah?
It gets better! As there are so many modes to choose from, you may want to have a handful of
your favourite modes at quick disposal. You can put any mode into the User List slots with ease
so that you can add your 5 best modes and quickly switch between them with a single button
press.
To set a mode to the User List slot enter the mode you want as you would normally do, then
whilst in that mode, hold the User Button (the A, B, X, Y or RB) and tap sync twice. The light
will flash 1 to 5 times to indicate it is set. Release it before 5 seconds though!
Elite Modes
RAPID FIRES (RT)
1. Rapid Fire
2. Rapid Fire GOW
3. Rapid Fire GTA + Aim
4. Ultra Fire
5. Dual Trigger
6. Aim
7. Rapid Fire + Aim
8. Rapid Fire 3 Burst
9. Ultra Fire + Drop Shot + Aim (LT Cancellation)
10. User Programming Mode
JUMP SHOTS + AIM (RT + A + LT)
41. Jump Shot + Aim
42. Rapid Fire + Jump Shot + Aim
43. Jump Shot + Aim (LT Cancellation)
44. Rapid Fire + Jump Shot + Aim (LT Cancellation)
45. Jump Shot + Fast Reload + Aim
46. Jump Shot + Auto-Fast Reload + Aim
47. Rapid Fire + Jump Shot + Fast Reload + Aim
48. Rapid Fire + Jump Shot + Auto-Fast Reload + Aim
49. Jump Shot + Auto Aim
50. Rapid Fire + Jump Shot + Auto Aim
DROP SHOTS (RT + B)
11. Drop Shot
12. Rapid Fire + Drop Shot
13. Ultra Fire + Drop Shot
14. Drop Shot (LT Cancellation)
15. Rapid Fire + Drop Shot (LT Cancellation)
16. Ultra Fire + Drop Shot (LT Cancellation)
17. Drop Shot + Fast Reload
18. Drop Shot + Auto-Fast Reload
19. Rapid Fire + Drop Shot + Fast Reload
20. Rapid Fire + Drop Shot + Auto-Fast Reload
AUTO AIMS (RT + LT)
51. Combination Mode (LT = Rapid Fire, RT = Aim)
52. Auto Aim
53. Auto Aim on LT
54. Fast Reload + Auto Aim
55. Auto-Fast Reload + Auto Aim
56. Rapid Fire + Auto Aim
57. Ultra Fire + Auto Aim
58. Rapid Fire + Fast Reload + Auto Aim
59. Rapid Fire + Auto-Fast Reload + Auto Aim
60. Ultra Fire + Auto-Fast Reload + Auto Aim
DROP SHOTS + AIM (RT + B + LT)
21. Drop Shot + Aim
22. Rapid Fire + Drop Shot + Aim
23. Drop Shot + Aim (LT Cancellation)
24. Rapid Fire + Drop Shot + Aim (LT Cancellation)
25. Drop Shot + Fast Reload + Aim
26. Drop Shot + Auto-Fast Reload + Aim
27. Rapid Fire + Drop Shot + Fast Reload + Aim
28. Rapid Fire + Drop Shot + Auto-Fast Reload + Aim
29. Drop Shot + Auto Aim
30. Rapid Fire + Drop Shot + Auto Aim
FAST RELOADS (RT + X)
61. Fast Reload
62. Auto-Fast Reload
63. Rapid Fire + Fast Reload
64. Rapid Fire + Auto-Fast Reload
65. Fast Reload + Aim
66. Auto-Fast Reload + Aim
67. Rapid Fire + Fast Reload + Aim
68. Rapid Fire + Auto-Fast Reload + Aim
69. Rapid Fire GOW + Fast Reload GOW
70. Rapid Fire GOW + Auto-Fast Reload GOW
JUMP SHOTS (RT + A)
31. Jump Shot
32. Rapid Fire + Jump Shot
33. Ultra Fire + Jump Shot
34. Jump Shot (LT Cancellation)
35 Rapid Fire + Jump Shot (LT Cancellation)
36. Ultra Fire + Jump Shot (LT Cancellation)
37. Jump Shot + Fast Reload
38. Jump Shot + Auto-Fast Reload
39. Rapid Fire + Jump Shot + Fast Reload
40. Rapid Fire + Jump Shot + Auto-Fast Reload
SPECIALS (RT + LT + X)
71. 2SPS DMR
72. Ultra Fire Alternative
73. Combi Legacy (LT = Rapid Fire, RT = Auto Aim)
74. Quick Scope
75. Quick Scope (3 Burst)
76. Quick Scope + Rapid Fire
77. Quick Scope Tap Shot (Hold Cancel*)
78. Quick Scope Tap Shot
* Hold Cancel: This means if you hold LT for longer than
it would be before it tap shots (default 1/3rd of a second)
then it won’t fire. This allows you to use Tap Shot mode
and still aim without firing if needed.
Chip Modes: Selecting the list of modes
This step is optional and only needs to be done each time you want to change the list of modes.
As standard the chip comes in LiTE mode. If at this stage you want to swap your list of modes
(Lite, Elite, A2 etc…) then do the following.
To select Elite or Lite mode, hold Y, tap & release Sync and keep Y held for 6 seconds.
To select Arbiter 2 mode, hold A, tap & release Sync and keep A held for 6 seconds.
To select GOW 3 mode, hold B, tap & release Sync and keep B held for 6 seconds.
1 flash is Elite, 2 flashes is Arbiter 2, 3 flashes is GOW3, 4 flashes is LiTE.
Once you are in that chip select, that is it, you are good to go and don’t have to change it until
you want to change chips, even after the battery is removed. So select your desired chip once,
and then start using it. We recommend basic LiTE mode to begin with, which is what all
controllers are setup to be as default.
Quick Select
In Elite mode only, because there are 70+ modes you don’t want to be pressing sync 70 times,
instead of just holding RT, each mode section has “activator buttons” so you can get there
quicker.
For example a Drop Shot + Aim section has (RT+LT+B) in the title then 10 modes in that section.
To get to Mode 6 within that (Mode 26), instead of holding RT, you hold RT, LT and B then tap
Sync 6 times. Wait 1 second then release all buttons. If you release them too quick the
controller will disconnect so make sure you just wait a second.
When you release the light will flash 2 slow and 6 fast to indicate mode 26.
Tactile Remapping Layout / Battlefield 3
Some users like to use alternate button layouts for the games. For Call of Duty the popular
alternative is Tactile Layout, which swaps the Drop button and Knifing button (B and Right
Thumb) around, so B will knife and the right thumb will drop. For battlefield 3 the dropping is
by default the right thumb stick.
Obviously this causes problems with the Drop Shot feature.
When you use Drop Shots with remapping turned on, it will use the right thumb stick for any B
actions.
To turn feature on/off hold down Right Thumbstick and then tap Sync.
When you do this the light will flash twice to say it is turned on, or once to say it is turned off.
Each time you tap Sync it toggles on/off.
Battlefield Auto-Spot
A much desired feature for you Battlefield fans is Auto-Spot. In a multiplayer game or
Campaign, you can ‘spot’ enemies by looking at them and pressing Back button. This can be
very difficult to do during gameplay as the Back button is in a difficult spot.
What Auto-spot does is as soon as you press LT to look down your weapon, or even when you
shoot with RT the chip will start spotting for you (pressing Back) thereby instantly spotting any
enemy you every shoot or look at!
As some of you may know, pressing Back too often results in you getting blocked for a few
seconds from spotting. Don’t worry – the A3 chip bypasses all of that and you never get a block.
To turn feature on/off hold down Left Thumbstick, Right Thumbstick and RT and then tap
Sync.
When you do this the light will flash twice to say it is turned on, or once to say it is turned off.
Each time you tap Sync it toggles on/off.
Auto-Stand
In Drop-Shot modes, after dropping you to the floor and releasing RT the chip automatically
stands you back up. If you would prefer it to leave you down after releasing RT then you can
toggle the feature on/off.
To turn feature on/off hold down Left Thumbstick and B, then tap Sync.
When you do this the light will flash twice to say it is turned on, or once to say it is turned off.
Each time you tap Sync it toggles on/off.
Auto-Run
One of the little hidden extras of the A3 is a new feature called Auto-Run. How annoying is it
that you have to click in the left thumb stick all the time to run in games like Call of Duty? Not
only that but it increases the wear on your controller. Not any more, not with Auto Run!
With Auto-run turned on all you need to start running is press and release LT. Now when you
push up on the left thumb stick you will instantly run continually. To de-activate a run just press
any other button such as A, B, X, Y, RT, RB etc… To activate it again just pull LT.
To turn feature on/off hold down Left Thumbstick and then tap Sync.
When you do this the light will flash twice to say it is turned on, or once to say it is turned off.
Each time you tap Sync it toggles on/off.
Gears of War 3: Auto-Chainsaw
For Gears of War 3, there is a new feature called Auto-Chainsaw. When you use a weapon with a
chainsaw you can kill enemies by holding B to bring up the chainsaw. When you face an enemy
who also has a chainsaw you have to rapidly press B as soon as the dual starts.
With Auto-Chainsaw enabled you simply have to hold the Left Thumbstick while B is pressed,
then as soon as you enter the dual, release B but keep Left Thumbstick pressed and the chip
will rapidly press B.
To turn feature on/off hold down Left Thumbstick and Right Thumbstick and then tap Sync.
When you do this the light will flash twice to say it is turned on, or once to say it is turned off.
Each time you tap Sync it toggles on/off.
Gears of War 3: Auto-Revive
For Gears of War 3, there is a new feature called Auto-Revive. When you get downed by an
enemy, you must rapidly press A to revive.
With Auto-Revive enabled you simply have to hold the Left Thumbstick and tap A, and while
you keep Left Thumbstick pressed the chip will rapidly press A.
To turn feature on/off hold down Left Thumbstick and A and then tap Sync.
When you do this the light will flash twice to say it is turned on, or once to say it is turned off.
Each time you tap Sync it toggles on/off.
Gears of War 3: Auto-Mark
For Gears of War 3, there is a new feature called Auto-Mark. When you aim at an enemy by
holding LT you can press in the Left Thumbstick to mark them with a coloured tag that will
follow them even behind objects and smoke so you can easily spot them and shoot them.
Aiming, firing, and pressing the Left Thumbstick all the time can become hard work.
With Auto-Mark enabled you simply have to aim by holding LT and while you keep LT pressed
the chip will rapidly press the Left Thumbstick.
To turn feature on/off hold down Left Thumbstick and LT and then tap Sync.
When you do this the light will flash twice to say it is turned on, or once to say it is turned off.
Each time you tap Sync it toggles on/off.
Adjusting Speed
One of the best things about the Arbiter 3 is every single mode that uses Rapid Fire or timings
can have its speed completely customized for future proof games.
As default the speed of rapid fire is what we call Speed Mode 30. The slowest speed is Speed
Mode 1, and fastest is Speed Mode 50 which is over 250 shots per second!
To adjust the speed of all modes on the chip, go into the User Programming Mode (by going into
the User Programming mode which is Mode 10) and you will notice the light will stay on when
you release RT instead of flashing back the mode number to you. You are now ready to adjust
the speed. You will start in whatever speed you were currently in, so if you haven’t done this
before it will be Speed Mode 30.
To increase the speed, press and release LT. The light will also flash once to indicate an
increase. You will now go to the next Speed Mode up (if you were in 30 to start with it will be
31).
You can test this speed on the fly by holding RT. To continue increasing the speed just press LT
again until you get to where you want. If you go too far, or want to slow down the speed (i.e. go
backwards one in the Speed Mode) then hold A while you press LT and instead of speeding up 1
it will slow down 1.
Once you are happy with your speed tap the Sync button with no other buttons pressed, and
the light will flash back to you the Speed Mode you are in. So for Speed Mode 37 it would flash 3
times slowly and then 7 times fast.
This speed is then hard saved into the chip and will be remembered even when the battery is
removed – you can now select any mode that uses Rapid Fire and see the speed has totally
changed.
NOTE: If you lose track of the speed, you can easily reset the chip to Speed Mode 30 by going
into User Programming Mode and then holding the B button for 3 seconds. The light will flash a
few times to confirm.
HINT: Try Speed Mode 47 for Modern Warfare 3 on Snipers and Pistols!
Trigger Level Adjusting Speed
If you find using LT to adjust speed is a little slow, you can toggle into trigger level speed
adjusting. Enter User Programming Mode as normal, but once in that mode, hold down X button
for a few seconds and the light will flash a few times to indicate you are now in trigger level
mode. The further you press RT the quicker the gun will fire. Pull the trigger down to the speed
you would like and with it held there tap Sync to set the speed.
Tap Shot Timing Adjust
As well as the rapid fire speed, the timing of the Quick Scope Tap Shot can be fully adjusted.
To enter the user programmable mode for adjusting tap shot timings, you enter Tap Shot mode
as you normally would except instead of holding RT + LT + X, you hold RT, LT, X and RB then
tap Sync 7 times. Remember to keep the buttons held for another second and then release
them. Now the light will stay on instead of flashing back number 77.
You are now ready to tweak the timings. To adjust the timing you can increase/decrease the
speed (delay) between pressing LT and the gun firing.
To reduce the delay (shoots sooner) press and release Left Thumbstick. Each time you press
the Left Thumbstick the light will flash. You can test the new speed by tapping LT and it will
fire the gun briefly after that. The default time is 1/3rd of a second after LT being pressed.
To slow down the speed (increase the delay) hold A when pressing Left Thumbstick.
Once you are happy with the timing set it by tapping Sync button with no buttons pressed.
GOW Fast Reload Timing Adjust
As well as the rapid fire speed, the timing of the Fast Reload for Gears of War games can also be
adjusted to keep up with any adjustments in the timing for future patches.
Firstly make sure you are in the GOW3 chip mode so you can access the modes. Now to adjust
the fast reload timings, enter any GOW mode as normal (hold RT then press Sync so many times)
but instead of entering the mode with just RT held, enter it with RB held as well. So to adjust
the timing of the Retro Lancer for example you would hold RT and RB and press Sync 2 times,
keep the buttons held for a second and release them.
You are now ready to tweak the timings. To adjust the timing you can increase the speed (so
reduce the delay) between reload by pressing and releasing LT. Each time you press LT the
light will flash. You can test the new speed by tapping RB. To slow down the speed (increase
the delay) hold A when pressing LT.
Once you are happy with the timing set it by tapping Sync button with no buttons pressed.
Features Explained
As many users might not be familiar with common terms used in the modified controller
industry, and as many have been created by the Modiify Team and only exist in the A3 chip, find
below explanations of what each terminology means.
Rapid Fire
Rapid fire is when you press the RT trigger to fire
your weapon and the chip rapidly fires the trigger
simulating you pressing the RT trigger over and
over very fast.
Aim & Auto Aim
Any modes that have ‘Aim’ activated mean that by
pulling RT to fire, it will automatically pull LT for
you so you don’t have to manually aim down the
sight. One less thing to think about.
Ultra Fire
Ultra fire is an enhancement of Rapid Fire to make
semi and fully automatic guns fire even faster. This
mode is only available for Call of Duty games up to
Black Ops. Any CODs that don’t support it will just
cause the gun to swap weapons very fast.
Auto aim is similar, but for offline games that have
an ‘aim assist’ option, the Auto Aim will
automatically track the enemies for you so you
don’t even need to aim at them!
Dual Trigger
Also sometimes called Akimbo, Dual Trigger is
Rapid Fire but for dual wielding guns like Dual
Pistols in Call of Duty and dual wielding in Halo’s
etc… Just pull the fire trigger to rapid fire both
triggers. If you have a single weapon in this mode
you can hold LT (to aim) before pulling RT to fire
and it will rapid fire the single shot weapon ok too.
Burst Fire
Burst fire is just Rapid Fire but with a limited
number of bullets. So 3 Burst will rapidly fire 3
shots then stop until you release the trigger.
Perfect for snipers and ammo preservation.
Quick Scope & Tap Shot
With quick scope, as soon as you look down the
sight by holding LT, the chip will automatically
hold your breath for you to steady your aim, which
you would usually have to click in the left thumb
stick to do. This makes scoping much easier. In Tap
mode you just tap LT quickly and let go and the
chip will keep LT pressed then fire shortly after.
LT Cancellation
For Jump and Drop Shot modes, you don’t always
want to drop or jump, for example if you are
behind a window. To prevent the drop or jump, in
any mode with LT Cancellation, if you are already
pressing LT (looking down the sight) when you fire
you won’t drop or jump.
Drop Shot
Still the only chip on the market to do Drop Shot
fully and not do half a job. When you pull the RT
the chip will instantly and automatically drop you
to the floor while doing any other action on the
mode you are in (such as aim for you and rapid
fire), then as soon as you release RT it will stand
you back up!
Jump Shot
This is identical to drop shot but instead of
dropping to the floor, you will continually jump.
Fast Reload
Fast Reload and Auto Fast Reload work specifically
on Black Ops and Gears of War 2 & 3. For Fast
Reload, when you reload your weapon, the A3 will
automatically ‘glitch’ on Black Ops about half a
second before finishing allowing you to finish
reloading that little bit quicker. This works for FN
Fal, Famas and a few others.
For Gears of Wars games the Fast Reload is
perfectly timed Active Reloads when you press
reload.
Auto-Fast Reload is the same as Fast Reload but
you don’t have to press reload, you just let go of
RT after firing, and it will reload for you.