Download TO: All CommPad users FROM: Industrial
Transcript
TO:
All CommPad users
FROM:
Industrial products marketing department, Advanced Automation Company,
Yamatake Corporation
DATE:
September 2007
RE:
Software Installation Procedure for the CommPad Smart Communicator
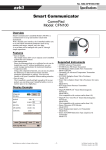
Thank you for purchasing Smart Communicator CommPad.
Application software updates for CommPad can be downloaded from http://www.yamatake.com after
indicating your agreement to the terms of the software contract. Please install new CommPad
software according to the indicated installation procedures, after having confirmed the following
conditions and environment of use.
1. Use conditions of the software
Yamatake retains the copyright and all other rights to this software, and permits its use with the
CommPad Smart Communicator in connection with the compatible field instruments listed below.
CommPad compatible instruments
1)
ST3000 Series 900 Smart Transmitter and ST3000 Ace Smart Transmitter
Model: ST*9**, JT*9***, JT*9**
- Not compatible with analog FSK communication model and fieldbus model
- Not compatible with model JTD720A
Compatible with old DSTJ3000 Smart Transmitter
- Compatible with model JTD*2** (except analog FSK communication models)
- Compatible with model JT*8**
- Not compatible with model JTD520/720
2)
SVP3000 Alphaplus Smart Valve Positioner
Model: AVP300/301/302/200/201/202
- Not compatible with old Smart Valve Positioner model SVP300
3)
Smart Valve eXplorer Smart Positioner for rotary type
Model: SVX100/102
4)
ThermoPLUS Smart Temperature Transmitter
Model: ATT6*/7*
- Not compatible with fieldbus model
- Not compatible with old Smart Temperature Transmitter Model STT301
5)
PTG Series Smart Pressure Transmitter
Model: PTG*1*
2. Use environment of the software
This is application software to be installed on a Pocket PC of our specification (the Casio IT-10).
3. Installation procedure for the Pocket PC
There are two method of installation, as noted below. After installing, start CommPad and confirm
that the software version indicated on the Home screen is 3.0.
Please back up the installed software with the Auto Restore Tool. (Without this backup the
installed program will be lost if CommPad’s battery fails.) For further details refer to section 1-5-6
of the CommPad common edition user’s manual.
1) Procedure with SD memory card (requires a separately sold SD memory card.)
- Decompress the downloaded file and copy the CE folder onto the SD memory card.
- Remove the SD card from the PC and insert it into CommPad’s memory card slot.
- The CommPad installer will start automatically. Simply follow the instructions given by
the installer. (This makes use of a built-in function of the Casio IT-10, the automatic
execution of ¥CE¥SA1100¥AutoRun.exe on an SD memory card.)
- After installation, remove the SD memory card from the slot, referring to the Casio
IT-10 manual for the safe method of removing the card.
- Back up the installed software with the Auto Restore Tool. (Otherwise the installed
program will be lost if CommPad’s battery fails.) For further details refer to section1-5-6
of the CommPad common edition user’s manual.
2) Procedure with a personal computer and cradle (requires a separately sold cradle)
- Decompress the downloaded file to an appropriate folder.
- Connect CommPad to the personal computer by means of the cradle. (ActiveSync
should be installed on the personal computer.)
- Execute SETUP_PC.exe in the PCtoPDA folder of the decompressed file. (Depending
on the Explorer settings, the ". exe" file extension may or may not be displayed.)
- When the CommPad installer starts, follow the instructions to install the software.
- Back up the installed software with the Auto Restore Tool. (Otherwise the installed
program will be lost if CommPad’s battery fails.) For further details refer to section1-5-6
of the CommPad common edition user’s manual.
4. History of software versions
1.1 (Mar. 3, 2006):
Initial sales release
2.0 (May 7, 2006):
DSTJ3000 Ace+ (new performance)
2.1 (Jan. 13, 2007):
azbil logo
3.0 (Mar. 15, 2007):
PTG Series


