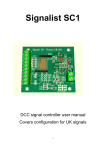
Download TAM VALLEY DEPOT QuadLN_S User Manual
Transcript
TAM VALLEY DEPOT QuadLN_S User Manual Firmware v1.0 N3IX Engineering 25 August 2014 © N3IX Engineering 2014 Tam Valley Depot QuadLN_S User Manual Contents 1 Basics .............................................................................................................................................. 1 1.1 1.2 1.3 1.4 Overview.................................................................................................................................. 1 Servos ...................................................................................................................................... 2 External Power Supply ............................................................................................................. 2 Onboard LED Indicators ............................................................................................................ 2 1.4.1 1.4.2 1.4.3 1.5 1.6 1.7 Frog Power............................................................................................................................... 3 Inputs....................................................................................................................................... 3 Addresses ................................................................................................................................ 3 1.7.1 1.7.2 1.7.3 1.7.4 1.7.5 1.8 Panel Indicators ................................................................................................................ 4 Quick Start ....................................................................................................................................... 4 2.1 2.2 Connecting Power .................................................................................................................... 4 Setup without JMRI .................................................................................................................. 5 2.2.1 2.2.2 2.2.3 2.3 2.4 Servo Start Address .......................................................................................................... 5 Manual Alignment of Travel and Speed ............................................................................ 5 Device Address ................................................................................................................. 6 Setup with JMRI ....................................................................................................................... 6 2.3.1 2.3.2 2.3.3 2.3.4 Minimum JMRI Version .................................................................................................... 6 Create roster entry and set the Device Address ................................................................ 6 Servo Start Address, Lock Start Address, Main and Aux IO Start Addresses ....................... 7 Travel and Speed .............................................................................................................. 8 Factory Reset ........................................................................................................................... 8 2.4.1 2.4.2 2.4.3 3 Device Address ................................................................................................................. 3 Servo Start Address .......................................................................................................... 3 Lock Start Address ............................................................................................................ 3 Main IO Start Address ....................................................................................................... 4 Aux IO Start Address ......................................................................................................... 4 Groups ..................................................................................................................................... 4 1.8.1 2 LN POWER LED ................................................................................................................. 2 LN MESSAGE LED .............................................................................................................. 2 LN ACTIVE LED .................................................................................................................. 2 Restore Selective Parameters to Factory Defaults using JMRI ........................................... 8 Restore All Parameters to Factory Defaults using the Remote Align Board ........................ 8 Restore Selective Parameters to Factory Defaults without using JMRI .............................. 9 Servo Control ................................................................................................................................... 9 3.1 Travel ....................................................................................................................................... 9 © N3IX Engineering 2014 Page i 25 August 2014 Tam Valley Depot QuadLN_S User Manual 3.1.1 3.1.2 3.1.3 3.1.4 3.1.5 3.1.6 3.1.7 3.2 Lock Mode ............................................................................................................................. 11 3.2.1 3.2.2 3.3 Trigger............................................................................................................................ 13 Action............................................................................................................................. 13 Turnout .......................................................................................................................... 13 Cascade Examples .......................................................................................................... 13 Main and Aux IO lines .................................................................................................................... 15 4.1 Input Response ...................................................................................................................... 15 4.1.1 4.1.2 4.1.3 4.1.4 4.1.5 4.1.6 4.2 4.3 4.4 Type – Aux Inputs ........................................................................................................... 15 Type – Main Inputs ......................................................................................................... 15 Detector Type (Main IO pins only) .................................................................................. 15 Sensitivity(Main IO pins only) ......................................................................................... 16 Trigger............................................................................................................................ 16 DCC Freeze ..................................................................................................................... 16 Indication ............................................................................................................................... 16 4.2.1 4.2.2 LED Mode ....................................................................................................................... 17 LED Drive ........................................................................................................................ 17 Action .................................................................................................................................... 18 Secondary Message................................................................................................................ 18 4.4.1 4.4.2 4.4.3 4.4.4 4.4.5 5 Exact feedback (sim) ....................................................................................................... 13 Cascade.................................................................................................................................. 13 3.4.1 3.4.2 3.4.3 3.4.4 4 Local Lockout.................................................................................................................. 11 Midpoint ........................................................................................................................ 12 Output Message - Servo Position Feedback without sensors .................................................. 12 3.3.1 3.4 Closed Position ................................................................................................................. 9 Thrown Position ............................................................................................................... 9 Speed ............................................................................................................................... 9 RapidStart ...................................................................................................................... 10 Directional Speed ........................................................................................................... 10 Thrown Speed ................................................................................................................ 10 Thrown RapidStart.......................................................................................................... 10 Type ............................................................................................................................... 18 Device ............................................................................................................................ 18 Condition........................................................................................................................ 18 Number .......................................................................................................................... 19 Secondary Message Examples ........................................................................................ 19 Routes ........................................................................................................................................... 19 5.1 5.2 Type ....................................................................................................................................... 20 Entries.................................................................................................................................... 20 © N3IX Engineering 2014 Page ii 25 August 2014 Tam Valley Depot QuadLN_S User Manual 5.3 6 Route Examples ..................................................................................................................... 20 The QuadLN_S Pane....................................................................................................................... 21 6.1 Addresses .............................................................................................................................. 21 6.1.1 6.1.2 6.1.3 6.1.4 6.1.5 6.2 Expansion Port ....................................................................................................................... 22 6.2.1 6.3 6.4 6.5 6.6 6.7 6.8 6.9 6.10 6.11 6.12 Manufacturer ID ............................................................................................................. 25 Product ID ...................................................................................................................... 25 Hardware Version........................................................................................................... 25 Software Version ............................................................................................................ 25 Build Number ................................................................................................................. 25 Updating the Firmware .................................................................................................................. 25 7.1 7.2 8 Route Delay .................................................................................................................... 22 Servo OFF When Stopped ....................................................................................................... 22 Servo State Memory............................................................................................................... 22 Signal State Memory .............................................................................................................. 22 Retry on DCC Busy.................................................................................................................. 23 Output Off Switch Request ..................................................................................................... 23 No Command Station ............................................................................................................. 24 Input Invert ............................................................................................................................ 24 Blink Indicates Unlock ............................................................................................................ 24 Broadcast Local Actions .......................................................................................................... 24 Device Information................................................................................................................. 25 6.12.1 6.12.2 6.12.3 6.12.4 6.12.5 7 Long Address .................................................................................................................. 21 Servo Start Address ........................................................................................................ 21 Lock Start Address .......................................................................................................... 21 Main IO Start Address ..................................................................................................... 22 Aux IO Start Address ....................................................................................................... 22 Performing the Update .......................................................................................................... 25 Updating the Decoder Template ............................................................................................ 27 CV Tables ....................................................................................................................................... 28 8.1 8.2 8.3 8.4 8.5 8.6 8.7 8.8 8.9 8.10 Full CV Table .......................................................................................................................... 28 Long Address CV Format ........................................................................................................ 29 Configuration CV Format ........................................................................................................ 29 Configuration2 CV Format ...................................................................................................... 30 Servo Speed CV Format .......................................................................................................... 30 Servo Closed Position CV Format ............................................................................................ 30 Servo Cascade Address CV Format.......................................................................................... 31 IO Option CV Format .............................................................................................................. 31 Main IO Detector Option CV Format – Detector Input ............................................................ 31 IO Secondary CV Format......................................................................................................... 32 © N3IX Engineering 2014 Page iii 25 August 2014 Tam Valley Depot QuadLN_S User Manual 8.11 8.12 8.13 8.14 8.15 8.16 8.17 8.18 8.19 IO Action CV Format ............................................................................................................... 32 Route Entry CV Format ........................................................................................................... 33 Route Control CV Format ....................................................................................................... 33 Signal Aspect CV Format......................................................................................................... 33 Signal Aspect Config CV Format .............................................................................................. 34 Signal Aspect Address CV Format – Signal Mode .................................................................... 34 Signal Aspect Address CV Format – Turnout Mode ................................................................. 34 Signal Lamp CV Format........................................................................................................... 35 Signal LED CV Format ............................................................................................................. 35 © N3IX Engineering 2014 Page iv 25 August 2014 Tam Valley Depot QuadLN_S User Manual 1 Basics 1.1 Overview The QuadLN_S is a stationary decoder that can drive up to 8 servos for controlling turnouts. The servos can be actuated using pushbutton or toggle switch inputs. A single input can control one servo or multiple servos. The QuadLN_S has 3 configurations: 4 servos, 8 IO plus 4 remote relay outputs (Relay Mode) 8 servos, 8 IO (Octo Mode) 4 servos, 8 IO plus 24 LEDs using the optional Signal Board The QuadLN_S can display the servo state on a Tam Valley Depot Fascia Controller or drive user control panel LEDs. Besides showing whether a turnout is Closed or Thrown, the QuadLN_S can indicate when a servo is in motion (without requiring Turnout Position Feedback sensors!) and when it is Locked. The QuadLN_S provides realistic signaling effects for Searchlight and Color Position Light signals and for Crossing signals using the optional Signal Board. Both Signal Head/Mast addressing and Turnout addressing for signals are available. © N3IX Engineering 2014 Page 1 25 August 2014 Tam Valley Depot QuadLN_S User Manual The QuadLN_S supports up to 4 current sense detectors or optical detectors using the optional Detector board (future). The QuadLN_S is a Loconet device. Servos can be controlled via Loconet Switch commands. Turnout position can be reported to software such as JMRI. The QuadLN_S even provides local control Locking capability so that local pushbutton or toggle switch servo control can be disabled on an individual servo basis whenever desired by just sending a Loconet Switch command. QuadLN_S inputs can be wired to external detectors and then report block occupancy using Loconet General Sensor messages. Almost any device with a contact closure or 5V logic-level signal output can be wired to an available QuadLN_S input and then reported via Loconet. The QuadLN_S also includes Cascade and programmable Routes/ Selectors features that take advantage of the Loconet to implement layout control functions such as yard ladder control and track selection. Although setting up these features is more complex than just configuring a single turnout, using the QuadLN_S template in JMRI greatly simplifies things. 1.2 Servos The QuadLN_S drives up to 8 R/C airplane servos for controlling turnouts or performing other layout animation tasks. Independent control over the travel and speed for each servo, plus a RapidStart feature, make turnout movement more realistic. 1.3 External Power Supply The QuadLN_S requires an external DC power supply between +7.5V and +18V. Do not exceed +18V DC. Typical current is 100-200 mA from a 12V supply, but heavy servos mechanical loads can increase the current beyond that range. See Section 2.1 for connection details. 1.4 Onboard LED Indicators There are 3 LEDs on the QuadLN_S. 1.4.1 LN POWER LED The LN POWER LED indicates that Loconet Rail Sync is present and the opto-isolated Loconet interface is powered. This LED should be ON when a Loconet cable is plugged into the QuadLN_S. 1.4.2 LN MESSAGE LED The MSG LED is normally lit. The LED blinks once when any Loconet message traffic is seen, other than messages sent by the QuadLN_S. If this LED never blinks then there is probably a Loconet connection issue. 1.4.3 LN ACTIVE LED The ACTV LED is normally lit. The LED blinks once when any Loconet message is sent by the QuadLN_S or when the QuadLN_S acts upon any incoming Loconet message. This LED also blinks once when the DCC state changes. © N3IX Engineering 2014 Page 2 25 August 2014 Tam Valley Depot QuadLN_S User Manual 1.5 Frog Power The QuadLN_S can drive four Tam Valley Depot 5 volt remote relay boards for powering turnout frogs and other uses. The relay state changes at the servo travel midpoint to reduce problems with electrical shorts during movement with certain types of turnouts. 1.6 Inputs The QuadLN_S provides 4 “Main” Inputs and 4 “Aux” Inputs. All inputs are fully configurable, including what action to take and what type of input change should trigger the action. Possible actions on an input change include controlling the onboard servos, sending Switch commands to other decoders or to trigger routes, and generating general sensor messages that report the input change to any interested Loconet device. The QuadLN_S has special features that allow the input lines to also drive LED indicators or other devices. Since each “input” also has an “output” capability, each connection is called an “IO” line in this manual (IO = Input / Output). 1.7 Addresses 1.7.1 Device Address The QuadLN_S requires a Device Address so its features can be configured via Loconet programming. This address is just for device programming, and is independent from the Servo and Sensor addresses which are described in Sections 1.7.2 and 1.7.3 below. The valid range for the Device Address is 0-16383 and it must be unique. Typically a 5 digit extended address is used for the Device Address. This avoids conflict with locomotives and other devices when doing programming. The default Device Address is 11000. When first installing QuadLN_S’s remember to connect just one unprogrammed unit at a time to Loconet and change the Device Address to a unique address following the procedure in 2.2.3. or 2.3.2. 1.7.2 Servo Start Address The QuadLN_S Servos respond to Loconet Switch commands at addresses starting at the Servo Start Address. The QuadLN_S Servos use 4 or 8 consecutive switch addresses depending on the configuration. The Servo Start Address can be from 1 to 2045. Avoid using addresses 1017-1020 for any Servo if possible (those addresses are also used by a special interrogation command). 1.7.3 Lock Start Address The QuadLN_S Locks respond to Loconet Switch commands at addresses starting at the Lock Start Address. The QuadLN_S Locks use 4 or 8 consecutive consecutive switch addresses depending on the configuration. The Lock Start Address can be from 1 to 2045. Avoid using addresses 1017-1020 for any Lock if possible (those addresses are also used by a special interrogation command). If the Servo and Lock address ranges overlap, any Lock with the same address as a Servo will not be accessible using Loconet Switch commands. © N3IX Engineering 2014 Page 3 25 August 2014 Tam Valley Depot QuadLN_S User Manual 1.7.4 Main IO Start Address The QuadLN_S reports the status of its Main inputs using Loconet Sensor addresses starting at the Main IO Start Address. The QuadLN_S uses 4 consecutive sensor addresses for Main IO1 – Main IO4. The Main IO Start Address can be from 1 to 4093. In general the Main IO address range should not overlap the Aux IO address range. 1.7.5 Aux IO Start Address The QuadLN_S reports the status of its Aux inputs using Loconet Sensor addresses starting at the Aux IO Start Address. The QuadLN_S uses 4 consecutive sensor addresses for Aux IO1 – Aux IO4. The Aux IO Start Address can be from 1 to 4093. In general the Main IO address range should not overlap the Aux IO address range. 1.8 Groups The QuadLN_S has 4 functional Groups when in Relay or Signaling mode. Each Group consists of a Servo, Main IO line and Aux IO line. As shipped, the IO lines in each Group are configured for a momentary pushbutton and change the state of the Servo on each button press. The QuadLN_S has 8 functional Groups when in Octo mode. Each Group consists of a Servo and either a Main IO line or an Aux IO line. As shipped, the IO line in each Group is configured for a momentary pushbutton and changes the state of the Servo on each button press. Any Input can be configured to control any Servo. In fact any input can control as many of the QuadLN_S Servos as desired, or it can serve other functions and not control any QuadLN_S servo. There are some QuadLN_S features (for example LED indication) that only work when an Input is used with the Servo in the same Group, so it is best to start with that arrangement when learning about the QuadLN_S. 1.8.1 Panel Indicators The QuadLN_S can drive panel indicator LEDs connected to the Main IO and Aux IO lines. The panel indication shown on any specific IO line reflects the state of the Servo in the same group. Thus when using panel indicators such as the Tam Valley Depot Fascia Controller, it is best to use an IO line in the same Group as the Servo being controlled so that the position, movement and lock indications are meaningful. 2 Quick Start 2.1 Connecting Power The QuadLN_S requires an external DC power supply between +7.5V and +18V. Do not exceed +18V DC. Typical current is 100-200 mA, but heavy servos mechanical loads can increase the current beyond that range. The power input is via the connector with two screw terminals near the upper left corner © N3IX Engineering 2014 Page 4 25 August 2014 Tam Valley Depot QuadLN_S User Manual of the board. Connect the power supply minus lead to the upper terminal (the one closest to the corner of the board) and connect the power supply plus lead to the lower terminal (the one furthest from the corner of the board). If the leads are connected backwards, the QuadLN_S will not function but will not be damaged. 2.2 Setup without JMRI All device behavior is controlled via CV values so it is possible to fully configure the device manually. Generally this requires deciphering the CV tables in Chapter 8 below and manually calculating the proper values, however the following steps will get your QuadLN_S up and running controlling turnouts. 2.2.1 Servo Start Address Set the Servo Start Address first to prevent conflicts with other stationary decoders. your device is not connected to Loconet). (Skip this step if Install the ADDR jumper. The ACTV and MSG LEDs on the board should start alternately flashing. Using your throttle issue a Switch command for the desired Servo Start Address. When the command is received, the Servo Start Address is set and the LEDs stop flashing. Remove the ADDR jumper. The Servos are now set to 4 consecutive addresses starting with the address sent with the Switch Command. Avoid using addresses 1017-1020 for any Servo if possible (those addresses are also used by a special interrogation command). 2.2.2 Manual Alignment of Travel and Speed The travel endpoints and speed for each servo can be set manually using the Select, Up and Down buttons on the Remote Alignment Board. Here is the adjustment procedure. 1. 2. 3. 4. 5. Connect the remote alignment board to the QuadLN_S. Remove the QuadLN_S ADDR jumper if it is installed. Hold the Select button down until a Servo selection LED turns on (about 1 second), indicating that you are in Servo Selection mode and that indicated Servo is selected. (The initial Servo selection will be the same as the one selected the last time alignment was performed.) Use the Up and Down buttons to select the desired Servo, then press the Select button briefly. The Closed LED is now flashing to indicate that the Closed Position is being adjusted. Use the Up and Down buttons to move the Servo to the desired Closed Position. When satisfied with the Closed Position, press the Select button briefly. The Thrown LED is now flashing to indicate that the Thrown Position is being adjusted. Use the Up and Down buttons to move the Servo to the desired Thrown Position. When satisfied with the Thrown Position, press the Select button briefly. The Speed LED is now flashing to indicate that the Speed is being adjusted. Use the Up and Down buttons to change the speed. The Servo will change position to demonstrate the new © N3IX Engineering 2014 Page 5 25 August 2014 Tam Valley Depot QuadLN_S User Manual Speed. You can continue to adjust the speed while the Servo is moving if desired. When satisfied with the Speed, press the Select button briefly. 6. To readjust any of the parameters, press the Select button briefly to return to step 4. To exit the Adjustment process at any point hold the Select button until the remote align board LEDs turn off (about 1 second). The new settings are now saved and in use. 2.2.3 Device Address The Device Address can be changed using Service Mode/Programming-Track programming messages that are received by the QuadLN_S over Loconet. (No connection between the QuadLN_S and the programming track is required.) Choose a unique address between 1 and 16383. See Section 1.7.1 for information about Device Addresses. The CV format is shown in Table 8-2 – note the upper 2 bits in CV17 must be 1. A unique 5 digit address is recommended to avoid conflicts. 2.3 Remove all locomotives from the programming track. Install the ADDR jumper. The ACTV and MSG LEDs should start flashing alternately. Enter Programming mode and select Paged mode. Write the high byte (upper 8 bits) of the desired address to CV17. Write the low byte (lower 8 bits) of the desired address to CV18. Remove the ADDR jumper. Setup with JMRI The QuadLN_S template in JMRI provides the easiest and quickest way to configure the overall device. This section covers the basics needed to get the decoder up and running. Later sections dive into the details. 2.3.1 Minimum JMRI Version The QuadLN_S template uses features introduced in JMRI version 3.8. If you are running an earlier version of JMRI, please update to the latest version before proceeding. 2.3.2 Create roster entry and set the Device Address Each decoder needs its own Roster entry so that there is a place to store the configuration settings that are unique to that decoder. In this step we will create the Roster entry for the decoder. We will also assign a unique Device Address to the decoder using the Service-Mode/ Programming-Track Programmer so that we can later alter its configuration whenever required without affecting any other devices. When setting all other parameters of the QuadLN_S we will always use . The Service-Mode/Programming-Track Programmer is only used in this step and when performing a Factory Reset. The Device Address can be set using Service Mode/Programming-Track programming messages that are received by the QuadLN_S over Loconet. (No connection between the QuadLN_S and the programming track is required.) © N3IX Engineering 2014 Page 6 25 August 2014 Tam Valley Depot QuadLN_S User Manual Remove all locomotives from the programming track. In DecoderPro or PanelPro click the Service-Mode Programmer button or go to Tools / Programmers and select Service-Mode Programmer. In DecoderPro3 select the Programming Track option and then click the “+ New Loco” button. Scroll down the decoder list to Tam Valley Depot, expand it, select the Quad-LN_S family and expand it, select Quad-LN_S_v1 decoder and then click Open Programmer. (see the note below if the entry is missing) On the Roster Entry tab, enter an ID for the device such as QLNnnnnn (where nnnnn is the 5 digit address for this device) or other unique identifier. Go to the Quad-LN_S tab. Enter the desired Device Address in the Long Address field. Choose a unique address between 1 and 16383. See Section 1.7.1 for information about Device Addresses. A unique 5 digit address is recommended to avoid conflicts. Click Save on the File menu to save the new roster entry. Go to the CVs tab. Install the ADDR jumper. The ACTV and MSG LEDs should start flashing alternately. Write CV17 and then Write CV18. (Ignore the “Programmer error” message, this is normal.) Remove the ADDR jumper. In DecoderPro or PanelPro Close the Service-Mode Programmer. In DP3 select the Program on Main option. Note: If the Tam Valley Depot / Quad-LN_S family or Quad-LN_S_v1 decoder entry is missing, please follow these steps to download and install the necessary template file. Download the latest QuadLN_S templates from the /Decoder files/Tam Valley Depot/ folder in the files area of the Yahoo JMRI Users Group. Place the decoder file in the decoders subfolder under the User File Location specified in your JMRI Preferences File Locations. Place the TVD folder in the xml/decoders subfolder under the User File Location specified in your JMRI Preferences File Locations. (Create this folder if it doesn’t already exist.) Close the Service-Mode Programmer if it is still open. Select Recreate Decoder Index on the Debug menu. When that step is complete, go back to the first step in this section. 2.3.3 Servo Start Address, Lock Start Address, Main and Aux IO Start Addresses Now we are ready to enter all other parameters of the QuadLN_S. . To do this in JMRI we use In DecoderPro or PanelPro click the Programmer button or go to Tools / Programmers and select Programmer. In DecoderPro3 select the option. Select the QuadLN_S entry you created above from the roster and Open it. Go to the QuadLN_S tab. Enter the desired servo start address in the Desired Servo Start Address field. © N3IX Engineering 2014 Page 7 25 August 2014 Tam Valley Depot QuadLN_S User Manual (optional) Enter the desired lock start address in the Desired Lock Start Address field. (optional) Enter the desired Main IO start address in the Desired Main IO Start Address field. (optional) Enter the desired Aux IO start address in the Desired Aux IO Start Address field. Click Write changes on sheet to update the QuadLN_S. (optional) Click Read full sheet to read back the address values and confirm the settings. Click Save on the File menu to update the roster entry. 2.3.4 Travel and Speed You can follow the procedure in Section 2.2.2 above or at any time just use in JMRI by clicking on one of the Group tabs and begin exploring using the information starting in Chapter 3. 2.4 Factory Reset The QuadLN_S settings can always be restored to their factory defaults. Factory Reset is performed by writing a special value to CV 8 (Manufacturer ID) using Service Mode programming messages that are received by the QuadLN_S over Loconet. (No connection between the QuadLN_S and the programming track is required.) Menu choices have been provided in the JMRI QuadLN_S template file to make this easy to do using the JMRI Service-Mode/Programming-Track Programmer. Alternate manual methods that do not require JMRI are also described below. 2.4.1 Restore Selective Parameters to Factory Defaults using JMRI Remove all locomotives from the programming track. Go to Programmers on the Tools tab and open the Service-Mode Programmer. (In DP3 just select the Programming Track option.) Select any QuadLN_S roster entry and open it. Select the Reset menu and then click Factory Reset… Select Restore All CVs…, Restore Addresses… or Restore Servo and Input CVs... to specify which parameters to restore. Install the ADDR jumper. The ACTV and MSG LEDs should start flashing alternately. Click OK to perform the reset. Remove the ADDR jumper. Close the Service-Mode Programmer. If you chose “Restore Addresses...” above, cycle power to the QuadLN_S so the changes can take effect. 2.4.2 Restore All Parameters to Factory Defaults using the Remote Align Board Remove power from the QuadLN_S. Install the ADDR jumper. Connect the remote alignment board to the QuadLN_S. Press and hold both the Up and Down buttons. Reapply power to the QuadLN_S. © N3IX Engineering 2014 Page 8 25 August 2014 Tam Valley Depot QuadLN_S User Manual Continue holding both the Up and Down buttons until the ACTV and MSG LEDs flash alternately for 1 second and then stop flashing. Release the buttons. Remove the ADDR jumper. 2.4.3 Restore Selective Parameters to Factory Defaults without using JMRI 3 Remove all locomotives from the programming track. Install the ADDR jumper. The ACTV and MSG LEDs should start flashing alternately. Enter Program Mode on your throttle. Write one of the following values to CV8 to specify which parameters to restore. o 8 to restore all configuration, address, servo and input parameters to their factory default values. o 9 to restore all configuration and address parameters to their factory default values. o 10 to restore all servo and input parameters to their factory default values. Remove the ADDR jumper. Exit Program Mode on your throttle. If you wrote 9 to CV8 above to restore only the addresses, cycle power to the QuadLN_S so the changes can take effect. Servo Control To access the following parameters in JMRI always use 3.1 . Travel The Travel parameters allow the Servo Closed and Thrown Position endpoints, Speed, and RapidStart feature to be set for each Servo. 3.1.1 Closed Position The Closed Position endpoint can be set from 0 to 2400, where 0 is fully counter-clockwise and 2400 is fully clockwise. 3.1.2 Thrown Position The Thrown Position endpoint can be set from 0 to 2400, where 0 is fully counter-clockwise and 2400 is fully clockwise. 3.1.3 Speed The Speed can be set from 0 to 63, where 0 is very slow and 63 is very fast. A typical Speed setting is 4. When you reduce the speed of other types of slow motion switch machines by lowering the drive voltage, this also reduces the applied force (torque). With servos the position is controlled continually during movement so full torque is available. This makes movement smooth even at very slow speed settings. © N3IX Engineering 2014 Page 9 25 August 2014 Tam Valley Depot QuadLN_S User Manual 3.1.4 RapidStart With any slow motion turnout motor there is generally some amount of over-travel to ensure that the throwbar is tensioned and the point rail is locked against the stock rail. When the motor is reversed, no movement of the points occurs until the over-travel is “unwound” and the motor begins to drive the throwbar in the opposite direction. The time it takes to unwind the over-travel is noticeable at slow motor speeds and detracts from the realistic movement that slow motion motors are intended to create. In some cases this effect creates the impression that the turnout action requested by the operator failed to occur, and results in operators re-actuating turnout control buttons and toggles. The RapidStart feature is designed to minimize the over-travel delay and provide more realistic throwbar motion. When RapidStart is enabled and a servo is reversed, the QuadLN_S moves the servo through the first part of the range of motion at high speed and then switches to the speed set by the Speed parameter for the remainder of the motion. The initial movement at high speed quickly unwinds the over-travel so that the throwbar beings moving much sooner, while the final movement at low speed creates the desired slow motion effect. The RapidStart parameter allows you to set the fraction of the movement that occurs at high speed. The available RapidStart settings are none, one-eighth travel, one-quarter travel, and three-eighths travel. 3.1.5 Directional Speed Normally the QuadLN_S drives a servo at the same speed whether the servo is moving towards the Closed position or towards the Thrown position. The QuadLN_S also allows each servo to have independent Speed (and RapidStart) settings for each direction of movement. This feature might be useful when using a servo to drive a semaphore blade or an animation function like a pile driver, where the speed in one direction is different than the other. The Directional Speed parameter allows you to set independent Speed and RapidStart values for each direction of travel. The available Directional Speed settings are Disable and Enable. When Directional Speed is set to Enable, the JMRI template will display two additional settings: “Thrown Speed” and “Thrown RapidStart”. 3.1.6 Thrown Speed When Directional Speed is enabled, the Thrown Speed parameter sets the speed when moving in the Thrown direction. The Speed parameter in Section 3.1.3 always sets the speed when moving in the Closed direction. 3.1.7 Thrown RapidStart When Directional Speed is enabled, the Thrown RapidStart parameter sets the RapidStart behavior in the Thrown direction. The RapidStart parameter in Section 3.1.4 always sets the behavior in the Closed direction. © N3IX Engineering 2014 Page 10 25 August 2014 Tam Valley Depot QuadLN_S User Manual 3.2 Lock Mode The QuadLN_S has two optional Lock modes, Local Lockout and Midpoint, which are described below. The Loconet Switches at addresses Lock Start Address to Lock Start Address + 3 control the locks on Servo 1 to Servo 4 respectively. When a Lock Switch is Thrown, the selected Lock Mode for the corresponding Servo is activated, and when the Lock Switch is Closed, the Lock Mode for the corresponding Servo is deactivated. The available Lock Mode settings for each Servo are None, Local Lockout and Midpoint. When set to None, the Loconet Switch at the Lock Address has no effect. When set to Local Lockout, the local controls for the turnout will be disabled (locked) when the Lock Control Switch is set to Thrown. When set to Midpoint, the Servo will move to the mid-travel position when the Lock Control Switch is set to Thrown and will return to the last commanded position when the Lock Control is set to Closed. 3.2.1 Local Lockout In systems like CTC, some turnouts are controlled remotely by the dispatcher. These remotely control turnouts are normally “locked “, that is they cannot be operated by a local train crew member. When a train crew wishes to operate one of these controlled turnouts such as during local switch moves, they are required to first obtain permission from the dispatcher before the turnout is “unlocked” and then operated locally. Besides supporting realistic operation under CTC, the ability to lock a turnout is useful just to prevent it from changing inadvertently. For example, if running a train continuously during an Open House it is desirable to lock the mainline route so that someone bumping into a fascia control doesn’t cause a derailment or worse. The QuadLN_S Local Lockout feature permits local control of a turnout to be disabled (locked out). It also has the ability to provide a local indication of the state of the turnout lock. Locking a QuadLN_S Servo means that local control actions via the Main and Aux IO lines (i.e. buttons, toggles and secondary triggers) can no longer directly change the Servo position. The Servo still responds normally to Loconet Switch commands at its address, including commands originated by secondary messages or by routes. Example 1. Servo 1 Lock Mode is set to Local Lockout and the QuadLN_S Lock Start Address is set to 13. This means the Lock Control Switch for Servo 1 is at Loconet Switch address 13. When Switch 13 is Thrown, local control of Servo 1 is locked, and when Switch 13 is Closed local control of Servo 1 is unlocked. Example 2. Servo 1 Lock Mode is set to None and the QuadLN_S Lock Start Address is set to 13. Changing Switch 13 to Thrown or Closed has no effect on local control of Servo 1. The QuadLN_S Lock mechanism supports unlocking either by the local crew or by the Dispatcher as desired. The local crew could control the lock by sending the appropriate Switch command to the Lock Control Switch using a handheld throttle. A more interesting approach might be for the local crew to © N3IX Engineering 2014 Page 11 25 August 2014 Tam Valley Depot QuadLN_S User Manual control the lock via a keyswitch or other special electrical interlock device that is connected to a QuadLN_S input pin. There is an example in Section 4.4.5 showing how to accomplish this. Having the local crew control the lock in this manner is similar to prototype practice but requires hardware like a keyswitch for every turnout to be unlocked. An alternative approach is to have the Dispatcher control the lock by sending the appropriate Loconet Switch command, which could be done via a control panel lever for instance. This approach doesn’t require extra hardware and the Tam Valley Fascia Controller can indicate the state of the Lock to the local crew to avoid confusion (see Section 4.2.1). To lock specific turnouts to protect a continuously running train during an open house, the Lock Control Switch for any turnout can be set using a handheld throttle. Lock Control Switches can be part of a Route, making it possible to lock or unlock a series of turnouts with just a single action. The Lock or Unlock Routes could even be fired by a pushbutton or toggle switch connected to one of the QuadLN_S inputs, making the process of locking or unlocking key fascia turnout controls very simple. There is an example in Section 4.4.5 showing how to configure a pushbutton press to fire a Route. Tam Valley Fascia Controllers can display the state of the Lock so it is easy to see that the layout is secured (see Section 4.2.1). 3.2.2 Midpoint When Midpoint mode is selected, setting the Lock Control Switch to Thrown causes the servo to move midway between the Closed and Thrown setpoints. The servo will return to the last commanded position when the Lock Control Switch is Closed. This mode may be useful for control of 3 position semaphores, 3-way stub turnouts, and special animation effects. Both LEDs on a Tam Valley Depot Fascia Controller will be lit when the corresponding servo is at the midpoint position. If using bicolor LEDs, the Red and Green elements are switched on and off rapidly so that each is on half the time, producing a shade of Yellow. The switch rate is faster than the eye can detect so no flicker is visible. If using a custom circuit to drive an indicator, the Yellow shade can be varied by changing the Red and Green LED current levels (often more Red current / less Green current is required). 3.3 Output Message - Servo Position Feedback without sensors The QuadLN_S sends continuous position commands to each servo, so it always knows the servo position. As a result the QuadLN_S can provide Turnout Position Feedback messages based on the servo position. This feature is a very effective way to provide visual indication of the turnout state on your dispatcher panel without any sensors! The available Output Message choices are No Output Feedback and Exact feedback (sim). If you are using software such as JMRI to create control panels, Exact feedback (sim) will allow you to incorporate © N3IX Engineering 2014 Page 12 25 August 2014 Tam Valley Depot QuadLN_S User Manual field device feedback into those panels. If you are not using software that monitors turnout position feedback or you just don’t require turnout position feedback for your layout, then select No Output Feedback to eliminate the unneeded Loconet messages. 3.3.1 Exact feedback (sim) Exact feedback normally utilizes two limit switches that are mounted on the turnout: one limit switch turns on when the turnout reaches the Closed position and the other limit switch turns on when the turnout reaches the Thrown position. Feedback messages are sent when either limit switch changes state. In Exact feedback (sim) mode, the QuadLN_S sends the same feedback messages but bases them on the current servo position. When the Servo first starts to move the limit switch corresponding to the initial position is reported as Low and when the Servo reaches its endpoint the limit switch corresponding to the final position is report as High. 3.4 Cascade Cascade action refers to a condition where command to one turnout also triggers a command to a second turnout. If the second turnout triggers a command to a third turnout, etc, the command is said to “Cascade” down. Cascade action provides a very handy way to align a route through a yard ladder or crossover by sending only one Loconet Switch command. The details of the Cascade settings are shown below, followed by examples to illustrate the basics. 3.4.1 Trigger The Trigger is the specific Switch command that initiates the Cascade event. command is received, the Cascade Switch command is sent. When the Trigger The available Cascade Trigger settings for each Servo are None, Closed, Thrown and Closed or Thrown. When set to Closed, the Cascade action is triggered whenever the Servo receives a Closed Switch command. When set to Thrown, the Cascade action is triggered whenever the Servo receives a Thrown Switch command. When set to Closed or Thrown, the Cascade action is triggered whenever the Servo receives any Switch command. 3.4.2 Action The Action is the type of Switch command that is sent to the Cascade turnout when the Trigger condition is met. The available Cascade Action settings for each Servo are Closed, Thrown, Follow and Invert. When set to Closed, a Closed Switch command is sent. When set to Thrown, a Thrown Switch command is sent. When set to Follow, a Switch command matching the state of the Servo is sent. When set to Invert, a Switch command opposite to the state of the Servo is sent 3.4.3 Turnout The Turnout is the Switch number for the turnout that is to receive the Cascade Switch command. 3.4.4 Cascade Examples Yard ladder alignment. © N3IX Engineering 2014 We have a number of yard tracks accessed via a simple ladder. Page 13 25 August 2014 Tam Valley Depot QuadLN_S User Manual The entry to the yard from the main is controlled by Switch 20: Closed for the main and Thrown for the ladder. Switches on the yard ladder are Closed for the ladder and Thrown to select their specific track, so Switch 1 is Thrown for track 1, Switch 2 is Thrown for track 2, etc. Suppose we wish to fully line the route from the main to any yard track by only issuing one Switch command. First set Switch 1 Cascade Trigger to Closed or Thrown, Cascade Action to Thrown, and Cascade Turnout to 20. Now whenever Switch 1 receives any command, it will send a message to Switch 20 to move to the Thrown position. To line a train into Track 1, all we need to do is set Switch 1 to Thrown: Switch 20 will get Thrown by the Cascade action. Next set Switch 2 Cascade Trigger to Closed or Thrown, Cascade Action to Closed, and Cascade Turnout to 1. Now whenever Switch 2 receives any command, it will send a message to Switch 1 to move to the Closed position. Switch 1 will in turn send a command to Switch 20 to move to the Thrown position. To line a train into Track 2, all we need to do is set Switch 2 to Thrown: Switch 1 will get Closed and Switch 20 will get Thrown by the Cascade action. Repeat this process for each of the remaining tracks. The key is that any change to the turnout that directly selects the track sends a Cascade message to the preceding turnout that aligns it as required. Crossover. We have a crossover is controlled by two turnouts at addresses 6 and 15. For the normal routes, both 6 and 15 are Closed. For the crossover route, both 6 and 15 are Thrown. Now suppose we want to just send Switch 6 Closed and Switch 6 Thrown to select the routes. One simple way for this to happen is if Switch 6 sends a Cascade message to Switch 15 to Follow it anytime Switch 6 is commanded to a position. Set Switch 6 Cascade Trigger to Closed or Thrown, Cascade Action to Follow, and Cascade Turnout to 15. Now whenever Switch 6 receives a command, it will send a message to Switch 15 to move to the same position. © N3IX Engineering 2014 Page 14 25 August 2014 Tam Valley Depot QuadLN_S User Manual 4 Main and Aux IO lines Each QuadLN_S Servo has an associated Main IO line and Aux IO line. The QuadLN_S samples each input line 50 times per second and debounces (filters) input changes to suppress switch bounce and electrical noise. Simple uses of the input capability of an IO line include reporting input state over Loconet or controlling an associate Servo. More complex actions are also possible, for instance a single IO line can control all of the QuadLN_S servos. The specific behavior of each input is configured using the parameters described in this section. To access the following parameters in JMRI always use . 4.1 Input Response 4.1.1 Type – Aux Inputs The available Input Types for each Aux Input are General and Detector. For General inputs, a debounce time of 100 milliseconds is used for both Positive and Negative edges. Trigger and Indication options are available. Typical devices connected to General inputs are pushbuttons, contact closures, and open collector outputs. For Detector inputs, Trigger is always set to Both Edges and Trigger options are not available. The debounce time for positive edges is extended to 2 seconds to ensure that the occupied (low) indication is maintained during momentary loss of contact (current detector) or momentary change in light level (optical detector). Indication options are available. 4.1.2 Type – Main Inputs The available Input Types for each Main Input are General and TVD Detector. For General inputs, a debounce time of 100 milliseconds is used for both Positive and Negative edges. Trigger and Indication options are available. Typical devices connected to General inputs are pushbuttons, contact closures, and open collector outputs. The TVD Detector input is used when connected to a Tam Valley Depot detector board. For TVD Detector inputs, Trigger is always set to Both Edges and the debounce time for positive edges is extended to 2 seconds to ensure that the occupied (low) indication is maintained during momentary loss of contact (current detector) or momentary change in light level (optical detector). Detector Type and Sensitivity options are available for TVD Detector inputs, while Trigger and Indication options are not available. 4.1.3 Detector Type (Main IO pins only) When using a Tam Valley Depot detector board, Current Transformer (CT) or Infrared (IR) detection can be individually assigned to each Main Input pin. © N3IX Engineering 2014 Page 15 25 August 2014 Tam Valley Depot QuadLN_S User Manual 4.1.4 Sensitivity(Main IO pins only) When a Main IO pin is set for TVD Detector, the input is processed using the Sensitivity value to determine if the signal represents the Occupied or Unoccupied state. The Occupied state is reported as a 0 and the Unoccupied state is reported as a 1. The higher the Sensitivity value, the more sensitive the input and the lower the signal value required for detection. Set the Sensitivity value just high enough to ensure reliable detection. If false detection occurs, decrease the Sensitivity value. 4.1.5 Trigger Input actions are initiated only when an input change occurs that matches the Trigger condition. For General inputs the available Input Trigger settings for each Input are None, Positive Edge, Negative Edge and Both Edges. When set to Positive Edge, the input action is triggered whenever the Input changes from the Low level to the High level. When set to Negative Edge, the input action is triggered whenever the Input changes from the High level to the Low level. When set to Both Edges, the input action is triggered whenever any Input change occurs. When set to None, no action is triggered by the input and the input line is not sampled. For Detector inputs the Input Trigger is fixed at Both Edges and the Trigger selection is not available. When a sampled input line changes state and then remains stable for the debounce time, a Loconet Sensor message is generated. 4.1.6 DCC Freeze Some input devices give false indications when DCC is not present. For example, a short in a DCC power district may cause all block occupancy detectors in that district to indicate that their blocks are vacant whether or not trains are present. The QuadLN_S has the ability to monitor the DCC signal and to freeze an input at its previous level when the DCC signal is lost, thus prevent false reports from detectors during short circuits. The available settings are Always Live and Freeze on DCC loss. When set to Always Live, input action follows the Trigger setting independent of the DCC state. This is generally the appropriate setting when the input is used for Servo control. When set to Freeze on DCC lost, input action is disabled when no DCC signal is present on the DCC input pins. This is generally the appropriate setting when the input is used for a block occupancy detector. 4.2 Indication When the Input line is not being sampled, the QuadLN_S has the capability to treat the line as an Output and can drive an LED indicator to display the state of the Servo. Since the input sampling takes place very quickly and at a rate higher than the eye can detect, the LED indicator will appear to be on continuously with no discernible flicker. (If using input devices other than Tam Valley Depot Fascia Controllers, please see the general Quad datasheet for information on simultaneously wiring switches and LEDs to the Input lines.) © N3IX Engineering 2014 Page 16 25 August 2014 Tam Valley Depot QuadLN_S User Manual For TVD Detector inputs the LED Indication feature is not available. 4.2.1 LED Mode When the LED indicator is enabled, the steady LED indication shows whether the Servo is Closed or Thrown. The LED can be set to blink rapidly while the Servo is moving, thus providing feedback that travel is complete when the indicator again becomes steady. When the associated Servo is Lockable, the LED can be set to blink slowly to provide feedback on the whether local control of the Servo is Locked or Unlocked. (The global Lock Indicator setting determines whether blinking indicates the Locked or the Unlocked state – see Section 6.9.) For TVD Detector inputs the LED Mode feature is not available. The available LED Mode settings for each Input are Disable – Input only, Steady Drive, Blink on Move, Blink on Move or Lock, Blink on Lock, Lock State, Position and Blink on Thrown. When set to Steady Drive, the output indication shows the Servo position. If the Servo is in motion the output indication changes when the Servo passes the midpoint. Choose this mode when the IO pin is driving a Tam Valley Depot 5 Volt relay board for frog power. When set to Blink on Move, the output indication shows the commanded Servo position and blinks rapidly while the Servo is moving. When set to Blink on Move or Lock, the output indication shows the commanded Servo position, blinks rapidly while the Servo is moving and blinks slowly when the Servo is Lockable and the state of the lock matches the Lock Indicator setting. When set to Blink on Lock, the output indication shows the commanded Servo position and blinks slowly when the Servo is Lockable and the state of the lock matches the Lock Indicator setting. When set to Lock State, the output indication shows the commanded Lock position instead of the commanded Servo position. When set to Position, the output indication shows the actual Servo position instead of the commanded position, and only changes when the servo reaches the commanded position and stops. When set to Blink on Thrown, the output indication blinks when the Servo is commanded to the Thrown position. In this mode the Main and Aux IO indications blink on opposite phases, which allows them to be used to animate grade crossing flashers when the Servo is controlling a crossing gate. When set to Disable – Input only, no output drive is provided and the line is always left as an input. This is appropriate when the input device is a detector for example. Except in the Steady and Position modes, the LED output changes gradually (fades) from one state to another to simulate the appearance of an incandescent panel lamp turning on or off. In the Steady and Position modes the output changes abruptly in one step, so that the output signal can more easily be used to trigger other types of devices if desired. 4.2.2 LED Drive If the LED panel wiring results in the opposite indication from what is desired, the QuadLN_S can simply invert the output drive to the LED. This eliminates the need to rewire the LED indicators or remount the Fascia Controller. For TVD Detector inputs the LED Drive feature is not available. © N3IX Engineering 2014 Page 17 25 August 2014 Tam Valley Depot QuadLN_S User Manual The available LED Sense settings for each Input are Normal and Inverted. When set to Normal, the LED output drive is High when the Servo is Closed and Low when Thrown. When set to Inverted, the LED output drive is Low when the Servo is Closed and High when Thrown. 4.3 Action Each QuadLN_S input can control any or all of the Servos. This allows inputs to trigger routes without requiring a Loconet connection. The local action of any input on each of the QuadLN_S Servos can be set independently. (The local action on a Servo is only performed if that Servo is not locked.) The available Servo action settings for each Input are None, Toggle, Follow, Invert, Closed, Thrown, Lock Toggle, Lock Follow, Lock Invert, Lock Closed and Lock Thrown. When set to None, the state of the corresponding Servo is unaffected by the input. When set to Toggle, the state of the corresponding Servo is set to the opposite of its current state. When set to Follow, the state of the corresponding Servo is set to Closed if the Input is High and set to Thrown if the Input is Low. When set to Invert, the state of the corresponding Servo is set to Closed if the Input is Low and set to Thrown if the Input is High. When set to Closed, the state of the corresponding Servo is set to Closed. When set to Thrown, the state of the corresponding Servo is set to Thrown. When one of the Lock settings is selected, the state of the corresponding Lock is set accordingly. 4.4 Secondary Message Each Input can receive or send a Secondary message. This can be used to implement more complex logic for yards, panels or other functions. If set to send a Secondary message, when the Input Trigger condition set in Section 4.1.1 is met the Secondary message is sent. If set to receive a Secondary message, a Loconet sensor or turnout message that matches the Secondary Trigger fires the Servo Actions that are configured for the Input. 4.4.1 Type The available Secondary Type settings for each Input are Trigger on this message and Send this message. When set to Trigger on this message, the specified Servo Actions for the input are executed when the Condition below is met. When set to Send this message, the Secondary message is sent when the Input Trigger condition is met, and the message content is determined by the Condition below. 4.4.2 Device The available Secondary Device settings for each Input are Turnout and Sensor. When set to Turnout, the Secondary message is a Switch command message. When set to Sensor, the Secondary message is a General Sensor message. 4.4.3 Condition The available Secondary Condition settings for each Input are None, Hi / Closed, Lo / Thrown and Both / Follow. © N3IX Engineering 2014 Page 18 25 August 2014 Tam Valley Depot QuadLN_S User Manual If Type is Trigger on this message: When set to Hi / Closed, the trigger condition is a Sensor Hi or Switch Closed message. When set to Lo / Closed, the trigger condition is a Sensor Lo or Switch Thrown message. When set to Both / Follow, the trigger condition is a Sensor or Switch message in either state. When set to None, the Secondary message function is disabled. If Type is Send this message: When set to Hi / Closed, the message sent is a Sensor Hi or Switch Closed message. When set to Lo / Closed, the message sent is a Sensor Lo or Switch Thrown message. When set to Both / Follow, the message sent is a Sensor or Switch message with the state matching the Input state. When set to None, the Secondary message function is disabled. 4.4.4 Number The Switch or Sensor number for the Secondary message. 4.4.5 Secondary Message Examples All Mainline Turnouts to Closed. Suppose we have many mainline turnouts controlled by QuadLN_S boards. Each turnout is controlled by a pushbutton on its Main IO line. We would like to be able to set all the turnouts to their Closed position with a single Switch command, say Switch 200 Closed. For each Servo Main IO line, set the Secondary Message Type to Trigger on this message, the Device to Turnout, the Condition to Hi / Closed , and the Number to 200. Now sending a single Switch command lines all the turnouts to the Closed position. All Mainline Turnouts to Closed with a single button press. Same as the previous example, except we want to press a pushbutton to line the turnouts instead of sending a Switch command with a throttle. Do the setup as in the previous example. Wire the pushbutton to an available Aux IO line on a QuadLN_S board, then adjust the settings for the Aux IO line as follows: Trigger to Positive Edge; Action to None for each Servo; Secondary Message Type to Send this message, Device to Turnout, Condition to Hi/Closed and Number to 200. Now pressing the button sends a Switch 200 Closed command, which in turn causes all the mainline turnouts to move to the Closed position. Unlock a Mainline Turnout using a keyswitch. We have a local fascia pushbutton set up for control of Switch 17, but wish to lock (disable) the pushbutton unless a keyswitch is actuated. Suppose we have also set the Lock Base Address to 21. Wire the keyswitch to an available IO line on a QuadLN_S board, then adjust the settings for the IO line as follows: Trigger to Both Edges; Action to None for each Servo; Secondary Message Type to Send this message, Device to Turnout, Condition to Both/Follow and Number to 21 (21 is the Lock Control Switch for Switch 17 – see Section 3.2). Now opening the keyswitch sends a Switch 21 Closed command which unlocks Switch 17, and closing the keyswitch sends a Switch 21 Thrown command which locks Switch 17. A suitable indicator on the Dispatcher panel could monitor Switch 21 and provide an indication when Switch 17 is unlocked. 5 Routes Routes are arbitrary sequences of Switch and Sensor messages that are sent when a trigger condition is met. The QuadLN_S has 8 routes, each containing up to 4 entries consisting of Switch commands, © N3IX Engineering 2014 Page 19 25 August 2014 Tam Valley Depot QuadLN_S User Manual Sensor state messages or Signal aspects. Routes can be set to Expand the prior route, so it is possible to have a single route with as many as 32 entries. This makes it easy to do things like create an arbitrary track alignment by sending a single command. To access the following parameters in JMRI always use . 5.1 Type The available Route Types are None, Normal Route, Selector and Expand (Prior) Route. A Normal Route is only triggered by the first entry and always sends the remaining entries exactly as entered. A Selector Route is triggered by any of the entries and sends the remaining entries in the opposite state from that entered. This action implements a “1-of-n” selection. An Expanded Route simply adds its entries to the prior route. 5.2 Entries Each Route entry consists of an Address and Device Type / Action. For Switch messages the available Actions are Closed and Thrown and for Sensor messages the available Actions are Sensor Hi and Sensor Lo. For these messages, the Address is the Loconet device number. For Signals the available action is Aspect, and the Address represents the number of an Aspect on this QuadLN_S. 5.3 Route Examples Align a Route when a button is pressed. We would like to be able to line a route that involves many turnouts by pressing a pushbutton. Wire the pushbutton to an available Aux IO line on a QuadLN_S board, then adjust the settings for the Aux IO line so that the Message is set to General Sensor. Set the Action to None for each Servo. Pick a Route in any QuadLN_S and set the Type to Normal Route, set the first entry to the Aux IO address and Sensor Hi, and then enter the Switch address and Closed or Thrown in the following entries for each turnout in the route. Use Expanded Routes as needed. Now pressing the button lines the entire route. Lock All Mainline Turnouts. We have many mainline turnouts controlled by QuadLN_S boards. Each turnout is controlled by a pushbutton on its Main IO line. We would like to be able to lock out all the pushbuttons (for continuous running during an Open House for example) by sending a single Switch command, say Switch 200 Closed. Pick a Route in any QuadLN_S and set the Type to Normal Route, set the first entry to 200 Closed, and then enter the Lock address and Thrown in the following entries for each mainline turnout lock. Use Expanded Routes as needed. Now sending a single Switch command locks all the mainline turnouts. Panel track selection indicator. We have a yard panel with an LED for each track. The LEDs are controlled via a stationary decoder(s) using Switch commands. Setting a particular Switch address to Closed turns an LED on, and setting it to Thrown turns the LED off. We would like to be able to send a single Switch command to light the LED for the selected track and have all the other LEDs go out. Pick a Route in any QuadLN_S, set the Type to Selector and then enter the Switch address and Closed in the route entries for each Switch address that controls an LED. Use Expanded Routes as needed. Now © N3IX Engineering 2014 Page 20 25 August 2014 Tam Valley Depot QuadLN_S User Manual sending a single Switch command turns on the LED for the selected track and turns off the LEDs for the non-selected tracks. Set signals for a turnout. We have a number of signals protecting Switch 200 and would like to set their Aspects just based on the position of a turnout. Pick a Route in the QuadLN_S that controls the signals and set the Type to Normal Route, set the first entry to 200 Closed, and then enter the desired Aspect Number for each signal and Aspect in the following entries in the route. Use Expanded Routes as needed. Next repeat these steps for another Normal Route, this time with 200 Thrown as the first entry and the desired Aspect Number in each of the following entries. Now sending any command to Switch 200 will cause each of the signals to display the appropriate Aspect. 6 The QuadLN_S Pane The QuadLN_S has a number of address settings and special configuration settings. Most users will only need to set the Servo Start Address, Main IO Start Address and Aux IO Start Address here (the Long Address is shown for information only and will have already been set if required). The remaining special configuration settings can generally be left at their default values. To access the following parameters in JMRI always use . 6.1 Addresses 6.1.1 Long Address The Long Address is the address used when programming the device in . This address is also shown on the Basic pane. See Section 1.7.1 for more info. A special procedure is required to change the device address, and this procedure is described in Section 2.2.3. This procedure is intended to prevent inadvertent device address changes. 6.1.2 Servo Start Address The Switch addresses for the QuadLN_S Servos are set using this field. The QuadLN_S uses 4 consecutive Switch addresses for Servo control. Avoid using addresses 1017-1020 for any Servo if possible (those addresses are also used by a special interrogation command). The address for each Servo is displayed on its Group tab. See Section 1.7.2 for more info on the Servo Start Address. 6.1.3 Lock Start Address The Switch addresses for the QuadLN_S Locks are set using this field. The QuadLN_S uses 4 consecutive Switch addresses for Lock control. Avoid using addresses 1017-1020 for any Lock if possible (those addresses are also used by a special interrogation command). The address for each Lock is displayed on its Group tab. See Section 1.7.3 for more info on the Lock Start Address. If the Servo and Lock address ranges overlap, any Lock with the same address as a Servo will not be accessible via a Loconet Switch command. © N3IX Engineering 2014 Page 21 25 August 2014 Tam Valley Depot QuadLN_S User Manual 6.1.4 Main IO Start Address The Main IO addresses for the QuadLN_S Servos are set using this field. The QuadLN_S uses 4 consecutive Sensor addresses for the Main IO. See Section 1.7.4 for more info on the Main IO Start Address. 6.1.5 Aux IO Start Address The Aux IO addresses for the QuadLN_S Servos are set using this field. The QuadLN_S uses 4 consecutive Sensor addresses for the Aux IO. See Section 1.7.5 for more info on the Aux IO Start Address. 6.2 Expansion Port The Expansion Port may be used to directly drive 4 Tam Valley Deport 5 Volt Relay Boards, 4 additional Servos, or 24 LEDs using the Tam Valley Depot Signal board. This setting determines which signals are supplied to the expansion port. When set to Relays 1-4, relay board drive signals are supplied that change state when the servo is at mid travel. When set to Signaling, LED drive signals are supplied to control 24 LEDs using the Tam Valley Depot Signal Board. When set to Servos 5-8, servo drive signals are supplied for 4 additional servos. 6.2.1 Route Delay Each action in a local route can occur immediately after the route is triggered or it can occur after a fixed delay. The length of the delay is controlled by this setting. The available Route Delay settings are 1 Sec, 2 Sec, 4 Sec and 8 Sec. The default is 1 Sec. 6.3 Servo OFF When Stopped This setting permits the drive signal to a servo to be turned off when the servo is not moving. In cases where little force is required to hold the turnout at the desired position, such as when over-center spring force holds the turnout in position, turning off the drive will prevent a problem servo from buzzing. The default value is Unchecked meaning Always On. Check the box to enable the Servo OFF When Stopped feature. 6.4 Servo State Memory This setting controls whether the QuadLN_S records the Servo positions when they change and then restores all Servos to their last known position at power-up. By default the box is Checked meaning that the state of each Servo will be Restored on Power-up. If the box is Unchecked then each Servo will be set to Closed at Power-up. 6.5 Signal State Memory This setting controls whether the QuadLN_S records the Signal aspects when they change and then restores all Signals to their last known aspect at power-up. By default the box is Unchecked meaning all Signal outputs will be Off at Power-up. If the box is Checked then the state of each Signal output will be Restored on Power-up. © N3IX Engineering 2014 Page 22 25 August 2014 Tam Valley Depot QuadLN_S User Manual 6.6 Retry on DCC Busy This setting controls whether the QuadLN_S attempts to retry Switch Requests when the Command Station reports that the DCC bus is busy. The default value is Checked meaning Retry Switch Requests when required. Note: This section is somewhat technical. Users that don’t need any Switch Request sent by the QuadLN_S to reach DCC-only stationary decoders can simply ignore this section. The information below is included so that those users with complex configurations that include DCC-only stationary decoders can better understand the system performance tradeoffs. When the QuadLN_S sends a Switch Request on Loconet as part of a Cascade, Secondary Message or Route, the Command Station attempts to send the command over the DCC bus. This is done so that DCC-only stationary decoders will also receive the command. However due to the difference in bandwidths, Loconet Switch Requests can arrive at the Command Station faster than the Command Station can send them out over DCC. When this happens the Command Station internally buffers the Switch Requests in order to give the DCC bus a chance to catch up. When the Command Station receives a Switch Request and its internal buffer is already full (or with some Command Stations if track power is turned off so that DCC commands cannot be sent), the Command Station responds with a special Loconet message to indicate that the Switch Request did not make it to the DCC bus. When a Switch Request does not get to the DCC bus, the QuadLN_S has two options: ignore the failure or send the Switch Request again. Sending the Switch Request again usually works out fine, but if there are a large number of Switch Requests being are generated on Loconet (from one or more devices) then the retries can start to pile up. When this happens performance degrades until the Command Station is able to get the DCC side caught up, and under most circumstances things get resolved without any noticeable impact. If you need the QuadLN_S to be able to send Switch Requests to DCC-only stationary decoders then Check this option and the QuadLN_S will Retry Switch Requests when required. If you have not set up the QuadLN_S to send Switch Requests to DCC-only stationary decoders, then Uncheck this option since in this case it doesn’t matter whether a command sent by the QuadLN_S makes it to the DCC bus and thus there is no reason to create additional Loconet traffic by resending Switch Requests. Finally, if you are using a DCS100 and have no DCC-only stationary decoders at all, you can set OPSW 27 to Closed. Closing OPSW 27 tells the DCS100 not to send any Switch Requests over the DCC bus. This eliminates the entire DCC backlog issue and allows Switch Requests to be sent at full Loconet speed under all conditions. 6.7 Output Off Switch Request This setting controls whether the QuadLN_S sends the Output Off form of the Switch Request after sending the Output On form of the Switch Request. The default value is Checked meaning Send Output Off form of the Switch Request. © N3IX Engineering 2014 Page 23 25 August 2014 Tam Valley Depot QuadLN_S User Manual Note: it. As with the preceding section, this section is somewhat technical and most users can just ignore When the QuadLN_S sends a Switch Request on Loconet as part of a Cascade, Secondary Message or Route, two Loconet messages are generated. The first message is an Output On Switch Request and the second is an Output Off Switch Request. By convention these two messages are sent because some stationary decoders turn their output drive on when they receive an Output On Switch Request and turn the drive off when they receive an Output Off Switch Request. The QuadLN_S inserts a delay of about 100 milliseconds between the two messages. When receiving Switch Requests, the QuadLN_S ignores the Output Off Switch Requests and leaves the output drive on all the time. Many stall motor decoders act this way. Although sending the Output Off messages doesn’t affect the decoders it does double the amount of Loconet traffic and doubles the amount of DCC traffic (see Section 6.5) for each Switch Request. This can reduce performance briefly during intense bursts of Switch Request activity, such as when sending a long Route. If all your stationary decoders ignore the Output Off Switch Request then Uncheck this option to eliminate the unnecessary Loconet messages. 6.8 No Command Station This setting is applicable to standalone LocoNet installations where no command station is present. The QuadLN_S can expand the responses to certain programming messages to also provide the replies normally sent by a Command Station. When no Command Station is present, these responses will suppress error messages in JMRI or other software that expects to see the command station replies. The default value is Unchecked meaning that a Command Station is present. Check this option if No Command Station is present on LocoNet. 6.9 Input Invert This setting allows the Sensor Input Polarity to be inverted for use with certain layout control programs that require Active Low inputs to be reported as High. The default value is Unchecked meaning inputs are not inverted. When Checked the signal level is Inverted at the pin prior to any other processing. Note that input settings may need to be adjusted whenever this option is changed. 6.10 Blink Indicates Unlock This setting determines whether the IO line LED indicators configured to display their Servo Lock status will blink when the Servo is in the Locked state or when it is in the Unlocked state. The default value is Unchecked and a blinking LED indicates the Locked state. When Checked a blinking LED indicates the Unlocked state. 6.11 Broadcast Local Actions This setting controls whether the QuadLN_S makes local Servo and Lock actions visible on Loconet. The default value is Checked meaning Local Actions are Broadcast. © N3IX Engineering 2014 Page 24 25 August 2014 Tam Valley Depot QuadLN_S User Manual The QuadLN_S can perform the local Servo or Lock actions that are triggered by input changes (see Section 4.3 for information on local actions) in two slightly different ways. In the first approach the QuadLN_S directly changes the Servos and Locks to the new values. In the second approach the QuadLN_S generates Loconet Switch Request commands just as would happen if some other Loconet device were sending the commands. The second approach is used by default and provides Loconet visibility to the state changes caused by the local actions the same as with any Loconet Switch Request. The second approach also allows the QuadLN_S input changes to trigger routes. If Loconet visibility is not needed and local routes are not in use, then you can Uncheck option and eliminate the unnecessary Loconet message traffic. Regardless of which setting you choose, the local actions will be performed whether or not the Loconet is connected. 6.12 Device Information This section contains information mainly useful for debugging problems and performing updates. 6.12.1 Manufacturer ID The Manufacturer ID for Tam Valley Depot is 59. Writing special values to this parameter when in Service Mode can reset the device – see Section 2.4. 6.12.2 Product ID This value identifies the product and helps prevent installing incorrect firmware updates. ID for the QuadLN_S is 6. The Product 6.12.3 Hardware Version This value identifies the product hardware revision and helps prevent installing incorrect firmware updates. 6.12.4 Software Version This value identifies the product software revision and helps prevent installing incorrect firmware updates. 6.12.5 Build Number This value is an additional software identifier and enables better factory support. 7 Updating the Firmware 7.1 Performing the Update The QuadLN_S design incorporates a bootloader that permits the firmware to be updated in the field using JMRI. The bootloader portion of the firmware is protected and cannot be accidentally overwritten during the update process. Normally the QuadLN_S user settings are not affected by the firmware update process. However it is always best to ensure your QuadLN_S decoder file is up to date before performing a firmware update so that your settings can be easily restored later if required. To perform a firmware update, follow the steps below. © N3IX Engineering 2014 Page 25 25 August 2014 Tam Valley Depot QuadLN_S User Manual 1. Download the new firmware from TamValleyDepot.com and place the file in your JMRI Preferences folder. 2. Select Download Firmware from the JMRI LocoNet menu. 3. Click the 16 bit File format button if it isn’t already selected. 4. Click the Select button and then open the downloaded file. 5. Click Read file to load the file into the downloader. 6. Connect the Remote Alignment Board to the QuadLN_S. 7. Simultaneously press and hold down all three buttons on the Remote Alignment Board. 8. After about 2 seconds when the MSG LED dims, release the buttons and the MSG LED should go dark. The QuadLN_S is now in bootloader mode. 9. In JMRI, click Download to begin downloading the file to the QuadLN_S. The MSG LED will toggle as each message is received. The ACTV LED will flash briefly as each block of memory is written. 10. If the download completes successfully, the QuadLN_S will resume normal operation. 11. If an error occurs, the ACTV LED will flash continuously about once/second. The MSG LED will indicate the error code. MSG LED On = communication error - bad message received. MSG LED Off = configuration error. This can be one of the following: firmware file error - wrong manufacturer code or wrong product code. The file you are attempting to download is not for this product. hardware version error – the firmware is not for this version of the board. Obtain the proper firmware file for the hardware version of your board. MSG LED Flashing once/second = software version error – the firmware isn’t newer than the existing firmware. The current firmware is as new or newer than the firmware you are attempting to download. If the download is still desired, select Don’t check software version in the JMRI Firmware Downloader, cycle power to the board and repeat the process starting with step 7 above. Notes: The QuadLN_S software is overwritten as the download progresses. Once the download starts, if it is interrupted or if a communication error occurs then the QuadLN_S software will probably be corrupted. However the bootloader will be intact, so just click Abort, remove power to the board, press and hold the Select button then reapply power to the board. The ACTV LED should be lit and the MSG LED should be dark. Now repeat the download process starting with step 9 above. In cases where there is a great deal of other Loconet traffic, try increasing the Delay (msec) value to 100. This will slow the download process but will make it more tolerant of Loconet collisions. If a configuration error occurs, the QuadLN_S did not accept the download and the previous software is intact. If you still want to perform the update, resolve the issue and then repeat the download process. © N3IX Engineering 2014 Page 26 25 August 2014 Tam Valley Depot QuadLN_S User Manual 7.2 Updating the Decoder Template If the firmware update contains new features, you will need the latest JMRI decoder template file to take advantage of those features. The latest version of JMRI should contain the latest decoder template. If you are not running the latest version of JMRI and a QuadLN_S feature appears to be missing when you open a roster entry, please follow these steps to download and install the new decoder template files. Download the latest templates from the /Decoder files/Tam Valley Depot/ folder in the files area of the Yahoo JMRI Users Group. Copy the decoder xml file to the “decoders” subfolder under the User File Location specified in your JMRI Preferences File Locations. Copy the decoder xsl file to the “xml/decoders” subfolder under the User File Location specified in your JMRI Preferences File Locations. Copy the tvd folder to the “xml/decoders” subfolder under the User File Location specified in your JMRI Preferences File Locations. Select Recreate Decoder Index on the JMRI Debug menu. © N3IX Engineering 2014 Page 27 25 August 2014 Tam Valley Depot QuadLN_S User Manual 8 CV Tables 8.1 Full CV Table CV # 1 3,2 4 5 6 7 8 10,9 11 12 14,13 16,15 17,18 19-58 59-250 251-256 257-264 265-272 273-288 289-304 305-320 321-324 325-328 329-332 333-340 341-348 349-364 365-380 381-512 513-536 537-632 Description Reserved Servo Start Address Software Version Software Build Number Hardware Revision Product ID Manufacturer ID Main IO Start Address Configuration Configuration2 Lock Start Address Aux IO Start Address Long Address Reserved Signal Aspect 1-48 Reserved Servo 1-8 Speed Servo 1-8 Speed Thrown Servo 1-8 Closed Position Servo 1-8 Thrown Position Servo 1-8 Cascade Address Aux IO 1-4 Option Main IO 1-4 Option Main IO 1-4 Detector Aux IO 1-4 Secondary Main IO 1-4 Secondary Aux IO 1-4 Action Main IO 1-4 Action Reserved Signal Lamp 1-24 Signal Address 1-48 633-656 657-704 705-768 769-776 777-784 785-792 793-800 801-808 809-816 Signal LED 1-24 Signal Aspect Config 1-48 Reserved Route 1 Entry 1-4 Route 2 Entry 1-4 Route 3 Entry 1-4 Route 4 Entry 1-4 Route 5 Entry 1-4 Route 6 Entry 1-4 © N3IX Engineering 2014 Range Default 0-2044 0-255 0-255 0-255 6 59 0-4092 Table 8-3 Table 8-4 0-2044 0-4092 Table 8-2 0 (0,0) 6 59 0 (0,0) 180 0 101 (0,101) 4 (0,4) 11000 (234, 248) Table 8-14 Page 28 Table 8-5 Table 8-5 Table 8-6 0-2400 Table 8-7 Table 8-8 Table 8-8 Table 8-9 Table 8-10 Table 8-10 Table 8-11 Table 8-11 4 4 1260 (4,236) 1140 (4,116) 0 (0,0) 13 13 16 0 (0,0) 0 (0,0) Table 8-11 Table 8-11 Table 8-18 Table 8-16 Table 8-17 Table 8-19 Table 8-15 160 Table 8-12 Table 8-12 Table 8-12 Table 8-12 Table 8-12 Table 8-12 0 (0,0) 0 (0,0) 0 (0,0) 0 (0,0) 0 (0,0) 0 (0,0) 0 159 0 25 August 2014 Tam Valley Depot QuadLN_S User Manual CV # 817-824 825-832 833-896 897-904 905- Description Route 7 Entry 1-4 Route 8 Entry 1-4 Reserved Route 1-8 Control Reserved Range Table 8-12 Table 8-12 Default 0 (0,0) 0 (0,0) Table 8-13 0 For address entries, the associated Loconet device number is (address + 1). Table 8-1 8.2 Full CV Table Long Address CV Format CV Bit Default 17 1 1 1 1 h 1 18 h 0 h 1 h 0 h 1 h 0 o 1 si 0 se 1 e 0 e 0 l 1 l 1 l 1 l 1 l 1 l 0 l 0 l 0 h = High address bits l = Low address bits Table 8-2 8.3 Long Address CV Format Configuration CV Format CV Bit Default b 1 lb 0 l 1 b = Busy retry: 0 = Disabled, 1 = Enabled lb = Lock blink state: 0 = Locked, 1 = Unlocked l = Local Action: 0 = Internal, 1 = Visible on Loconet o = Output Off switch request: 0 = don’t send, 1 = send si = Signal State Memory: 0 = Off, 1 = On se = Servo State Memory: 0 = Off, 1 = On e = Expansion Port: 0 = Relay Drive, 1 = Signal Drive, 2 = Servo Drive (Octo Mode), 3 = Reserved Table 8-3 Configuration CV Format © N3IX Engineering 2014 Page 29 25 August 2014 Tam Valley Depot QuadLN_S User Manual 8.4 Configuration2 CV Format CV Bit Default r 0 r 0 rd 0 rd 0 r 0 c 0 d 0 p 0 r = Reserved rd = Route Delay: 0 = 1 Sec, 1 = 2 Sec, 2 = 4 Sec, 3 = 8 Sec c = No Command Station: 0 = Disable, 1 = Enable d = Servo Drive: 0 = Always on, 1 = Off when stopped p = Invert Input: 0 = Normal, 1 = Inverted Table 8-4 8.5 Configuration2 CV Format Servo Speed CV Format CV Bit Default r 0 r 0 s 0 s 0 s 0 s 1 s 0 s 0 r = RapidStart mode: 0 = None, 1 = one-eighth, 2 = one-quarter, 3 = three-eighths s = Speed: 0 = slowest, 63 = fastest Table 8-5 8.6 Servo Speed CV Format Servo Closed Position CV Format CV Bit Default d 0 l 0 l 0 m 0 h 0 h 1 h 0 h 0 l 1 l 1 l 1 l 0 l 1 l 0 l 0 l 0 d = Directional Speed: 0 = Disabled, 1 = Enabled l = Lock mode: 0 = None, 1 = Local Lockout, 2 = Midpoint, 3 = Reserved m = Message: 0 = None, 1 = Exact Feedback h = High position bits l = Low position bits Table 8-6 Servo Output Option CV Format © N3IX Engineering 2014 Page 30 25 August 2014 Tam Valley Depot QuadLN_S User Manual 8.7 Servo Cascade Address CV Format CV Bit Default T 0 t 0 a 0 a 0 x 0 h 0 h 0 h 0 l 0 l 0 l 0 l 0 l 0 l 0 l 0 l 0 t = Trigger: 0 = None, 1 = Closed, 2 = Thrown, 3 = Closed or Thrown a = Action: 0 = Closed, 1 = Thrown, 2 = Follow, 3 = Invert h = High address bits l = Low address bits Table 8-7 8.8 Servo Cascade Address CV Format IO Option CV Format CV Bit Default f 0 ty 0 s 0 l 0 l 1 l 1 tr 0 tr 1 f = DCC Freeze: 0 = Always live, 1 = Freeze on DCC loss ty = Input Type: 0 = General, 1 = Detector s = LED Sense: 0 = Normal, 1 = Inverted l = LED Mode: 0 = Disable, 1 = Steady, 2 = Blink on Move, 3 = Blink on Move or Lock, 4 = Blink on Lock, 5 = Lock State, 6 = Position, 7 = Blink on Thrown tr = Trigger: 0 = None, 1 = Positive Edge, 2 = Negative Edge, 3 = Both Edges Table 8-8 8.9 IO Option CV Format Main IO Detector Option CV Format – Detector Input CV Bit Default t 0 r 0 r 0 s 1 s 0 s 0 s 0 s 0 t = Input Type: 0 = CT, 1 = IR r = Reserved s = Sensitivity: 0-31 Table 8-9 Main IO Option CV Format – Detector Input © N3IX Engineering 2014 Page 31 25 August 2014 Tam Valley Depot QuadLN_S User Manual 8.10 IO Secondary CV Format CV Bit Default t 0 d 0 c 0 c 0 h 0 h 0 h 0 h 0 l 0 l 0 l 0 l 0 l 0 l 0 l 0 l 0 t = Type: 0 = Trigger on this message, 1 = Send this message d = Device: 0 = Turnout, 1 = Sensor c = Condition: 0 = None, 1 = Hi/Closed, 2 = Lo/Thrown, 3 = Both/Follow h = high address bits l = low address bits Table 8-10 IO Secondary CV Format 8.11 IO Action CV Format CV Bit Default CV Bit Default h H h H h H h H g G g G g G g G f F f F f F f F e E e E e E e E d D d D d D d D c C c C c C c C b B b B b B b B a A a A a A a A h = Servo 8 (Octo Mode only) g = Servo 7 (Octo Mode only) f = Servo 6 (Octo Mode only) e = Servo 5 (Octo Mode only) d = Servo 4 c = Servo 3 b = Servo 2 a = Servo 1 0 = None, 1 = Toggle, 2 = Follow, 3 = Invert, 4 = Closed, 5 = Thrown, 9 = Lock Toggle, 10 = Lock Follow, 11 = Lock Invert, 12 = Lock Closed, 13 = Lock Thrown Default: For the Servo in the same group, Default = 1; for all other Servos, Default = 0. Table 8-11 IO Action CV Format © N3IX Engineering 2014 Page 32 25 August 2014 Tam Valley Depot QuadLN_S User Manual 8.12 Route Entry CV Format CV Bit Default r 0 a 0 a 0 (even) a h 0 0 h 0 h 0 h 0 l 0 l 0 l 0 (odd) l l 0 0 l 0 l 0 l 0 r = Reserved a = Action: 0= None, 1 = Closed Turnout, 2 = Thrown Turnout, 3 = Hi Sensor, 4 = Lo Sensor h = high address bits l = low address bits Table 8-12 Route Entry CV Format 8.13 Route Control CV Format CV Bit Default r 0 r 0 r 0 r 0 r 0 r 0 t 0 t 0 r = Reserved t = Type: 0 = None, 1 = Basic, 2 = Selector, 3 = Expand Type = 3 is not used on Route 1. Table 8-13 Route Control CV Format 8.14 Signal Aspect CV Format CV Bit Default b 0 m 0 m 0 p 0 p 0 p 0 p 0 p 0 b = Bicolor: 0 = No, 1 = Yes mm = Mode: 0 = None, 1 = Steady, 2 = Flash Phase A, 3 = Flash Phase B ppppp = Pin: 0-31 i = In Use: 0 = No, 1 = Yes a = Address Mode: 0 = Signal Mode, 1 = Turnout Mode r = Reserved Table 8-14 Signal Aspect CV Format © N3IX Engineering 2014 Page 33 25 August 2014 Tam Valley Depot QuadLN_S User Manual 8.15 Signal Aspect Config CV Format CV Bit Default i 0 m 0 r 0 r 0 r 0 r 0 r 0 r 0 i = In Use: 0 = No, 1 = Yes a = Address Mode: 0 = Signal Mode, 1 = Turnout Mode r = Reserved Table 8-15 Signal Aspect Config CV Format 8.16 Signal Aspect Address CV Format – Signal Mode CV Bit Default a 0 a 0 a 0 (even) a a 0 0 h 0 h 0 h 0 l 0 l 0 l 0 (odd) l l 0 0 l 0 l 0 l 0 l 0 l 0 (odd) l l 0 0 l 0 l 0 l 0 a = Aspect: 0-31 h = Mast high address bits l = Mast low address bits Table 8-16 Signal Aspect Address CV Format – Signal Mode 8.17 Signal Aspect Address CV Format – Turnout Mode CV Bit Default m 0 m 0 m 0 (even) m s 0 0 h 0 h 0 h 0 l 0 a = Mast: 0-15 s = Turnout Sense: 0 = Thrown, 1 = Closed h = Turnout high address bits l = Turnout low address bits Table 8-17 Signal Aspect Address CV Format – Turnout Mode © N3IX Engineering 2014 Page 34 25 August 2014 Tam Valley Depot QuadLN_S User Manual 8.18 Signal Lamp CV Format CV Bit Default f 1 fr 0 t 1 r 0 r 0 r 0 r 0 r 0 b 1 b 1 b 1 r = Reserved t = Type: 0 = Non-Searchlight, 1 = Searchlight fr = Flash Rate: 0 = Signal, 1 = Crossing f = Fade: 0 = No, 1 = Yes Table 8-18 Signal Lamp CV Format 8.19 Signal LED CV Format CV Bit Default g 1 e 0 e 0 b 1 b 1 g = Group Start: 0 = No, 1 = Yes e = Effect: 0 = Off, 1 = On, 2 = Bicolor, 3 = Reserved b = Brightness: 0-31 Table 8-19 Signal LED CV Format © N3IX Engineering 2014 Page 35 25 August 2014


