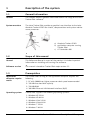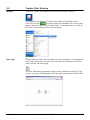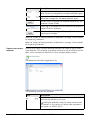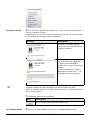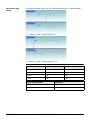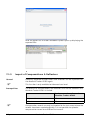
1
Leica Tracker Pilot Reference Manual Version 1.1 English Introduction Purchase Congratulations on the purchase of a Leica Geosystems product. To use this product in a permitted manner, please refer to the detailed safety directions in the Absolute Tracker AT401 User Manual. Product identification The type and serial number of the product are indicated on the type plate on the sensor unit. Enter the type and serial number below and always refer to this information when you need to contact your agency of Leica Geosystems authorized Service Center. Type: Serial No.: Symbols The symbols used in this manual have the following meanings: Type Description Important paragraphs which must be adhered to in practice as they enable the product to be used in a technically correct and efficient manner. Trademarks Product names are trademarks or registered trademarks of their respective owners. Windows is a registered trademark of the Microsoft Corporation in the United States and other countries. Adobe Reader is a registered trademark of Adobe Systems Incorporated in the United States and other countries. Validity of this manual This manual applies to all product series instruments. Where there are differences between the various models they are clearly described. 2 Absolute Tracker AT401 Introduction Available documentation Name Description and Format Tracker Pilot Reference Manual Overall comprehensive technical guide to the product functions of Tracker Pilot. Name Description and Format User Manual All instructions required to operate the product to a basic level are contained in the User Manual. Provides an overview of the product together with technical data and safety directions. Quick Start Manual Describes the specific embedded software for checks and compensation in standard use. Intended as quick reference guide. TPI Programmers Manual Describes the usage and commands of the Tracker Programming Interface (TPI). Refer to the following site for Absolute Tracker documentation and software: http://www.leica-geosystems.com/metrology/ Feedback Your feedback is important as we strive to improve the quality of our documentation. We request you to make specific comments as to where you envisage scope for improvement. Please use the following E-mail address to send your suggestions: [email protected] Contact Leica Geosystems AG Metrology Division Moenchmattweg 5 5035 Unterentfelden Switzerland Phone +41-62-737 67 67 Fax +41-62-723 07 34 www.leica-geosystems.com/metrology Introduction Absolute Tracker AT401 3 Table of Contents Introduction . . . . . . . . . . . . . . . . . . . . . . . . . . . . . . . . . . . . . . . . 2 Table of Contents . . . . . . . . . . . . . . . . . . . . . . . . . . . . . . . . . . 4 1 Description of the system . . . . . . . . . . . . . . . . . . . . . . . 6 1.1 General Information . . . . . . . . . . . . . . . . . . . . . . . . . . . . . . 6 1.2 Scope of this manual. . . . . . . . . . . . . . . . . . . . . . . . . . . . . . 6 1.3 Prerequisites . . . . . . . . . . . . . . . . . . . . . . . . . . . . . . . . . . . . 6 2 Installation . . . . . . . . . . . . . . . . . . . . . . . . . . . . . . . . . . . . . . 8 2.1 Tracker Pilot Software. . . . . . . . . . . . . . . . . . . . . . . . . . . . . 8 2.1.1 Windows XP . . . . . . . . . . . . . . . . . . . . . . . . . . . . . . . . 8 2.1.2 Windows 7 . . . . . . . . . . . . . . . . . . . . . . . . . . . . . . . . 11 2.2 Tracker Pilot Updates . . . . . . . . . . . . . . . . . . . . . . . . . . . . 14 2.3 Tracker Pilot Uninstall . . . . . . . . . . . . . . . . . . . . . . . . . . . . 14 2.4 Absolute Tracker System Software . . . . . . . . . . . . . . . . . . 15 3 User Interface . . . . . . . . . . . . . . . . . . . . . . . . . . . . . . . . . . 16 3.1 User Levels . . . . . . . . . . . . . . . . . . . . . . . . . . . . . . . . . . . . 16 3.2 Tracker Pilot Startup . . . . . . . . . . . . . . . . . . . . . . . . . . . . . 17 3.3 Select Sensor Page . . . . . . . . . . . . . . . . . . . . . . . . . . . . . . 19 3.4 Keyboard & Remote Control Shortcuts . . . . . . . . . . . . . . . 21 3.5 Main Page . . . . . . . . . . . . . . . . . . . . . . . . . . . . . . . . . . . . . 22 3.6 Power Source . . . . . . . . . . . . . . . . . . . . . . . . . . . . . . . . . . 26 3.7 Reflectors . . . . . . . . . . . . . . . . . . . . . . . . . . . . . . . . . . . . . 27 3.7.1 Reflectors on Standard User Level . . . . . . . . . . . . . . 27 3.7.2 Reflectors on Advanced User Level . . . . . . . . . . . . . 28 3.8 Compensations . . . . . . . . . . . . . . . . . . . . . . . . . . . . . . . . . 32 3.8.1 Compensations on Standard User Level . . . . . . . . . . 33 3.8.2 Compensations on Advanced User Level . . . . . . . . . 35 3.9 Measurement Time . . . . . . . . . . . . . . . . . . . . . . . . . . . . . . 38 3.10Configuration . . . . . . . . . . . . . . . . . . . . . . . . . . . . . . . . . . 39 3.10.1Settings - Sensor & Controller. . . . . . . . . . . . . . . . . 39 3.10.2Settings - Tracker Pilot . . . . . . . . . . . . . . . . . . . . . . 48 3.10.3Viewing PDF Reports . . . . . . . . . . . . . . . . . . . . . . . . 50 3.11Initialization . . . . . . . . . . . . . . . . . . . . . . . . . . . . . . . . . . . 51 3.12Find Reflector . . . . . . . . . . . . . . . . . . . . . . . . . . . . . . . . . . 52 3.13Overview Camera . . . . . . . . . . . . . . . . . . . . . . . . . . . . . . . 52 3.14Messages & Impediments . . . . . . . . . . . . . . . . . . . . . . . . . 53 3.14.1Impediments . . . . . . . . . . . . . . . . . . . . . . . . . . . . . . 54 3.14.2Warning & Error Messages . . . . . . . . . . . . . . . . . . . 54 3.14.3Exception Handling . . . . . . . . . . . . . . . . . . . . . . . . . 55 4 Absolute Tracker AT401 4 Network Settings . . . . . . . . . . . . . . . . . . . . . . . . . . . . . . 56 4.1 Tracker Setup . . . . . . . . . . . . . . . . . . . . . . . . . . . . . . . . . . 56 4.2 Application Computer Network Settings . . . . . . . . . . . . . . 56 4.2.1 Windows XP . . . . . . . . . . . . . . . . . . . . . . . . . . . . . . . 57 4.2.2 Windows 7 . . . . . . . . . . . . . . . . . . . . . . . . . . . . . . . . 59 4.3 Tracker Pilot Network Settings . . . . . . . . . . . . . . . . . . . . . 63 4.3.1 LAN Point-to-Point (P2P) with Static IP Address . . . 64 4.3.2 LAN Network Connection (DHCP) . . . . . . . . . . . . . . . 65 4.3.3 WLAN Connection with Static IP Address . . . . . . . . . 66 4.3.4 WLAN Network Connection (DHCP) . . . . . . . . . . . . . 68 4.3.5 Troubleshooting Network Problems . . . . . . . . . . . . . 70 5 Check . . . . . . . . . . . . . . . . . . . . . . . . . . . . . . . . . . . . . . . . . . 75 5.1 Check Wizards . . . . . . . . . . . . . . . . . . . . . . . . . . . . . . . . . . 75 5.1.1 Two Face Check . . . . . . . . . . . . . . . . . . . . . . . . . . . . 82 5.1.2 ADM Check . . . . . . . . . . . . . . . . . . . . . . . . . . . . . . . . 88 6 Compensation . . . . . . . . . . . . . . . . . . . . . . . . . . . . . . . . . . 96 6.1 Compensation Wizards . . . . . . . . . . . . . . . . . . . . . . . . . . . 97 6.1.1 Inclination Sensor . . . . . . . . . . . . . . . . . . . . . . . . . 104 6.1.2 Angle Compensation . . . . . . . . . . . . . . . . . . . . . . . 104 6.1.3 ADM Compensation . . . . . . . . . . . . . . . . . . . . . . . . 111 6.1.4 ADM Offset Compensation for Custom Reflector. . 118 7 Help . . . . . . . . . . . . . . . . . . . . . . . . . . . . . . . . . . . . . . . . . . . 127 7.1 Support Center . . . . . . . . . . . . . . . . . . . . . . . . . . . . . . . . 127 7.1.1 Create Support File . . . . . . . . . . . . . . . . . . . . . . . . 128 7.1.2 Open Leica Support Website . . . . . . . . . . . . . . . . . 129 7.1.3 Update System. . . . . . . . . . . . . . . . . . . . . . . . . . . . 130 7.1.4 Export of Compensations & Reflectors . . . . . . . . . 133 7.1.5 Import of Compensations & Reflectors . . . . . . . . . 135 8 Appendix . . . . . . . . . . . . . . . . . . . . . . . . . . . . . . . . . . . . . . 142 8.1 Abbreviations . . . . . . . . . . . . . . . . . . . . . . . . . . . . . . . . . 142 8.2 Regional Contact Addresses . . . . . . . . . . . . . . . . . . . . . . 143 Index . . . . . . . . . . . . . . . . . . . . . . . . . . . . . . . . . . . . . . . . . . . . . 144 Absolute Tracker AT401 5 1 Description of the system 1.1 General Information General This chapter contains general information about the usage of the Leica Tracker Pilot software. System overview The Leica Tracker Pilot provides a graphical user interface to the Leica Absolute Tracker AT401 for checks, compensations and system maintenance processes. a) Absolute Tracker AT401 b) application computer running Tracker Pilot c) AT Controller 400 1.2 Scope of this manual General This Reference Manual is a part of the product. It includes important information on installing and running the software. Software version This manual is based on Tracker Pilot major version 1.1. 1.3 Prerequisites Application computer requirements The Tracker Pilot running on the application computer requires the following: 1. PC with 300MHz or higher processor clock speed recommended 2. 150 MB free hard disk capacity 3. 128 MB RAM 4. 100 MBit Ethernet LAN Network Interface (RJ45) Operating system Tracker Pilot supports the following operating systems: 1. Windows XP 32-bit 2. Windows XP 64-bit 3. Windows Vista 32-bit 4. Windows Vista 64-bit 5. Windows 7 32-bit 6. Windows 7 64-bit 6 Absolute Tracker AT401 Description of the system Software To view or print PDF Reports Adobe Reader 9 or higher is required. Windows user account control It is not possible to install or run the Tracker Pilot under the Windows Guest account. Laser Tracker & Controller hardware The Tracker Pilot supports the following Leica Geosystems Laser Tracker models: 1. Absolute Tracker AT401 with AT Controller 400. Description of the system Absolute Tracker AT401 7 2 Installation 2.1 Tracker Pilot Software Windows UAC Installing the Tracker Pilot into the proposed default location does not require administrator privileges. Installing the Tracker Pilot into a different folder may require authorization of a system administrator. Please contact your system administrator for details. Operating System Default Directory Windows XP C:\Documents and Settings\[Local User]\Start Menu\Programs\Leica Tracker Pilot Windows Vista C:\Users\[Local User]\AppData\Roaming\Microsoft\Windows\Start Menu\Programs\Leica Tracker Pilot Windows 7 C:\Users\[Local User]\AppData\Roaming\Microsoft\Windows\Start Menu\Programs\Leica Tracker Pilot A shortcut to Tracker Pilot will be created on the desktop by default. 2.1.1 General Windows XP The provided Tracker Pilot product CD contains the installation files for the Tracker Pilot software. Insert the CD into the CD drive of the application PC, the "Autorun" should launch the Installer menu automatically. Start the application "AT401Software.exe" manually in case the AutoPlay option is not activated on your PC. The following controls are available: 8 Absolute Tracker AT401 Installation Button Description Starts the installation of Tracker Pilot Opens this reference manual. Opens a file explorer to display the content of the Product CD. Exits the application. Tracker Pilot installation Click on the button The installation routine will check if an instance of the Tracker Pilot already exists on the application computer. If a Tracker Pilot installation is found, the following message will be displayed: Click cancel. Press Installation to start the installation. to install the Tracker Pilot anyway or click to continue or Absolute Tracker AT401 to to terminate the installation. 9 To select a different installation folder press location where the Tracker Pilot shall be installed. and choose the It is recommended to install the Tracker Pilot into the proposed folder. Click to continue. Press to confirm the proposed destination for the shortcut in the Windows Start Menu and to start the installation or press to change the destination. Tracker Pilot will now be installed into the displayed folder. 10 Absolute Tracker AT401 Installation Click 2.1.2 to complete the installation. Windows 7 General The provided Tracker Pilot product CD contains the installation files for the Tracker Pilot software. Insert the CD into the CD drive of the application PC, the "Autorun" should launch the Installer menu automatically. Start the application "AT401Software.exe" manually in case the AutoPlay option is not activated on your PC. The following controls are available: Installation Absolute Tracker AT401 11 Button Description Starts the installation of Tracker Pilot Opens this reference manual. Opens a file explorer to display the content of the Product CD. Exits the application. Tracker Pilot installation Click on the button Press to start the installation. to continue or to terminate the installation. To select a different installation folder press location where the Tracker Pilot shall be installed. 12 and choose the It is recommended to install the Tracker Pilot into the proposed folder. Click to continue. Absolute Tracker AT401 Installation Press to confirm the proposed destination for the shortcut in the Windows Start Menu and start to install the software or press to change the destination. Tracker Pilot will now be installed into the displayed folder. Click Installation to complete the installation. Absolute Tracker AT401 13 2.2 Tracker Pilot Updates General The Tracker Pilot software only needs to be installed once. Any future updates will be included in the provided system update package. Only a single instance of Tracker Pilot should be installed on one application computer. A warning will be shown in case an existing instance of the Tracker Pilot is found on the application computer when trying to install a new instance. Refer to “Update System” on page 130 for details on updating the system software. 2.3 Tracker Pilot Uninstall General Click on the button to open the Windows Start menu. Navigate to the menu entry Leica Tracker Pilot. A submenu pops up containing an item Uninstall. Click on the item "Uninstall Tracker Pilot" to remove the Tracker Pilot. Click if you want to continue to remove Tracker Pilot from the application computer. Click to cancel the uninstall. 14 Absolute Tracker AT401 Installation The progress bar displays the status of the uninstall progress. A message is displayed to confirm that Tracker Pilot has been uninstalled successfully. Close this message by clicking . 2.4 Absolute Tracker System Software General The system software of the Absolute Tracker is pre installed on the system. No user installation or modification is required unless the system requires an update to a newer system software version. Refer to “Update System” on page 130 for details on updating the system software. Installation Absolute Tracker AT401 15 3 User Interface General This chapter contains general information about how to use the Leica Tracker Pilot software. 3.1 User Levels General The Tracker Pilot has three different user levels: User Level Password Functionality Standard • Add and delete connections • Activate reflectors and compensations • Checks • Network Settings Advanced Advanced • Basic Measurements • Create Support File • Add and delete connections • Change Accuracy Settings • View reflector and compensation details • Activate and create reflectors and compensations • Checks • Network Settings • Basic Measurements • Update Absolute Tracker system • Create Support File • Export and Import reflectors and compensations Administrator Administrator • 16 Add and delete connections • Change Accuracy Settings • View reflector and compensation details • Activate and create reflectors and compensations • Checks • Network Settings • Basic Measurements • Update Absolute Tracker system • Create Support File • Export and Import reflectors and compensations • Manage passwords Absolute Tracker AT401 User Interface 3.2 Tracker Pilot Startup General To launch Tracker Pilot double-click onto the desktop shortcut. Alternatively the software can be started from the Windows Start menu.Click on the button to open the Windows Start menu. Navigate to the menu entry Leica Tracker Pilot. A submenu pops up, click on the item Tracker Pilot to launch the software. User login Tracker Pilot launches with Standard user level by default. To change the user level click on the user icon at the bottom left hand corner of the status bar on the main page. The user selection page allows to log in with a different user level. The current user level is displayed on the top right hand side of Tracker Pilot. User Interface Absolute Tracker AT401 17 Item Description Logs in with Standard user level. A password is not required. Logs in with Advanced or Administrator user level. A password is required. Login page Clicking on the icon for Advanced user level opens the login page. Item Description Enter the password. The following passwords are set by default: User Level Default Password Standard no password required Advanced Advanced Administrator Administrator Refer to “Passwords” on page 44 for details on setting user defined passwords. 18 Absolute Tracker AT401 User Interface 3.3 Select Sensor Page General One connection is available by default: • Point-to-point connection (wired) The following controls are available on the Select Sensor page: Item Description The default connection for Tracker Pilot or other third party applications is a point-to-point connection. Click on the icon to establish a point-to-point connection with IP address 192.168.0.1 to the Absolute Tracker AT401. Click on this symbol to create a new connection. The green background indicates an active connection. Moving the mouse over an inactive connection enables the Delete button. Click Delete to remove a connection from the list. Only inactive connections can be deleted. The current active connection cannot be deleted. New Connection Click on the symbol for New Connection to create a new connection. User Interface Absolute Tracker AT401 19 The following controls are available: Item Description Enter a name under which the new connection is displayed on the connection page. The name is arbitrary. Enter the IP address for the desired connection. The IP address can be found on the LCD display of the AT Controller 400. Click Create to create and add the new connection to the connection page. The Tracker Pilot returns to the connection page afterwards. Click Cancel to return to the connection page without applying any changes. Click Back to return to the main page without applying any changes. Connection 20 During the connection process to the Absolute Tracker the following page is displayed showing the progress of the connection process: Absolute Tracker AT401 User Interface 3.4 Keyboard & Remote Control Shortcuts General The following functions can be addressed by function keys: Leica Remote Control Key Function F1 Help F2 Start Measurement F3 Initialize F6 Find reflector F9 Back (on wizard pages) F10 Next (on wizard pages) F11 Toggle overview camera (OVC) window F12 Toggle between full sketch view, full DRO view and shared view The following functions are mapped to the function keys of the Leica Remote Control: a b c d e d) e) f) g) h) AT401_023 User Interface Absolute Tracker AT401 IR Transmitter Button A Button B Button D Button C 21 3.5 Button Function A Start Measurement (F2) B Next (F9) (on Tracker Pilot wizard pages) C Back (F10) (on Tracker Pilot wizard pages) D Toggle between full sketch view, full DRO view and shared view (F12) Main Page The main page consists of the following elements: a) Tracker Pilot title bar, current connection details b) Window title bar c) Window controls d) Absolute Tracker controls e) Data Read Out (DRO) window f) Absolute Tracker status bar g) Menu bar Windows title bar Tracker Pilot title bar Data Read Out Window (DRO) The Windows title bar displays the following elements: • Application Name • Name of the current active connection The Tracker Pilot title bar displays the following elements: • Name of the current active connection • Type of connected Absolute Tracker • Serial Number of connected Absolute Tracker The Data Read Out window (DRO) displays the following elements: a) b) c) d) e) f) Current reflector position Last measured point Face Selected angle unit Selected length unit Expanded Uncertainty U95 (k=2) of the last measured point g) Distance h) Vertical angle i) Horizontal angle The DRO window shows the following status information: 22 Absolute Tracker AT401 User Interface DRO Status Description Ready (reflector locked and ready to measure) Measurement in progress Not ready (no reflector locked or not ready to measure) Move the mouse over the Measurement button to display a tool tip providing information about the current state. Tracker controls The following Tracker controls are available: Item Description Initialize the Absolute Tracker AT401. An initialization must be executed after the first start or a restart of the Absolute Tracker system. After a significant temperature change or after moving the Tracker, the user might be asked to initialize the Absolute Tracker. A reflector needs to be in the field of view for the initialization process! Find Reflector (F6) within the field of view of the ATR. Find Reflector using the Overview Camera (OVC) (F11). Start Measurement (F2) with the selected measurement time. Refer to “Setting measurement time” on page 39 for details on setting the measurement time. User Interface Absolute Tracker AT401 23 Status bar The following controls are available in the status bar: Item Description Displays the current active user level. Click to access the User Selection page. Refer to “User Levels” on page 16 for details on user levels. Displays the status of the selected connection. Click to access the Select Sensor page. Refer to “Select Sensor Page” on page 19 for details on available connections. Displays the current Power Source of the Absolute Tracker AT401 and AT Controller 400. Refer to “Power Source” on page 26 on details on the power source options. Displays the current state of the inclination sensor. Click to access Inclination Sensor page. Refer to “Inclination” on page 41 for details on inclination sensor settings. Displays the current state of the In-/Outdoor Mode. Click to access the In-/Outdoor Mode page. Refer to “In-/Outdoor Mode” on page 40 for details on the In-/Outdoor Mode settings. Displays the actual values and current source of environmental parameters. Click to access the Meteo Monitor page. Refer to “Meteo Monitor” on page 42 for details on environmental data settings. Displays the current active reflector. Click to access the Reflectors page. Refer to “Reflectors” on page 27 for details on reflectors. No reflector available. A reflector needs to be created or imported. Requires Advanced user level privileges. Refer to “Create new standard reflector” on page 30 for details on creating reflectors. Displays the current active compensations. Click to access the Compensations page. Refer to “Compensations” on page 32 for details on compensations. No compensation record available. A compensation record needs to be created or imported. Requires Advanced user level privileges. Refer to “Compensation” on page 96 for details on compensations. 24 Absolute Tracker AT401 User Interface Item Description Displays the selected measurement time. Click into the input field to change the measurement time. Refer to “Measurement Time” on page 38 for details on the measurement time. User Interface Absolute Tracker AT401 25 3.6 Power Source General The Power Source element of the status bar displays the current power source of the Absolute Tracker system. Item Description Power source of the Absolute Tracker AT401. Power source of the AT Controller 400. System powered through mains. System powered through Power over Ethernet (PoE). Absolute Tracker AT401 or AT Controller 400 battery capacity between 0% - 7%. The tool tip will show the exact battery capacity. The battery should be changed immediately. Absolute Tracker AT401 or AT Controller 400 battery capacity between 7% - 20%. The tool tip will show the exact battery capacity. The tool tip will show the exact battery capacity. The tool tip will show the exact battery capacity. The tool tip will show the exact battery capacity. The tool tip will show the exact battery capacity. Absolute Tracker AT401 or AT Controller 400 battery capacity between 21% - 40%. Absolute Tracker AT401 or AT Controller 400 battery capacity between 41% - 60%. Absolute Tracker AT401 or AT Controller 400 battery capacity between 61% - 80%. Absolute Tracker AT401 or AT Controller 400 battery capacity between 81% - 100%. The sensor unit always needs to be equipped with an internal battery GEB241 independently from the power source. This battery may be empty, but should be charged from time to time to avoid damage to the battery. The Absolute Tracker allows to change both batteries during operation without the need to shutdown the system. Refer to chapter "3.4.4 Hot Swapping" of the Absolute Tracker AT401 User Manual for details on hot swapping of batteries. 26 Absolute Tracker AT401 User Interface 3.7 Reflectors General The Reflectors page allows to view and maintain reflector definitions. The following functions are available: Reflectors User Level Activate Reflector View Reflector definition Create new Reflector Delete Reflector 3.7.1 Standard Advanced Reflectors on Standard User Level Activate reflector Click on the Status Bar element for Reflector to access the Reflectors page: The reflector page for the user level Standard looks as follows: The following controls are available: User Interface Absolute Tracker AT401 27 Item Description Displays the currently active reflector. Click onto a reflector element to activate this reflector. The state change will be applied instantly and Tracker Pilot returns to the main page. Moving the mouse over a reflector element displays the View icon. Click on the icon to display the details of the selected reflector. Displays the details about the selected reflector. • Name (max. 32 characters) • User definable comment (max. 128 characters) • Reflector radius • ADM Offset Return to the main page of Tracker Pilot without applying any changes. 3.7.2 General Reflectors on Advanced User Level Click on the Status Bar element for Reflector to access the Reflectors page: The reflector page for the user level Advanced looks as follows: The following controls are available: 28 Absolute Tracker AT401 User Interface Item Description Displays the currently active reflector. Click onto a reflector element to activate this reflector. The state change will be applied instantly and Tracker Pilot returns to the main page. Moving the mouse over a reflector element displays the View icon. Click on the icon to display the details of the selected reflector. Displays the details about the selected reflector. • Name (max. 32 characters) • User definable comment (max. 128 characters) • Reflector radius • ADM Offset Click on Delete to remove a reflector permanently from the Absolute Tracker AT401. Click on New Tooling Ball Refl 0.5in to create a new 0.5’’ TBR reflector. Refer to “Create new standard reflector” on page 30 for details on creating new reflectors. Click on New Red Ring Refl 0.5in to create a new 0.5’’ RRR reflector. Refer to “Create new standard reflector” on page 30 for details on creating new reflectors. Click on New Red Ring Refl 1.5in to create a new 1.5’’ RRR reflector. Refer to “Create new standard reflector” on page 30 for details on creating new reflectors. Click on New Break Resistant Refl 1.5in to create a new 1.5’’ BRR reflector. Refer to “Create new standard reflector” on page 30 for details on creating new reflectors. Click on New Break Resistant Refl 0.5in to create a new 0.5’’ BRR reflector. Refer to “Create new standard reflector” on page 30 for details on creating new reflectors. User Interface Absolute Tracker AT401 29 Item Description Click on New RFI Refl 0.5in to create a new 1.5’’ RFI (Reflector for fixed installations) reflector. Refer to “Create new standard reflector” on page 30 for details on creating new reflectors. Click on New Custom Reflector to create a new custom reflector. Refer to “Create new custom reflector” on page 31 for details on creating new reflectors. Apply changes to the Absolute Tracker and return to the main page of Tracker Pilot. A message is displayed while the data on the Absolute Tracker AT401 is updated. Create new standard reflector Click on the element of one of the standard reflector types to create, i.e.: The Reflector Definition page opens up. The following controls are available: Item Description A default name for the reflector will be proposed. The name can be edited by the user. Multiple reflectors with the same name cannot be created. In this case Tracker Pilot proposes a new name, i.e. RRR 1.5in(1). A user definable comment can be added, i.e. the serial number of the reflector. 30 Absolute Tracker AT401 User Interface Item Description Displays the Reflector Radius of the housing. This value cannot be changed for standard reflector types. Displays the ADM Offset of the reflector. This value cannot be changed for standard reflector types. Click on Finish to create the selected reflector on the Absolute Tracker AT401. A message is displayed while the data on the Absolute Tracker AT401 is updated. Return to the main page of Tracker Pilot without applying any changes. Refer to “Export of Compensations & Reflectors” on page 133 on details on exporting reflectors. Refer to “Import of Compensations & Reflectors” on page 135 on details on importing reflectors. Create new custom reflector Click on the Create Custom Reflector element to create a new custom type reflector. This reflector type allows to either enter an ADM Offset for glass prism manually or determine it by a compensation process. The Reflector Definition page opens up. The following controls are available: Item Description A default name for the reflector will be proposed. The name can be edited by the user. Multiple reflectors with the same name cannot be created. In this case the Tracker Pilot proposes a new name, i.e. RRR 1.5in(1). User Interface Absolute Tracker AT401 31 Item Description A user definable comment can be added, i.e. the serial number of the reflector. Add a reflector radius for Custom reflectors. For all other reflector types the reflector radius is given. For Custom reflectors only! For Custom reflectors only! Either add an ADM Offset for Custom reflectors manually or start the ADM Offset compensation wizard. For all other reflector types the ADM Offset is given. Refer to “ADM Offset Compensation for Custom Reflector” on page 118 for details on the ADM Offset compensation process. Click on Compensate to start the ADM Reflector Offset compensation wizard. Click on Finish to create the selected reflector on the Absolute Tracker AT401. A message is displayed while the data on the Absolute Tracker AT401 is updated. Return to the main page of Tracker Pilot without applying any changes. Refer to “Export of Compensations & Reflectors” on page 133 on details on exporting reflectors. Refer to “Import of Compensations & Reflectors” on page 135 on details on importing reflectors. ADM Offset compensation Custom reflector types with an individual ADM Offset compensation can only be imported to the instrument where the records have been created originally. It is not possible to upload a custom reflector to a different instrument. All glass prism reflectors cause a refraction of the laser beam in the glass body. This results in a lag of the path of the laser beam. The ADM Offset Compensation for Custom Reflectors routine verifies this additional path of the ADM beam. The ADM Offset can either be manually entered or determined by the ADM Offset Compensation process. Refer to “ADM Offset Compensation for Custom Reflector” on page 118 for details on the ADM Offset Compensation process. 3.8 Compensations General The Compensations page allows to view and maintain compensation records. The following functions are available: 32 Absolute Tracker AT401 User Interface Compensations User Level Standard Activate Compensation View Compensation details Create new Compensation Delete Compensations 3.8.1 Advanced Limited Full Compensations on Standard User Level General Click on the Status Bar element for Compensations to access the Compensations page: The Compensations page for user level Standards looks as follows: The following controls are available: User Interface Absolute Tracker AT401 33 Item Description Displays the current active compensation record. The following details are shown: • Compensation name consisting of the date & time the compensation has been finished • Start time of the compensation • Type of compensation • Environmental parameters • Active reflector Click onto a compensation element to activate this compensation record. The state change will be applied instantly and Tracker Pilot returns to the main page. Activating a compensation requires to reinitialize the Absolute Tracker. Moving the mouse over a compensation element displays the View icon. Click on the icon to display the details of the selected compensation record. Displays the details about the selected compensation record. • Compensation date • Name (max. 32 characters) • User defined comment (max. 128 characters) • Reflector type Return to the main page of Tracker Pilot without applying any changes. A message is displayed while the data on the Absolute Tracker AT401 is updated. Compensation details 34 On Standard user level a condensed summary of the compensation details will be displayed. Category Parameters Compensation • Compensation Date • Name • Comment • Reflector Type Absolute Tracker AT401 User Interface 3.8.2 Compensations on Advanced User Level General Click on the Status Bar element for Compensations to access the Compensations page: The Compensations page for user level Advanced looks as follows: The following controls are available: User Interface Absolute Tracker AT401 35 Item Description Displays the current active compensation record. The following details are shown: • Compensation name consisting of the date & time the compensation has been finished • Start time of the compensation • Type of compensation • Environmental parameters • Active reflector Click onto a compensation element to activate this compensation record. The state change will be applied instantly and Tracker Pilot returns to the main page. Activating a compensation requires to reinitialize the Absolute Tracker. Moving the mouse over a compensation element displays the View icon. Click on the icon View to display the details of the selected compensation record. Displays the details about the selected compensation record. • Compensation date • Name (max. 32 characters) • User defined comment (max. 128 characters) • Reflector type • Tracker compensation parameter details Click on the icon Delete to permanently delete the selected compensation record from the Absolute Tracker. The currently active compensation record can not be deleted. Click on New Angle Compensation to access the Angle Compensation wizard. Refer to “Angle Compensation” on page 104 for details on the Angle Compensation procedure. Click on New ADM Compensation to access the ADM Compensation wizard. Refer to “ADM Compensation” on page 111 for details on the ADM Compensation procedure. Apply changes and return to the main page of Tracker Pilot. A message is displayed while the data on the Absolute Tracker AT401 is updated. 36 Absolute Tracker AT401 User Interface Refer to “Compensation” on page 96 for details on compensation wizards and procedures. Refer to “Export of Compensations & Reflectors” on page 133 for details on exporting reflectors. Refer to “Import of Compensations & Reflectors” on page 135 for details on importing reflectors. Compensation details User Interface On Advanced user level the fully detailed compensation parameter report will be shown. Category Parameters Compensation • Compensation Date • Name • Comment • Reflector Type Absolute Tracker AT401 37 Category Parameters PowerLock • Compensation Date • Zero-Pixel Coordinate X0 • Zero-Pixel Coordinate Y0 ATR Angle Axes ADM OVC • Compensation Date • Zero-Pixel Coordinate X0 • Zero-Pixel Coordinate Y0 • Compensation Date • Inclination Index Length • Inclination Index Cross • Inclination Sensor State • Collimation error c • Trunnian (Transit) Axis tilt i • Vertical index error j • Compensation Date • Standing axis to trunnian axis Offset e • Standing axis to collimation axis Offset Ox • Trunnian axis to collimation axis Offset Oy • Collimation Buckling H • Collimation Buckling H Exponent • Collimation Buckling V • Collimation Buckling V Exponent • Compensation Date • ADM Offset • Compensation Date • H Offset (horizontal) • V Offset (vertical) 3.9 Measurement Time General The measurement time for basic measurements, checks and compensations is user selectable. Range 38 Measurement Time Measurement Mode Minimum Maximum Default Basic (main page) 500 ms 25000 ms 2000 ms Check 500 ms 25000 ms 2000 ms Absolute Tracker AT401 User Interface Measurement Time Measurement Mode Minimum Maximum Default Compensation 2000 ms 25000 ms 5000 ms For high precision measurement a measurement time of 2000 ms is strongly recommended. For check and compensation measurements a measurement time of 5000 ms is recommended. Setting measurement time To change the current measurement time, click into the Measurement Time input field and enter the desired measurement time in the given units. Hit Enter to apply the change. To reset the measurement time to the default value of 2000 ms, click the Default button, which appears when changing the measurement time. 3.10 Configuration General The configuration menu provides access to general system and software settings and status information. To access the system settings click on Configuration, Settings in the menu bar: 3.10.1 Settings - Sensor & Controller General User Interface The menu Sensor & Controller provides access to general system settings and status information: Absolute Tracker AT401 39 Firmware version Click on Firmware Version to display the current state of the Absolute Tracker firmware versions. Depending of the current system firmware version on the system either of the following messages will be displayed: Message Description All system firmware components are matched. No actions need to be taken. The system firmware components do not match together. It is highly recommended to update the system to the latest version. Use the provided link “Download latest Update here..." to download the actual version. A system update can only be done on Administrator user level. Refer to “Update System” on page 130 for details on updating the Absolute Tracker system. The following controls are available: Item Description Return to the main page of Tracker Pilot. In-/Outdoor Mode 40 Click on In-/Outdoor Mode to access the Outdoor Mode settings: Absolute Tracker AT401 User Interface The following controls are available: Item Description Click on the radio button Indoor to activate the Indoor mode. The Indoor mode is the default mode. • PowerLock mode user selectable • Accelerated Find Reflector search Click on the radio button Outdoor Standard (<80 m) to activate the Outdoor Standard mode. • PowerLock disabled • Reduced Find Reflector speed Click on the radio button Outdoor Long Range (>80 m) to activate the Outdoor Long Range mode. • PowerLock disabled • Reduced Find Reflector speed • ATR long range mode Return to the main page of Tracker Pilot. The selected In-/Outdoor Mode is shown on the Tracker Pilot Status Bar and on the AT Controller 400 display. Mode Tracker Pilot AT Controller 400 Indoor Outdoor Standard (< 80m) Outdoor Long Range (> 80 m) A compensation of the Absolute Tracker system can only be done in Indoor mode to achieve the highest possible accuracy of the system. An impediment will be displayed when attempting to start a compensation in one of the Outdoor modes. Changing the In-/Outdoor mode will be stored persistently in a data file on the application computer. Inclination Click on Inclination to access the inclination sensor settings: User Interface Absolute Tracker AT401 41 The following controls are available: Item Description Click the radio button Off to disable the inclination sensor. Angular measurements will no longer be corrected by inclination values. The state change will be applied instantly. Click on the radio button On to enable the inclination sensor and apply full angle corrections to the measurements. The state change will be applied instantly. Click Reset to replace the initial inclination readings with a new initial current reading. Click Update to get a current reading from the inclination sensor. The difference between Initial and Current will be displayed under Drift. Return to the main page of Tracker Pilot. It is highly recommended to work with enabled inclination sensor in applicable environments to achieve highest accuracy of the Absolute Tracker. Working in an unstable environment(i.e. vibrating ground, floating dock etc.) may require to disable the inclination sensor. The Absolute Tracker AT401 will still provide its full functionality but the achievable accuracy might be reduced. Disabling the inclination sensor will not be stored persistently. By default the inclination sensor will enabled at startup of the Absolute Tracker. Meteo Monitor Click on Meteo Monitor to access the meteo station settings: 42 Absolute Tracker AT401 User Interface The following controls are available: Item Description Click on the icon Manual Settings to manually input environmental parameters. The state change will be applied instantly. Click into the input fields and enter the values for ambient temperature, pressure and humidity manually. The changes need to be applied manually by clicking OK. Click on the icon Automatic Readings to read the environmental data from the Meteo Monitor automatically. The state change will be applied instantly. Apply manual input of environmental data and return to the main page of Tracker Pilot. Network Settings User Interface Connecting and disconnecting an external temperature sensor will be recognized automatically. To achieve highest possible measurement accuracy it is highly recommended to determine the ambient temperature using the provided external temperature sensor. Using the internal temperature sensor can lead to erroneous measurements of 4 - 5 ppm! Setting the Meteo Monitor to manual input of the environmental values will not be stored persistently. By default automatic readings of the environmental data will be enabled at startup of the Absolute Tracker. Click on Network Settings to access the network settings page. Absolute Tracker AT401 43 The following types of connections are available: Network Connection Type LAN Connection WLAN Connection • Get Address from DHCP • Get Address from DHCP • Static IP Address • Static IP Address Refer to “Tracker Pilot Network Settings” on page 63 for detailed instructions on setting up different types of network connections to the AT Controller 400. For certain countries with special regulations for operating wireless networks the WLAN module will be decommissioned by the factory. The user of the product will not be able to activate the WLAN module in this case. Please contact your Leica Geosystems representative for further details on wireless network regulations. In France outdoor usage of the WLAN functionality is not permitted! Only use WLAN indoors. Passwords Click on Password to access the password settings page. This function is only available to Advanced and Administrator user level. Item User Level Advanced: • Change password for user level Advanced 44 Absolute Tracker AT401 User Interface Item User Level Administrator: • Change password for user level Advanced • Reset password for user level Advanced • Change password for user level Administrator The following controls are available: Item Description Type in the old password for the relevant user level. Type in the new password for the relevant user level. Repeat the new password for the relevant user level. Click Apply to apply the changes. Click Default to reset the password for the Advanced user level back to the default password. Return to the main page of Tracker Pilot. PowerLock Passwords will be stored on the AT Controller 400. Therefore passwords only apply to the individual AT Controller 400. In case of a lost Administrator user level password, please contact your local Leica Geosystems representative. Click on PowerLock to access the PowerLock settings. The following controls are available: Item Description Click on the radio button Off to disable PowerLock. The state change will be applied instantly. Click on the radio button On to enable PowerLock. The state change will be applied instantly. Return to the main page of Tracker Pilot. User Interface Absolute Tracker AT401 45 Remote Control In certain situations where multiple reflectors are located in the field of view of PowerLock it might be favorable to disable PowerLock to avoid that the reflector locks onto an unwanted reflector. Disabling PowerLock will not be stored persistently. By default PowerLock will enabled be at startup of the Absolute Tracker. Click on Remote Control to access the settings for the AT400 Remote Control. The following controls are available: Item Description Click on the radio button Off to disable the Remote Control buttons. The state change will be applied instantly. Click on the radio button On to enable the Remote Control buttons. The state change will be applied instantly. Return to the main page of Tracker Pilot. 46 In certain situations where multiple Absolute Trackers are located in the range of the AT400 Remote Control it might be favorable to disable the Remote Control buttons to avoid an unwanted reaction of a sensor unit. Disabling the Remote Control buttons will not be stored persistently. By default the Remote Control buttons will enabled at startup of the Absolute Tracker. Absolute Tracker AT401 User Interface Wake Up Click on Wake Up to access the standby and wake-up settings. The following controls are available: Item Description Click the green arrows to select the year for the wakeup. Click the green arrows to select the month for the wake-up. Click onto the calender view to select a day for the wake-up. The selected day is marked orange. Click into the hour or minute field of the time. Type in the time for the wake-up. Alternatively the time can be set using the grey arrows. Once the date and time for the wake-up is set, click on Apply & go standby. The state change will be applied instantly. The Tracker Pilot returns to the Connection page. Return to the main page of Tracker Pilot. Click Reconnect to wake up the Absolute Tracker manually. The Absolute Tracker AT401 will be turned off during the standby to prolong the lifetime of the laser components. The AT Controller 400 remains powered up. User Interface As soon as the system is powered up, the Absolute Tracker AT401 is ready to measure. Nevertheless a minimum warm-up time of 30 minutes is recommended before starting a measurement job. To achieve the highest possible measurement accuracy a warm-up time of at least 2 hours is highly recommended. Absolute Tracker AT401 47 3.10.2 General Settings - Tracker Pilot The menu Tracker Pilot provides access to general Tracker Pilot settings: User Level Standard Accuracy Advanced Click on Accuracy to access the accuracy level settings. The a priori accuracy of measurements is multiplied by the accuracy level factor. The level can be increased by the user in case of unstable environment. The default value is 1.0. The a priori accuracy level has an influence on the highlighting threshold for various tolerances and MPE values. The following controls are available: Item Description Click into the input field and change the accuracy level setting as required. Reset the accuracy level to the default value (1.0). Apply changes to accuracy level settings and return to the main page of Tracker Pilot. 48 The Accuracy Level has a direct influence on the passed/failed criterion of checks and compensations. Therefore the Accuracy Level should be changed carefully. Changing the accuracy level will be stored persistently in a data file on the application computer. Absolute Tracker AT401 User Interface Units Click on Units to change of dimensions displayed in the Tracker Pilot. The following controls are available: Item Description Click on the button to change the length unit. A drop down menu opens displaying a list of available units. • Meter [m] • Millimeter [mm] (Default) • Micrometer [mu] • Foot [foot] • Yard [yard] • Inch [inch] Click on the button to change the angle unit. A drop down menu opens displaying a list of available units. • Radian [rad] • Degree [deg] (Default) • Gon [gon] Click on the button to change the temperature unit. A drop down menu opens displaying a list of available units. • Degree Celsius [C] (Default) • Degree Fahrenheit [F] Click on the button to change the pressure unit. A drop down menu opens displaying a list of available units. • Millibar [mBar] (Default) • Hektopascal [hPa] • Kilopascal [kPa] • Millimeter column of mercury [mmHg] • Pounds per square inch [PSI] • Inch column of water [InH2O] • Inch column of mercury [InHg] Click on the button to change the humidity unit. A drop down menu opens displaying a list of available units. • Relative Humidity [%] (Default) User Interface Absolute Tracker AT401 49 Item Description Click on the button to change the time unit. A drop down menu opens displaying a list of available units. • Milliseconds [ms] (Default) • Seconds [s] • Minutes [min] • Hours [h] Increase displayed decimals of the relevant dimension. Decrease displayed decimals of the relevant dimension. Apply changes to unit settings and return to the main page of Tracker Pilot. 3.10.3 General All unit and decimal settings only have an effect on the Tracker Pilot. No changes are made on the AT Controller 400 by this function. Changing the units and decimals will be stored persistently in a data file on the application computer. Viewing PDF Reports Generated PDF reports of checks and compensation are saved locally on the application computer. Saved reports can be viewed with any PDF Reader, i.e. Adobe Reader. To view saved reports click on the link Reports. Clicking on the link opens a Windows Explorer displaying the folder where all PDF reports are saved. Double-click on the required PDF report to open it. The file name of the PDF report consists of the serial number of the Absolute Tracker, date and the type check or compensation performed, i.e. "390493 2010-04-14 11-30 Two Face Check.pdf". The Reports link will not be displayed In case no PDF reports are saved on the application computer. Refer to “PDF report” on page 87 for details on the default file location of check PDF reports. Refer to “PDF report” on page 111 for details on the default file location of compensation PDF Reports. 50 Absolute Tracker AT401 User Interface 3.11 Initialization General Under certain circumstances an initialization may be required or recommended: Absolute Tracker system state Initialization Startup of the system Required System warmed up Recommended Active compensation changed Required Absolute Tracker system moved Required Inclination sensor enabled Required An impediment message will be displayed as a tool tip on the Start Measurement (F2) button in case an initialization is required or recommended. Item Description An initialization is recommended to ensure highest possible accuracy of the Absolute Tracker. An initialization is required. Refer to “Impediments” on page 54 for details on Impediment messages. Procedure The initialization takes approximately 50 to 60 seconds and consists of a number of inclination measurements and a single two face measurement to adjust sensor internal parameters. A message is displayed during the initialization process: User Interface A reflector needs to be in the field of view of the Absolute Tracker AT401 for the initialization process! Ensure the Absolute Tracker AT401 is accurately levelled before initializing the system. The electronic bubble should be as close to the center as possible, the L and T values displayed on the Levelling Page of the AT Controller 400 should be between -4 and +4. Absolute Tracker AT401 51 3.12 Find Reflector General The Find Reflector function searches for a reflector within a defined search area and locks onto a target found. The behavior of the Find Reflector function depends on the PowerLock state. Procedure PowerLock Description On Find Reflector searches with PowerLock within its field of view without moving the Absolute Tracker AT401. Off Find Reflector performs a spiral search within a predefined search area. The size of the search window is 9.5°, approximating the field of view of PowerLock. Click on the Find Reflector icon: The following message is displayed during the search process: 3.13 Overview Camera General The monochrome Overview Camera enables visualization of reflectors. Activation Click on the Overview Camera icon in the Absolute Tracker controls to activate the live video image. This opens the following dialog window: The following controls are available: 52 Absolute Tracker AT401 User Interface Item Description Drag the button on the panel to move the Absolute Tracker. The rotation speed increases the further the button is moved away from the center. Release the button to stop the movement. Adjust the brightness of the view image by moving the slider up or down. This setting will be stored persistently. Adjust the contrast of the view image by moving the slider up or down. This setting will be stored persistently. Click into the image with the mouse pointer to move the Absolute Tracker to the selected position. Lock option disabled: The Absolute Tracker AT401 will not try to lock onto a reflector when clicking into the image with the mouse pointer. The OVC window stays open until closed manually. Lock option enabled: The Absolute Tracker AT401 will try to lock onto a reflector when clicking into the image with the mouse pointer. The OVC window will be closed automatically. The DRO status will change to green when a reflector has been found. A message is displayed during the lock-on process. Close the OVC window. A reflector in the field of view will be locked if the lock option is ticked once the OVC window is closed. The measurement status will only become ready (green) when the OVC window has been closed. While the OVC window is open the measurement status in the DRO window will be not ready (red). In case the Absolute Tracker AT401 is in face 2, the sensor will switch to face 1 when turning on the OVC. 3.14 Messages & Impediments General Two different types of status information are shown to the user: User Interface Absolute Tracker AT401 53 Item Description Impediment An tool tip will display an impediment whenever a button is disabled (grayed out) describing the reason for the impediment, i.e. Tracker not initialized. Pop-up message A warning or error message will be displayed during a user operation if an exception occurs during this operation. 3.14.1 General Impediments Impediments are shown to the user when moving the mouse over a function or a function button to execute a certain function of the Tracker Pilot, i.e. pressing the measure button. In case a required condition or a recommended state is not met, an impediment will be shown in a tool tip. Two different types of impediments are shown to the user: Impediment The Description Impediments in green font indicate a recommended action to the user. The selected function will still be available. Impediments in red font indicate a mandatory action. A red impediment has to be resolved before the intended function can be executed. The selected function button will be disabled (grayed out) until the impediment is resolved. Click on the selected function button to resolve the impediment. 3.14.2 General 54 Warning & Error Messages Warning or error messages are shown to the user in a pop-up window in case of an exception. All warning and error messages display a number, a warning or error text and a recommended solution. Absolute Tracker AT401 User Interface a) OK button and count down b) Detailed solution recommendation c) Message details d) Message short description e) Warning or error number The following controls are available: Item Description Click OK to close the warning or error message pop-up window. The count down displays the remaining time before the window closes automatically. 3.14.3 Exception Handling General In case of an exception which cannot be resolved by the user generate a Support File and contact your Leica Geosystems representative. In case the Tracker Pilot crashes with an unhandled exception a message will pop up displaying the status of the software and the file name of the Support File that will be generated automatically. To facilitate analyzing the problem please send this Support File to your Leica Geosystems representative. Refer to “Create Support File” on page 128 for details on creating Support Files. User Interface Absolute Tracker AT401 55 4 Network Settings 4.1 Tracker Setup General After installation of the Tracker Pilot on the application computer, the network connection to the AT Controller 400 needs to be configured. Setup the network connection to the Absolute Tracker system. The following connection types can be configured: Network Connection Type LAN Connection WLAN Connection • Get Address from DHCP • Get Address from DHCP • Static IP Address • Static IP Address Refer to the chapter Operation of the Leica AT401 User Manual for details on setting up the product. 4.2 Application Computer Network Settings Network topology A local network topology is set up between the Application PC and the AT Controller 400, each with a unique IP address in the private network range of the class C network numbers. The AT Controller 400 is delivered with a default IP address 192.168.0.1. The IP address of the application computer must be in the same range. C-class network The class C is used for private networks. The full IP address consists of the Network ID (192.168.0) and the Host ID (1 - 254). TCP/IP protocol setup 56 To communicate via TCP/IP protocol, private networks using class C IP addresses that are not recognized on public networks and do not require coordination with IANA (Internet Assigned Numbers Authority) or an Internet Authority. Private hosts can access external services only via application layer relays. To setup the TCP/IP protocol on the application computer, complete the following steps. Absolute Tracker AT401 Network Settings 4.2.1 Windows XP Control Panel Click on the button to open the Windows Start menu. Launch the Control Panel. Double-click on the Network Connections icon. Highlight the "Local Area Connection" or the name of the network card to be used for the connection to the AT Controller 400. Network Settings Absolute Tracker AT401 57 Click the right mouse button to activate the context menu and select Properties. Highlight the "Internet Protocol TCP/IP" and click on Point-to-Point (P2P) connection . To setup a point-to-point (P2P) connection select the radio button "Use the following IP address". Enter an IP address in the class C network address range, i.e. 192.168.0.2 for the point-to-point connection. Click into the Subnet mask field below, the Subnet address 255.255.255.0 will fill in automatically. 58 Absolute Tracker AT401 Network Settings Ensure the entered IP address for the application computer is different from the IP address of the AT Controller 400. Close the dialog by clicking Network connection (DHCP) To setup a network connection where the network adapter obtains its IP address from DHCP select the radio button "Obtain IP address automatically". Close the dialog by clicking 4.2.2 two times. two times. Windows 7 Control Panel Click on the button to open the Windows Start menu. Launch the Control Panel. Network Settings Absolute Tracker AT401 59 Click on the Network and Internet icon. Click on the Network and Sharing Center Icon. Click on the menu item "Change adapter settings" on the left hand side. 60 Absolute Tracker AT401 Network Settings Right-click on the "Local Area Connection" or the name of the network card to be used for the connection to the AT Controller 400. Click the right mouse button to activate the context menu and select Properties. Depending on the Windows security settings the following dialog may pop up. In this case an Administrator is required to change the network adapter settings. Please contact your system administrator. Network Settings Absolute Tracker AT401 61 Highlight the "Internet Protocol Version 4 (TCP/IPv4) and click on . Point-to-Point (P2P) connection To setup a point-to-point (P2P) connection select the radio button "Use the following IP address". Enter an IP address in the class C network address range, i.e. 192.168.0.2 for the point-to-point connection. Click into the Subnet mask field below, the Subnet address 255.255.255.0 will fill in automatically. Ensure the entered IP address for the application computer is different from the IP address of the AT Controller 400. Close the dialog by clicking Panel. Network connection (DHCP) 62 and . Close the Control To setup a network connection where the network adapter obtains its IP address from DHCP select the radio button "Obtain IP address automatically". Absolute Tracker AT401 Network Settings Close the dialog by clicking Panel. and 4.3 Tracker Pilot Network Settings General The following types of connections are available: . Close the Control Network Connection Type LAN Connection WLAN Connection • Get Address from DHCP • Get Address from DHCP • Static IP Address • Static IP Address Refer to “Network Settings” on page 43 for details on accessing the Network Settings page. AT Controller display Network Settings The display on the AT Controller 400 shows the following network connection states: Item Description 192.168.0.1 Network address assigned and connection established. (192.168.0.1) Network address assigned but no connection established, i.e. network cable unplugged. Loading ... AT Controller 400 loads saved network connection settings and tries to establish a network connection. Not Active WLAN disabled Absolute Tracker AT401 63 4.3.1 LAN Point-to-Point (P2P) with Static IP Address General The wired point-to-point (P2P) connection is the default factory setting of the Absolute Tracker system. To reset this connection from a different setting select the following: Required settings: Item Setting Network Mode Static IP Address IP Address IP-Address in C-Class network range, i.e. 192.168.0.1 IP Mask 255.255.255.0 Gateway Address 0.0.0.0 Ensure all setting are entered correctly and click to activate the point-to-point (P2P) connection. The LCD display of the AT Controller 400 displays a message while the system is being reconfigured. Tracker Pilot will return to the Select Sensor page. The IP Address will be displayed on the LCD screen of the AT Controller 400. Click on the following icon to connect to the AT Controller 400: P2P shortcut 64 Ensure the entered IP address for the AT Controller 400 is different from the IP address of the application computer. A keyboard shortcut allows to reset any network connection to a pointto-point connection without launching Tracker Pilot. When starting the AT Controller 400 wait for the following message on the LCD screen: Absolute Tracker AT401 Network Settings While the message "Searching IP" is displayed, press and hold the scroll button of the AT Controller 400 for 10 seconds. The following message will be displayed: After the AT Controller 400 has been reconfigured the connection page displays the IP address 192.168.0.1. Click on the P2P-Connection icon to connect to the Absolute Tracker. 4.3.2 LAN Network Connection (DHCP) General The Absolute Tracker system can be integrated into a company network environment. In this case the IP Address of the AT Controller 400 will be provided by a DHCP server in the relevant network. To configure the AT Controller 400 to obtain an IP Address from DHCP: Required settings: Item Setting Network Mode Get Address from DHCP All input fields will be grayed out. Click to activate the network connection. The LCD display of the AT Controller 400 displays a message while the system is being reconfigured. Tracker Pilot will return to the Select Sensor page. The IP Address will be displayed on the LCD screen of the AT Controller 400, i.e.: A new connection needs to be created using the IP address displayed on the LCD screen of the AT Controller 400. Refer to “New Connection” on page 19 for details on creating a new connection. Network Settings Absolute Tracker AT401 65 4.3.3 WLAN Connection with Static IP Address General The Absolute Tracker system can be operated in a wireless network environment. A wireless access point is required for this configuration. In this case the AT Controller 400 uses a static IP address. Refer to “Network Settings” on page 43 for details on WLAN restrictions in certain countries. To activate the WLAN communication on the AT Controller 400 tick the Activate WLAN box: IP Address settings To configure the AT Controller 400 to use a static IP Address over WLAN: Required settings: Item Setting Activate WLAN Enabled (Ticked) SSID User selectable SSID (Default: Leica AT401) Network Mode Static IP Address IP Address IP address within the allocated range of the network IP Mask Required IP mask, i.e. 255.255.255.0 Gateway Address IP Address of the access point provided by the parent network Please contact your network administrator for detailed information of the required IP address settings. Encryption Three different encryption modes can be selected: 66 • None • WEP 64bit (40+24) Absolute Tracker AT401 Network Settings • WPA2 PSK (Passphrase) The following controls are available: Item Description Non-encrypted WLAN connection WEP (Wired Equivalent Privacy) using 64 key (WEP-40), requires a key length of exactly 5 characters. Wi-Fi Protected Access 2, Preshared key mode (Passphrase), allows a key length of 8 to 63 characters. The encryption key can either be entered manually in case the WLAN access point has been configured in advance or automatically generated using the Generate button: This key is required to configure the WLAN access point to communicate with the AT Controller 400. Please contact your network administrator for detailed information of the required WLAN encryption settings. Changing the IP settings and encryption mode will be stored persistently. After a restart of the Absolute Tracker system the WLAN parameter settings will remain. Ensure all setting are entered correctly and click to activate the network connection. The LCD display of the AT Controller 400 displays a message while the system is being reconfigured. Tracker Pilot will return to the Select Sensor page. The IP Address will be displayed on the LCD screen of the AT Controller 400, i.e.: Encryption Mode Controller Display Not encrypted Encrypted A new connection needs to be created using the IP address displayed on the LCD screen of the AT Controller 400. Refer to “New Connection” on page 19 for details on creating a new connection. Network Settings Absolute Tracker AT401 67 4.3.4 WLAN Network Connection (DHCP) General The Absolute Tracker system can be operated in a wireless network environment. A wireless access point is required for this configuration. In this case the IP Address of the AT Controller 400 will be provided by a DHCP server in the relevant network. Refer to “Network Settings” on page 43 for details on WLAN restrictions in certain countries. To activate the WLAN communication on the AT Controller 400 tick the Activate WLAN box: IP Address settings To configure the AT Controller 400 to obtain an IP Address from DHCP over WLAN: Required settings: Item Setting Activate WLAN Enabled (Ticked) SSID User selectable SSID (Default: Leica AT401) Network Mode Get Address from DHCP All input fields will be grayed out. Encryption Three different encryption modes can be selected: • None • WEP 64bit (40+24) • WPA2 PSK (Passphrase) The following controls are available: Item Description Non-encrypted WLAN connection 68 Absolute Tracker AT401 Network Settings Item Description WEP (Wired Equivalent Privacy) using 64 key (WEP-40), requires a key length of exactly 5 characters. Wi-Fi Protected Access 2, Preshared key mode (Passphrase), allows a keylength of 8 to 63 characters. The encryption key can either be entered manually in case the WLAN access point has been configured in advance or automatically generated using the Generate button: This key is required to configure the WLAN access point to communicate with the AT Controller 400. Please contact your network administrator for detailed information of the required WLAN encryption settings. Changing the IP settings and encryption mode will be stored persistently. After a restart of the Absolute Tracker system the WLAN parameter settings will remain. Ensure all setting are entered correctly and click to activate the network connection. The LCD display of the AT Controller 400 displays a message while the system is being reconfigured. The Tracker Pilot will return to the Select Sensor page. The IP Address will be displayed on the LCD screen of the AT Controller 400, i.e.: Encryption Mode Controller Display Not encrypted Encrypted A new connection needs to be created using the IP address displayed on the LCD screen of the AT Controller 400. Refer to “New Connection” on page 19 for details on creating a new connection. Network Settings Absolute Tracker AT401 69 4.3.5 Troubleshooting Network Problems General Network communication problems can have various reasons. Therefore it is recommended to verify all items shown below in case of network communication problems. IP config Click on the button to open the Windows Start menu. Select Run ..., this will open the following dialog box: Type cmd (for command prompt) and click . The following window appears: Type in "ipconfig" and hit [Enter]. The following page will be displayed: 70 Absolute Tracker AT401 Network Settings The IP addresses of all network adapters are displayed. Identify the network adapter used for the connection to the AT Controller 400 and verify the settings are correct. Ping command Once the network settings on the application computer are verified the communication to the AT Controller 400 can be tested using the ping command. Click on the button to open the Windows Start menu. Select Run ..., this will open the following dialog box: Type cmd (for command prompt) and click . The following window appears: Network Settings Absolute Tracker AT401 71 Note the IP address that is displayed on the LCD screen of the AT Controller 400 and type in "ping <IP Address>", i.e. ping 192.168.0.1 and hit [Enter]. The following page will be displayed in case a successful communication: The following page will be displayed if no communication could be established: Possible reasons for a failed communication could be: • Incorrect AT Controller 400 IP settings • Incorrect TCP/IP protocol settings • Faulty LAN cable or RJ45 connectors Cables Some older network adapters may require a crossed-over TJ45 twisted pair LAN cable to communicate. Modern network adapters automatically detect the type of cable. Settings The network adapter of the application PC may be disabled or the network communication may not have been initialized at startup of the application computer. 72 Absolute Tracker AT401 Network Settings Click on the button to open the Windows Start menu. Launch the Control Panel. Double-click on the Network Connections icon. Highlight the "Local Area Connection" or the name of the network card to be used for the connection to the AT Controller 400. Network Settings Absolute Tracker AT401 73 Click the right mouse button to activate the context menu and select Enable to activate the network adapter. Network connection disruption A disruption in the network connection between the application computer and the AT Controller 400 will be detected by the Tracker Pilot. The following message will be displayed in this case: The Tracker Pilot continuously tries to reestablish the connection the AT Controller 400. Once the connection is established again, the Absolute Tracker system will be reset to its previous state. To terminate the connection manually click the button 74 Absolute Tracker AT401 . Network Settings 5 Check General Leica Geosystems products are manufactured, assembled and adjusted to the best possible quality. Quick temperature changes, frequent movement of the product, shock or stress can cause deviations and a decrease of the measurement accuracy. It is therefore recommended to check the product in regular intervals. This can be done onsite by running through specific check or compensation measurements. If checks do not provide satisfying results repeatedly, a compensation of the product is recommended. Measurement precision To achieve precise measurement results in the daily work, it is important to check and adjust the product from time to time. During the manufacturing process the product parameters are carefully determined. As mentioned above, the values can change and it is highly recommended to check or adjust the product in the following situations: • Before the first use of the product • Before taking high precision measurements • After long transportations • After long working periods • After long storage periods • In a high or low temperature environment Before starting to work the product has to become warmed up and acclimatized to the ambient temperature, especially if the product has been stored under different temperature conditions. Ensure sufficient acclimatization to the environment before taking precision measurements. The systems needs to be initialized before a check wizard can be started. A check can be performed in either of the indoor or outdoor modes. 5.1 Check Wizards General The following check wizards can be selected: Check Wizard Two Face Check ADM Check Process User Level Standard Advanced All check wizards consist of a 2-step process: • Measurement process • Report process Therefore all check pages share the same layout. The wizard starts with the measurement page(s) to take all required measurements, where on Check Absolute Tracker AT401 75 the last page of the wizard the measurement results can be analyzed and printed or archived as required. Sketches Dynamic sketches will guide the user through the check process. The sketches contain a top view and a side view to the measurement scene guiding the user to the required position. The current position of the locked reflector and the target positions for the measurement be will be updated dynamically through the whole measurement process. The current beam direction is represented by a colored line which reflects the current state shown in the DRO window. a) b) c) d) e) f) 76 Top view of measurement setup Side view of measurement setup Nominal position Scale Instrument position Measured position Absolute Tracker AT401 Check Tool tips Dynamic tool tips provide additional information on the required positions, check measurements and accuracy information related to the measurements. Tool Tip Description Nominal Position: • Point ID • Required Horizontal Angle • Required Vertical Angle • Required Distance Measured Position: • Point ID Data Read Out (DRO) window • Measured Horizontal Angle • Measured Vertical Angle • Measured Distance • Standard Deviation for each component (a posteriori) • Accuracy (a priori) • Temperature • Pressure • Humidity A Data Read Out (DRO) window provides numerical information about the current approximate position and the deviation to the target position. Position deviations over the tolerance will be flagged with red background color. The Data Read Out (DRO) window shows the following status information: Check Absolute Tracker AT401 77 DRO Status Description Not ready (no reflector locked or not ready to measure). Move the mouse over the Measurement button to display a tooltip providing information about the current state. Ready (reflector locked and ready to measure). Measurement in progress. Individual tolerance exceeded. DRO Display modes The Data Read Out (DRO) offers two different modes in check wizards to display the current reflector position: Display Mode Description Displays the absolute values of • Horizontal Angle (H) • Vertical Angle (V) • Distance (D) of the current reflector position in the sensor coordinate system. Displays the relative values of • Horizontal Angle Delta (H) • Vertical Angle Delta (V) • Distance Delta (D) of the current reflector position in relation to the next point to measure. Click on 78 to toggle between the DRO display modes. Absolute Tracker AT401 Check The following symbols provide a graphical guidance in Delta HVD mode to find the nominal position: Icon Description Move the reflector up. Move the reflector down. Move the reflector towards the Absolute Tracker AT401. Move the reflector away from the Absolute Tracker AT401. Move the reflector clockwise with reference to the sensor unit position (for ADM Check only). Move the reflector counter-clockwise with reference to the sensor unit position (for ADM Check only). Navigation Check The following controls are available in all check wizards: Absolute Tracker AT401 79 Icon Description Find Reflector (F6). Find Reflector with OVC (F11). Measure (F2). Toggle DRO between HVD and Delta HVD Display. Toggle DRO to HVD display. Toggle between full sketch view, full DRO view and shared view (F12). Navigate to next wizard page (F9). Navigate to previous wizard page (F10). Finish wizard. Cancel the process and discard all measurements. Delete a single measurement. View measurement details. Settings 80 The following controls are available in all check wizards to display settings or measurement parameters. The settings cannot be changed inside the check wizard: Absolute Tracker AT401 Check Icon Description Displays the inclination sensor state. Refer to “Inclination” on page 41 for details on the inclination sensor. Displays the source and actual values of the environmental parameters. Refer to “Meteo Monitor” on page 42 for details on the meteo parameters. Displays the active reflector. Refer to “Reflectors” on page 27 for details on reflectors. Displays the active compensation. Refer to “Compensations” on page 32 for details on compensations. Displays the selected measurement time. The result is an average of the measurements taken during the selected time. Default measurement time is 2000 ms. A measurement time of 2000 ms is recommended for check measurements. Selection Check To start a check select the desired wizard from the Check menu on the navigation bar: Absolute Tracker AT401 81 5.1.1 Two Face Check General The Two Face check routine verifies the system geometry (horizontal and vertical collimation). Large ambient temperature changes may result in significant two face check deviations. Check procedure Two Face measurements consist of the following 2-step process: 1. Measurement of three points, ideally on a line, at the height of tilting axis of the Absolute Tracker AT401. 2. Measurement of one point at a steep angle, ideally points at floor level. Recommended setup 82 The recommended setup for the Two Face check is shown below: Point ID Vertical Angle [deg] 1 ~ 90 2.0 2 ~ 90 20.0 3 ~ 90 40.0 4 ~ 133 2.2 Absolute Tracker AT401 Distance [m] Check Procedure step-by-step Step Description 1. Setup the Absolute Tracker system according the setup sketch shown above. 2. Ensure the Absolute Tracker system is warmed up and acclimatized to the environment. 3. Navigate to the main page and select the reflector to use for the check. 4. Select the compensation to use for the check. 5. Select the measurement time to use. 6. Icon A measurement time of 2000 ms is recommended for checks. Initialize (F3) the system. Ensure a reflector is in the field of view when starting the initialization process. A message is displayed during the initialization process. Check 7. Start the Two Face Check wizard 8. Move the reflector to the first point to measure. The DRO window and the sketch provide guidance to find the correct position. 9. Press the Measure (F2) button. 10. Repeat steps 8. & 9. for all other positions. Additional points can be added optionally. 11. Optionally analyze measurement details in the Measurements table, delete or repeat measurements accordingly. 12. Navigate to the Report page when all measurements are taken. 13. The Two Face Check is marked as "Passed" or "Failed" depending on the measurement results. Click on the Show Report icon to view detailed results of the Two Face Check. Absolute Tracker AT401 83 Step Description 14. Icon Finish the Two Face Check process. The PDF Report will be generated. A message is displayed during this process. 84 Absolute Tracker AT401 Check Measurements table All measurements taken are listed in the Measurements table on the bottom half of the screen. The following actions can be taken: Icon Description Click on the point ID to open a pop-up window showing details about the selected measurement record. Click on the trash bin icon to delete a single measurement record. Move the mouse over indiviual measurement values to display a tooltip with the measurement value and tolerance used where applicable. Result The Report page summarizes the results of the Two Face Check. Symbol Description The Two Face Check is passed within tolerance. The Two Face Check failed, tolerance has been exceeded. In case a Two Face check fails it is recommended to perform an Angle Compensation. Refer to “Angle Compensation” on page 104 for details on the Angle Compensation. Check Absolute Tracker AT401 85 Report The Report shows detailed information about Two Face Check. The following actions can be taken: Icon Description Save the Report as PDF file. This button can be used to save a copy of the PDF Report in a personal folder. Print the Report. Use the Back button to navigate back to the measurements page. Click on the Finish button to generate the PDF report and finish the Two Face Check process. Click on the Cancel button to cancel the wizard and delete all measurements. 86 Cancelling the process deletes all measured data! Absolute Tracker AT401 Check Category Detail Information Information • Configuration Passed / Failed • Name • Comment • User (Windows User Login & Tracker Pilot Login) • Tracker (click on the link for further details) • IP Address • Tracker Type • Absolute Tracker AT401 Serial Number • AT Controller 400 Server Version • Active Compensation (click on the link to display the active compensation parameters) • Active Reflector (click on the link to display the details of the active reflector) • Inclination Sensor state • Measurement Time • Accuracy Level • Temperature • Pressure • Humidity Results • MPE (Maximum Permissible Error) Used in [%] Measurements • Sketch Side View • Sketch Top View • Measurement Details Table T PDF report The generated PDF report is saved in the following location on the application computer: Within the Report page of the Tracker Pilot tooltips are still displayed in sketch view and measurement details can be viewed as well. Use the Back button to navigate back to the measurements page, i.e. to delete measurements or take additional measurements. When returning to the Report page, the report will be updated dynamically. Operating System Directory Check Windows XP C:\Documents and Settings\[Local User]\Application Data\Tracker Pilot\Reports Windows Vista C:\Users\[Local User]\AppData\Roaming\Tracker Pilot\Reports Windows 7 C:\Users\[Local User]\AppData\Roaming\Tracker Pilot\Reports Absolute Tracker AT401 87 Refer to “Viewing PDF Reports” on page 50 for details on viewing saved Check reports. 5.1.2 ADM Check General The ADM check routine verifies the zero point offset of the ADM in relation to the origin of the Tracker coordinate system by measuring two fixed points from two different Tracker stations. Large ambient temperature changes may result in significant ADM check deviations. Check procedure ADM check measurements consist of the following 2-step process: 1. Measurement of two fixed points, at the height of tilting axis of the Absolute Tracker AT401 from the middle of the two points. 2. Measurement of the same two fixed points, at the height of tilting axis of the Absolute Tracker AT401 from the outside of the two points. Recommended setup The recommended setup for the Two Face check is shown below: 1. Station 1: ADM - Measurements In 2. Station 2: ADM - Measurements Out 88 Point ID Vertical Angle [deg] Distance [m] 1 (In) ~ 90 2.0 2 (In) ~ 90 2.0 Absolute Tracker AT401 Check Check Point ID Vertical Angle [deg] Distance [m] 1 (Out) ~ 90 2.0 2 (Out) ~ 90 6.0 Required alignment Tolerance Horizontal ± 3° Vertical ± 3° Absolute Tracker AT401 89 Procedure step-by-step Step Description 1. Setup the Absolute Tracker system on Station 1: ADM - Measurements In according the setup sketch shown above. 2. Ensure the Absolute Tracker system is warmed up and acclimatized to the environment. 3. Navigate to the main page and select the reflector to use for the check. A corner cube type (RRR, CCR or BRR) reflector is required for the ADM Check. 4. Select the compensation to use for the check. 5. Select the measurement time to use. 6. Icon A measurement time of 2000 ms is recommended for checks. Initialize (F3) the system. Ensure a reflector is in the field of view when starting the initialization process. A message is displayed during the initialization process. 90 7. Start the ADM Check wizard. 8. Move the reflector to Point 1 (In). The DRO window and the sketch provide guidance to find the correct position. 9. Press the Measure (F2) button to measure Point 1 (In). 10. Repeat steps 8. & 9. for Point 2 (In). 11. Optionally analyze measurement details in the Measurements table, delete or repeat measurements accordingly. 12. Move the Absolute Tracker AT401 to Station 2: ADM - Measurements Out, the reflector remains on the same point. 13. Navigate to the ADM - Measurements Out page. Absolute Tracker AT401 Check Step Description 14. Icon Point the laser beam to the vicinity of Point 1 (Out) and click on Find Reflector (F6). A message is displayed during the find process. 15. Press the Measure (F2) button to measure Point 1 (Out). 16. Move the reflector to Point 2 (Out). The DRO window and the sketch provide guidance to find the correct position. 17. Press the Measure (F2) button to measure Point 2 (Out). 18. Optionally analyze measurement details in the Measurements table, delete or repeat measurements accordingly. 19. Navigate to the Report page when all measurements are taken. 20. The ADM Check is marked as "Passed" or "Failed" depending on the measurement results. Click on the Show Report icon to view detailed results of the Two Face Check. 21. Finish the ADM Check process. The PDF Report will be generated. A message is displayed during this process. Measurements table Check All measurements taken are listed in the Measurements table on the bottom half of the screen. Absolute Tracker AT401 91 1. Station 1: ADM - Measurements In 2. Station 2: ADM - Measurements Out The following actions can be taken: Icon Description Click on the point ID to open a pop-up window showing details about the selected measurement record. Click on the trash bin icon to delete a single measurement record. Move the mouse over indiviual measurement values to display a tooltip with the measurement value and tolerance used where applicable. Navigate back to Station 1 to optionally analyze measurement details in the Measurements table. Navigate forward to Station 2 to optionally analyze measurement details in the Measurements table. Result The Report page summarizes the results of the ADM Check. Symbol Description The ADM Check is passed within tolerance. The ADM Check failed, tolerance has been exceeded or measurement setup is insufficient. In case the ADM Check fails it is recommended to repeat the check once. If the ADM Check fails again, an ADM Compensation is recommended. Refer to “ADM Compensation” on page 111 for details on the ADM Compensation. 92 Absolute Tracker AT401 Check Report Check The Report shows detailed information about the ADM Check. Absolute Tracker AT401 93 The following actions can be taken: Icon Description Save the Report as PDF file. This button can be used to save a copy of the PDF Report in a personal folder. Print the Report. Use the Back button to navigate back to the measurements page. Click on the Finish button to generate the PDF report and finish the Two Face Check process. Click on the Cancel button to cancel the wizard and delete all measurements. Category Detail Information Information • Configuration 94 Cancelling the process deletes all measured data! Passed / Failed • Name • Comment • User (Windows User Login & Tracker Pilot Login) • Tracker (click on the link for further details) • IP Address • Tracker Type • Absolute Tracker AT401 Serial Number • AT Controller 400 Server Version • Active Compensation (click on the link to display the active compensation parameters) • Active Reflector (click on the link to display the details of the active reflector) • Inclination Sensor state • Measurement Time • Accuracy Level • Temperature • Pressure • Humidity Results • MPE (Maximum Permissible Error) Used in [%] Measurements • Sketch Side View • Sketch Top View • Measurement Details Table T Within the Report page of the Tracker Pilot tooltips are still displayed in sketch view and measurement details can be viewed as well. Absolute Tracker AT401 Check PDF report Use the Back button to navigate back to the measurements page, i.e. to delete measurements or take additional measurements on Station 2. In case measurements from Station 1 have to be remeasured, the whole station has to be repeated. When returning to the Report page, the report will be updated dynamically. The generated PDF report is saved in the following location on the application computer: Operating System Directory Windows XP C:\Documents and Settings\[Local User]\Application Data\Tracker Pilot\Reports Windows Vista C:\Users\[Local User]\AppData\Roaming\Tracker Pilot\Reports Windows 7 C:\Users\[Local User]\AppData\Roaming\Tracker Pilot\Reports Refer to “Viewing PDF Reports” on page 50 for details on viewing saved Check reports. Check Absolute Tracker AT401 95 6 Compensation General Leica Geosystems products are manufactured, assembled and adjusted to the best possible quality. Quick temperature changes, frequent movement of the product, shock or stress can cause deviations an decrease of the measurement accuracy. It is therefore recommended to check the product in regular intervals. This can be done onsite by running through specific check or compensation measurements. If checks do not provide satisfying results repeatedly, a compensation of the product is recommended. Measurement precision To achieve precise measurement results in the daily work, it is important to check and adjust the product from time to time. During the manufacturing process the product parameters are carefully determined. As mentioned above, the values can change an it is highly recommended to check or adjust the product in the following situations: • Before the first use of the product • Before taking high precision measurements • After long transportations • After long working periods • After long storage periods • In a high or low temperature environment Before starting to work the product has to become warmed up and acclimatized to the ambient temperature, especially if the product has been stored under different temperature conditions. Ensure sufficient acclimatization to the environment before taking precision measurements. To achieve the highest possible accuracy level a warm up time of two hours is strongly recommended before starting a compensation or a high precision measurement job. The systems needs to be initialized before a compensation wizard can be started. A compensation can only be performed in Indoor mode. Refer to “In-/Outdoor Mode” on page 40 for details on In-/Outdoor mode. Space requirement The required room space for the compensation of the Absolute Tracker AT401 is 2 x 16 meter. Minimum room height is 2 meter. Best practice To achieve the highest possible accuracy, the following steps are recommended: 96 • Set up the Absolute Tracker on a stable ground and level it accurately. • Environmental parameters should remain constant during the compensation. • The Absolute Tracker should be warmed up for 2 hours before starting the compensation. A pop-up message will be displayed once the system is warmed up. • A Leica RRR 1.5’’ reflector should be used for compensations. Absolute Tracker AT401 Compensation • The reflector should be clean and undamaged. • The ideal reflector position for the initialization should be at 10 m from the sensor. 6.1 Compensation Wizards General The following compensation wizards can be selected: Compensation Wizard User Level Standard Angle Compensation ADM Compensation Compensation records Advanced A maximum number of 25 compensation records can be stored on the Absolute Tracker AT401. In case the maximum number of compensations has been reached, a warning message will appear. Refer to “Export of Compensations & Reflectors” on page 133 for details on exporting compensations to an application computer. Refer to “Import of Compensations & Reflectors” on page 135 on details on deleting compensations from the Absolute Tracker AT401. Process All compensation wizards consist of a 2-step process: • Measurement process • Report process Therefore all compensation wizard pages share the same layout. On the first page of the wizard all measurements are taken, where on the second page the measurement results can be analyzed and printed or archived as required. Sketches Compensation Dynamic sketches will guide the user through the compensation process. The sketches contain a top view and a side view to the measurement scene guiding the user to the required position. The current position of the locked reflector and the target positions for the measurement be will be updated dynamically through the whole measurement process. The current beam direction is represented by a colored line which reflects the current state shown in the DRO window. Absolute Tracker AT401 97 a) b) c) d) e) f) 98 Top view of measurement setup Side view of measurement setup Nominal position Scale Instrument position Measured position Absolute Tracker AT401 Compensation Tool tips Dynamic tool tips provide additional information on the required positions, compensation measurements and accuracy information related to the measurements. Tool Tip Description Nominal Position: • Point ID • Required Horizontal Angle • Required Vertical Angle • Required Distance Measured Position: • Point ID Data Read Out (DRO) window • Measured Horizontal Angle • Measured Vertical Angle • Measured Distance • Standard Deviation for each component (a posteriori) • Accuracy (a priori) • Temperature • Pressure • Humidity A Data Read Out (DRO) window provides numerical information about the current approximate position and the deviation to the target position. Position deviations over the tolerance will be flagged with red background color. The Data Read Out (DRO) window shows the following status information: DRO Status Description Not ready (no reflector locked or not ready to measure). Move the mouse over the Measurement button to display a tool tip providing information about the current state. Ready (reflector locked and ready to measure.) Compensation Absolute Tracker AT401 99 DRO Status Description Measurement in progress. Individual tolerance exceeded. DRO Display modes The Data Read Out (DRO) offers two different modes in compensation wizards to display the current reflector position: Display Mode Description Displays the absolute values of • Horizontal Angle (H) • Vertical Angle (V) • Distance (D) of the current reflector position in the sensor coordinate system. Displays the relative values of • Horizontal Angle Delta (H) • Vertical Angle Delta (V) • Distance Delta (D) of the current reflector position in relation to the next point to measure. Click on to toggle between the DRO display modes. The following symbols provide a graphical guidance in Delta HVD to find the nominal position: 100 Absolute Tracker AT401 Compensation Symbol Description Move the reflector up. Move the reflector down. Move the reflector towards the Absolute Tracker AT401. Move the reflector away from the Absolute Tracker AT401. Move the reflector clockwise with reference to the sensor unit position (for ADM Compensation only). Move the reflector counter-clockwise with reference to the sensor unit position (for ADM Compensation only). Navigation Compensation The following controls are available in all compensation wizards: Absolute Tracker AT401 101 Icon Description Find Reflector (F6) Find Reflector with OVC (F11) Measure (F2) Toggle DRO to Delta HVD display Toggle DRO to HVD display Toggle between full sketch view, full DRO view and shared view (F12) Navigate to next wizard page (F9). Navigate to previous wizard page (F10). Finish wizard Cancel the process and discard all measurements Delete a single measurement View measurement details Settings The following controls are available in all compensation wizards to display settings or measurement parameters. The settings cannot be changed inside the compensation wizard: Icon Description Displays the inclination sensor state. Refer to “Inclination” on page 41 for details on the inclination sensor. Displays the In-/Outdoor mode. Compensations can only be done in Indoor mode. Refer to “In-/Outdoor Mode” on page 40 for details on the In-/Outdoor mode. Displays the source and actual values of the environmental parameters. Refer to “Meteo Monitor” on page 42 for details on the meteo parameters. 102 Absolute Tracker AT401 Compensation Icon Description Displays the active reflector. Refer to “Reflectors” on page 27 for details on reflectors. Displays the active compensation. Refer to “Compensations” on page 32 for details on compensations. Displays the selected measurement time. The result is an average of the measurements taken during the selected time. Default measurement time is 5000 ms. A measurement time of 5000 ms is recommended for compensation measurements. Selection A minimum measurement time of 2000 ms is required for compensations. In case a measurement time of < 2000 ms is entered, the measurement time will be changed to 5000 ms when a compensation wizard is started. To start a compensation navigate to the Compensations page and select the required compensation wizard. Step Description 1. Navigate to the Compensations page. 2. Select the required compensation wizard. Icon Refer to “Procedure step-by-step” on page 106 for details on the Angle Compensation. Refer to “Procedure step-by-step” on page 113 for details on the ADM Compensation. Compensation Absolute Tracker AT401 103 6.1.1 Inclination Sensor General The Absolute Tracker AT401 can either be compensated with enabled or disabled inclination sensor. The actual state of the inclination sensor will be associated with the compensation record. Inclination sensor state Inclination Sensor Compensation Record marked Enabled (full corrections) Inclination Sensor: On Disabled (no corrections) Inclination Sensor: Off The state of the inclination sensor will be changed when a compensation record is activated according to the inclination sensor state retained in the compensation record. Independently from the inclination sensor state marked in the compensation record the actual setting of the inclination sensor can manually be overwritten, i.e. the inclination can be set to disabled when using a compensation record marked with inclination sensor on. Refer to “Inclination” on page 41 for further details on setting the inclination sensor state. 6.1.2 Angle Compensation General The Angle Compensation routine verifies the system geometry (horizontal and vertical collimation). Large ambient temperature changes may require to perform an Angle Compensation. Compensation procedure Angle Compensation measurements consist of the following 2-step process: 1. Measurement of two points at a steep angle at a given distance, ideally points at floor level. 2. Measurement of four points at a given distance, ideally on a line, at the height of tilting axis of the Absolute Tracker AT401. 104 Absolute Tracker AT401 Compensation Required setup Compensation The required setup for the Angle Compensation is shown below: Point ID Vertical Angle [deg] Distance [m] 1 ~ 134 2.2 2 ~ 122 2.9 3 ~ 110 4.5 4 ~ 90 2.2 5 ~ 90 2.9 6 ~ 90 4.5 The measurements should be taken in sequential order and close to the specified point locations. Absolute Tracker AT401 105 Procedure step-by-step Step Description 1. It is recommended to setup the Absolute Tracker AT401 at least 1300 mm height from the ground (tilting axis height). 2. Ensure the Absolute Tracker system is warmed up and acclimatized. 3. Navigate to the main page and select the reflector to use for the compensation. 4. Select the compensation to use for the compensation. 5. Select the measurement time to use. 6. Icon Setup the Absolute Tracker system according the setup sketch shown above. A measurement time of 5000 ms is recommended for compensations. Initialize (F3) the system. Ensure a reflector is in the field of view when starting the initialization process. A message is displayed during the initialization process. 7. Navigate to the Compensations page 8. Start the Angle Compensation. 9. Click on the Measure button to start the inclination index determination. The process returns the Inclination Index values after a successful measurement. 106 In case the inclination measurement fails due to unstable conditions, repeat step 6. 10. Navigate to the Angle - Measurements page. 11. Move the reflector to the first point to measure. The DRO window and the sketch provide guidance to find the correct position. 12. Press the Measure (F2) button. Absolute Tracker AT401 Compensation Step Description 13. Icon The Measure (F2) button only becomes available when the reflector is located at the required position, otherwise the button will remain grayed out. Repeat steps 11. & 12. for all other positions. Additional points can be added if required. The Angle Compensation is a guided process. The measurements have to be taken in sequential order. The DRO window guides to the next point in sequence. 14. Optionally analyze measurement details in the Measurements table, delete or repeat measurements accordingly. 15. Navigate to the Report page when all measurements are taken. 16. The Angle Compensation is marked as "Passed" or "Failed" depending on the measurement results. Click on the Show Report icon to view detailed results of the Angle Compensation. 17. Finish the Angle Compensation process. The compensation parameters will be stored on the system and the PDF Report will be generated. A message is displayed during this process. Measurements table All measurements taken are listed in the Measurements table on the bottom half of the screen. The following actions can be taken: Compensation Absolute Tracker AT401 107 Icon Description Click on the point ID to open a pop-up window showing details about the selected measurement record. Click on the trash bin icon to delete a single measurement record. During Angle Compensation only the actual last record in the list can be deleted! Move the mouse over indiviual measurement values to display a tool tip with the measurement value and tolerance used where applicable. Result The Report page summarizes the results of the Angle Compensation. Symbol Description The Angle Compensation is passed within tolerance. The Angle Compensation failed, tolerance has been exceeded or measurement setup insufficient. 108 Absolute Tracker AT401 Compensation Report The Report shows detailed information about the Angle Compensation. The following actions can be taken: Compensation Absolute Tracker AT401 109 Icon Description Save the Report as PDF file. This button can be used to save the PDF Report in a personal folder. In this case no copy of the report will be saved into the default location. Print the Report. Use the Back button to navigate back to the measurements page. Click on the Finish button to generate the PDF report and finish the Angle Compensation process. Click on the Cancel button to cancel the wizard and delete all measurements. Category Detail Information Information • Configuration 110 Cancelling the process deletes all measured data! Passed / Failed • Name • Comment • User (Windows User Login & Tracker Pilot Login) • Tracker (click on the link for further details) • IP Address • Tracker Type • Absolute Tracker AT401 Serial Number • AT Controller 400 Server Version • Active Compensation (click on the link to display the active compensation parameters) • Active Reflector (click on the link to display the details of the active reflector) • Inclination Sensor state • Measurement Time • Accuracy Level • Temperature • Pressure • Humidity Results • Tolerance Used in [%] Measurements • Sketch Side View • Sketch Top View • Measurement Details Table T Within the Report page of the Tracker Pilot tool tips are still displayed in sketch view and measurement details can be viewed as well. Absolute Tracker AT401 Compensation Use the Back button to navigate back to the measurements page, i.e. to delete measurements or take additional measurements. When returning to the Report page, the report will be updated dynamically. PDF report The generated PDF report is saved in the following default location on the application computer unless its saved into a personal folder manually: Operating System Directory Windows XP C:\Documents and Settings\[Local User]\Application Data\Tracker Pilot\Reports Windows Vista C:\Users\[Local User]\AppData\Roaming\Tracker Pilot\Reports Windows 7 C:\Users\[Local User]\AppData\Roaming\Tracker Pilot\Reports Refer to “Viewing PDF Reports” on page 50 for details on viewing saved Compensation reports. 6.1.3 ADM Compensation General The ADM Compensation routine verifies the zero point offset of the ADM in relation to the origin of the Tracker coordinate system. Large ambient temperature changes may require to perform an ADM Compensation. Compensation procedure ADM Compensation measurements consist of the following 2-step process: 1. Measurement of two fixed points, at the height of tilting axis of the Absolute Tracker AT401 from the middle of the two points. 2. Measurement of the same two fixed points, at the height of tilting axis of the Absolute Tracker AT401 from the outside of the two points. Compensation Absolute Tracker AT401 111 Recommended setup The recommended setup for the ADM Compensation is shown below: 1. Station 1: ADM - Measurements In 2. Station 2: ADM - Measurements Out Point ID Vertical Angle [deg] Distance [m] 1 (In) ~ 90 2.0 2 (In) ~ 90 2.0 1 (Out) ~ 90 2.0 2 (Out) ~ 90 6.0 Required alignment 112 Tolerance Horizontal ± 3° Vertical ± 3° Absolute Tracker AT401 Compensation Procedure step-by-step Step Description 1. Setup the Absolute Tracker system on Station 1: ADM - Measurements In according the setup sketch shown above. 2. Ensure the Absolute Tracker system is warmed up and acclimatized. 3. Navigate to the main page and select the reflector to use for the compensation. A corner cube type (RRR, CCR or BRR) reflector is required for the ADM Compensation. 4. Select the compensation to use for the compensation. 5. Select the measurement time to use. 6. Icon A measurement time of 2000 ms is recommended for compensations. Initialize (F3) the system Ensure a reflector is in the field of view when starting the initialization process. A message is displayed during the initialization process. Compensation 7. Navigate to the Compensations page 8. Start the ADM Compensation wizard 9. Move the reflector to Point 1 (In). The DRO window and the sketch provide guidance to find the correct position. 10. Press the Measure (F2) button to measure Point 1 (In). 11. Repeat steps 9. & 10. for Point 2 (In). 12. Optionally analyze measurement details in the Measurements table, delete or repeat measurements accordingly. 13. Move the Absolute Tracker AT401 to Station 2: ADM - Measurements Out, the reflector remains on the same point. 14. Navigate to the ADM - Measurements Out page. Absolute Tracker AT401 113 Step Description 15. Icon Point the laser beam to the vicinity of Point 1 (Out) and click on Find Reflector (F6). A message is displayed during the find process. 16. Press the Measure (F2) button to measure Point 1 (Out). 17. Move the reflector to Point 2 (Out). The DRO window and the sketch provide guidance to find the correct position. 18. Press the Measure (F2) button to measure Point 2 (Out). 19. Optionally analyze measurement details in the Measurements table, delete or repeat measurements accordingly. 20. Navigate to the Report page when all measurements are taken. 21. The ADM Compensation is marked as "Passed" or "Failed" depending on the measurement results. Click on the Show Report icon to view detailed results of the ADM Compensation. 22. Finish the ADM Compensation process. The compensation parameters will be stored on the system and the PDF Report will be generated. A message is displayed during this process. Measurements table 114 All measurements taken are listed in the Measurements table on the bottom half of the screen. Absolute Tracker AT401 Compensation 1. Station 1: ADM - Measurements In 2. Station 2: ADM - Measurements Out The following actions can be taken: Icon Description Click on the point ID to open a pop-up window showing details about the selected measurement record. Click on the trash bin icon to delete a single measurement record. Move the mouse over indiviual measurement values to display a tool tip with the measurement value and tolerance used where applicable. Navigate back to Station 1 to optionally analyze measurement details in the Measurements table. Navigate forward to Station 2 to optionally analyze measurement details in the Measurements table. Result The Report page summarizes the results of the ADM Compensation. Symbol Description The ADM Compensation is passed within tolerance. The ADM Compensation failed, tolerance has been exceeded or measurement setup is insufficient. Compensation Absolute Tracker AT401 115 Report 116 The Report shows detailed information about ADM Compensation. Absolute Tracker AT401 Compensation The following actions can be taken: Icon Description Save the Report as PDF file. This button can be used to save the PDF Report in a personal folder. In this case no copy of the report will be saved into the default location. Print the Report. Use the Back button to navigate back to the measurements page. Click on the Finish button to generate the PDF report and finish the ADM Compensation process. Click on the Cancel button to cancel the wizard and delete all measurements. Cancelling the process deletes all measured data! Category Detail Information Information • Configuration Passed / Failed • Name • Comment • User (Windows User Login & Tracker Pilot Login) • Tracker (click on the link for further details) • IP Address • Tracker Type • Absolute Tracker AT401 Serial Number • AT Controller 400 Server Version • Active Compensation (click on the link to display the active compensation parameters) • Active Reflector (click on the link to display the details of the active reflector) • Inclination Sensor state • Measurement Time • Accuracy Level • Temperature • Pressure • Humidity Results • MPE (Maximum Permissible Error) Used in [%] Measurements • Sketch Side View • Sketch Top View • Measurement Details Table T Compensation Absolute Tracker AT401 117 Within the Report page of the Tracker Pilot tool tips are still displayed in sketch view and measurement details can be viewed as well. Use the Back button to navigate back to the measurements page, i.e. to delete measurements or take additional measurements on Station 2. In case measurements from Station 1 have to be remeasured, the whole station has to be repeated. When returning to the Report page, the report will be updated dynamically. PDF report The generated PDF report is saved in the following default location on the application computer unless its saved into a personal folder manually: Operating System Directory Windows XP C:\Documents and Settings\[Local User]\Application Data\Tracker Pilot\Reports Windows Vista C:\Users\[Local User]\AppData\Roaming\Tracker Pilot\Reports Windows 7 C:\Users\[Local User]\AppData\Roaming\Tracker Pilot\Reports Refer to “Viewing PDF Reports” on page 50 for details on viewing saved Compensation reports. 6.1.4 ADM Offset Compensation for Custom Reflector General All glass prism reflectors cause a refraction of the laser beam in the glass body. This results in a lag of the path of the laser beam. The ADM Offset Compensation for Custom Reflectors routine verifies this additional path of the ADM beam. Compensation procedure ADM Offset Compensation measurements consist of the following 2-step process: 1. Measurement of two fixed points, at the height of tilting axis of the Absolute Tracker AT401 from the middle of the two points. 2. Measurement of the same two fixed points, at the height of tilting axis of the Absolute Tracker AT401 from the outside of the two points. 118 Absolute Tracker AT401 Compensation Recommended setup The recommended setup for the ADM Offset Compensation is shown below: 1. Station 1: ADM Offset Compensation - Measurements In 2. Station 2: ADM Offset Compensation - Measurements Out Compensation Point ID Vertical Angle [deg] Distance [m] 1 (In) ~ 90 2.0 2 (In) ~ 90 2.0 1 (Out) ~ 90 2.0 2 (Out) ~ 90 6.0 Required alignment Tolerance Horizontal ± 3° Vertical ± 3° Absolute Tracker AT401 119 Procedure step-by-step Step Description 1. Setup the Absolute Tracker system on Station 1: ADM Offset Compensation Measurements In according the setup sketch shown above. 2. Ensure the Absolute Tracker system is warmed up and acclimatized. 3. Select the compensation to use for the compensation. 4. Select the measurement time to use. 5. Icon A measurement time of 2000 ms is recommended for compensations. Initialize (F3) the system Ensure a reflector is in the field of view when starting the initialization process. A message is displayed during the initialization process. 120 6. Navigate to the Reflectors page. 7. Click on the button New Custom Reflector. 8. Enter a name for the Custom Reflector. 9. Enter an optional comment for the Custom Reflector. 10. Enter the radius of the Custom Reflector housing in the given units. 11. Click on the button Compensate to start the ADM Offset Compensation process. 12. Move the reflector to Point 1 (In). The DRO window and the sketch provide guidance to find the correct position. 13. Press the Measure (F2) button to measure Point 1 (In). 14. Repeat steps 9. & 10. for Point 2 (In). 15. Optionally analyze measurement details in the Measurements table, delete or repeat measurements accordingly. Absolute Tracker AT401 Compensation Step Description 16. Move the Absolute Tracker AT401 to Station 2: ADM Offset Compensation Measurements Out, the reflector remains on the same point. 17. Navigate to the ADM Offset Compensation - Measurements Out page. 18. Point the laser beam to the vicinity of Point 1 (Out) and click on Find Reflector (F6). Icon A message is displayed during the find process. 19. Press the Measure (F2) button to measure Point 1 (Out). 20. Move the reflector to Point 2 (Out). The DRO window and the sketch provide guidance to find the correct position. 21. Press the Measure (F2) button to measure Point 2 (Out). 22. Optionally analyze measurement details in the Measurements table, delete or repeat measurements accordingly. 23. Navigate to the Report page when all measurements are taken. 24. The ADM Offset Compensation is marked as "Passed" or "Failed" depending on the measurement results. Click on the Show Report icon to view detailed results of the ADM Compensation. 25. Finish the ADM Offset Compensation process. The compensation parameters will be stored on the system and the PDF Report will be generated. A message is displayed during this process. Measurements table Compensation All measurements taken are listed in the Measurements table on the bottom half of the screen. Absolute Tracker AT401 121 1. Station 1: ADM Offset Compensation - Measurements In 2. Station 2: ADM Offset Compensation - Measurements Out The following actions can be taken: Icon Description Click on the point ID to open a pop-up window showing details about the selected measurement record. Click on the trash bin icon to delete a single measurement record. Move the mouse over indiviual measurement values to display a tool tip with the measurement value and tolerance used where applicable. Navigate back to Station 1 to optionally analyze measurement details in the Measurements table. Navigate forward to Station 2 to optionally analyze measurement details in the Measurements table. Result The Report page summarizes the results of the ADM Offset Compensation. Symbol Description The ADM Compensation is passed within tolerance. The ADM Compensation failed, tolerance has been exceeded or measurement setup is insufficient. 122 Absolute Tracker AT401 Compensation Report Compensation The Report shows detailed information about ADM Offset Compensation. Absolute Tracker AT401 123 The following actions can be taken: Icon Description Save the Report as PDF file. This button can be used to save the PDF Report in a personal folder. In this case no copy of the report will be saved into the default location. Print the Report. Use the Back button to navigate back to the measurements page. Click on the Finish button to generate the PDF report and finish the ADM Compensation process. Click on the Cancel button to cancel the wizard and delete all measurements. 124 Cancelling the process deletes all measured data! Absolute Tracker AT401 Compensation Category Detail Information Information • Configuration Results Parameters Measurements Passed / Failed • Name • Comment • User (Windows User Login & Tracker Pilot Login) • Tracker (click on the link for further details) • IP Address • Tracker Type • Absolute Tracker AT401 Serial Number • AT Controller 400 Server Version • Active Compensation (click on the link to display the active compensation parameters) • Active Reflector (click on the link to display the details of the active reflector) • Inclination Sensor state • Measurement Time • Accuracy Level • Temperature • Pressure • Humidity • MPE (Maximum Permissible Error) Used in [%] • New ADM Reflector Offset • Active ADM Reflector Offset • Deviation • U(95) • Sketch Side View • Sketch Top View • Measurement Details Table T PDF report The generated PDF report is saved in the following default location on the application computer unless its saved into a personal folder manually: Within the Report page of the Tracker Pilot tool tips are still displayed in sketch view and measurement details can be viewed as well. Use the Back button to navigate back to the measurements page, i.e. to delete measurements or take additional measurements on Station 2. In case measurements from Station 1 have to be remeasured, the whole station has to be repeated. When returning to the Report page, the report will be updated dynamically. Operating System Directory Windows XP Compensation C:\Documents and Settings\[Local User]\Application Data\Tracker Pilot\Reports Absolute Tracker AT401 125 Operating System Directory Windows Vista C:\Users\[Local User]\AppData\Roaming\Tracker Pilot\Reports Windows 7 C:\Users\[Local User]\AppData\Roaming\Tracker Pilot\Reports Refer to “Viewing PDF Reports” on page 50 for details on viewing saved Compensation reports. 126 Absolute Tracker AT401 Compensation 7 Help General The Help section provides the following functionality: • System Maintenance functions • User Manual • Software version and copyright information 7.1 Support Center General The Support Center provides functionality to maintain the Absolute Tracker system. Modules The following modules can be selected: Support Center Module Create Support File Open Leica Support Website Update System Export Compensations & Reflectors Import Compensations & Reflectors Help Absolute Tracker AT401 User Level Standard Advanced 127 7.1.1 Create Support File General Creating Support File The Support File provides important information to Leica Geosystems support staff for troubleshooting. In case of doubt or problems with the Absolute Tracker system a Support File should be generated and sent to your Leica Geosystems representative. Whenever support from Leica Geosystems is required, please generate and send a Support File via e-mail to your local support representative. To create a Support File click on the icon: Support File Description The Support File generated contains the following information: • Actual state of the system File location • Error logs • Debug information The Support File will be stored in the following location: Operating System Directory Windows XP C:\Documents and Settings\[Local User]\Application Data\Tracker Pilot\Support Windows Vista C:\Users\[Local User]\AppData\Roaming\Tracker Pilot\Support Windows 7 C:\Users\[Local User]\AppData\Roaming\Tracker Pilot\Support Once the Support File has been saved a Windows Explorer will open up showing the content of the folder specified above. 128 Absolute Tracker AT401 Help 7.1.2 Open Leica Support Website General The Leica Geosystems Support Website provides information to find a contact person of your local Leica Geosystems representative. Contact person click on the following icon: Open Leica Support Website Description Find a contact person in your region for: • Sales Regional contacts • Support • Technical Service Clicking on the icon opens the following website in the default web browser of the application computer: Select the field of interest (Sales, Support or Technical Service), country and product line and click on the icon .The contact details of the responsible Leica Geosystems representative in your region will be displayed. Help Absolute Tracker AT401 129 7.1.3 Update System General Updates to the Absolute Tracker AT401 firmware, the AT Controller 400 software and the Tracker Pilot software are integrated into a single update file. This function is only available to user level Advanced. Update package The Absolute Tracker AT401 update package has the following file name: • Prerequisites AT400_Vx.x.xxxx.x.Update (x.x.xxxx.x representing the version number, i.e. AT400_V1.0.0142.0.Update) The following prerequisites need to be met for a system update of the Absolute Tracker system: • The Absolute Tracker system needs to be powered by mains. It is not possible to update the system running on battery power! • It is not possible to update the Absolute Tracker system over a WLAN connection. Windows UAC In case the Tracker Pilot has not been installed into the default location, administrator privileges may be required to update the Absolute Tracker system as the Update package may contain an update for the Tracker Pilot as well. Procedure Click on the following icon to start the system update: Update System Description Install an update package for the following system components: • Absolute Tracker AT401 • AT Controller 400 • Tracker Pilot The Tracker Pilot does not need to be updated separately. After updating the Absolute Tracker, the Tracker Pilot will update itself without user interaction. It is recommended only to install a single instance of the Tracker Pilot on the application computer. Clicking onto the Update System icon opens the following dialog: 130 Absolute Tracker AT401 Help Select the update package to install and click . Alternatively the Update file can just be dragged and dropped from a Windows Explorer anywhere onto the window of the Support Center. The following message is displayed while the Update Manager launches: Once the Update Manager has started up, the following screen will appear: To start the system update click on click on . Help . To cancel the update Depending on the system software components contained in the update package the update can take a significant amount of time (up to 2 hours). Once the update process is running, it must not be stopped! To avoid an unintended interruption, the Windows control to close the Tracker Pilot is disabled. Absolute Tracker AT401 131 The application computer needs to be connected to the AT Controller 400 during the entire update process, as the system parameters (compensations, reflectors and persistent system settings) will be backed up and restored during the update process. The system update will now start. A progress bar informs about the progress of the update and the remaining time. In case the Update package contains a new version of the Tracker Pilot itself, the software will shutdown for the update. The following message will be displayed while the Tracker Pilot is updated: Once the system update has finished the system prompts that the updates have been installed successfully. 132 Absolute Tracker AT401 Help Click on to shutdown the Tracker Pilot. Restart the application the application to re-connect to the Absolute Tracker. Refer to “Tracker Pilot Startup” on page 17 on details on launching the Tracker Pilot. Troubleshooting The following items should be checked in case the Tracker Pilot does not allow to update the system or an update fails: • 7.1.4 AT Controller 400 powered and booted up. • LAN connection between application computer and AT Controller 400 established. • Sensor cable connected to AT Controller 400 and Absolute Tracker AT401. Retry to start the update after checking these points. If the update keeps failing, generate a support file and send it to you local Leica Geosystems representative. Export of Compensations & Reflectors General File name & location Help AT Controller 400 connected to mains power. • The compensations and reflectors stored on the Absolute Tracker AT401 can be exported to an application computer for the following purposes: • Data backup of compensations and reflectors • Sharing common reflector definitions between different Absolute Tracker AT401 systems. This function is only available to user level Advanced. Exported compensations and reflectors are stored into two separate files: Absolute Tracker AT401 133 Item File Name Compensations AT401_xxxxxx_MMM-dd-yyyy_hh-mm-ss.Compensations • xxxxxx representing the 6-digit serial number of the Absolute Tracker AT401. • Reflectors MMM-dd-yyyy_hh-mm-ss representing the date and time of the export. AT401_xxxxxx_MMM-dd-yyyy_hh-mm-ss.Reflectors • xxxxxx representing the 6-digit serial number of the Absolute Tracker AT401. • MMM-dd-yyyy_hh-mm-ss representing the date and time of the export. The exported files will be stored in the following location: Operating System Directory Windows XP C:\Documents and Settings\[Local User]\Application Data\Tracker Pilot\Support Windows Vista C:\Users\[Local User]\AppData\Roaming\Tracker Pilot\Support Windows 7 C:\Users\[Local User]\AppData\Roaming\Tracker Pilot\Support Once the Support File has been saved a Windows Explorer will open up showing the content of the folder specified above. Procedure Click on the following icon to export compensations and reflectors: Export Compensations & Reflectors Description Export the following items to the application computer: • Compensations • Reflectors The following screen appears: 134 Absolute Tracker AT401 Help After the export has finished a Windows Explorer opens up displaying the exported files. 7.1.5 Import of Compensations & Reflectors General Prerequisites Help Previously exported compensations and reflectors can be imported into the Absolute Tracker AT401 again. This function is only available to Advanced user level. The amount of compensations and reflectors that can be stored on the Absolute Tracker AT401 is limited. Item Maximum number of records on Absolute Tracker AT401 Compensation 25 Reflectors 25 Compensation records can only be imported to the instrument where the records have been created originally. It is not possible to upload a compensation record to a different instrument. Absolute Tracker AT401 135 File name & location Standard reflector types can be shared between different Absolute Tracker AT401, i.e. to have common reflector definitions on all sensors. Custom reflector types with an individual ADM Offset compensation can only be imported to the instrument where the records have been created originally. It is not possible to upload a custom reflector to a different instrument. Previously exported compensations and reflectors are stored into two separate files: Item File Name Compensations AT401_xxxxxx_MMM-dd-yyyy_hh-mm-ss.Compensations • xxxxxx representing the 6-digit serial number of the Absolute Tracker AT401. • Reflectors MMM-dd-yyyy_hh-mm-ss representing the date and time of the export. AT401_xxxxxx_MMM-dd-yyyy_hh-mm-ss.Reflectors • xxxxxx representing the 6-digit serial number of the Absolute Tracker AT401. • MMM-dd-yyyy_hh-mm-ss representing the date and time of the export. The exported files are stored in the following location by default: Operating System Directory Windows XP C:\Documents and Settings\[Local User]\Application Data\Tracker Pilot\Support Windows Vista C:\Users\[Local User]\AppData\Roaming\Tracker Pilot\Support Windows 7 C:\Users\[Local User]\AppData\Roaming\Tracker Pilot\Support Compensations and reflectors can also be imported from different locations, i.e. personal folders or portable memory devices. Procedure Click on the followings icon to import compensations and reflectors: Import Compensations & Reflectors Description Import the following items from the application computer: • Compensations • Import Reflectors 136 Reflectors To import reflectors select the following: Absolute Tracker AT401 Help Select the desired item and click appears: . The following screen a) Trash bin b) Reflectors currently stored on the Absolute Tracker AT401 c) Reflectors contained in the import file The following actions can be taken: • Drag & drop a reflector from the import file (c) onto the Absolute Tracker AT401 (b) to mark this reflector to be imported to the sensor. • Drag & drop a reflector from the Absolute Tracker AT401 (b) onto the Trash bin to mark this reflector to be removed from the sensor. The Tracker Pilot does not allow to import a reflector with the same name as an existing reflector on the system. The screen shows a preview of the changes. Help Absolute Tracker AT401 137 The following controls are available: Icon Description Import selected reflectors to the Absolute Tracker AT401. Changes will only be applied when clicking on the button Import. Cancel and leave the import dialogue without committing any changes. Click on the button to apply the changes on the Absolute Tracker AT401. The following screens shows the progress of the import: The Tracker Pilot returns to the Support Center page after the import has finished. 138 Absolute Tracker AT401 Help Import Compensations To import compensations select the following: Select the desired item and click appears: . The following screen a) Trash bin b) Reflectors currently stored on the Absolute Tracker AT401 c) Reflectors contained in the import file The following actions can be taken: • Drag & drop a compensation from the import file (c) onto the AT401 AT401 (b) to mark this compensation to be imported to the sensor. • Drag & drop a compensation from the Absolute Tracker AT401 (b) onto the Trash bin to mark this compensation to be removed from the sensor. The Tracker Pilot does not allow to import a compensation with the same name as an existing compensation on the system. The screen shows a preview of the changes. Help Absolute Tracker AT401 139 The following controls are available: Icon Description Import selected reflectors to the Absolute Tracker AT401. Changes will only be applied when clicking on the button Import. Cancel and leave the import dialogue without committing any changes. Click on the button to apply the changes on the Absolute Tracker AT401. The following screens shows the progress of the import: The Tracker Pilot returns to the Support Center page after the import has finished. Troubleshooting 140 When the maximum number of compensations or reflectors is already stored on the Absolute Tracker AT401, no more further records can be marked for import. The import file area will be grayed out: Absolute Tracker AT401 Help The following warning message will be show in this case: Move one or more compensations or reflectors to the trash bin. Once a record has been dragged & dropped into the trash bin, additional records can be imported from the import file. In case the maximum number of compensations and reflectors is reached during import, the Tracker Pilot disables dragging & dropping additional records from the import file. The remaining capacity of compensations and reflectors can be seen on the status bar of the import dialog: a) Counter of remaining capacity of records on the Absolute Tracker AT401 Help Absolute Tracker AT401 141 8 Appendix 8.1 Abbreviations The following abbreviations may be found in this manual: 142 Term Description ADM Absolute Distance Meter AT Absolute Tracker ATC Absolute Tracker Controller ATR Automatic Target Recognition BRR Break Resistant Reflector CCR Corner Cube Reflector CD-ROM Compact Disk - Read Only Memory DHCP Dynamic Host Configuration Protocol DRO Data Read Out Window IP Internet Protocol IR Infrared LAN Local Area Network MB Megabytes MHz Megahertz OVC Overview Camera PDF Portable Document Format RFI Reflector for Fixed Installation RJ45 Registered Jack 45, standardized physical interface for connecting telecommunication equipment RRR Red Ring Reflector SSID Shared Set Identifier TBR Tooling Ball Reflector TCP/IP Transmission Control Protocol / Internet Protocol TPI Tracker Programming Interface U (95) Expanded Uncertainty (k=2) UAC Windows User Account Control WLAN Wireless Local Area Network PoE Power over Ethernet WEP Wired Equivalent Privacy WPA2 Wi-Fi Protected Access 2 PSK Pre-shared key Absolute Tracker AT401 Appendix 8.2 Regional Contact Addresses China Hexagon Metrology (Qingdao) Co., Ltd. 188 Zhuzhou Road 266101 Qingdao China P.R. China Phone +86 532 8870 2188 Fax +86 532 8870 3060 France Hexagon Metrology SAS Service Client Leica Immeuble Le Viking 32, Avenue La Baltique 91978 Courtaboeuf Cédex France Phone +33 01 69 29 12 00 Fax +33 01 69 29 00 32 Germany Hexagon Metrology GmbH Vertrieb Triebstrasse 14 80993 München Deutschland Tel. +49 89 14 98 10 -0 Fax +49 89 14 98 10 -33 Great Britain Hexagon Metrology Ltd. Davy Avenue Knowlhill Milton Keynes MK5 8LB Phone +44 1908 246 294 Fax +44 1908 200 637 Italy Hexagon Metrology SpA Via Bizzozzero, 118 20132 Cormano (MI) Phone +39 02 6154 111 Fax +39 02 6150 473 Spain Hexagon Metrology S.A. Parc Tecnològic del Vallès C/ Sabaters, 5 ES-08290 Cerdanyola del Vallès (Barcelona) Phone +34 93 594 69 20 Fax +34 93 594 69 21 Switzerland Leica Geosystems AG Metrology Division Moenchmattweg 5 CH-5035 Unterentfelden Phone +41 62 737 67 67 Fax +41 62 737 68 33 USA Hexagon Metrology Precision Center 7 Orchard Road, Suite 102 Lake Forest, CA 92630 Toll free +1 800 955 5200 Phone +1 949 916 4490 Fax +1 949 916 449 USA Hexagon Metrology Precision Center 9424 E 37th Street North Suite 220 Wichita, KS 67226 Toll free +1 866 756 6763 Phone +1 316 634 0856 Fax +1 316 634 0878 USA Hexagon Metrology Precision Center 2473 Belvo Road Miamisburg, OH 45342 Phone +1 937 353 1206 Fax +1 937 247 0426 Appendix Absolute Tracker AT401 143 Index A D Abbreviations .......................................... 142 Absolute Tracker ......................................... 6 AT Controller 400 ........................................ 6 AT401 ......................................................... 6 Available Documentation ............................. 3 Default Passwords ..................................... 18 Description of the system ............................ 6 C Check ........................................................ 75 ADM ..................................................... 88 Detail Report .................................. 86, 93 DRO ...................................................... 77 Modules ................................................ 75 Navigation ............................................ 79 PDF Report ..................................... 87, 95 Prerequisites ......................................... 75 Sketches ............................................... 76 Tool Tips ............................................... 77 Two Face .............................................. 82 Compensation ..................................... 32, 96 Activate .......................................... 34, 36 ADM Compensation ............................ 111 Angle Compensation ........................... 104 Delete .................................................. 36 Detail Report ...................... 109, 116, 123 DRO ...................................................... 99 Export ................................................. 133 Import ................................................ 135 Inclination Sensor ............................... 104 Modules ................................................ 97 PDF Report ......................... 111, 118, 125 Prerequisites ......................................... 96 Settings .............................................. 102 Sketches ............................................... 97 Tool Tips ............................................... 99 View ............................................... 34, 36 Configuration ............................................ 39 Firmware .............................................. 40 Inclination ............................................. 41 Meteo Monitor ...................................... 42 Network Settings .................................. 43 Passwords ............................................ 44 PowerLock ............................................ 45 Remote Control .................................... 46 Wake Up ............................................... 47 144 H Help ......................................................... 127 Create Support File ............................. 128 Support Center ................................... 127 I Initialization ............................................... 51 Installation Windows 7 ............................................ 11 Windows UAC .......................................... 8 Windows XP ............................................ 8 Introduction ................................................. 2 M Measurement Time .................................... 38 N Navigation Compensations ..................................... 32 DRO ...................................................... 22 Main Page ............................................. 22 Reflectors ............................................. 27 Status Bar ............................................. 24 Tracker Controls .................................... 23 Network Application Computer ............................ 56 DHCP .............................................. 59, 62 Point-to-Point (P2P) ........................ 58, 62 Troubleshooting .................................... 70 WLAN DHCP Connection ........................ 68 WLAN Point-to-Point Connection ........... 66 O Overview Camera ....................................... 52 P Power Source ............................................ 26 Prerequisites Application Computer .............................. 6 Operating System ................................... 6 R Reflectors .................................................. 27 Absolute Tracker AT401 Index Activate ................................................ 27 Create New Reflector ............................ 29 Custom Reflector .................................. 31 Delete .................................................. 29 Export ................................................. 133 Import ................................................ 135 View Details .................................... 28, 29 Regional Contact Addresses .................... 143 S Settings Accuracy Level ...................................... 48 Units ..................................................... 49 Shortcuts AT400 Remote Control ......................... 21 Keyboard .............................................. 21 System Overview ......................................... 6 T Tracker Pilot Access Levels ........................................ 16 Impediments ......................................... 54 Initialization .......................................... 51 Installation .............................................. 8 Windows XP ....................................... 8 Network Settings .................................. 63 Prerequisites ........................................... 6 Uninstall ............................................... 15 Update System ................................... 130 Warning & Error Messages .................... 54 Tracker Programming Interface .................... 3 U Update System Software .................................. 15 Tracker Pilot ......................................... 14 W Window User Account Control (UAC) ............ 7 WLAN DHCP .................................................... 68 Encryption ...................................... 66, 68 France Regulation ................................. 44 Static IP Address ................................... 66 Index Absolute Tracker AT401 145 Whether building the fastest car, the biggest plane, or the most precise tooling, you need exact measurements to improve quality and productivity. So when it has to be right, professionals trust Leica Geosystems Metrology to help collect, analyze, and present 3-dimensional (3D) data for industrial measurement. Leica Geosystems Metrology is best known for its broad array of control and industrial measurement products including laser trackers, Local Positioning Technology (LPT) based systems, hand-held scanners, 3D software and highprecision total stations. Those who use Leica Metrology products every day trust them for their dependability, the value they deliver, and the world-class service & support that‘s second to none. Precision, reliability and service from Leica Geosystems Metrology. When it has to be right. 778016 - V1.1.4en © 2010 Copyright Leica Geosystems AG, Unterentfelden, Switzerland. For more information, please contact [email protected] Leica Geosystems AG Metrology Products Moenchmattweg 5 CH-5035 Unterentfelden Switzerland Phone +41 62 737 67 67 [email protected] www.leica-geosystems.com/metrology