1
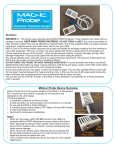
AL-MEISTER ALM3220
INSTRUCTION MANUAL
Thank you very much for purchasing the FUJIPLA ALM3220 Auto
Laminator. Please read through this manual carefully before operation.
Please keep this manual and refer to it whenever necessary.
Ver.1.1 [US]
AL-MEISTER ALM3220 Instruction Manual <Rev.2>
IMPORTANT
The following safety precautions must be observed for your safety during the operation of this
product. Please read the cautions and warnings carefully. Please keep this manual and refer to
it whenever necessary.
General Caution
Electric Shock
Indicates possible electric shocks under the specified conditions.
Tangling Warning Indicates possible injuries caused by tangling in a rotating
machine part.
Amputation Warning Indicates possible serious injuries such as finger
amputation.
Heat Warning Indicates possible injuries caused by extreme heat.
Don’t Do Indicates unspecified acts that are forbidden.
Unplug immediately Indicates a dangerous situation that needs you to unplug
the power immediately.
These two different words are used on the machine according to the level of danger.
WARNING In the case of incorrect use, there can be serious injury.
CAUTION Injury to the operator or damage to equipment possible. There can also
be a machine malfunction.
2
AL-MEISTER ALM3220 Instruction Manual <Rev.2>
INSTALLATION
To avoid fire, electric shock, or any danger, do not install the machine in a place like:
In direct sunshine or near an air
conditioner.
In an extremely humid/dry area.
In/near a heating appliance or extremely
hot area.
In an extremely cold area.
In an extremely dusty area.
On an uneven or shaky floor.
POWER SUPPLY/EARTH WIRE
1. Use appropriate power supply
Always connect to AC120V. Unstable voltage may cause electric shock, fire, or damage to the machine.
Always avoid using multiple outlet connections.
2. Pay attention to the amperage
Unless the amperage is enough, it may cause fire or malfunction. Do not share the electrical outlet with
other devices.
3. Connect earth wire
Ensure a ground connection is correctly made to avoid any danger or electrical problems.
4. Handle power cord with care
Do not set the machine on the power cord. Do not pull the power cord forcibly.
Do not place the machine near heated equipment.
Do not alter the power cord.
Damage to the power cord may cause fire, electric shock or damage to the machine.
3
AL-MEISTER ALM3220 Instruction Manual <Rev.2>
GENERAL CAUTIONS
Always follow these instructions for safe operation.
1. What to wear
In order to avoid any possible danger
•do not wear neck-ties or necklaces that are loose.
•do not wear loose clothes. If entangled, turn off the power or unplug immediately.
•Be careful that your hair does not get caught in the machine.
2. Operation
• Always close the covers.
• When you are in a closed room, ventilate well.
•Do not spill water on the machine or handle it with wet hands.
•Do not leave the machine during operation. The socket outlet should be installed near the equipment
and be easily accessible.
3. in an emergency
•If a malfunction occurs switch off and/or unplug immediately.
• Contact your dealer or Dry-Lam service department.
•Do not attempt to disassemble/repair /alter the machine yourself.
4. Others
In order to avoid serious personal injury or damage to the machine:
• Do not use the machine for any other purposes than what it was designed for.
• Do not put heavy items on the machine or subject it to physical abuse.
• Always unplug the machine before moving it.
•Remember that the laminated objects can be very hot.
•Machine may be damaged when incorrectly used.
• Do not drop metal items such as paper clips or staples inside the machine.
•Do not remove the covers from the machine or otherwise defeat the safety switches.
•Never alter or modify the machine.
•Do not remove caution labels from the machine.
•Always use our exclusive AL-ROLL lamination film.
4
AL-MEISTER ALM3220 Instruction Manual <Rev.2>
REQUIREMENTS OF PAPERS TO BE LAMINATED
Do not laminate:
•Money or valuable securities
•Paper with staples
•Flammable paper or material that is affected by heat such as vinyl chloride or polyethylene
•Documents that are unique and irreplaceable
•Paper thicker than 0.4mm including film thickness
•Paper that discolors and changes in quality with heat such as thermal papers and crayoned pictures
•Paper that contains a lot of moisture
•Items other than paper
•Paper that is curved or has creases
CLEANING
Be sure that the machine is unplugged.
Before cleaning the machine turn off the power and let the machine cool down.
Wipe off stains with a soft cloth. When stains are persistent use a firmly squeezed soft cloth soaked in a
small quantity of water or detergent. Wipe off the residue of detergent with a cloth soaked in water.
RECYCLING INFORATION
This is a serviceable electronic device which contains components which need to be replaced at the end
of their effective lives. You can help control emerging risks by disposing the electronic device and your
domestic waste separately. Electric and electronic devices are marked with a crossed out waste bin
indicating that these products should not be dumped together with domestic waste. If being dumped
together with domestic waste electric and electronic equipment there may be a severe impact on the
environment as well as human health due to the possibly of hazardous materials.
Fujipla provides, in accordance with the European WEEE directives an easy way to recycle waste of
electric and electronic equipment. Please dispose of your electric and electronic equipment waste by
using your local collection site for this type of waste. The disposal will be free for you. Fujipla then will
take care of the efficient recycling and treatment of electric and electronic waste together with the
management of the local collection site.
5
AL-MEISTER ALM3220 Instruction Manual <Rev.2>
1
2
2-1
2-2
2-3
2-4
2-5
3
3-1
3-2
3-3
3-4
3-5
4
5
5-1
5-2
5-2-1
5-2-2
5-2-3
5-2-4
5-2-5
5-2-6
5-2-7
5-3
5-4
5-5
5-6
6
7
CONTENTS
COMPONENTS
INCLUDED COMPONENTS
NAMES AND FUNCTIONS
EXTERIOR
INTERIOR
OPERATION PANEL
LCD DISPLAY
OTHER SWITCHES AND KEYS
INSTALLATION
INSTALL AL-MEISTER
INSTALL FEEDER TRAY
INSTALL EXIT TRAY
INSTALL WASTE COLLECTION BOX
CONNECT POWER CORD
SET LAMINATION FILM
OPERATION
WARM UP
SETTINGS
SET TEMPERATURE
SET SPEED
SET MARGIN
SET COUNTER
MARGIN SET
CUT ADJUST
TOTAL COUNT
SET PAPER
START OPERATION
ECO MODE
TERMINATE LAMINATION
TROUBLESHOOTING
SPECIFICATIONS
6
PAGE
7
8
9
10
11
12
13
13
13
14
14
15
22
23
23
24
25
27
29
30
30
31
32
33
33
34
37
AL-MEISTER ALM3220 Instruction Manual <Rev.2>
COMPONENTS
Please check all these components are included.
•
•
•
•
•
•
•
•
•
•
•
ALM-3220
Feeder Tray
Feeder Tray Extension
Exit Tray
Power Cord
Instruction Manual
Waste Collection Box
Stand
Stand Assembly Instructions
Tool for assembling Stand
Screws for assembling Stand
7
AL-MEISTER ALM3220 Instruction Manual <Rev.2>
2. NAMES AND FUNCTIONS
2-1. EXTERIOR
1
2
3
4
5
6
7
8
9
Stand
Stand Door
Waste Collection Box
Lower Tension Controller
Feed Adjustment Knob
Feeder Tray
Feeder Flex (Paper Pressure Lever)
Front Cover
Feeder Cover
8
10
11
12
13
14
15
16
17
Operation Lever
Upper Tension Controller
Roll Film Cover
Trimmer Cover
Operation Panel
Exit Tray
Power Switch
AC Inlet
AL-MEISTER ALM3220 Instruction Manual <Rev.2>
2. NAMES AND FUNCTION
2-2. INTERIOR
A
B
C
D
1
2
3
4
5
6
7
8
9
10
SECTIONS
Feeder Section
Lamination Section
Cutter Section
Trimmer Section
COMPONENTS
Feeder Tray Extension
Feeder Tray
Feeder Roller
Lower Film Roll
Stopper/Gate Roller
Heat Rollers
Upper Film Roll
Cutter Unit
Trimmer Unit
Exit Tray
For letter, double letter and digital paper size laminations
Tray for paper
Picks paper from feeder tray and aligns it at the Stopper/Gate Rollers
Feeds paper to lamination rollers
Laminates upper and lower films with heat and pressure
Cuts front and back of the film (leading and trailing edges)
Cuts sides of paper (operator and non-operator sides of the machine)
Tray for finished papers
9
AL-MEISTER ALM3220 Instruction Manual <Rev.2>
2. NAMES AND FUNCTION
2-3.OPERATION PANEL
START
Press to start operation
STOP
Press to stop operation.
RESET
Press to return to the operation mode and to reset the counter.
SCROLL (UP) Press to raise set value.
SCROLL (DOWN) Press to reduce set value.
MODE
Press to select MODE setting.
TEMP/SPEED Press to select temperature or speed setting. Press continuously
to see the current temperature.
POWER LAMP Indicates the power is on.
READY LAMP Indicates that the set temperature has been achieved.
ECO LAMP
Lights during the power saving mode.
ERROR LAMP Lights when an operation error occurs. To aid in servicing note
the error message that is generated on the LCD display.
LCD DISPLAY Shows status of the settings. See Chapter LCD DISPLAY.
10
AL-MEISTER ALM3220 Instruction Manual <Rev.2>
2. NAMES AND FUNCTION
2-4.LCD DISPLAY
WARM UP
Indicates the machine is being heated up.
Operation is not possible during this time.
1) Indicates the set temperature in Fahrenheit.
When the machine is heated up the buzzer beeps three times.
READY appears if machine is fully heated. If the machine has been properly threaded it is ready to be
run in automatic mode.
2) [TEMP] indicates the set temperature in Fahrenheit.
3) [SPEED] indicates the set speed in inches per minute.
4) [MARGIN] indicates that the trimming and cutting is with/without margin on the front and back
(leading and trailing edges) of the laminated paper. (A “margin” is a (sealed) edge of film around
the laminated paper.)
Example: MARGIN:
ON
••
A 0.12"laminated frame has been added to your CUT ADJUST setting
OFF
••
No laminated frame has been added to your CUT ADJUST setting.
5) [SET COUNT] indicates number of the papers to be processed.
Example: SET COUNT:
MULTI
••
laminates all the paper in the feeder tray.
012/100
••
indicates the set number (100) and the number of processed sheets (12).
11
AL-MEISTER ALM3220 Instruction Manual <Rev.2>
2. NAMES AND FUNCTIONS
2-5.OTHER SWITCHES AND KEYS
Open the trimmer cover.
1) Manual MOVE Switch
Use to set/feed film or to take out paper when it is stuck
To feed forward, turn the switch to left.
To feed backward, turn the switch to right.
* Set the trimmer adjuster to Film Set position.
2) Manual CUT Switch
Use when setting film or cutting film which is stuck in the laminator. It only works
once.
*It does not work when a cutting error has occurred.
CAUTION: Manual Switch works on any setting. If film does not exit the discharge in less than 5 seconds
STOP! Film may be accumulating within the machine. If this is allowed to continue, damage to the
machine will occur.
*When you use the manual MOVE Switch, move enough film out the discharge to grab on to. Then CUT
the film by using the manual CUT Switch. Pull out the cut film/paper from the discharge.
*After the film waste has been pulled from the discharge the machine is ready to be run in automatic
mode. Do NOT run the MOVE switch again unless CUT is performed immediately afterward.
12
AL-MEISTER ALM3220 Instruction Manual <Rev.2>
3. INSTALLATION
3-1. INSTALL AL-MEISTER
Allow an area about 18”' around the machine for operation.
*Read the safety instructions about the installation carefully.
3-2.SET FEEDER TRAY
Attach the tray by holding the feeder tray downward.
* When you laminate materials in double letter and digital
paper sizes set the extension tray on the feeder tray as shown.
3-3.SET EXIT TRAY
Attach the exit tray firmly in the holes. Select upper or lower holes
according to the film thickness.
1
2
13
1.5mil - 3 mil film thickness
4mil -5 mil film thickness
AL-MEISTER ALM3220 Instruction Manual <Rev.2>
3. INSTALLATION
3-4.SET WASTE COLLECTION BOX
Open the door. Set the waste collection box to the right so that
there is no space between the box and the side.
3-5.CONNECT POWER CORD
Connect power cord to the machine firmly.
14
AL-MEISTER ALM3220 Instruction Manual <Rev.2>
4. SET LAMINATION FILM
1. Always use the exclusive lamination film for ALM3220. Always use a combined set of upper and lower
film together. Prior to loading film inspect the rolls for possible shipping damage.
Do not install damaged rolls of film on the ALM3220.
2. Open the cover at the trimmer. Adjust the levers to the FILM
SET position. Adjust both left and right levers. Do not close the
cover for the next step.
Always make sure that the levers are at the film
set position when threading. Otherwise, the
threading card will get caught on the trimmer
blades. Damage to the trimmer blades may occur.
3. Open the covers in the following order: Front Cover, Feeder
Cover and Film Cover. Feeder Cover can only be opened when
the front cover is open.
NOTE: Components on the inside of the machine get very hot.
Always be careful.
4. Loosen the two tension controllers, if necessary. Set the roll
of film in the upper mandrel holders. Either film roll may be
used in either upper or lower position. However, the black tape
on the film roll end should match up with the one on the
mandrel holder.
NOTE: If the film roll is incorrectly loaded adhesive may contact
the heat chambers or rollers and cause damage.
15
AL-MEISTER ALM3220 Instruction Manual <Rev.2>
4. SET LAMINATION FILM (cont’d)
5. For the lower film roll, place it back from the mandrel holders
in the feeder area.
6. Pull about 8-10” of the film off the roll and place it behind and
up around the lower rotating idler bar. Loosen the two tension
controllers, if necessary. Place the film roll in the lower mandrel
holders firmly. Lay the end of the film back on top of the film
roll.
NOTE: If the film roll is incorrectly loaded adhesive may contact
the heat chambers or rollers and cause damage.
7. Raise the Lamination Handle to the OPEN position to separate
the chambers and heat rollers.
8. Pull the upper film off the roll. Pull it down and over the upper rotating idler bar. Bring the end of the
film down until it just touches the lower film. This should overlap both chambers by a few inches.
Bring the lower sheet of film up and over the upper sheet of film. There should now be two sheets of
film crossing overlapping the heat chambers by about 8”
16
AL-MEISTER ALM3220 Instruction Manual <Rev.2>
4. SET LAMINATION FILM (cont’d)
9. Using an 11” long threading card,
push both sheets of film between
the chambers (and into the ‘nip’).
Holding the card level continue to
push both sheets of film all the way
through the machine. There should
only be 1” of threading card
exposed at the fronts of the
chambers at this time.
If the threading card will not pass a point about 4” into the machine it is likely being
stopped by the film guides on the Cutter Unit. The threading card MUST pass yet another
4”, or so, beyond that point before the lamination handle is lowered.
10. Do NOT lower the Lamination handle at this time.
11. Turn on the power switch, if not already on.
12. Push the Manual MOVE Switch towards the exit of the machine. The threading card and film should
start to move. If they do not move it may be necessary to push the threading card firmly at the
chambers to make it engage the rollers at the exit. In one or two seconds the threading card, along with
two sheets of film should exit the discharge.
If the card and film to do exit the machine within 5 seconds STOP! Film could be
accumulating within the machine. If this is allowed to continue damage to the machine
will occur!
17
AL-MEISTER ALM3220 Instruction Manual <Rev.2>
4. SET LAMINATION FILM (cont’d)
If the threading card and film do not emerge from the discharge within 5 seconds pull the threading
back out of the nip and repeat the threading process at step 6. If the machine is not threaded properly
damage will occur.
13. When the card/film combination emerges lower the
Lamination Handle.
14. Perform the remainder of this procedure with the machine
warmed up (READY light on). Before running paper in the
machine in automatic mode examine the lamination quality of
the film.
15. It is very important to look at the film as it exits the discharge. It should be well laminated (clear) and
free of wrinkles. If wrinkles are observed adjust the tension knobs slightly on the film rolls. If the film is
curled that could be an indication that the tension of one of the film rolls is tighter than the other. Film
must exit the machine flat. If there is curl in manual mode (using the manual MOVE switch) there may
be curl during automatic mode which will produce errors and possible damage to the machine.
16. Adjustment of tension controllers
There are four (4) tension controllers. Two for the
lower film roll and two for the upper film roll. The
purpose of the tension controllers is to apply
resistance or "drag" on the film rolls which makes
the film lay flat on the heat chambers and
thereby eliminates creases and bubbles in the
lamination. It is recommended that the right side
and left side controllers on each roll be adjusted
with the same amount of tension. The top pair of
controllers versus the bottom pair of controllers
may vary slightly only to eliminate "curl" in the
18
AL-MEISTER ALM3220 Instruction Manual <Rev.2>
4. SET LAMINATION FILM (cont’d)
laminated piece. If the laminated piece curls upward loosen the two upper controllers or tighten the two
bottom controllers. If the exiting laminated piece curls downward, do the opposite and make the lower
controllers looser than the upper controllers.
17. When the laminator has "warmed-up" and the READY light is on, use the manual MOVE switch to
run film out of the laminator until all of the bubbles, wrinkles and creases disappear from the lamination
and the film is laying flat on the heat shoes. If these lamination defects are not disappearing in a
reasonable amount of film footage (3 or 4 feet), slightly increase tension on the controllers (equally).
18. Test for film curl. If not already done, push the
manual MOVE switch forward until about one (1) foot
of film has exited the laminator. Then, using a pair of
scissors cut the laminated film at a point approximately
one (1) inch out from the laminator. Be sure to identify
the upper side of the film from the lower side of the
film.
19. Hold the film vertically about 2 inches from the
cut side. Look at the film from the side.
19
AL-MEISTER ALM3220 Instruction Manual <Rev.2>
4. SET LAMINATION FILM (cont’d)
•If the curl is less than 1/2'' from the vertical plane, there is no need to adjust.
•If the curl is more than 1/2" to the lower side, tighten the two upper tension controllers with half turn.
•If the curl is more than 1/2" to the upper side, loosen the two upper tension controllers with half turn.
Minimizing the curl may avoid problems as shown
below. If film is allowed to curl it will curl up or
down into interior areas of the machine. This will
results in errors and possible damage to the
machine.
The proper tension set with new film rolls will likely be too great as film rolls are reduced in size. This will
result in noise, poor performance and increased wear on the heat chambers. Also, as film rolls reduce in
diameter due to use, curling may begin. If so, re-adjusting the tension controllers may be necessary.
Other results of poor tension controller settings:
A) The corner of the laminated film is folded.
B) Lamination scrap comes out with laminated film.
20
AL-MEISTER ALM3220 Instruction Manual <Rev.2>
4. SET LAMINATION FILM (cont’d)
C) "LAMINATION ERROR" appears on the display.
In these cases remove the jammed film.
Follow the trouble shooting procedures of the instruction manual.
20. When film is properly overlapped, there are no
wrinkles or bubbles, and film exits without curl the
machine is properly setup and ready to be run in
automatic mode.
21. Set the Trimmer levers at their desired positions.
22. Close all the covers in the order of Film Cover, Feeder
Cover and Front Cover. The machine is ready for automatic
operation.
21
AL-MEISTER ALM3220 Instruction Manual <Rev.2>
5.OPERATION
5-1.WARM UP
Connect the power cord to the wall socket. Turn on
the power switch.
This display appears for 3 seconds.
WARM UP display appears on the screen.
The POWER lamp lights.
22
AL-MEISTER ALM3220 Instruction Manual <Rev.2>
5.OPERATION (cont’d)
5-2.SETTINGS
5-2-1. SET TEMPERATURE
Press TEMP./SPEED key once.
* The default is set at 210F.
Press UP or DOWN key to set temperature. Temperature can be set in 10F
increments. The temperature display blinks.
Press TEMP./SPEED key to confirm the temperature.
This table shows an example of temperature settings for different film and paper thicknesses. It pays to
experiment with different temperatures and speeds to achieve quality laminations.
Film thickness
1.5mil
3mil – 4mil
5mil
Copying paper
210F - 40"/min
220F - 40" /min
230F - 40"/min
23
Thicker paper
220F - 40" /min
230F - 40" /min
240F - 40" /min
AL-MEISTER ALM3220 Instruction Manual <Rev.2>
5.OPERATION (cont’d)
5-2-2.SET SPEED
Press TEMP./SPEED key twice on the READY screen.
* The default is set at 40"/min.
Press UP or DOWN key to set speed.
The speed can be set by 4"/min increments.
The speed display blinks. Press TEMP./SPEED key to confirm the speed.
Press TEMP./SPEED key again to return to the previous display.
24
AL-MEISTER ALM3220 Instruction Manual <Rev.2>
5.OPERATION (cont’d)
5-2-3.SET MARGIN
Open the trimmer cover.
Adjust both the left and right levers to set either
with or without margin.
The lever should be fixed in the appropriate groove
firmly.
Close the cover.
1) Without margin (without laminated frame)
2) With margin (with laminated frame)
3) Without margin (without laminated frame)
4) With margin (with laminated frame)
5) FILM setting position
*1 and 2) for letter size and double letter size
widths
*3 and 4) for digital paper size widths
NOTES:
• When setting film, always set the lever to 5 (Position of Film Set). Otherwise the threading card
used for film setting may cause damage to the trimmer blades and will not exit properly.
• When there is film remaining in the trimmer unit, you cannot change the setting.
25
AL-MEISTER ALM3220 Instruction Manual <Rev.2>
•
5.OPERATION (cont’d)
Lamination with laminated frame is shown
as MARGIN:ON.
Lamination without laminated frame is shown
as MARGIN:OFF.
26
AL-MEISTER ALM3220 Instruction Manual <Rev.2>
5.OPERATION (cont’d)
5-2-4.SET COUNTER
Press MODE key.
Move cursor by using UP or DOWN key.
Press MODE key to confirm.
[SET COUNT]
Set the number you want to laminate.
[MARGIN SET]
Make cuts either with, or without margin.
[CUT ADJUST]
Adjusts the cutting positions at the leading and trailing edges of the sheet.
[TOTAL COUNT]
Indicates the accumulated number of laminations.
27
AL-MEISTER ALM3220 Instruction Manual <Rev.2>
5.OPERATION (cont’d)
SET COUNTER (continued)
Select SET COUNT.
Press UP or DOWN key to enter numeric values. You can set up to 200 sheets.
Unspecified number of lamination is displayed as multi.
Press the MODE key one more time to confirm. The display returns to the
previous display.
28
AL-MEISTER ALM3220 Instruction Manual <Rev.2>
5.OPERATION (cont’d)
SET COUNTER (continued)
Example of setting 100 sheets:
In this example:
0: finished number/100: set value
Lamination errors do not affect counting
Example of setting multi:
When you select multi all the papers in the
feeder tray will be laminated.
* The default is set to multi.
5-2-5.MARGIN SET
Select MARGI N SET.
Press UP or DOWN key to turn MARGINS on or off.
Press MODE key to confirm.
29
AL-MEISTER ALM3220 Instruction Manual <Rev.2>
5.OPERATION (cont’d)
5-2-6.CUT ADJUST
This function adjusts the cutting positions at both the leading, and trailing edges of the paper.
Select Cut Adjustment from the Mode display.
*Attention: Please read and take note of the value
shown on the display before adjusting. Each unit
has its own value. The numbers seen are relative
only to this particular machine.
Press TEMP./SPEED key and move the cursor to F or B.
F: cutting position at the front end (leading edge)
B: cutting position at the back end (trailing edge)
Set value using the UP/Down buttons. Adjustment can be done between - 0.20"
and + 0.20".
Press MODE key or wait for 5 sec. to get back to the mode display.
5.2.7.TOTAL COUNT
Select TOTAL COUNT from MODE
display. The accumulated number of
laminations is shown. Counts up to
99999999 until counter is reset.
Press RESET key to return the counter to “0”.
30
AL-MEISTER ALM3220 Instruction Manual <Rev.2>
5.OPERATION (cont’d)
5-3.SET PAPER
Loosen knobs to adjust the paper guide (left)
according to paper size.
Press the edge of the feeder tray downward
Keep pressing it while loading paper.
Place paper in the feeder tray correctly.
* The picture shows how to set letter.
Release your hand from the tray. The spring action
will push the paper upwards towards the feeder
roller.
* If necessary, attach the extension tray for double
letter and digital paper sizes.
31
AL-MEISTER ALM3220 Instruction Manual <Rev.2>
5. OPERATION (cont’d)
5-4.START OPERATION
•Open Front Cover and make sure Operation Handle is down in the Laminate position.
Check the settings.
Make sure READY lamp is on.
Press START key. Operation starts.
Press STOP key during the operation to stop the lamination.
* Lamination will stop when the process is done.
FILM END
Our exclusive AL-Roll Film has a special feature that allows the end of the film roll to be detected. The
last 20" of each roll of film is colored in black. When this black “leader” passes the Cutter Sensor a
lamination error is displayed and operation stops immediately.
32
AL-MEISTER ALM3220 Instruction Manual <Rev.2>
5.-OPERATION (cont’d)
5-5.ECO MODE (Power Saving Mode)
ECO MODE enters when the machine is idle
or the operation panel is not touched for
more than 15 minutes.
* Buzzer will sound 1 minute before entering
ECO MODE. ECO MODE will be deactivated by
pressing any key.
1) Current temperature
2) ECO MODE temperature (130F)
5-6.TERMINATE LAMINATION
1. Make sure the lamination has finished.
2. Raise Lamination Handle to prevent damaging the heat rollers.
3. Turn off Power Switch. Disconnect the power plug.
4. Make sure that the fan stops and LCD display disappears.
33
AL-MEISTER ALM3220 Instruction Manual <Rev.2>
6. TROUBLESHOOTING
PROBLEM:
“CUTTING ERROR”
error or CUTTER DOES
NOT CUT WELL
“PAPER JAM” error
CHECK IF:
There are many reasons
for cutting errors. Some
reasons are not related
directly to the cutter
unit.
SOLUTION:
PAGE
Open the Trimmer cover (between the
Cutter and Trimmer modules). If loose film
is present pull it up over the cover. Close
the cover, (with the film exiting through
the cover) press RESET, then press the
manual CUT Switch. The loose film should
be cut. Pull it out through the Trimmer
cover. Be sure the guides under the
Trimmer Cover are set to ‘point’ the film
towards the exit of the machine.
If the error is not solved contact your
dealer or Dry-Lam service department.
Temperature set too
Lower the temperature of the ALM3220 to
high
the lowest setting that adhesion will allow.
More than 1 sheet of
Remove the paper. Bring Paper Pressure
paper is fed. Paper is
Lever down by one notch. Ruffle the
very thin.
papers well. Flatten the papers. Press
RESET key.
Paper is fed on the bias Remove paper. Widen paper guide a little.
direction.
Press RESET key.
The surface of feeding
Remove paper. Open feeder cover. Wipe
rollers is not clean.
residue from the feeder rollers with a soft
cloth. Press RESET key.
Are cuts being made
Go to MODE | CUT ADJUST. Make a note
through paper and film, of the settings for F: and B:. Increase the
rather than through film settings to cut through only film or
alone? If paper is
decrease the setting to hit paper directly
skewing within the film from the side.
the cutter may not be
hitting the side of the
paper straight on.
Damage to the Cutter
Turn off the power. Contact your dealer or
Unit.
Dry-Lam service department. Do not
dismantle.
Paper is stuck between Open Feeder Cover. Remove all stuck
feeding section and
paper. For more solutions look at
lamination sections.
“FEEDING ERROR”, above. Press RESET key.
CAUTION: Lamination section may be hot
34
AL-MEISTER ALM3220 Instruction Manual <Rev.2>
“LAMINATION ERROR”
error
Paper is stuck in
lamination section
cutter section or
trimmer section.
Lamination scrap is
stuck in the trimmer
section.
Lamination lever is in
the OPEN position.
Roll film has run out.
“PAPER STUCK” error
“COVER OPEN” error
Paper is stuck in
lamination section
cutter section or
trimmer section.
Lamination scrap is
stuck in Trimmer
section.
PAPER STUCK errors are
also the result of
feeder, cutter or
discharge sensors
sending messages to
system control at the
wrong time. The most
common source is from
the Cutter Sensor.
Either the Feeder or
Trimmer covers are
open.
Open Feeder and Trimmer covers. Remove
any the stuck paper by using Manual Feed
Switch. Cut the film with the manual CUT
switch. Pull out any paper/film. Press
RESET key. CAUTION: Chambers are HOT.
Be careful that your fingers or clothes do
not get caught in the rollers. When using
the Manual MOVE Switch set the trimmer
adjustment levers to POSITION OF FILM
SET. Be careful that your fingers do not get
cut.
Open Trimmer Cover. Remove all the
lamination scrap. Press RESET key. Be
careful that your fingers do not get cut.
Lamination scrap might not go straight
down to the waste collection box. Turn
the switch off remove all the scraps and
prohibited from touching the cutter unit
during removing them.
Open Front Cover. Raise Lamination Lever
to OPEN position. Press RESET key.
Remove the empty film rolls. Press RESET
key. Load new film rolls. CAUTION: Heat
Chambers may be HOT.
Open Feeder and Trimmer Covers. Remove
all the papers and laminated paper that
are stuck inside. Press RESET key.
Open trimmer cover. Remove all the
lamination scraps. Press RESET key.
CAUTION: Be careful that your fingers do
not get cut.
If you have cleared all paper/film from the
paper path and the error remains contact
your dealer or Dry-Lam service
department.
Close the cover(s). Press RESET key.
35
AL-MEISTER ALM3220 Instruction Manual <Rev.2>
“OVERHEAT” error
“TEMP. SENSOR
BREAK” error
“TEMP. SENSOR
SHORT” error
“LAMINATION MOTOR
ERROR” error
TRIMMER DOES NOT
CUT WELL
Lamination scrap is
stuck in trimmer
section.
LEFT AND RIGHT
MARGINS ARE NOT
EQUAL
Paper not centered
within the film area
Check if the trimmer
adjustment levers are
correctly set.
Check if the paper is fed
correctly.
Turn off the power. Then turn on the
power. The problem will be solved in most
cases. If the problem is not solved contact
your dealer or Dry-Lam service
department.
Turn off the power. Contact your dealer or
Dry-Lam service department. Do not
dismantle.
Turn off the power. Contact your dealer or
Dry-Lam service department. Do not
dismantle.
Turn off the power. Then turn on the
power. The problem will be solved in most
cases. If the problem is not solved or
happens frequently contact your dealer or
Dry-Lam service department. Do not
dismantle the machine.
Open Trimmer Cover. Remove all the
lamination scrap. CAUTION: Be careful that
your fingers do not get cut. Lamination
scrap might not go straight down to the
waste collection box. Turn the switch off.
Remove all the scraps.
Contact your dealer or Dry-Lam service
department. Do not dismantle.
Set Trimmer levers to Position Of Film Set.
Push the START button and laminate one
sheet of paper. Look at how the paper is
centered within the film area. If it is not
centered adjust the paper tray adjustment
screw (or the paper tray guides) to center
the paper within the film area. Set
Trimmer levers as desired and run again.
Adjust the trimmer adjustment levers. It
may be necessary to set the levers at
positions that do not have slots. You may
set the levers at any position desired, then
secure with magnets.
If paper is skewing within the film area
adjust the Paper Pressure adjustment
lever.
36
AL-MEISTER ALM3220 Instruction Manual <Rev.2>
CREASES APPEAR IN
THE LAMINATED FILM
Tension knobs too
loose.
Tighten the tension controllers slightly on
each side of the film rolls. Do not apply any
more tension than necessary.
SPECIFICATIONS:
Model
Maximum Laminating Paper
Width
Maximum Laminating
Thickness
Film Thickness
Paper Thickness
Laminating Speed
Temperature
Warm-up Time
Power Source
Power Consumption
Dimensions (W x L x H)
Weight
Feeder capacity
Exit Tray capacity
Finished Size (W x D)
Remarks
Attachments
AL-MEISTER(ALM3220)
12.24"
16mil (including film thickness)
1.5 – 5mil Exclusive AL-Roll Film
3-10mil
20" - 48"/min
170F- 270F
Approx. 5 min.
AC 120V 60 Hz
900W
51.0" (W) X 22.0" (D) X 43.3" (H) with Stand, Feeder Tray, Feeder Tray
Extension and Exit Tray installed.
Laminator : 110 LBS -- Stand : 48.5 LBS
200 pages (copying paper)
200 pages (copying paper laminated with 4mil film)
Letter w/margin: 8.74" X 11.24" -- w/o margin: 8.38" X 10.88"
Double Letter w/margin: 11.24" X 17.24" -- w/o margin:
10.88"
X 16.88"
Digital Paper w/margin: 12.24" X 18.24" -- w/o margin: 11.88" X
17.88"
*The finished size is accurate to within less than 20mil either way.
Within the range of 32F to 105F (68 +/- 40F recommended)/an altitude
below 6600'.
Box 1: Feeder Tray -- Extension Feeder Tray -- Exit Tray -- Power Cord -This manual -- Waste Collection Box
Box 2: Stand -- Stand Assembly Instructions -- Tool and screws for
assembling Stand.
*Corners are cut square.
*Warm-up time may differ according to the environment.
37