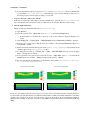
1
SPECFEM3D
User Manual
© California Institute of Technology (U.S.) and
University of Pau (France)
Version 1.4.3
February 14, 2008
Contents
1
Introduction
1.1 Citation . . . . . . . . . . . . . . . . . . . . . . . . . . . . . . . . . . . . . . . . . . . . . . . . . .
1.2 Support . . . . . . . . . . . . . . . . . . . . . . . . . . . . . . . . . . . . . . . . . . . . . . . . . .
2
2
2
2
Getting Started
3
3
Running the Mesher xmeshfem3D
3.1 Checking the MPI Buffers (Optional) . . . . . . . . . . . . . . . . . . . . . . . . . . . . . . . . . .
3.2 Checking the Mesh Quality (Optional) . . . . . . . . . . . . . . . . . . . . . . . . . . . . . . . . . .
5
8
8
4
Running the Solver xspecfem3D
10
5
Adjoint Simulations
5.1 Adjoint Simulations for Sources . . . . . . . . . . . . . . . . . . . . . . . . . . . . . . . . . . . . .
5.2 Adjoint Simulations for Finite-Frequency Kernels (Kernel Simulation) . . . . . . . . . . . . . . . . .
15
15
16
6
Graphics
6.1 Meshes . . . . . . . . .
6.2 Movies . . . . . . . . .
6.2.1 Movie Surface .
6.3 Finite-Frequency Kernels
.
.
.
.
18
18
18
18
19
7
Running through a Scheduler
7.1 run_lsf.bash . . . . . . . . . . . . . . . . . . . . . . . . . . . . . . . . . . . . . . . . . . . . .
7.2 go_mesher_solver_lsf.bash . . . . . . . . . . . . . . . . . . . . . . . . . . . . . . . . . .
21
21
22
8
Post-Processing Scripts
8.1 Collect Synthetic Seismograms . . . . . . . . .
8.2 Clean Local Database . . . . . . . . . . . . . .
8.3 Process Data and Synthetics . . . . . . . . . .
8.3.1 process_trinet_data.pl . . . .
8.3.2 process_trinet_syn.pl . . . .
8.3.3 rotate.pl . . . . . . . . . . . . . .
8.4 Plot Movie Snapshots and Synthetic Shakemaps
8.4.1 movie2gif.pl . . . . . . . . . . . .
8.4.2 plot_shakemap.pl . . . . . . . .
8.5 Map Local Database . . . . . . . . . . . . . .
24
24
24
24
24
25
25
25
25
26
26
.
.
.
.
.
.
.
.
.
.
.
.
.
.
.
.
.
.
.
.
.
.
.
.
.
.
.
.
.
.
.
.
.
.
.
.
.
.
.
.
.
.
.
.
.
.
.
.
.
.
.
.
.
.
.
.
.
.
.
.
.
.
.
.
.
.
.
.
.
.
.
.
.
.
.
.
.
.
.
.
.
.
.
.
.
.
.
.
.
.
.
.
.
.
.
.
.
.
.
.
.
.
.
.
.
.
.
.
.
.
.
.
.
.
.
.
.
.
.
.
.
.
.
.
.
.
.
.
.
.
.
.
.
.
.
.
.
.
.
.
.
.
.
.
.
.
.
.
.
.
.
.
.
.
.
.
.
.
.
.
.
.
.
.
.
.
.
.
.
.
.
.
.
.
.
.
.
.
.
.
.
.
.
.
.
.
.
.
.
.
.
.
.
.
.
.
.
.
.
.
.
.
.
.
.
.
.
.
.
.
.
.
.
.
.
.
.
.
.
.
.
.
.
.
.
.
.
.
.
.
.
.
.
.
.
.
.
.
.
.
.
.
.
.
.
.
.
.
.
.
.
.
.
.
.
.
.
.
.
.
.
.
.
.
.
.
.
.
.
.
.
.
.
.
.
.
.
.
.
.
.
.
.
.
.
.
.
.
.
.
.
.
.
.
.
.
.
.
.
.
.
.
.
.
.
.
.
.
.
.
.
.
.
.
.
.
.
.
.
.
.
.
.
.
.
.
.
.
.
.
.
.
.
.
.
.
.
.
.
.
.
.
.
.
.
.
.
.
.
.
.
.
.
.
.
.
.
.
.
.
.
.
.
.
.
.
.
.
.
.
.
.
.
.
.
.
.
.
.
.
.
.
.
.
.
.
.
.
.
.
.
.
.
.
.
.
.
.
.
.
.
.
.
.
.
.
.
.
.
.
.
.
.
.
.
.
.
.
.
.
.
.
.
.
.
.
.
.
.
.
.
.
.
.
.
.
.
.
.
.
.
.
.
.
.
.
.
.
.
.
A Reference Frame Convention
32
B License
33
1
Chapter 1
Introduction
The software package SPECFEM3D simulates southern California seismic wave propagation based upon the spectralelement method (SEM). Effects due to lateral variations in compressional-wave speed, shear-wave speed, density,
a 3D crustal model, topography and bathymetry are included. For a detailed introduction to the SEM as applied
to regional seismic wave propagation, please consult Komatitsch and Vilotte [1998], Komatitsch and Tromp [1999]
and in particular Komatitsch et al. [2004]. If you use the 3D southern California model, please cite Süss and Shaw
[2003] (LA), Lovely et al. [2006] (Salton Trough), and Hauksson [2000] (southern California). The Moho map was
determined by Zhu and Kanamori [2000]. The 1D SoCal model was developed by Dreger and Helmberger [1990].
The package can accommodate full 21-parameter anisotropy (see Chen and Tromp [2007]) as well as lateral variations
in attenuation. Adjoint capabilities and finite-frequency kernel simulations are included [Liu and Tromp, 2006].
All SPECFEM3D software is written in Fortran90, and conforms strictly to the Fortran95 standard. It uses no obsolete or obsolescent features of Fortran77. The package uses parallel programming based upon the Message Passing
Interface (MPI) [Gropp et al., 1994, Pacheco, 1997].
1.1
Citation
If you use SPECFEM3D for your own research, please cite at least one of the following articles: Komatitsch et al.
[2004], Komatitsch and Tromp [1999] or Komatitsch and Vilotte [1998]. The corresponding BibTEX entries may be
found in file USER_MANUAL/bibliography.bib or in comments at the beginning of file specfem3D.f90.
1.2
Support
This material is based upon work supported by the U.S. National Science Foundation under Grants No. EAR-0406751
and EAR-0711177, by the French CNRS, French INRIA Sud-Ouest MAGIQUE-3D, French ANR NUMASIS under
Grant No. ANR-05-CIGC-002, and European FP6 Marie Curie International Reintegration Grant No. MIRG-CT2005-017461. Any opinions, findings, and conclusions or recommendations expressed in this material are those of the
authors and do not necessarily reflect the views of the U.S. National Science Foundation, CNRS, INRIA, ANR or the
European Marie Curie program.
2
Chapter 2
Getting Started
The SPECFEM3D software package comes in a gzipped tar ball. In the directory in which you want to install the
package, type
tar -zxvf SPECFEM3D_V1.4.3.tar.gz
The directory SPECFEM3D_V1.4.3 will then contain the source code. To configure the software for your system, run
the configure shell script. This script will attempt to guess the appropriate configuration values for your system.
However, at a minimum, it is recommended that you explicitly specify the appropriate command names for your
Fortran90 compiler and MPI package:
./configure FC=ifort MPIFC=mpif90
To compile a serial version of the code for small meshes that fit on one compute node and can therefore be run serially,
run configure with the --without-mpi option to suppress all calls to MPI.
A summary of the most important configuration variables follows.
F90 Path to the Fortran90 compiler.
MPIF90 Path to MPI Fortran90.
MPI_FLAGS Some systems require this flag to link to MPI libraries.
FLAGS_CHECK Compiler flag for non-critical subroutines.
FLAGS_NO_CHECK Compiler flag for creating fast, production-run code for critical subroutines.
The Makefile contains a number of suggested entries for various compilers, e.g., Portland, Intel, Absoft, NAG, and
Lahey. The software has run on a wide variety of compute platforms, e.g., various PC clusters and machines from Sun,
SGI, IBM, Compaq, and NEC. Select the compiler you wish to use on your system and choose the related optimization
flags. Note that the default flags in the Makefile are undoubtedly not optimal for your system, so we encourage
you to experiment with these flags and to solicit advice from your systems administrator. Selecting the right compiler
and optimization flags can make a tremendous difference in terms of performance. We welcome feedback on your
experience with various compilers and flags.
Now that you have set the compiler information, you need to select a number of flags in the constants.h file
depending on your system:
LOCAL_PATH_IS_ALSO_GLOBAL Set to .false. on most cluster applications. For reasons of speed, the (parallel) mesher typically writes a (parallel) database for the solver on the local disks of the compute nodes. Some
systems have no local disks, e.g., BlueGene or the Earth Simulator, and other systems have a fast parallel file
system, in which case this flag should be set to .true.. Note that this flag is not used by the mesher or the
solver; it is only used for some of the post-processing.
3
CHAPTER 2. GETTING STARTED
4
The package can run either in single or in double precision. The default is single precision mode because this requires
exactly half as much memory. Select your preference by selecting the appropriate setting in the constants.h file:
CUSTOM_REAL Set to SIZE_REAL for single precision and SIZE_DOUBLE for double precision.
In the precision.h file:
CUSTOM_MPI_TYPE Set to MPI_REAL for single precision and MPI_DOUBLE_PRECISION for double precision.
On a new system, it is definitely worth experimenting with single versus double precision simulations to determine
which is faster. Note that on many current processors (e.g., Intel, AMD, IBM Power), single precision calculations are
often significantly faster; the difference can typically be 10% to 25%. It is therefore often worth using single precision
if you can. We recommend running the same calculation once in single precision and in double precision on your
system and comparing the seismograms. If they are identical, you should probably select single precision for your
future runs.
When running on an SGI add “setenv TRAP_FPE OFF” to your .cshrc file before compiling in order to turn
underflow trapping off.
Finally, before compiling make sure that the subdirectories obj and OUTPUT_FILES exist within the directory
with the source code (SPECFEM3D_V1.4.3). The go_mesher script discussed in Chapter 3 automatically takes
care of creating the OUTPUT_FILES directory.
Note that if you run very large meshes on a relatively small number of processors, the memory size needed on each
processor might become greater than 2 gigabytes, which is the upper limit for 32-bit addressing; in this case, on some
compilers you may need to add "-mcmodel=medium" to the compiler options otherwise the compiler will display
an error message.
Chapter 3
Running the Mesher xmeshfem3D
You are now ready to compile the mesher. In the directory with the source code type ‘make meshfem3D’. If all
paths and flags have been set correctly, the mesher should now compile and produce the executable xmeshfem3D.
Input for the mesher (and the solver) is provided through the parameter file Par_file, which resides in the
subdirectory DATA. Before running the mesher, a number of parameters need to be set in the Par_file. This
requires a basic understanding of how the SEM is implemented, and we encourage you to read Komatitsch and Vilotte
[1998], Komatitsch and Tromp [1999] and Komatitsch et al. [2004].
The mesher and the solver use UTM coordinates internally, therefore you need to define the zone number for the
UTM projection (e.g., zone 11 for Los Angeles). Use decimal values for latitude and longitude (no minutes/seconds).
These values are approximate; the mesher will round them off to define a square mesh in UTM coordinates. When running benchmarks on rectangular models, turn the UTM projection off by using the flag SUPPRESS_UTM_PROJECTION,
in which case all ‘longitude’ parameters simply refer to the x axis, and all ‘latitude’ parameters simply refer to the
y axis. To run the mesher for a global simulation, the following parameters need to be set in the Par_file:
SIMULATION_TYPE is set to 1 for forward simulations, 2 for adjoint simulations (see Section 5.2) and 3 for kernel
simulations (see Section 6.3).
SAVE_FORWARD is only set to .true. for a forward simulation with the last frame of the simulation saved,
as part of the finite-frequency kernel calculations (see Section 6.3). For a regular forward simulation, leave
SIMULATION_TYPE and SAVE_FORWARD at their default values.
LATITUDE_MIN Minimum latitude in the block (negative for South).
LATITUDE_MAX Maximum latitude in the block.
LONGITUDE_MIN Minimum longitude in the block (negative for West).
LONGITUDE_MAX Maximum longitude in the block.
DEPTH_BLOCK_KM Depth of bottom of mesh in kilometers.
NEX_XI The number of spectral elements along one side of the block. This number must be 8 × a multiple of
NPROC_XI defined below. Based upon benchmarks against semi-analytical discrete wavenumber synthetic
seismograms [Komatitsch et al., 2004], determined that a NEX_XI = 288 run is accurate to a shortest period of
roughly 2 s. Therefore, since accuracy is determined by the number of grid points per shortest wavelength, for
any particular value of NEX_XI the simulation will be accurate to a shortest period determined by
shortest period (s) = (288/NEX_XI) × 2.
(3.1)
The number of grid points in each orthogonal direction of the reference element, i.e., the number of GaussLobatto-Legendre points, is determined by NGLLX in the constants.h file. We generally use NGLLX = 5,
for a total of 53 = 125 points per elements. We suggest not to change this value.
5
CHAPTER 3. RUNNING THE MESHER XMESHFEM3D
6
Figure 3.1: For parallel computing purposes, the model block is subdivided in NPROC_XI × NPROC_ETA slices of
elements. In this example we use 52 = 25 processors.
UTM_PROJECTION_ZONE UTM projection zone in which your model resides, only valid when SUPPRESS_UTM_
PROJECTION is .false..
SUPPRESS_UTM_PROJECTION set to be .false. when your model range is specified in the geographical coordinates, and needs to be .true. when your model is specified in a cartesian coordinates. UTM PROJECTION
ZONE IN WHICH YOUR SIMULATION REGION RESIDES .
NEX_ETA The number of spectral elements along the other side of the block. This number must be 8 × a multiple of
NPROC_ETA defined below.
NPROC_XI The number of processors or slices along one side of the block (see Figure 3.1); we must have NEX_XI =
8 × c × NPROC_XI, where c ≥ 1 is a positive integer.
NPROC_ETA The number of processors or slices along the other side of the block; we must have NEX_ETA =
8 × c × NPROC_ETA, where c ≥ 1 is a positive integer.
MODEL Must be set to one of the following:
SoCal Isotropic, southern California layercake model developed by Dreger and Helmberger [1990].
Harvard_LA 3D model based upon the high-resolution Los Angeles basin model developed by Süss and
Shaw [2003] the Salton Trough model developed by Lovely et al. [2006], the regional tomographic model
of Hauksson [2000], and the Moho map determined by Zhu and Kanamori [2000].
OCEANS Set to .true. if the effect of the oceans on seismic wave propagation should be incorporated based upon
the approximate treatment discussed in Komatitsch and Tromp [2002b]. This feature is inexpensive from a
numerical perspective, both in terms of memory requirements and CPU time. This approximation is accurate at
periods of roughly 20 s and longer. At shorter periods the effect of water phases/reverberations is not taken into
account, even when the flag is on.
TOPOGRAPHY Set to .true. if topography and bathymetry should be incorporated based upon model ETOPO5
[NOAA, 1988]. This feature adds no cost to the simulation.
CHAPTER 3. RUNNING THE MESHER XMESHFEM3D
7
ATTENUATION Set to .true. if attenuation should be incorporated. Turning this feature on increases the memory
requirements significantly (roughly by a factor of 1.5), and is numerically fairly expensive. See Komatitsch and
Tromp [1999, 2002a] for a discussion on the implementation of attenuation based upon standard linear solids.
USE_OLSEN_ATTENUATION Set to .true. if you want to use the attenuation model that scaled from the velocity
model using Olsen’s empirical relation (reference).
ABSORBING_CONDITIONS Set to .true. to turn on Clayton-Enquist absorbing boundary conditions (see Komatitsch and Tromp [1999]).
RECORD_LENGTH_IN_MINUTES Choose the desired record length of the synthetic seismograms (in minutes). This
controls the length of the numerical simulation, i.e., twice the record length requires twice as much CPU time.
This feature is not used at the time of meshing but is required for the solver, i.e., you may change this parameter
after running the mesher.
MOVIE_SURFACE Set to .false., unless you want to create a movie of seismic wave propagation on the Earth’s
surface. Turning this option on generates large output files. See Section 6.2 for a discussion on the generation
of movies. This feature is not used at the time of meshing but is relevant for the solver.
MOVIE_VOLUME Set to .false., unless you want to create a movie of seismic wave propagation in the Earth’s
interior. Turning this option on generates huge output files. See Section 6.2 for a discussion on the generation
of movies. This feature is not used at the time of meshing but is relevant for the solver.
NTSTEP_BETWEEN_FRAMES Determines the number of timesteps between movie frames. Typically you want to
save a snapshot every 100 timesteps. The smaller you make this number the more output will be generated! See
Section 6.2 for a discussion on the generation of movies. This feature is not used at the time of meshing but is
relevant for the solver.
CREATE_SHAKEMAP Set this flag to .true. to create a ShakeMap, i.e., a peak ground velocity map.
SAVE_DISPLACEMENT Set this flag to .true. if you want to save the displacement instead of velocity for the
movie frames.
USE_HIGHRES_FOR_MOVIES Set this flag to .true. if you want to save the values at all the NGLL grid points
for the movie frames.
SAVE_MESH_FILES Set this flag to .true. to save AVS (www.avs.com), OpenDX (www.opendx.org),
or ParaView (www.paraview.org) mesh files for subsequent viewing. Turning the flag on generates large
(distributed) files in the LOCAL_PATH directory. See Section 6.1 for a discussion of mesh viewing features.
LOCAL_PATH Directory in which the databases generated by the mesher will be written. Generally one uses a
directory on the local disk of the compute nodes, although on some machines these databases are written on a
parallel (global) file system (see also the earlier discussion of the LOCAL_PATH_IS_ALSO_GLOBAL flag in
Chapter 2). The mesher generates the necessary databases in parallel, one set for each of the NPROC_XI ×
NPROC_ETA slices that constitutes the mesh (see Figure 3.1). After the mesher finishes, you can log in to one
of the compute nodes and view the contents of the LOCAL_PATH directory to see the (many) files generated by
the mesher.
NTSTEP_BETWEEN_OUTPUT_INFO This parameter specifies the interval at which basic information about a run is
written to the file system (timestamp* files in the OUTPUT_FILES directory). If you have access to a fast
machine, set NTSTEP_BETWEEN_OUTPUT_INFO to a relatively high value (e.g., at least 100, or even 1000
or more) to avoid writing output text files too often. This feature is not used at the time of meshing. One can set
this parameter to a larger value than the number of time steps to avoid writing output during the run.
NTSTEP_BETWEEN_OUTPUT_SEISMOS This parameter specifies the interval at which synthetic seismograms are
written in the LOCAL_PATH directory. If a run crashes, you may still find usable (but shorter than requested)
seismograms in this directory. On a fast machine set NTSTEP_BETWEEN_OUTPUT_SEISMOS to a relatively
high value to avoid writing to the seismograms too often. This feature is not used at the time of meshing.
CHAPTER 3. RUNNING THE MESHER XMESHFEM3D
8
PRINT_SOURCE_TIME_FUNCTION Turn this flag on to print information about the source time function in the file
OUTPUT_FILES/plot_source_time_function.txt. This feature is not used at the time of meshing.
Finally, you need to provide a file that tells MPI what compute nodes to use for the simulations. The file must have a
number of entries (one entry per line) at least equal to the number of processors needed for the run. A sample file is
provided in the file mymachines. This file is not used by the mesher or solver, but is required by the go_mesher
and go_solver default job submission scripts. See Chapter 7 for information about running the code on a system
with a scheduler, e.g., LSF.
Now that you have set the appropriate parameters in the Par_file and have compiled the mesher, you are ready
to launch it! This is most easily accomplished based upon the go_mesher script. When you run on a PC cluster, the
script assumes that the nodes are named n001, n002, etc. If this is not the case, change the tr -d ‘n’ line in the
script. You may also need to edit the last command at the end of the script that invokes the mpirun command. See
Chapter 7 for information about running the code on a system with a scheduler, e.g., LSF.
Mesher output is provided in the OUTPUT_FILES directory in output_mesher.txt; this file provides lots of
details about the mesh that was generated. Alternatively, output can be directed to the screen instead by uncommenting
a line in constants.h:
! uncomment this to write messages to the screen
! integer, parameter :: IMAIN = ISTANDARD_OUTPUT
Another file generated by the mesher is the header file OUTPUT_FILES/values_from_mesher.h. This file
specifies a number of constants and flags needed by the solver. These values are passed statically to the solver for
reasons of speed. Some useful statistics about the mesh are also provided in this file.
For a given model, set of nodes, and set of parameters in Par_file, one only needs to run the mesher once and
for all, even if one wants to run several simulations with different sources and/or receivers (the source and receiver
information is used in the solver only).
3.1
Checking the MPI Buffers (Optional)
The mesher writes MPI communication tables in the OUTPUT_FILES subdirectory in the files addressing.txt,
list_messages_corners.txt and list_messages_faces.txt, and MPI communication buffers to the
local disks. Use the four serial codes
check_buffers_2D.f90
check_buffers_1D.f90
to check that all the MPI buffers created by the mesher have been generated correctly. For example, typing ‘make
check_buffers_2D’ and then ‘xcheck_buffers_2D’ checks the communication buffers between faces common to the mesh slices.
Please note that running these codes is optional because no information needed by the solver is generated.
3.2
Checking the Mesh Quality (Optional)
The quality of the mesh may be inspected based upon the serial code check_mesh_quality_AVS_DX.f90.
Type
make check_mesh_quality_AVS_DX
and then use
xcheck_mesh_quality_AVS_DX
CHAPTER 3. RUNNING THE MESHER XMESHFEM3D
9
to generate an AVS output file (AVS_meshquality.inp in AVS UCD format) or OpenDX output file (DX_meshquality.
dx) that can be used to investigate mesh quality, e.g, skewness of elements and a Gnuplot histogram (mesh_quality_
histogram.txt) that can be plotted with gnuplot (type ‘gnuplot plot_mesh_quality_histogram.gnu’). The
histogram is also printed to the screen. If you want to start designing your own meshes, this tool is useful for viewing
your creations. You are striving for meshes with elements with ‘cube-like’ dimensions, e.g., the mesh should contain
no very elongated or skewed elements.
Running this code is optional because no information needed by the solver is generated.
Chapter 4
Running the Solver xspecfem3D
Now that you have successfully run the mesher, you are ready to compile the solver. For reasons of speed, the solver
uses static memory allocation. Therefore it needs to be recompiled (type ‘make clean’ and ‘make specfem3D’)
every time one reruns the mesher. To compile the solver one needs a file generated by the mesher in the directory
OUTPUT_FILES called values_from_mesher.h, which contains parameters describing the static size of the
arrays as well as the setting of certain flags.
The solver needs three input files in the DATA directory to run: the Par_file which was discussed in detail in
Chapter 3, the earthquake source parameter file CMTSOLUTION, and the stations file STATIONS. Most parameters
in the Par_file should be set prior to running the mesher. Only the following parameters may be changed after
running the mesher:
• the simulation type control parameters: SIMULATION_TYPE and SAVE_FORWARD
• the record length RECORD_LENGTH_IN_MINUTES
• the movie control parameters MOVIE_SURFACE, MOVIE_VOLUME, and NTSTEPS_BETWEEN_FRAMES
• the ShakeMap option CREATE_SHAKEMAP
• the output information parameters NTSTEP_BETWEEN_OUTPUT_INFO and NTSTEP_BETWEEN_OUTPUT_
SEISMOS
• the PRINT_SOURCE_TIME_FUNCTION flags
Any other change to the Par_file implies rerunning both the mesher and the solver.
For any particular earthquake, the CMTSOLUTION file that represents the point source may be obtained directly
from the Harvard Centroid-Moment Tensor (CMT) web page (www.seismology.harvard.edu). It looks like
this:
10
CHAPTER 4. RUNNING THE SOLVER XSPECFEM3D
11
body-wave magnitude
surface-wave magnitude
Preliminary Determination of Epicenter
year
day
Harvard CMT solution
month
hour
min
sec
PDE 2001 9 9 23 59 17.78
event name:
9703873
time shift:
0.0000
half duration:
0.0000
latitude:
34.0745
longitude:
-118.3792
depth:
5.4000
Mrr:
-0.002000e+23
Mtt:
-0.064000e+23
Mpp:
0.066000e+23
Mrt:
-0.090000e+23
Mrp:
-0.002000e+23
Mtp:
0.188000e+23
latitude
longitude
34.0745 -118.3792
depth
mb
Ms
PDE event name
6.4 4.2 4.2 HOLLYWOOD
Figure 4.1: CMTSOLUTION file based on the format from the Harvard CMT catalog. M is the moment tensor, M0 is
the seismic moment, and Mw is the moment magnitude.
The CMTSOLUTION should be edited in the following way:
• Set the time shift parameter equal to 0.0 (the solver will not run otherwise.) The time shift parameter
would simply apply an overall time shift to the synthetics, something that can be done in the post-processing
(see Section 8.3).
• For point-source simulations (see finite sources, page 12) we recommend setting the source half-duration parameter half duration equal to zero, which corresponds to simulating a step source-time function, i.e.,
a moment-rate function that is a delta function. If half duration is not set to zero, the code will use a
Gaussian (i.e., a signal with a shape similar to a ‘smoothed triangle’, as explained in Komatitsch and Tromp
[2002a] and shown in Fig 4.2) source-time function with half-width half duration. We prefer to run the
solver with half duration set to zero and convolve the resulting synthetic seismograms in post-processing
after the run, because this way it is easy to use a variety of source-time functions (see Section 8.3). Komatitsch and Tromp [2002a] determined that the noise generated in the simulation by using a step source time
function may be safely filtered out afterward based upon a convolution with the desired source time function
and/or low-pass filtering. Use the serial code convolve_source_timefunction.f90 and the script
convolve_source_timefunction.csh for this purpose, or alternatively use signal-processing software
packages such as SAC (www.llnl.gov/sac). Type
make convolve_source_timefunction
to compile the code and then set the parameter hdur in convolve_source_timefunction.csh to the
desired half-duration.
• The zero time of the simulation corresponds to the center of the triangle/Gaussian, or the centroid time of the
earthquake. The start time of the simulation is t = −1.5 ∗ half duration (the 1.5 is to make sure the
moment rate function is very close to zero when starting the simulation). To convert to absolute time tabs , set
tabs = tpde + time shift + tsynthetic
where tpde is the time given in the first line of the CMTSOLUTION, time shift is the corresponding value
from the original CMTSOLUTION file and tsynthetic is the time in the first column of the output seismogram.
CHAPTER 4. RUNNING THE SOLVER XSPECFEM3D
12
- source decay rate
- half duration
half duration
tCMT
Figure 4.2: Comparison of the shape of a triangle and the Gaussian function actually used.
Centroid latitude and longitude should be provided in geographical coordinates. The code converts these coordinates to geocentric coordinates [Dahlen and Tromp, 1998]. Of course you may provide your own source representations by designing your own CMTSOLUTION file. Just make sure that the resulting file adheres to the Harvard CMT
conventions (see Appendix A).
To simulate a kinematic rupture, i.e., a finite-source event, represented in terms of Nsources point sources, provide
a CMTSOLUTION file that has Nsources entries, one for each subevent (i.e., concatenate Nsources CMTSOLUTION files
to a single CMTSOLUTION file). At least one entry (not necessarily the first) must have a zero time shift, and
all the other entries must have non-negative time shift. Each subevent can have its own half duration, latitude,
longitude, depth, and moment tensor (effectively, the local moment-density tensor).
Note that the zero in the synthetics does NOT represent the hypocentral time or centroid time in general, but the
timing of the center of the source triangle with zero time shift (Fig 4.3).
Although it is convenient to think of each source as a triangle, in the simulation they are actually Gaussians (as
they have better frequency characteristics). The relationship between the triangle and the gaussian used is shown in
Fig 4.2. For finite fault simulations it is usually not advisable to use a zero half duration and convolve afterwards,
since the half duration is generally fixed by the finite fault model.
CHAPTER 4. RUNNING THE SOLVER XSPECFEM3D
13
tstart
t1=0
hdur1
t2
t3
hdur2
Time
hdur3
Figure 4.3: Example of timing for three sources. The center of the first source triangle is defined to be time zero. Note
that this is NOT in general the hypocentral time, or the start time of the source (marked as tstart). The parameter time
shift in the CMTSOLUTION file would be t1(=0), t2, t3 in this case, and the parameter half duration would
be hdur1, hdur2, hdur3 for the sources 1, 2, 3 respectively.
The solver can calculate seismograms at any number of stations for basically the same numerical cost, so the user
is encouraged to include as many stations as conceivably useful in the STATIONS file, which looks like this:
Figure 4.4: Sample STATIONS file.
Station latitude and longitude should be provided in geographical coordinates.
The width of the station label should be no more than 32 characters (see
MAX_LENGTH_STATION_NAME in the constants.h file), and the network label should be no more than 8 characters (see MAX_LENGTH_NETWORK_NAME in the constants.h file).
Each line represents one station in the following format:
CHAPTER 4. RUNNING THE SOLVER XSPECFEM3D
14
Station Network Latitude (degrees) Longitude (degrees) Elevation (m) burial (m)
The mesher filters the list of stations in file DATA/STATIONS to exclude stations that are not located within the
region given in the Par_file (between LATITUDE_MIN and LATITUDE_MAX and between LONGITUDE_MIN
and LONGITUDE_MAX). The filtered file is called DATA/STATIONS_FILTERED.
Solver output is provided in the OUTPUT_FILES directory in the output_solver.txt file. Output can be
directed to the screen instead by uncommenting a line in constants.h:
! uncomment this to write messages to the screen
! integer, parameter :: IMAIN = ISTANDARD_OUTPUT
On PC clusters the seismogram files are generally written to the local disks (the path LOCAL_PATH in the Par_file)
and need to be gathered at the end of the simulation.
While the solver is running, its progress may be tracked by monitoring the ‘timestamp*’ files in the OUTPUT_FILES
directory. These tiny files look something like this:
Time step #
10000
Time:
108.4890
seconds
Elapsed time in seconds =
1153.28696703911
Elapsed time in hh:mm:ss =
0 h 19 m 13 s
Mean elapsed time per time step in seconds =
0.115328696703911
Max norm displacement vector U in all slices (m) =
1.0789589E-02
The timestamp* files provide the Mean elapsed time per time step in seconds, which may be
used to assess performance on various machines (assuming you are the only user on a node), as well as the Max
norm displacement vector U in all slices (m). If something is wrong with the model, the mesh,
or the source, you will see the code become unstable through exponentially growing values of the displacement and
fluid potential with time, and ultimately the run will be terminated by the program. You can control the rate at which
the timestamp files are written based upon the parameter NTSTEP_BETWEEN_OUTPUT_INFO in the Par_file.
Having set the Par_file parameters, and having provided the CMTSOLUTION and STATIONS files, you are
now ready to launch the solver! This is most easily accomplished based upon the go_solver script (See Chapter
7 for information about running through a scheduler, e.g., LSF). You may need to edit the last command at the end
of the script that invokes the mpirun command. The runall script compiles and runs both mesher and solver in
sequence. This is a safe approach that ensures using the correct combination of mesher output and solver input.
It is important to realize that the CPU and memory requirements of the solver are closely tied to choices about
attenuation (ATTENUATION) and the nature of the model (i.e., isotropic models are cheaper than anisotropic models).
We encourage you to run a variety of simulations with various flags turned on or off to develop a sense for what is
involved.
For the same model, one can rerun the solver for different events by simply changing the CMTSOLUTION file, or
for different stations by changing the STATIONS file. There is no need to rerun the mesher. Of course it is best to
include as many stations as possible, since this does not add to the cost of the simulation.
Chapter 5
Adjoint Simulations
Adjoint simulations are generally performed for two distinct applications. First, they can be used for earthquake source
inversions, especially earthquakes with large ruptures such as the Lander’s earthquake [Wald and Heaton, 1994]. Second, they can be used to generate finite-frequency sensitivity kernels that are a critical part of tomographic inversions
based upon 3D reference models [Tromp et al., 2005, Liu and Tromp, 2006, 2008]. In either case, source parameter or
velocity structure updates are sought to minimize a specific misfit function (e.g., waveform or traveltime differences),
and the adjoint simulation provides a means of computing the gradient of the misfit function and further reducing it
in successive iterations. Applications and procedures pertaining to source studies and finite-frequency kernels are discussed in Sections 5.1 and 5.2, respectively. The two related parameters in the Par_file are SIMULATION_TYPE
(1 or 2) and the SAVE_FORWARD (boolean).
5.1
Adjoint Simulations for Sources
In the case where a specific misfit function is minimized to invert for the earthquake source parameters, the gradient
of the misfit function with respect to these source parameters can be computed by placing time-reversed seismograms
at the receivers and using them as sources in an adjoint simulation, and then the value of the gradient is obtained from
the adjoint seismograms recorded at the original earthquake location.
1. Prepare the adjoint sources
(a) First, run a regular forward simlation (SIMULATION_TYPE = 1 and SAVE_FORWARD = .false.).
You can automatically set these two variables using the UTILS/change_simulation_type.pl script:
UTILS/change_simulation_type.pl -f
and then collect the recorded seismograms at all the stations given in DATA/STATIONS.
(b) Then select the stations for which you want to compute the time-reversed adjoint sources and run the
adjoint simulation, and compile them into the DATA/STATIONS_ADJOINT file, which has the same
format as the regular DATA/STATIONS file.
• Depending on what type of misfit function is used for the source inversion, adjoint sources need to
be computed from the original recorded seismograms for the selected stations and saved in the SEM/
directory with the format STA.NT.BH?.adj, where STA, NT are the station name and network
code given in the DATA/STATIONS_ADJOINT file, and BH? represents the component name of a
particular adjoint seismogram.
• The adjoint seismograms are in the same format as the original seismogram (STA.NT.BH?.sem?),
with the same start time, time interval and record length.
(c) Notice that even if you choose to time reverse only one component from one specific station, you still need
to supply all three components because the code is expecting them (you can set the other two components
to be zero).
15
CHAPTER 5. ADJOINT SIMULATIONS
16
(d) Also note that since time-reversal is done in the code itself, no explicit time-reversing is needed for the
preparation of the adjoint sources, i.e., the adjoint sources are in the same forward time sense as the original
recorded seismograms.
2. Set the related parameters and run the adjoint simulation
In the DATA/Par_file, set the two related parameters to be SIMULATION_TYPE = 2 and SAVE_FORWARD
= .false.. More conveniently, use the scripts UTILS/change_simulation_type.pl to modify the
Par_file automatically (change_simulation_type.pl -a). Then run the solver to launch the adjoint simulation.
3. Collect the seismograms at the original source location
After the adjoint simulation has completed successfully, collect the seismograms from LOCAL_PATH.
• These adjoint seismograms are recorded at the locations of the original earthquake sources given by the
DATA/CMTSOLUTION file, and have names of the form S?????.NT.S??.sem for the six-component
strain tensor (SNN,SEE,SZZ,SNE,SNZ,SEZ) at these locations, and S?????.NT.BH?.sem for the
three-component displacements (BHN,BHE,BHZ) recorded at these locations.
• S????? denotes the source number; for example, if the original CMTSOLUTION provides only a point
source, then the seismograms collected will start with S00001.
• These adjoint seismograms provide critical information for the computation of the gradient of the misfit
function.
5.2
Adjoint Simulations for Finite-Frequency Kernels (Kernel Simulation)
Finite-frequency sensitivity kernels are computed in two successive simulations (please refer to Liu and Tromp [2006]
for details).
1. Run a forward simulation with the state variables saved at the end of the simulation
Prepare the CMTSOLUTION and STATIONS files, set the parameters SIMULATION_TYPE = 1 and SAVE_FORWARD
= .true. in the Par_file (change_simulation_type -F), and run the solver.
• Notice that attenuation is not implemented yet for the computation of finite-frequency kernels; therefore
set ATTENUATION = .false. in the Par_file.
• We also suggest you modify the half duration of the CMTSOLUTION to be similar to the accuracy of the
simulation (see Equation 3.1) to avoid too much high-frequency noise in the forward wavefield, although
theoretically the high-frequency noise should be eliminated when convolved with an adjoint wavefield with
the proper frequency content.
• This forward simulation differs from the regular simulations (SIMULATION_TYPE = 1 and SAVE_FORWARD
= .false.) described in the previous chapters in that the state variables for the last time step of the simulation, including wavefields of the displacement, velocity, acceleration, etc., are saved to the LOCAL_PATH
to be used for the subsequent simulation.
• For regional simulations, the files recording the absorbing boundary contribution are also written to the
LOCAL_PATH when SAVE_FORWARD = .true..
2. Prepare the adjoint sources
The adjoint sources need to be prepared the same way as described in the Section 1.
• In the case of travel-time finite-frequency kernel for one source-receiver pair, i.e., point source from
the CMTSOLUTION, and one station in the STATIONS_ADJOINT list, we supply a sample program in
UTILS/xcut_velocity to cut a certain portion of the original displacement seismograms and convert
it into the proper adjoint source to compute the finite-frequency kernel.
xcut_velocity t1 t2 ifile[0-5] E/N/Z-ascii-files [baz]
CHAPTER 5. ADJOINT SIMULATIONS
17
where t1 and t2 are the start and end time of the portion you are interested in, ifile denotes the
component of the seismograms to be used (0 for all three components, 1 for East, 2 for North, and 3
for vertical, 4 for transverse, and 5 for radial component), E/N/Z-ascii-files indicate the threecomponent displacement seismograms in the right order, and baz is the back-azimuth of the station. Note
that baz is only supplied when ifile = 4 or 5.
3. Run the kernel simulation
With the successful forward simulation and the adjoint source ready in SEM/, set SIMULATION_TYPE =
3 and SAVE_FORWARD = .false. in the Par_file(change_simulation_type.pl -b), and
rerun the solver.
• The adjoint simulation is launched together with the back reconstruction of the original forward wavefield
from the state variables saved from the previous forward simulation, and the finite-frequency kernels are
computed by the interaction of the reconstructed forward wavefield and the adjoint wavefield.
• The back-reconstructed seismograms at the original station locations are saved to the LOCAL_PATH at the
end of the kernel simulations, and can be collected to the local disk.
• These back-constructed seismograms can be compared with the time-reversed original seismograms to
assess the accuracy of the backward reconstruction, and they should match very well.
• The arrays for density, P-wave speed and S-wave speed kernels are also saved in the LOCAL_PATH with
the names proc??????_rho(alpha,beta)_kernel.bin, where proc?????? represents the
processor number, rho(alpha,beta) are the different types of kernels.
In general, the three steps need to be run sequentially to assure proper access to the necessary files. If the simulations
are run through some cluster scheduling system (e.g., LSF), and the forward simulation and the subsequent kernel
simulations cannot be assigned to the same set of computer nodes, the kernel simulation will not be able to access the
database files saved by the forward simulation. Solutions for this dilemma are provided in Chapter 7. Visualization of
the finite-frequency kernels is discussed in Section 6.3.
Chapter 6
Graphics
6.1
Meshes
Use the serial code combine_AVS_DX.f90 (type ‘make combine_AVS_DX’ and then ‘xcombine_AVS_DX’)
to generate AVS (www.avs.com) output files (in AVS UCD format) or OpenDX (www.opendx.org) output files
showing the mesh, the MPI partition (slices), the NCHUNKS chunks, the source and receiver location, etc. Use the
AVS UCD files AVS_continent_boundaries.inp and AVS_plate_boundaries.inp or the OpenDX
files DX_continent_boundaries.dx and DX_plate_boundaries.dx for reference.
6.2
Movies
To make a surface or volume movie of the simulation, set parameters MOVIE_SURFACE, MOVIE_VOLUME, and
NTSTEP_BETWEEN_FRAMES in the Par_file. Turning on the movie flags, in particular MOVIE_VOLUME, produces large output files. MOVIE_VOLUME files are saved in the LOCAL_PATH directory, whereas MOVIE_SURFACE
output files are saved in the OUTPUT_FILES directory. We save the velocity field. The look of a movie is determined
by the half-duration of the source. The half-duration should be large enough so that the movie does not contain frequencies that are not resolved by the mesh, i.e., it should not contain numerical noise. This can be accomplished by
selecting a CMT HALF_DURATION > 1.1 × smallest period (see figure 4.1). When MOVIE_SURFACE = .true.,
the half duration of each source in the CMTSOLUTION file is replaced by
p
(HALF_DURATION2 + HDUR_MOVIE2 )
NOTE: If HDUR_MOVIE is set to 0.0, the code will select the appropriate value of 1.1 × smallest period.
As usual, for a point source one can set HALF_DURATION in the Par_file to be 0.0 and HDUR_MOVIE
= 0.0 to get the highest frequencies resolved by the simulation, but for a finite source one would keep all
the HALF_DURATIONs as prescribed by the finite source model and set HDUR_MOVIE = 0.0.
6.2.1
Movie Surface
When running xspecfem3D with the MOVIE_SURFACE flag turned on, the code outputs moviedata??????
files in the OUTPUT_FILES directory. The files are in a fairly complicated binary format, but there are two programs
provided to convert the output into more user friendly formats. The first one, create_movie_AVS_DX.f90,
outputs data in ASCII, OpenDX, AVS, or ParaView format. Run the code from the source directory (type ‘make
create_movie_AVS_DX’ first) to create an input file in your format of choice. The code will prompt the user for
input parameters. The second program create_movie_GMT.f90 outputs ascii xyz files, convenient for use with
GMT. This code uses significantly less memory than create_movie_AVS_DX.f90 and is therefore useful for
high resolution runs.
The SPECFEM3D code is running in near real-time to produce animations of southern California earthquakes via
the web; see Southern California ShakeMovie (www.shakemovie.caltech.edu).
18
CHAPTER 6. GRAPHICS
6.3
19
Finite-Frequency Kernels
The finite-frequency kernels computed as explained in Section 5.2 are saved in the LOCAL_PATH at the end of the
simulation. Therefore, we first need to collect these files on the front end, combine them into one mesh file, and
visualize them with some auxilliary programs.
1. Create slice files
We will only discuss the case of one source-receiver pair, i.e., the so-called banana-doughnut kernels. Although
it is possible to collect the kernel files from all slices on the front end, it usually takes up too much storage space
(at least tens of gigabytes). Since the sensitivity kernels are the strongest along the source-receiver great circle
path, it is sufficient to collect only the slices that are along or close to the great circle path.
A Perl script UTILS/slice_number.pl that calls MATLAB can help to figure out the slice numbers that
lie along the great circle path (both the minor and major arcs), as well as the slice numbers required to produce
a full picture of the inner core if your kernel also illuminates the inner core.
(a) On machines where you have MATLAB access, copy the CMTSOLUTION file, STATIONS_ADJOINT,
and Par_file, and run:
UTILS/slice_number.pl Par_file output_solver.txt slice_file
which will generate a slices_file.
(b) For cases with multiple sources and multiple receivers, you need to provide a slice file before proceeding
to the next step.
2. Collect the kernel files
After obtaining the slice files, you can collect the corresponding kernel files from the given slices.
(a) You can use or modify the script UTILS/copy_databases.pl to accomplish this:
UTILS/copy_database.pl slice_file lsf_machine_file filename [jobid]
where lsf_machine_file is the machine file generated by the LSF scheduler, filename is the kernel
name (e.g., rho_kernel, alpha_kernel and beta_kernel), and the optional jobid is the name of the
subdirectory under LOCAL_PATH where all the kernel files are stored.
(b) After executing this script, all the necessary mesh topology files as well as the kernel array files are collected to the local directory of the front end.
3. Combine kernel files into one mesh file
We use an auxilliary program combine_paraview_data.f90 to combine the kernel files from all slices
into one mesh file.
(a) Compile it in the global code directory:
make combine_paraview_data
xcombine_paraview_data slice_list filename input_dir output_dir high/low-resolution
where input_dir is the directory where all the individual kernel files are stored, and output_dir is
where the mesh file will be written.
(b) Use 1 for a high-resolution mesh, outputting all the GLL points to the mesh file, or use 0 for low resolution,
outputting only the corner points of the elements to the mesh file.
(c) The output mesh file will have the name filename_rho(alpha,beta).mesh
4. Convert mesh files into .vtu files
(a) We next convert the .mesh file into the VTU (Unstructured grid file) format which can be viewed in
ParaView, for example:
UTILS/mesh2vtu.pl -i file.mesh -o file.vtu
CHAPTER 6. GRAPHICS
20
(b) Notice that this Perl script uses a program mesh2vtu in the UTILS/mesh2vtu directory, which further
uses the VTK (http://www.vtk.org/) run-time library for its execution. Therefore, make sure you
have them properly set in the script according to your system.
5. Copy over the source and receiver .vtk file
In the case of a single source and a single receiver, the simulation also generates the OUTPUT_FILES/sr.vtk
file to describe the source and receiver locations, which can also be viewed in Paraview in the next step.
6. View the mesh in ParaView
Finally, we can view the mesh in ParaView (www.paraview.org).
(a) Open ParaView.
(b) From the top menu, File →Open data, select file.vtu, and click the Accept button.
• If the mesh file is of moderate size, it shows up on the screen; otherwise, only the bounding box is
shown.
(c) Click Display Tab → Display Style → Representation and select wireframe of surface to display it.
(d) To create a cross-section of the volumetric mesh, choose Filter → cut, and under Parameters Tab, choose
Cut Function → plane.
(e) Fill in center and normal information given by the global_slice_number.pl script (either from the
standard output or from normal_plane.txt file).
(f) To change the color scale, go to Display Tab → Color → Edit Color Map and reselect lower and upper
limits, or change the color scheme.
(g) Now load in the source and receiver location file by File → Open data, select sr.vtk, and click the
Accept button. Choose Filter → Glyph, and represent the points by ‘spheres’.
(h) For more information about ParaView, see the ParaView Users Guide (www.paraview.org/files/
v1.6/ParaViewUsersGuide.PDF).
(a) S Kernel for Station GSC
(b) S Kernel for Station HEC
5
10
0
-10
-20
-30
-40
-50
-60
4
3
2
1
0
0
50
100
150
km/s
5
10
0
-10
-20
-30
-40
-50
-60
4
3
2
1
0
0
50
100
150
km/s
Figure 6.1: (a) Top Panel: Vertical source-receiver cross-section of the S-wave finite-frequency sensitivity kernel Kβ
for station GSC at an epicentral distance of 176 km from the September 3, 2002, Yorba Linda earthquake. Lower Panel:
Vertical source-receiver cross-section of the 3D S-wave velocity model used for the spectral-element simulations
[Komatitsch et al., 2004]. (b) The same as (a) but for station HEC at an epicentral distance of 165 km [Liu and Tromp,
2006].
Chapter 7
Running through a Scheduler
The code is usually run on large parallel machines, often PC clusters, most of which use schedulers, i.e., queuing or
batch management systems to manage the running of jobs from a large number of users. The following considerations
need to be taken into account when running on a system that uses a scheduler:
• The processors/nodes to be used for each run are assigned dynamically by the scheduler, based on availability.
Therefore, in order for the mesher and the solver (or between successive runs of the solver) to have access to the
same database files (if they are stored on hard drives local to the nodes on which the code is run), they must be
launched in sequence as a single job.
• On some systems, the nodes to which running jobs are assigned are not configured for compilation. It may therefore be necessary to pre-compile both the mesher and the solver. A small program provided in the distribution
called create_header_file.f90 can be used to directly create OUTPUT_FILES/values_from_mesher.h
using the information in the DATA/Par_file without having to run the mesher (type ‘make create_header_
file’ to compile it and ‘xcreate_header_file’ to run it; refer to the sample scripts below). The solver can
now be compiled as explained above.
• One feature of schedulers/queuing systems is that they allow submission of multiple jobs in a “launch and
forget” mode. In order to take advantage of this property, care needs to be taken that output and intermediate
files from separate jobs do not overwrite each other, or otherwise interfere with other running jobs.
We describe here in some detail a job submission procedure for the Caltech 1024-node cluster, CITerra, under the
LSF scheduling system. We consider the submission of a regular forward simulation. The two main scripts are
run_lsf.bash, which compiles the Fortran code and submits the job to the scheduler, and go_mesher_solver_lsf
.bash, which contains the instructions that make up the job itself. These scripts can be found in UTILS/ directory
and can straightforwardly be modified and adapted to meet more specific running needs.
7.1
run_lsf.bash
This script first sets the job queue to be ‘normal’. It then compiles the mesher and solver together, figures out the
number of processors required for this simulation from the DATA/Par_file, and submits the LSF job.
#!/bin/bash
# use the normal queue unless otherwise directed queue="-q normal"
if [ $# -eq 1 ]; then
echo "Setting the queue to $1"
queue="-q $1"
fi
# compile the mesher and the solver
d=‘date’ echo "Starting compilation $d"
21
CHAPTER 7. RUNNING THROUGH A SCHEDULER
22
make clean
make meshfem3D
make create_header_file
xcreate_header_file
make specfem3D
d=‘date’
echo "Finished compilation $d"
# compute total number of nodes needed
NPROC_XI=‘grep NPROC_XI DATA/Par_file | cut -c 34- ’
NPROC_ETA=‘grep NPROC_ETA DATA/Par_file | cut -c 34- ’
# total number of nodes is the product of the values read
numnodes=$(( $NPROC_XI * $NPROC_ETA ))
echo "Submitting job"
bsub $queue -n $numnodes -W 60 -K <go_mesher_solver_lsf.bash
7.2
go_mesher_solver_lsf.bash
This script describes the job itself, including setup steps that can only be done once the scheduler has assigned a job-ID
and a set of compute nodes to the job, the run_lsf.bash commands used to run the mesher and the solver, and
calls to scripts that collect the output seismograms from the compute nodes and perform clean-up operations.
1. First the script directs the scheduler to save its own output and output from stdout into OUTPUT_FILES/%J.o,
where %J is short-hand for the job-ID; it also tells the scheduler what version of mpich to use (mpich_gm)
and how to name this job (go_mesher_solver_lsf).
2. The script then creates a list of the nodes allocated to this job by echoing the value of a dynamically set environment variable LSB_MCPU_HOSTS and parsing the output into a one-column list using the Perl script
UTILS/remap_lsf_machines.pl. It then creates a set of scratch directories on these nodes (/scratch/
$USER/DATABASES_MPI) to be used as the LOCAL_PATH for temporary storage of the database files. The
scratch directories are created using shmux, a shell multiplexor that can execute the same commands on
many hosts in parallel. shmux is available from Shmux (web.taranis.org/shmux/). Make sure that
the LOCAL_PATH parameter in DATA/Par_file is also set properly.
3. The next portion of the script launches the mesher and then the solver using run_lsf.bash.
4. The final portion of the script collects the seismograms and performs clean up on the nodes, using the Perl
scripts collect_seismo_lsf_multi.pl and cleanmulti.pl.
#!/bin/bash -v
#BSUB -o OUTPUT_FILES/%J.o
#BSUB -a mpich_gm
#BSUB -J go_mesher_solver_lsf
# set up local scratch directories
BASEMPIDIR=/scratch/$USER/DATABASES_MPI
mkdir -p OUTPUT_FILE
echo "$LSB_MCPU_HOSTS" > OUTPUT_FILES/lsf_machines
echo "$LSB_JOBID" > OUTPUT_FILES/jobid
remap_lsf_machines.pl OUTPUT_FILES/lsf_machines >OUTPUT_FILES/machines
shmux -M50 -Sall -c "rm -r -f /scratch/$USER; \
mkdir -p /scratch/$USER; mkdir -p $BASEMPIDIR" \
- < OUTPUT_FILES/machines >/dev/null
CHAPTER 7. RUNNING THROUGH A SCHEDULER
# run the specfem program
current_pwd=$PWD
run_lsf.bash --gm-no-shmem --gm-copy-env $current_pwd/xmeshfem3D
run_lsf.bash --gm-no-shmem --gm-copy-env $current_pwd/xspecfem3D
# collect seismograms and clean up
mkdir -p SEM
cd SEM
collect_seismo.pl ../OUTPUT_FILES/lsf_machines
cleanbase.pl ../OUTPUT_FILES/machines
23
Chapter 8
Post-Processing Scripts
Several post-processing scripts/programs are provided in the UTILS/ directory, and most of them need to be adjusted
when used on different systems, for example, the path of the executable programs. Here we only list the available
scripts and provide a brief description, and you can either refer to the related sections for detailed usage or, in a lot of
cases, type the script/program name without arguments for its usage.
8.1
Collect Synthetic Seismograms
The forward and adjoint simulations generate synthetic seismograms in the LOCAL_PATH. For the forward simulation,
the files are named STA.NT.BH?.semd for two-column time series, or STA.NT.BH?.semd.sac for ASCII SAC
format, where STA and NT are the station name and network code, and BH? stands for the component name. The adjont simulations generate synthetic seismograms with the name S?????.NT.S??.sem (refer to Section 5.1 for details). The kernel simulations output the back-reconstructed synthetic seismogram in the name STA.NT.BH?.semd,
mainly for the purpose of checking the accuracy of the reconstruction. Refer to Section 5.2 for further details.
To collect the synthetics onto the frontend, you can use the UTILS/collect_seismo.pl machines script:
collect_seismo.pl machines
8.2
Clean Local Database
After all the simulations are done, the seismograms are collected, and the useful database files are copied to the
frontend, you may need to clean the local scratch disk for the next simulation. This is especially important in the case
of 1- or 2-chunk kernel simulation, where very large files are generated for the absorbing boundaries to help with the
reconstruction of the regular forward wavefield. A sample script is provided in UTILS/:
cleanbase.pl machines
8.3
Process Data and Synthetics
In many cases, the SEM synthetics are calculated and compared to data seismograms recorded at seismic stations.
Since the SEM synthetics are accurate for a certain frequency range, both the original data and the synthetics need to
be processed before a comparison can be made. We generally use the following scripts:
8.3.1
process_trinet_data.pl
This script cuts a given portion of the original data, filters it, transfers the data into a displacement record, and picks
the first P and S arrivals. For more functionality, type ‘process_trinet_data.pl’ without any argument. An
example of the usage of the script:
24
CHAPTER 8. POST-PROCESSING SCRIPTS
process_trinet_data.pl -m CMTSOLUTION -l 0/180 -t 2/40 -i dir -p -x bp
25
9703873*.BH?.SAC
which has cut all the sac files between 0 and 180 seconds, filtered them between 2 and 40 seconds, transfered them
into displacement records using the polezero files in dir directory, picked the first P and S arrivals, and added suffix
‘bp’ to the file names.
Note that all of the scripts in this section actually use the SAC and/or IASP91 to do the core operations; therefore
make sure that the SAC and IASP91 packages are installed properly on your system, and that all the environment
variables are set properly before running these scripts.
8.3.2
process_trinet_syn.pl
This script converts the synthetic output from the SEM code from ASCII to SAC format, and performs similar operations as ‘process_trinet_data.pl’. An example of the usage of the script:
process_trinet_syn.pl -m CMTSOLUTION -a STATIONS -l 0/180 -t 2/40 -p -x bp syn/*.BH?.semd
which will convert the synthetics into SAC format, add event and station information into the SAC headers, cut the
SAC files between 0 and 180 seconds, filter them between 2 and 40 seconds, pick the first P and S arrivals, and add
the suffix ‘bp’ to the file names.
More options are available for this script, such as adding time shift to the origin time of the synthetics, convolving
the synthetics with a triangular source time function with a given half duration, etc. Type process_trinet_syn.pl
without any argument for a detailed usage.
8.3.3
rotate.pl
The original data and synthetics have three components: vertical (BHZ), north (BHN) and east (BHE). However, for
most seismology applications, transverse and radial components are also desirable. Therefore, we need to rotate the
horizontal components of both the data and the synthetics to the transverse and radial direction, and rotate.pl can
be used to accomplish this:
rotate.pl -l 0 -L 180 -d DATA/*.BHE.SAC.bp
rotate.pl -l 0 -L 180 SEM/*.BHE.semd.sac.bp
where the first command performs rotation on the SAC data obtained through Seismogram Transfer Program (STP)
(http://www.data.scec.org/STP/stp.html), while the second command rotates the processed SEM synthetics.
8.4
8.4.1
Plot Movie Snapshots and Synthetic Shakemaps
movie2gif.pl
With the movie data saved in OUTPUT_FILES/ at the end of a movie simulation (MOVIE_SURFACE=.true.), you
can run the ‘create_movie_GMT’ code to convert these binary movie data into GMT xyz files for futher processing. A sample script movie2gif.pl is provided to do this conversion, and then plot the movie snapshots in GMT,
for example:
movie2gif.pl -m CMTSOLUTION -g -f 1/40 -n -2 -p
which for the first through the 40th movie frame, converts the moviedata files into GMT xyz files, interpolates them
using the ’nearneighbor’ command in GMT, and plots them on a 2D topography map. Note that ‘-2’ and ‘-p’ are
both optional.
CHAPTER 8. POST-PROCESSING SCRIPTS
8.4.2
26
plot_shakemap.pl
With the shakemap data saved in OUTPUT_FILES/ at the end of a shakemap simulation (CREATE_SHAKEMAP=.true.),
you can also run ‘create_movie_GMT’ code to convert the binary shakemap data into GMT xyz files. A sample
script plot_shakemap.pl is provided to do this conversion, and then plot the shakemaps in GMT, for example:
plot_shakemap.pl data_dir type(1,2,3) CMTSOLUTION
where type=1 for a displacement shakemap, 2 for velocity, and 3 for acceleration.
8.5
Map Local Database
A sample program remap_database is provided to map the local database from a set of machines to another set of
machines. This is especially useful when you want to run mesher and solver, or different types of solvers separately
through a scheduler (refer to Chapter 7).
run_lsf.bash --gm-no-shmem --gm-copy-env remap_database old_machines 150
where old_machines is the LSF machine file used in the previous simulation, and 150 is the number of processors
in total.
Bug Reports and Suggestions for
Improvements
To report bugs or suggest improvements to the code, please send an e-mail to the CIG Computational Seismology Mailing List ([email protected]) or Jeroen Tromp (jtromp-AT-gps.caltech.edu), and/or use
our online bug tracking system Roundup (www.geodynamics.org/roundup).
27
Notes & Acknowledgments
In order to keep the software package thread-safe in case a multithreaded implementation of MPI is used, developers
should not add modules or common blocks to the source code but rather use regular subroutine arguments (which can
be grouped in “derived types” if needed for clarity).
The Gauss-Lobatto-Legendre subroutines in gll_library.f90 are based in part on software libraries from
Massachusetts Institute of Technology, Department of Mechanical Engineering, Cambridge, Massachusetts. The nonstructured global numbering software was provided by Paul F. Fischer.
OpenDX (http://www.opendx.org) is open-source based on IBM Data Explorer, AVS (http://www.
avs.com) is a trademark of Advanced Visualization Systems, and ParaView (http://www.paraview.com) is
an open-source visualization platform.
The main developers of the SPECFEM3D source code are Dimitri Komatitsch, Jeroen Tromp, and Qinya Liu.
The following individuals (listed in alphabetical order) have also contributed to the development of the source code:
Min Chen, Vala Hjörleifsdóttir, Brian Savage, and Leif Strand. The following individuals (listed in alphabetical order)
contributed to this manual: Min Chen, Vala Hjörleifsdóttir, Sue Kientz, Dimitri Komatitsch, Qinya Liu, Alessia Maggi,
Brian Savage, Carl Tape, and Jeroen Tromp. The manual’s cover graphic was created by Santiago Lombeyda from
Caltech’s Center for Advanced Computing Research (CACR) (http://www.cacr.caltech.edu/).
Please e-mail your feedback, questions, comments, and suggestions to Jeroen Tromp (jtromp-AT-gps.caltech.
edu) or to the CIG Computational Seismology Mailing List ([email protected]).
28
Copyright
Main authors: Dimitri Komatitsch and Jeroen Tromp
Seismological Laboratory, California Institute of Technology, U.S., and University of Pau, France
© California Institute of Technology and University of Pau, November 2007
This program is free software; you can redistribute it and/or modify it under the terms of the GNU General Public
License as published by the Free Software Foundation (see Appendix B).
29
Bibliography
K. Aki and P. G. Richards. Quantitative seismology, theory and methods. W. H. Freeman, San Francisco, 1980.
M. Chen and J. Tromp. Theoretical and numerical investigations of global and regional seismic wave propagation
in weakly anisotropic Earth models. Geophys. J. Int., 168(3):1130–1152, 2007. doi: 10.1111/j.1365-246X.2006.
03218.x.
F. A. Dahlen and J. Tromp. Theoretical Global Seismology. Princeton University Press, Princeton, 1998.
D. S. Dreger and D. V. Helmberger. Broadband modeling of local earthquakes. Bull. Seismol. Soc. Am., 80:1162–1179,
1990.
W. Gropp, E. Lusk, and A. Skjellum. Using MPI, portable parallel programming with the Message-Passing Interface.
MIT Press, Cambridge, 1994.
E. Hauksson. Crustal structure and seismicity distribution adjacent to the Pacific and North America plate boundary
in Southern California. J. Geophys. Res., 105:13875–13903, 2000.
D. Komatitsch and J. Tromp. Spectral-element simulations of global seismic wave propagation-I. Validation. Geophys.
J. Int., 149:390–412, 2002a.
D. Komatitsch and J. Tromp. Spectral-element simulations of global seismic wave propagation-II. 3-D models, oceans,
rotation, and self-gravitation. Geophys. J. Int., 150:303–318, 2002b.
D. Komatitsch and J. Tromp. Introduction to the spectral-element method for 3-D seismic wave propagation. Geophys.
J. Int., 139(3):806–822, 1999. doi: 10.1046/j.1365-246x.1999.00967.x.
D. Komatitsch and J. P. Vilotte. The spectral-element method: an efficient tool to simulate the seismic response of 2D
and 3D geological structures. Bull. Seismol. Soc. Am., 88(2):368–392, 1998.
D. Komatitsch, Q. Liu, J. Tromp, P. Süss, C. Stidham, and J. H. Shaw. Simulations of strong ground motion in the Los
Angeles Basin based upon the spectral-element method. Bull. Seismol. Soc. Am., 94(1):187–206, 2004.
Q. Liu and J. Tromp. Finite-frequency kernels based on adjoint methods. Bull. Seismol. Soc. Am., 96(6):2383–2397,
2006. doi: 10.1785/0120060041.
Q. Liu and J. Tromp. Finite-frequency sensitivity kernels for global seismic wave propagation based upon adjoint
methods. Geophys. J. Int., 2008. submitted.
P. Lovely, J. Shaw, Q. Liu, and J. Tromp. A structural model of the Salton Trough and its implications for seismic
hazard. Bull. Seismol. Soc. Am., 96:1882–1896, 2006.
NOAA. National Oceanic and Atmospheric Administration (NOAA) product information catalog - ETOPO5 Earth
Topography 5-minute digital model. Technical report, U.S. Department of Commerce, Washington, D.C., 1988.
171 pages.
P. S. Pacheco. Parallel programming with MPI. Morgan Kaufmann Press, San Francisco, 1997.
M. P. Süss and J. H. Shaw. P-wave seismic velocity structure derived from sonic logs and industry reflection data in
the Los Angeles basin, California. J. Geophys. Res., 108:2170, 2003. doi:10.1029/2001JB001628.
30
BIBLIOGRAPHY
31
J. Tromp, C. Tape, and Q. Liu. Seismic tomography, adjoint methods, time reversal, and banana-doughnut kernels.
Geophys. J. Int., 160:195–216, 2005.
D. J. Wald and T. H. Heaton. Spatial and temporal distribution of slip for the 1992 Landers, California earthquake.
Bull. Seismol. Soc. Am., 84, 1994.
L. Zhu and H. Kanamori. Moho depth variation in southern California from teleseismic receiver functions. J. Geophys.
Res., 105:2969–2980, 2000.
Appendix A
Reference Frame Convention
The code uses the following convention for the Cartesian reference frame:
• the x axis points East
• the y axis points North
• the z axis points up
Note that this convention is different from both the Aki and Richards [1980] convention and the Harvard CentroidMoment Tensor (CMT) convention. The Aki & Richards convention is
• the x axis points North
• the y axis points East
• the z axis points down
and the Harvard CMT convention is
• the x axis points South
• the y axis points East
• the z axis points up
32
Appendix B
License
GNU GENERAL PUBLIC LICENSE Version 2, June 1991. Copyright (C) 1989, 1991 Free Software Foundation, Inc. 59 Temple Place, Suite 330, Boston, MA 02111-1307 USA
Everyone is permitted to copy and distribute verbatim copies of this license document, but changing it is not allowed.
Preamble
The licenses for most software are designed to take away your freedom to share and change it. By contrast, the
GNU General Public License is intended to guarantee your freedom to share and change free software – to make sure
the software is free for all its users. This General Public License applies to most of the Free Software Foundation’s
software and to any other program whose authors commit to using it. (Some other Free Software Foundation software
is covered by the GNU Library General Public License instead.) You can apply it to your programs, too.
When we speak of free software, we are referring to freedom, not price. Our General Public Licenses are designed
to make sure that you have the freedom to distribute copies of free software (and charge for this service if you wish),
that you receive source code or can get it if you want it, that you can change the software or use pieces of it in new
free programs; and that you know you can do these things.
To protect your rights, we need to make restrictions that forbid anyone to deny you these rights or to ask you
to surrender the rights. These restrictions translate to certain responsibilities for you if you distribute copies of the
software, or if you modify it.
For example, if you distribute copies of such a program, whether gratis or for a fee, you must give the recipients
all the rights that you have. You must make sure that they, too, receive or can get the source code. And you must show
them these terms so they know their rights.
We protect your rights with two steps:
1. Copyright the software, and
2. Offer you this license which gives you legal permission to copy, distribute and/or modify the software.
Also, for each author’s protection and ours, we want to make certain that everyone understands that there is no warranty
for this free software. If the software is modified by someone else and passed on, we want its recipients to know that
what they have is not the original, so that any problems introduced by others will not reflect on the original authors’
reputations.
Finally, any free program is threatened constantly by software patents. We wish to avoid the danger that redistributors of a free program will individually obtain patent licenses, in effect making the program proprietary. To prevent
this, we have made it clear that any patent must be licensed for everyone’s free use or not licensed at all.
The precise terms and conditions for copying, distribution and modification follow.
33
APPENDIX B. LICENSE
34
GNU GENERAL PUBLIC LICENSE TERMS AND CONDITIONS FOR
COPYING, DISTRIBUTION AND MODIFICATION
0. This License applies to any program or other work which contains a notice placed by the copyright holder saying it may be distributed under the terms of this General Public License. The “Program” below refers to any
such program or work, and a “work based on the Program” means either the Program or any derivative work
under copyright law: that is to say, a work containing the Program or a portion of it, either verbatim or with
modifications and/or translated into another language. (Hereinafter, translation is included without limitation in
the term “modification.”) Each licensee is addressed as “you.”
Activities other than copying, distribution and modification are not covered by this License; they are outside
its scope. The act of running the Program is not restricted, and the output from the Program is covered only if its
contents constitute a work based on the Program (independent of having been made by running the Program).
Whether that is true depends on what the Program does.
1. You may copy and distribute verbatim copies of the Program’s source code as you receive it, in any medium,
provided that you conspicuously and appropriately publish on each copy an appropriate copyright notice and
disclaimer of warranty; keep intact all the notices that refer to this License and to the absence of any warranty;
and give any other recipients of the Program a copy of this License along with the Program.
You may charge a fee for the physical act of transferring a copy, and you may at your option offer warranty
protection in exchange for a fee.
2. You may modify your copy or copies of the Program or any portion of it, thus forming a work based on the
Program, and copy and distribute such modifications or work under the terms of Section 1 above, provided that
you also meet all of these conditions:
(a) You must cause the modified files to carry prominent notices stating that you changed the files and the date
of any change.
(b) You must cause any work that you distribute or publish, that in whole or in part contains or is derived from
the Program or any part thereof, to be licensed as a whole at no charge to all third parties under the terms
of this License.
(c) If the modified program normally reads commands interactively when run, you must cause it, when started
running for such interactive use in the most ordinary way, to print or display an announcement including
an appropriate copyright notice and a notice that there is no warranty (or else, saying that you provide a
warranty) and that users may redistribute the program under these conditions, and telling the user how to
view a copy of this License. (Exception: if the Program itself is interactive but does not normally print
such an announcement, your work based on the Program is not required to print an announcement.)
These requirements apply to the modified work as a whole. If identifiable sections of that work are not derived
from the Program, and can be reasonably considered independent and separate works in themselves, then this
License, and its terms, do not apply to those sections when you distribute them as separate works. But when
you distribute the same sections as part of a whole which is a work based on the Program, the distribution of the
whole must be on the terms of this License, whose permissions for other licensees extend to the entire whole,
and thus to each and every part regardless of who wrote it.
Thus, it is not the intent of this section to claim rights or contest your rights to work written entirely by you;
rather, the intent is to exercise the right to control the distribution of derivative or collective works based on the
Program.
In addition, mere aggregation of another work not based on the Program with the Program (or with a work based
on the Program) on a volume of a storage or distribution medium does not bring the other work under the scope
of this License.
3. You may copy and distribute the Program (or a work based on it, under Section 2) in object code or executable
form under the terms of Sections 1 and 2 above provided that you also do one of the following:
APPENDIX B. LICENSE
35
(a) Accompany it with the complete corresponding machine-readable source code, which must be distributed
under the terms of Sections 1 and 2 above on a medium customarily used for software interchange; or,
(b) Accompany it with a written offer, valid for at least three years, to give any third party, for a charge no
more than your cost of physically performing source distribution, a complete machine-readable copy of
the corresponding source code, to be distributed under the terms of Sections 1 and 2 above on a medium
customarily used for software interchange; or,
(c) Accompany it with the information you received as to the offer to distribute corresponding source code.
(This alternative is allowed only for noncommercial distribution and only if you received the program in
object code or executable form with such an offer, in accord with Subsection b above.)
The source code for a work means the preferred form of the work for making modifications to it. For an
executable work, complete source code means all the source code for all modules it contains, plus any associated
interface definition files, plus the scripts used to control compilation and installation of the executable. However,
as a special exception, the source code distributed need not include anything that is normally distributed (in
either source or binary form) with the major components (compiler, kernel, and so on) of the operating system
on which the executable runs, unless that component itself accompanies the executable.
If distribution of executable or object code is made by offering access to copy from a designated place, then
offering equivalent access to copy the source code from the same place counts as distribution of the source code,
even though third parties are not compelled to copy the source along with the object code.
4. You may not copy, modify, sublicense, or distribute the Program except as expressly provided under this License.
Any attempt otherwise to copy, modify, sublicense or distribute the Program is void, and will automatically
terminate your rights under this License. However, parties who have received copies, or rights, from you under
this License will not have their licenses terminated so long as such parties remain in full compliance.
5. You are not required to accept this License, since you have not signed it. However, nothing else grants you
permission to modify or distribute the Program or its derivative works. These actions are prohibited by law if
you do not accept this License. Therefore, by modifying or distributing the Program (or any work based on the
Program), you indicate your acceptance of this License to do so, and all its terms and conditions for copying,
distributing or modifying the Program or works based on it.
6. Each time you redistribute the Program (or any work based on the Program), the recipient automatically receives
a license from the original licensor to copy, distribute or modify the Program subject to these terms and conditions. You may not impose any further restrictions on the recipients’ exercise of the rights granted herein. You
are not responsible for enforcing compliance by third parties to this License.
7. If, as a consequence of a court judgment or allegation of patent infringement or for any other reason (not
limited to patent issues), conditions are imposed on you (whether by court order, agreement or otherwise) that
contradict the conditions of this License, they do not excuse you from the conditions of this License. If you
cannot distribute so as to satisfy simultaneously your obligations under this License and any other pertinent
obligations, then as a consequence you may not distribute the Program at all. For example, if a patent license
would not permit royalty-free redistribution of the Program by all those who receive copies directly or indirectly
through you, then the only way you could satisfy both it and this License would be to refrain entirely from
distribution of the Program.
If any portion of this section is held invalid or unenforceable under any particular circumstance, the balance of
the section is intended to apply and the section as a whole is intended to apply in other circumstances.
It is not the purpose of this section to induce you to infringe any patents or other property right claims or to
contest validity of any such claims; this section has the sole purpose of protecting the integrity of the free software distribution system, which is implemented by public license practices. Many people have made generous
contributions to the wide range of software distributed through that system in reliance on consistent application
of that system; it is up to the author/donor to decide if he or she is willing to distribute software through any
other system and a licensee cannot impose that choice.
This section is intended to make thoroughly clear what is believed to be a consequence of the rest of this License.
APPENDIX B. LICENSE
36
8. If the distribution and/or use of the Program is restricted in certain countries either by patents or by copyrighted
interfaces, the original copyright holder who places the Program under this License may add an explicit geographical distribution limitation excluding those countries, so that distribution is permitted only in or among
countries not thus excluded. In such case, this License incorporates the limitation as if written in the body of
this License.
9. The Free Software Foundation may publish revised and/or new versions of the General Public License from
time to time. Such new versions will be similar in spirit to the present version, but may differ in detail to address
new problems or concerns.
Each version is given a distinguishing version number. If the Program specifies a version number of this License
which applies to it and “any later version,” you have the option of following the terms and conditions either of
that version or of any later version published by the Free Software Foundation. If the Program does not specify
a version number of this License, you may choose any version ever published by the Free Software Foundation.
10. If you wish to incorporate parts of the Program into other free programs whose distribution conditions are
different, write to the author to ask for permission. For software which is copyrighted by the Free Software
Foundation, write to the Free Software Foundation; we sometimes make exceptions for this. Our decision will
be guided by the two goals of preserving the free status of all derivatives of our free software and of promoting
the sharing and reuse of software generally.
NO WARRANTY
11. BECAUSE THE PROGRAM IS LICENSED FREE OF CHARGE, THERE IS NO WARRANTY FOR THE
PROGRAM, TO THE EXTENT PERMITTED BY APPLICABLE LAW. EXCEPT WHEN OTHERWISE
STATED IN WRITING THE COPYRIGHT HOLDERS AND/OR OTHER PARTIES PROVIDE THE PROGRAM “AS IS” WITHOUT WARRANTY OF ANY KIND, EITHER EXPRESSED OR IMPLIED, INCLUDING, BUT NOT LIMITED TO, THE IMPLIED WARRANTIES OF MERCHANTABILITY AND FITNESS
FOR A PARTICULAR PURPOSE. THE ENTIRE RISK AS TO THE QUALITY AND PERFORMANCE OF
THE PROGRAM IS WITH YOU. SHOULD THE PROGRAM PROVE DEFECTIVE, YOU ASSUME THE
COST OF ALL NECESSARY SERVICING, REPAIR OR CORRECTION.
12. IN NO EVENT UNLESS REQUIRED BY APPLICABLE LAW OR AGREED TO IN WRITING WILL ANY
COPYRIGHT HOLDER, OR ANY OTHER PARTY WHO MAY MODIFY AND/OR REDISTRIBUTE THE
PROGRAM AS PERMITTED ABOVE, BE LIABLE TO YOU FOR DAMAGES, INCLUDING ANY GENERAL, SPECIAL, INCIDENTAL OR CONSEQUENTIAL DAMAGES ARISING OUT OF THE USE OR
INABILITY TO USE THE PROGRAM (INCLUDING BUT NOT LIMITED TO LOSS OF DATA OR DATA
BEING RENDERED INACCURATE OR LOSSES SUSTAINED BY YOU OR THIRD PARTIES OR A FAILURE OF THE PROGRAM TO OPERATE WITH ANY OTHER PROGRAMS), EVEN IF SUCH HOLDER
OR OTHER PARTY HAS BEEN ADVISED OF THE POSSIBILITY OF SUCH DAMAGES.
END OF TERMS AND CONDITIONS
How to Apply These Terms to Your New Programs
If you develop a new program, and you want it to be of the greatest possible use to the public, the best way to achieve
this is to make it free software which everyone can redistribute and change under these terms.
To do so, attach the following notices to the program. It is safest to attach them to the start of each source file to
most effectively convey the exclusion of warranty; and each file should have at least the “copyright” line and a pointer
to where the full notice is found. For example:
One line to give the program’s name and a brief idea of what it does. Copyright © (year) (name of author)
This program is free software; you can redistribute it and/or modify it under the terms of the GNU General
Public License as published by the Free Software Foundation; either version 2 of the License, or (at your
option) any later version.
APPENDIX B. LICENSE
37
This program is distributed in the hope that it will be useful, but WITHOUT ANY WARRANTY; without
even the implied warranty of MERCHANTABILITY or FITNESS FOR A PARTICULAR PURPOSE.
See the GNU General Public License for more details.
You should have received a copy of the GNU General Public License along with this program; if not,
write to the Free Software Foundation, Inc., 59 Temple Place, Suite 330, Boston, MA 02111-1307 USA
Also add information on how to contact you by electronic and paper mail.
If the program is interactive, make it output a short notice like this when it starts in an interactive mode:
Gnomovision version 69, Copyright © year name of author Gnomovision comes with ABSOLUTELY
NO WARRANTY; for details type ‘show w’. This is free software, and you are welcome to redistribute it
under certain conditions; type ‘show c’ for details.
The hypothetical commands ‘show w’ and ‘show c’ should show the appropriate parts of the General Public License.
Of course, the commands you use may be called something other than ‘show w’ and ‘show c’; they could even be
mouse-clicks or menu items – whatever suits your program.
You should also get your employer (if you work as a programmer) or your school, if any, to sign a “copyright
disclaimer” for the program, if necessary. Here is a sample; alter the names:
Yoyodyne, Inc., hereby disclaims all copyright interest in the program ‘Gnomovision’ (which makes
passes at compilers) written by James Hacker.
(signature of Ty Coon)
1 April 1989
Ty Coon, President of Vice
This General Public License does not permit incorporating your program into proprietary programs. If your program
is a subroutine library, you may consider it more useful to permit linking proprietary applications with the library. If
this is what you want to do, use the GNU Library General Public License instead of this License.