1
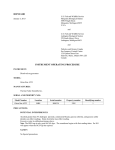
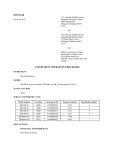
IOP:004.3B
U.S. Fish and Wildlife Service
Marquette Biological Station
3090 Wright Street
Marquette, Michigan 49855
U.S.A.
January 12, 2012
and
U.S. Fish and Wildlife Service
Ludington Biological Station
229 South Jebavy Drive
Ludington, Michigan 49431
U.S.A.
and
Department of Fisheries and Oceans
Sea Lamprey Control Centre
1219 Queen Street East
Sault Ste. Marie, Ontario P6A 2E5
Canada
INSTRUMENT OPERATING PROCEDURE
INSTRUMENT:
Fluorometer
MODEL:
Model 10-AU-005-CE
MANUFACTURER:
Turner Designs
SERIAL AND PROPERTY NOS:
Model number
Location
Serial number
Property number
Identifying number
10-AU-005-CE
LBS
6406xxx
US 392266
–
PRECAUTIONS:
POTENTIAL INTERFERENCES
No known interferences
SAFETY
No special safety precautions
PROCEDURES:
I.
II.
Installation
A.
Place the instrument on a vibration free laboratory counter.
B.
Connect power cord to instrument and to outlet. The unit will also run with power from a
12 volt battery if required.
Instrument Components
A.
B.
Controls and indicators
1.
Sensitivity: Sets the basic sensitivity of the unit. This procedure is done the first
time before calibration and is locked in place (5/32 Allen screw).
2.
Blank: Is used to compensate for the residual or “blank” fluorescence
corresponding to zero concentration of the unknown.
3.
Span: During calibration, minor adjustments may be made to sensitivity with the
span function
4.
Auto-ranging function: Will select the appropriate instrument range for the
standard and blank. Instrument ranges (high, medium, and low) are in factors of
10. You also have the option of setting the instrument to manual and selecting
the range for the blank and standard.
5.
Range alarm indicators: These indicate the selected sensitivity.
Cuvette system
1.
III.
A single-sample cell (cuvette) is used for measurement of individual samples
(discrete sampling).
Calibration
A.
The calibration process is completed only once; the information is stored within the
instruments memory. Once calibrated, drift is less than 0.5%.
B.
Prior to use, prepare a standard that is ~ 80% of the highest concentration that you may
encounter, but still within the linear range.
C.
Turn unit on and wait 10 minutes for instrument to warm up.
D.
Access the calibration menu, screen 2.0. Set the concentration range to Auto. Enter the
concentration for your standard.
E.
If you want the instrument to subtract a blank, set screen 2.12 to yes.
F.
Measure the blank to determine blank range. The auto range mode will automatically
select the appropriate range, generally the lowest range. Access Run Blank from screen
2.11. While on screen 2.11, wait until the reading is stable. Then, if the blank is less
than 200%, press<0>. Remove the cuvette and set aside.
IV.
G.
Run standard to determine the standard range (access Run Standard screen 2.3). The
auto range function will select the best standard range for the instrument that will ensure
the optimum resolution. Note: the best accuracy and resolution is attained on low and
medium ranges. In all cases, regardless of range selection, the concentration of the
standard must be within the linear range of the instrument for the dye being analyzed.
H.
Return to the Home screen and analyze samples. The dye concentration of each sample
will be displayed digitally (ug/L).
Operation
A.
Turn on power switch.
B.
Allow the instrument to warm up for 10 minutes. Set the basic operating level.
C.
Calibrate the instrument (see section III.) The calibration should be checked periodically
to ensure accuracy/precision and to detect drift.
D.
Pour a stream blank sample into a cuvette. This reading can be subtracted from sample
readings to compensate for background.
E.
Record the temperature of the samples for temperature compensation if greater precision
is needed.
MAINTENANCE:
I.
II.
General Maintenance and Repair
A.
Instrument is kept clean and out of dusty areas or areas with temperature and humidity
extremes. Make sure cuvettes are clean/clear and dry before use.
B.
The sample compartment should be air tight to prevent condensation on the cuvette. If
the unit is moved from a cold to a hot humid area, the unit may fail to operate correctly.
Leave instrument on and the condensate will evaporate in about 15-20 minutes.
C.
Little can be done by the operator to repair a malfunction. It is recommended that the
unit be returned to a service technician for repair.
Documentation
A.
Note all instrument malfunctions.
B.
Note all repairs conducted on the fluorometer.
REFERENCE:
Operating and Service Manual for the Model 10-AU-005-CE Fluorometer user’s manual, April 1999
Part Number 10-AU-074
Service department:
Turner Designs 845 W. Maude Ave. Sunnyvale, CA. 94086
This procedure has been reviewed and approved by the undersigned representative of the U.S.
Fish and Wildlife Service.
REVIEWED/APPROVED______________________________
Field Supervisor (U.S.)
DATE____________