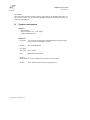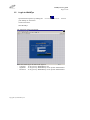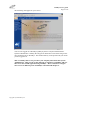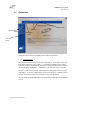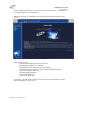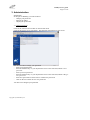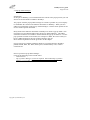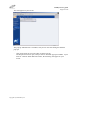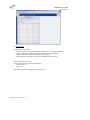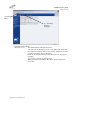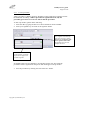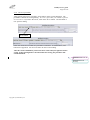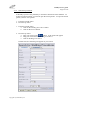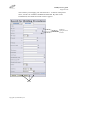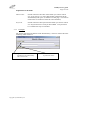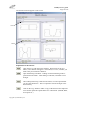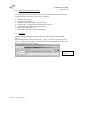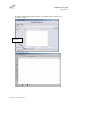
1
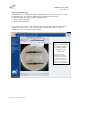
WeldEye® User guide.
Page 1 of 74
1.
General ............................................................................................................................... 2
1.1
System requirements .................................................................................................. 2
1.2
Login to WeldEye ...................................................................................................... 3
1.3
Definitions.................................................................................................................. 5
1.3.1
Left side menu.................................................................................................... 5
1.3.2
Top menu............................................................................................................ 6
1.4 General use (Tip)............................................................................................................ 10
2. System Administration ..................................................................................................... 13
2.1 Create users .................................................................................................................... 13
2.2 Give the users needed access ......................................................................................... 15
3 Administration.................................................................................................................. 21
3.1
Change password.................................................................................................. 21
3.2
Pop-up tables manager ......................................................................................... 22
3.3
Preferences ........................................................................................................... 24
4. Welding Procedures ............................................................................................................. 27
4.1 Create new documents ................................................................................................... 27
4.1.1
Open a new document ...................................................................................... 27
4.1.2 Explanation of the buttons....................................................................................... 29
4.1.3
Explanation of the fields .................................................................................. 29
4.1.4
Copying of lines ............................................................................................... 34
4.1.5
Save a procedure .............................................................................................. 35
4.1.6
Sketches............................................................................................................ 36
4.1.7
Lock a procedure .............................................................................................. 43
4.1.8
Revise a procedure ........................................................................................... 44
4.1.9
Search for procedures....................................................................................... 45
4.1.10
Print out of Welding Procedures ...................................................................... 52
4.1.11
Additional pages............................................................................................... 58
5. Tools..................................................................................................................................... 61
5.1
Sketch library ........................................................................................................... 62
5.1.1
Open the sketch library .................................................................................... 62
5.1.2
Search for sketches........................................................................................... 62
5.1.3
Example 1......................................................................................................... 63
5.1.4
Add sketches to the sketch library.................................................................... 65
5.1.5
Example 2......................................................................................................... 65
5.2
Print tool................................................................................................................... 68
5.2.1
Open the print tool directly .............................................................................. 68
5.2.2
Print documents marked in a list ...................................................................... 70
5.2.3
Print out of a Weld Summary List ................................................................... 71
5.2.4
Print out of a project......................................................................................... 72
5.2.5
Download ......................................................................................................... 72
Copyright© by Weldindustry AS
WeldEye® User guide.
Page 2 of 74
General
Introduction
This part of the manual describes system requirements to run WeldEye® and how to
log on to the system. We also describes WeldEye® definitions and useful tip for you
when using WeldEye®.
1.1
System requirements
Software:
- MS Windows
- Internet Explorer ver. 5.5 or higher
- Adobe Acrobat Reader
Hardware:
- Computer: Any computer supported by W98/2000/XP/Linux/ASP, with a
processor that is 300 MHz or higher.
- Memory:
Min 128 MB (RAM)
- Free hard
disc space: Min. 10 MB.
- Line:
Min double ISDN 128 k
- Monitor
colour depth: 256 colours (Millions of colours recommended)
- Mouse:
Copyright© by Weldindustry AS
Three buttons mouse with a scrolling function.
WeldEye® User guide.
Page 3 of 74
1.2
Login to WeldEye
Open Internet Explorer by clicking the
your desktop or start menu.
Click on Favorites
Launch Internet Explorer Browser.lnk
icon on
Start WeldEye
The following picture will appear:
Insert the following in the field to the right of:
- Company: To be given by Weldindustry AS
- Signature: To be given by Weldindustry AS or System Administrator.
- Password: To be given by Weldindustry AS or System Administrator.
Copyright© by Weldindustry AS
WeldEye® User guide.
Page 4 of 74
The following will appear on your screen:
1
You are now logged on to WeldEye Quality System as a System Administrator.
System Administrator is usually the only person allowed to create users and give the
users needed access to WeldEye. The marked field (1) in the picture tells you whom
you are logged in as.
NB!! Normally, there is one person in your company that will be the System
Administrator. This person got the authority to add users to WeldEye and give
these users the needed rights for using WeldEye. How to add users and give
users access to different parts of WeldEye is described in chapter 2.
Copyright© by Weldindustry AS
WeldEye® User guide.
Page 5 of 74
1.3
Definitions
Top menu
Buttons
Buttons
Drop-down
menu
Left side
menu
The figure above shows the WeldEye main menus and buttons.
1.3.1
Left side menu
The left side menu shows the main parts of WeldEye. The buttons in the left
side menu which have icons with a “+”, means that something more will be
visible if you click on the button. You may be used to double-click to activate
when using other applications. In WeldEye, you only click once to activate.
The parts visible on the left side menu depend on what kind of access you got
in WeldEye. If you for example have no access to the Project Administration,
this part will not be visible for you when you log on to WeldEye.
How the different parts of WeldEye are functioning is described in the chapters
2 to 10.
Copyright© by Weldindustry AS
WeldEye® User guide.
Page 6 of 74
1.3.2
Top menu
The top menu shows one drop-down menu. The rest is buttons.
Drop-down menu:
If you click (Not double-click) at the down-arrow on the right side of the dropdown menu, you will see all the projects that are active. You can switch
between these projects by click on the wanted project. See picture below.
Drop-down
menu where
you can switch
between active
projects.
Buttons:
In the top menu there are two kinds of buttons. All buttons are links to a
special function. In WeldEye, there are two kinds of buttons:
1. Link:
You need to click on the link to perform an action.
2. Hot-link: A drop-down menu appears when your cursor touches the
button.
Copyright© by Weldindustry AS
Top
menu
WeldEye® User guide.
Page 7 of 74
Explanation to the buttons:
Name of button Type of button
Logout
Link
Language
Hot-link
About
Link
Help
Hot-link
New
Hot-link
Open
Hot-link
Copyright© by Weldindustry AS
Explanation
When you click on logout, you will log out of
WeldEye. You will then see a window showing the
text “Thank you for running WeldEye”. If you click on
this text, you will come back to the WeldEye login
window. This function is also available from the left
side menu.
To be used when you want to change language.
Applicable languages today are English and
Norwegian.
When your cursor touches this button, the applicable
languages will appear as a drop-down menu. Click on
the preferred language. NB! You are required to click
on the refresh button after changing language to switch
to the chosen language. The refresh button is shown on
the picture below.
When you click on this button, information about
current version number of WeldEye will appear.
This function is also available from the left side menu.
When your cursor touches this button a drop-down
menu will appear. At this time the help function is
limited. To be implemented later.
This function is also available from the left side menu.
Can be used to create new documents. (Test reports,
WPAR, WPS, WI, welder certificates, etc.)
When your cursor touches this button a drop-down will
appear. See picture below. Some of the fields in the
drop-down menu show an arrow on the right. (a in the
picture below) This arrow means that a sub-menu will
open when your cursor touches this field. In the
picture below, you can see the sub-menu of Welding
Procedures is open. If you had clicked in the field for
WPAR, a new WPAR would open. You also have the
same function in the left side menu.
Can be used when you want to open a Weld Summary
List or an Inspection Plan List.
When your cursor touches this button, a drop-down
menu appears. You will now have the choice to open
the Weld Summary List (WSL) or the Inspection Plan
List (IPL). If you click on Weld Summary List, the
WSL for the current project will open. You are now
able to search for WSL by drawing no, section, serial
no, etc.
Please notify that the WSL or IPL for the project
showed in the project field will be opened. This field is
shown as b in the picture below. If you want to see a
WSL for another project, This is one way to do it:
1. Click on the down-arrow to the left in the
WeldEye® User guide.
Page 8 of 74
Name of button
Type of button
Print
Hot-link
Find
Hot-link
Explanation
project field
2. Choose the wanted project
3. Move your cursor to the Open button.
4. Click on Weld Summary List.
You can now load WSL from the chosen project.
Can be used when you want to print or e-mail
documents.
When your cursor touches this button, a drop-down
menu appears. This button gives you three
opportunities.
1. You can print the current document you are
working on in WeldEye
2. You can print documents you have marked in a
list
3. You can open the Print Tool to choose which
documents to be printed. This option is
normally used for printing final documentation
for a project.
Further explanations are given in chapter 8.
This function is also available from the left side menu.
Can be used when you want to search for documents.
When your cursor touches this button a drop-down
menu appears. If you click on the field Qualifications,
the search window “Search for certificates” will show.
You are now able to search for certificates. This
function is also available from the left side menu.
”Refresh”
button
b (Field
for
current
project)
a
Drop-down
menu
Sub-menu
Copyright© by Weldindustry AS
WeldEye® User guide.
Page 9 of 74
1
5
4
2
3
The picture above shows a section of a new Welding Procedure Specification (WPS). This is
what in WeldEye is called a document. A document can consist of:
1. Fields. This is where you can fill in information.
2. Fields with a drop-down menu. These fields have a mark to the right to show that this
field is a drop-down field. The content in a field’s drop-down menu is set in the Popup Tables Manager. How to administrate the content of the drop-down menus is
described in chapter 3.
3. Button with hyperlink.
4. Term with hyperlink.
5. Term without hyperlink.
Copyright© by Weldindustry AS
WeldEye® User guide.
Page 10 of 74
1.4 General use (Tip)
WeldEye® is build on new and modern technology. There are some general tips,
which can make the use of WeldEye easier, and more time efficient.
Function key F11:
When you are logged on to WeldEye, you can press the F11 key on your keyboard.
The result is a “bigger” screen. See the pictures below.
This area disappears
when pressing the
F11 key on your
keyboard.
“Bigger” screen
Copyright© by Weldindustry AS
WeldEye® User guide.
Page 11 of 74
You can also get a “bigger” screen if you click on the arrow placed on the top, to the
right in the left side menu. (Marked with an a on the pictures below) The left side
menu will then disappear. If you click on the arrow again, the left side menu will
appear.
a
a
Use of tabulator key and arrow keys
To move between fields in WeldEye documents, you can either use your mouse or
your keyboard.
Use of your keyboard:
- Tabulator key is used to move between fields. When pressing the tabulator
key you will move to the next field in the document.
-
To move backwards, you can hold in the Shift key, and then press the
Tabulator-key. You will then move back one field in the document.
-
Arrow keys are used to move up and down in the drop-down menus.
-
When using the keyboard to make documents, the drop-down menus will
open when you come to a drop-down field. You then use the arrow keys to
navigate in the drop-down menu. When the wanted text in the drop-down
menu is highlighted (blue), hit the Tabulator key. You have now chosen the
text and moved to the next field. (See picture below)
Copyright© by Weldindustry AS
WeldEye® User guide.
Page 12 of 74
Exxon is my
choice.
Press the
Tabulator
key. Exxon
is chosen and
the next field
is entered.
PS!! Always remember to save changes before leaving a document or
other places information/data is inserted.
Copyright© by Weldindustry AS
WeldEye® User guide.
Page 13 of 74
2. System Administration
2.1 Create users
Click on System Administration in the menu on your left. 2 boxes will show
up as subtitles. (User manager and Access manager.)
Click on user manager. The following picture will be shown:
You are now able to create users.
Explanation to the fields:
Name: Insert the name of the user you want to create.
Company: This field is locked. The name of your company will be shown.
Default project: Insert the project you want as default for the user. This project will
be active when the user starts WeldEye. If several projects are registered in
WeldEye, you can choose a project from the pull-down menu.
Signature: Insert the signature of the user you want to create. This signature will be
shown in the documents the user signs in WeldEye.
Password: Insert the users password in this field. A correct combination of a user’s
Company, Signature and Password are required to log on to WeldEye.
Copyright© by Weldindustry AS
WeldEye® User guide.
Page 14 of 74
Active:
If System Administrator wants the user to be active, let the tag stay visible. (Active is
default) If not, click in the field, and then the user is inactive. When a user is set to
inactive, the user got no access to WeldEye at all. This is the method used in
WeldEye instead of deleting users.
The main reason for no possibility to deleting users is that your company will need to
keep the documents a certain user has signed. The documents will still be visible in a
signed condition even if a user is made inactive.
There may be different reasons why a company will make a user inactive; The user
got another position in the company, the user have left the company etc.
Full project access:
If the user shall have access to all active projects in WeldEye, check (mark) the check
box when creating the user. If for example a client shall have read access in
WeldEye, you may not want him to read information in all your projects in WeldEye.
When you create your client as a WeldEye user, mark this check box and he will not
see any other information than for the project you set him up to. To define users in
project is described in chapter 9.
System access: If tagged, user got system access. This means that the user got the
right to create users and give the created users access to WeldEye.
If not tagged, user got no system access. (No system access is default)
NB!! Usually, there is one person in your company that got system access
(System Administrator). This person got the authority to add users to the
system, and give these users the needed rights for using WeldEye.
When you have finished create/edit a user, you are required to save to keep the
changes. You save by clicking on the save button.
Copyright© by Weldindustry AS
WeldEye® User guide.
Page 15 of 74
2.2 Give the users needed access
Introduction
Access to WeldEye can be given related to what function the user has in the
organisation. Normally the Welding Engineer needs access to bigger parts of
WeldEye than for example a person reporting NDE in production. WeldEye shall
also secure that settings and documents in WeldEye cannot be made, edited, signed,
deleted or red by unwanted personnel. Therefore WeldEye got an access manager
used to set wanted/limited access at different levels for the personnel using WeldEye.
Usually there is one person in the organisation who is responsible for creating users,
and give these users the access needed for them to perform their daily tasks.
WeldEye call this person for a System Administrator.
The System Administrator got what in WeldEye is called a System Access.
This means that when purchasing WeldEye, the System Administrator with a System
Access, is already set. The System Administrator needs to create new users and give
these users access to WeldEye.
Give users needed access to WeldEye:
To open the Access Manager, please do the following:
1. Click on the System Administration button in left side menu (If not already open)
2. Click on the Access Manager button. The following picture will appear on your
screen:
Click on the arrow to the right for Choose user. The drop-down menu will now show
the created users.
Copyright© by Weldindustry AS
WeldEye® User guide.
Page 16 of 74
Choose the wanted user. The following picture will appear on your screen:
The main topics of WeldEye are shown: DOCUMENT REGISTER, INSPECTION
PLANS, INSPECTION REPORTS, etc.
As you can see, all of the topics got a + sign on their left. If you click on the + sign, a
submenu will appear. This is where you set the wanted access for a user. None is the
default access for a new created user.
Copyright© by Weldindustry AS
WeldEye® User guide.
Page 17 of 74
Copyright© by Weldindustry AS
WeldEye® User guide.
Page 18 of 74
Explanation to the different access levels:
- None: The user has no access to this part of WeldEye.
- Read: The user has the access to read the information in this part of
WeldEye.
- Write: The user has access to write in to this part of WeldEye.
- Sign: The user has access to sign document(s) in this part of WeldEye.
- Delete: The user has access to delete documents in this part of WeldEye.
- Special:
Copyright© by Weldindustry AS
WeldEye® User guide.
Page 19 of 74
Example:
Copyright© by Weldindustry AS
WeldEye® User guide.
Page 20 of 74
System Administrator has set access to Demo User as shown above. The access can
for example apply for an NDE operator.
When this user logs on to WeldEye, the user will see the following picture on the
screen:
Please note that buttons in the left side menu disappears.
This user got access to:
- Sign Inspection Reports MT, PT, RT and VT.
- Read Inspection Reports UT and PMI
- Read information in Weld Summary Lists (WSL).
- Read information in Weld View (WV) Engineering and Production.
- Sign in WV Quality Inspection.
- Read Weld Repair Reports.
- Write NDE requisitions
- Access to the Print Tool.
Conclusion: The left menu will have an increased or decreased number of visible
buttons depending on given access.
Copyright© by Weldindustry AS
WeldEye® User guide.
Page 21 of 74
3 Administration
Introduction
In this part of WeldEye you will be able to:
- Change your password
- Edit pop-up tables
- Adjust your preferences
3.1 Change password
Click on the Administration button on the left side menu.
Click on the Change password button. The following will appear on your screen:
You are now able to change your password.
- Insert your old password.
- Press the tabulator key on your keyboard to move to the next field, which is New
password.
- Insert your new password.
- Press the tabulator key on your keyboard to move to the next field, which is Retype
New password.
- Insert new password one more time to confirm new password.
- Click on the Save button to save new password.
You have now changed your password.
Copyright© by Weldindustry AS
WeldEye® User guide.
Page 22 of 74
3.2 Pop-up tables manager
Introduction
In this part of WeldEye you can administrate the content in the pop-up menus you will
find in several documents available in WeldEye.
The purpose with the pop-up tables manager is to make it possible for your Company
to standardize the content in the different documents in WeldEye. When you have
added your information in the Pop-up Tables Manager, it will be much quicker for the
users to make required documents.
Many fields in the different documents in WeldEye are made as pop-up fields. This
means that you can add information into the Pop-up Tables Manager. The added
information will then be available in the documents this pop-up is related to. If some
pop-up fields are blank in a document, for example in a WPS, the reason is that you
haven’t added anything in the pop-up tables manager up front.
More detailed explanations will be given later in this chapter.
Pop-up menus are available in different fields in several documents in WeldEye,
pWPS, WPAR, WPS, WI, WPT, NDE reports, Weld Summary Lists, welders
certificates etc.
How to open the Pop-up tables Manager:
Click on the following on the left side menu:
- Administration
- Pop-up Tables Manager (Access is required. If the button Pop-up Tables
Manager is not visible, you have no access to edit pop-up tables)
Copyright© by Weldindustry AS
WeldEye® User guide.
Page 23 of 74
This will appear on your screen:
The pop-up Administrator is available, and you can now start editing the different
pop-ups.
-
Click on the down-arrow to the right of Choose pop-up.
The drop-down menu is open, and you will see all of the pop-ups available. If you
click on “General: Filler Material Classes, the following will appear on your
screen:
Copyright© by Weldindustry AS
WeldEye® User guide.
Page 24 of 74
3.3 Preferences
Preferences can be used to:
- Choose the project you want WeldEye to open when you log on to WeldEye.
- Choose what kind of date format to be shown when using WeldEye.
- Choose if WeldEye shall be in English or Norwegian.
- Choose which e-mail address you want as default in the print tool.
How to open the Preferences:
Click on the following on the left side menu:
- Administration
- Preferences
The following picture will appear on your screen:
Copyright© by Weldindustry AS
WeldEye® User guide.
Page 25 of 74
(2) Refresh
button.
(1) Switching
between
languages
Explanation to the fields:
- Default project:
This field contains a drop-down menu.
You can click on the down- arrow to the right of the field, and
the content in the drop-down will be visible. (Depends on what
projects is set in the Project manager)
From the drop-down menu you can choose one of the projects
available.
You choose a project by clicking on it.
When you log in to WeldEye, the chosen project will be the
active one.
Copyright© by Weldindustry AS
WeldEye® User guide.
Page 26 of 74
- Date format:
This field contains a drop-down menu.
You can click on the down- arrow to the right of the field, and
the content in the drop-down will be visible.
You can choose between American date format and different
European date formats.
From the drop-down menu you can choose preferred date
format.
You choose a date format by clicking on it.
When you log in to WeldEye, the chosen date format will be
used in all documents in WeldEye.
- Language:
This field contains a drop-down menu.
You can click on the down- arrow to the right of the field, and
the content in the drop-down will be visible.
You can choose between English and Norwegian languages..
From the drop-down menu you can choose preferred language.
You choose language by clicking on it.
When you log in to WeldEye, the chosen language will be used.
Note: You can also switch between languages by clicking the
language button (1), and then click on refresh (2 on the picture
above)
- E-mail address:
This is where you set the wanted designation for printing of
documents. Inserted e-mail address will automatically show up
in the print tool.
Copyright© by Weldindustry AS
WeldEye® User guide.
Page 27 of 74
4. Welding Procedures
Introduction
In this part of the user guide, it will be described how to:
- Create new documents
- Revise existing documents
- Use the sketch library
- Use the drawing tool
- Search for existing documents
Currently supported document layouts are:
o EN 288 pWPS
o EN 288 WPAR
o EN 288 WPS
o EN 288 WPT
o EN 288 WI
o ASME PQR
o ASME WPS
4.1 Create new documents
4.1.1 Open a new document
To open a new document, you have two options:
1. From the left side menu
2. From the top menu
1. From the left side menu
a. Click on the Welding Procedure button.
b. Click on New
c. Click on the wanted document layout. In this case pWPS.
2. From the top menu
button. A sub menu will appear.
a. Move your cursor to the
b. Move your cursor to Welding Procedure. A sub menu will appear.
c. Click on the wanted document layout. In this case pWPS.
Copyright© by Weldindustry AS
WeldEye® User guide.
Page 28 of 74
An empty document (pWPS) will appear on your screen:
2
1
3
4
5
6
Copyright© by Weldindustry AS
7
WeldEye® User guide.
Page 29 of 74
As shown above, only three buttons are visible in the top. (1). When saving the
document, more buttons will appear. Note that the field Prod. by (2) is mandatory
(must be filled in) before you are able to save.
In the document there are fields with and without drop-down menus. If a field not
contains drop-down menu, no icon is showed to the right of the field. (2)
If the field contains a drop-down menu, an icon is shown to the right of these fields.
(4)
There are also Go buttons in the document. The Go button is shown to the right of the
field. (3). If a document number is referred to in a field, the document will open in a
new window directly. The referred document must of course exist in WeldEye.
The documents includes an area for sketches (5)
4.1.2 Explanation of the buttons
Click here to remove the text inserted after last time you saved.
Click her to save the document
Click here to go to the previous page.
The document is set to active. Remove the tag by click on it. The
document is then inactive. Instead of deleting the document, you can
set it to inactive. The document is still in the database and it’s possible
to search for inactive documents.
4.1.3 Explanation of the fields
The fields in the different documents are very much the same. The following
describes the terms in a general manner.
pWPS no
Insert the documents number in this field.
Ref.
If you need to insert any reference in the document, insert it here.
Date
This field is not for editing. The date will automatically show when
you save the document. Requires that you have inserted a date in the
date field (6), and your signature in the signature field (7).
Rev.
Insert the document revision number in this field.
Copyright© by Weldindustry AS
WeldEye® User guide.
Page 30 of 74
Prod. by
Enter who made this document. What you type in to this field is
optional. Usually your Company name or the name of the person who
make the document is entered.
Client
Insert the name of the Client. If the document is to be made in a more
general manner, you can for example assign it as a general document or
an internal document.
Ref. standard Insert a reference to a standard. The procedure must fulfill the
requirements in the stated standard. Examples of standards to be filled
in can be:
EN 288-3, ASME IX, NORSOK M-601 etc.
Project
Insert the name of the Project this procedure shall be used on. If the
document is to be made in a more general manner, you can for example
assign it as a general document or an internal document.
Ref. spec.
Possibility to insert a reference to a specification. Many clients have
additional welding requirements in a project specific specification.
Several companys have their own internal specifications. If so, you can
insert a reference to the specification(s) in this field. The field can also
remain empty.
Exam. body
If the procedure is approved by, or tested by a third party, you can enter
the name of the examination body in this field.
Location
Insert your Company location. Usually the name and / or the location
of the company who welds the qualification test is inserted in this field.
Ref. WP
If you want to refer to another welding procedure, insert the WP name
in this field. You can refer to four different documents. The fields
have Go buttons (3) to the right, which means that the referred
document will open directly in a new window when you click on the
Go button. The referred document must of course exist in WeldEye.
Welding Process
Insert the name of the welding process. Three processes for
each procedure are supplied.
Shielding gas type
Insert the name of the shielding gas for each welding process.
Weaving (yes/no)
State yes or no. If yes, state the width of the weaving.
Purging gas type
State the name of the purging gas, if any.
Welding positions
State the welding position(s) to be used for a qualification or to
be used in production.
Joint type
State what type(s) of joint the welding procedure applies for.
Copyright© by Weldindustry AS
WeldEye® User guide.
Page 31 of 74
Joint preparation
Describe how to do the joint preparation.
Cleaning method
Describe how to clean the joint before welding
Backing
Describe if backing shall be / are used. If used, enter the type.
Single/Double
State if the procedure applies for single sided welding, double
sided welding, or both.
Back gouging
Describe how to do the back gouging, if any.
Flux designation
State the flux designation, if used.
Flux handling
Describe how to handle the flux. You can also refer to a
procedure for handling of filler/consumables in this field.
Tungsten electrode
Describe what Tungsten type and size used or shall be used.
Torch angle
State the torch angle used or shall be used. (Different torch
angles depending on welding processes.)
Stand off distance
State the stand off distance
Nozzle diameter
State the nozzle diameter here. Internal nozzle diameter is the
most correct diameter to enter.
Tack welding proc.
If a procedure for the tack welding is or shall be used, enter the
name of the procedure here.
Identification of parent metal
C max:
Max permitted carbon content in the parent material to be welded.
CE max:
Maximum permitted carbon equivalent of parent metal to be welded on.
Value is based on actual CE at parent metal used for qualification of
welding procedure and permitted variable given in standard the welding
has to take place in accordance with.
PCM max:
Maximum permitted PCM of parent metal to be welded. Value is based
on actual PCM content at parent metal used for qualification of welding
procedure and permitted variable given in standard the welding has to
take place in accordance with.
Part
Part I and Part II are references to the two parent metals to be welded
together. Can also be referred to on the sketch. Information about the
two parts are given in the fields: Name/grade, Standard, Group,
Delivery cond., thickness (range) and diameter (range).
Copyright© by Weldindustry AS
WeldEye® User guide.
Page 32 of 74
Name/grade
Identify trade name of parent metal to be joined. (For Part I and Part II.
Standard
Identify the standard that parent metal has been produced in accordance
with.
Group
Identify what material group the material belong to. The material
group can be in accordance with EN 288 standard when using EN 288
document layout. When using ASME IX layouts, use the ASME IX
material group numbers. (P-no or S-no)
Note! If pop-up table manager “General: Materials” is filled in properly, it’s
only required to choose the name/grade from the drop-down menu. The fields
Standard, Group and Delivery condition will be filled in automatically.
Delivery cond. Identify what delivery condition to the parent material welded.
Examples of delivery conditions: Normalized, Quenched and tempered,
Solution annealed etc.
Thickness
Range
Diameter
Range
Insert the thickness range for this procedure. If a WPAR, insert the
thickness of the parent metal used for the qualification.
Insert the diameter range for this procedure. If a WPAR and a tube,
insert the diameter of the tube used for the qualification. According to
EN 288, the outside diameter shall be stated.
Identification of filler metal
Index
A number you are required to refer to in the area for welding
parameters. Index 1,2 or 3. This means that three different fillers can
be reported.
Trade name
Insert the name of the filler name. The trade name is usually the name
given in the filler catalogue. Elgacore DWA 55 LSR and ESAB OK
48.08 are examples of fillers trade name.
Classification The fillers classification shall be entered in this field. The
classification is usually found in the filler catalogue.
Group
Filler
handling
Enter how the filler belonging to actual index shall be handled. You
can also refer to a procedure or a specification for filler handling.
Note! If pop-up table manager “General: Filler Materials” and “General Filler
Material (Wires) is filled in properly, it’s only required to choose the trade name
Copyright© by Weldindustry AS
WeldEye® User guide.
Page 33 of 74
from the drop-down menu. The fields Classification, Group and Filler handling
will be filled in automatically.
Welding parameters
Equipment
Insert type of equipment used or shall be used
Pass no
Insert the pass number for the welding parameters this pass or passes
applies for. 9 lines are supplied.
Index
Insert the index for the filler to be used. Must correspond with the
index given in Identification of filler material.
Dia [mm]
Insert the diameter for the actual filler to be used.
Welding
process
Insert the actual welding process to be used
Wire feed
speed [mm/min] Insert the wire feed speed if necessary. Applies for automatic or semi
automatic processes.
Current
Insert the wanted current for this pass. You can insert a single current
value or a current range.
Voltage
Insert the wanted voltage for this pass. You can insert a single value or
a range.
Current/
Polarity
Identify what type of current used and the polarity. Examples of
current types are Alternating Current (AC) and Direct Current (DC)
Examples of polarity are electrode negative (-) and electrode positive
(+)
Welding speed Insert the welding speed in this field. You can apply a single value or a
range.
Run out length When using the welding process 111 (EN 288) SMAW (ASME IX),
the run-out length can be entered.
Run out length: After welding one covered electrode, measure the
length of the weld metal.
Gas [l/min]
Insert the gas flow for the shielding gas.
Copyright© by Weldindustry AS
WeldEye® User guide.
Page 34 of 74
Heat input
The heat input is calculated automatically provided that the Current,
Voltage and welding speed is entered. You can also enter the heat
input manually by typing it in to the fields. It’s also possible to set a
factor for each welding process. To be done in the Pop-up tables
manager, “Welding Procedures: Welding Process”
4.1.4 Copying of lines
It’s possible to copy data from one line and paste the data into another line.
This can be done by use of the buttons below.
Button for copying a line
Button for paste a copied line
1. Go to the line you want to copy from, and click on the
button.
2. Go to the line you want to paste the data in to, and click on the
button.
To delete a line, copy an empty line and paste it in to the line you want to delete.
Heat treatment
Method
Insert method used or method to be used for the heat treatment.
(Electrical heating, propane etc.)
Preheat min. Insert the minimum preheat temperature for this procedure.
Interpass
temp. max
Insert maximum permitted temperature before welding of the next pass
can start.
Heat treatment
proc.
In this field, you can refer to a heat treatment procedure, if any.
Temp.control Identify how to perform the temperature control for the preheat
temperature and/or interpass temperature.
PWHT min.°C Identify the minimum temperature for the Post Weld Heat Treatment
Max. °C
Identify the minimum temperature for the Post Weld Heat Treatment
Soaking mm/min
Identify the PWHT temperature holding time.
Heating rate °C/h
Cooling rate°C/h
Identify the speed of heating up to holding temperature.
Identify the speed of cooling from holding temperature, after
PWHT holding time
Copyright© by Weldindustry AS
WeldEye® User guide.
Page 35 of 74
Remarks
In this field you can enter additional information.
Date/Signature
Button for open the calendar
Button for inserting your signature
4.1.5
Save a procedure
To save a procedure, you need to fill in the field Produced by. This field is
mandatory, which means that you are required to fill it in before saving. When the
Produced by field is filled in, you can save the procedure, by click one time on the
Save button.
When a procedure is saved, more buttons will appear on the top. See picture below.
Explanation to the buttons
Gives you the opportunity to save the document as a new
document. You can also save the document as an other
document layout. For example save a WPAR as a WPS. All
data in the WPAR will be saved in a WPS document. This is a
kind of copy function. You are required to give the document a
unique name. (A dialog box will open when you click on the
Save as button.) Enter the name of the document and click OK.
The drawing tool will open when you click on this button.
A sub menu will appear when drag the cursor over this button.
Paste, Insert, Copy to clipboard and Copy to sketch library are
the options. See also Chapter 7.1.6.
Delete the document. Documents can also be deleted from
welding procedures survey. (See Chapter 7.1.9.1) You are able
to delete more than one document from the survey. Please note
that some documents cannot be deleted. If the document is
referred to elsewhere in WeldEye, the document cannot be
deleted. The option is then to make the document inactive.
Copyright© by Weldindustry AS
WeldEye® User guide.
Page 36 of 74
Drop-down menu where you can open the documents related to this procedure. There
are different numbers of “pages” depending of what kind of document you work in.
4.1.6
Sketches
To add a sketch to a procedure you have three options:
1. Open the editor and draw the sketch.
2. Copy a sketch from the sketch library.
3. Insert a sketch from an existing procedure.
4.1.6.1 Draw a sketch
To be able to draw a sketch, you need to open the drawing tool.
-
button. The drawing tool will open in a new window. The
Click on the
picture below shows menus in the drawing tool after click on the button for
drawing lines
Copyright© by Weldindustry AS
WeldEye® User guide.
Page 37 of 74
After drawing the sketch, you are required to click on File and Save to URL. See
picture below:
The sketch is now saved in the procedure.
To do further editing of the sketch: Click on the editor button, and the drawing tool
with the existing drawing opens. Edit the sketch and save to URL.
To save the changes you are always required to click on the
or in the bottom of the procedure.
4.1.6.2
button on the top
Copy a sketch from the sketch library
To copy a sketch from the sketch library, please do the following:
o Open the sketch library from the left side menu (Tools, sketch library) or
button. A sub menu
from the top menu (Move your cursor to the
will appear. Click on sketch. The sketch library are now open)
o Search for the wanted sketch. Described in chapter 8.
Example:
We want to copy a sketch showing a butt weld and a V-groove in to the procedure.
Please do the following:
o Insert BV% as a search criteria. To be entered into the field for sketch
name.
o Click on the search button
All sketches in the sketch library starting with the name BV will be shown. See picture
below:
Copyright© by Weldindustry AS
WeldEye® User guide.
Page 38 of 74
Click on the Copy button to copy the wanted sketch. In this case BV.
Copyright© by Weldindustry AS
WeldEye® User guide.
Page 39 of 74
1
Drag your cursor to the Sketch button in the procedure. A sub menu will appear. Click on
Paste. (1 in picture above) The sketch is now pasted into the procedure. If you want to edit
the sketch, click on the Editor button and the editor opens.
NB!!
You are always required to open the editor, click on File, Save to URL before saving the
procedure. (Even if you don’t have done any changes to the sketch) This to get the
sketch saved in the document.
Also remember File and Save to URL when editing of the sketch is done.
4.1.6.3
Insert a sketch from an existing procedure
It’s possible to insert a sketch from an existing procedure in WeldEye. To be able to do
so, you need to know the Index number to the procedure you want to copy the sketch
from. An Index number is a unique number for a document. WeldEye will create this
number automatically when you save the document. This number will show up in the
down left corner. See picture below:
Copyright© by Weldindustry AS
WeldEye® User guide.
Page 40 of 74
To copy a sketch from an existing procedure, please do the following:
1. Drag your cursor to the Sketch button in the procedure. A sub menu will
appear. Click on Insert. (1 in picture below) A dialog box will open.
2. In this dialog box, type in the Index number to the procedure you want to
copy the sketch from.
3. Click on the OK button. The sketch is now copied.
4. Open the editor.
5. Click on the File button. (Upper left corner) and Save to URL.
6. Close the editor, and save the procedure by click on the Save button.
NB!!
You are always required to open the editor, click on File, Save to URL before saving the
procedure. (Even if you don’t have done any changes to the sketch) This to get the
sketch saved in the document.
Also remember File and Save to URL when editing of the sketch is done.
1
2
Copyright© by Weldindustry AS
WeldEye® User guide.
Page 41 of 74
4.1.6.4
Copy sketch to clipboard
In WeldEye there is a possibility to copy a sketch to clipboard for then be able to paste it
in another document or an additional page. To copy sketch to clipboard, please do the
following:
Drag your cursor to the Sketch button in the procedure. A sub menu will appear. Drag
your cursor to Copy To and click on Clipboard. (1 in picture below).
The sketch in the procedure is now copied to your clipboard.
1
2
4.1.6.5
Copy sketch to Sketch Library
In WeldEye there is a possibility to copy a sketch from the procedure and into the sketch
library. To copy a sketch from a procedure into the sketch library, please do the following:
Drag your cursor to the Sketch button in the procedure. A sub menu will appear. Drag
your cursor to Copy To and click on Sketch Library. (2 in picture above). A registration
box will appear:
In this box you are required to give the sketch a name. Insert the name in the field Sketch
name:
In addition to the sketch name, you are also able to register the sketch with keywords.
This is optional. Sketch name and keywords are possible search criteria’s in the Sketch
Library.
When the sketch name (and keywords) is entered, click the OK button to copy the sketch
from the procedure to Sketch Library.
Copyright© by Weldindustry AS
WeldEye® User guide.
Page 42 of 74
4.1.6.6
Delete sketch from Sketch Library
In WeldEye there is a possibility to delete sketches from the sketch library. In the
following example, the sketch with sketch name Test shall be deleted. To delete a sketch
from the sketch library, please do the following:
1. Open Sketch Library (Tools->Sketch Library from the left side menu.)
2. Search for the Sketch to delete. The sketches searched for will open in Sketch
Library. In this case all sketches with sketch name starting with Test was searched
for:
3. Click the Delete button under the sketch you want to delete. In this case, Test.
4. A warning will appear on your screen.
5. Click OK to confirm, or Cancel to abort.
Copyright© by Weldindustry AS
WeldEye® User guide.
Page 43 of 74
4.1.7
Lock a procedure
After a procedure is filled in properly, WeldEye require a date and a signature to lock
the document for editing. When a procedure is signed and saved, only the
personnel given access to revise are able to edit the procedure.
To lock a procedure, please do the following:
1. Insert the date by typing the date in or choose the date from the calendar.
2. Insert your signature by one click on the signature button.
This field will be filled in with the
user’s signature automatically,
when click on the Save button.
NB! You are required to click
on the signature button first.
The signature set in the user
manager will show.
Another user can enter the
second signature. Normally
the person who approve the
procedure sign here
In WeldEye there are two signatures, one signature for the user who made the
procedure and one signature for the person who shall approve the procedure.
3. Save the procedure by clicking one time at the Save button.
Copyright© by Weldindustry AS
WeldEye® User guide.
Page 44 of 74
4.1.8
Revise a procedure
After signing and saving a procedure, some buttons on the top will disappear. The
procedure is locked for revising/editing. To revise a procedure you need the required
access to do so. If you have the access, click on the Revise button. The document is
now open for editing.
Revise button
After click on the Revise button, the procedure is unlocked. As shown above, more
buttons have appeared. You are now able to do the revision/editing.
After the revision is finished, you need to insert a date and your signature before
saving. If date and signature is not inserted before saving, the procedure will
remain unlocked.
Formatted: Indent: Left: 36
pt
Formatted: Bullets and
Numbering
Copyright© by Weldindustry AS
WeldEye® User guide.
Page 45 of 74
4.1.9
Search for procedures
In WeldEye you have the possibility to search for documents in the database. To
be able to perform search, you need to open the search picture. To open the search
picture you have two options:
1. From the left side menu
2. From the top menu.
1. From the left side menu
a. Click on the Welding Procedures button.
b. Click on the Search button.
2. From the top menu:
button. A sub menu will appear.
a. Drag your cursor to the
b. Drag your cursor down to Welding Procedures.
c. Click on Welding Procedures.
In both cases, the following will appear on your screen:
Copyright© by Weldindustry AS
WeldEye® User guide.
Page 46 of 74
This is where you can apply your search criteria’s. As shown in the picture
above, two tabs are available: Standard and Extended. By click on the
Extended tab, more fields for search criteria’s appears:
Fields for
typing in search
criteria’s
Buttons
Copyright© by Weldindustry AS
WeldEye® User guide.
Page 47 of 74
Explanations to the buttons
Click on this button when the search criteria’s are entered.
Click on this button to count the number of hits. Some companies got
thousands of welding procedures (WPAR/WPS etc.) in the database. A
search for all procedures will take a long time. To count the number of
hits is done in seconds. Therefore it can be useful to count the number
of hits before performing the search. If the number of hits is above
approximately 100, it’s recommended to enter one or more search
criteria’s, if possible.
Blank the search criteria fields.
Explanation to the fields
Index
If you know the index number for the procedure you search for, type it
in to this field and click on the Search button. Since this is a search for
a unique procedure, the procedure will open directly.
WP no:
Type in the number of the procedure to search for. You can also insert
% to search for more procedures. Example: You want to search for the
procedures with names starting with 12. You then enter 12% in this
field.
Project
Search for procedures related to a certain project.
WP type
State what type of procedure you want to search for. WI, WPAR,
WPS, WPT or pWPS.
Process
State which welding process(es) the procedure shall contain.
Preheat
State if you want to search for procedures with preheat.
Parent metal State which parent metal(s) the procedures you want to search for
contains.
Thickness
State the thickness of the parent metal the procedures you want to
search for contains. The search result will show all procedures
containing the inserted thickness.
Diameter
State the diameter the procedures you want to search for contains. The
search result will show all procedures containing the inserted diameter.
Joint type
Search for procedures related to a certain joint type.
Copyright© by Weldindustry AS
WeldEye® User guide.
Page 48 of 74
Active
Possibility to search for active, inactive or both active and inactive
procedures. Instead of deleting procedures, you have the opportunity to
set them inactive. See chapter 7.1.2.
Yes, means that you search for active procedures.
No, means that you search for procedures set as inactive.
Blank, means that you search for both active and inactive procedures.
Order by
Gives you the opportunity to decide how the procedures shall be sorted
when showing up in the survey. (Sorted by Index number or procedure
number)
Survey
Gives you the opportunity to decide which survey type that shall appear
after search is performed.
Heading: The most common information is shown.
Miscellaneous: A more detailed survey is shown.
Sketches: The sketch for each procedure is shown. In addition to the
sketches, information for each procedure is shown.
Copyright© by Weldindustry AS
WeldEye® User guide.
Page 49 of 74
Example:
I want to search for:
- WPS’s that applies for the welding process 136
- For the parent metal 360 LT.
- I just want to search for active procedures.
- Order/sort the procedure by Index number
- I want the survey to appear as heading.
The search criteria’s is to be entered as follows:
Search criteria’s
is chosen by
using the drop-
After your search criteria’s are entered, you execute the search by click on the Search
button. The survey appear on your screen:
Copyright© by Weldindustry AS
WeldEye® User guide.
Page 50 of 74
4.1.9.1 Welding Procedure Survey
Hyperlinks to the
actual WPS.
Three WPS’s are shown. The Heading survey is opened. By click on the tabs
Miscellaneous or Sketch, more information regarding this WPS’s will appear.
Under the columns WP NO. and INDEX NO., the text is blue. This means that the
WPS no and Index number are hyperlinks. You open the wanted WPS just by a click
on the hyperlink.
Explanation to the buttons:
The checked (marked) documents will be copied to the project you
currently work in. For example approved procedures for the project.
(Not available for WeldEye WP)
Possibility to make more than one document inactive at the same time. Check (mark)
the check box(es) to the left of WP NO. you want to make inactive, and click the Make
Inactive button. If Inactive procedures are searched for, the Make inactive button is
replaced with Make active button. This to have the opportunity to make more than
one procedure active at the same time.
4.1.9.2 Deleting of procedures
Possibility to delete more than one procedure at the same time. Check
(mark) the check box(es) to the left of WP NO. you want to delete, and
click the Delete button. Please note that some documents cannot be
deleted. If the document is referred to elsewhere in WeldEye, the
document cannot be deleted. The option is then to make the document
inactive. You are also able to delete a procedure from the procedure
“front page”. To delete a procedure that is open, just click the Delete
button. See 1 below. Confirm the operation by clicking OK in the
dialog box. The procedure is then deleted (If the procedure is not
referred to elsewhere in WeldEye.)
Copyright© by Weldindustry AS
WeldEye® User guide.
Page 51 of 74
1
Copyright© by Weldindustry AS
WeldEye® User guide.
Page 52 of 74
4.1.10 Print out of Welding Procedures
It is possible to print a single procedure or several procedures (a batch). The print job
is sent to a mail address. This mail address is set in the User Manager or in the
Preferences under the Administration button on the left side menu. You can also enter
the e-mail address you want by typing it in yourself in the print tool.
4.1.10.1
Printing a single procedure
When a procedure is in the condition you want it, you can print the single procedure.
This procedure can be the one you work on now, or it can be a procedure you need to
search for.
When the procedure you want to print is opened, please do the following:
-
Drag your cursor to the Print button on the top menu. A sub menu will appear.
(See picture below)
-
Click on Print Document. The following will appear on your screen:
Copyright© by Weldindustry AS
WeldEye® User guide.
Page 53 of 74
All fields is
predefined
due to
chose of
printout of
a single
procedure
1. You can
choose the print
out language.
2. You can choose
the e-mail address to
send the print job to
Click on the Print button
to start the print job
Copyright© by Weldindustry AS
WeldEye® User guide.
Page 54 of 74
After a click on the Print button, the following will appear on your screen.:
If something isn’t filled in properly, you will receive an error message. Then you are
required to adjust your input in the print tool.
-
When you click on the Print button, WeldEye converts all the data in the
procedure and generate a PDF file.
The PDF file is then sent to the E-mail address inserted in the print tool.
Open the file from your mailbox and print it out.
To read a PDF file, you are required to have Acrobat Reader installed on your
computer.
Formatted: Indent: Left: 45
pt
Formatted: Bullets and
Numbering
Copyright© by Weldindustry AS
WeldEye® User guide.
Page 55 of 74
4.1.10.2
Printout of several procedures (Batch print)
To print several procedures at the same time, you need to perform a search first. This
example is based on the example shown in Chapter 7.1.9.
I want to print/mail:
- WPS’s that applies for the welding process 136
- For the parent metal 360 LT.
- I just want to print the active procedures.
1. Search for the procedures as described in chapter 7.1.9. The survey will open as
shown below.
2. Tag of the procedures you want to print/mail.
button. A sub menu will appear.
3. Drag your cursor to the
4. Click on Print Documents in List
Copyright© by Weldindustry AS
WeldEye® User guide.
Page 56 of 74
The following will appear on your screen:
Compared
to printout
of a single
procedure,
this time
WPS listed
in survey is
d fi d
Copyright© by Weldindustry AS
WeldEye® User guide.
Page 57 of 74
When click on the Print button, the procedures will be sent to the mail recipient for print
out.
The print/mailing can also be performed manually. This is possible via the left side menu or
the top menu.
From the left side menu:
1. Click on the Tool button
2. Click on the Print Tool button. The print tool will open.
3. Make your definitions.
4. Click on the Print button.
From the top menu:
1.
2.
3.
4.
Drag your cursor to the
Click on Print Tool
Make your definitions.
Click on the Print button
button. A sub menu will open.
Print/mail of procedure related documents
In general there is also possible to choose what documents you want to print/mail in
addition to the procedure front page. If a procedure contains more than a front page, it is
possible to mail/print these pages. You are required to tag the document type you want to
include in the print/mail. See picture below:
This is an example of a print/mail of a WPAR. The print/mail will include:
- Front page
- NDE test document
- Reports from destructive testing. (Tensile, bend, Charpy-V, CTOD.)
- Reports from hardness and macro examination.
- Additional pages. (Digital images i.e. macro pictures, additional information.)
Attached files in additional pages will be available as separate files in the e-mail.
Copyright© by Weldindustry AS
WeldEye® User guide.
Page 58 of 74
4.1.11 Additional pages
In a procedure you got a Drop down menu called “Choose document to go to”. One
of the options here is New Additional Page. NB! The document must be saved to
make the drop-down menu available.
To navigate between documents in a procedure:
- Click on the arrow to the right of the drop down menu
- Choose the document to go to by click on the text. In this case we want to add a
new Additional page:
Click on New Additional Page
The following will appear on your screen:
If you want to insert a digital image or a file:
1. Mark as shown below. This mark is default
2. Browse for the file you want to insert. In this case a macro photo. The file
must be available on your computer or network. It’s also required to be a GIF
or JPEG file. (Digital photos). Word, Excel and Adobe files can also be
attached.
3. Click on the Save button. The file will then be inserted.
6
1
4
5
3
Copyright© by Weldindustry AS
2
WeldEye® User guide.
Page 59 of 74
The chosen digital image is inserted in the additional page in the procedure
1
2
The field marked 4 on the picture on the previous page can be marked if you want some
additional text or explanations to the procedure.
The field marked 5 on the picture on the previous page can be marked if you want to
insert an additional drawing into the procedure. The editor will then be available.
Delete an additional page
To delete an additional page, please do the following:
1. Open the additional page you want to delete.
2. Click on the delete button. (Marked 1 picture above)
Copyright© by Weldindustry AS
WeldEye® User guide.
Page 60 of 74
Name an additional page
The default name on an additional page is ADDITIONAL PAGE. It is possible to rename
an additional page. To rename an additional page, please do the following:
1. Delete the content in field marked 2 in picture above.
2. Type in the text you want.
3. Click on the Save button.
To go back to the procedure, just click on the arrow to the right of the drop down menu
“Choose document to go to”. The content in the drop down list is shown. Click on
Welding Procedure to go back to the procedure.
The additional pages
that are inserted in the
procedure are shown
in the drop down
menu above the
dashed line.
Documents below the
dashed lines are empty
documents not inserted in
the procedure. When for
example a NDE report is
signed and saved, it will be
lifted above the dashed line
Copyright© by Weldindustry AS
WeldEye® User guide.
Page 61 of 74
5. Tools
Introduction
In this part of WeldEye the sketch library and the mail/print functions are included.
Sketch library
In the sketch library, there are a number of sketches implemented as a standard. The
sketch library is dynamic, which means that you can edit it. Some of the editing
possibilities are:
- Add new sketches to the library
- Edit existing sketches
- Insert your own keyword to the sketches. (Search criteria)
There are a lot of documents with possibility to insert sketches:
- PWPS
- WPAR
- WI
- WPT
- Inspection reports
In this part of the manual it will be described how to
- Open the sketch library
- Search for sketches
- Edit a sketch
- Insert a sketch to a document
Print tool
In the print tool it is possible to:
- Print single documents
- Print documents marked in a list
- Print Weld Summary Lists.
- Print out a project
- Send documents by e-mail.
How to do this is described in this part of the manual.
Copyright© by Weldindustry AS
WeldEye® User guide.
Page 62 of 74
5.1
Sketch library
5.1.1
Open the sketch library
To open the sketch library, you got two options:
1. From the left side menu
2. From the Top menu
From the left side menu:
a. Click on Tools
b. Click on Sketch library.
From the top menu:
a. Drag your cursor to the
b. Click on Sketch library.
button. A sub menu will appear.
In both cases, the following will appear on your screen:
Buttons
(1)
The sketch library is now open.
Note that the sketch library opens in a new window. This means that it will
be open even if you go to another part of WeldEye. The sketch library will
close when you click on the X (1) in the upper right corner.
5.1.2
Search for sketches
As shown in the picture above, you are now able to do a search for existing
sketches, or you can add new sketches.
Explanation to the buttons:
Performs a search based on your search criteria’s
Makes it possible to add a new sketch to the sketch library. When click
on this button, a dialog box open. You need to type in the name to the
new sketch you want to add. Then click OK. The drawing tool/editor
will then open.
Copyright© by Weldindustry AS
WeldEye® User guide.
Page 63 of 74
Explanation to the fields:
Sketch name:
Search criteria for the name of the sketch you want to search
for. If you type in “%” in the sketch name, all sketches in the
sketch library will open. (4 sketches on each page. You need to
click on the Next button to show the 4 next sketches)
Keyword:
Search criteria for the keyword to the sketch you want to search
for. Keyword can be a word you have added. A keyword can
be a word that is easy to remember
5.1.3
Example 1
We want to search for all sketches in the sketch library. Then we need to fill in the
following search criteria’s:
1.
Type in % in the sketch name field.
All sketches in the sketch library
will be searched for.
Copyright© by Weldindustry AS
2.
Click on the Search button
to perform the search.
WeldEye® User guide.
Page 64 of 74
The search result will appear on the screen:
Field
Button
Explanation to the buttons:
Open the survey with the next 4 sketches. When click on the Next
button, a new button will appear. This button, Previous, will take you
back to the previous shown sketches.
Open the drawing tool/editor. Editing of a sketch/drawing must be
performed in the editor. After editing of a sketch, remember to save
changes.
After editing and saving a sketch in the editor, it is also required that
you save the sketch here. This is required to store the changes in the
sketch library.
Click on the Copy button to make a copy of the sketch to the clipboard.
You can then paste the copied sketch in to a document. (WPAR, WPS,
test reports etc.)
Copyright© by Weldindustry AS
WeldEye® User guide.
Page 65 of 74
5.1.4
Add sketches to the sketch library
As mentioned earlier it is possible to add your own sketches in to the sketch library.
To add a sketch to the library, please do the following:
1.
2.
3.
4.
5.
6.
7.
5.1.5
Open the Sketch library
Click on the Add button
Insert the name of the sketch you want to add.
Click on OK. A window with a blank sketch will open.
Click on the Edit button. The editor will open.
Draw your sketch and save it.
Click on the Save button in the sketch library.
Example 2
Adding a drawing/sketch to the sketch library by following the steps described
above:
The following picture will open after step 1, 2 and 3. The name of the sketch is set
to Test 2. This will be the name of the new sketch in the sketch library. Please note
that the sketch name must be unique.
4. Click on the
OK button.
Copyright© by Weldindustry AS
WeldEye® User guide.
Page 66 of 74
A window with a blank sketch will open. The sketch name is created. The
keywords is blank
5. Click on the
Edit button.
The editor will open:
Copyright© by Weldindustry AS
WeldEye® User guide.
Page 67 of 74
6. Draw the sketch, and Save to URL:
The sketch appears in the sketch library window. To make it easier to search for, let
us give the sketch a keyword. In this case the keyword is Manual BV1. Then I know
it’s a sketch regarding the user Manual, B for butt weld, V for type of joint and 1 is
just a serial number.
NB! To save changes to sketch library, you are required
to click on the Save button. If not, the sketch will not be
Copyright© by Weldindustry AS
included in the sketch library.
WeldEye® User guide.
Page 68 of 74
5.2 Print tool
In the print tool it is possible to:
- Print single documents
- Print documents marked in a list
- Print final documentation.
- Send documents by e-mail.
The print tool can be opened directly, which means that the user defines which
documents to be printed/mailed.
The print tool can also be opened with the print work pre-defined. This means that
the documents to print automatically are defined by WeldEye. The user is allowed
to do corrections regarding which documents to be printed. (Open from a
document/list)
In the further explanations, examples of different kind of print-outs/mails will be
shown.
5.2.1
Open the print tool directly
To open the print tool, you got two options:
1. From the left side menu
2. From the top menu
From the left side menu
a. Click on the Tools button
b. Click on the Print tool button
From the top menu
a. Drag your cursor to the
b. Click on Print tool.
Copyright© by Weldindustry AS
button.
WeldEye® User guide.
Page 69 of 74
The following will appear on your screen:
Column for print modules
Copyright© by Weldindustry AS
Column for documents to print
WeldEye® User guide.
Page 70 of 74
As shown in the picture above, almost nothing is pre-defined. Project and language
only. E-mail address will also be pre-defined if you have set it in Administration>Preferences.
Before print out is possible, you are required to choose a print module, and which
documents to be included in the print out. If not chosen properly, you will receive an
Error message when click on the Print button.
5.2.2
Print documents marked in a list
To be able to print documents in a list, a search must be performed.
Example:
Three WPS’s are to be printed out. To print out these three WPS’s, please do
the following:
1. Open the search picture for WPS’s by click on Welding Procedures>Search.
2. Insert your search criteria’s.
3. Click on the Search button.
The survey over the searched WPS’s is shown:
4. Mark the WPS’s you want to print.
5. Drag your cursor to the
button on the top menu.
6. Click on Print documents in list.
The print Tool will open with predefined settings.
7. Click on the Print button.
The WPS’s marked in the survey will now be printed to the e-mail adress
inserted in the print tool.
See also chapter 7, Welding Procedures.
Copyright© by Weldindustry AS
WeldEye® User guide.
Page 71 of 74
5.2.3
Print out of a Weld Summary List
Introduction
In WeldEye there is a possibility to print out a Weld Summary List with content based
on your print selection. The print job will either go to the e-mail address set in the print
tool, or to a catalogue. This depends on installation type. Normally the print job will be
sent to an e-mail address.
To print out a list, please do the following:
1. Open the Weld Summary List you want to print. How to open WSL is described in
chapter 10.
2. Drag your cursor to the print icon on top menu. A sub menu will appear.
3. Click on Print document.
The print tool will open with the module Welding Management marked:
2
1
This is pre defined
1 Tag off in check boxes what to include in the print job.
2 Tag off the type of inspection reports you want to include in the print job.
Copyright© by Weldindustry AS
WeldEye® User guide.
Page 72 of 74
This defined print job will result in print out of:
- The current Weld Summary List
- Inspection Reports referred to in current WSL/WV.
- WPS’s referred to in current WSL/WV
- Certificates to the welders referred to in current WSL/WV
- Weld repair reports referred to in current WSL/WV
This is from the setting in area 1 on picture above.
In area 2 on picture above, it is set what type of inspection reports to include in the
print job. (MT, PT, UT, RT and VT.)
5.2.4
Print out of a project
To print out documentation for a project pleas do the following:
1. Make sure that the project you want to print from is choosed in the project field on
the top menu.
2. Open the print tool (Tools->Print Tool from left side menu. Print button->Print
Tool from top menu) Print tool will open with only the project predefined.
3. Tag off the documents to be included in the print job.
4. Click on the print button.
5.2.5
Download
All print jobs will go to your email and to the server. If the size of the file is less than
the pre-defined maximum file size, the file will be sent to e-mail and the sever. The
default maximum file size is 3 MB. If required, you can change this maximum file
size.
If the file size exceeds the maximum limit set in Print Tool (See 1 below), the print job
will not be sent to your e-mail, but will be available from Tools->Download in the left
side menu. Then you can open it from there for saving the file or print it.
1
Copyright© by Weldindustry AS
WeldEye® User guide.
Page 73 of 74
5.2.5.1 Open Download Manager
To open the Download Manager, please do the following:
1. Click on Tools->Download in left side menu
The Download Manager will open:
Explanation to the buttons:
Delete the files marked in the check box(es)
Mark all check boxes
Remove the marks in marked check boxes.
Take you back to the previous page.
Copyright© by Weldindustry AS
WeldEye® User guide.
Page 74 of 74
Explanation to the coloumns:
FILE NAME: The name of the file. You can give the file a name by insert the
wanted name in Print Tool field: Message/reference in email. If nothing is
inserted in this field, WeldEye will create a unique name for the file.
LAST MODIFIED: The date the file was last modified.
FILE SIZE:
Information of the file size in kilobytes.
5.2.5.2 Handling of files in Download Manager
1
The file name marked 1 above is a hyperlink that will open your printout in
Adobe Reader. When opened, you have the choice to print it out or save it to
disk.
If you want to delete the file, just mark the check box and click on the Delete
button. A confirmation message will appear. If you want to delete the checked
file, click OK, if not click Cancel.
Copyright© by Weldindustry AS