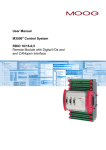
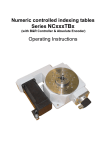
1
USER MANUAL 1.3 E-I/O EtherCAT® I/O Modules Copyright © Berghof Automationstechnik GmbH Reproduction and duplication of this document and utilisation and communication of its content is prohibited, unless with our express permission. All rights reserved. Damages will be payable in case of infringement. Disclaimer The content of this publication was checked for compliance with the hardware and software described. However, discrepancies may arise, therefore no liability is assumed regarding complete compliance. The information in this document will be checked regularly and all necessary corrections will be included in subsequent editions. Suggestions for improvements are always welcome. Subject to technical changes. Trademarks CANtrol® and CANtrol®- dialog are registered trademarks of Berghof Automationstechnik GmbH Microsoft®, Windows® and the Windows® Logo are registered trademarks of Microsoft Corporation in the USA and other countries. EtherCAT® is a registered trademark and patented technology, licensed from Beckhoff Automation GmbH, Germany. CiA® and CANopen® are registered community trademarks of CAN in Automation e.V. All rights reserved by the individual copyright holders. Content Completeness General Information on this Manual This equipment manual contains product-specific information valid at the time of publication. This equipment manual is only complete in conjunction with the product-related hardware and software user manuals required for the individual application. You can reach us at: Berghof Automationstechnik GmbH Harretstr. 1 72800 Eningen Germany T +49.7121.894-0 F +49.7121.894-100 e-mail: [email protected] www.berghof.com Berghof Automationstechnik GmbH works in accordance with DIN EN ISO 9001:2000. USER MANUAL 1.3 | E-I/O Update Version Date Subject 1.01 16.10.2012 First Version 1.1 09.11.2012 Update of document title and the trademarks 1.2 04.04.2013 Transition in new CD Update of chapter ‘Temperature modules’ with module AI8-Pt/Ni100 Update of ‘Technical data‘ in all chapters 1.3 25.07.2013 Update of tables ‘Analogue values current‘ and ‘Analogue values voltage’ Update of table ‘Analogue outputs’ in chapter ‘Analogue outputs voltage / current AO4-U/I’, section ‘Function’ Berghof Automationstechnik GmbH | Harretstrasse 1 | 72800 Eningen | www.berghof.com EtherCAT_IO_HB_en_2D1722004ZD00.docx 3 USER MANUAL 1.3 | E-I/O Blank page 4 Berghof Automationstechnik GmbH | Harretstrasse 1 | 72800 Eningen | www.berghof.com EtherCAT_IO_HB_en_2D1722004ZD00.docx USER MANUAL 1.3 | E-I/O Contents 1. GENERAL INFORMATION ............................................................................................................ 9 1.1. About This Manual ....................................................................................................................... 9 1.2. Hazard Categories and Terminology ......................................................................................... 10 1.3. Conformity Declaration .............................................................................................................. 10 1.4. Qualified Personnel.................................................................................................................... 11 1.5. Due Diligence ............................................................................................................................. 11 1.5.1. Working on the controller module.................................................................................................. 11 1.6. Use as Prescribed ...................................................................................................................... 12 2. INTRODUCTION ETHERCAT I/O MODULES .............................................................................. 13 2.1. EtherCAT - Ethernet Control Automation Technology............................................................... 13 2.2. CANtrol - the automation platform............................................................................................. 13 2.3. E-I/O - CANtrol EtherCAT I/O-System......................................................................................... 14 2.4. 2.4.1. 2.4.2. 2.4.3. 2.4.4. 2.4.5. 2.4.6. 2.4.7. Electromagnetic compatibility ................................................................................................... 15 Definition ..................................................................................................................................... 15 Interference emission ................................................................................................................... 15 General notes on installation ........................................................................................................ 15 Electrical immission safeguard...................................................................................................... 15 Cable routing and wiring ............................................................................................................... 16 Location of installation .................................................................................................................. 16 Particular sources of interference.................................................................................................. 16 3. SYSTEM DESCRIPTION ETHERCAT I/O MODULES .................................................................. 17 3.1. Mechanical design ..................................................................................................................... 17 3.1.1. Earth ........................................................................................................................................... 18 3.1.2. Installation ................................................................................................................................... 19 3.2. 3.2.1. 3.2.2. 3.2.3. System power supply................................................................................................................. 20 General ....................................................................................................................................... 20 Bus coupler.................................................................................................................................. 20 I/O Modules ................................................................................................................................. 20 3.3. 3.3.1. 3.3.2. 3.3.3. 3.3.4. Status LEDs ............................................................................................................................... 21 “EtherCAT” LED ........................................................................................................................... 21 “In” LED, “Out” LED...................................................................................................................... 21 “I/O” LED ..................................................................................................................................... 21 “Power” LED ................................................................................................................................ 21 4. BUS COUPLER........................................................................................................................... 23 4.1. Terminals .................................................................................................................................... 23 4.2. Status LEDs ............................................................................................................................... 23 4.3. Function ..................................................................................................................................... 24 4.4. Technical data ............................................................................................................................ 25 5. DIGITAL MODULES .................................................................................................................... 27 Berghof Automationstechnik GmbH | Harretstrasse 1 | 72800 Eningen | www.berghof.com EtherCAT_IO_HB_en_2D1722004ZD00.docx 5 USER MANUAL 1.3 | E-I/O 6 5.1. 5.1.1. 5.1.2. 5.1.3. 5.1.4. Digital in- and outputs DI16 / DO16 ............................................................................................ 27 Terminals ..................................................................................................................................... 27 Status LEDs ................................................................................................................................. 27 Function....................................................................................................................................... 29 Technical data .............................................................................................................................. 29 5.2. 5.2.1. 5.2.2. 5.2.3. 5.2.4. Digital inputs DI32 ...................................................................................................................... 30 Terminals ..................................................................................................................................... 30 Status LEDs ................................................................................................................................. 30 Function....................................................................................................................................... 31 Technical data .............................................................................................................................. 31 5.3. 5.3.1. 5.3.2. 5.3.3. 5.3.4. Digital inputs DI16 ...................................................................................................................... 32 Terminals ..................................................................................................................................... 32 Status LEDs ................................................................................................................................. 32 Function....................................................................................................................................... 33 Technical data .............................................................................................................................. 33 5.4. 5.4.1. 5.4.2. 5.4.3. 5.4.4. Digital outputs DO16 .................................................................................................................. 34 Terminals ..................................................................................................................................... 34 Status LEDs ................................................................................................................................. 34 Function....................................................................................................................................... 35 Technical data .............................................................................................................................. 36 6. ANALOGUE MODULES .............................................................................................................. 37 6.1. 6.1.1. 6.1.2. 6.1.3. 6.1.4. Analogue inputs for current measurement AI4-I........................................................................ 37 Terminals ..................................................................................................................................... 37 Status LEDs ................................................................................................................................. 37 Function....................................................................................................................................... 38 Technical data .............................................................................................................................. 43 6.2. 6.2.1. 6.2.2. 6.2.3. 6.2.4. Analogue inputs for current measurement AI8-I........................................................................ 44 Terminals ..................................................................................................................................... 44 Status LEDs ................................................................................................................................. 44 Function....................................................................................................................................... 45 Technical data .............................................................................................................................. 50 6.3. 6.3.1. 6.3.2. 6.3.3. 6.3.4. Analogue inputs for voltage measurement AI4/8-U ................................................................... 51 Terminals ..................................................................................................................................... 51 Status LEDs ................................................................................................................................. 51 Function....................................................................................................................................... 52 Technical data .............................................................................................................................. 56 6.4. 6.4.1. 6.4.2. 6.4.3. 6.4.4. Analogue outputs voltage / current AO4-U/I .............................................................................. 57 Terminals ..................................................................................................................................... 57 Status LEDs ................................................................................................................................. 57 Function....................................................................................................................................... 59 Technical data .............................................................................................................................. 61 7. TEMPERATURE MODULES ........................................................................................................ 63 7.1. 7.1.1. 7.1.2. 7.1.3. 7.1.4. Analogue temperature inputs AI4-Pt/Ni100, AI4-Pt/Ni1000 ....................................................... 63 Terminals ..................................................................................................................................... 63 Status LEDs ................................................................................................................................. 63 Function....................................................................................................................................... 64 Technical data AI4-Pt/Ni100 .......................................................................................................... 68 Berghof Automationstechnik GmbH | Harretstrasse 1 | 72800 Eningen | www.berghof.com EtherCAT_IO_HB_en_2D1722004ZD00.docx USER MANUAL 1.3 | E-I/O 7.1.5. Technical data AI4-Pt/Ni1000 ........................................................................................................ 69 7.2. 7.2.1. 7.2.2. 7.2.3. 7.2.4. Analogue temperature inputs AI8-Pt/Ni100 ............................................................................... 70 Terminals ..................................................................................................................................... 70 Status LEDs................................................................................................................................. 70 Function ...................................................................................................................................... 71 Technical data AI8-Pt/Ni100.......................................................................................................... 75 7.3. 7.3.1. 7.3.2. 7.3.3. 7.3.4. Analogue temperature inputs AI4 .............................................................................................. 76 Terminals ..................................................................................................................................... 76 Status LEDs................................................................................................................................. 76 Function ...................................................................................................................................... 77 Technical data .............................................................................................................................. 80 8. COMMUNICATION MODULES .................................................................................................... 81 8.1. 8.1.1. 8.1.2. 8.1.3. 8.1.4. PROFIBUS-DP-Slave .................................................................................................................. 81 Terminals ..................................................................................................................................... 81 Status LEDs................................................................................................................................. 81 Function ...................................................................................................................................... 82 Technical data PROFIBUS-DP-Slave ............................................................................................ 86 9. COUNTER MODULES................................................................................................................. 87 9.1. Counters with analogues outputs Counter/Posi2 5V, Counter2 5V .......................................... 87 9.1.1. Terminals ..................................................................................................................................... 88 9.1.2. Status LEDs................................................................................................................................. 88 9.1.3. Function ...................................................................................................................................... 90 9.1.4. Controlling and watching the entire module ................................................................................... 91 9.1.5. Controlling / Watching Counter 1 .................................................................................................. 92 9.1.6. Counter values of Zähler 1 (Counter 1) ......................................................................................... 94 9.1.7. Digital I/Os ................................................................................................................................... 95 9.1.8. Analogue outputs (Counter/Posi2 5V only) .................................................................................... 99 9.1.9. Examples................................................................................................................................... 100 9.1.10. Technical data ............................................................................................................................ 105 10. EXTENDER ............................................................................................................................... 107 10.1. Extender 2 Port ........................................................................................................................ 107 10.1.1. Terminals ................................................................................................................................... 107 10.1.2. Status LEDs............................................................................................................................... 108 10.1.3. Function .................................................................................................................................... 108 10.1.4. Technical data ............................................................................................................................ 109 11. SUPPLEMENT .......................................................................................................................... 111 11.1. 11.1.1. 11.1.2. 11.1.3. 11.1.4. Potential Distributor 2 x 16 ....................................................................................................... 111 Terminals .................................................................................................................................... 111 Status LEDs................................................................................................................................ 111 Function ..................................................................................................................................... 111 Technical data .............................................................................................................................112 11.2. 11.2.1. 11.2.2. 11.2.3. Shield connection terminal block .............................................................................................112 Terminals ....................................................................................................................................112 Function .....................................................................................................................................113 Technical data .............................................................................................................................113 Berghof Automationstechnik GmbH | Harretstrasse 1 | 72800 Eningen | www.berghof.com EtherCAT_IO_HB_en_2D1722004ZD00.docx 7 USER MANUAL 1.3 | E-I/O 12. ANNEX ...................................................................................................................................... 115 12.1. Environmental Protection ........................................................................................................ 115 12.1.1. Emission .................................................................................................................................... 115 12.1.2. Disposal ..................................................................................................................................... 115 12.2. Maintenance/Upkeep ................................................................................................................ 115 12.3. Repairs/Service ........................................................................................................................ 115 12.3.1. Warranty .................................................................................................................................... 115 12.4. Nameplate................................................................................................................................. 116 Nameplate descriptions (example) .............................................................................................. 116 12.5. Addresses and Bibliography.................................................................................................... 117 12.5.1. Addresses .................................................................................................................................. 117 12.5.2. Standards/Bibliography............................................................................................................... 118 8 Berghof Automationstechnik GmbH | Harretstrasse 1 | 72800 Eningen | www.berghof.com EtherCAT_IO_HB_en_2D1722004ZD00.docx USER MANUAL 1.3 | E-I/O 1. General Information Documentation This equipment manual is intended for qualified personnel and contains information regarding mounting, installation, commissioning and maintenance. The information contained in this manual is subject to change without prior notice. 1.1. About This Manual This equipment manual is an integral part of the product. Make sure the equipment manual is always available near the product’s point-of-employment. The manual contains information about the following topics: Areas of application; Safety; Mechanical construction; Electrical construction; Connections; Commissioning; Care and maintenance; Decommissioning; Disposal. Berghof Automationstechnik GmbH | Harretstrasse 1 | 72800 Eningen | www.berghof.com 2VF100181FE01.docx | EtherCAT_IO_HB_en_2D1722004ZD00.docx 9 USER MANUAL 1.3 | E-I/O 1.2. Hazard Categories and Terminology DANGER Immediate danger Failure to observe the information indicated by this warning will result in death, serious injury or extensive property damage. WARNING Potential danger Failure to observe the information indicated by this warning may result in death, serious injury or extensive property damage. CAUTION Danger Failure to observe the information indicated by this warning may result in injury or property damage. NOTICE No hazard Information indicated in this manner provides additional notes concerning the product. 1.3. Conformity Declaration The EtherCAT I/O Modules comply with and make allowance for the following directives and standards EMP Directive 2004/108/EC DIN EN 61131-2:2009-1 Programmable controllers Part 2: Equipment requirements and tests DIN EN 61000-6-2:2011-06 Electromagnetic compatibility (EMP) Part 6-2: Generic standard – immunity for industrial environments DIN EN 61000-6-4:2011-9 Electromagnetic compatibility (EMP) Part 6-4: Generic standard – electrostatic discharge for industrial environments 10 Berghof Automationstechnik GmbH | Harretstrasse 1 | 72800 Eningen | www.berghof.com EtherCAT_IO_HB_en_2D1722004ZD00.docx | 2VF100181FE01.docx USER MANUAL 1.3 | E-I/O 1.4. Qualified Personnel Only qualified personnel may install, operate and maintain the EtherCAT I/O Modules. Within the context of this documentation and the safety information it contains, qualified personnel constitutes trained specialists who have the authority to mount, install, commission, ground and identify equipment, systems and power circuits in accordance with the standards of safety technology, and who are familiar with the safety concepts of automation technology. 1.5. Due Diligence The operator, or the processor (OEM) must ensure that the EtherCAT I/O Modules are only used for the purpose for which they are intended; the EtherCAT I/O Modules are only operated in impeccable full working order; the user manual is always available in full and in a legible condition; only specialists with sufficient qualification and authorisation mount, install, commission and maintain the controller module; these specialists are regularly instructed in all relevant questions of occupational health and safety and environmental protection and that they also know the contents of the user manual and especially of the safety notes therein; the device markings, identifications, safety and warning notes attached to the EtherCAT I/O Modules are not removed and are always kept in a legible state; the national and international regulations for controlling machines and systems which apply at the relevant usage site are observed; the relevant information about the EtherCAT I/O Modules and their application and operation is always available to the users 1.5.1. Working on the controller module Before carrying out work on the EtherCAT I/O Modules you must always first ensure that the controller and the system are in a secure state; only then switch off the controller and the system and only now disconnect the EtherCAT I/O Modules from the system. Berghof Automationstechnik GmbH | Harretstrasse 1 | 72800 Eningen | www.berghof.com 2VF100181FE01.docx | EtherCAT_IO_HB_en_2D1722004ZD00.docx 11 USER MANUAL 1.3 | E-I/O 1.6. Use as Prescribed This is a modular automation system based on the CANbus, intended for industrial control applications within the medium to high performance range. The automation system is designed for use within Overvoltage Category I (IEC 364-4-443) for the controlling and regulating of machinery and industrial processes in low-voltage installations in which the rated supply voltage does not exceed 1,000 VAC (50/60 Hz) or 1,500 VDC. Qualified project planning and design, proper transport, storage, installation, use and careful maintenance are essential to the flawless and safe operation of the automation system. The automation system may only be used within the scope of the data and applications specified in the present documentation and associated user manuals. The automation system is to be used only as follows as prescribed, in technically flawless condition, without arbitrary or unauthorized changes and exclusively by qualified users The regulations of the German professional and trade associations, the German technical supervisory board (TÜV), the VDE (Association of German electricians) or other corresponding national bodies are to be observed. Safety-oriented (fail-safe) systems Particular measures are required in connection with the use of PLCs in safety-oriented systems. If a PLC is to be used in a safety-oriented system, the user ought to seek the full advice of the PLC manufacturer in addition to observing any standards or guidelines on safety installations which may be available. WARNING As with any electronic control system, the failure of particular components may result in uncontrolled and/or unpredictable operation. All types of failure and the associated fuse systems are to be taken into account at system level. The advice of the PLC manufacturer should be sought if necessary. 12 Berghof Automationstechnik GmbH | Harretstrasse 1 | 72800 Eningen | www.berghof.com EtherCAT_IO_HB_en_2D1722004ZD00.docx | 2VF100181FE01.docx USER MANUAL 1.3 | E-I/O 2. Introduction EtherCAT I/O Modules 2.1. EtherCAT - Ethernet Control Automation Technology EtherCAT is one of the most powerful Ethernet-based fieldbus systems. EtherCAT puts up the top speed mark, and its flexible topology and simple configuration make it the perfect means of controlling extremely fast processes. Because of its high performance, the simple wiring and its open protocol support, EtherCAT is often used as a fast motion control and I/O bus driven by an industrial PC or in conjunction with control technology on a smaller scale. EtherCAT moves beyond the limits of conventional fieldbus systems. Its interconnections between the controller at one end and both the I/O modules and drives at the other are as fast as those of a backplane bus. EtherCAT controllers thus nearly act like centralized control systems, overcoming the issue of bus transfer times that conventional fieldbus systems are burdened with. 2.2. CANtrol - the automation platform The automation platform CANtrol EC and CANtrol Dialog has been specifically engineered with applications near to the machine in mind. CANtrol provides flexible automation solutions including hardware and software PLCs based around industrial PCs, remote I/Os, PLCs with / without display and decentralized drives. EtherCAT, PROFINET, Bacnet, PROFIBUS-DP and CANopen are supported for networking. CANtrol controllers and industrial PCs used as EtherCAT masters feature a CoDeSys PLC. Berghof Automationstechnik GmbH | Harretstrasse 1 | 72800 Eningen | www.berghof.com 2VF100186FE02.docx | EtherCAT_IO_HB_en_2D1722004ZD00.docx 13 USER MANUAL 1.3 | E-I/O 2.3. E-I/O - CANtrol EtherCAT I/O-System CANtrol E-I/O is a system of I/O modules for connecting the process signals to an EtherCAT network. CANtrol E-I/O consists of the E-I/O bus coupler and a range of I/O modules. The CANtrol E-I/O bus coupler converts the physical transfer technology (twisted pair) to LVDS (E-bus) and generates the system voltages required by the LVDS modules. The standard 100 Base Tx lines used for office network communications connect to the one side, the CANtrol E-I/O Modules for the process signals connect to the other. This is how the Ethernet EtherCAT protocol is retained right through to the last I/O module. At the end of the modular device, the connection between the forward and return lines is automatically closed, the effect being that another 100 Base Tx line can be plugged in to connect the next EtherCAT unit to the second bus coupler port. variant with EC1000 variant with DC1000 variant with DPC3000 E-I/O E-I/O E-I/O E-I/O E-I/O E-I/O 2VF100530DG00.cdr 14 Berghof Automationstechnik GmbH | Harretstrasse 1 | 72800 Eningen | www.berghof.com EtherCAT_IO_HB_en_2D1722004ZD00.docx | 2VF100186FE02.docx USER MANUAL 1.3 | E-I/O 2.4. Electromagnetic compatibility 2.4.1. Definition Electromagnetic compatibility is the ability of a device to function satisfactorily in its electromagnetic environment without itself causing any electromagnetic interference that would be intolerable to other devices in this environment. Of all known phenomena of electromagnetic noise, only a certain range occurs at the location of a given device. It is defined in the relevant product standards. The design and immunity to interference of programmable logic controllers are internationally governed by Standard IEC 61131-2 which, in Europe, has been the basis for European Standard EN 61131-2. NOTICE Refer to IEC 61131-4, User's Guideline, for general installation instructions to be complied with to ensure that hardware interface factors and the ensuing noise voltages are limited to tolerable levels. 2.4.2. Interference emission Interfering emission of electromagnetic fields, HF compliant to EN 55011, limiting value class A, Group 1 NOTICE If the controller is designed for use in residential areas, high-frequency emissions must comply with limiting value class B as described in EN 55011. Fitting the controller into earthed metal cabinets and in-stalling filters in the supply lines may produce a shielding compliant to the above standard. 2.4.3. General notes on installation As component parts of machines, facilities and systems, electronic control systems must comply with valid rules and regulations, depending on their field of application. General requirements concerning the electrical equipment of machines and aiming at the safety of these machines are contained in Part 1 of European Standard EN 60204 (same as VDE 0113). For safe installation of our control system please observe the information given below. 2.4.4. Electrical immission safeguard Connect the control system to the protective earth conductor to eliminate electromagnetic interference. Practice best cable routing. Berghof Automationstechnik GmbH | Harretstrasse 1 | 72800 Eningen | www.berghof.com 2VF100186FE02.docx | EtherCAT_IO_HB_en_2D1722004ZD00.docx 15 USER MANUAL 1.3 | E-I/O 2.4.5. Cable routing and wiring Keep power circuits separate from control circuits: DC voltages 60 V ... 400 V AC voltages 25 V ... 400 V Joint laying of control circuits is allowed for: shielded data signals shielded analogue signals unshielded digital I/O lines unshielded DC voltages < 60 V unshielded AC voltages < 25 V 2.4.6. Location of installation Exclude any and all impediments due to temperature, dirt, impact, vibration or electromagnetic interference. Temperature Consider heat sources such as general heating of rooms, sunlight, heat accumulation in assembly rooms or control cabinets. Contamination Use suitable casings to avoid possible negative influences due to humidity, corrosive gas, liquid or conducting dust. Impact and vibration Consider possible influences caused by motors, compressors, transfer lines, presses, ramming machines and vehicles. Electromagnetic interference Consider electromagnetic interference from various local sources: motors, switching devices, switching thyristors, radio-controlled devices, welding equipment, arcing, switched-mode power supplies, converters / inverters. 2.4.7. Particular sources of interference Inductive actuators Switching off inductances (such as from relays, contactors, solenoids or switching magnets) produces surge voltages. It is necessary to reduce these extra voltages to a minimum. Reducing elements may be diodes, Zdiodes, varistors or RC elements. To find the best adapted elements, we recommend that you contact the manufacturer or supplier of the corresponding actuators for the relevant information. 16 Berghof Automationstechnik GmbH | Harretstrasse 1 | 72800 Eningen | www.berghof.com EtherCAT_IO_HB_en_2D1722004ZD00.docx | 2VF100186FE02.docx USER MANUAL 1.3 | E-I/O 3. System description EtherCAT I/O Modules CANtrol E-I/O is a system of I/O modules for connecting the process signals to any EtherCAT network station. CANtrol E-I/O consists of the CANtrol E-I/O bus coupler and a range of CANtrol E-I/O modules. The CANtrol E-I/O bus coupler converts the physical transfer technology (twisted pair) to LVDS (E-bus) and generates the system voltages required by the LVDS modules. The standard 100 Base Tx lines used for office network communications connect to the one side, the CANtrol E-I/O modules for the process signals connect to the other. This is how the Ethernet EtherCAT protocol is retained right through to the last I/O module. At the end of the modular device, the connection between the forward and return lines is automatically closed, the effect being that another 100 Base Tx line can be plugged in to connect the next EtherCAT unit to the second bus coupler port. If the bus coupler is the last station of the EtherCAT network, i.e. if its RJ45 "Out" socket remains unplugged, the connection between the forward and return lines is automatically closed. 3.1. Mechanical design The figure shows the basic layout of the CANtrol E-I/O modules. The bus coupler and the I/O modules differ in their connectors and indicators, however. Module structure Entriegelungshebel Unlock button Status-LEDs Signalzustands-LEDs Status LEDs Signal state indicators (LEDs) Schirmanschluss am Gehäuseträger Shield-to-housing mount connector Konvektionsschlitze Ventilation slots Beschriftungsclip Label clip Griffkante Grip Aufnahme für Federzugsammelstecker Slot for spring-assisted combi plug Modulverriegelung und E-Bus Module lock and E-bus Hutschienenbefestigung und Funktionserde Carrier rail mount and operative earth 2VF100534DG00.VSD The housing mount consists of an aluminium profile with an integral snap-on device used to snap the module to a 35mm DIN rail. The housing trough including the optical fibres for the status indicators, the side face and the front is made of plastic and contains the module. The optical fibres for the signal state indicators (LEDs) are located next to the spring-assisted combi plug. They slightly protrude from the housing and allow a clear diagnosis at a glance. Berghof Automationstechnik GmbH | Harretstrasse 1 | 72800 Eningen | www.berghof.com 2VF100187FE02.docx | EtherCAT_IO_HB_en_2D1722004ZD00.docx 17 USER MANUAL 1.3 | E-I/O 3.1.1. Earth The CANtrol E-I/O modules shall be earthed. Thereto the metal housing shall be attached to operative earth. Since the operative earth connectors dissipate HF currents, it is of utmost importance for the module's noise immunity. HF interference is dissipated from the electronics board to the metal housing. The metal housing therefore needs to be suitably connected to an operative earth connector. You will normally have to ensure that the connection between module housing and DIN rail conducts well, the connection between DIN rail and switching cabinet conducts well, the switching cabinet is safely connected to earth. In special cases you may attach the earth wire straight to the module. Attach cable shield here M3x5 Bolt connection Connect DIN rail with operative earth Aluminium profile NOTICE Earth wires should be short and have a large surface (copper mesh). Further details has site http://en.wikipedia.org/wiki/Ground_(electricity) 18 Berghof Automationstechnik GmbH | Harretstrasse 1 | 72800 Eningen | www.berghof.com EtherCAT_IO_HB_en_2D1722004ZD00.docx | 2VF100187FE02.docx USER MANUAL 1.3 | E-I/O 3.1.2. Installation The CANtrol E-I/O modules are intended for mounting rail installation (DIN EN 50022, 35 x 7.5 mm). Push up the module against the mounting rail from below, allowing the metal spring to snap in between mounting rail and mounting area as illustrated. Push the module above against the mounting wall until it snaps in. To snap on a single module 2 1 Rail mounting of module To interconnect two modules After snapping on the first module to the rail, snap on the second module about 1cm away towards the right of the first module. Push the second module along the rail towards the first module until you hear the locking device snap in. To disconnect two modules Push down the unlock button (see figure below) of the module that you wish to disconnect from the module to the left of it. Push both modules away from one another until they are about 1 cm apart. Push the module up and against the metal spring located on the underside of the rail guide. Tip the module away from the rail as shown in the illustration. Pull the module down and out of the mounting rail. 2 To take down a single module 3 Unlock button Uninstalling a module Berghof Automationstechnik GmbH | Harretstrasse 1 | 72800 Eningen | www.berghof.com 2VF100187FE02.docx | EtherCAT_IO_HB_en_2D1722004ZD00.docx 1 19 USER MANUAL 1.3 | E-I/O 3.2. System power supply 3.2.1. General General Spring-assisted blocks of sockets allow fast and simple wiring. A multiple socket connector densely packs the wires on a small footprint. Use the unlock button to easily disconnect the wires where there is little space. Tool: 0.4 x 2.5 blade screwdriver Cores: 0.20 - 1.0 mm² (IEC) / 28 - 18 ENC (UL) Rated current: 5 A (CSA) / 10 A (UL) CAUTION Do not connect the power supply lines through from one I/O power supply port to the next. To ensure that there is as little interference as possible, install a central power supply point and establish a star topology of as short wires as possible between the central point and the I/O Modules. 3.2.2. Bus coupler The system power supply connects to the bus coupler through a 2-pole plug-type terminal block. Since the bus coupler supplies power to both the E-bus and the logic circuits of the I/O modules, its power consumption depends on the number of I/O modules connected. Power to the I/O module outputs is supplied separately. Spring-assisted connector and bus coupler unlock button 2VF100532DG00.cdr 3.2.3. I/O Modules The I/O supply connects to the I/O module, normally together with the I/Os, using plug-type terminal blocks with different numbers of poles. Power to the I/O module logic circuits is supplied by the bus coupler. Spring-assisted connector with I/O module unlock button 2VF100533DG00.cdr 20 Berghof Automationstechnik GmbH | Harretstrasse 1 | 72800 Eningen | www.berghof.com EtherCAT_IO_HB_en_2D1722004ZD00.docx | 2VF100187FE02.docx USER MANUAL 1.3 | E-I/O 3.3. Status LEDs 3.3.1. “EtherCAT” LED An LED labeled “EtherCAT” is located on both the bus coupler and the I/O Modules. It indicates the state of the EtherCAT ASIC. EtherCAT State LED flash code Explanation Init Red, on Initializing, no data exchange Pre-Op Red/green, 1:1 Pre-operational, no data exchange Safe-Op Red/green, 3:1 Safe operation, inputs readable Op Green, on Operational, unrestricted data exchange 3.3.2. “In” LED, “Out” LED The “In” and “Out” LEDs are located on the bus coupler. They indicate the respective physical state of the Ethernet. Ethernet State LED flash code Explanation Not connected Off No Ethernet connection Connected Green, on Connected to Ethernet Traffic Green, flashing Exchanging telegrams 3.3.3. “I/O” LED Every I/O Module has an LED labeled "IO". It indicates the state of the Module's I/Os. Refer to the I/O Module sections in this manual to know which states of a module are monitored and indicated. 3.3.4. “Power” LED An LED labeled “Power” is located on every I/O Module that has a power supply connector (e.g. for digital outputs). It indicates the state of the I/O module's I/O power supply. I/O power supply State LED flash code Explanation On Green, on 24 V DC supply ok Off Off 24 V DC supply not ok Berghof Automationstechnik GmbH | Harretstrasse 1 | 72800 Eningen | www.berghof.com 2VF100187FE02.docx | EtherCAT_IO_HB_en_2D1722004ZD00.docx 21 USER MANUAL 1.3 | E-I/O Blank page 22 Berghof Automationstechnik GmbH | Harretstrasse 1 | 72800 Eningen | www.berghof.com EtherCAT_IO_HB_en_2D1722004ZD00.docx | 2VF100187FE02.docx USER MANUAL 1.3 | E-I/O 4. Bus coupler Bus coupler front view 4.1. Terminals Module power supply L+: 24 V DC L-: 0 V EtherCAT (RJ45 socket) IN: input (from previous EtherCAT station) OUT: output (to next EtherCAT station) 4.2. Status LEDs “EtherCAT” LED The LED labeled “EtherCAT” indicates the state of the EtherCAT ASIC. EtherCAT State LED flash code Explanation Init Red, on Initializing, no data exchange Pre-Op Red/green, 1:1 Pre-operational, no data exchange Safe-Op Red/green, 3:1 Safe operation, inputs readable Op Green, on Operational, unrestricted data exchange Berghof Automationstechnik GmbH | Harretstrasse 1 | 72800 Eningen | www.berghof.com 2VF100188FE02.docx | EtherCAT_IO_HB_en_2D1722004ZD00.docx 23 USER MANUAL 1.3 | E-I/O “In” LED, “Out” LED The “In” and “Out” LEDs indicate the physical state of the Ethernet’s ports they are allocated to. Ethernet State LED flash code Explanation Not connected Off No Ethernet connection Connected Green, on Connected to Ethernet Traffic Green, flashing Exchanging telegrams 4.3. Function The CANtrol E-I/O bus coupler converts the physical transfer technology (twisted pair) to LVDS (E-bus) and generates the system voltages required by the LVDS modules. The standard 100 Base Tx lines used for office network communications connect to the one side, the CANtrol E-I/O Modules for the process signals connect to the other. This is how the Ethernet EtherCAT protocol is retained right through to the last I/O module. At the end of the modular device, the connection between the forward and return lines is automatically closed, the effect being that another 100 Base Tx line can be plugged in to connect the next EtherCAT unit to the second bus coupler port. Module state 24 Variable Data type Explanation Undervoltage BOOL Low voltage (supplied power < 19.2 V) Berghof Automationstechnik GmbH | Harretstrasse 1 | 72800 Eningen | www.berghof.com EtherCAT_IO_HB_en_2D1722004ZD00.docx | 2VF100188FE02.docx USER MANUAL 1.3 | E-I/O 4.4. Technical data Bus coupler Label E-I/O BUSKOPPLER 3A Part no. 204800000 Plug-in connector 2-pole 204801800 (part of the package) Function Connects a 100Base-TX EtherCAT with the CANtrol E-I/O Modules Generates the LVDS system voltages Controller ASIC ET1100 Baud rate 100Mbit/s Cable CAT5 Length of cable max. 100 m between 2 bus couplers Terminal EtherCAT 2 x RJ45 Power supply 24 V DC -20% +25% Connector power Plug 2-pole (part of the module) Input current 50 mA + E-bus power supply E-bus power supply max. 3 A (ca. 20 modules) E-bus load 195 mA Berghof Automationstechnik GmbH | Harretstrasse 1 | 72800 Eningen | www.berghof.com 2VF100188FE02.docx | EtherCAT_IO_HB_en_2D1722004ZD00.docx 25 USER MANUAL 1.3 | E-I/O Blank page 26 Berghof Automationstechnik GmbH | Harretstrasse 1 | 72800 Eningen | www.berghof.com EtherCAT_IO_HB_en_2D1722004ZD00.docx | 2VF100188FE02.docx USER MANUAL 1.3 | E-I/O 5. Digital modules 5.1. Digital in- and outputs DI16 / DO16 Front view of DI16/DO16 I/O module I/O connection 5.1.1. Terminals Power supply to module I/Os L+: 24 V DC L-: 0 V CAUTION Connect L+ to both L+ terminals if the total current exceeds the 6A limit. 5.1.2. Status LEDs “EtherCAT” LED The LED labeled “EtherCAT” indicates the state of the EtherCAT ASIC. EtherCAT State LED flash code Explanation Init Red, on Initializing, no data exchange Pre-Op Red/green, 1:1 Pre-operational, no data exchange Safe-Op Red/green, 3:1 Safe operation, inputs readable Op Green, on Operational, unrestricted data exchange Berghof Automationstechnik GmbH | Harretstrasse 1 | 72800 Eningen | www.berghof.com 2VF100189FE02.docx | EtherCAT_IO_HB_en_2D1722004ZD00.docx 27 USER MANUAL 1.3 | E-I/O “I/O” LED The LED labeled “IO” indicates the state of the module's I/Os. I/O State LED flash code Explanation Ok Off No error SC Red, on Short-circuited digital output CAUTION The output drivers have a thermal fuse to automatically turn off any short-circuited outputs. In case the short circuit prevails, the outputs are allowed to cool down to be turned back on until the thermal fuse blows again. “Power” LED The LED labeled "Power" indicates the state of the I/O module's I/O power supply. Power State LED flash code Explanation On Green, on 24 V DC supply ok Off Off 24 V DC supply not ok CAUTION The module is not monitored for low voltage states. “Channel” LEDs Channel 28 State LED Explanation On Green, on Input signal TRUE / output enabled Off Off Input signal FALSE / output disabled Berghof Automationstechnik GmbH | Harretstrasse 1 | 72800 Eningen | www.berghof.com EtherCAT_IO_HB_en_2D1722004ZD00.docx | 2VF100189FE02.docx USER MANUAL 1.3 | E-I/O 5.1.3. Function The DI16/DO16 module features 16 digital inputs and 16 digital outputs. Function Variable Data type Explanation DigitalInputn BOOL Digital input (n=0…15) DigitalOutputn BOOL Digital output (n=0…15) 5.1.4. Technical data DI16 / DO16 Label E-I/O DI16/DO16 1MS/0.5A Part no. 204800100 Plug-in connector 36-pole 204800300 (not part of the module) Digital inputs 16 Input delay 1 ms / 5 ms (typically) Signal level Off: On: Digital outputs 16 Max. current 0.5 A per output Total current max. 8 A Controller ASIC ET1200 Baud rate 100 Mbit/s Connector 10-pin system plug in side wall Term. module not required Power supply 24 V DC -20% +25% E-bus load 135 mA -3 … 5 V (EN 61131-3, Type1) 15 V … 30 V Berghof Automationstechnik GmbH | Harretstrasse 1 | 72800 Eningen | www.berghof.com 2VF100189FE02.docx | EtherCAT_IO_HB_en_2D1722004ZD00.docx 29 USER MANUAL 1.3 | E-I/O 5.2. Digital inputs DI32 Front view of DI32 I/O module I/O connection 5.2.1. Terminals Power supply to module I/Os L-: 0 V 5.2.2. Status LEDs “EtherCAT” LED The LED labeled “EtherCAT” indicates the state of the EtherCAT ASIC. EtherCAT State LED flash code Explanation Init Red, on Initializing, no data exchange Pre-Op Red/green, 1:1 Pre-operational, no data exchange Safe-Op Red/green, 3:1 Safe operation, inputs readable Op Green, on Operational, unrestricted data exchange “I/O” LED There is no LED labeled “I/O”. “Power” LED There is no LED labeled “Power” because a separate power feed is not required. 30 Berghof Automationstechnik GmbH | Harretstrasse 1 | 72800 Eningen | www.berghof.com EtherCAT_IO_HB_en_2D1722004ZD00.docx | 2VF100189FE02.docx USER MANUAL 1.3 | E-I/O “Channel” LEDs Channel State LED Explanation On Green, on Input signal TRUE Off Off Input signal FALSE 5.2.3. Function The DI32 module has 32 digital inputs. Function Variable Data type Explanation DigitalInputn BOOL Digital input (n=0…31) 5.2.4. Technical data DI32 Label E-I/O DI32 1MS Part no. 204800900 Plug-in connector 36-pole 204800300 (not part of the module) Digital inputs 32 Input delay 1 ms / 5 ms (typically) Signal level Off: On: Controller ASIC ET1100 Baud rate 100 Mbit/s Connector 10-pin system plug in side wall Term. module not required Power supply 24 V DC -20 % +25 % E-bus load 85 mA -3 … 5 V (EN 61131-3, Type1) 15 V … 30 V Berghof Automationstechnik GmbH | Harretstrasse 1 | 72800 Eningen | www.berghof.com 2VF100189FE02.docx | EtherCAT_IO_HB_en_2D1722004ZD00.docx 31 USER MANUAL 1.3 | E-I/O 5.3. Digital inputs DI16 Front view of DI16 I/O module I/O connection 5.3.1. Terminals Power supply to module I/Os L-: 0 V 5.3.2. Status LEDs “EtherCAT” LED The LED labeled “EtherCAT” indicates the state of the EtherCAT ASIC. EtherCAT State LED flash code Explanation Init Red, on Initializing, no data exchange Pre-Op Red/green, 1:1 Pre-operational, no data exchange Safe-Op Red/green, 3:1 Safe operation, inputs readable Op Green, on Operational, unrestricted data exchange “I/O” LED There is no LED labeled “I/O”. “Power” LED There is no LED labeled “Power” because a separate power feed is not required. 32 Berghof Automationstechnik GmbH | Harretstrasse 1 | 72800 Eningen | www.berghof.com EtherCAT_IO_HB_en_2D1722004ZD00.docx | 2VF100189FE02.docx USER MANUAL 1.3 | E-I/O “Channel” LEDs Channel State LED Explanation On Green, on Input signal TRUE Off Off Input signal FALSE 5.3.3. Function The DI16 module has 16 digital inputs. Function Variable Data type Explanation DigitalInputn BOOL Digital input (n=0…15) 5.3.4. Technical data DI16 Label E-I/O DI16 1MS Part no. 204800800 Plug-in connector 18-pole 204800400 (not part of the module) Digital inputs 16 Input delay 1 ms / 5 ms (typically) Signal level Off: On: Controller ASIC ET1200 Baud rate 100 Mbit/s Connector 10-pin system plug in side wall Term. module not required Power supply 24 V DC -20% +25% E-bus load 100 mA -3 … 5 V (EN 61131-3, Type1) 15 V … 30 V Berghof Automationstechnik GmbH | Harretstrasse 1 | 72800 Eningen | www.berghof.com 2VF100189FE02.docx | EtherCAT_IO_HB_en_2D1722004ZD00.docx 33 USER MANUAL 1.3 | E-I/O 5.4. Digital outputs DO16 Front view of the DO16 I/O module I/O connection 5.4.1. Terminals Power supply to module I/Os L+: 24 V DC L-: 0 V 5.4.2. Status LEDs “EtherCAT” LED The LED labeled “EtherCAT” indicates the state of the EtherCAT ASIC. EtherCAT 34 State LED flash code Explanation Init Red, on Initializing, no data exchange Pre-Op Red/green, 1:1 Pre-operational, no data exchange Safe-Op Red/green, 3:1 Safe operation, inputs readable Op Green, on Operational, unrestricted data exchange Berghof Automationstechnik GmbH | Harretstrasse 1 | 72800 Eningen | www.berghof.com EtherCAT_IO_HB_en_2D1722004ZD00.docx | 2VF100189FE02.docx USER MANUAL 1.3 | E-I/O “I/O” LED The LED labeled “I/O” indicates the state of the module’s I/Os. I/O State LED flash code Explanation Ok Off No error SC Red, on Short-circuited digital output CAUTION The output drivers have a thermal fuse to automatically turn off any short-circuited outputs. In case the short circuit prevails, the outputs are allowed to cool down to be turned back on until the thermal fuse blows again. “Power” LED The LED labeled "Power" indicates the state of the I/O module's I/O power supply. Power State LED flash code Explanation On Green, on 24 V DC supply ok Off Off 24 V DC supply not ok CAUTION The module is not monitored for low voltage states. “Channel” LEDs Channel State LED Explanation On Green, on Output enabled Off Off Output disabled 5.4.3. Function The DO16 module has 16 digital outputs. Function Variable Data type Explanation DigitalOutputn BOOL Digital output (n=0…15) Berghof Automationstechnik GmbH | Harretstrasse 1 | 72800 Eningen | www.berghof.com 2VF100189FE02.docx | EtherCAT_IO_HB_en_2D1722004ZD00.docx 35 USER MANUAL 1.3 | E-I/O 5.4.4. Technical data DO16 36 Label E-I/O DO16 0,5A Part no. 204801000 Plug-in connector 18-pole 204800400 (not part of the module) Digital outputs 16 Max. current 0,5 A per output Total current max. 8 A Controller ASIC ET1200 Baud rate 100 Mbit/s Connector 10-pin system plug in side wall Term. module not required Power supply 24 V DC -20% +25% E-bus load 130 mA Berghof Automationstechnik GmbH | Harretstrasse 1 | 72800 Eningen | www.berghof.com EtherCAT_IO_HB_en_2D1722004ZD00.docx | 2VF100189FE02.docx USER MANUAL 1.3 | E-I/O 6. Analogue modules 6.1. Analogue inputs for current measurement AI4-I Front view of AI4-I I/O module I/O connection passive/active power source 6.1.1. Terminals Module supply L+: 24 V DC L-: 0 V Operative earth / shielding of analog wires section 3.1.1 Earth 6.1.2. Status LEDs “EtherCAT” LED The LED labeled “EtherCAT” indicates the state of the EtherCAT ASIC. EtherCAT State LED flash code Explanation Init Red, on Initializing, no data exchange Pre-Op Red/green, 1:1 Pre-operational, no data exchange Safe-Op Red/green, 3:1 Safe operation, inputs readable Op Green, on Operational, unrestricted data exchange Berghof Automationstechnik GmbH | Harretstrasse 1 | 72800 Eningen | www.berghof.com 2VF100190FE03.docx | EtherCAT_IO_HB_en_2D1722004ZD00.docx 37 USER MANUAL 1.3 | E-I/O “I/O” LED The LED labeled “I/O” indicates the state of the module's I/Os. I/O State LED flash code Explanation Ok Green, on No error Error Off Malfunction of module if E-bus LED = On Inoperative if E-bus LED = Off Defective Red, 2x Undervoltage (not implemented) Red, 3x Watchdog Red, 4x EtherCAT watchdog control Red, 6x Module-specific fault Red, 7x Configuration error (E-bus pre-operational), no. of process data differs from that in the module Red, on Module defective “Power” LED The LED labeled "Power" indicates the state of the I/O module's I/O power supply. Power State LED flash code Explanation On Green, on 24 V DC supply ok Off Off 24 V DC supply not ok State LED flash code Explanation On Green, on Channel enabled Off Off Channel disabled Error Red Open, overcurrent “Channel” LEDs Channel 6.1.3. Function The AI4-I module has 4 analogue current signal inputs. Their measuring range can be set separately for every channel, i.e. either to 0..20 mA or to 4..20 mA. 38 Berghof Automationstechnik GmbH | Harretstrasse 1 | 72800 Eningen | www.berghof.com EtherCAT_IO_HB_en_2D1722004ZD00.docx | 2VF100190FE03.docx USER MANUAL 1.3 | E-I/O Analogue inputs Check the following variable for the digitized input values: Inputs Variable Data type Explanation Channel_n INT Value measured on channel n (n= 0…3) Measured value The maximal measuring value (0xFFF0) of the current input module is 0.5 V/23.4 Ω = 21.3675 mA. The status is shown by the channel LED. Measuring values, variable values and status Berghof Automationstechnik GmbH | Harretstrasse 1 | 72800 Eningen | www.berghof.com 2VF100190FE03.docx | EtherCAT_IO_HB_en_2D1722004ZD00.docx 39 USER MANUAL 1.3 | E-I/O Analogue values current Measuring Variable value mA decimal CODESYS (INT) hexadecimal 0 0 0 0 1 3056 3056 16#0BF0 2 6128 6128 16#17F0 3 9184 9184 16#23E0 4 12256 12256 16#2FE0 5 15328 15328 16#3BE0 6 18384 18384 16#47D0 7 21456 21456 16#53D0 8 24528 24528 16#5FD0 9 27584 27584 16#6BC0 10 30656 30656 16#77C0 11 33728 -31808 16#83C0 12 36784 -28752 16#8FB0 13 39856 -25680 16#9BB0 14 42928 -22608 16#A7B0 15 45984 -19552 16#B3A0 16 49056 -16480 16#BFA0 17 52112 -13424 16#CB90 18 55184 -10352 16#D790 19 58256 -7280 16#E390 20 61312 -4224 16#EF80 20.5 62848 -2688 16#F580 65520 -16 16#FFF0 … ≥ 21.37 40 Berghof Automationstechnik GmbH | Harretstrasse 1 | 72800 Eningen | www.berghof.com EtherCAT_IO_HB_en_2D1722004ZD00.docx | 2VF100190FE03.docx USER MANUAL 1.3 | E-I/O Module control The module provides you with various operational options. To set up the module choose the options as appropriate and accept by setting control bit “SetOptions” to a rising edge. The module will confirm by returning “OptionsSet”. There are various “module error” bits that the module uses to indicate errors. The states of the error bits are retained and also used for error indication by the “I/O” LED. To reset the error bits set control bit “ResetError” to a rising edge. Error bits Variable Data type Explanation SetOptions BOOL Rising edge accepts module options ResetError BOOL Rising edge acknowledges error Module options The following options are available for module AI4-I: Module options Variable Data type Channel_n_0_20mA BOOL Channel_n_On BOOL Channel_n_Filter USINT n Explanation TRUE Channel n to 0…20 mA FALSE Channel n to 4…20 mA Enables channel n 0..255 Filter on channel n New values avail. in k/3 ms (k=0..255) 0…3 Channel number To set and accept options, see Module control Module state The following states are indicated: Module state Variable Data type Explanation Shortcut BOOL Short circuit Undervoltage BOOL Low voltage (supplied power < 19.2 V) Watchdog BOOL Internal watchdog of module EtherCAT_Error BOOL Configuration error or watchdog control Specific_Error BOOL Module-specific fault OptionsSet BOOL Sent by module to acknowledge SetOptions To reset the messages, see Module control Berghof Automationstechnik GmbH | Harretstrasse 1 | 72800 Eningen | www.berghof.com 2VF100190FE03.docx | EtherCAT_IO_HB_en_2D1722004ZD00.docx 41 USER MANUAL 1.3 | E-I/O Module-specific messages Apart from the module error messages, there is a set of messages containing details about the current state of the module: Messages Variable Data type Explanation Channel_n_Open BOOL 4..20 mA mode: input current < 3.5 mA Specific_Error = TRUE Channel_n_Overcurrent BOOL Input current > 20.5 mA Specific_Error = TRUE These messages are automatically reset when the state concerned has returned to normal. Conversion time The analogue signals are converted one by one down every channel. Disabling one or several channels will shorten the entire A/D conversion cycle. “Filter” in this case means to compute an average when the set filter time is over. Analogue value conversion runs cyclically and is not synchronized with the receipt of EtherCAT telegrams. The cycle consists of the analogue value conversion plus transmitting the values into the EtherCAT data area. Channel Number of channels Cycle time in ms (all filters=0) 1 0.27 2 0.41 3 0.55 4 0.69 NOTICE If you are aiming for a high sampling frequency, the EtherCAT master should do the filtering (averaging) because it will normally have much more processing power. NOTICE Take the EtherCAT cycle into account to assess how much the values stored by the EtherCAT master are up-to-date. The module described in this section will accept the above times as the ideal EtherCAT cycle setup. Quality of analogue values The inputs connect to both active or passive current sensors. The module provides terminals for the 24 V DC- supply to the transmitter of every channel. 42 Berghof Automationstechnik GmbH | Harretstrasse 1 | 72800 Eningen | www.berghof.com EtherCAT_IO_HB_en_2D1722004ZD00.docx | 2VF100190FE03.docx USER MANUAL 1.3 | E-I/O Passive current sensors: Interconnect the “–” and “0 V” terminals. Active current sensors: Use the power supplied by the module if at all possible. If power to the current sensors is supplied by an external source, connect the 0 V terminal of that power source to the 0 V terminal of the module. 24V Connector channel n + - Current sensor 24V (ext.) 0V NOTICE Best results are obtained by connected the shield of the signal cables to operative earth. 6.1.4. Technical data AI4-I Label E-I/O AI4-I 12BIT Part no. 204801100 Plug-in connector 18-pole 204800400 (not part of the module) Analogue inputs 4 single ended Resolution 12 Bit (5.2 µA) Measuring range 0 … 20 mA, 4..20 mA (limit 21.3675 mA) Temperature drift < ± 25 ppm/°C regarding range limit Critical frequency typical 12.5 kHz Burden < 75 Ω Sampling frequency 1.45 kHz (if all channels are enabled) Controller ASIC ET1200 Baud rate 100 Mbit/s E-bus port 10-pin system plug in side wall Term. module not required Power supply from coupler through E-bus connector E-bus load 140 mA Berghof Automationstechnik GmbH | Harretstrasse 1 | 72800 Eningen | www.berghof.com 2VF100190FE03.docx | EtherCAT_IO_HB_en_2D1722004ZD00.docx 43 USER MANUAL 1.3 | E-I/O 6.2. Analogue inputs for current measurement AI8-I Front view of AI8-I I/O module I/O connection passive/active power source 6.2.1. Terminals Module supply L+: 24 V DC L-: 0 V Operative earth / shielding of analog wires section 3.1.1 Earth 6.2.2. Status LEDs “EtherCAT” LED The LED labeled “EtherCAT” indicates the state of the EtherCAT ASIC. EtherCAT 44 State LED flash code Explanation Init Red, on Initializing, no data exchange Pre-Op Red/green, 1:1 Pre-operational, no data exchange Safe-Op Red/green, 3:1 Safe operation, inputs readable Op Green, on Operational, unrestricted data exchange Berghof Automationstechnik GmbH | Harretstrasse 1 | 72800 Eningen | www.berghof.com EtherCAT_IO_HB_en_2D1722004ZD00.docx | 2VF100190FE03.docx USER MANUAL 1.3 | E-I/O “I/O” LED The LED labeled “I/O” indicates the state of the module's I/Os. I/O State LED flash code Explanation Ok Green, on No error Error Off Malfunction of module if E-bus LED = On Inoperative if E-bus LED = Off Defective Red, 2x Undervoltage (not implemented) Red, 3x Watchdog Red, 4x EtherCAT watchdog control Red, 6x Module-specific fault Red, 7x Configuration error (E-bus pre-operational), no. of process data differs from that in the module Red, on Module defective “Power” LED The LED labeled "Power" indicates the state of the I/O module's I/O power supply. Power State LED flash code Explanation On Green, on 24 V DC supply ok Off Off 24 V DC supply not ok State LED flash code Explanation On Green, on Channel enabled Off Off Channel disabled Error Red Open, overcurrent “Channel” LEDs Channel 6.2.3. Function The AI8-I module has 8 analogue current signal inputs. Their measuring range can be set separately for every channel, i.e. either to 0..20 mA or to 4..20 mA. Berghof Automationstechnik GmbH | Harretstrasse 1 | 72800 Eningen | www.berghof.com 2VF100190FE03.docx | EtherCAT_IO_HB_en_2D1722004ZD00.docx 45 USER MANUAL 1.3 | E-I/O Analogue inputs Check the following variable for the digitized input values: Inputs Variable Data type Explanation Channel_n INT Value measured on channel n (n= 0…7) Measured value The maximal measuring value (0xFFF0) of the current input module is 0.5 V/23.4 Ω = 21.3675 mA. The status is shown by the channel LED. Measuring values, variable values and status 46 Berghof Automationstechnik GmbH | Harretstrasse 1 | 72800 Eningen | www.berghof.com EtherCAT_IO_HB_en_2D1722004ZD00.docx | 2VF100190FE03.docx USER MANUAL 1.3 | E-I/O Analogue values current Measuring Variable value mA decimal CODESYS (INT) hexadecimal 0 0 0 0 1 3056 3056 16#0BF0 2 6128 6128 16#17F0 3 9184 9184 16#23E0 4 12256 12256 16#2FE0 5 15328 15328 16#3BE0 6 18384 18384 16#47D0 7 21456 21456 16#53D0 8 24528 24528 16#5FD0 9 27584 27584 16#6BC0 10 30656 30656 16#77C0 11 33728 -31808 16#83C0 12 36784 -28752 16#8FB0 13 39856 -25680 16#9BB0 14 42928 -22608 16#A7B0 15 45984 -19552 16#B3A0 16 49056 -16480 16#BFA0 17 52112 -13424 16#CB90 18 55184 -10352 16#D790 19 58256 -7280 16#E390 20 61312 -4224 16#EF80 20.5 62848 -2688 16#F580 65520 -16 16#FFF0 … ≥ 21.37 Berghof Automationstechnik GmbH | Harretstrasse 1 | 72800 Eningen | www.berghof.com 2VF100190FE03.docx | EtherCAT_IO_HB_en_2D1722004ZD00.docx 47 USER MANUAL 1.3 | E-I/O Module control The module provides you with various operational options. To set up the module choose the options as appropriate and accept by setting control bit “SetOptions” to a rising edge. The module will confirm by returning “OptionsSet”. There are various “module error” bits that the module uses to indicate errors. The states of the error bits are retained and also used for error indication by the “I/O” LED. To reset the error bits set control bit “ResetError” to a rising edge. Error bits Variable Data type Explanation SetOptions BOOL Rising edge accepts module options ResetError BOOL Rising edge acknowledges error Module options The following options are available for module AI8-I: Module options Variable Data type Channel_n_0_20mA BOOL Channel_n_On BOOL Channel_n_Filter USINT Explanation TRUE Channel n to 0…20 mA FALSE Channel n to 4…20 mA Enables channel n n 0..255 Filter on channel n New values avail. in k/3 ms (k=0..255) 0…7 Channel number To set and accept options, see Module control Module state The following states are indicated: Module state Variable Data type Explanation Shortcut BOOL Short circuit Undervoltage BOOL Low voltage (supplied power < 19.2 V) Watchdog BOOL Internal watchdog of module EtherCAT_Error BOOL Configuration error or watchdog control Specific_Error BOOL Module-specific fault OptionsSet BOOL Sent by module to acknowledge SetOptions To reset the messages, see Module control 48 Berghof Automationstechnik GmbH | Harretstrasse 1 | 72800 Eningen | www.berghof.com EtherCAT_IO_HB_en_2D1722004ZD00.docx | 2VF100190FE03.docx USER MANUAL 1.3 | E-I/O Module-specific messages Apart from the module error messages, there is a set of messages containing details about the current state of the module: Messages Variable Data type Explanation Channel_n_Open BOOL 4..20 mA mode: input current < 3.5 mA Specific_Error = TRUE Channel_n_Overcurrent BOOL Input current > 20.5 mA Specific_Error = TRUE These messages are automatically reset when the state concerned has returned to normal. Conversion time The analogue signals are converted one by one down every channel. Disabling one or several channels will shorten the entire A/D conversion cycle. “Filter” in this case means to compute an average when the set filter time is over. Analogue value conversion runs cyclically and is not synchronized with the receipt of EtherCAT telegrams. The cycle consists of the analogue value conversion plus transmitting the values into the EtherCAT data area. Conversion time Number of channels Cycle time in ms Number of channels Cycle time in ms 1 0.40 5 0.92 2 0.53 6 1.06 3 0.66 7 1.19 4 0.79 8 1.32 NOTICE If you are aiming for a high sampling frequency, the EtherCAT master should do the filtering (averaging) because it will normally have much more processing power. NOTICE Take the EtherCAT cycle into account to assess how much the values stored by the EtherCAT master are up-to-date. The module described in this section will accept the above times as the ideal EtherCAT cycle setup. Quality of analogue values The inputs connect to both active or passive current sensors. The module provides terminals for the 24 V DC- supply to the transmitter of every channel. Berghof Automationstechnik GmbH | Harretstrasse 1 | 72800 Eningen | www.berghof.com 2VF100190FE03.docx | EtherCAT_IO_HB_en_2D1722004ZD00.docx 49 USER MANUAL 1.3 | E-I/O Passive current sensors: Interconnect the “–” and “0 V” terminals. Active current sensors: Use the power supplied by the module if at all possible. If power to the current sensors is supplied by an external source, connect the 0 V terminal of that power source to the 0 V terminal of the module. 24V Connector channel n + Current sensor - 24V (ext.) 0V NOTICE Best results are obtained by connected the shield of the signal cables to operative earth. 6.2.4. Technical data AI8-I 50 Label E-I/O AI8-I 12 BIT Part no. 204802700 Plug-in connector 18-pole 204800400 (not part of the module) Analogue inputs 8 single ended Resolution 12 Bit (5.2 µA) Measuring range 0 … 20 mA, 4..20 mA (limit 21.3675 mA) Temperature drift < ± 25 ppm/°C regarding range limit Critical frequency typical 12.5 kHz Burden < 75 Ω Sampling frequency 0.76 kHz (if all channels are enabled) Controller ASIC ET1200 Baud rate 100 Mbit/s E-bus port 10-pin system plug in side wall Term. module not required Power supply from coupler through E-bus connector E-bus load 160 mA Berghof Automationstechnik GmbH | Harretstrasse 1 | 72800 Eningen | www.berghof.com EtherCAT_IO_HB_en_2D1722004ZD00.docx | 2VF100190FE03.docx USER MANUAL 1.3 | E-I/O 6.3. Analogue inputs for voltage measurement AI4/8-U Front view of AI4/8-U I/O module I/O connection 6.3.1. Terminals The module needs no separate 24 V connector. Power is supplied to the module through the E-bus connector. Operative earth / shielding of analog wires section 3.1.1 Earth 6.3.2. Status LEDs “EtherCAT” LED The LED labeled “EtherCAT” indicates the state of the EtherCAT ASIC. EtherCAT State LED flash code Explanation Init Red, on Initializing, no data exchange Pre-Op Red/green, 1:1 Pre-operational, no data exchange Safe-Op Red/green, 3:1 Safe operation, inputs readable Op Green, on Operational, unrestricted data exchange Berghof Automationstechnik GmbH | Harretstrasse 1 | 72800 Eningen | www.berghof.com 2VF100190FE03.docx | EtherCAT_IO_HB_en_2D1722004ZD00.docx 51 USER MANUAL 1.3 | E-I/O “I/O” LED The LED labeled “I/O” indicates the state of the module's I/Os. I/O State LED flash code Explanation Ok Green, on No error Error Off Malfunction of module if E-bus LED = On Inoperative if E-bus LED = Off Defective Red, 3x Watchdog Red, 4x EtherCAT watchdog control Red, 6x Module-specific fault Red, 7x Configuration error (E-bus pre-operational), no. of process data differs from that in the module Red, on Module defective “Power” LED There is no LED labeled “Power” because a separate power feed is not required. “Channel” LEDs Channel State LED flash code Explanation On Green, on Channel enabled Off Off Channel disabled 6.3.3. Function The AI4/8-U module has 8 analogue inputs. If signal lines are single-ended (measured against earth, L-), 8 channels are available. To measure differential signals, you will need 2 channels for every signal, i.e. you can pick up no more than 4 differential signals. Channels can be combined as follows: 0/1, 2/3, 4/5 and 6/7. Analogue inputs Check the following variable for the digitized input values: Inputs 52 Variable Data type Explanation Channel_n INT Value measured on channel n (n= 0…7) Berghof Automationstechnik GmbH | Harretstrasse 1 | 72800 Eningen | www.berghof.com EtherCAT_IO_HB_en_2D1722004ZD00.docx | 2VF100190FE03.docx USER MANUAL 1.3 | E-I/O Analogue values voltage Measuring Variable value (for 16 bit) bipolar volt decimal unipolar CODESYS hexadecimal decimal (INT) CODESYS hexadecimal (INT) -10 32768 -32768 16#8000 -9 36044 -29492 16#8CCC -8 39321 -26215 16#9999 -7 42598 -22938 16#A666 -6 45875 -19661 16#B333 -5 49152 -16384 16#C000 -4 52428 -13108 16#CCCC -3 55705 -9831 16#D999 -2 58982 -6554 16#E666 -1 62244 -3292 16#F324 0 0 0 0 0 0 0 1 3276 3276 16#0CCC 6553 6553 16#1999 2 6553 6553 16#1999 13107 13107 16#3332 3 9830 9830 16#2666 19660 19660 16#4CCC 4 13106 13106 16#3332 26214 26214 16#6665 5 16383 16383 16#3FFF 32767 32767 16#7FFF 6 19660 19660 16#4CCC 39320 -26216 16#9998 7 22936 22936 16#5998 45874 -19662 16#B332 8 26213 26213 16#6665 52427 -13109 16#CCCB 9 29490 29490 16#7332 58981 -6555 16#E665 10 32767 32767 16#7FFF 65534 -2 16#FFFE Berghof Automationstechnik GmbH | Harretstrasse 1 | 72800 Eningen | www.berghof.com 2VF100190FE03.docx | EtherCAT_IO_HB_en_2D1722004ZD00.docx 53 USER MANUAL 1.3 | E-I/O Module control The module provides you with various operational options. To set up the module choose the options as appropriate and accept by setting control bit “SetOptions” to a rising edge. The module will confirm by returning “OptionsSet”. There are various “module error” bits that the module uses to indicate errors. The states of the error bits are retained and also used for error indication by the “I/O” LED. To reset the error bits set control bit “ResetError” to a rising edge. Error bits Variable Data type Explanation SetOptions BOOL Rising edge accepts module options ResetError BOOL Rising edge acknowledges error Module options The following options are available for module AI4/8-U: Module options Variable Data type Explanation Channel_n_n+1_Differential BOOL The difference in voltages of channel n and channel n+1 is measured and output to channel n. Channel_n_On BOOL Enable channel n Channel_n_Unipolar BOOL Change measuring range of channel n from bipolar +10 V ... -10 V to unipolar 0… 10 V (doubles the resolution) Channel_n_Filter USINT Filter on channel n New values avail. in k/3 ms (k=0..255) 0…7 n Channel number To set and accept options, see Module control Module state The following states are indicated: Module state 54 Variable Data type Explanation Shortcut BOOL Not used Undervoltage BOOL Not used Watchdog BOOL Internal watchdog of module EtherCAT_Error BOOL Configuration error or watchdog control Specific_Error BOOL Module-specific fault OptionsSet BOOL Sent by module to acknowledge SetOptions Berghof Automationstechnik GmbH | Harretstrasse 1 | 72800 Eningen | www.berghof.com EtherCAT_IO_HB_en_2D1722004ZD00.docx | 2VF100190FE03.docx USER MANUAL 1.3 | E-I/O To reset the messages, see Module control Module-specific messages There are no module-specific messages for this module. Conversion time The analogue signals are converted one by one down every channel. Disabling one or several channels will shorten the entire A/D conversion cycle. “Filter” in this case means to compute an average when the set filter time is over. Analogue value conversion runs cyclically and is not synchronized with the receipt of EtherCAT telegrams. The cycle consists of the analogue value conversion plus transmitting the values into the EtherCAT data area. Conversion time Number of channels Cycle time in ms (all filters=0) Number of channels Cycle time in ms (all filters=0) 1 270 µs 5 630 µs 2 360 µs 6 710 µs 3 450 µs 7 800 µs 4 540 µs 8 890 µs NOTICE If you are aiming for a high sampling frequency, the EtherCAT master should do the filtering (averaging) because it will normally have much more processing power. NOTICE Take the EtherCAT cycle into account to assess how much the values stored by the EtherCAT master are up-to-date. The module described in this section will accept the above times as the ideal EtherCAT cycle setup. Quality of analogue values NOTICE Best results are obtained by connecting the shield of the signal cables to operative earth connecting unused single-ended lines to Ground short-circuiting unused differential inputs Berghof Automationstechnik GmbH | Harretstrasse 1 | 72800 Eningen | www.berghof.com 2VF100190FE03.docx | EtherCAT_IO_HB_en_2D1722004ZD00.docx 55 USER MANUAL 1.3 | E-I/O 6.3.4. Technical data AI4/8-U 56 Label E-I/O AI4/8-U 13 BIT Part no. 204800200 Plug-in connector 18-pole 204800400 (not part of the module) Analogue inputs 8 single ended or 4 differential Resolution 13 Bit (1.221 µV unipolar, 2.442 µV bipolar) Measuring range 0 … 10 V, ± 10 V Temperature drift < -15 ppm/°C regarding range limit Critical frequency typical 1 MHz Input resistance > 100 MΩ Sampling frequency 1.12 kHz (if all channels are enabled) Controller ASIC ET1200 Baud rate 100 Mbit/s E-bus port 10-pin system plug in side wall Term. module not required Power supply from coupler through E-bus connector E-bus load 190 mA Berghof Automationstechnik GmbH | Harretstrasse 1 | 72800 Eningen | www.berghof.com EtherCAT_IO_HB_en_2D1722004ZD00.docx | 2VF100190FE03.docx USER MANUAL 1.3 | E-I/O 6.4. Analogue outputs voltage / current AO4-U/I Front view of AO4 I/O module + - Channel0 0 1 Channel1 2 3 Channel2 4 5 Channel3 6 7 I/O connection 6.4.1. Terminals Power supply to module I/Os L+: 24 V DC L-: 0 V 6.4.2. Status LEDs “EtherCAT” LED The LED labeled “EtherCAT” indicates the state of the EtherCAT ASIC. EtherCAT State LED flash code Explanation Init Red, on Initializing, no data exchange Pre-Op Red/green, 1:1 Pre-operational, no data exchange Safe-Op Red/green, 3:1 Safe operation, inputs readable Op Green, on Operational, unrestricted data exchange Berghof Automationstechnik GmbH | Harretstrasse 1 | 72800 Eningen | www.berghof.com 2VF100190FE03.docx | EtherCAT_IO_HB_en_2D1722004ZD00.docx 57 USER MANUAL 1.3 | E-I/O “I/O” LED The LED labeled “I/O” indicates the state of the module's I/Os. I/O State LED flash code Explanation Ok Green, on No error Error Off Malfunction of module if E-bus LED = On Inoperative if E-bus LED = Off Defective Red, 1x Short circuit Red, 2x Low voltage Red, 4x EtherCAT watchdog control Red, 6x Module-specific fault Red, 7x Configuration error (E-bus pre-operational), no. of process data differs from that in the module Red, on Module defective “Power” LED The LED labeled "Power" indicates the state of the I/O module's I/O power supply. Power State LED flash code Explanation On Green, on 24 V DC supply ok Off Off 24 V DC supply not ok State LED flash code Explanation On Green, on Channel enabled Off Off Channel disabled Error Red, 1x Short circuit Red, 3x Broken wire Red, 5x Excessive temp. of output drivers “Channel” LEDs Channel 58 Berghof Automationstechnik GmbH | Harretstrasse 1 | 72800 Eningen | www.berghof.com EtherCAT_IO_HB_en_2D1722004ZD00.docx | 2VF100190FE03.docx USER MANUAL 1.3 | E-I/O 6.4.3. Function The AO4 module has 4 analogue outputs. Every channel can be separately set to the unipolar or bipolar output of voltages or currents. The letter 'n' in the tables below represents the channel number (n=0…3). Analogue outputs Write the output values into the following variables: Outputs Variable Data type Explanation Channel_n INT Output value for channel n (n=0…3) Analog values voltage see table page 53 Current 0 ... 0xFFF0 for 0... 20 mA Module control The module provides you with various operational options. To set up the module choose the options as appropriate and accept by setting control bit “SetOptions” to a rising edge. The module will confirm by returning “OptionsSet”. There are various “module error” bits that the module uses to indicate errors. The states of the error bits are retained and also used for error indication by the “I/O” LED. To reset the error bits set control bit “ResetError” to a rising edge. Error bits Variable Data type Explanation SetOptions BOOL Rising edge accepts module options ResetError BOOL Rising edge acknowledges error Berghof Automationstechnik GmbH | Harretstrasse 1 | 72800 Eningen | www.berghof.com 2VF100190FE03.docx | EtherCAT_IO_HB_en_2D1722004ZD00.docx 59 USER MANUAL 1.3 | E-I/O Module options The following options are available for module AO4: Module options Variable Data type Explanation Channel_n_On BOOL Enables channel n (set to high impedance to disable) Channel_n_Current BOOL Sets channel n to current output mode Channel_n_n+1_Unipolar BOOL Sets channels 1 and 2 or 2 and 3 to unipolar mode Outputs_Active_Shortcut BOOL Leave outputs unchanged after short circuit Outputs_Active_Undervoltage BOOL Leave outputs unchanged after low voltage Outputs_Active_Specific_Error BOOL Leave outputs unchanged after module-specific error Outputs_Active_EtherCAT_Error BOOL Leave outputs unchanged after short circuit 0…3 n Channel number To set and accept options, see section Module control Module state The following states are indicated: Module state Variable Data type Explanation Shortcut BOOL Short circuit (not used) Undervoltage BOOL Low voltage (supplied power < 19.2 V) Watchdog BOOL Internal watchdog of module EtherCAT_Error BOOL Configuration error or watchdog control Specific_Error BOOL Module-specific fault OptionsSet BOOL Sent by module to acknowledge SetOptions To reset the messages, see Module control Module-specific messages Apart from the module error messages, there is a set of messages containing details about the current state of the module: 60 Berghof Automationstechnik GmbH | Harretstrasse 1 | 72800 Eningen | www.berghof.com EtherCAT_IO_HB_en_2D1722004ZD00.docx | 2VF100190FE03.docx USER MANUAL 1.3 | E-I/O Messages Variable Data type Explanation Channel_n_Overtemp BOOL Temperature of output driver of channel n > 140 °C (automatic switch-off) Outputs_Active_Shortcut = TRUE Undervoltage_24 BOOL Power supplied to module > 19.2V Outputs_Active_Undervoltage = TRUE Channel_n_Open BOOL Current mode: channel n load is > 500 Specific_Error = TRUE Channel_n_Shortcut BOOL Voltage mode: channel n load is < 600 Specific_Error = TRUE These messages are automatically reset when the state concerned has returned to normal. These messages are summarized as “Specific_Error” in the module status and mapped as “Module-specific error” onto the I/O-LED. Conversion time The AO4 module operates with a cycle time of 320µs which is independent of the number of the enabled channels (time from the acquisition of the output values to the start of the D/A converters). 6.4.4. Technical data AO4-U/I Label E-I/O AO4-U/I 12BIT Part no. 204801200 Plug-in connector 18-pole 204800400 (not part of the module) Analogue outputs 4 Resolution 16 bit, 12 bit Measuring range 0 … 10 V, ± 10 V, 0…20 mA, ± 20 mA Output frequency 3.125 kHz Controller ASIC ET1200 Baud rate 100 Mbit/s E-bus port 10-pin system plug in side wall Term. module not required Power supply 24 V DC -20% +25% E-bus load 150 mA Berghof Automationstechnik GmbH | Harretstrasse 1 | 72800 Eningen | www.berghof.com 2VF100190FE03.docx | EtherCAT_IO_HB_en_2D1722004ZD00.docx 61 USER MANUAL 1.3 | E-I/O Blank page 62 Berghof Automationstechnik GmbH | Harretstrasse 1 | 72800 Eningen | www.berghof.com EtherCAT_IO_HB_en_2D1722004ZD00.docx | 2VF100190FE03.docx USER MANUAL 1.3 | E-I/O 7. Temperature modules 7.1. Analogue temperature inputs AI4-Pt/Ni100, AI4-Pt/Ni1000 Front view of Pt/Ni100 I/O module I/O connection 7.1.1. Terminals The module needs no separate 24 V connector. Power is supplied to the module through the E-bus connector. Operative earth / shielding of analog wires section 3.1.1 Earth 7.1.2. Status LEDs “EtherCAT” LED The LED labeled “EtherCAT” indicates the state of the EtherCAT ASIC. EtherCAT State LED flash code Explanation Init Red, on Initializing, no data exchange Pre-Op Red/green, 1:1 Pre-operational, no data exchange Safe-Op Red/green, 3:1 Safe operation, inputs readable Op Green, on Operational, unrestricted data exchange Berghof Automationstechnik GmbH | Harretstrasse 1 | 72800 Eningen | www.berghof.com 2VF100191FE02.docx | EtherCAT_IO_HB_en_2D1722004ZD00.docx 63 USER MANUAL 1.3 | E-I/O “I/O” LED The LED labeled “I/O” indicates the state of the module's I/Os. I/O State LED flash code Explanation Ok Green, on No error Error Off Malfunction of module if E-bus LED = On Inoperative if E-bus LED = Off Defective Red, 4x EtherCAT watchdog control Red, 6x Module-specific fault Red, 7x Configuration error (E-bus pre-operational), no. of process data differs from that in the module Red, on Module defective “Power” LED There is no LED labeled “Power” because a separate power feed is not required. “Channel” LEDs Channel State LED flash code Explanation On Green, on Channel enabled Off Off Channel disabled Error Red Short circuit, broken wire 7.1.3. Function Module AI4-Pt/Ni100 has 4 analogue inputs for Pt100 or Ni100 temperature sensors. It can also measure resistances between 70 and 330 . Module AI4-Pt/Ni1000 has 4 analogue inputs for Pt1000 or Ni1000 temperature sensors. It can also measure resistances between 700 and 3000 . The letter 'n' in the tables below represents the channel number (n=0…3). Analogue inputs Check the following variable for the digitized input values: 64 Berghof Automationstechnik GmbH | Harretstrasse 1 | 72800 Eningen | www.berghof.com EtherCAT_IO_HB_en_2D1722004ZD00.docx | 2VF100191FE02.docx USER MANUAL 1.3 | E-I/O Inputs Variable Data type Explanation Channel_n INT Value measured on channel n (n= 0…3) Default in 1/10 °C ResMode Pt100 in 1/100 Pt1000 in 1/10 Module control The module provides you with various operational options. To set up the module choose the options as appropriate and accept by setting control bit “SetOptions” to a rising edge. The module will confirm by returning “OptionsSet”. There are various “module error” bits that the module uses to indicate errors. The states of the error bits are retained and also used for error indication by the “I/O” LED. To reset the error bits set control bit “ResetError” to a rising edge. Error bits Variable Data type Explanation SetOptions BOOL Rising edge accepts module options ResetError BOOL Rising edge acknowledges error Module options The following options are available for module AI4-Pt/Ni100 or 1000: Module options Variable Data type Explanation Channel_n_Ni BOOL Set channel n to Ni100 sensor Channel_n_On BOOL Enables channel n Channel_n_ResMode BOOL Set channel n to resistance mode Channel_n_Filter USINT Set filter for channel n The arithmetic mean is output after n+1 conversions. n 0…3 Channel number To set and accept options, see Module control Berghof Automationstechnik GmbH | Harretstrasse 1 | 72800 Eningen | www.berghof.com 2VF100191FE02.docx | EtherCAT_IO_HB_en_2D1722004ZD00.docx 65 USER MANUAL 1.3 | E-I/O Module state The following module states are indicated: Module state Variable Data type Explanation Shortcut BOOL Not used Undervoltage BOOL Not used Watchdog BOOL Internal watchdog of module EtherCAT_Error BOOL Configuration error or watchdog control Specific_Error BOOL Module-specific fault OptionsSet BOOL Sent by module to acknowledge SetOptions To reset the messages, see Module control Module-specific messages Apart from the module error messages, there is a set of messages containing details about the current state of the module: Messages Variable Data type Explanation Channel_n_Open BOOL - Channel n load > maximum - Broken wire of connector 0 * - Broken wire of connector 3 * - Broken wire of connector 0/3 * Specific_Error = TRUE Channel_n_Shortcut BOOL - Channel n load < minimum - Short circuit of connector 0-3 * - Broken wire of connector 1 * Specific_Error = TRUE * The causes of 'Short circuit' and 'Broken wire 0..3' are shown for channel 0 (equivalent applies to other channels). These messages are automatically reset when the state concerned has returned to normal. They are combined into a single “Specific_Error” state of the module and output to the I/O LED as “modulespecific error”. Conversion time The analogue signals are converted one by one down every channel. Disabling one or several channels will shorten the entire A/D conversion cycle. 'Filter' in this case means to compute an average when the set filter time is over. Analogue value conversion runs cyclically and is not synchronized with the receipt of EtherCAT telegrams. The cycle consists of the analogue value conversion plus transmitting the values into the EtherCAT data area. 66 Berghof Automationstechnik GmbH | Harretstrasse 1 | 72800 Eningen | www.berghof.com EtherCAT_IO_HB_en_2D1722004ZD00.docx | 2VF100191FE02.docx USER MANUAL 1.3 | E-I/O Channel Number of channels Cycle time in ms (all filters=0) 1 32 2 65 3 97 4 129 NOTICE If you are aiming for a high sampling frequency, the EtherCAT master should do the filtering (averaging) because it will normally have much more processing power. NOTICE Take the EtherCAT cycle into account to assess how much the values stored by the EtherCAT master are up-to-date. The module described in this section will accept the above times as the ideal EtherCAT cycle setup. Quality of analogue values NOTICE Best results are obtained by connecting the shield of the signal cables to operative earth. Berghof Automationstechnik GmbH | Harretstrasse 1 | 72800 Eningen | www.berghof.com 2VF100191FE02.docx | EtherCAT_IO_HB_en_2D1722004ZD00.docx 67 USER MANUAL 1.3 | E-I/O 7.1.4. Technical data AI4-Pt/Ni100 AI4-Pt/Ni100 68 Label E-I/O AI4-PT/NI100 16 BIT Part no. 204801300 Plug-in connector 18-pole 204800400 (not part of the module) Analogue inputs 4 Resolution 16 bit (resistance 0.01 , temperature 0.1°C) Pt100 measuring range - 75°C…+ 670°C Ni100 measuring range - 60°C…+ 250°C Resistance 70…330 Temperature drift < ± 50 ppm/°C regarding range limit Critical frequency typical 2 Hz Measurement current < 0.50 mA Sampling frequency > 7.75 Hz (if all channels are enabled) Controller ASIC ET1200 Baud rate 100 Mbit/s E-bus port 10-pin system plug in side wall Term. module not required Power supply 24 V DC -20% +25% E-bus load 150 mA Berghof Automationstechnik GmbH | Harretstrasse 1 | 72800 Eningen | www.berghof.com EtherCAT_IO_HB_en_2D1722004ZD00.docx | 2VF100191FE02.docx USER MANUAL 1.3 | E-I/O 7.1.5. Technical data AI4-Pt/Ni1000 AI4-Pt/Ni1000 Label E-I/O AI4-PT/NI1000 16 BIT Part no. 204802800 Plug-in connector 18-pole 204800400 (not part of the module) Analogue inputs 4 Resolution 16 bit (resistance 0.1 , temperature 0.1°C) Pt100 measuring range - 75°C…+ 570°C Ni100 measuring range - 60°C…+ 250°C Resistance 700…3000 Temperature drift < ± 60 ppm/°C regarding range limit Critical frequency typical 2 Hz Measurement current < 0.12 mA Sampling frequency > 7.75 Hz (if all channels are enabled) Controller ASIC ET1200 Baud rate 100 Mbit/s E-bus port 10-pin system plug in side wall Term. module not required Power supply 24 V DC -20% +25% E-bus load 150 mA Berghof Automationstechnik GmbH | Harretstrasse 1 | 72800 Eningen | www.berghof.com 2VF100191FE02.docx | EtherCAT_IO_HB_en_2D1722004ZD00.docx 69 USER MANUAL 1.3 | E-I/O 7.2. Analogue temperature inputs AI8-Pt/Ni100 Front view of Pt/Ni100 I/O module I/O connection 7.2.1. Terminals The module needs no separate 24 V connector. Power is supplied to the module through the E-bus connector. Operative earth / shielding of analog wires section 3.1.1 Earth 7.2.2. Status LEDs “EtherCAT” LED The LED labeled “EtherCAT” indicates the state of the EtherCAT ASIC. EtherCAT 70 State LED flash code Explanation Init Red, on Initializing, no data exchange Pre-Op Red/green, 1:1 Pre-operational, no data exchange Safe-Op Red/green, 3:1 Safe operation, inputs readable Op Green, on Operational, unrestricted data exchange Berghof Automationstechnik GmbH | Harretstrasse 1 | 72800 Eningen | www.berghof.com EtherCAT_IO_HB_en_2D1722004ZD00.docx | 2VF100191FE02.docx USER MANUAL 1.3 | E-I/O “I/O” LED The LED labeled “I/O” indicates the state of the module's I/Os. I/O State LED flash code Explanation Ok Green, on No error Error Off Malfunction of module if E-bus LED = On Inoperative if E-bus LED = Off Defective Red, 4x EtherCAT watchdog control Red, 6x Module-specific fault Red, 7x Configuration error (E-bus pre-operational), no. of process data differs from that in the module Red, on Module defective “Power” LED There is no LED labeled “Power” because a separate power feed is not required. “Channel” LEDs Channel State LED flash code Explanation On Green, on Channel enabled Off Off Channel disabled Error Red Short circuit, broken wire 7.2.3. Function Module AI8-Pt/Ni100 has 8 analogue inputs for Pt100 or Ni100 temperature sensors. It can also measure resistances between 70 and 330 . The letter 'n' in the tables below represents the channel number (n=0…7). Analogue inputs Check the following variable for the digitized input values: Berghof Automationstechnik GmbH | Harretstrasse 1 | 72800 Eningen | www.berghof.com 2VF100191FE02.docx | EtherCAT_IO_HB_en_2D1722004ZD00.docx 71 USER MANUAL 1.3 | E-I/O Inputs Variable Data type Explanation Channel_n INT Value measured on channel n (n= 0…7) Default in 1/10 °C ResMode Pt100 in 1/100 Module control The module provides you with various operational options. To set up the module choose the options as appropriate and accept by setting control bit “SetOptions” to a rising edge. The module will confirm by returning “OptionsSet”. There are various “module error” bits that the module uses to indicate errors. The states of the error bits are retained and also used for error indication by the “I/O” LED. To reset the error bits set control bit “ResetError” to a rising edge. Error bits Variable Data type Explanation SetOptions BOOL Rising edge accepts module options ResetError BOOL Rising edge acknowledges error Module options The following options are available for module AI8-Pt/Ni100: Module options Variable Data type Explanation Channel_n_Ni BOOL Set channel n to Ni100 sensor Channel_n_On BOOL Enables channel n Channel_n_ResMode BOOL Set channel n to resistance mode Channel_n_Filter USINT Set filter for channel n The arithmetic mean is output after n+1 conversions. n 0…7 Channel number To set and accept options, see Module control 72 Berghof Automationstechnik GmbH | Harretstrasse 1 | 72800 Eningen | www.berghof.com EtherCAT_IO_HB_en_2D1722004ZD00.docx | 2VF100191FE02.docx USER MANUAL 1.3 | E-I/O Module state The following module states are indicated: Module state Variable Data type Explanation Shortcut BOOL Not used Undervoltage BOOL Not used Watchdog BOOL Internal watchdog of module EtherCAT_Error BOOL Configuration error or watchdog control Specific_Error BOOL Module-specific fault OptionsSet BOOL Sent by module to acknowledge SetOptions To reset the messages, see Module control Module-specific messages Apart from the module error messages, there is a set of messages containing details about the current state of the module: Messages Variable Data type Explanation Channel_n_Open BOOL - Channel n load > maximum - Broken wire of connector 0 * - Broken wire of connector 3 * - Broken wire of connector 0/3 * Specific_Error = TRUE Channel_n_Shortcut BOOL - Channel n load < minimum - Short circuit of connector 0-3 * - Broken wire of connector 1 * Specific_Error = TRUE * The causes of 'Short circuit' and 'Broken wire 0..3' are shown for channel 0 (equivalent applies to other channels). These messages are automatically reset when the state concerned has returned to normal. They are combined into a single “Specific_Error” state of the module and output to the I/O LED as “modulespecific error”. Conversion time The analogue signals are converted one by one down every channel. Disabling one or several channels will shorten the entire A/D conversion cycle. 'Filter' in this case means to compute an average when the set filter time is over. Analogue value conversion runs cyclically and is not synchronized with the receipt of EtherCAT telegrams. The cycle consists of the analogue value conversion plus transmitting the values into the EtherCAT data area. Berghof Automationstechnik GmbH | Harretstrasse 1 | 72800 Eningen | www.berghof.com 2VF100191FE02.docx | EtherCAT_IO_HB_en_2D1722004ZD00.docx 73 USER MANUAL 1.3 | E-I/O Channel Number of channels Cycle time in ms (all filters=0) Number of channels Cycle time in ms (all filters=0) 1 34 5 162 2 66 6 194 3 98 7 226 4 130 8 258 NOTICE If you are aiming for a high sampling frequency, the EtherCAT master should do the filtering (averaging) because it will normally have much more processing power. NOTICE Take the EtherCAT cycle into account to assess how much the values stored by the EtherCAT master are up-to-date. The module described in this section will accept the above times as the ideal EtherCAT cycle setup. Quality of analogue values NOTICE 74 Best results are obtained by connecting the shield of the signal cables to operative earth. Berghof Automationstechnik GmbH | Harretstrasse 1 | 72800 Eningen | www.berghof.com EtherCAT_IO_HB_en_2D1722004ZD00.docx | 2VF100191FE02.docx USER MANUAL 1.3 | E-I/O 7.2.4. Technical data AI8-Pt/Ni100 AI8-Pt/Ni100 Label E-I/O AI8-PT/NI100 16 BIT Part no. 204800500 Plug-in connector 36-pole 204800300 (not part of the module) Analogue inputs 8 Resolution 16 bit (resistance 0.01 , temperature 0.1°C) Pt100 measuring range - 75°C…+ 670°C Ni100 measuring range - 60°C…+ 250°C Resistance 70…330 Temperature drift < ± 50 ppm/°C regarding range limit Critical frequency typical 2 Hz Measurement current < 0.50 mA Sampling frequency > 3.88 Hz (if all channels are enabled) Controller ASIC ET1200 Baud rate 100 Mbit/s E-bus port 10-pin system plug in side wall Term. module not required Power supply 24 V DC -20% +25% E-bus load 170 mA Berghof Automationstechnik GmbH | Harretstrasse 1 | 72800 Eningen | www.berghof.com 2VF100191FE02.docx | EtherCAT_IO_HB_en_2D1722004ZD00.docx 75 USER MANUAL 1.3 | E-I/O 7.3. Analogue temperature inputs AI4 Front view of AI4-TE I/O module I/O connection 7.3.1. Terminals The module needs no separate 24 V connector. Power is supplied to the module through the E-bus connector. Operative earth / shielding of analog wires section 3.1.1 Earth 7.3.2. Status LEDs “EtherCAT” LED The LED labeled “EtherCAT” indicates the state of the EtherCAT ASIC. EtherCAT 76 State LED flash code Explanation Init Red, on Initializing, no data exchange Pre-Op Red/green, 1:1 Pre-operational, no data exchange Safe-Op Red/green, 3:1 Safe operation, inputs readable Op Green, on Operational, unrestricted data exchange Berghof Automationstechnik GmbH | Harretstrasse 1 | 72800 Eningen | www.berghof.com EtherCAT_IO_HB_en_2D1722004ZD00.docx | 2VF100191FE02.docx USER MANUAL 1.3 | E-I/O “I/O” LED The LED labeled “I/O” indicates the state of the module's I/Os. I/O State LED flash code Explanation Ok Green, on No error Error Off Malfunction of module if E-bus LED = On Inoperative if E-bus LED = Off Defective Red, 4x EtherCAT watchdog control Red, 6x Module-specific fault Red, 7x Configuration error (E-bus pre-operational), no. of process data differs from that in the module Red, on Module defective “Power” LED There is no LED labeled “Power” because a separate power feed is not required. “Channel” LEDs Channel State LED flash code Explanation On Green, on Channel enabled Off Off Channel disabled Error Red Measuring value is out of range 7.3.3. Function Module AI4-TE has 4 analogue inputs for thermo-element sensors. It can also measure mV-voltages. The letter 'n' in the tables below represents the channel number (n=0…3). Analogue inputs Check the following variable for the digitized input values: Inputs Variable Data type Explanation Channel_n INT Measuring value of channel n (n = 0…3) mV-Mode in µV resp. 2 µV Default in 1/10 °C Berghof Automationstechnik GmbH | Harretstrasse 1 | 72800 Eningen | www.berghof.com 2VF100191FE02.docx | EtherCAT_IO_HB_en_2D1722004ZD00.docx 77 USER MANUAL 1.3 | E-I/O Module control The module provides you with various operational options. To set up the module choose the options as appropriate and accept by setting control bit “SetOptions” to a rising edge. The module will confirm by returning “OptionsSet”. There are various “module error” bits that the module uses to indicate errors. The states of the error bits are retained and also used for error indication by the “I/O” LED. To reset the error bits set control bit “ResetError” to a rising edge. Error bits Variable Data type Explanation SetOptions BOOL Rising edge accepts module options ResetError BOOL Rising edge acknowledges error Module options The following options are available for module AI4-TE: Module options Variable Data type Explanation Channel_n_SensorType USINT Sensor type 16#00 mV: not used 16#10 mV: -40 ..+65 mV, values in 2 µV 16#04 Type K: not used 16#14 Type K: -200°C .. +1372°C in 0.1°C Channel_n_On BOOL Enable channel n Channel_n_Filter USINT Set filter for channel n The arithmetic mean is output after n+1 conversions. 0…3 n Channel number To set and accept options, see Module control 78 Berghof Automationstechnik GmbH | Harretstrasse 1 | 72800 Eningen | www.berghof.com EtherCAT_IO_HB_en_2D1722004ZD00.docx | 2VF100191FE02.docx USER MANUAL 1.3 | E-I/O Module state The following module states are indicated: Module state Variable Data type Explanation Shortcut BOOL Not used Undervoltage BOOL Not used Watchdog BOOL Internal watchdog of module EtherCAT_Error BOOL Configuration error or watchdog control Specific_Error BOOL Module-specific fault OptionsSet BOOL Sent by module to acknowledge SetOptions To reset the messages, see Module control Module-specific messages Apart from the module error messages, there is a set of messages containing details about the current state of the module: Messages Variable Data type Explanation Channel_n_ Out_of_Range BOOL Measuring value is out of range. These messages are automatically reset when the state concerned has returned to normal. They are combined into a single “Specific_Error” state of the module and output to the I/O LED as “modulespecific error”. Conversion time The analogue signals are converted one by one down every channel. Disabling one or several channels will shorten the entire A/D conversion cycle. 'Filter' in this case means to compute an average when the set filter time is over. Analogue value conversion runs cyclically and is not synchronized with the receipt of EtherCAT telegrams. The cycle consists of the analogue value conversion plus transmitting the values into the EtherCAT data area. Channel Number of channels Cycle time in ms (all filters=0) 1 35 2 67 3 99 4 131 Berghof Automationstechnik GmbH | Harretstrasse 1 | 72800 Eningen | www.berghof.com 2VF100191FE02.docx | EtherCAT_IO_HB_en_2D1722004ZD00.docx 79 USER MANUAL 1.3 | E-I/O NOTICE If you are aiming for a high sampling frequency, the EtherCAT master should do the filtering (averaging) because it will normally have much more processing power. NOTICE Take the EtherCAT cycle into account to assess how much the values stored by the EtherCAT master are up-to-date. The module described in this section will accept the above times as the ideal EtherCAT cycle setup. Quality of analogue values NOTICE Best results are obtained by connecting the shield of the signal cables to operative earth. 7.3.4. Technical data AI4 80 Label E-I/O AI4-THERMO 16 BIT Part no. 204801400 Plug-in connector 18-pole 204800400 (not part of the module) Analogue inputs 4 Resolution 16 bit mV measuring range mV: -40 ..+65 mV, values in 2 µV Type K measuring range Typ K: -200°C .. +1372°C in 0.1°C Measurement failure 25°C < ± 0.4% regarding range limit Less measurement failure on demand Cold junction compensation yes Critical frequency typical 0.33 Hz Sampling frequency > 7.63 Hz (if all channels are enabled) Controller ASIC ET1200 Baud rate 100 Mbit/s E-bus port 10-pin system plug in side wall Term. module not required Power supply 24 V DC -20% +25% E-bus load 150 mA Berghof Automationstechnik GmbH | Harretstrasse 1 | 72800 Eningen | www.berghof.com EtherCAT_IO_HB_en_2D1722004ZD00.docx | 2VF100191FE02.docx USER MANUAL 1.3 | E-I/O 8. Communication modules 8.1. PROFIBUS-DP-Slave Pinning Front view of PROFIBUSDP-Slave module Pin Signal Explanation 1 Shield Shield/functional ground 2 M24 Not connected 3 RxD/TxD-P Receive/Transmit data – plus, B wire 4 CNTR-P Repeater control signal (direction control), RTS signal 5 DGND Data ground (reference potential for VP) 6 VP Supply voltage – plus, (P5V) 7 P24 Not connected 8 RxD/TxD-N Receive/Transmit data – minus, A wire 9 CNTR-N Repeater control signal (direction control) Pinning PROFIBUS 8.1.1. Terminals The module needs no separate 24 V connector. Power is supplied to the module through the E-bus connector. Operative earth / shielding of analog wires section 3.1.1 Earth 8.1.2. Status LEDs “EtherCAT” LED The LED labeled “EtherCAT” indicates the state of the EtherCAT ASIC. EtherCAT State LED flash code Explanation Init Red, on Initializing, no data exchange Pre-Op Red/green, 1:1 Pre-operational, no data exchange Safe-Op Red/green, 3:1 Safe operation, inputs readable Op Green, on Operational, unrestricted data exchange Berghof Automationstechnik GmbH | Harretstrasse 1 | 72800 Eningen | www.berghof.com 2VF100192FE02.docx | EtherCAT_IO_HB_en_2D1722004ZD00.docx 81 USER MANUAL 1.3 | E-I/O LED “PROFIBUS” The LED labeled “PROFIBUS” indicates the state of the module regarding PROFIBUS. PROFIBUS State LED flash code Explanation Ok Green, on No error Error Red, flashing light Connection fault Start, Defect Red, on Module not initialized 8.1.3. Function The module PROFIBUS-DP-Slave is an EtherCAT/PROFIBUS-DP gateway. It accomplishes the data transfer between an EtherCAT system and a PROFIBUS-DP system. Data Utilizable data you will find in 4 groups of input variables and 4 groups of output variables: Utilizable data Variable Data type Number Explanation InByteM1_0 .. _15 USINT 16 Input data module1 Byte_0 ..Byte_15 InByteM2_0 .. _31 USINT 32 Input data module2 Byte_0 ..Byte_31 InByteM3_0 .. _47 USINT 48 Input data module3 Byte_0 ..Byte_47 InByteM4_0 .. _63 USINT 64 Input data module4 Byte_0 ..Byte_63 OutByteM1_0 .. _15 USINT 16 Output data module1 Byte_0 ..Byte_15 OutByteM2_0 .. _31 USINT 32 Output data module2 Byte_0 ..Byte_31 OutByteM3_0 .. _47 USINT 48 Output data module3 Byte_0 ..Byte_47 OutByteM4_0 .. _63 USINT 64 Output data module4 Byte_0 ..Byte_63 See section “Configuring of the data modules” for configuring the data Module control The module provides no operational options but a PROFIBUS-address, which is set by the EtherCAT Master. The module indicates errors by different “Module state” bits. These error bits are stored. To reset the error bits set control bit “ResetError” to a rising edge. Error bits 82 Variable Data type Explanation SetOptions BOOL Rising edge accepts the PROFIBUS address ResetError BOOL Rising edge acknowledges error Berghof Automationstechnik GmbH | Harretstrasse 1 | 72800 Eningen | www.berghof.com EtherCAT_IO_HB_en_2D1722004ZD00.docx | 2VF100192FE02.docx USER MANUAL 1.3 | E-I/O SPC3 address The PROFIBUS-DP-Slave address is set by the following variable: SPC3 Variable Data type Explanation Address USINT PROFIBUS-DP-Slave Address The assumption of the address is released with the rising edge of SetOptions. The execution is indicated with OptionsSet. Since revision 2 the PROFIBUS DP slave address can be changed also at runtime. Module state The following module states are indicated: Module state Variable Data type Explanation Shortcut BOOL Not used Undervoltage BOOL Not used Watchdog BOOL Internal watchdog of module EtherCAT_Error BOOL Configuration error or watchdog control Specific_Error BOOL Not used OptionsSet BOOL Sent by module to acknowledge SetOptions To reset the messages, see Module control Module-specific messages Apart from the module error messages, there is a set of messages containing details about the current state of the module: Messages Variable Data type Explanation ProfibusRunning BOOL PROFIBUS runs Berghof Automationstechnik GmbH | Harretstrasse 1 | 72800 Eningen | www.berghof.com 2VF100192FE02.docx | EtherCAT_IO_HB_en_2D1722004ZD00.docx 83 USER MANUAL 1.3 | E-I/O Configuring of the data modules For the configuration of the EtherCAT and the PROFIBUS the appropriate configuration files are needed: EtherCAT: Berghof EIO Modules.xml PROFIBUS: E-IO DP-S.GSD Number and size of the data modules are configurable. The relationship of input data and output data is always thereby 1:1. Select the desired data modules in the respective configurator tools. NOTICE Make sure that configuring on the EtherCAT side and the PROFIBUS side must be implemented identically. PROFIBUS For the configuration of the PROFIBUS you need E-IO DP-S.GSD. Those is to be imported into the PROFIBUS Master configurator which can be used. Example Maximally 4 modules with a maximum data area length of 160 bytes for each direction can be selected. The individual modules are consistent for themselves. The module provides the following module-specific diagnosis data “Ext_Diag_Data”: Ext_Diag_Data Octet Value Explanation 1..4 … Standard diagnosis 5 0x43 Standard diagnosis: Module Id. 6943 6 0x69 7 3 3 (1+2) byte extended diagnosis 8 0 EtherCAT runs 6 EtherCAT error 0x11 Revision 1 0x12 Revision 2 (with DP address change) 9 EtherCAT You need Berghof EIO Modules.xml for the EtherCAT configuration. Those is to be imported in the EtherCAT Master configurator which can be used. NOTICE 84 Online-configuration (Scan Boxes = Reading of the configuration data from the connected EtherCAT devices) is not possible because of a too large amount of data). Berghof Automationstechnik GmbH | Harretstrasse 1 | 72800 Eningen | www.berghof.com EtherCAT_IO_HB_en_2D1722004ZD00.docx | 2VF100192FE02.docx USER MANUAL 1.3 | E-I/O Example Berghof EC1000 as EtherCAT Master, configuration with EtherCAT configurator in CoDeSys 2.3. For the configuration of the EtherCAT appropriate PDOs are available: PDOs Index Input variable Index Output variable 0x1601 ModulKontrolle 0x1A01 ModulStatus 0x1602 Modulspezifische Meldungen 0x1A02 SPC3address_Adress 0x1603 Profibusdata_InByteM1_0 .. _15 0x1A03 Profibusdata_OutByteM1_0 .. _15 0x1604 Profibusdata_InByteM2_0 .. _31 0x1A04 Profibusdata_OutByteM2_0 .. _31 0x1605 Profibusdata_InByteM3_0 .. _47 0x1A05 Profibusdata_OutByteM3_0 .. _47 0x1606 Profibusdata_InByteM4_0 .. _63 0x1A06 Profibusdata_OutByteM4_0 .. _63 NOTICE Make sure that configuring on the EtherCAT side and the PROFIBUS side must be implemented identically. Selection of the PROFIBUS address The PROFIBUS address is written into the variable “Address” of the PLC program and transmitted as PDO 1602 to the PROFIBUS-DP-Slave module. With the setting of the bit “SetOption” the assumption of the address in the module becomes released. The module acknowledges the assumption of the address by setting of “OptionsSet”. After receipt of a valid PROFIBUS address the module initializes the PROFIBUS. If a master accesses the module over the PROFIBUS and transfers a valid configuration, the professional bus is functional. This is indicated by the bit “ProfibusRunning”. Only then data exchange EtherCAT <- -> PROFIBUS is possible. Since revision 2 the address change at runtime is possible. The connection with the PROFIBUS master will be cut for a short time but the master will rebuild the connection to the new address by its GAP update. The status of the connection is shown in “ProfibusRunning”. Example Setting of usiDP_Adresse as DP Slave address (* Start (Single action) *) Term2_Address:=usiDP_Adresse; (* Copying the DP-Slave address *) Term2_SetOptions_Byte.0:=TRUE; (* Start of the address setting *) (* Controlling *) IF Term2_SetOptions_Byte.0=TRUE THEN IF Term2_Shortcut_Byte.7=TRUE THEN Term2_SetOptions_Byte.0=FALSE; (*Wait for confirmation *) (* Reset *) END_IF END_IF Berghof Automationstechnik GmbH | Harretstrasse 1 | 72800 Eningen | www.berghof.com 2VF100192FE02.docx | EtherCAT_IO_HB_en_2D1722004ZD00.docx 85 USER MANUAL 1.3 | E-I/O 8.1.4. Technical data PROFIBUS-DP-Slave PROFIBUS 86 Label E-I/O DP-SLAVE Part no. 204802600 Fieldbus1 (System) EtherCAT 100 Mbit/s EtherCAT file Berghof EIO Modules.xml Fieldbus2 PROFIBUS-DP-Slave Implementation type VPC3 Connector D-SUB Plug 9-pole female (not part of the module) Baud rate max. 12 Mbit/s Detection automatically Addressing via EtherCAT variable GSD file E-IO DP-S.GSD WxHxD 25x120x90 mm Mounting 35 mm DIN top hat rail Controller ASIC ET1200 Connection 10-pole system plug at the side wall Term. module not required Power supply from EtherCAT Coupler via E-bus plug E-bus load 210 mA Galvanic separation Separated from one another and versus the bus Storage temperature -25°C…+70°C Operating temperature 0°C…+55°C Relative humidity 5%...95% without dewing Protection IP20 Interference immunity Zone B Berghof Automationstechnik GmbH | Harretstrasse 1 | 72800 Eningen | www.berghof.com EtherCAT_IO_HB_en_2D1722004ZD00.docx | 2VF100192FE02.docx USER MANUAL 1.3 | E-I/O 9. Counter modules 9.1. Counters with analogues outputs Counter/Posi2 5V, Counter2 5V Front view of Counter/Posi2 I/O module Pinning Counter/Posi2 Front view of Counter2 I/O module Pinning Counter2 Berghof Automationstechnik GmbH | Harretstrasse 1 | 72800 Eningen | www.berghof.com 2VF100193FE02.docx | EtherCAT_IO_HB_en_2D1722004ZD00.docx 87 USER MANUAL 1.3 | E-I/O 9.1.1. Terminals Counter/Posi2, Counter2 Pin Signal Explanation 0..3 In_0..3 Digital inputs 4 Out_0 Digital output 5..6 A_Out Analogue output (Counter/Posi2 only) 7..12 A, B, Ref Encoder signals 13..14 5V Encoder supply 5 V (0.2 A fuse) 15 +24 V Initiator supply +24 V (0.2 A fuse) 16..17 24 V Module supply Operative earth / shielding of analog wires section 3.1.1 Earth 9.1.2. Status LEDs “EtherCAT” LED The LED labeled “EtherCAT” indicates the state of the EtherCAT ASIC. EtherCAT State LED flash code Explanation Init Red, on Initializing, no data exchange Pre-Op Red/green, 1:1 Pre-operational, no data exchange Safe-Op Red/green, 3:1 Safe operation, inputs readable Op Green, on Operational, unrestricted data exchange “I/O” LED The LED labeled “I/O” indicates the state of the module's I/Os. 88 Berghof Automationstechnik GmbH | Harretstrasse 1 | 72800 Eningen | www.berghof.com EtherCAT_IO_HB_en_2D1722004ZD00.docx | 2VF100193FE02.docx USER MANUAL 1.3 | E-I/O I/O State LED flash code Explanation Ok Green, on No error Error Off Malfunction of module if E-bus LED = On Inoperative if E-bus LED = Off Defective Red, 2x Low voltage Red, 3x Watchdog internal Red, 4x EtherCAT watchdog control Red, 7x Configuration error (E-bus pre-operational), no. of process data differs from that in the module Red, on Module defective “Power” LED The LED labeled "Power" indicates the state of the I/O module's I/O power supply. Power State LED flash code Explanation On Green, on 24 V DC supply ok Off Off 24 V DC supply not ok Status LEDs of the I/Os The Status LEDs of the several I/Os indicate the state of the individual digital I/Os. Status Pin Voltage LED Explanation 0..3 24 V Green Digital inputs 4 24 V Green Digital output 7, 9, 11 5V Green Encoder signals A, B, Ref Berghof Automationstechnik GmbH | Harretstrasse 1 | 72800 Eningen | www.berghof.com 2VF100193FE02.docx | EtherCAT_IO_HB_en_2D1722004ZD00.docx 89 USER MANUAL 1.3 | E-I/O 9.1.3. Function The module Counter2 has 2 identical channels. Each channel has terminals for one encoder and 4 digital inputs and 1 digital output. The Counter/Posi2 module has 1 additional analogue output. There are structured groups of variables for. Controlling and watching the entire module: Modul Kontrolle/Modul Status (Module control/Module status) Controlling and watching of Counter 1 resp. 2: Optionen/Kontrolle/Status/Fehler (Options/Control/ Status/Errors) Counter values of Counter 1 resp. 2: Sollwerte/Istwerte (Set values/Current values) State of the digital I/Os of Counter 1 resp. 2: Digitale Ausgänge/Digitale Eingänge/EingangsflankenZeitstempel/Ausgangsverzögerung (Digital outputs/Digital inputs/Input change time stamp/ Output delay) State of the analogue outputs of Counter 1 resp. 2: Optional Analogausgang (Analogue output, Function with module Counter/Posi2 only) Principle of control (controller) and status If a control bit is set (=TRUE), the module will operate the corresponding function due to the rising edge of the bit. The module indicates the execution of the function by setting the corresponding status bit (=TRUE). When the control bit is reset (=FALSE) the module will also reset the status bit (=FALSE). NOTICE In the following the functions of the counter module are described by Counter/Posi 1. For Counter/Posi 2 the data are valid accordingly. Frame- or DC- synchronous mode Dependent on whether Distributed Clocks (DC) are used or not, the module adjusts itself independently on the suitable mode of operation. The module is preset on Frame synchronous mode. With the receipt of the first DC telegram the module is changed over to DC-synchronous mode and maintains this mode of operation up to next switching off. 90 Berghof Automationstechnik GmbH | Harretstrasse 1 | 72800 Eningen | www.berghof.com EtherCAT_IO_HB_en_2D1722004ZD00.docx | 2VF100193FE02.docx USER MANUAL 1.3 | E-I/O Frame-synchronous The EtherCAT master sends EtherCAT frames with the output data for the module. With the arrival of such frame the output data are taken over and processed by the module. The module places its input data into the EtherCAT frame, so that the master can receive it. DC-synchronous If the module is adjusted to DC-synchronous mode, it produces interrupts according to the rules of the Distributed Clocks DC. The EtherCAT master sends also here EtherCAT Frames away with the output data for the module. With the arrival of such frames the output data of the module are taken over however then processed only if a DC interrupt has occurred. With the DC interrupt the module places its input data into a buffer, from which they are transported with the next EtherCAT Frame to the master. With this method time-synchronous functions for digital inputs and digital outputs for several modules in one EtherCAT network are possible. 9.1.4. Controlling and watching the entire module The module control is carried out with the variables from the group “Modul Kontrolle”. The status of the settings having been carried out becomes shown in the variables of the group “Modul Status”. Modulkontrolle (Module Control) The module does not have any options at present. The module reports faults with different “Modul Status” bits. These bits are stored. They can be reset only then if the fault is not there any more. Send a rising edge to “ResetError” to reset the “Modul Status” bits. Error bits Variable Data type Explanation ResetError BOOL Rising edge acknowledges error Modulstatus (Module Status) The following module status bits are indicated: Module status Variable Data type Explanation LowSupplyVoltage BOOL Low voltage Watchdog BOOL Module internal Watchdog EtherCAT_Error BOOL Configuration error or watchdog control Acknowledgement see Module control Berghof Automationstechnik GmbH | Harretstrasse 1 | 72800 Eningen | www.berghof.com 2VF100193FE02.docx | EtherCAT_IO_HB_en_2D1722004ZD00.docx 91 USER MANUAL 1.3 | E-I/O 9.1.5. Controlling / Watching Counter 1 The setting of the functions of the counter is carried out with the variables from the group “Zähler 1 Optionen”. The module control is carried out with the variables from the group “Zähler 1 Kontrolle”. The status of the settings is indicated in the variables of the group “Zähler 1 Status”. NOTICE The use of the counter module in a variety of different applications is possible by use of the variables from the groups of Zähler 1-Optionen, -Kontrolle and –Status. Zähler 1 Optionen (Counter 1 Options) The module offers you different options for the operation of Counter 1. The options are set in the module with the help of the control bit “SetOptions_1” (see also Zähler 1 Kontrolle) and then valid up to the next setting procedure. At first select the options, please. For taking over send a rising edge to the control bit “SetOptions_1”. The module indicates the execution by “OptionsSet_1=TRUE”. When “SetOptions_1” becomes FALSE again, the module responses by “OptionsSet_1=FALSE”. So the module is ready for the next setting process. Counter 1 Options Variable Data type Value Explanation Enable_Compare_1 BOOL 0 Deactivate compare function 1 Activate compare function 0 A, B, Ref with detection of direction 1 Event counter at A SelectEncoder_1 BOOL B=0 down B=1 up SetResolution_1 ControlOutput_1 BOOL BOOL Only if SelectEncoder=1 (Event counter) 0 Rising and falling edges 1 Only rising edges 0 Output_0_0 is a regular digital output 1 Output_0_0 is controlled by the compare function. Zähler 1 Kontrolle (Counter 1 Control) Enabling and disabling of counting and referencing are determined by the state of the control variables. Set and Reset functions are activated by setting of the appropriate variable. The execution is indicated in the corresponding status variable. If the control variable is reset, the counter module also resets the corresponding status variable. 92 Berghof Automationstechnik GmbH | Harretstrasse 1 | 72800 Eningen | www.berghof.com EtherCAT_IO_HB_en_2D1722004ZD00.docx | 2VF100193FE02.docx USER MANUAL 1.3 | E-I/O Counter 1 Control Variable Data type Value Explanation SetOptions_1 BOOL 0/1 Take over “Zähler 1 Optionen” ResetReferenced_1 BOOL 0/1 Reset of status bit “Referenced_1” ResetCompared_1 BOOL 0/1 Reset of status bit “Compared_1” ResetCaptured_1 BOOL 0/1 Reset of status bit “Captured_1” EnableCounter_1 BOOL 0 Disable counter 1 Enable counter 0 Disable Referencing 1 Enable Referencing EnableReferencing_1 BOOL SetCounter_1 BOOL 0/1 Set counter to preset value SetCompare_1 BOOL 0/1 Set compare value register SetPreset_1 BOOL 0/1 Set preset value register SetMax_1 BOOL 0/1 Set maximum value register Zähler 1 Status (Counter 1 State) The status variables indicate the status of the counter. This concerns the appearance of events and the indication of the execution of settings. Counter 1 Status Variable Data type Explanation Counting_1 BOOL Counter is enabled Referenced_1 BOOL Reference function was executed, reset by ResetReferenced_1 Clockwise_1 BOOL Counter counts up Compared_1 BOOL Compare function was executed, reset by ResetCompared_1 Captured_1 BOOL Capture function was executed, reset by ResetCaptured_1 CounterSet_1 BOOL Counter is set to preset value CompareSet_1 BOOL Compare value is set PresetSet_1 BOOL Preset value is set MaxSet_1 BOOL Maximum value is set OptionsSet_1 BOOL Options of counter 1 are set. Berghof Automationstechnik GmbH | Harretstrasse 1 | 72800 Eningen | www.berghof.com 2VF100193FE02.docx | EtherCAT_IO_HB_en_2D1722004ZD00.docx 93 USER MANUAL 1.3 | E-I/O Zähler 1 Fehler (Counter 1 Errors) The variables are provided for the indication of error states. Counter 1 Errors Variable Data type Explanation Err_Reserved_1_x BOOL Reserved error bits 9.1.6. Counter values of Zähler 1 (Counter 1) Zähler 1 Sollwerte (Counter 1 Set Values) The counter can be preset with different set values. That is done by help of the variable “SetValue_1”. After setting the following control bits from the group “Zähler 1 Kontrolle” the content of “SetValue_1” will be copied as set value in the corresponding registers. Counter 1 Set Values Variable Explanation SetCounter_1 Copy “SetValue_1” to the current counter value SetCompare_1 Copy "SetValue_1" to the compare value register SetPreset_1 Copy "SetValue_1" to the preset value register SetMax_1 Copy "SetValue_1" to the maximum value register The current set values can be read in the variable “SelectedValue” from the “Zähleristwerte” (Counter current values) group. Select by the variable “Select_1”, which value you want to see in the variable “SelectedValue”. SelectedValue Variable Data type Explanation Select_1 USINT Selection which value of counter1 shall be displayed in the variable “SelectedValue”. SetValue_1 94 DINT 0 none 1 Vergleichswert (Compare value) 2 Vorwahlwert (Preset value) 3 Endwert (Max value) 4 Fangwert (Capture value) 5 Counter pulses/second 6 Revolutions per minute 128 Version info Set value of counter 1 (source) to copy (operated by a control bit) into a set value register (target). Berghof Automationstechnik GmbH | Harretstrasse 1 | 72800 Eningen | www.berghof.com EtherCAT_IO_HB_en_2D1722004ZD00.docx | 2VF100193FE02.docx USER MANUAL 1.3 | E-I/O Zähler 1 Istwerte (Counter 1 Actual Values) These variables display the current counter value and the current set values. The set values are represented multiplexedly in the variable “SelectedValue” (Selection by Select_1). Counter 1 Actual Values Variable Data type Explanation Counter_1 DINT Current value of counter 1 Selected_1 USINT Selection of that value of counter 1, which is displayed in the variable SelectedValue (value of Select_1 read from the module). SelectedValue 0 none 1 Vergleichswert (Compare value) 2 Vorwahlwert (Preset value) 3 Endwert (Max value) 4 Fangwert (Capture value) 5 Counter pulses/second 6 Revolutions per minute 128 Version info DINT Selected current value of counter 1 Byte 3 2 1 0 Explanation Version # Release Level Type code Example 0x02 0x00 0x00 0x53 2 0 0 S Version Info 9.1.7. Digital I/Os Zähler 1 (Counter 1) Digital inputs The variables indicate the status of the digital inputs. Digital inputs Variable Data type Explanation Input_0_0 BOOL Digital input 0 Input_0_1 BOOL Digital input 1 Input_0_2 BOOL Digital input 2 Input_0_3 BOOL Digital input 3 In_Output_0_0 BOOL Status of digital output 0 (reads the status) Berghof Automationstechnik GmbH | Harretstrasse 1 | 72800 Eningen | www.berghof.com 2VF100193FE02.docx | EtherCAT_IO_HB_en_2D1722004ZD00.docx 95 USER MANUAL 1.3 | E-I/O Zähler 1 (Counter 1) Input edge timestamp The variables indicate the time, on which the status of the digital input has changed. When the time measurement is started depends on the mode of operation (see also section 9.1.3 Framesynchronous, DC-synchronous). Input edge timestamp Variable Data type Explanation Input_0_0_TS UINT Time stamp for digital input 0 (Hardware Capture) Input_0_1_TS UINT Time stamp for digital input 1 (Software Polling) Input_0_2_TS UINT Time stamp for digital input 2 (Software Polling) Input_0_3_TS UINT Time stamp for digital input 3 (Software Polling) NOTICE The time stamp is metered between frame- or DC-interrupts and signal changes on the input in µs. The value of the time stamp becomes to 0xFFFF, when no signal change takes place between two frame- or DC-interrupts. 96 Berghof Automationstechnik GmbH | Harretstrasse 1 | 72800 Eningen | www.berghof.com EtherCAT_IO_HB_en_2D1722004ZD00.docx | 2VF100193FE02.docx USER MANUAL 1.3 | E-I/O In frame-synchronous mode The time from the last frame-interrupt to the status change of the input is stored in the time stamp and sent in the following frame to the EtherCAT Master. Frame-Interrupts n n+1 n+2 On Digital Input Off t Timestamp (n) Timestamp (n+1) Frame-synchronous Frame Digital Input Variable Time stamp n+1 TRUE Time stamp (n) n+2 FALSE Time stamp (n+1) In DC-synchronous mode The time from the last DC-interrupt to the status change of the input is stored in the time stamp and sent in the following frame to the EtherCAT Master. DC-Interrupts n Frame n+1 n+2 On Digital Input Off t Timestamp (n) Timestamp (n+1) Berghof Automationstechnik GmbH | Harretstrasse 1 | 72800 Eningen | www.berghof.com 2VF100193FE02.docx | EtherCAT_IO_HB_en_2D1722004ZD00.docx 97 USER MANUAL 1.3 | E-I/O DC-synchronous Frame Digital Input Variable Time stamp n+1 TRUE Time stamp (n) n+2 FALSE Time stamp (n+1) Digital outputs The variables indicate the status of the digital outputs. Digital outputs Variable Data type Explanation Output_0_0 BOOL Digital output 0 Output set delay (in preparation) This variable defines the time, when the output is set. Output set delay Variable Data type Explanation Output_0_0_Del UINT Output set delay in µs In frame-synchronous mode Frame-Interrupts n n+1 n+2 On Digital Output Off t Output set delay (n) Output set delay (n+1) Frame-synchronous Frame 98 Digital Output Variable Output set delay n TRUE Output set delay (n) n+1 FALSE Output set delay (n+1) Berghof Automationstechnik GmbH | Harretstrasse 1 | 72800 Eningen | www.berghof.com EtherCAT_IO_HB_en_2D1722004ZD00.docx | 2VF100193FE02.docx USER MANUAL 1.3 | E-I/O In DC-synchronous mode DC-Interrupts Frame n n+1 n+2 On Digital Output Off t Output set delay (n) Output set delay (n+1) DC-synchronous Frame Digital Output Variable Output set delay n TRUE Output set delay (n) n+1 FALSE Output set delay (n+1) 9.1.8. Analogue outputs (Counter/Posi2 5V only) The variables define the voltage of the analogue outputs. Analogue outputs Variable Data type Explanation AnalogOutput_1 UINT Analogue output 1 Output values see table voltage, page 53 Berghof Automationstechnik GmbH | Harretstrasse 1 | 72800 Eningen | www.berghof.com 2VF100193FE02.docx | EtherCAT_IO_HB_en_2D1722004ZD00.docx 99 USER MANUAL 1.3 | E-I/O 9.1.9. Examples Enable Counter The counter is active, when the variable “EnableCounter_1” is TRUE. Term2_EnableCounter_1:=TRUE; (*Release of the counter *) Term2_Counting_1; (*TRUE, if counter is enabled *) Term2_Clockwise_1; (*Count direction, TRUE, when up *) Counter set/clear Copying the contents of “SetValue_1” into the current value is executed by a rising edge to “SetCounter_1”. Execution is indicated by “CounterSet_1=TRUE”. If “SetCounter_1” is reset (FALSE) again, “CounterSet_1” also becomes FALSE again. Term2_SetValue_1:=diCounterValue ; (*Copy a number into the source var*) (* 0 = Clear*) Term2_SetCounter_1:=TRUE; (*and copy to the counter current value*) Term2_CounterSet_1; (*TRUE, if set*) Set compare value Configuration settings set in “Zähler 1 Optionen” are activated by the rising edge of the control bit “SetOptions_1”. The successful take-over of the options is confirmed with the status bit “OptionsSet_1” (e.g. Set compare function). PROGRAM Initialisierung (Initialization) VAR bInit: BOOL := TRUE; Step: USINT; END_VAR ------------------------------------------------------------------------------IF bInit THEN CASE Step OF (*Select options, activate them by a rising edge to "Set_Options"*) 0: Term2_EnableCounter_1:=TRUE; (*Release counter *) Term2_EnableCompare_1:=TRUE; (*Activate compare function *) Term2_ControlOutput_1:=TRUE; (*Compare function controls output *) Term2_SetValue_1:=10000; (*Set value = 10000..*) Term2_SetCompare_1:=TRUE; (*..use as compare value *) Term2_SetOptions_1:=TRUE; (*Activate selected options *) Step:= 1; (* Wait for confirmations "OptionsSet" and "CompareSet"*) 1: IF Term2_OptionsSet_1 AND Term2_CompareSet_1 THEN Step:= 2; END_IF (* Set "Set_Options" and "SetCompare" in the starting position*) 100 Berghof Automationstechnik GmbH | Harretstrasse 1 | 72800 Eningen | www.berghof.com EtherCAT_IO_HB_en_2D1722004ZD00.docx | 2VF100193FE02.docx USER MANUAL 1.3 | E-I/O 2: Term2_SetOptions_1:=FALSE; Term2_SetCompare_1:=FALSE; Step:=0; bInit:=FALSE; END_CASE END_IF Set preset value Copying the value of “SetValue_1” into the preset value is executed by a rising edge to “SetPreset_1”. The execution is indicated by “PresetSet_1=TRUE”. If “SetPreset_1” is reset (FALSE) again, “PresetSet_1” also becomes FALSE again. Term2_SetValue_1:=diPresetValue ; (*Copy a number into the source var*) Term2_SetPreset_1:=TRUE; (*and copy to the preset value*) Term2_PresetSet_1; (*TRUE, if set*) Set maximum value Copying the value of “SetValue_1” into the maximum value is executed by a rising edge to “SetMax_1”. The execution is indicated by “MaxSet_1=TRUE”. If “SetMax_1” is reset (FALSE) again, “MaxSet_1” also becomes FALSE again. Term2_SetValue_1:=diMaxValue ; (*Copy a number into the source var*) Term2_SetMax_1:=TRUE; (*and copy to the maximum value*) Term2_MaxSet_1; (*TRUE, if set*) Digital output see also page 92 Zähler 1 Optionen The digital output can be controlled optionally by the variable "Output_0_0" or the compare function. Decision is done by the variable "ControlOutput_1" (Set options see also page 100). The current status of the output is read from the module and displayed in “In_Output_0_0”. Term2_ControlOutput_1:=FALSE; (*Term2_Output_0_0 controls output*) Term2_ControlOutput_1:=TRUE; (*Compare function controls output*) Term2_In_Output_0_0; (*Status of the output*) Operating as A-B-Ref-Counter or Event Counter see also page 92 Zähler 1 Optionen The counter can be operated as A, B, Ref -Counter with self detection of the direction or as event counter. The selection is done by the variable “SelectEncoder_1” (Set options see also page 100). Term2_SelectEncoder_1:=FALSE; (*A, B, Ref with self detection of the direction*) Term2_SelectEncoder_1:=TRUE; (*Event counter at A*) (*B=FALSE:down, B=TRUE:up*) Single and multiple counting This option is valid in the event counter mode only (see also page 92 Zähler 1 Optionen). The counter can count edges (all rising and falling edges) or pulses (only the rising edges). Berghof Automationstechnik GmbH | Harretstrasse 1 | 72800 Eningen | www.berghof.com 2VF100193FE02.docx | EtherCAT_IO_HB_en_2D1722004ZD00.docx 101 USER MANUAL 1.3 | E-I/O The selection is done by the variable “SetResolution_1” (Set options see also page 100). Term2_SetResolution_1:=FALSE; (*All edges*) Term2_SetResolution_1:=TRUE; (*Pulses*) Referencing The counter can be set to preset value when a pulse occurs at the Ref input. The preset value can be 0, but also any other 32-bit number. Task An encoder with 500 pulses provides 2000 increments per turn in 4-fold mode. Every Ref pulse shall set the counter to the preset value 2000. It shall be counted down to 0 within 1 turn. (The counting direction is determined by the turning direction of the encoder.) PROGRAM Referenzierung (Referencing) VAR bInit: BOOL := TRUE; StepInit: USINT; bInitReady: BOOL; Step: USINT; END_VAR ------------------------------------------------------------------------------(*1. Initializing: Enabling of the counter and setting of the preset value*) IF bInit THEN CASE StepInit OF (*Selecing of the options and setting them by a rising edge of "Set_Options"*) 0: Term2_EnableCounter_1:=TRUE; Term2_SetValue_1:=2000; Term2_SetPreset_1:=TRUE; Term2_SetOptions_1:=TRUE; StepInit:=1; (*Wait for confirmations "OptionsSet" and "PresetSet"*) 1: IF Term2_OptionsSet_1 AND Term2_PresetSet_1 THEN StepInit:=2; END_IF (*Reset "Set_Options" und "Set_Preset" into the start position*) 2: Term2_SetOptions_1:=FALSE; Term2_SetPreset_1:=FALSE; StepInit:=0; bInit:=FALSE; bInitReady:=TRUE; END_CASE END_IF 102 Berghof Automationstechnik GmbH | Harretstrasse 1 | 72800 Eningen | www.berghof.com EtherCAT_IO_HB_en_2D1722004ZD00.docx | 2VF100193FE02.docx USER MANUAL 1.3 | E-I/O (*2. Controlling of the referencing*) IF bInitReady THEN CASE Step OF (*Switch on the referencing mode*) 0: Term2_EnableReferencing_1:=TRUE; Step:=1; (*Wait for a referencing pulse*) 1: IF Term2_Referenced_1 THEN Step:=2; END_IF (*Reset of the referencing message*) 2: Term2_ResetReferenced_1:=TRUE; Step:=3; 3: IF NOT Term2_Referenced_1 THEN (*Exit reset of the referencing message*) Term2_ResetReferenced_1:=FALSE; (*Switch off the referencing mode*) Term2_EnableReferencing_1:=FALSE; Step:=0; (*reference in the next turn again*) END_IF END_CASE END_IF Capture A falling edge at the digital input 1 can be used as trigger in order to save the current counter value (capture). You get a message in the status bit “Captured_1” that a capture event has appeared. You have to reset “Captured_1” by “ResetCaptured_1” that the next capture event can be indicated. Term2_Input_0_1; (*Status of input 1*) Term2_Select_1:=4; (*Copy capture register to Term2_SelectedValue_1*) Term2_Selected_1; (* =4, if capture value in Term2_SelectedValue_1*) Term2_SelectedValue_1; (*Here you can read the capture value.*) Term2_Captured_1; (*A capture event has appeared.*) Term2_ResetCaptured_1; (*Reset of Term2_Captured_1*) Digital inputs (Input_0_x) The statuses of the digital inputs are indicated in the variables “Input_0_x”. Permanent additional function: The current counter value is saved in the capture register when a falling edge appears at Input_0_1. Term2_Input_0_0; (*Status of input 0*) Term2_Input_0_1; (*Status of input 1*) Term2_Input_0_2; (*Status of input 2*) Term2_Input_0_3; (*Status of input 3*) Berghof Automationstechnik GmbH | Harretstrasse 1 | 72800 Eningen | www.berghof.com 2VF100193FE02.docx | EtherCAT_IO_HB_en_2D1722004ZD00.docx 103 USER MANUAL 1.3 | E-I/O Analogue outputs (Counter/Posi2 5V only) The output values of the analogue outputs are written into the variables “AnalogOutput _x”. Term2_ AnalogOutput_1:= 16#7FFF; (*Set AnalogOutput_1 to +10V*) Term2_ AnalogOutput_2:= 16#8000; (*Set AnalogOutput_2 to -10V*) Output values see table “AI4/8-U, Analogue values voltage”. 104 Berghof Automationstechnik GmbH | Harretstrasse 1 | 72800 Eningen | www.berghof.com EtherCAT_IO_HB_en_2D1722004ZD00.docx | 2VF100193FE02.docx USER MANUAL 1.3 | E-I/O 9.1.10. Technical data Counter/Posi2 5V Label E-I/O COUNTER/POSI 2 5V Part no. 204801700 Plug-in connector 36-pole 204800300 (not part of the module) Encoder 2 A, B, Ref Encoder type 5 V (RS422) Count rate max. 400 kHz Digital inputs 8 Input delay 1 ms Signal level Off: -3 … 5 V, On: 15 V … 30 V (EN 61131-3, Type1) Digital outputs 2 Max. current 2 A per output Fieldbus EtherCAT 100 Mbit/s EtherCAT file Berghof EIO Modules.xml WxHxD 25x120x90 mm Mounting 35 mm DIN top hat rail Controller ASIC ET1200 E-bus port 10-pole system plug at the side wall Term. module not required E-bus load 300 mA Analogue outputs 2 Voltage -10 V ...+10 V Resolution 12 bit Power supply Logic by EtherCAT coupler via E-bus plug Power 24 V DC -20% +25% Galvanic separation Separated from one another and versus the bus Storage temperature -25 °C…+70 °C Operating temperature 0°C…+55°C Relative humidity 5%...95% without dewing Protection IP20 Interference immunity Zone B Berghof Automationstechnik GmbH | Harretstrasse 1 | 72800 Eningen | www.berghof.com 2VF100193FE02.docx | EtherCAT_IO_HB_en_2D1722004ZD00.docx 105 USER MANUAL 1.3 | E-I/O Blank page 106 Berghof Automationstechnik GmbH | Harretstrasse 1 | 72800 Eningen | www.berghof.com EtherCAT_IO_HB_en_2D1722004ZD00.docx | 2VF100193FE02.docx USER MANUAL 1.3 | E-I/O 10. Extender 10.1. Extender 2 Port The purpose of the CANtrol E-I/O Extender is the extension of a CANtrol E-I/O block or an EC1000 by EtherCAT slaves, which have a standard 100 base TX connection. The Extender module changes the transmitting physics of LVDS (E-bus) on twisted pair. The module is usually arranged thereby at the end of the block. In addition, the Extender can be used in arbitrary place behind the bus coupler and/or the EC1000 PLC controller. Thus EtherCAT slaves can also be connected in star topology. Extender 2 Port CANtrol E-I/O PLC with I/O modules EC1000 CANtrol E-I/O bus coupler with I/O modules E-I/O E-I/O 2VF100531DG00.cdr 10.1.1. Terminals Supply of the module via E-bus EtherCAT (RJ45 socket) OUT1: Output port (to the next EtherCAT device) OUT2: Output port (to the next EtherCAT device) Berghof Automationstechnik GmbH | Harretstrasse 1 | 72800 Eningen | www.berghof.com 2VF100194FE02.docx | EtherCAT_IO_HB_en_2D1722004ZD00.docx 107 USER MANUAL 1.3 | E-I/O 10.1.2. Status LEDs “EtherCAT” LED The LED labeled “EtherCAT” indicates the state of the EtherCAT ASIC. EtherCAT State LED flash code Explanation Init Red, on Initializing, no data exchange Pre-Op Red/green, 1:1 Pre-operational, no data exchange Safe-Op Red/green, 3:1 Safe operation, inputs readable Op Green, on Operational, unrestricted data exchange “Out2” LED/“Out1” LED The “Out2” LED and the “Out1” LED indicate the physical state of the Ethernet port they are allocated to. Out2 / Out1 State LED flash code Explanation Not connected Off No Ethernet connection Connected Green, on Connected to Ethernet Traffic Green, flashing light Exchanging telegrams 10.1.3. Function The Extender 2 port module has actually 4 ports. Name 2 port module was chosen because of the 2 standard 100 base TX (OUT1, OUT2) RJ45 connections. Another 2 ports are covered by the E-bus. It is important to the configuration in which sequence the connections are operated, i.e. which way the EtherCAT frame runs. Function 108 Port Connection Sequence Port A E-Bus In 1 Port B Out 1 3 Port C Out 2 4 Port D E-Bus Out 2 Berghof Automationstechnik GmbH | Harretstrasse 1 | 72800 Eningen | www.berghof.com EtherCAT_IO_HB_en_2D1722004ZD00.docx | 2VF100194FE02.docx USER MANUAL 1.3 | E-I/O 10.1.4. Technical data Extender 2 Port Label E-I/O EXTENDER 2 PORT Part no. 204801500 Function Extension of a CANtrol E-I/O block resp. of an EC1000 Transformation of transmission physics from LVDS (E-bus) to 100Base-TX Controller ASIC ET1100 Baud rate 100 Mbit/s Cable CAT5 Cable length max. 100 m EtherCAT Connection 2 x RJ45 Power supply via E-bus E-bus load 160 mA for Out1 / 210 mA for Out1 + Out2 Berghof Automationstechnik GmbH | Harretstrasse 1 | 72800 Eningen | www.berghof.com 2VF100194FE02.docx | EtherCAT_IO_HB_en_2D1722004ZD00.docx 109 USER MANUAL 1.3 | E-I/O Blank page 110 Berghof Automationstechnik GmbH | Harretstrasse 1 | 72800 Eningen | www.berghof.com EtherCAT_IO_HB_en_2D1722004ZD00.docx | 2VF100194FE02.docx USER MANUAL 1.3 | E-I/O 11. Supplement 11.1. Potential Distributor 2 x 16 Front view of Potential Distributor Connections 11.1.1. Terminals The module Potential Distributor 2 x 16 has 2 separate potential lines. It distributes the potential (optional 0 V DC or 24 V DC) attached at the pins L1 or L2 on the pins 0 to 15 of the same row. The E-bus is passed on from the previous one to the next module. 11.1.2. Status LEDs The module has no status LEDs. 11.1.3. Function 2-wire or 3-wire terminals for digital I/O modules Berghof Automationstechnik GmbH | Harretstrasse 1 | 72800 Eningen | www.berghof.com 2VF100195FE02.docx | EtherCAT_IO_HB_en_2D1722004ZD00.docx 111 USER MANUAL 1.3 | E-I/O 11.1.4. Technical data Potential Distributor Label Potential Distributor 2 x 16 Part no. 204802300 Plug-in connector 36-pole 204800300 (not part of the module) E-bus port 10-pin system plug in side wall E-bus load none 11.2. Shield connection terminal block Shield connection terminal block 1 x 14 mm; 2 x 8 mm Measurements of the clamp 14 mm 11.2.1. Terminals The shield connection terminal block consists of the shield clamp, the clamp holder, 2 screws M3x5, 2 washers and 2 spring washers. Fasten the clamp holder with the 2 screws by using the washers and spring washers on the housing of the CANtrol E-I/O module. Use the two tapped holes on the front side below. They are provided for it. Shield connection terminal block 14 mm 112 Berghof Automationstechnik GmbH | Harretstrasse 1 | 72800 Eningen | www.berghof.com EtherCAT_IO_HB_en_2D1722004ZD00.docx | 2VF100195FE02.docx USER MANUAL 1.3 | E-I/O 11.2.2. Function The shield connection terminal block makes it easy to apply the cable shield. The shield connection terminal block conducts the potential of the cable screen on the DIN top hat rail on which the CANtrol E-I/O module is picked up. WARNING The mounting rail must have a suitable earth connection. The shield connection terminal blocks may not be used as strain relief. See also section 3.1.1 Earth 11.2.3. Technical data Shield connection terminal block Label E-I/O Shield connection terminal block 2 x 8 mm Part no. 204802400 Berghof Automationstechnik GmbH | Harretstrasse 1 | 72800 Eningen | www.berghof.com 2VF100195FE02.docx | EtherCAT_IO_HB_en_2D1722004ZD00.docx 113 USER MANUAL 1.3 | E-I/O Blank page 114 Berghof Automationstechnik GmbH | Harretstrasse 1 | 72800 Eningen | www.berghof.com EtherCAT_IO_HB_en_2D1722004ZD00.docx | 2VF100195FE02.docx USER MANUAL 1.3 | E-I/O 12. Annex 12.1. Environmental Protection 12.1.1. Emission When used correctly, our modules do not produce any harmful emissions. 12.1.2. Disposal At the end of their service life, modules may be returned to the manufacturer against payment of an allinclusive charge to cover costs. The manufacturer will then arrange for the modules to be recycled. 12.2. Maintenance/Upkeep WARNING Do not insert, apply, detach or touch connections while in operation – risk of destruction or malfunction. Disconnect all incoming power supplies before working on our modules; this also applies to connected peripheral equipment such as externally powered sensors, programming devices, etc. All ventilation openings must always be kept free of any obstruction. The modules are maintenance-free when used correctly. Clean only with a dry, non-fluffing cloth. Do not use detergents! 12.3. Repairs/Service WARNING Repair work may only be carried out by the manufacturer or its authorised service engineers. 12.3.1. Warranty Sold under statutory warranty conditions. Warranty lapses in the event of unauthorised attempts to repair the equipment and/or product, or in the event of any other form of intervention. Berghof Automationstechnik GmbH | Harretstrasse 1 | 72800 Eningen | www.berghof.com 2VF100055FE04.docx | EtherCAT_IO_HB_en_2D1722004ZD00.docx 115 USER MANUAL 1.3 | E-I/O 12.4. Nameplate Nameplate descriptions (example) 1 6 2 3 4 7 5 2VF100080DG02.cdr 1 Barcode same as identification number. 2 Module type plain-text name of module. 3 Identification no. is the unique labeling of the module, consists of two elements. Part no. (the first nine digits) The designation of this number suffices for ordering a module. The delivery takes place in each current hard- and software version. Serial no. (five digits behind the hyphen) 4 Version defines the design-level of the module as supplied ex-works. 5 Supply voltage 6 Production date year / calendar week of the production. 7 CE mark NOTICE The ‘Version’ (supply version) panel specifies the design-level of the module as supplied ex-works. When replacing a module, users, with the CNW (CANtrol Node Wizard) tool, can read off the current software version of the newly supplied module, and then reload their 'own' software version for a particular project if necessary. With the latter in mind, before the download you should always keep a record of the existing software levels in your project documentation (software version, node IDs, baud rate, etc.). 116 Berghof Automationstechnik GmbH | Harretstrasse 1 | 72800 Eningen | www.berghof.com EtherCAT_IO_HB_en_2D1722004ZD00.docx | 2VF100055FE04.docx USER MANUAL 1.3 | E-I/O 12.5. Addresses and Bibliography 12.5.1. Addresses CAN in Automation; international manufacturers and users organisation for CAN users in the field of automation: CAN in Automation e.V. (CiA) Am Weichselgarten 26 D-91058 Erlangen / Germany [email protected] www.can-cia.de CiA EtherCAT Technology Group ETG Headquarters Ostendstraße 196 D-90482 Nuremberg / Germany [email protected] www.ethercat.org ETG Beuth Verlag GmbH, 10772 Berlin DIN-EN Standards or VDE-Verlag GmbH, 10625 Berlin VDE Verlag GmbH, 10625 Berlin IEC Standards or Internet search: www.iec.ch Berghof Automationstechnik GmbH | Harretstrasse 1 | 72800 Eningen | www.berghof.com 2VF100055FE04.docx | EtherCAT_IO_HB_en_2D1722004ZD00.docx 117 USER MANUAL 1.3 | E-I/O 12.5.2. Standards/Bibliography Standard Label IEC61131-1 / EN61131-1 Programmable controllers Part 1: General information IEC61131-2 / EN61131-2 Programmable controllers Part 2: Equipment requirements and tests IEC61131-3 / EN61131-3 Programmable controllers Part 3: Programming languages IEC61131-4 / EN61131Bl1 Programmable logic controllers Supplementary Sheet 1: User guidelines IEC61000-6-4 / EN61000-6-4 German EMC Standard: Emitted interference IEC61000-6-2 / EN61000-6-2 German EMC Standard: Noise immunity ISO/DIS 11898 Draft International Standard: Road vehicles - Interchange of digital information - Controller Area Network (CAN) for high-speed communication DIN EN ISO 13849-1 Safety of machinery: Safety-related parts of control systems (Part 1) Bibliography A variety of specialist publications on the CANbus is available from specialist bookshops, or can be obtained through the CiA users' organisation. Notice: Our Technical Support team will be glad to provide other literature references on request. 118 Berghof Automationstechnik GmbH | Harretstrasse 1 | 72800 Eningen | www.berghof.com EtherCAT_IO_HB_en_2D1722004ZD00.docx | 2VF100055FE04.docx