1
TechniSat HDFS
Satellite HD Digital Receiver
Owner’s Manual
Dear Customer,
Welcome and thank you for choosing TechniSat Digital’s HDFS Digital Satellite
HD Receiver for your TV entertainment. This product has been designed and
built to the highest standards of quality and reliability. We trust that you will
find this digital satellite receiver easy to install and use, delivering exceptional
picture quality, coupled with ease of use.
This Owner’s manual is intended to ensure you gain the optimum experience
by carefully explaining the comprehensive features and functions of your
HDFS. With its wealth of functionality, we believe the HDFS will become an
essential element of your home entertainment system.
Best regards,
TechniSat Digital
HDMI, the HDMI Logo and High-Definition Multimedia Interface
are trademarks or registered trademarks of HDMI Licensing LLC.
Manufactured under license from Dolby Laboratories.
“Dolby“ and the double-D symbol are trademarks of Dolby Laboratories.
Contents
1
Contents...................................................................................... 3
2
Disposal Advice.......................................................................... 8
3
Safety advice.............................................................................. 9
3.1
When not in operation.................................................................. 9
4
Connecting the Receiver......................................................... 10
4.1
Connection (a)............................................................................ 10
4.2
External input (b).........................................................................11
4.3
Connection to a TV (c and d)......................................................11
4.4
Connection to a VCR or DVD Recorder (e)................................11
4.5
Audio connection to Hi-Fi or surround sound system (f)............11
5
The receiver front and back panel......................................... 12
6
Remote Control........................................................................ 13
7
Everyday Use............................................................................ 14
7.1
Switching on and off................................................................... 14
7.2
Changing channels.................................................................... 14
7.2.1
Using the channel up/down keys............................................... 14
7.2.2
Using the numeric keys.............................................................. 14
7.3
Volume control........................................................................... 14
7.4
TV/Radio switching.................................................................... 14
7.5
Access Electronic Programme Guide (EPG)............................. 15
7.6
Movie playback.......................................................................... 15
7.7
Music playback........................................................................... 15
7.8
Picture viewer............................................................................. 15
7.9
Optional features – using the ‘tick’ key...................................... 16
7.9.1
Additional programme information............................................. 16
7.9.2
Quickly setting a timer in the EPG............................................. 16
7.10
Getting Help............................................................................... 17
8
Initial Installation (AutoInstall)................................................ 18
8.1
Antenna configuration................................................................ 18
8.1.1
Modifying Antenna Settings (DiSEqC)....................................... 19
8.1.2
Configuring the antenna............................................................. 20
3
8.2
Software update......................................................................... 21
8.3
AV Output................................................................................... 21
8.4
Screen format............................................................................. 22
8.5
Regional postcode entry............................................................ 22
8.6
Channel searching..................................................................... 23
9
Programme information banner............................................. 24
10
Navigator................................................................................... 26
10.1
Status......................................................................................... 27
10.1.1
Transponder Information............................................................ 27
10.1.2
Audio/Video................................................................................ 28
10.1.3
Programme information.............................................................. 28
11
NAV Menu.................................................................................. 29
11.1
MPEG Movie Player................................................................... 30
11.1.1
Playing an MPEG movie............................................................ 30
11.1.2
Pause/Still picture...................................................................... 30
11.1.3
Fast Forward and Rewind.......................................................... 30
11.1.4
Audio Track selection................................................................. 31
11.1.5
Zoom.......................................................................................... 31
11.1.6
End playback.............................................................................. 31
11.2
MP3 Music player....................................................................... 31
11.2.1
Playing MP3 files........................................................................ 32
11.2.2
Creating a music playlist............................................................ 32
11.2.3
Accessing MP3 track information............................................... 32
11.2.4
Skipping titles/tracks.................................................................. 32
11.2.5
Pausing a track.......................................................................... 32
11.2.6
Fast Forward and Rewind.......................................................... 33
11.2.7
Go up one folder level................................................................ 33
11.2.8
MP3 Playback modes................................................................ 33
11.3
Picture viewer............................................................................. 34
11.3.1
To view an image....................................................................... 34
11.3.2
Creating a picture playlist........................................................... 35
11.3.3
Show next/previous picture........................................................ 35
11.3.4
Rotate image.............................................................................. 35
4
11.3.5
Go up one folder level................................................................ 35
11.3.6
Stop/End playback..................................................................... 35
11.3.7
Slideshow................................................................................... 35
11.3.8
Pause......................................................................................... 36
11.3.9
Show next/previous picture........................................................ 36
11.3.10
Adjusting image changeover speed........................................... 36
12
Electronic Programme Guide (EPG)...................................... 37
12.1
EPG Menu.................................................................................. 38
12.2
EPG Grid – Viewing channels and programmes....................... 39
12.2.1
Scrolling through programmes in the grid.................................. 39
12.2.2
Scrolling through the channels in the grid.................................. 39
12.2.3
Viewing programme information................................................ 39
12.2.4
Viewing a different day in the schedule..................................... 40
12.3
EPG Overview List..................................................................... 40
12.4
EPG Programme List................................................................. 42
12.4.1
Viewing the programme channel list.......................................... 42
12.4.2
Changing channel in the programme list................................... 42
12.5
EPG Genres............................................................................... 43
12.5.1
Changing genres........................................................................ 44
12.6
EPG Search............................................................................... 44
12.6.1
New search for a programme using the keyboard..................... 45
12.6.2
View a previous search.............................................................. 46
13
Timer.......................................................................................... 48
13.1
Ways to set a timer.................................................................... 48
13.2
Main Menu – Timer Organiser................................................... 48
13.2.1
Timer overview........................................................................... 49
13.2.2
New video recorder timer........................................................... 50
13.2.3
New channel change timer........................................................ 51
13.2.4
New wake up timer.................................................................... 53
13.2.5
Timer settings............................................................................. 54
13.3
Timer Menu in the EPG............................................................. 55
13.3.1
Creating a new timer in the EPG............................................... 56
13.3.2
Editing a timer in the EPG......................................................... 57
5
13.3.3
Deleting a timer in the EPG....................................................... 57
13.4
Timer Conflicts........................................................................... 57
14
Main menu................................................................................ 58
14.1
How to navigate the menus....................................................... 58
14.2
Automatic channel search.......................................................... 59
14.3
Settings...................................................................................... 60
14.3.1
Parental control.......................................................................... 61
14.3.2
Basic Settings............................................................................ 64
14.3.3
Picture settings........................................................................... 65
14.3.4
Sound Settings........................................................................... 66
14.3.5
Settings – Antenna configuration............................................... 66
14.3.6
Special Functions....................................................................... 67
14.3.7
System configuration.................................................................. 72
14.3.8
Service settings.......................................................................... 73
14.4
Timer organiser.......................................................................... 75
14.5
TV lists organiser....................................................................... 76
14.5.1
Filtering complete channel lists.................................................. 76
14.5.2
Viewing the TV list...................................................................... 77
14.5.3
Creating a new TV list and Adding channels............................. 78
14.5.4
Removing channels from a TV list............................................. 80
14.5.5
Deleting channels....................................................................... 80
14.5.6
Sorting channels in a TV list...................................................... 81
14.5.7
Replacing customisable channels.............................................. 82
14.5.8
Setting Parental control.............................................................. 83
14.6
Radio lists organiser................................................................... 84
15
TechniSat operating mode...................................................... 85
15.1
Channel search.......................................................................... 85
15.1.1
Automatic search....................................................................... 86
15.1.2
Satellite....................................................................................... 87
15.1.3
Transponder............................................................................... 87
15.1.4
Manual search............................................................................ 88
15.1.5
Start search screen.................................................................... 89
15.1.6
Result of channel search screen................................................ 89
6
15.2
Settings...................................................................................... 90
15.2.1
Programme guide....................................................................... 91
15.2.2
Basic Settings............................................................................ 93
15.2.3
Antenna configuration................................................................ 94
15.2.4
Use with a Motor Rotating Antenna (DiSEqC 1.2)..................... 94
15.2.5
Service Settings....................................................................... 104
15.3
TV/Radio Lists Organiser......................................................... 104
15.4
Menu language........................................................................ 105
16
Troubleshooting Guide.......................................................... 106
16.1
The receiver display is blank.................................................... 106
16.2
Glitching picture or sound........................................................ 106
16.3
No sound.................................................................................. 107
16.4
‘No signal’ is displayed on screen............................................ 107
16.5
‘Channel not available’ is displayed on screen........................ 107
16.6
Remote control unit does not work.......................................... 108
16.7
External storage device is not accessible................................ 108
16.8
Cannot access files on PC in LAN mode................................. 108
16.9
Cannot access files on PC in WLAN mode............................. 109
16.10
Unresolved problems............................................................... 109
17
Main Menu Structure...............................................................110
7
2 Disposal Advice
The packaging for your unit consists entirely of recyclable material. Please sort
the items appropriately for disposal via your local waste disposal system.
This product cannot be disposed of at the end of its useful life along with standard household refuse. It must be taken to a collection point designated for the
recycling of electrical and electronic equipment.
This is indicated by the symbol below which appears on the product and packaging materials.
Please ensure that used remote control batteries are not included with
household refuse and are disposed of in the appropriate manner for hazardous
waste.
8
3 Safety advice
For your own protection, please read the safety instructions carefully before
commencing operation of your new unit. The manufacturer accepts no responsibility for damage caused by inappropriate operation, or by non-compliance
with safety precautions.
>
To ensure sufficient ventilation, position the device on a flat, even surface and do not place any objects on the lid of the device. Also
ensure that there is 5 cm clearance above the device.
>
Do not place any burning objects, such as burning candles, on top of the unit.
>
Do not subject the unit to water spray or droplets, and do not place any objects filled with liquid, e.g. vases, on top of the unit.
>
The unit may only be operated in a temperate climate.
>
Do not connect or disconnect the antenna input when the receiver is on.
>
Never open the receiver housing. You will be in danger of receiving an electric shock. Any necessary repairs should be carried out only by qualified service personnel. In the following cases, you should disconnect the unit from the mains power supply, and consult a qualified technician:
•
the mains cable or the mains plug is damaged
•
the unit was exposed to liquid, or liquid has run into the unit
•
in case of significant malfunction
•
in case of severe external damage
3.1 When not in operation
During an electrical storm, or when the unit will not be used for a lengthy period
of time (e.g. while you are on holiday), disconnect the unit from the mains power supply.
9
4 Connecting the DVB Receiver
>
Mains connection.
>
Connection between the satellite dish LNB and the receiver LNB input.
>
HDMI connection between the receiver and the TV.
>
Optional SCART connection between the receiver and the TV.
>
Optional SCART connection between the receiver and a VCR.
>
Optional connection of the receiver audio output to a Hi-Fi or surround sound system.
4.1 Connection (a)
>After you have made all connections in accordance with the following
points, connect the receiver using the enclosed power cable to a mains
socket. Never connect or disconnect the antenna input when the receiver is switched on.
10
4.2 External input (b)
>Connect the satellite cable from the external antenna to the LNB input
of the receiver.
4.3 Connection to a TV (c and d)
>Connect the receiver HDMI output and TV HDMI input using an HDMI
cable. Select the correct AV channel on your TV.
Alternatively:
>Use a SCART cable to connect the receiver ‘TV SCART’ to the SCART
socket on your TV. If your TV is appropriately equipped, it will automatically switch to AV, and thus to satellite operation, when the receiver is
switched on.
4.4 Connection to a VCR or DVD Recorder (e)
>Connect the VCR or DVD recorder to the ‘VCR SCART’ on the receiver. During playback, the VCR or DVD recorder applies a signal
voltage via the SCART to the receiver. This allows the audio and video
to automatically reach the ‘VCR SCART’. If your equipment does not
support this signalling, use the TV AV button to switch your receiver
to the external VCR input. Pressing this button again will allow you to
revert to normal operation.
4.5 Audio connection to Hi-Fi or surround sound system (f)
>Connect either the analogue or digital audio output from the receiver to
the appropriate input on a Hi-Fi or surround sound system.
11
5 The Receiver front and back panel
On/Standby
OK
Arrow Keys
Alphanumeric display
USB socket
MS/SD/MMC
card reader
TV SCART
LNB
Input
Audio/Video
Output
VCR
SCART
12
Compact flash reader
Ethernet
Port
HDMI
USB Mains
Output
Input
Digital
Audio
6 Remote Control
Remote control
On/Standby
Mute
Keypad
Back
Option
Function keys
Arrow keys
OK
EPG
Information (i)
Channel change up
(+) / down (-)
TV/Radio mode
Volume
up (+) / down (-)
MENU
Digital Text
AV
Audio Description
Subtitles
RCU mode switch
Timer Sleep
13
7
Everyday Use
The following sections explain basic operation of the receiver using the remote
control and front panel features.
7.1 Switching on and off
>Press the On/Standby key either on the receiver or the remote control
to switch the receiver on.
>Press the same key again to switch the receiver off, and put the receiver into standby mode.
7.2 Changing channels
There are various ways to change channels:
7.2.1 Using the channel up/down keys
>Use the channel up/down keys on the remote control or on the receiver
to move up or down the list one channel at a time.
>Press the Back key on the remote control to take you back to the last
channel selected.
7.2.2 Using the numeric keys
>
Press the numeric keys to enter the desired channel number.
>Please note: When entering a channel number consisting of several
digits, you have approx. 3 seconds after pressing each number to
complete the entry. If you wish to enter a number consisting of only one
or two digits, you can speed up the switching procedure by holding the
key down on the last digit.
7.3 Volume control
>Adjust the volume of your receiver using the Volume + key to increase
the volume, and Volume – to decrease the volume.
>
Press the Mute key to switch the sound on or off.
7.4 TV/Radio switching
>
Press the TV/Radio button to switch between TV and Radio operation.
14
7.5 Access Electronic Programme Guide (EPG)
>
Press the ‘guide’ key on the remote control.
>The Channel genre screen is displayed. Select a genre using the arrow
keys and press OK.
>The Electronic Programme Guide then appears on the screen. The
channels you have selected, or those of the factory default settings, will
be shown with their current programmes. You can also use the EPG
function to obtain information on the contents of various programmes.
In addition, you may use the EPG functions to select a particular programme, to pre-select a programme, or to set a timer for a programme.
>
Press the exit key to return to normal operation.
>
See section 12 for full details of using the EPG.
7.6 Movie playback
With your receiver you can play back MPEG movies on a USB device, SD
card, CompactFlash card or networked PC.
>Press the OK key to enter the Navigator and press the blue key to access the NAV menu – select ‘Movies’ from the menu using the OK key.
>
Please see section 11.1 for full details of using the MPEG movie player.
7.7 Music playback
With your receiver you can play back files in MP3 format on a USB device, SD
card, CompactFlash card or networked PC.
>Press the OK key to enter the Navigator and press the blue key to
access the NAV menu - select ‘Music’ from the menu using the OK key.
>
Please see section 11.2 for full details of using the MP3 music player.
7.8 Picture viewer
With your receiver, you can display files in JPEG format on a USB device, SD
card, CompactFlash card or networked PC.
>Press the OK key to enter the Navigator and press the blue key to access
the NAV menu - select ‘Pictures’ from the menu using the OK key.
>
Please see section 11.3 for full details of using the Picture viewer.
15
7.9 Optional features – using the ‘tick’ key
The ‘tick’ key on the remote control helps you access extra optional features in
certain situations. These are documented where applicable in this manual.
Extra features are listed below:
7.9.1 Additional programme information
When you change channels, an information box will be displayed briefly, showing the channel and the name of the programme selected. In addition, other
programme properties will be indicated, such as subtitles, widescreen broadcasts and dolby digital.
If a TV broadcast is available in multiple languages or with multiple audio channels, or if multiple radio channels are available on a single radio station, this
will be displayed on the screen. You may then proceed as follows to select a
different language or a different audio channel:
>Press the ‘tick’ key. A list will now be displayed on screen, indicating
the languages currently available.
>Use the up/down arrow keys to highlight the desired language or the
desired radio station and confirm by pressing the OK key. You may now
listen to the programme in the language selected. Your receiver is also
equipped to receive monaural programmes.
>Use the left/right arrow keys to select between Mono channel 1, Mono
channel 2 and stereo.
>Press the blue key to toggle through the different screen picture formats.
>Press the ‘tick’ key to access the subtitle menu to switch subtitles on or
off. You can select either analogue subtitles or digital subtitles.
7.9.2 Quickly setting a timer in the EPG
When in the EPG, and having selected either ‘Programme’ or ‘Overview’ mode
via the Guide menu on the blue button, you can use the ‘tick’ key to quickly set
a timer:
>Press the ‘tick’ key to toggle between a ‘Channel Change Timer’ (a bell
image), a Wake Up Timer (shown in blue) and Video Recorder Timer
(shown in red with a video tape image in black).
16
7.10Getting Help
If you need additional help while using the menus or using a receiver function
then you can usually access a help page by pressing the blue function key.
Help can also be accessed via ‘Help’ menu options on menus, where applicable.
17
8
Initial Installation (AutoInstall)
When switching on the unit for the first time, a start window will be displayed,
with the installation assistant AutoInstall.
>
Press the green or the OK key to start the auto installation process.
8.1 Antenna configuration
The Antenna configuration step allows you to adjust the receiver to the configuration of your antenna.
18
>For standard installations accept the antenna settings by pressing the
green accept key or the OK key.
>If the configuration of your receiving installation does not correspond
with the standard setting press the yellow key to select Modify. See
below for details.
8.1.1 Modifying Antenna Settings (DiSEqC)
This advanced screen allows you to change the configuration of your antenna.
>DiSEqC – You can toggle DiSEqC components in your receiving installation on or off by using the arrow keys or the OK key. Setting this option to ‘off’ will change the options below and only allow you to change
the default satellite.
>If you set DiSEqC to ‘on’ you will see the following options. Use the up/
down arrow keys to move to the options:
>A/A – Position A/Option A – Use the OK key to select the satellite you
wish to receive at the DiSEqC setting position A/A from the drop down
option list. If you want to configure the satellite, highlight ‘Proceed’
using the arrow keys and press OK. See 8.1.2 for details.
>B/A – Position B/Option A – Use the OK key to select the satellite you
wish to receive at the DiSEqC setting position B/A from the drop down
option list. If you want to configure the satellite, highlight ‘Proceed’
using the arrow keys and press OK. See 8.1.2 for details.
>A/B – Position A/Option B – Use the OK key to select the satellite you
wish to receive at the DiSEqC setting position A/B from the drop down
option list. If you want to configure the satellite, highlight ‘Proceed’
using the arrow keys and press OK. See 8.1.2 for details.
19
>B/B – Position B/Option B – Use the OK key to select the satellite you
wish to receive at the DiSEqC setting position B/B from the drop down
option list. If you want to configure the satellite, highlight ‘Proceed’
using the arrow keys and press OK. See 8.1.2 for details.
>When you have configured your satellite and antenna settings press
the green or the OK key to ‘Accept’ the settings.
>
Press the blue ‘Help’ key to view a help screen.
8.1.2 Configuring the antenna
This list of options gives you the ability to change various advanced settings for
your antenna.
>To change each option, move the orange highlight with the up/down
arrow keys and scroll through options with the left/right arrow keys or
the OK key.
>When you have configured your antenna, press the red key to go back
to the previous screen and accept your settings.
>
If you want to cancel your settings then press the red key.
>
Press the blue ‘Help’ key to view a help screen.
20
8.2 Software update
The receiver will automatically scan for software updates.
>
If newer updates are found they will be downloaded automatically.
>
Press the green or the OK key to continue the installation steps.
8.3 AV Output
The AV Output step screen allows you to specify whether your TV is connected
via SCART or HDMI.
>To specify your AV output type move the orange highlight with your
remote control arrow keys, and press green or OK to confirm.
21
8.4 Screen format
The Screen format step allows you to specify your TV screen format (aspect
ratio) to either normal 4:3 or 16:9 widescreen format.
>To specify your TV screen format move the orange highlight with your
arrow keys, and press green or OK to confirm.
8.5 Regional postcode entry
The next installation step allows you to configure the receiver with your postcode to receive the correct regional programmes.
>Use the arrow keys to move the orange highlight and press the OK key
to enter your post code.
>
Enter your postcode exactly and ensure that it includes a space.
>Press the green key or OK while the ‘Accept’ option is highlighted to
continue to the next step.
22
8.6 Channel searching
This final step will now scan the satellite for freesat channels.
>
Press the OK key when all the channels are found.
>
Press the green or the OK key to complete the installation.
23
9 Programme information banner
>You can access programme information when you press the ‘i’ key while
tuned to a channel. This will display a programme information banner.
When you change channel, the information banner will also briefly be displayed, this time with some extended regional programme information. To
change the length of time the banner remains visible for see section 14.3.6.1.
The following information is displayed on the banner:
>
A yellow/grey bar displaying time remaining for the current programme.
>
The broadcast date and start and end times.
>
The current time.
>
The name of the programme
>
The type of programme list – TV or Radio.
>
The channel name.
>
The channel number.
>
The ‘TxT’ symbol indicates the availability of Teletext subtitles.
>
The ear symbol indicates the availability of DVB subtitles.
>
The ‘int’ symbol indicates the availability of interactive services.
>The ‘AD’ symbol indicates the availability of Audio Description subtitles
e.g. for a phone ring on a programme, the audio description subtitle
would be ‘phone rings’.
>The aspect ratio (4:3 or 16:9) of the current programme will briefly be
displayed in the bottom right of the bar.
While the Programme information banner is visible, the following options are
24
possible:
>Use the up/down arrow keys to scroll through all programmes in the
current channel list. The banner information will change with each new
programme displayed.
>Press the OK key to switch to the channel currently displayed in the
programme information banner.
>Press the left/right arrow keys while the banner is displayed to move
through the daily programme schedule for the current channel.
>You can quickly set a Channel Change Timer for any programme in the
future by pressing the OK key. The date and start times will be displayed in blue with a bell image next to it. To remove the timer, press
the OK key again. See section 13 for more details on timers.
>
To close the Programme information banner press the exit key.
>Press the ‘i’ key again to see further information about a programme,
as shown below:
25
10 Navigator
The navigator gives a quick list of all channels.
>
Press the OK key to see a list of channels.
The current programme name is displayed on the right panel.
>
Use the up/down arrow keys to scroll through the channels.
>
Use the left/right arrow keys to jump a page of channels at a time.
>
Press the OK key to tune to the currently highlighted channel.
>
Press the ‘i’ key to view information about the current programme on
the highlighted channel. Press ‘i’ or the yellow key to close the information panel and return to the Navigator.
>
Press the ‘tick’ key to select TV lists or TV genre lists.
>
Press the yellow ‘Status’ key to see detailed information on the transponder. See section 10.1 for more details.
>
Press the blue key to display the NAV Menu. See section 11 for details.
>
Press the exit key to return to your programme without tuning to a
channel.
10.1 Status
On pressing the yellow ‘Status’ key, screens provide information on the satellite, transponder and audio/video.
The following options are available:
26
>Press the red key to view Transponder information. See section
10.1.1 for more details.
>Press the green key to view Audio/Video information. See section
10.1.2 for more details.
>Press the blue key to view Programme information. See section
10.1.3 for more details.
>Press the back key to return to the Navigator. See section 10 above for
details.
The three status screens are described below:
10.1.1
Transponder Information
This screen displays transponder information.
10.1.2
Audio/Video
This screen displays audio and video information about the current channel.
27
10.1.3
Programme information
This screen contains information about the current programme.
11 NAV Menu
The NAV Menu provides a quick way to navigate channel lists and other features of the receiver.
28
>
Press the blue key when in the Navigator to access the NAV Menu.
>
Use the up/down arrow keys to scroll through the menu options and
press the OK key to select one of the following:
NAV Menu
>
TV – displays the current channel list. See 10 for details.
>
Radio – displays the first radio channel in the radio channel list.
>
Movies – displays the MPEG movie player. See 11.1 for details.
>
Music – displays the MP3 music player. See 11.2 for details.
>
Pictures – displays the picture viewer. See 11.3 for details.
>
Help – Displays the help page.
11.1 MPEG Movie Player
With your receiver, you can play MPEG movie files on a device connected via
the USB socket, a card inserted into the card reader or a networked PC.
29
11.1.1
>
Playing an MPEG movie
Press the blue key to open the NAV Menu.
>Use the up/down arrow keys to highlight the ‘Movies’ option and confirm by pressing the OK key.
>
A list showing the movie files and folders available will be displayed.
>Use the up/down arrow keys to highlight the movie or folder containing
the desired movie and confirm by pressing the OK key.
>Use the up/down arrow keys to select from the list of MPEG files which
you wish to view and confirm with the OK key. The movie selected will
now be played.
11.1.2
Pause/Still picture
>To halt the playback of a recording (still picture), during playback, press
the Yellow Pause / Play key. The symbol „Pause >II“ will be displayed
on screen.
>
Press this key again to restart the playback from the same position.
11.1.3
Fast Forward and Rewind
To access a specific section of a movie, variable speed Fast Forward and
Rewind functions are available.
>During playback, press the Blue Fast Forward or Red Rewind key. The
display indicates ‘Forward >>’ or ‘Rewind <<’. The recording will now
be run at 4× normal speed in the desired direction.
>Press the Blue Fast Forward or Red Rewind key again and the speed
increases to 16×. The display indicates ‘Forward >>>’ or ‘Rewind <<<’.
>Press the Blue Fast Forward or Red Rewind key again and the
speed increases to 64×. The display indicates ‘Forward >>>>’ or
‘Rewind <<<<’.
>Once the desired portion of the recording has been reached, you can
access normal playback by pressing the Yellow Pause / Play key.
11.1.4
>
Audio Track selection
Press the ‘tick’ key.
>An Audio menu will appear. Use arrow keys to select an audio track in
the MPEG movie to play and press the OK key.
30
>
The menu will disappear and the movie will continue to play.
11.1.5
Zoom
>Press the ‘tick’ key. A Zoom mode text will be displayed at the bottom
of the screen.
>Press the blue Zoom key to toggle through the various screen zoom
factors.
>Press the OK key to confirm the zoom mode and return to playing the
movie in full-screen.
11.1.6
>
End playback
To exit playback, press the Green Stop key.
11.2MP3 Music player
With your receiver you can play back files in MP3 format on a USB device, SD
card, CompactFlash card or networked PC.
11.2.1
Playing MP3 files
>Connect your USB device, SD card, CompactFlash card or PC containing your MP3 files to the receiver.
>Use the up/down arrow keys to select the source from which you wish
to play back the MP3 files.
31
>Press the OK key to display a list of the MP3 files contained on the
storage device.
>Use the up/down arrow keys to highlight the folder containing the desired MP3 file and confirm by pressing the OK key.
>Use the arrow keys to select the MP3 file you wish to play first from the
list and confirm by pressing the OK key. The file selected will now be
played. Thereafter, any other files located on the same source medium
will be played automatically.
11.2.2
Creating a music playlist
>To create a playlist, select tracks using the up/down arrows keys and
press Playlist+ on the green key. A file called ‘Playlist.pls’ will be created.
11.2.3
Accessing MP3 track information
>Press the ‘i’ key to display further information about the selected track
(providing its title is included in the ID3 tag).
>
Press this ‘i’ key again to close the information screen.
11.2.4
Skipping titles/tracks
>Press the up/down arrow keys to skip forward or backward by one
track. The new file skipped to will now be played. Thereafter, any
remaining files located on the same source medium will be played
automatically.
11.2.5
Pausing a track
>Press the Pause / Play key to pause playback of the current track. On
the receiver display this is indicated by ‘_II’.
>Press the Pause / Play key again to resume playing the file from this
position.
11.2.6
Fast Forward and Rewind
>Press Fast Forward or Rewind during playback of a track, several
times as required, to advance or rewind the track at 4×, 16× or 64×
normal speed. The receiver’s display will show the relevant setting as
Fast Forward >>, Fast Forward >>>, Fast Forward >>>> or Rewind <<,
Rewind <<<, Rewind <<<<.
32
>While using the 64× speed, press the Fast Forward or Rewind button
to go forwards or backwards in 10-minute steps.
>Once the desired place has been reached, you can access normal
playback by pressing the Pause / Play key.
11.2.7
Go up one folder level
>During playback operation, first press the Stop button to reactivate the
navigator.
>
To go up one level, highlight ‘Back’ and press the OK key.
11.2.8
MP3 Playback modes
As well as the normal playback mode, the following functions are also available:
>Shuffle – random playback of all tracks in the selected folder. See section 11.2.8.1.
>Repeat – repeats either a single track or all tracks in a folder. See section 11.2.8.2.
11.2.8.1
Repeat a single track or folder of tracks
>To activate repeat options, press the ‘tick’ key, while playing a music
track.
>A menu will appear under the ‘Repeat’ menu with the following repeat
modes:
• off – turns off repeat mode.
• Title – repeats the current track when it has finished playing.
• Directory – repeats all tracks in the current directory.
>Use the up/down arrow keys to highlight the desired repeat modes and
confirm by pressing OK key.
11.2.8.2
Shuffle (random playback mode)
>To activate shuffle mode (random playback mode), press the ‘tick’ key,
while playing a music track.
>A menu will appear under the ‘Repeat’ menu. Press the ‘tick’ key again
to display the ‘Shuffle’ drop down menu.
33
>
The following options are available:
• off – turns off shuffle mode.
• on – turns on shuffle mode, which will play tracks within a folder at
random.
>Use the up/down arrow keys to highlight the desired shuffle mode and
confirm by pressing the OK key.
11.3Picture viewer
With your receiver you can display data saved in JPEG format on a USB device, SD card, CompactFlash card or networked PC.
11.3.1
To view an image
>Use the up/down arrow keys to select the source from which you wish
to view the picture files and confirm by pressing the OK key. A list
showing the picture files available will be displayed.
>Use the up/down arrow keys as applicable to highlight the folder which
contains the desired image file and confirm by pressing the OK key.
>Use the up/down arrow keys to select from the list of JPG files which
you can view and confirm with the OK key. The picture selected will
now be displayed.
>
Press the back key to return to the picture viewer.
11.3.2
Creating a picture playlist
>To create a picturelist, select pictures using the up/down arrows keys
34
and press Playlist+ on the green key. A file called ‘Picture.plp’ will be
created.
11.3.3
>
Show next/previous picture
Press the up/down arrow keys to skip to the next or previous picture.
11.3.4
Rotate image
>Press the blue or red function key to rotate the image in a clockwise or
anticlockwise direction, respectively.
11.3.5
Go up one folder level
>When an image is displayed first press the Stop button to reactivate
the navigator.
>
To go up one level, highlight ‘Back’ and press the OK key.
11.3.6
Stop/End playback
>Press the TV/Radio key to stop playback and revert to normal operation.
11.3.7
Slideshow
It is possible to view images in the form of a slideshow. This function allows
images to be shown automatically one after the other on the screen.
>Use the up/down arrow keys to select the JPG files from the list that
you want to view in a slideshow.
>Press the yellow ‘Slideshow’ key to start the slideshow. All the images
in a folder or playlist are automatically played one after the other, starting with the highlighted image.
>
Press the Stop key to end the slideshow.
>
Press the TV/Radio key to revert back to normal operation,
11.3.8
Pause
>Press the Pause / Play key to stop the playback operation (Pause).
This is indicated by Pause on the display.
>
Press the Pause / Play key again to resume playback.
35
11.3.9
Show next/previous picture
>Press the up/down arrow keys to skip to the next or previous picture
more quickly.
11.3.10
Adjusting image changeover speed
>Press the left/right arrow keys to adjust the image changeover speed
between 5 and 100 seconds.
>Please note: for large files and short interval times, it may be impossible to display all of the images in the time allowed. If the specified
image changeover time is too short for the images, the picture will be
displayed after it has finished being read.
12 Electronic Programme Guide (EPG)
The EPG shows an 8 day programme schedule for all channels and provides
various ways to view this information.
>
Press the ‘guide’ key to display the EPG.
When you press the ‘guide’ key the EPG will display a Channel genre list.
36
>Use the up/down arrow keys to move through the genres and press OK
to select. The view will change to a grid showing all the channels in the
chosen genre.
>To return to the Channel genre list, press the Back key on the remote
control.
The EPG allows you to view programmes and channels in three main ways:
>
Grid – The default view, showing a grid of channels and programmes.
>
Programme – A list of programmes for each channel.
>Overview – A quick summary of what is on now, next and later, for a
list of channels.
For descriptions of the various EPG views and associated functions available
see the following sections below:
12.1 EPG Menu
The EPG Menu changes the EPG viewing mode.
37
Depending on the EPG viewing mode you are in; Grid, Programme or Overview, the EPG Menu will be contextual, displaying appropriate options for that
view.
>Press the blue key to access the menu while in the EPG and a popup
menu will appear. Use the up/down arrow keys and the OK key to select an option.
>Press the TV/Radio key at any time to exit the EPG and return to the
channel.
The full range of EPG menu options is as follows:
>
Grid – displays the EPG Grid view. See section 12.2 for details.
>Overview – displays the EPG Overview view. See section 12.3 for
details.
>Programme – displays the EPG Programme view. See section 12.4 for
details.
>
enres – displays a list of programmes and channels by genre. See
G
section 12.5 for details.
>
Search – displays the search screen. See section 12.6 for details.
>
Help – displays a help screen.
12.2EPG Grid – Viewing channels and programmes
The EPG Grid displays a grid of channels in the schedule.
38
12.2.1
Scrolling through programmes in the grid
>The orange highlight will show the current programme. Use the left/
right arrow keys to navigate later in the channel schedule. A summary
of programme information is displayed, including start and end times at
the top of the screen.
>
Press the green key to jump 2 hours earlier in the schedule.
>
Press the yellow key to jump 2 hours later in the schedule.
12.2.2
Scrolling through the channels in the grid
>Use the up/down arrow keys to move the highlight up and down the
channel list. Scrolling at the top and bottom of the table will reveal more
channels.
12.2.3
Viewing programme information
>Press the ‘i’ key to view full information on the currently selected programme.
>
Press ‘i’, green or the exit key to return to the channel grid.
12.2.4
Viewing a different day in the schedule
>Press the number 1 key to see what is on now (and the rest of the
current day) on the currently selected channel.
39
>
To view the schedule for the remaining 7 days press the number keys 2-8.
12.3EPG Overview List
The EPG Overview mode displays a vertical list of channels and the current
programme on now, next or in the future for each of those channels.
By default, the current channel and programme on ‘NOW’ will be displayed first.
A yellow bar to the left of each programme indicates the progress of each programme.
>Use the up/down arrow keys to scroll through different channels and
press the OK key to switch to the highlighted channel.
>
Use the left/right arrow keys to scroll a page of channels at a time.
>Press the yellow key to see what programme is on ‘NEXT’. The time
remaining bar is replaced by the start and end time of the programme.
>To advance to programmes later in the channel schedule, press the
40
yellow (MORE) key repeatedly.
>Press the ‘i’ key to view further information about each programme.
Press the ‘i’, OK, or green ‘Back’ key to return to the EPG Overview.
12.4EPG Programme List
The EPG Programme TV List provides a quick view of the list of programmes
for every channel.
41
The grey list highlight will default to the current programme broadcasting on the
current channel. A yellow bar shows the progress of each programme.
12.4.1
Viewing the programme channel list
Moving the highlight down the Programme List will eventually change the day
and allow you to scroll through 8 days of listings.
>Press the up/down arrow keys to scroll through each programme in the
list.
>Press the left/right arrow keys to scroll up or down a page of channels
at a time.
>
Press ‘i’ or the OK key to see programme information.
12.4.2
Changing channel in the programme list
>Press the yellow ‘Programmes’ key to display a list of channels on the
left.
>Press the up/down arrow keys to navigate the channel list. The list of
programmes for each highlighted channel will be displayed on the right
panel.
42
>
Press the left/right arrow keys to scroll a page of channels at a time.
>Press the OK key to view the programme list for the currently selected
channel. The channel list will close and the new list of programmes for
your chosen channel will be displayed. See section 12.4.1 above for
details of viewing the programme list.
>To return to the normal programme list, without changing a channel,
press the yellow key. The channel list will close and the view will return
to the normal list of programmes.
12.5EPG Genres
The EPG Genres view allows you to view channels and programmes within a
chosen genre.
The following options are available:
>
Use up/down arrow keys to scroll through the channel list.
>
Use left/right arrow keys to scroll a page, up or down, at a time.
>Press the ‘i’ key to view programme information. Press again to return
to Genre view.
>Press the yellow ‘Genres’ key to change genre. See section 12.5.1
below for details:
12.5.1
Changing genres
This screen allows you to view the EPG TV list by genre.
43
The following options are available:
>Use up/down arrow keys and the OK key to select a genre on the left
panel. The list on the right will display a list of programmes in that chosen genre.
>Press OK or the yellow ‘Genres’ key to view the default genres channel
list. See section 12.5 above for details.
12.6EPG Search
The popup EPG Menu provides a search facility so you can find occurrences of
a specific programme or channel in the programme guide across a full 8 days.
If you have any existing searches in the list, the following options are available:
>Use the up/down arrow keys and the OK key to select ‘New search’ to
start a new search. See section 12.6.1 for details.
>Press red ‘Delete’ key to remove a previously saved search from the list.
44
>Press the green ‘Edit Mode’ key to edit an existing search. See section
12.6.1 for details of using the keypad to edit the search term.
>Press the yellow ‘select search’ key to view a search list. See section
12.6.2 for details.
>Press the blue ‘EPG Menu’ to display the popup menu. See section 12
for details.
If there are already existing searches available you can also:
>
Press the up/down arrow keys to scroll through the list.
>
Press the OK key to view everything in a search list.
12.6.1
New search for a programme using the keyboard
If there are no previous searches saved and this is your first search, a keyboard will appear as shown below:
The current programme you have highlighted in any of the EPG views (Grid,
Programme and Overview) will be displayed by default in the search field. This
allows you to search quickly for other occurrences in the schedule as follows:
>Press the green ‘Accept’ key when you have typed your search term to
start searching the programme schedule. The keyboard will close and
the highlight will display the words ‘Search is running…’ and a list of all
occurrences of your programme will be displayed.
If you want to key in your own programme or channel to search for then you
have the following options:
>
Use the arrow keys to move the orange highlight around the keyboard.
45
>Press the OK key to select the highlighted character and it will be displayed in the field above.
>Press the red ‘Delete’ key to delete a single character from the current
search term displayed in the search field.
>Press the yellow ‘Upper Case’ key to switch the keyboard to upper
case and also reveal an extended range of characters. Press the yellow key to toggle the keyboard between lower and uppercase mode.
>Press the blue ‘Cancel’ key to close the search keyboard and return to
the Search List.
>Press the green ‘Accept’ key when you have entered your search term
to activate the search query.
12.6.2
View a previous search
If you save a previous search you can then scroll through this list.
>Press the OK or yellow ‘Select search’ key to view all the occurrences
of a programme search. All the programmes in the chosen search
group will be displayed as shown below:
46
From this view the following options are available:
>Press the red ‘Timer’ key to access timer functions on a programme in
your search query, as you would using any EPG view. See section 13
for details of how to set timers.
>Press the green ‘Edit Mode’ key to edit the search query. See section 12.6.1.
>Press the yellow ‘Select search’ key to switch back to the normal
search view where you can select a previous search. Pressing the
yellow key toggles between these two screens.
>Press the blue ‘EPG Menu’ key to activate the popup menu. See section 12.1 for details.
47
13 Timer
The Timer menu provides functions to set various timers.
13.1Ways to set a timer
There are various ways to set a timer in the receiver:
>
Via the Main Menu. See section 13.2 for details.
>
Via the EPG. See section 13.3 for details.
>
Via the Programme information banner. See section 9 for details.
13.2Main Menu – Timer Organiser
This menu allows you to set and edit timers. The timer features here are the
same as those on the Timer popup menu in the EPG, but they allow you to edit
all fields.
To access the timer menu:
>Press the menu key and select ‘Timer organiser’ from the menu with
the up/down arrow keys and the OK key.
The following timer options are available:
>Timer overview – allows you to manage existing timers and set the
three types of timer. See section 13.2.1 for details.
>New video recorder timer – sets a timer that enables a video recording of the programme. See section 13.2.2 for details.
>New channel change timer – sets a timer to change a channel. See
section 13.2.3 for details.
48
>New wake up timer – sets a timer to bring the receiver out of standby.
See section 13.2.4 for details.
>Timer settings – allows you to set the time to start and end recording
times. See section 13.2.5 for details.
>
Press the blue ‘Help’ key to view a help screen.
13.2.1
Timer overview
The timer overview allows you to create new timers and manage any existing
timers you have previously set.
>To create a new timer, move the highlight to a blank space and press
the OK or green ‘New’ key. See the sections below for the three types
of timer.
>Press the OK or green ‘Edit’ key on a timer in the list to edit the timer
parameters. See the sections below for the three types of timer.
>
Press the yellow ‘Delete’ key to delete a highlighted timer.
>
Press the blue ‘Help’ key to view a help screen.
49
13.2.2
New video recorder timer
The video recorder timer allows you to set the receiver so that it switches to the
correct channel and prevents you from changing channel, so you can video a
programme with an external recording device.
Set the video recorder timer as follows:
>Use the up/down arrow keys and the OK key to select either TV List or
Radio List from the dropdown.
>Use the up/down arrow keys and the OK key to select the channel from
the channel list dropdown.
>Use the left/right arrow keys to move the highlight to the ‘Date’ field and
use the number keys to enter the broadcast date of the programme.
>Use the left/right arrow keys to move the highlight to the ‘Start’ field and
use the number keys to enter the start time of the programme. Format
is hour/min (hh/mm).
>Use the left/right arrow keys to move the highlight to the ‘Stop’ field and
use the number keys to enter the finish time of the programme. Format
is hour/min (hh/mm).
>Use the up/down arrow keys and the OK key to specify the repeat option from the ‘Repeat’ dropdown. The options are as follows:
• 1x – activate the timer only once.
•D
– activate the timer at the same time every day.
• 1 W – activate the timer every week.
• 1-5 – activate 5 days a week (mon-fri).
• 6-7 – activate 2 days a week (sat-sun).
50
>Press the green ‘Accept’ key to confirm your options and save your
timer.
>Press the blue ‘Help’ key to view a help screen.
The new Video Recorder Timer will be displayed in the Timer Overview list,
indicated by a video tape image to the right of the timer description, as shown
below:
At any time before the start time of the timer is reached, you can edit the timer
settings by choosing the timer from the Timer Overview and following the steps
above.
The timer will activate at the start time of the timer, switch to the correct channel and lock the receiver until the timer has finished. If you have set the timer to
1x (once) the timer will be deleted after it is activated.
13.2.3
New channel change timer
The channel change timer allows you to set a reminder timer to change to a
channel at the start of a programme so you do not miss it.
51
Set the channel change timer as follows:
>Use the up/down arrow keys and the OK key to select either TV List or
Radio List from the dropdown.
>Use the up/down arrow keys and the OK key to select the channel from
the channel list dropdown.
>Use the left/right arrow keys to move the highlight to the ‘Date’ field and
use the number keys to enter the broadcast date of the programme.
>Use the left/right arrow keys to move the highlight to the ‘Start’ field and
use the number keys to enter the start time of the programme or the
time you want to switch to your chosen channel. Format is hour/min
(hh/mm).
>Use the up/down arrow keys and the OK key to specify the repeat option from the ‘Repeat’ dropdown. The options are as follows:
• 1x – activate the timer only once.
•D
– activate the timer at the same time every day.
• 1 W – activate the timer every week.
• 1-5 – activate 5 days a week (mon-fri).
• 6-7 – activate 2 days a week (sat-sun).
>Press the green ‘Accept’ key to confirm your options and save your
timer.
>Press the blue ‘Help’ key to view a help screen.
The new Channel Change Timer will be displayed in the Timer Overview list,
indicated by a bell image to the right of the timer description, as shown below:
52
At any time before the start time of the timer is reached, you can edit the timer
settings by choosing the timer from the Timer Overview list and following the
steps above.
The timer will activate at the start time of the timer and switch to the correct
channel. If you have set the timer to 1x (once) the timer will be deleted after it is
activated.
13.2.4
New wake up timer
The wake up timer allows you to set a reminder timer that will bring the receiver
out of standby mode and tune to the correct channel so you do not miss your
favourite programme.
Set the wake up timer as follows:
>Use the up/down arrow keys and the OK key to select either TV List or
Radio List from the dropdown.
>Use the up/down arrow keys and the OK key to select the channel from
the channel list dropdown.
>Use the left/right arrow keys to move the highlight to the ‘Date’ field and
use the number keys to enter the broadcast date of the programme.
>Use the left/right arrow keys to move the highlight to the ‘Start’ field
and use the number keys to enter the start time of the programme or
the time you want to activate the receiver and switch to your chosen
channel. Format is hour/min (hh/mm).
53
>Use the up/down arrow keys and the OK key to specify the repeat option from the ‘Repeat’ dropdown. The options are as follows:
• 1x – activate the timer only once.
•D
– activate the timer at the same time every day.
• 1 W – activate the timer every week.
• 1-5 – activate 5 days a week (mon-fri).
• 6-7 – activate 2 days a week (sat-sun).
>Press the green ‘Accept’ key to confirm your options and save your
timer.
>Press the blue ‘Help’ key to view a help screen.
The new Wake Up Timer will be displayed in the Timer Overview list as shown
below:
At any time before the start time of the timer is reached, you can edit the timer
settings by choosing the timer from the Timer Overview list and following the
steps above.
The timer will activate at the start time of the timer and bring the receiver out
of standby and switch to the correct channel. If you have set the timer to 1x
(once) the timer will be deleted after it is activated.
13.2.5
Timer settings
The Timer settings feature allows you to set a time to activate any timer a set
number of minutes before the start time of that timer and, if applicable, after the
end time.
This feature compensates for any variation in programme start and end time
54
and ensures your receiver is ready on the correct channel in good time so that
your recording equipment does not miss the start or end of your programme.
The following options can be set:
>Use the up/down arrow keys to select ‘Timer pre-roll time [min]’ and
type in the number of minutes you want to activate any timer before the
defined Start time.
>Use the up/down arrow keys to select ‘Timer post-roll time [min]’ and
type in the number of minutes after any timer End time you want the
timer to stay active for.
>
Press the blue ‘Help’ key to view a help screen.
13.3Timer Menu in the EPG
To access the timer menu in the EPG:
>Press the red key in any EPG view to display the timer popup. The
options are the same as described above in section 13.2.
>
Use the up/down arrow keys and the OK key to select a timer option.
55
13.3.1
Creating a new timer in the EPG
To create a new timer for a programme while in any EPG mode do the following:
>
Select a channel and a programme you want to set a timer for.
>Press the red ‘Timer’ key and select a timer type from the menu. An
example for a Channel change timer is shown below:
By default the channel list, channel and programme will already be set and
cannot be edited in this mode. For details of setting the other fields refer to the
above sections on the three different timers in the Timer organiser menu. See
13.2 for details.
>Highlight the ‘Accept’ button and press the OK key to save the timer.
The programme will now be marked with a bell timer image in the EPG
to show you have set a timer, as shown below:
56
13.3.2
Editing a timer in the EPG
You can edit an existing timer in the EPG via the popup timer menu (while in
any view mode) in two ways:
>Use the arrow keys to select an existing programme with a timer
displayed next to it (a bell, video tape image or anything highlighted
in blue or red) in any EPG view and press the red ‘Timer’ key - select
‘Edit Timer’ from the menu. See 13.2 for details of all types of timer and
how to edit them.
Or
>Press the red ‘Timer’ key and select ‘Timer Overview’ from the menu select the timer to edit from the list. See 13.2 for details of all types of
timer and how to edit them.
13.3.3
Deleting a timer in the EPG
You can delete an existing timer in the EPG via the popup timer menu (while in
any view mode) in two ways:
>Use the arrow keys to select an existing programme with a timer
displayed next to it (a bell, video tape image or anything highlighted
in blue or red) in any EPG view and press the red ‘Timer’ key - select
‘Timer delete’ from the menu.
>EPG view will be refreshed and the selected programme timer will be
deleted.
Or
>Press the red ‘Timer’ key and select ‘Timer Overview’ from the menu select the timer to delete from the list.
13.4Timer Conflicts
If you set a timer with a Start or End time that clashes with any other previously
set timer, a warning message will appear and you will be shown the conflicting
timers (highlighted in red) in the Timer Overview screen.
>While in the Timer Overview screen, Use up/down arrows and the
yellow ‘Delete’ key to remove the conflicting timer, or edit the timers to
solve the issue.
Please note: Any timer displayed in the EPG that has a conflicting start/end
time is displayed in red.
57
14 Main menu
The Main menu provides access to various settings and features of your receiver.
14.1How to navigate the menus
The following functions can be used in the menus:
>
Press the menu key on the remote control to open the Main menu.
>Use the up/down arrow keys to move the orange highlight through the
fields and press OK to select a menu option.
>Where a menu field shows a down arrow, you can press the OK key to
open a drop down menu, where you can select more options.
>Use the number keys to enter digits into time fields. Use the left arrow
key to delete.
>Press the green ‘Accept’ key to save the changes and return to a previous menu.
>
Press the red ‘Back’ key to navigate back to a previous menu.
>
Press the ‘exit’ key to return to TV or radio.
>
Press the blue ‘Help’ key to view a help screen.
The Main menu provides access to the following features:
>Channel search – automatically rescans the freesat home transponder for channels. See section 14.2 for details.
>
Settings – receiver settings such as audio, video and system settings.
58
See section 14.3 for details.
>
Timer organiser – See section 14.4 for details.
>
TV lists organiser – See section 14.5 for details.
>
Radio lists organiser – See section 14.6 for details.
14.2Automatic channel search
This option automatically rescans the freesat home transponder for any available TV and radio channels. Progress of the scan is displayed on a progress bar.
To access this menu option:
>Press the menu key and select ‘Channel search’ from the menu with
the up/down arrow keys and the OK key.
>Press the OK key when a message informs you that all the available
channels have been found to save the channels in the receiver.
59
14.3Settings
The Settings menu provides access to various settings to configure your receiver.
To access this menu option:
>Press the menu key and select ‘Settings’ from the menu with the up/
down arrow keys and the OK key.
>
Press the blue ‘Help’ key to view a help screen.
The menu options are as follows:
>Parental control – allows you to restrict access to channels. See section 14.3.1 for more details.
>Basic settings – Clock and power saving settings. See section 14.3.2
for more details.
>
Picture settings – Video settings. See section 14.3.3 for more details.
>
Sound settings – Audio settings. See section 14.3.4 for more details.
>
ntenna configuration – Allows you to change the antenna settings.
A
See section 8.1 for more details.
>Special functions – screen display, media player and network settings. See section 14.3.6 for more details.
>System configuration – Information screen. See section 14.3.7 for
more details.
>Service settings – See section 14.3.8 for more details.
60
14.3.1
Parental control
The Parental control screen allows you to restrict access to channels and also
the main menu by setting a PIN.
To access this menu option:
>Press the menu key and select ‘Settings’ - select ‘Parental control’ from
the menu with the up/down arrow keys and the OK key.
>Press the blue ‘Help’ key to view a help screen.
When you have PIN access set on a channel
>Use arrow keys and the OK key to move to various field options.
The following options are available:
>PIN enquiry mode – by default this is ‘off’. To switch on PIN control,
toggle the option to ‘on’. When PIN enquiry mode is on, any channels
set to be ‘locked’ using the Select TV/radio programmes options cannot
be accessed without entering the 4 digit PIN.
>
Change PIN – press the OK key to open a popup box as shown below:
61
Use the number keys to type in your existing PIN. When this is correct specify
another 4 digit PIN and repeat the number to confirm. Your PIN will now be
changed.
>Select TV programmes – press the OK key to go to the TV channel
selection screen. See section 14.3.1.1 for details.
>Select radio programmes – press the OK key to go to the radio channel selection screen. See section 14.3.1.1 for details.
14.3.1.1
Parental control – locking TV or radio channels
This screen allows you to select TV or radio channels to be locked, until a 4
digit PIN has been entered.
To select and lock channels do the following:
Use the up/down arrow keys to move to the channel you want to restrict access to.
>Press the yellow key to lock the channel currently highlighted. A padlock will appear next to the channel name to indicate it is locked.
62
>To lock multiple channels in a row at once press the OK key and a
cross (x) will appear before the channel name, as shown below:
Moving the highlight up and down will now mark all channels with a cross. You can
now lock all of the cross marked channels by pressing the yellow key as above.
>
Press the green ‘Accept’ key when you have locked all your channels.
>Press the TV/radio key to return to the programme channel. When you
switch to any channel that has been locked you will not be able to view
or listen to the channel without entering your 4 digit PIN, as shown
below:
>
Press the blue ‘Help’ key to view a help screen.
63
14.3.2
Basic Settings
To access this menu option:
>Press the menu key and select ‘Settings’ – select ‘Basic settings’ from
the menu with the up/down arrow keys and the OK key.
>Press the blue ‘Help’ key to view a help screen.
The basic settings are as follows:
>
tandby clock – activates a clock on the front panel of the receiver
S
when in standby mode. Please note that the receiver will consume
more power when this is set to ‘on’.
>
IRC code – your remote control has three modes (SAT1, SAT2 and
TV). It can be set to control up to two satellite receivers and a television. The default is SAT1. To set the IRC mode, press the OK key and
the IRC code key (labelled SAT1, SAT2, TV) simultaneously.
>Quickstart – when this mode is activated the receiver will come out of
standby more quickly. Please note: if Quickstart mode is on, the receiver will consume more power.
>Auto standby – this allows you to set the receiver to automatically
enter standby mode after a set period of inactivity and when the timer
is within a user defined idle range. If switched on, you can set the following settings:
• Idle range start – the start time of the idle range.
• Idle range stop – the stop time of the idle range.
• Idle period [m] – the amount of time that passes before the receiver
goes into standby.
64
14.3.3
Picture settings
To access this menu option:
>Press the menu key and select ‘Settings’ – select ‘Picture settings’ from
the menu with the up/down arrow keys and the OK key.
>Press the blue ‘Help’ key to view a help screen.
You can set the following picture settings:
>
creen format – set this according to the aspect ratio of your TV
S
screen. Either 4:3 or 16:9 widescreen.
>Video scaling/Zoom – these options maximise the size of the video in
your TV display.
>AV mode – sets the video output mode of your receiver. Options are
‘SCART’ or ‘HDMI’. See section 4 for connection settings.
>HDMI resolution – if AV Mode is set to ‘HDMI’ this option will be enabled
and should be set to the resolution of your TV. Options are: ‘auto’, ‘576i’,
‘576p’, ‘720p’, ‘1080i’ and ‘native’. When you select a new resolution
a popup message will warn that it needs to test your TV display. If the
display passes the test then your display resolution will be set.
>
V SCART mode – sets the SCART mode of the TV SCART output of
T
the back of receiver. See section 4 for connection details.
>
CR SCART mode – sets the SCART mode of the VCR output on the
V
back of the receiver. See section 4 for connection details.
65
14.3.4
Sound Settings
To access this menu option:
>Press the menu key and select ‘Settings’ – select ‘Sound settings’ from
the menu with the up/down arrow keys and the OK key.
>Press the blue ‘Help’ key to view a help screen.
You can set the following sound settings:
>
udio language – sets the language of the audio transmission, if this
A
service is available.
>Subtitle language – sets the language of the subtitles, if this service is
available.
>
Dolby Digital – switches Dolby Digital on or off. If active, Dolby Digital
audio will be output on the S/PDIF interface for any programme that is
broadcast with Dolby Digital. See section 4 for connection details.
>AV sync [ms] – can be used to correct any time lag present between
video and audio.
>
DMI audio format – if you are connected to HDMI equipment this
H
sets the audio format transmitted over HDMI. Either PCM for transmission of the decoded signal or Bitstream for external decoding of the
audio signal.
14.3.5
Settings – Antenna configuration
See 8.1 for details.
66
14.3.6
Special Functions
To access this menu option:
>Press the menu key and select ‘Settings’ - select ‘Special functions’
from the menu with the up/down arrow keys and the OK key.
>Press the blue ‘Help’ key to view a help screen.
The following menu options are available:
>
OSD – changes main menu settings. See section 14.3.6.1 for details.
>Media Player – play and control media files. See section 14.3.6.2 for
details.
>Network settings – LAN – configure network settings for LAN operation. See section 14.3.6.3 for details.
>Network settings – WLAN – configure network settings for WLAN operation. See section 14.3.6.4 for details.
67
14.3.6.1
OSD
This screen allows you to change various options relating to the menus and
on-screen displays.
To access this menu option:
>Press the menu key and select ‘Settings’, followed by ‘Special functions’ – select ‘OSD’ from the menu with the up/down arrow keys and
the OK key.
>Press the blue ‘Help’ key to view a help screen.
The following options can be set:
>
ont size – changes size of font for all menus and text. Either normal
F
or large.
>
Info banner display time [s] – sets the number of seconds that the
information banner is displayed for when changing to a new channel.
See section 9 for details of the information banner.
>OSD radio/music – switches On Screen Display for the radio/music
feature ‘on’ or ‘off’.
68
14.3.6.2
Media Player
This screen allows the location of media files to be specified.
To access this menu option:
>Press the menu key and select ‘Settings’, followed by ‘Special functions’ - select ‘Media Player’ from the menu with the up/down arrow
keys and the OK key.
>Press the blue ‘Help’ key to view a help screen.
The following options can be set:
>Start directory music – sets the start directory to access mp3 music
files. Specify either ‘device view’ or ‘last used’.
>
tart directory pictures – sets the start directory to access image
S
files. Specify either ‘device view’ or ‘last used’.
>Start directory pictures – sets the start directory to access movie
files. Specify either ‘device view’ or ‘last used’.
69
14.3.6.3
Network settings - LAN
This screen allows you to set the network settings of the receiver so it can be
added to a local area network.
To access this menu option:
>Press the menu key and select ‘Settings’, followed by ‘Special functions’ – select ‘Network settings - LAN’ from the menu with the up/down
arrow keys and the OK key.
>
The TCP/IP settings screen will appear.
>IP mode – set to ‘DHCP client’ and accept using the green key. Options are also available for ‘DHCP server’ or ‘Static’.
>A shared folder needs to be created on the PC from which multimedia
files can now be accessed and played using the NAV menu. See section 11 for details.
>
Press the blue ‘Help’ key to view a help screen.
14.3.6.4
Network settings - WLAN
This screen allows you to set the network settings of the receiver so it can be
added to a local area network via a wireless connection. Please note that a
TechniSat USB-WLAN adaptor is required for this functionality
70
To access this menu option:
>Press the menu key and select ‘Settings’, followed by ‘Special functions’ - select ‘Network settings - WLAN’ from the menu with the up/
down arrow keys and the OK key.
>
A screen appears showing the search results for available WLANs.
>Select the appropriate WLAN from the list using the up/down arrow
keys and press the OK key to connect.
>Highlight ‘Proceed’ and press the OK key – the TCP/IP settings screen
will appear. Set to ‘DHCP client’ and accept using the green key.
>If the connection is locked you will be asked to enter the WEP/WPA key
before you can proceed.
71
>A shared folder needs to be created on the PC from which multimedia
files can now be accessed and played using the NAV menu. See section 11 for details.
>
Press the blue ‘Help’ key to view a help screen.
14.3.7
System configuration
This screen shows system information about the hardware and software in your
receiver.
To access this menu option:
>Press the menu key and select ‘Settings’ – select ‘System configuration’
from the menu with the up/down arrow keys and the OK key.
>
Press the blue ‘Help’ key to view a help screen.
72
14.3.8
Service settings
This menu provides access to service features of your receiver.
To access this menu option:
>Press the menu key and select ‘Settings’ – select ‘Service settings’
from the menu with the up/down arrow keys and the OK key.
>
Press the blue ‘Help’ key to view a help screen.
The following menu options are available:
>Restore factory settings – deletes all settings and restores the receiver to its factory state. See section 14.3.8.1 for details.
>Update software – allows you to update the receiver firmware software. See section 14.3.8.2 for details.
>
Operating mode – allows you to change the operating mode of the
receiver. See section 14.3.8.3 for details.
>
HDCP setting – see section 14.3.8.4 for details.
14.3.8.1
Restore factory settings
To access this menu option:
>Press the menu key and select ‘Settings’, followed by ‘Service settings’ - select ‘Restore factory settings’ from the menu with the up/down
arrow keys and the OK key.
The receiver will reset and the TV will go blank for a short while until the AutoInstall screen is displayed. See section 7 for details of how to install the receiver
again.
73
14.3.8.2
Update software
This screen allows you to set times to update software in the receiver.
When you first activate this option the receiver will start to search the transponder for any available new software updates. If software is available you can
then set a time to download it.
To access this menu option:
>Press the menu key and select ‘Settings’, followed by ‘Service settings’
– select ‘Update software’ from the menu with the up/down arrow keys
and the OK key.
>Press the blue ‘Help’ key to view a help screen.
The following options are available:
>
Updates – switches software updates either on or off.
>
pdate time – allows you to set the time (hh:mm) the box will downU
load new software from the transponder.
Press the green key to ‘Accept’ the settings. If any new software is available at
the ‘Update time’ your receiver will download it.
Please note: the update can take up to 90 minutes.
14.3.8.3
Operating mode
This screen allows you to change the default operating mode to access the
advanced features provided by TechniSat mode.
74
To access this menu option:
>Press the menu key and select ‘Settings’, followed by ‘Service settings’
– select ‘Operating mode’ from the menu with the left/right arrow keys
or the OK key.
>
Press the blue ‘Help’ key to view a help screen.
The following options are available:
>
perating mode – by default the receiver is in ‘freesat’ mode. To
O
access the advanced features use the OK key to toggle the option to
‘TechniSat’ mode. See section 15 for details of TechniSat mode.
14.3.8.4
HDCP setting
This screen allows you to set high definition encryption on the HDMI output.
To access this menu option:
>Press the menu key and select ‘Settings’, followed by ‘Service settings’
- select ‘HDCP setting’ from the menu with the up/down arrow keys and
the OK key.
>
Press the blue ‘Help’ key to view a help screen.
The following options are available:
>HDCP setting – Sets protection encryption on the HDMI output of the
receiver. Either ‘on’ or ‘off’
14.4Timer organiser
See 13.2 for details.
75
14.5TV lists organiser
This screen allows you to customise channels or create your own TV channel list.
To access this menu option:
>Press the menu key and select ‘TV lists organiser’ from the menu with
the up/down arrow keys and the OK key.
>Press the blue ‘Functions’ key and select ‘Help’ from the menu to view
a help screen.
14.5.1
Filtering complete channel lists
>Press red ‘Complete list’ key to move the grey highlight to the list of all
channels on the left. You will see a black up/down arrow at the top of
the left list of menu items.
>Press red key again to see a drop down list as shown below. Use the
up/down arrow keys and the OK key to select an option to filter the
channel list:
76
The options are as follows:
• All channels – lists all possible channels.
• Genre lists – displays another popup, which allows you to list the
channels in a particular genre, as shown below:
• Alternative Channels – displays all regional alternative channels.
Choosing one of these options will close the popup and relist the channel list
on the left according to your chosen channel filter.
14.5.2
Viewing the TV list
>Press the green ‘TV list’ key to move the grey highlight to the list of
channels on the right. You will see a black up/down arrow at the top of
the right list of menu items.
>Press the green key again to see a drop down list, as shown below.
Use the up/down arrow keys and the OK key to select an option to filter
the TV list:
77
The options are as follows:
• TV list – this is the default channel list that is created after the Autoinstallation procedure (see 8.6) or when scanning for channels via the
Main menu (see 14.2).
• TV list 2 – a blank channel list designed for you to customise to your
requirements. See 14.5.3 for details.
• TV list 3 – a blank channel list designed for you to customise to your
requirements. See 14.5.3 for details.
• Customisable Channels – this lists any channels from the main list
that have regional alternatives. See 14.5.7 for details.
14.5.3
Creating a new TV list and Adding channels
You can create two customised channel lists with a smaller selection of your
favourites:
To create a new customised channel list do the following:
78
>Press the green key and select either ‘TV list 2’ or ‘TV list 3’ from the
drop down list.
>The grey highlight will jump to the channel list on the left and the yellow
bar at the bottom of the screen will changed to ‘> add’ by default.
>Use the up/down arrow keys (left/right to scroll a page at a time) to
scroll down the channels and press the yellow ‘> add’ key to add the
channels you want in your own favourites channel list.
>To add multiple channels (in a row) press the OK key and move the up/
down arrow keys. A cross will appear next to selected channels. Then
press the yellow key as above to add all marked channels to your favourites list.
>
To remove a channel from your favourites list see section 14.5.4 below.
>
To delete a channel from your favourites list see section 14.5.5 below.
>To sort the list of channels in your favourites TV list see section 14.5.6
below.
79
14.5.4
Removing channels from a TV list
You can remove a channel from your favourites list while in the ‘TV lists organiser’ screen (either TV list 2 or TV list 3) while navigating the main channel list
or when in your own favourites list.
In either list, you can remove a channel as follows:
>Use the up/down arrow keys to select a channel you have in your
favourites list on the right. These channels are easy to spot as they will
have order numbers before them in the list.
>When you highlight a channel in your favourites list the yellow option at
the bottom of the screen will change to ‘< remove’.
>
Press the yellow key to remove a channel.
>To remove multiple channels at once, press the OK key on a channel
you want to remove and move the up/down arrow keys to mark channels with a cross - then press the yellow key as above.
14.5.5
Deleting channels
To delete channels from a Favourites list do the following:
>
Press red to set the focus to the right channel menu.
>Press the blue ‘Functions’ key to open a popup menu and select ‘Delete’ from the list.
>
The yellow bar at the bottom of the screen will change to ‘x Delete’.
80
14.5.6
Sorting channels in a TV list.
To sort channels into a different order in your favourites do the following:
>Press the green ‘TV list’ key to move focus to the right TV list channel
column.
>Press the blue ‘Functions’ key to open the popup menu and use the up/
down arrow keys and the OK key to select the ‘Sort’ menu option.
>Use the up/down arrow keys to select a channel you want to change
position and press the yellow ‘Sort’ key. An up/down arrow image will
appear next to the channel name to indicate you can now move it.
>Use the up/down arrow keys to move the selected channel into the
new position.
>Press the yellow ‘Sort’ key again to drop the channel into the new position.
81
>Follow the steps above to move any other channels into a new position.
>If you want to move (sort) multiple channels press the OK key and use
the up/down arrow keys to mark selective channels with a cross. Then
follow steps above to move the selected channels.
14.5.7
Replacing customisable channels
Where channels have a regional alternative, you can customise the channel
with a regional alternative of your choice.
To customise default channels with regional alternatives do the following:
>Press the green ‘TV list’ key to select ‘Customisable Channels’ from
the TV list drop down. The customisable channels will be displayed
on the right.
>Press the red ‘Complete list’ key to move the highlight to the left list
of channels.
>Use the up/down arrow keys (left/right to scroll a page at a time) to scroll through the regional options for the selected customisable channel
on the right.
>Press the yellow ‘Replace’ key to replace the default customisable
channel on the right, with your new highlighted channel on the left.
82
>If you want to change any other channels in your customisable channels list, press the green key again to move focus to the right channel
list and follow the steps above.
>When you switch to a customised channel, you will now see the regional alternative you have chosen.
14.5.8
Setting Parental control
The TV and radio list provides a quick way of setting channels to be locked with
parental control, so that those channels cannot be viewed unless a 4 digit PIN
is entered.
To lock channels do the following:
>Press the blue ‘Functions’ key and use the up/down arrow keys and the
OK key to select the ‘Parental control’ menu item.
>The yellow menu at the bottom of the screen will change to ‘Parental
control’.
83
>Use the up/down arrow keys to specify a channel to lock and press the
yellow key. A padlock image will be displayed next to locked channels
as shown below:
>To mark multiple channels in a row, press the OK key to mark a cross
next to a channel and use the up/down arrow keys to select multiple
channels. Then press the yellow key as above to lock all marked channels.
>To unlock a channel, select it with the up/down arrow keys and press
the yellow key again. The padlock image will disappear.
14.6Radio lists organiser
This screen allows you to customise channels or create your own radio channel list.
To access this menu option:
>Press the menu key and select ‘Radio lists organiser’ from the menu
with the up/down arrow keys and the OK key.
The operation of radio lists is identical to TV lists organiser. Please see section
14.5 for details.
84
15 TechniSat operating mode
The receiver can function in two modes: freesat and TechniSat. By default the
receiver is in ‘freesat’ mode.
TechniSat mode provides extra features and advanced functionality within the
main menus. To switch to this mode do the following:
>Press the menu key and select ‘Settings’, followed by ‘Service settings’
- select ‘Operating mode’ from the menu with the left/right arrow keys
and the OK key.
>
Press the green ‘Accept’ key to confirm the mode switch.
The following sections document the menu sections with extra functionality in
TechniSat mode:
15.1Channel search
Channel search under TechniSat mode provides an additional menu of options.
85
To access this menu option:
>Press the menu key and select ‘Channel search’ from the menu with
the up/down arrow keys and the OK key.
>
Press the blue ‘Help’ key to view a help screen.
The channel search menu provides the following options:
>Automatic search – automatic channel search options. See section
15.1.1 for details.
>
atellite – allows you to specify a satellite to search for channels. See
S
section 15.1.2 for details.
>Transponder – allows you to search for services on a specific transponder. See section 15.1.3 for details.
>Manual search – allows you to search for particular channels only.
See section 15.1.4 for details.
15.1.1
Automatic search
The following options are available:
>Search mode – select either ‘Free channels’ (all unencrypted channels) or ‘All channels’ (includes encrypted channels).
>
tart search – press the OK key to activate the channel search or
S
press the green ‘Search’ key. The receiver will automatically start to
search for TV and radio channels. See section 15.1.5 for details.
>
Press the blue ‘Help’ key to view a help screen.
86
15.1.2
Satellite
The following options are available:
>Satellite – search ‘All satellites’ or pick a specific satellite from the drop
down list.
>
Search mode – select either ‘Free channels’ (all unencrypted channels) or ‘All channels’ (includes encrypted channels).
>Start search – press the OK key to activate the channel search or
press the green ‘Search’ key. The receiver will automatically start to
search for TV and radio channels. See section 15.1.5 for details.
>
Press the blue ‘Help’ key to view a help screen.
15.1.3
Transponder
This screen allows you to search for services on a specific transponder.
87
The following options are available:
>
ransponder frequency [MHz] – use the number keys (left arrow to
T
delete) to change frequency number.
>Polarisation – use the left/right arrow keys or the OK key to select
either ‘h’ (horizontal) or ‘v’ (vertical).
>
ymbol rate [kSps] – use the number keys (left arrow to delete) to
S
change symbol rate number.
>Modulation – press the OK key to select modulation mode. Either
‘DVB-S’ (for non-HDTV channels), or ‘DVB-S2’.
>
earch mode – use the left/right arrow keys or the OK key to select
S
either ‘Free channels’ (all unencrypted channels) or ‘All channels’
(includes encrypted channels). If you want more control over these
parameters press yellow for PID search. Press the yellow key again to
return to normal search mode. See below for details.
>Start search – press the OK key to activate the channel search or
press the green ‘Search’ key. The receiver will automatically start to
search for TV and radio channels. See section 15.1.5 for details.
If you want to search just for one particular programme:
>PID search – press the yellow ‘PID search’ key to change the default
‘TS search’ mode so you can manually change the following options
with the arrow and number keys:
• PCR-PID
• Audio-PID
• Video-PID
>
Press the blue ‘Help’ key to view a help screen.
15.1.4
Manual search
This screen has the same functionality as the Transponder screen. See section
15.1.3 above for details.
88
15.1.5
Start search screen
Starting a search using any of the channel search functions will display the
following screen and initiate an automatic search for TV and radio channels.
>Press the red ‘Abort’ key to cancel the channel search process and
return to the previous screen or menu.
15.1.6
Result of channel search screen
After new channels are found using any of the Channel search menus (see
15.1) the option screen is displayed:
You have the following options:
>
Sort automatically – new channels are added to the existing channel list, where they are all sorted and added together to create a new
channel list.
89
>
ppend automatically – new channels are appended to the existing
A
channel list, without reordering the whole list.
>Sort manually – TV – allows you to use the TV lists organiser screen
to manually add the newly found channels into your chosen position.
>Sort manually – radio – allows you to use the radio lists organiser
screen to manually add the newly found channels into your chosen
position.
>
Back – goes back to previous page.
>
Press the blue ‘Help’ key to view a help screen.
15.2Settings
In TechniSat mode, the Settings menu has extra menu options and also adds
extra functionality to some existing menus. The new features are documented
in the following sections.
To access this menu option:
>Press the menu key and select ‘Settings’ from the menu with the up/
down arrow keys and the OK key.
>
Press the blue ‘Help’ key to view a help screen.
90
15.2.1
Programme guide
This screen allows you to configure settings for programme information for the EPG.
To access this menu option:
>Press the menu key and select ‘Settings’ from the menu – select ‘Programme guide’ with the up/down arrow keys and the OK key.
>Press the blue ‘Help’ key to view a help screen.
The following options are available:
>Updates – use the left/right arrow keys or the OK key to enable or
disable the download of EPG information on selected channels. Select
either ‘on’ or ‘off’.
>Update time – use the number keys (left arrow to delete) to specify a
time to download new EPG information.
>EPG channel – press the OK key to specify the source satellite and
set transponder settings.
Set the following options and press the green ‘Accept’ key to save and return to
the Programme guide screen.
• Satellite
• Transponder frequency [MHz]
• Polarisation
• Symbol rate [kSps]
• Modulation
• PID
• Service-ID
91
>
elect TV programmes – use the OK key to select channels for which
S
you want to enable EPG download. See section 15.2.1.1 for details.
>Select radio programmes – use the OK key to select channels for
which you want to enable EPG download. See section 15.2.1.1 for
details.
>Start category – press the OK key to specify the start category (mode)
that the EPG view starts in when you press the ’guide’ key. Either
‘Grid’, ‘Programmes’, ‘Overview’, ‘Genres’ or ‘last used’. See section 12
for details of EPG modes.
>
Start download – press OK to start the download of EPG information.
>Press the green ‘Accept’ key to save these settings and return to the
‘Settings’ menu.
15.2.1.1
Selecting TV or radio programmes
>Press the red ‘TV list’ or ‘Radio list’ key to open a drop down menu.
In TechniSat mode, you can access the TV lists or Radio lists like the ‘freesat’
mode, but it gives you an extra item called ‘Provider lists’, which allows you to
select a channel list from a particular channel provider.
>Use the up/down arrow keys and the yellow key to select channels for
which you want to download EPG information. Channels will be marked
with a letter image.
>To select multiple channels at a time, press the OK key to mark a cross
next to a channel. Use the up/down arrow keys to mark multiple channels and press yellow as above to set all the marked channels.
>
Press the exit key to return to the ‘Programme guide’ screen.
92
>
Press the blue ‘Help’ key to view a help screen.
15.2.2
Basic Settings
To access this menu option:
>Press the menu key and select ‘Settings’ - select ‘Basic settings’ from
the menu with the up/down arrow keys and the OK key.
>
Press the blue ‘Help’ key to view a help screen.
The basic settings are as follows:
>Country – press the OK key to select the country you are in and set
the ‘Time zone’ field below. If you do not select a country you have to
set a time zone manually.
>Date/Time – press OK to select a channel to synchronise the date and
time to. For most occasions you can keep the default of ‘Automatic’.
>Standby clock – Use left/right or OK keys to activate a clock on the
front panel of the receiver when in standby mode.
>
IRC code – your remote control has three modes (SAT1, SAT2 and
TV). It can be set to control up to two satellite receivers and a television. The default is ‘SAT1’. To set the IRC mode, press the OK key and
the IRC code key (labelled SAT1, SAT2, TV) simultaneously.
>Quickstart – when this mode is activated the receiver will start faster
from standby mode. Please note: if Quickstart mode is on, the receiver
will consume more power.
>
DMI TechniLink – use the left/right arrow keys or the OK key to
H
switch ‘on’ or ‘off’.
93
15.2.3
Antenna configuration
The Antenna configuration settings are the same as the normal freesat mode
(see 8.11) except that you can specify different satellites when the antenna is
directed towards a satellite other than Eurobird-Astra or if there is a multi-LNB
antenna installation which can receive services from four satellite positions.
The satellites can be specified using the dropdown fields, as shown below:
In TechniSat mode you can also control a motorised rotating antenna if you
have one. Details can be found below in section 15.2.4.
15.2.4
Use with a Motor Rotating Antenna (DiSEqC 1.2)
Your receiver is ready for use with a motorised rotating antenna. Using the
DiSEqC control (DiSEqC 1.2) you have the facility to control a suitable motor
via the co-axial cable.
In the Antenna configuration screen do the following:
>Use the up/down arrow keys to move the highlight to the Satellite selection
column and press the OK key to open the dropdown satellite list.
94
>Use the up/down arrow keys to select ‘Motor Antenna’ from the list and
press the OK key to confirm.
>If an existing satellite service is active and you are changing it to ‘Motor
Antenna’ from the list, a popup message will appear that gives you the
choice to delete all your existing channels or to leave them as they are.
Use left/right arrow keys to select either ‘Yes’ or ‘No’ then press OK to
confirm.
>A popup warning message regarding the setting of East and West
limits will be displayed. Confirm by pressing the OK key.
>Use left/right arrow keys to move the highlight to the ‘Proceed’ field and
press the OK key. A motor antenna configuration screen will be displayed, as described below:
95
15.2.4.1
Setting motor antenna East and West limits
To avoid mechanical damage to the satellite antenna or the LNB by physical
obstacles, you must first set the maximum degree of rotation to both East and
West. If there are any obstacles in the rotating field of the antenna (e.g. a wall
or chimney), these must be considered when setting the East-West limits.
If there are no obstacles in the rotating range of the antenna, set the limits so
that it can be rotated a little further than the most extreme locations of the satellites to be received.
To setup a motorised antenna East and West limits do the following steps:
15.2.4.2
Deleting old limits
>Before setting new East/West limits you need to ensure any old limits
are deleted. Press the blue ‘Actions’ key to display the popup menu, as
shown below:
>Use up/down arrows and the OK key to select ‘Delete limits’ from the list.
>A message will be displayed warning you that you must set new East/
West limits. Press the OK key to confirm.
15.2.4.3
>
Setting a new East limit
Use the arrow keys to move the highlight to the ‘Save’ field.
>Now press the right arrow key to rotate the antenna to the maximum
East position possible.
>Press the blue ‘Actions’ key and use up/down arrows and the OK key
to select ‘Set east limit’.
>A popup will be displayed when it is set. Press the OK key to confirm
your setting, as shown below:
96
15.2.4.4
>
Setting a new West limit
Use the arrow keys to move the highlight to the ‘Save’ field.
>Now press the left arrow key to rotate the antenna to the maximum
West position possible.
>Press the blue ‘Actions’ key and use up/down arrows and the OK key
to select ‘Set west limit’.
>A popup will be displayed when it is set. Press the OK key to confirm
your setting, as shown below:
97
15.2.4.5
Geo-positioning
If you have a suitable motor, and if the geographical coordinates of your location are known, this function can facilitate finding the individual satellite positions.
Note! Only switch on the geo-positioning function if your DiSEqC motor
supports this function.
To set geo-positioning do the following:
>Use the arrow keys to move the highlight to the field labelled ‘Geo. pos.
(off)’ and press the OK key to display the popup below:
>Use the left/right arrow keys to switch the geo-positioning function ‘on’
or ‘off’.
>Use up/down arrow keys to highlight the ‘E’ or ‘W’ field, and use the OK
key to toggle between ‘E’ (East) and ‘W’ (West) to set the Longitude
value to either East or West.
>Use the arrow keys to select the ‘Longitude’ value field and enter the
geographical longitude with the number keys.
>Now use the arrow keys to highlight the ‘N’ or ‘S’ field and use the OK
key to toggle between ‘N’ (North) and ‘S’ (South) to set the Latitude
value to either North or South.
>Use the arrow keys to highlight the ‘Latitude’ value field and enter the
geographical latitude with the number keys.
>Press the Back key to return to the Antenna configuration screen.
The data relating to your location must be entered as a decimal value, correct
to one decimal place. As the coordinates are often stated in degrees, minutes
98
and seconds, these must be converted to decimal values as follows:
The value for degrees is not affected by the conversion. The minutes are
divided by 60, and rounded to one decimal place. The result of this division is
added to the value for full degrees.
The seconds are not taken into consideration, as they do not affect the first
decimal place.
Example:
Degrees Latitude:
51° 55’ 43.04” N
Degrees Longitude:
0° 39’ 39.27” W
Converting to decimal:
Decimal Latitude:
51 + 55/60 = 51.9º
Decimal Longitude:
0 + 39/60 = 0.7º
These rounded decimal values would then be entered in the latitude and longitude boxes in the geo-positioning popup screen.
15.2.4.6
Setting a satellite position
For each satellite position to be added, follow the instructions given in sections
15.2.4.7 to 15.2.4.13.
When programming satellite positions, it is recommended to start with the satellite that has the most Easterly orbital position. Continue by adding the other
satellites, working your way through in a Westerly direction, until you have
reached the satellite with the most Westerly orbital position. Your receiver is
pre-programmed at the factory for the most popular satellite positions.
In addition, you can configure user-defined satellite positions
(User 1 to User 11) for any orbital position desired.
99
15.2.4.7
Selecting a pre-programmed satellite position
>To add a satellite position to the satellite list, use the arrow keys to
move the highlight to the field labelled ‘Sat new’ and press the OK key.
>A list of the available satellite positions will be displayed, as shown
below:
>Use the up/down arrow keys to select a satellite position you wish to
add to the satellite list and press OK to accept.
If the Geo-positioning function is switched on (see 15.2.4.5 above), the antenna will now be automatically rotated to the programmed satellite position. The
rotating procedure will be indicated by the blinking text ‘turning’ on screen.
If the Geo-positioning function is switched off, you must rotate the antenna to
the desired satellite position manually (see 15.2.4.11 for details).
15.2.4.8 Setting a user-defined satellite position (User satellite)
>To add a user satellite position to the satellite list, use the arrow keys to
move the highlight to the field labelled ‘Sat new’ and press the OK key.
>Now use the up/down arrow keys to highlight a user satellite position
from the list (User 1 to User 11) and press the OK key to accept the
selection, as shown below:
100
>Use the arrow keys to move to the orbital position field and use the
numeric keys to enter the orbital position of the user satellite.
>Use the arrow keys to move the highlight to the ‘W’ or ‘E’ field. Now
press the OK key appropriately to indicate whether this is a westerly
(W) or an easterly (E) orbital position.
If the Geo-Positioning function (see 15.2.4.5) is set to on, you can now use
the yellow key function ‘turn to sat’ (see 15.2.4.15) to rotate the antenna to the
programmed user satellite position.
If the Geo-Positioning function is switched off, you must rotate the antenna to
the desired satellite position manually (see 15.2.4.11).
15.2.4.9
Adjusting the satellite antenna
A test transponder has been set for each satellite, to allow you to point the
antenna at the desired satellite to determine whether you are able to receive
services from the satellite at the position set.
Only once the signal strength and signal quality of this test transponder are
displayed can you adjust the antenna precisely.
15.2.4.10
Test transponder/LNB configuration
To change the data of the test transponder in question, do the following:
>Use the arrow keys to highlight the field under the label ‘Current satellite list’ and press the OK key to open the satellite list.
>Use the up/down arrow keys to mark the satellite position for which you
wish to change the data and confirm by pressing the OK key.
>Now use the arrow keys to highlight the field ‘LNB Config.’ and press
the OK key. The LNB settings page will be displayed. See 8.1.2 for
101
details of configuring the antenna.
>In this menu, enter the data of the test transponder as well as of the
LNB used (see 8.1.2 for more details).
>Press the red ‘Back’ key to return to the settings for the motorised antenna.
15.2.4.11
Positioning antenna manually
To position the antenna manually you can determine the optimum position for
the desired satellite by monitoring the indicators for signal strength and signal
quality. You need to adjust the antenna so that both bar graphs show a maximum value.
>
Use the up/down arrow keys to highlight the ‘Save’ field.
>Now use the right arrow keys (to highlight the field ‘East’) or use the
left arrow key (to highlight the field ‘West’) to rotate the antenna to the
desired position. In each case keep the key pressed down until the
position has been reached.
15.2.4.12
Automatic fine adjustment (Auto focus)
Before saving a satellite position, you should perform the automatic focusing
function which calibrates the antenna for optimum reception.
>Press the blue ‘Actions’ key to open the popup menu and use up/down
arrows and the OK key to select the ‘Auto focus’ option.
>The message popup ‘Auto focus Please Wait...’ will be displayed while
the automatic adjustment procedure is in progress.
15.2.4.13
Saving a satellite position
When you have completed the auto focus procedure, you must still save the
satellite position in memory.
>
Use the arrow keys to highlight the ‘Save’ field and press the OK key.
>A confirmation popup will be displayed when the Satellite position is
stored. Press the OK key to confirm.
If during this checking of the test transponder no pre-programmed position is
recognised, or if the signal is too weak, appropriate messages will be displayed
on screen.
102
15.2.4.14
Current satellite list
The saved satellite positions can be found in the satellite list.
>To rotate the antenna to a position included in the satellite list, use the
arrow keys to highlight the field under the label ‘Current satellite list’
and press the OK key.
>Use the up/down arrow keys to select the desired satellite and press
the OK key to confirm. The antenna will now be rotated to the position
selected. The ongoing rotation will be indicated in the menu by the
blinking message ‘turning’.
15.2.4.15
Turning to a satellite position
To turn the antenna to the position set in the satellite list, your receiver is equipped with a ‘turn to sat’ function.
>Press the yellow ‘Turn to sat’ key to turn the antenna to the satellite
position selected.
15.2.4.16
Deleting a satellite position
To delete a satellite position from the satellite list, do the following:
>Use the arrow keys to highlight the ‘Current satellite list’ field and press
the ok key.
>Use the up/down arrow keys to select the satellite you wish to delete
from the list and press the OK key to confirm.
>Use the arrow keys to highlight the ‘Sat delete’ field and press the OK
key to confirm. A popup confirmation message will appear.
>Use left/right arrow keys to move the highlight to the ‘OK’ option and
press the OK key to confirm the delete operation.
15.2.4.17
Reference position
When installing the external installation, the motor must be set to the reference
position (0°). You can therefore use the function “Go to reference position” to
turn the motor to this position (0°) at any time.
>Press the green ‘Ref. position’ key to turn the antenna automatically to
the reference position.
103
15.2.5
Service Settings
In TechniSat mode the Service Settings menu does not include the ‘HDCP
setting’, and has an extra menu option called ‘Delete all channels’.
>Use up/down arrows and the OK key to select the ‘Delete all channels’
option and select ‘Yes’ from the option to delete all the channels in the
receiver.
15.3TV/Radio Lists Organiser
Using the TV/Radio Lists in TechniSat mode is the same as in freesat mode
(see section 14.5 for details) except the option menu for the complete list of
channels provides a larger range of options to filter the channel list.
The options on the red key drop down are:
>
All channels – no filter is used, and all channels are listed.
>
All free – lists only free-to-air channels.
>
All new – lists new channels.
104
>All found – lists new channels found after searching for new channels.
See section 15.1 for details.
>
All HDTV – lists only channels broadcast in High Definition.
>Provider lists – displays a popup menu to list channels broadcast by a
specific provider.
>Genre lists – as freesat mode, displays a popup allowing you to list
channels in a specific genre.
>Satellites – displays a popup menu to list channels on a specific satellite.
>Languages – displays a popup menu to list channels in a specific language.
15.4Menu language
This TechniSat menu option allows you to change the menu language.
To change the menu language do the following:
>Press the menu key and select ‘Menu language’ from the menu with
the up/down arrow keys and the OK key.
>
Use the up/down arrow keys and the OK key to select a language.
>
Press the blue ‘Help’ key to view a help screen.
105
16 Troubleshooting Guide
16.1The receiver display is blank.
Power may not be connected
>
Check that power lead is plugged into the rear of the receiver.
>Check that power lead is plugged into a mains outlet and that this is
switched on at the wall.
Receiver may be in standby
>If power button on the receiver is RED, press this button or the power
button on the remote control
>If power button on the receiver is not illuminated, the power may not be
connected – see above.
No picture on TV screen
a. Receiver output may not be connected to TV
>Check that either the HDMI lead or the SCART lead is connected correctly to both the receiver and the TV.
b. TV may not be set to the correct AV channel
>
Check each AV channel of the TV until the picture appears.
16.2Glitching picture or sound
>
Check connections between receiver and TV
>Check connection between receiver and satellite antenna – remember
to turn off power to the receiver whilst checking connections.
>
Check signal quality via the STATUS button in the Navigator screen
>
Severe weather such as heavy rain or snow can weaken the signal.
106
16.3No sound
The receiver or the TV may be muted
>Check that the mute button on the remote control or the TV has not
been pressed.
The volume may be level may be too low
>
Check the volume setting by using the remote control
16.4‘No signal’ is displayed on screen
There is no valid signal being received
>Check that the coaxial cable from the satellite antenna is correctly fitted
to the antenna input on the receiver – remember to turn off power to
the receiver whilst checking connections.
>Check that the antenna is correctly fitted and aligned to the correct
satellite.
>Check that there are no obstacles between the antenna and the satellite.
>Severe weather conditions such as heavy rain or snow can block the
signal.
The wrong AV channel is selected
>
Check that the correct AV channel is selected on the TV
16.5 ‘Channel not available’ is displayed on screen
Channel is currently not being broadcast
107
16.6Remote control unit does not work.
Infrared signal may not be received by the receiver
>
Ensure that remote control is pointed directly at the receiver
>Check that the receiver front panel is not obscured by furniture or cabinet doors.
Remote control may be set in an incorrect mode
>Press SAT1 and OK at the same time to ensure that the remote control
is set to the correct mode.
Batteries may not be inserted correctly
>
Check that batteries are correctly orientated and firmly in position.
Battery power may be low
>Try using the remote control close to the receiver – if it works, the battery power is low.
>
Replace batteries.
16.7External storage device is not accessible
The device may not be formatted correctly
>Ensure that the storage device has been formatted for the FAT32 file
system
16.8Cannot access files on PC in LAN mode
The network may not be set up correctly
>Ensure that Ethernet connections have been made between the receiver and the router.
>Check that the ‘Network settings – LAN’ IP mode is set to DHCP client.
If an IP address is not reported, the receiver is not connected to the
router correctly.
The PC may not have a shared directory
>Ensure that the multimedia files are contained in a shared directory on
the PC.
108
16.9Cannot access files on PC in WLAN mode
The USB-WLAN Adaptor may not be connected to the wireless router
>Ensure that a wireless connection has been successful by checking
‘Network settings – WLAN’. Remember that a secure wireless network
will require a WEP or WPA key.
If the wireless network is connected correctly, follow the points for LAN
mode above.
16.10
Unresolved problems
There are several methods of receiving technical assistance for unresolved problems
>
Consult the FAQ section of our website at www.technisat.co.uk
>Contact our customer service department by telephone or e-mail:
0845 467 1935
[email protected]
109
17 Main Menu Structure
110
TechniSat Digital GmbH
TechniPark
54550 Daun/Vulkaneifel
Deutschland
TechniSat Digital S.A.
11, rue Pierre Werner
6832 Betzdorf
Luxemburg
Research and Development:
TechniSat Digital GmbH
Gewerbepark Merbitz Nr. 5
01156 Dresden
Deutschland
TechniSat Digital UK Ltd
45 Sunningdale House
Caldecotte Lake Drive
Milton Keynes
MK7 3HT
United Kingdom
Support:
Customer service helpline:
0845 467 1935
Customer service e-mail:
[email protected]
Website:
www.technisat.co.uk
081107 V5 1124 2233560000400

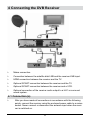
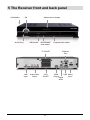
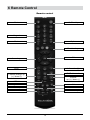

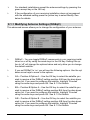
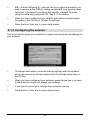
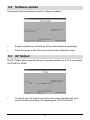
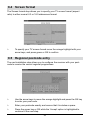

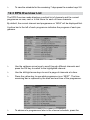
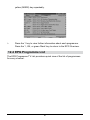
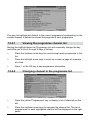
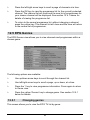
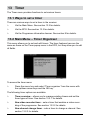
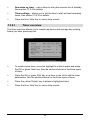
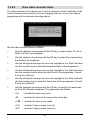

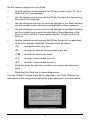
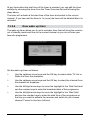
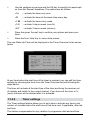
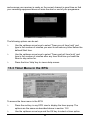
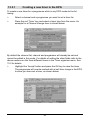
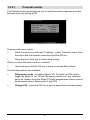
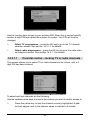
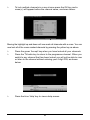
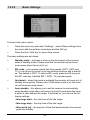
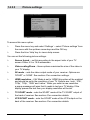
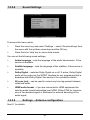

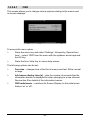
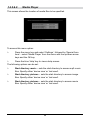
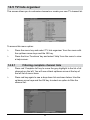

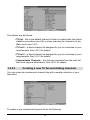
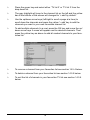
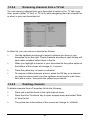
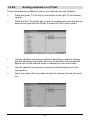
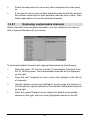
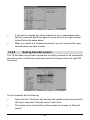
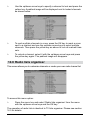
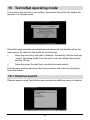
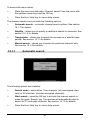
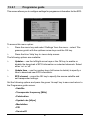
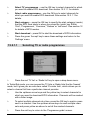
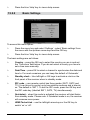
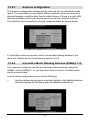
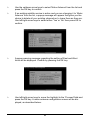
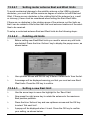
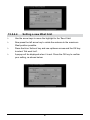

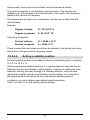
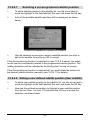

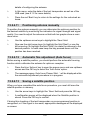
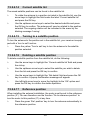
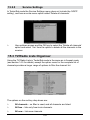
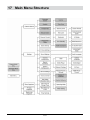


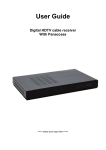
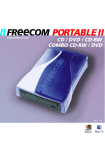


![The Pinball Interface Gadget [PIG] User Manual](http://vs1.manualzilla.com/store/data/005778998_1-4ef7b51c0feccb7069db304928e0e19c-150x150.png)