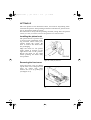
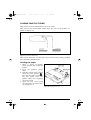
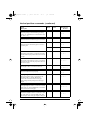
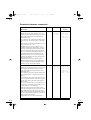
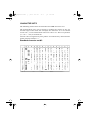
1
Hyo1.frame y [ W 1 1997 N 1 16 œ j œ 1:43 PM USER’S MANUAL RAINBOW COLOUR NX-1040 LC-100 COLOUR QA 80825023 Federal Communications Commission Radio Frequency Interference Statement This equipment has been tested and found to comply with the limits for a Class B digital device, pursuant to Part 15 of FCC Rules. These limits are designed to provide reasonable protection against harmful interference in a residential installation. This equipment generates, uses and can radiate radio frequency energy and, if not installed and used in accordance with the instructions, may cause harmful interference to radio communications. However, there is no guarantee that interference will not ocur in a paricular installation. If this equipment does cause harmful interference to radio or television reception, which can be determined by turning the equipment off and on, the user is encouraged to try to correct the interference by one or more of the following measures: • Reorient or relocate the receiving antenna. • Increase the separation between the equipment and receiver. • Connect the equipment into an outlet on a circuit different from that to which the receiver is connected. • Consult the dealer or an experienced radio/TV technician for help. Unauthorized modifications of this product by the user will void his authority to operate the equipment unless expressly approved by the party responsible for compliance. For compliance with the Federal Noise Interference Standard, this equipment requires a shielded cable. The above statement applies only to printers marketed in the U.S.A. Statement of The Canadian Department of Communications Radio Interference Regulations This digital apparatus does not exceed the Class B limits for radio noise emissions from digital apparatus set out in the Radio Interference Regulations of the Canadian Department of Communications. Le présent appareil numérique n’émet pas de bruits radioélectiques dépassant les limites applicables aux appareils numériques de la classe B prescrites dans le Règlement sur le brouillage radioélectrique édicté par le ministère des Communications du Canada. The above statement applies only to printers marketed in Canada. VDE Statement This device carries the VDE RFI protection mark to certify that it meets the radio interference requirements of the Postal Ordinance No. 243/1991. The additional marking “Vfg. 243/P” expresses in short form that this is a peripheral device (not operable alone) which only individually meets the Class B RFI requirements in accordance with the DIN VDE 0878 part 3/11.89 and the Postal Ordinance 243/1991. If this device is operated in conjunction with other devices within a set-up, in order to take advantage of a “General (Operating) Authorization” in accordance with the Postal Ordinance 243/1991, the complete set-up must comply with the Class B limits in accordance with the DIN VDE 0878 part 3/11.89, as well as satisfy the preconditions in accordance with § 2 and the prerequisites in accordance with § 3 of the Postal Ordinance 243/1991. As a rule, this is only fulfilled when the device is operated in a set-up which has been type-tested and provided with a VDE RFI protection mark with the additional marking “Vfg 243”. Machine Noise Information Ordinance 3. GSGV, January 18, 1991: The sound pressure level at the operator position is equal or less than 70 dB(A) according to ISO 7779. The above statement applies only to printers marketed in Germany. Trademark Acknowledgements NX-1040, NX-1020, NX-1000, LC-100, LC-200, LC-10, SE-10DT, SPC-8K: Star Micronics Co., Ltd. IBM-PC, PS/2, PC-AT, Proprinter, PC-DOS: International Business Machines Corp. MS-DOS, Microsoft BASIC: Microsoft Corporation LX-810, EX-800, FX-850: Seiko Epson Corp. Notice • All rights reserved. Reproduction of any part of this manual in any form whatsoever without STAR’s express permission is forbidden. • The contents of this manual are subject to change without notice. • All efforts have been made to ensure the accuracy of the contents of this manual at the time of press. However, should any errors be detected, STAR would greatly appreciate being informed of them. • The above notwithstanding, STAR can assume no responsibility for any errors in this manual. Copyright 1992 Star Micronics Co., Ltd. HOW TO USE THIS MANUAL This manual is organized into eight chapters. To learn how to make the best use of your printer, you are urged to read through Chapters 1 through 6. Chapters 7 and 8 may be treated as a reference guide for programming operations etc. It assumes a degree of knowledge of the operation of computers. The chapters are as follows: Chapter 1 — Introduction This chapter indicates the primary features of your printer, the names and functions of the printer components, and contains an example of the many font styles that your printer can produce. Chapter 2 — Setting up the Printer This chapter explains how to get the printer unpacked and set up. Read this chapter before you do anything else. Chapter 3 — Paper Installation and Use This chapter describes preparatory printing tasks such as selecting paper types, adjusting the printing gap, and installing paper. Chapter 4 — Control Panel Operations There are a number of controls on the front panel which perform various functions related to paper handling, print modes and font selection. After setting up the printer, read this chapter and try out the procedures to find out how the printer works. Chapter 5 — Default Settings – EDS mode This chapter explains how to use the Electronic DIP Switch (EDS) mode to make your printer match your system and software needs. Chapter 6 — Troubleshooting This section gives a list of check points to follow if your printer is not working properly. It also includes details of routine maintenance operations which you can perform yourself. It is not, however, a complete service manual. Call your authorized service center if you are unsure of your ability to carry out any maintenance or servicing operations on the printer. Chapter 7 — Printer Control Commands This chapter explains the software commands that are used to drive your printer. This section is of use if you are writing or modifying programs to take advantage of the printer’s features. Chapter 8 — Reference This section provides references for your printer, such as specifications, the pinouts of interface connectors, and the character tables. The character table charts show the different character sets available. TABLE OF CONTENTS Chap. 1 INTRODUCTION PRINTER COMPONENTS SUMMARY OF PRINTER FEATURES FONT STYLE EXAMPLE Chap. 2 SETTING UP THE PRINTER PRINTER PLACEMENT UNPACKING AND INSPECTION SETTING UP Installing the platen knob Removing the front cover Installing the ribbon cartridge Installing the front cover Installing the paper guide Connecting the interface cable Configuring your software for the printer Chap. 3 PAPER INSTALLATION AND USE SELECTION OF PAPER ADJUSTING THE PRINTING GAP LOADING FANFOLD FORMS Loading the paper Paper parking Paper unparking Tear off function LOADING SINGLE SHEETS Chap. 4 CONTROL PANEL OPERATIONS BUTTON AND INDICATOR FUNCTIONS ON LINE PAPER FEED PITCH FONT POWER-UP FUNCTIONS Short test mode Long test mode Pitch lock mode Font lock mode Font and Pitch lock mode Dot adjustment mode Hexadecimal dump SWITCH COMBINATION FUNCTIONS Form feed 1 2 4 6 7 7 8 9 9 9 10 11 12 12 13 15 15 16 17 17 20 20 21 21 23 23 23 24 25 25 26 26 27 28 28 28 28 29 30 30 Chap. 5 Paper parking Top of form Forward micro-feed Reverse micro-feed Changing the auto loading position Clearing the buffer/All reset Save Macro Definition CONDITIONS INDICATED BY BEEP TONES 30 31 31 31 32 32 33 34 DEFAULT SETTINGS-EDS MODE 35 35 36 HOW TO SET THE EDS MODE FUNCTIONS OF THE EDS SETTINGS Chap. 6 TROUBLESHOOTING TROUBLESHOOTING MAINTENANCE Chap. 7 PRINTER CONTROL COMMANDS INTRODUCTION Font control commands Character set commands Character size and pitch commands Vertical position commands Horizontal position commands Graphics commands Download character commands Color selection commands Other printer commands Chap. 8 REFERENCE SPECIFICATIONS PINOUT OF INTERFACE CONNECTOR Parallel interface Serial Interface CHARACTER SETS Standard character set #2 International character sets IBM character set #2 Character set #1 IBM special character set 41 41 44 45 45 46 47 49 52 55 57 59 61 62 65 65 67 67 68 69 69 70 71 73 73 INDEX 74 Customer service information 76 Customer response Chapter1.frame y [ W 1 1997 N 1 16 œ j œ 9:02 AM Chap. 1 INTRODUCTION This printer has a full complement of features, making it an excellent partner for a personal computer. It supports the Epson/IBM printer commands and character sets, enabling it to print just about anything your computer can generate, both text and graphics. The selection of paper you can use is as varied as the types of documents you can produce. This printer accepts any of the following papers: • • • • Single sheets (cut forms) and stationery Fanfold forms (continuous forms) Multi-part forms Preprinted forms This Multi-font printer has the following resident (internal) fonts which you can print: • • • • • Draft Courier Sanserif Orator with small caps Orator with lower case The panel has four buttons and ten indicators. The indicators display and beep tones provide immediate, easy to understand feedback when you press the buttons on the control panel. The four buttons can operate in combinations to perform a surprising variety of functions, including saving a micro. The Paper Parking function enables you to keep fanfold forms parked in readiness while printing on single sheet paper. To get acquainted with the printer’s components and capabilities, refer to the information on the pages that follow. 1 11 Chapter1.frame y [ W 2 1997 N 1 16 œ PRINTER COMPONENTS 2 j œ 9:02 AM Chapter1.frame y [ W 3 1997 N 1 16 œ j œ 9:02 AM Component Description Paper guide Aligns single sheets (cut forms) to help the printer detect when paper is inserted. Release lever Releases pressure on the paper. This lever must be back for cut-sheet forms ( ), and forward for fanfold forms ( ). Front cover Protects the print head and other internal components of your printer. Rear cover Protects the tractor feed unit and separates incoming and outgoing fanfold forms. Entry slot For inserting single sheets of paper. Control panel Indicates printer status and makes various control of printer functions simple and convenient. Power switch Switches power on or off. Platen knob Advances the paper manually. Interface connector Connects the computer to the printer. Print head Has a high resolution dot matrix (9-wire) composition for outstanding print quality. Ribbon cartridge Contains the printer ribbon. Adjustment lever Controls print darkness by adjusting for the thickness of forms being printed. Tractors Control the movement of fanfold forms. Clamp lever Clamps the tractor in place. Bail lever Opens and closes the paper bail which holds the paper against the platen. This lever is also used to load paper. 3 Chapter1.frame y [ W 4 1997 N 1 16 œ j œ 9:02 AM SUMMARY OF PRINTER FEATURES Feature Function Dot matrix (9-wire) impact printing Draft and Near Letter-Quality printing. Extensive software support It is compatible with the Epson and IBM standard, and works with any software that supports those printers. AEC mode Auto Emulation Change (AEC) mode is provided to select the proper emulation mode automatically sent from your program. Color printing Magenta, cyan, violet, yellow, orange, and green add a color dimension to your printed output by the color ribbon cartridge as standard. Multi-font support This printer includes Draft, Courier, Sanserif and Orator with small capitals or lower case fonts. Carriage size A standard carriage that prints on fanfold forms up to 254 mm (10 inches) wide and cut forms up to 215.9 mm (8.5 inches) wide. Multi-speed printing In Draft mode, prints at speeds up to: • 180 CPS in 12 pitch • 150 CPS in 10 pitch In Near Letter-Quality mode, prints at speeds up to: • 45 CPS in 12 pitch • 37.5 CPS in 10 pitch. Character spacing Prints in 10, 12, 17, and 20 CPI, as well as proportional spacing. Control panel Button control for fonts, pitches, paper movement, and paper park functions. Font/Pitch Lock Ignores font and pitch selections sent from your computer, and stays on the selected font and pitch with the control panel. Quiet mode Reduces printing noise by approximately 50%. However, printing speed is also reduced. Paper parking Parks fanfold paper. You can print on cut sheet paper without unloading the fanfold forms. 4 Chapter1.frame y [ W 5 1997 N 1 16 œ j œ 9:02 AM Feature Function Print styles Highlighting capability with the following emphasis styles: • Double-high • Double-strike • Double-wide • Emphasized • Italics • Overlining • Quadruple-high • Quadruple-wide • Subscript • Superscript • Underlining. Tear off function Fanfold forms can be removed without advancing blank forms. Multi-part forms Prints up to three-part forms. EDS mode Electronic DIP Switch (EDS) mode allows you to easily change the default settings of your printer to match your system and software needs. 5 Chapter1.frame y [ W 6 1997 N 1 16 œ j œ 9:02 AM FONT STYLE EXAMPLE The following example shows the many font styles your printer can print. 6 Chapter2.frame y [ W 7 1997 N 1 16 œ j œ 9:43 AM Chap. 2 SETTING UP THE PRINTER This chapter describes the following procedures to set up your new printer. If you have optional accessories, refer to the manuals attached to each accessory. • • • • • • Printer placement Unpacking the carton box Installing the platen knob Installing the ribbon cartridge Connecting the printer to your computer Configure your software for the printer 21 PRINTER PLACEMENT Before you start setting up your printer, make sure that you have a suitable place on which to locate it. By “a suitable place”, we mean: • A firm, level surface which is fairly vibration-free • Away from excessive heat (such as direct sunlight, heaters, etc) • Away from excessive humidity • Away from excessive dust • A steady power supply that is not subject to power surges should be connected to the printer. For example, do not connect it to the same circuit as a large, noiseproducing appliance such as a refrigerator or an air conditioner. • Make sure the line voltage is the voltage specified on the printer’s identification plate. • To disconnect the printer, the plug has to be disconnected from the wall socket, which has to be located close to the printer, and easy to access. • Install the printer where there is sufficient room for the fanfold paper stack and any paper being fed in or printed out. • If you are connecting your printer with a parallel interface, make sure that the cable is within 2m (6ft) of the printer. An RS-232 connection using the optional SPC-8K interface converter can be made over longer distances. 7 Chapter2.frame y [ W 8 1997 N 1 16 œ j œ 9:43 AM UNPACKING AND INSPECTION Now check each item in the box against Figure 2-1 to make sure that you have everything (there should be five items). If any of these items are missing, contact your supplier. Figure 2-1. Check to make sure you have all five items: 1) Printer, 2) Platen knob, 3) Ribbon cartridge, 4) Paper guide, and 5) User’s manual. The optional accessories which you may have ordered with your printer are: • Monochrome ribbon cartridge (LC9HD/LC9W), (LC9/LC9W) • Serial-Parallel converter (SPC-8K) • Automatic sheet feeder (SF-10DT) For details of the optional accessories, refer to the manuals that are attached with the SPC-8K and SF-10DT. 8 Chapter2.frame y [ W 9 1997 N 1 16 œ j œ 9:43 AM SETTING UP Place the printer in the desired location, and remove all packing material from the printer. This packing material is intended to prevent damage to the printer while in transit. You will want to keep all the packing material, along with the printer carton, in case you have to move the printer to a new location. Installing the platen knob The platen knob is packed into a recess of the cardboard packing material which held your printer inside the carton. Be sure to remove the knob from the packaging. Align the knob on the platen shaft, which is located on the right-hand side of the printer. Rotate the knob on the shaft before pushing the knob fully into position. Figure 2-2. Installing the platen knob. Removing the front cover Open the front cover by lifting up the back cover using the two grips on either side, then remove the cover by pulling up (see Figure 2-3). Figure 2-3. Open the front cover, and remove it by pulling up. 9 Chapter2.frame y [ W 10 1997 N 1 16 œ j œ 9:43 AM NOTE You can keep the front cover installed on the printer, as shown in Figure 2-4. But, in this case you must take care not to injure your fingers with the tear assist edge. Figure 2-4. The front cover can stay on the printer. Installing the ribbon cartridge Now install the ribbon with the following procedure. 1. Take the slack out of the ribbon by turning the tension knob on the ribbon cartridge counterclockwise as shown by the arrow. 2. Guide the ribbon between the print head and the silver print head shield, making certain that the spindles on the cartridge holder fit into the sockets on the cartridge itself. Figure 2-5. Take out the slack of the ribbon by turning the tension knob on the ribbon cartridge. 3. Make sure that the ribbon is positioned between the print head and the print head shield as shown in Figure 2-6. 4. Take the slack out of the ribbon again by turning the tension knob. Figure 2-6. Installing the ribbon cartridge. 10 Chapter2.frame y [ W 11 1997 N 1 16 œ j œ 9:43 AM NOTE If you want to print with black only, install the optional monochrome ribbon cartridge, LC9 or LC9W. At this monent, you need to change the EDS settings. Figure 2-7. Make sure that the ribbon is positioned correctly. Installing the front cover After you have installed the ribbon cartridge, re-install the front cover. 1. Insert the tabs into the slots on the printer case. 2. Swing down the rear of the front cover to close it. Figure 2-8. Swing down the rear of the front cover after insert the tabs into the slots of the printer case. Leave the front cover closed during normal operation. The cover keeps out dust and dirt and reduces the printer’s operating sounds. Open the cover only to change the ribbon or make an adjustment. 11 Chapter2.frame y [ W 12 1997 N 1 16 œ j œ 9:43 AM Installing the paper guide Follow the procedure below to install the paper guide: 1. Insert the two slots on either side of the paper guide into the two tabs on the rear cover, as shown in Figure 29. 2. Place the paper guide horizontally to use fanfold forms, and vertically to use single sheets. Figure 2-9. Installing the paper guide. Connecting the interface cable Connect the printer to your computer using a standard Centronics parallel interface cable. On a PS/2 or PC/AT-type computer, this means that you use the 25-pin D-type connector at the computer end, and the Amphenol-type 36-pin connector at the printer end. The configuration of the printer’s connector is given in Chapter 8, should you need a cable for connecting to another computer. If you need to connect to a serial port, use the optional Serial-Parallel Converter, SPC-8K. Follow the procedures below to connect the interface cable: 1. Turn off the power switch both the printer and the computer. 2. Connect the interface cable to the printer as shown in Figure 2-10. Make sure that you press the plug into the interface connector. Figure 2-10. Connecting the interface cable. 12 Chapter2.frame y [ W 13 1997 N 1 16 œ j œ 9:43 AM 3. Move both clips inside the extended prongs on the sides of the plug until you hear a click. 4. Connect the other end of the interface cable to your computer. Use your computer instructions to attach the interface cable. Figure 2-11. Move the clips until you hear a click. Configuring your software for the printer Most application software programs let you specify the type of printer you are using so that the software can take full advantage of the printer’s features. Many of these software packages provide an installation or set-up program that presents a list of printers. This printer is set up to emulate the Epson printer commands at the factory. If you want to emulate the IBM printer commands, you can select it with the Electronic DIP Switch (EDS) mode. Choose one of the following (in order of preference) according to your selected Emulation mode: # 1 2 3 4 5 Standard (Epson) mode Star NX-1040/LC-100 Color Star NX-1020/LC-200 Color Epson EX-800 *Epson FX-850 Star NX-1000/LC-10 Color IBM mode *Proprinter III *Proprinter II *Proprinter NOTE *does not support color printing. 13 Chapter2.frame y [ W 14 1997 N 1 16 œ j œ 9:43 AM If your software package does not mention printers by name, but asks instead what features your printer is capable of, the most common questions are: “Can your printer perform a backspace?” and “Can it do a hardware form feed?”. You should answer “Yes” to both these questions. Make sure that the Electronic DIP Switch (EDS) is set for the correct printer emulation, and that you have also selected the appropriate character set. (Refer to Chapter 5 for detailed information on the EDS mode.) If you are in doubt about the configuration of your application software, seek expert advice. Your software supplier will probably be your most qualified reference. 14 Chapter3.frame y [ W 15 1997 N 1 16 œ j œ 9:47 AM Chap. 3 PAPER INSTALLATION AND USE This chapter describes instructions for printing such as selecting paper types, adjusting the printing gap, and installing paper. SELECTION OF PAPER Your printer accepts any of the following types of paper: • Single sheets (cut forms) and stationary Use the friction feed or the optional Automatic Sheet Feeder. • Fanfold forms Fanfold forms have holes along the sides and perforations between the sheets. They are also called sprocket forms, continuous forms, or just plain “computer paper”. Printing on or near the perforations of continuous fanfold forms may reduce printing quality, misalign the fanfold forms, or cause a paper jam. • Multi-part forms You can use multi-part forms that have up to three parts including the original. Use pressure sensitive multi-part forms with both side edges glued and a difference in thickness of 0.05mm or less between the side edges. Figure 3-1 shows the recommended print area for each type of papers. Figure 3-1. Recommended printable areas for different paper types. 15 31 Chapter3.frame y [ W 16 1997 N 1 16 œ j œ 9:47 AM ADJUSTING THE PRINTING GAP The distance between the print head and the platen can be adjusted to accommodate different paper thicknesses. The adjustment lever is located at the left side of the printer. Pushing the adjustment lever towards the rear of the printer narrows the gap; pulling it towards the front of the printer widens the gap. There are five positions, and you can feel the lever clicking into each position. The second position from the rear (marked with “•”) is the one most commonly used for single sheets of paper. Try different positions until you get the best printing results. NOTE Printing with an inappropriate gap may drastically shorten the life of the print head. Figure 3-2. Location of the adjustment lever. The following table provides the recommended lever positions for each paper types as a reference. 16 Paper Type Weight(g/m2) (Each paper) Thickness (mm) (Total) Recommended Lever position Single 52 ~ 90 0.07 ~ 0.12 2nd or 3rd 2-ply 40 ~ 52 0.12 ~ 0.14 2nd or 3rd 3-ply 40 ~ 52 0.18 ~ 0.21 3rd or 4th Chapter3.frame y [ W 17 1997 N 1 16 œ j œ 9:47 AM LOADING FANFOLD FORMS This printer accepts fanfold forms up to 10” wide. This printer can feed fanfold forms from the rear of the printer, as shown in Figure 3-3. Figure 3-3. Paper path for fanfold forms. This section will take you through the procedures for loading, parking and unparking fanfold forms. Loading the paper 1. Place a stack of fanfold paper behind and below the printer. 2. Turn the printer’s power OFF. 3. Pull the release lever toward the front of the printer ( ). This has the effect of releasing the paper from the platen roller, and engaging the tractor feed. 4. Open the rear cover using the two grips on either side, as in Figure 3-4. Figure 3-4. Opening the rear cover. 17 Chapter3.frame y [ W 18 1997 N 1 16 œ j œ 9:47 AM 5. Pass the paper between the printer case and the rear cover. 6. Open both tractor covers and mount the paper by aligning holes with the pins on the tractor unit. Figure 3-5. Mount the fanfold paper over the tractor units. 7. Adjust the spacing of the tractor units by sliding them along the bar, using the clamp lever at the back of each unit to release and lock them in position. When the clamp lever is down, the unit is released, and when it is up, the unit is locked. 8. Now close the tractor covers, again making sure that the paper holes are aligned with the pins on the tractor units. If they are not aligned properly, you will have problems with paper feeding, possibly resulting in tearing and jamming of the paper. Figure 3-6. Adjust the tractor positions to accommodate the width of fanfold forms. 18 Chapter3.frame y [ W 19 1997 N 1 16 œ j œ 9:47 AM 9. Close the rear cover, then set the paper guide in the horizontal position, as shown in Figure 3-7. This will separate the printed from the unprinted paper. Figure 3-7. Close the rear cover, then set the paper guide horizontally. 10. Turn on the power using the switch located at the front of the printer. The printer will beep, indicating that the paper is not yet fully loaded. The indicator will also flash on the control panel to confirm this. 11. Now pull the bail lever toward the front of the printer. The paper will be fed and adjusted past the print head to a position ready for printing. Figure 3-8. Pull the bail lever toward the front of the printer to load paper. NOTE Do not return the bail lever backward before the paper goes through under the bail lever location. The printer indicates with the beep tones to close the bail lever after the paper goes through under the bail lever location. 12. If you want to set the paper to a different position, set the printer off-line by pressing the button, then set the paper by using the micro-feed function. (For details, refer to Chapter 4.) 19 Chapter3.frame y [ W 20 1997 N 1 16 œ j œ 9:47 AM Paper parking After loading fanfold paper, you need not to unload it when you want to print on a cut sheet. The printer will “park” it for you if you follow the procedure below. 1. To begin paper parking, start with the power ON, fanfold paper loaded in printing position, and the release lever toward the front of the printer ( ). 2. Press the button on the control panel to set the printer off-line. The indicator will turn off. 3. Tear off the printed form at the last perforation, leaving not more than about half a page showing above the front cover. If necessary, press the button to feed paper forward until a perforation is located just above the front cover, and tear there. Figure 3-9. Tear off the printed fanfold paper. 4. Press the button while holding the button on the control panel. The printer will automatically feed the fanfold form backward until the paper is completely free of the platen. 5. The indicator on the control panel will blink and a beep will sound. 6. Move the release lever toward the rear of the printer ( ). 7. Mount the paper guide in the upright position. Now you can load single sheets. The fanfold paper remains parked at the back of the printer. Paper unparking When you want to resume using fanfold paper, the procedure is as follows. 1. 2. 3. 4. Remove all cut forms from the printer. Mount the paper guide in the horizontal position. Move the release lever toward the front of the printer ( ). Move the bail lever forward. The printer will automatically feed the parked fanfold paper back into position for printing. NOTE The printer beeps intermittently if you move the release lever while the paper is loaded. 20 Chapter3.frame y [ W 21 1997 N 1 16 œ j œ 9:47 AM Tear off function At the end of printing, use this tear off function to cut off the printed form without advancing blank forms. 1. Press and hold the button for one second while in the online state. The paper will be fed to the tear off position and the printer goes offline state. 2. Tear off the printed form with the tear assist edge of the front cover. 3. Press the button again to go back on-line. The paper automatically returns to the printing position. (If fine adjustmemt is needed use the Micro Feed feature.) LOADING SINGLE SHEETS This section will take you through the procedures for loading single sheets of paper. The paper path for cut forms is shown in Figure 3-10. Figure 3-10. Paper path for cut forms. If you are using the optional Automatic Sheet Feeder, refer to the manual that is attached with the SF-10DT. 21 Chapter3.frame y [ W 22 1997 N 1 16 œ j œ 9:47 AM 1. Raise the paper guide in position on the rear cover of the printer. 2. Adjust the paper guides to match the size of the paper you will be using. Remember that printing will start some distance from the left-hand edge of the carriage. Figure 3-11. Raise the paper guide for single sheets. 3. Turn on the power using the switch located at the front of the printer. The printer will beep, indicating that there is no paper in position for printing. The indicator will also flash on the control panel to confirm this. 4. Make sure that the release lever is at rear position ( ). If fanfold paper is already mounted in the printer, press the button while holding the button to park the paper in the off-line state, then move the release lever toward the rear of the printer. 5. Place a single sheet between the guides, placing the side on which you want to print towards the back of the printer. Gently push the paper down in the guides until you feel it stop. 6. Now pull the bail lever toward the front of the printer. The paper will be fed into the printer and adjusted past the print head to a position ready for printing. Figure 3-12. Place a single sheet between the guides and pull the bail lever forward. NOTE Do not return the bail lever backward before the paper goes through under the bail lever location. The printer indicates with the beep tones to close the bail lever after the paper goes through under the bail lever location. 7. If you want to set the paper to a different position, set the printer off-line by pressing the button, then set the paper position by using the micro-feed function. (For details, refer to Chapter 4.) 22 Chapter4.frame y [ W 23 1997 N 1 16 œ j œ 10:14 AM Chap. 4 CONTROL PANEL OPERATIONS The control panel buttons can be pressed individually to perform the operations indicated by their names. Other functions can be achieved by holding these buttons down when you turn the printer’s power on, or by pressing the control panel buttons in combination. This chapter explains all the button and indicator functions. • Pause printing • Feed paper (fast and slow, forward and reverse) • Park fanfold forms • Set the top-of-form position • Select the print pitch • Select a font • Print test patterns • Prevent software from changing the panel pitch and font selections • Adjusting the print alignment for bi-directional printing • Print a hexadecimal dump • Clear the printer’s buffer • Save macro definition BUTTON AND INDICATOR FUNCTIONS The printer is equipped with four buttons on the control panel. From left to right they are , , and . The following is a brief guide to the buttons and indicators on the control panel. Figure 4-1. Control panel. ON LINE The button sets the printer on-line and off-line. The status changes each time you press the button. When the printer is on-line, it can receive and print data from the computer and will be indicated by the indicator being lit. When the printer is off-line, it stops printing and sends the computer a signal indicating that it cannot accept data. 23 41 Chapter4.frame y [ W 24 1997 N 1 16 œ j œ 10:14 AM The printer powers up in the on-line status when paper is loaded. If paper is not loaded, the printer powers up off-line with the indicator light blinking. When you load paper, the printer goes on-line. You will want to press the button: • Before and after any other panel operation The other panel buttons operate only in the off-line state. Press the button to go off-line. After performing the panel operation(s), press the button again to go back on-line. • To pause during printing If you press the button during printing, the printer stops printing and goes off-line, allowing you to check the printout or change a control panel setting. Printing resumes when you press the button again to go back on-line. • To cut fanfold forms at the end of printing When you hold the button down for one second with the fanfold forms, the printer goes off-line, then the printer also feeds the paper forward approximately two inches forward. This allows you to cut it off just below the last line printed. When you press the button again to go back on-line, the paper feeds backward stopping where you left off. NOTE This function is valid only when the buffer is empty. PAPER FEED If you press and release this button while off-line, the paper will feed forward one line. If you hold the button down, the printer will perform consecutive line feeds. If you also press the button while you are line-feeding, the paper will feed automatically to the top of the next page. This is explained later. If you press the button while on-line, this will alternately select and cancel the Quiet mode. When in Quiet mode, the printer will print slightly slower, but at a reduced noise level. 24 Chapter4.frame y [ W 25 1997 N 1 16 œ j œ 10:14 AM PITCH This button allows you to select the printing pitch. Remember that the printer must be off-line for you to do this. Successive presses of this button will illuminate (and select) the following options in order: Pitch Indicator(s) Pica (10 CPI) 10 CPI Elite (12 CPI) 12 CPI Condensed pica (17 CPI) 10 CPI, COND Condensed elite (20 CPI) 12 CPI, COND Pica proportional 10 CPI, PROP Elite proportional 12 CPI, PROP Condensed pica proportional 10 CPI, PROP, COND Condensed elite proportional 12 CPI, PROP, COND FONT This button selects the font to be printed. Draft font is selected at power-up unless the default settings are changed. To change the font, set the printer off-line, then press the button repeatedly until the indicator beside the desired selection illuminate. The selections cycle in the following order: Font Indicator Draft DRAFT Courier COURIER Sanserif SANSERIF Orator ORATOR The Orator font is unique in two ways. First, it is larger (higher) than the other fonts, which makes it a good choice for text requiring high visibility. You will need a little extra line spacing when Orator is used. Second, there are two versions of the Orator font: one prints small capitals in place of lower-case letters; the other prints lower-case letters, but without descenders. The other fonts do not have a small-capitals option. Lower case will always print as lower case. The version you get when you select Orator from the control panel depends on the EDS settings. If EDS switch D-2 is OFF, lower-case Orator will print as lower case. Otherwise it will print as small capitals. When this button is pressed in on-line, the printer indicates the current status as shown below: 25 Chapter4.frame y [ W 26 1997 N 1 16 œ Status j œ 10:14 AM Indicator Font lock mode DRAFT Pitch lock mode COURIER Macro definition SANSERIF Auto Emulation Change ORATOR POWER-UP FUNCTIONS In addition to their normal functions, all of the control panel buttons perform “special” functions if you hold them down while switching the power button on. Figure 4-2. Power-up functions of control panel. Short test mode If the printer is turned on while the button is pressed, the printer will enter the short self-test mode. The printer will print the version number of the printer’s ROM, followed by seven lines of the character set. Each line will be offset by one character from the one before it. The final result will be something like Figure 4-3. (If the color ribbon is used, each line prints in a different color.) Figure 4-3. Short self-test. 26 Chapter4.frame y [ W 27 1997 N 1 16 œ j œ 10:14 AM Since the self-test prints across the full width of the carriage, it is recommended that the printer is loaded with the widest paper possible to avoid damage to the print head and/or platen. Long test mode If the printer is turned on while the button is pressed, the printer will enter the long self-test mode. The printer will print the version number of the printer’s ROM and the current Electronic DIP Switch (EDS) settings followed by the entire character set printed in each font and pitch available. The test repeats endlessly, so you must turn the power off to stop it. Figure 4-4. Long self-test. Since the self-test prints across the full width of the carriage, it is recommended that the printer is loaded with the widest paper possible to avoid damage to the print head and/or platen. In addition, the total 27 Chapter4.frame y [ W 28 1997 N 1 16 œ j œ 10:14 AM number of lines printed is considerable, more than can be accommodated on a single sheet, so fanfold paper is recommended for this test. Pitch lock mode By holding the button down during power-up, the print pitch can only be selected from the control panel. This prevents software interference. You will hear an acknowledging beep as power comes on. After the beep tone, you can set the printer off-line, select a print pitch, then return to on-line and start printing. The pitch you selected will show with indicators on the control panel and will not be reset or otherwise changed by any commands your software may issue. Font lock mode By holding the button during power-up, fonts can only be selected from the control panel. This prevents software interference. There will be an acknowledging beep. After which you can set the printer off-line, select a font, then return to the on-line state and begin printing. The selected font will not be changed by any commands your software may issue. Font and Pitch lock mode If you want to protect both the font and pitch settings from software changes, press both the and buttons during power-up. There will be two acknowledging beep tones. Pressing these buttons during power-up does not prevent you from making any number of changes later from the control panel. Dot adjustment mode This mode is used to adjust the vertical alignment of text on successive bi-directional passes. After a period of time, your printer may work itself out of alignment on left and right printing passes, appearing most visibly during NLQ printing. This mode will probably be used very rarely. 1. Turn the printer off and then turn it on again while holding down the and buttons. The printer will print something like the following: 2. The printer will feed the paper forwards and backwards during this operation, allowing you to view the paper for optimum alignment. 28 Chapter4.frame y [ W 29 1997 N 1 16 œ j œ 10:14 AM 3. To adjust the printing, use the and buttons. The button will move the second pass to the left. The button will move the second pass to the right. 4. When the two passes are aligned with each other to form one continuous line, the bi-directional alignment test is completed. 5. To exit from this mode, press the button. Hexadecimal dump This feature is useful for programmers who are debugging printing programs and want to see the actual codes the printer is receiving. (Some computers change the codes the programmer intended.) In this mode, all data received will be printed in a hexadecimal dump format, rather than the control codes being acted on as command codes. This mode is accessed with the following procedure: 1. While holding both the and buttons down, turn power ON. A beep tone will be heard. 2. Begin printing. In place of the usual printout you will get a formatted dump showing exactly what data the printer receives. Each line presents sixteen characters, their hexadecimal codes to the left and printable characters printed on the right. 3. At the end of the hexadecimal dump, set the printer off-line with the button. This is necessary to print the last line. 29 Chapter4.frame y [ W 30 1997 N 1 16 œ j œ 10:14 AM SWITCH COMBINATION FUNCTIONS Several additional functions can be achieved by pressing the control panel buttons in combinations. Figure 4-5. Switch combination functions of control panel. Form feed If you are using cut forms, this operation ejects the current page. If you are using fanfold forms, it feeds to the top of the next page. 1. Press the button to set the printer off-line. 2. Press the button and hold it down. The printer will start performing successive line feeds. 3. While holding the button down, press the button, then release both buttons at the same time. The printer will smoothly eject the current page. Paper parking This procedure feeds the paper backward. It parks the fanfold form at the back of the printer so that you can switch to single-sheet feeding (by moving the release lever to the down position). Before parking fanfold forms, tear off all but the last page, leaving less (at least three inches less) than a full page showing above the front cover. 1. Press the button to set the printer off-line. 2. Press the button and hold it down. 3. While holding the button down, press the ton. The paper will be fed out backward. 30 but- Chapter4.frame y [ W 31 1997 N 1 16 œ j œ 10:14 AM Top of form When you power on the printer, the top-of-form position is automatically set to the current position. If this is not where you want the top of the page to be, you can change the top-of-form position as follows: 1. Press the button to set the printer off-line. 2. Move the paper to the desired top-of-form position by pressing the button. 3. Press and hold the button. 4. While holding the button down, press the button, then release both buttons at the same time. The top-of-form position has been set. Forward micro-feed For fine alignment, you can feed the paper forward in very small increments as follows: 1. Press the button to set the printer off-line. 2. Press the button again and hold it down. 3. While holding the button down, press the ton. The paper will start advancing in a series of small steps. When you want to stop, release both buttons. but- Reverse micro-feed You can also feed the paper in small increments in reverse, to return to a higher position on the same page. 1. Press the button to set the printer off-line. 2. Press the button again and hold it down. 3. While holding the button down, press the button. The paper will start moving backwards in a series of small steps. When you want to stop, release both buttons. NOTE Open the bail lever when the printer beeps intermittently near the edge of the paper. 31 Chapter4.frame y [ W 32 1997 N 1 16 œ j œ 10:14 AM Changing the auto loading position Normally, the printer automatically loads the paper to the desired position according to the setting of EDS switch B-2. If you want to change this value, follow this procedure: 1. Load the paper by moving bail lever toward the front of the printer. 2. Change the print position using the micro feed function. 3. After you get the desired position, press the button to save the value. This position will remain unless you power off the printer. If you want to retain this position even after you turn off the power, store it using the Macro Definition function, which is described later. Note that you can only change this value immediately after loading paper. If you feed paper, you cannot change the auto loading value. Clearing the buffer/All reset The printer stores received data in a large memory buffer. This creates a problem when you want to abandon a printing job and restart: the printer may be holding more data in its buffer than it has actually printed, and this unprinted data must be cleared out before restarting. Turning power off is one way to clear the buffer, but there is another way: 1. Halt the printing program on the computer. If printing stops immediately, the buffer is clear and the rest of this procedure is unnecessary. If printing does not stop, continue as follows: 2. Press the button to set the printer off-line. Printing will now stop, but there may be data remaining in the buffer. 3. Press and hold the button. 4. While pressing the button down, press and hold the button. Continue holding these two buttons down, you will hear a beep tone that the buffer is cleared. If you hold these buttons down longer, you will hear three beep tones and the printer has been initialized to the power-on default settings. 5. Release these buttons, make any necessary control panel settings, then set the printer back on-line. It is essential to stop the printing program on the computer before you go off-line. Otherwise, when you go back on-line the computer will start sending data again and the printer will continue printing, with missing data from when the buffer was cleared. 32 Chapter4.frame y [ W 33 1997 N 1 16 œ j œ 10:14 AM Save Macro Definition You can save the current settings to the printer for later use with the following procedure: 1. Press the button to set the printer off-line. 2. Press the button and hold it down. 3. While holding the button down, press the button and hold them down. 4. Release both buttons at the same time after two beep tones to save the current setting. If you release these buttons after three beep tones, the macro has been cleared. NOTE You can store the following settings with this procedure. • Current Font • Current Pitch • Current auto-loading amount for cut forms • Current auto-loading amount for fanfold forms • Current auto-loading amount in ASF mode Data to be stored are controlled in Standard mode and IBM mode separately. For example, the data stored in the Standard mode are not effective in the IBM mode, and vice versa. 33 Chapter4.frame y [ W 34 1997 N 1 16 œ j œ 10:14 AM CONDITIONS INDICATED BY BEEP TONES This section helps you identify the meanings of beep tones. Beep tones Meanings Two seconds tone Printer detects an error condition. Turn off the power switch and turn it on again. Long tone, once sequence, two times Printer detects an error condition. Turn off the power switch and turn it on again. Two long tone Bail lever is closed before the paper goes through the location of the bail lever. Open the bail lever to pass the paper under the bail lever. Four short tone sequence, two times Printer is out of paper. Short tone, once • • • • Short tone, twice • Macro definition is selected. • Quiet mode is cancelled. Short tone, triple • Macro definition is cancelled. • Printer is reset. One-quarter tone • Hexadecimal mode is selected. • Pitch lock mode is selected. • Font lock mode is selected. One-quarter tone, twice Pitch and Font lock mode is selected at a time. Intermittent tone Release lever is moved while the paper is in printing position. 34 Buffer is cleared. Top of form is set. Quiet mode is selected. EDS mode is selected. Chapter5.frame y [ W 35 1997 N 1 16 œ j œ 10:49 AM Chap. 5 DEFAULT SETTINGS-EDS MODE From the control panel you can change the parameters that define how your printer works. These parameters become your power-on settings. This function is called the Electronic DIP Switch (EDS) mode. HOW TO SET THE EDS MODE The EDS mode in this printer has 15 functions that you can set as the power-on default. Turn the printer on while simultaneously holding the , , and buttons. You will hear an acknowledging beep as power comes on. This indicates that you have entered the EDS mode. In EDS mode, the buttons on the control panel are used as shown below in Figure 5-1. 51 Figure 5-1. Button functions in the EDS mode. • Use the button to select the Bank Letter. • Use the button to select the Switch Number. • The indicator shows the current setting, ON or OFF. Use the button to change the settings. • Press the button to print the current settings. • Press the button while holding down the button to save and exit the EDS mode. 35 Chapter5.frame y [ W 36 1997 N 1 16 œ j œ 10:49 AM FUNCTIONS OF THE EDS SETTINGS The printer stores the parameters that you can select from the control panel while in the EDS mode. A default is the setting that the printer will use if none is specifically selected by a program. When you first turn on or later reset your printer these default settings will take effect. By changing the settings, you can alter various printer functions to match your specific requirements. The following questions will help you choose the proper settings. Bank-Switch A-1 A-2 A-3 A-4 B-1 B-2 B-3 B-4 C-1 C-2 C-3 C-4 D-1 D-2 D-3 D-4 E-1 E-2 E-3 E-4 Function Emulation AEC mode RAM usage Auto LF with CR Auto Sheet Feeder Printable area Paper-out (Reserved) ON Standard Enabled Input buffer Disabled Not installed Type A Enabled Leave ON Ink ribbon type (See below) Page Length (See below) Print mode Draft pica Orator lower case NLQ direction CR Centering Character table Standard mode IBM mode Small caps Uni-direction Disabled NLQ Courier pica Lower case Bi-direction Enabled Graphics Set #2 Italics Set #1 IBM code page or International Character Set OFF IBM Disabled Download buffer Enabled Installed Type B Disabled (See below) NOTE The factory default is ON for all functions except B-2 which is set to the OFF position. 36 Chapter5.frame y [ W 37 1997 N 1 16 œ j œ 10:49 AM Switch A-1: Emulation Select the mode compatible with your computer and software. In standard mode the printer operates like the Epson LX-810. In IBM mode it operates like the IBM Proprinter III. The ON position selects standard mode. The OFF position selects IBM mode. Switch A-2: Auto Emulation Change (AEC) Mode This switch selects the Auto Emulation Change (AEC) mode. When the AEC mode is enabled, the printer automatically judges the Emulation which your application program uses. Switch A-3: RAM usage In order to download characters this switch must be in the OFF position. The printer then uses its RAM memory for storing character patterns and provides only a one-line print buffer. If you leave this switch ON, the printer uses its RAM memory as an input buffer, allowing the computer to send faster than the printer prints. Switch A-4: Auto LF with CR If you leave this switch at the ON position, a separate line-feed code is required from your computer to obtain a line feed. If you move this switch to the OFF position, the printer performs both a carriage return and line feed each time it receives a carriage-return code. Most computer systems send a line feed code, or both a carriage return and line feed, at the end of each line, so this switch should be left ON. If you get double line spacing when you expect single spacing, or if lines overprint each other, try changing the setting of this switch. Switch B-1: Auto Sheet Feeder In order to use the optional automatic sheet feeder (SF-10DT), move this switch to the OFF position. Otherwise leave it ON. Switch B-2: Printable area This printer can use two types of printing area format. By putting the switch ON (“Type A”), the top of the first line of printing will start 1/6 inch from the top of the paper, and the printed area will end 1/6 inch from the bottom of the paper. By putting the switch OFF (“Type B”), the first line of printing will start at one inch from the top of the paper, and the printed area will end to print 6 mm from the bottom of the printer. Switch B-3: Paper-out When this switch is OFF the printer ignores the paper-out detector and prints down to (and beyond) the bottom edge. 37 Chapter5.frame y [ W 38 1997 N 1 16 œ j œ 10:49 AM Switch B-4: This switch is used for technical purpose only. Leave this switch ON. Switches C-1 and C-2: Ink ribbon type Your printer can use three types of ink ribbon. You must set these switches according to your using ink ribbon type, as shown below: Ribbon type C-1 C-2 Color/Mono (LC9CL/LC9HD/LC9) ON ON Monochrome (LC9W) ON OFF Monochrome (LC9HD/LC9) OFF ON Switches C-3 and C-4: Page Length Leave these switches ON if you will be using 11-inch forms. You will need to change the switches if you will be using a different page length as shown below: Page Length C-3 C-4 ON ON 11.7 inches/A4 ON OFF 8 inches OFF ON 12 inches OFF OFF 11 inches/Letter Switch D-1: Print mode This switch selects the default print mode. If you leave this switch at the ON position, the draft pica characters are printed at the power-on. If you move this switch to the OFF position, the NLQ Courier pica characters are selected as the power-on default. Switch D-2: Orator lower case There are two versions of the Orator font. When this switch is set ON, you select Orator font with small capitals in place of lower-case letters. When this switch is set OFF, you select Orator font with lower-case letters, but without descenders. Switch D-3: NLQ Direction NLQ characters are printed by two passes of the print head. If you leave this switch at the ON position, the second pass of NLQ printing is performed with the same direction of the first pass, for increased accuracy. If you move this switch to the OFF position, the two passes of NLQ printing are performed in bi-directionally (in alternate directions) for speed. 38 Chapter5.frame y [ W 39 1997 N 1 16 œ j œ 10:49 AM Switch D-4: CR Centering If you set this switch OFF, the carriage moves to the center each time to feed paper near the perforation. This way, you can get better quality of printing around the perforations. It is recommended to match the page length setting to your fanfold paper, otherwise, this function does not work properly at the perforations. If you leave this switch ON, the carriage does not move when feeding paper. Switch E-1: Character Table The action of this switch depends on the mode choosen with switch A-1. Move this switch OFF to select Italic character table with the Standard/Epson emulation mode. If you leave this switch to the ON position, in place of italics you will get the graphic characters, international characters, and mathematical symbols of IBM character set #2. In the IBM emulation mode, ON selects character set #2, which has international characters and fewer control words. OFF selects character set #1, for computers with a 7-bit interface. 39 Chapter5.frame y [ W 40 1997 N 1 16 œ j œ 10:49 AM Switches E-2 to E-4: IBM Code Page or International Character Set Except in the standard italic character set, these switches select the default character code page as shown below: E-2 E-3 E-4 #437 U.S.A. Code Page ON ON ON #850 Multi-lingual60 OFF ON ON #860 Portuguese ON OFF ON #861 Icelandic OFF OFF ON #863 Canadian French ON ON OFF #865 Nordic OFF ON OFF International character sets differ in their assignment of 14 character codes in the Standard Italic character set. See the character tables in Chapter 8. With these switches you can select one of eight character sets as follows: Country 40 E-2 E-3 E-4 U.S.A. ON ON ON France OFF ON ON Germany ON OFF ON England OFF OFF ON Denmark I ON ON OFF Sweden OFF ON OFF Italy ON OFF OFF Spain I OFF OFF OFF Chapter6.frame y [ W 41 1997 N 1 16 œ j œ 0:07 PM Chap. 6 TROUBLESHOOTING This chapter helps you identify printer conditions and problems that you can often correct yourself. Remember that your printer is a highly sophisticated electronic device, which also contains high voltage inside. For that reason, only carry out those operations described in this chapter. CAUTION Any attempt to carry out operations other than those described here may result in electric shock and/or damage to the printer. When carrying out any repairs or maintenance, always follow the instructions carefully. TROUBLESHOOTING Your printer is a reliable piece of precision machinery, which should not cause you any trouble, provided it is used and treated sensibly. However, the few elementary tips below should help you avoid having to make unnecessary service calls. Power switch is on, but power indicator is off • Printer is not getting power. Make sure that the power cord is correctly connected. Verify that the power source works. Printer sounds as if it is printing but does not; Printing is weak • Ribbon is jamming, twisted, or not between the print head and the print head shield. Make sure that the ribbon cartridge is correctly installed. Make sure that the ribbon is between the shield on the print head and the end of the print head. Replace the ribbon. • Adjustment level is set incorrectly. Check the setting of the adjustment lever. Move the lever to a darker setting. Printer test works, but printer does not print when attached to computer • Printer cable has a problem. Make sure that the printer cable is correctly connected at both ends, printer and computer. • Problem with the application program. Refer to your application program manual. • Incorrect emulation is selected. Select the other emulation with the EDS setting. See Chapter 5. 41 61 Chapter6.frame y [ W 42 1997 N 1 16 œ j œ 0:07 PM Printer sounds the audible alarm • This might indicate an error or normal operation. Check the status of the control panel indicators and see “Conditions indicated by beep tones” in Chapter 4. Pitch or font selected is being changed • Your software is overriding your control panel selection. Set your printer in Font/Pitch lock. See “Pitch lock mode” and “Font lock mode” in Chapter 4. Printer does not feed paper • Paper is jamming. Remove all forms and pieces of paper. • Bail lever is closed before paper goes through the bail lever location. Open the bail lever. • Adjustment lever is set incorrectly. Check the setting of the adjustment lever. See “Adjusting the printing gap” in Chapter 3. • Fanfold form is parked. Fanfold form is parked.Move bail lever forward to unpark the fanfold paper. Line spacing is incorrect or overprinting occurs • The tractor positions are incorrectly adjusted. Adjust the tractor positions. See “Loading fanfold forms” in Chapter 3. • Incorrect emulation is selected. Select the other emulation with the EDS setting. See Chapter 5. • Problem with the application program. Refer to your application program manual. • Platen knob was manually turned while the Power indicator was on. Set the top of form. See “Top of form” in Chapter 4. Do not manually turn the platen knob when the power is on. Use the PAPER FEED button. • Forms are jamming between printing surface and the print head. Reset adjustment lever. See “Adjusting the printing gap” in Chapter 3. • Forms are jamming between printing surface and the platen. Clean the surface of the platen roller with a cloth barely dampended with a little alcohol. Incorrect number of lines on a page • Paper is adjusted incorrectly. Set the top of form. See “Top of form” in Chapter 4. • Paper has shifted backwards after several forms printed correctly. Readjust forms. 42 Chapter6.frame y [ W 43 1997 N 1 16 œ j œ 0:07 PM • Incorrect emulation is selected. Select the other emulation with the EDS setting. See Chapter 5. • Problem with the application program. Refer to your application program manual. • Distance printer must pull paper is too far. Move paper closer to the printer. • Paper is getting stuck on cables. Move the paper away from any wires or cables. Line length is wrong; Graphics do not print; Lines are not starting at left margin • Incorrect emulation is selected. Select the other emulation with the EDS setting. See Chapter 5. • Problem with the application program. Refer to your application program manual. Characters are wrong or missing; formatting control codes do not work • Problem with the application program. Refer to your application program manual. • Some wires are missing from the print head. Printer needs repair. • Wrong default setting with EDS switches. Check the current EDS setting. Modify the EDS setting. Dots are missing or print quality is poor • Adjustment lever is set incorrectly. Check the position of the adjustment lever. See Chapter 3. • Print head is not working. Printer needs repair. Forms are smudged or printing is too dark • Adjustment lever is set incorrectly. Check the position of the adjustment lever. Move the lever to a lighter setting (front). See Chapter 3. • Ribbon is twisted or is not between the print head and the print head shield. Install the ribbon correctly. See “Installing the ribbon cartridge” in Chapter 2. • Print head shield (or print head) is damaged or missing. See “Installing the ribbon cartridge” in Chapter 2 to locate the print head shield and print head. Contact your dealer. Printer is unstable; Wrong characters are printed; Left margin changes; Printing stops • Static electricity is resulting from low humidity or interference from nearby electrical devices. Increase the humidity. Move devices with electric motors away from the printer. 43 Chapter6.frame y [ W 44 1997 N 1 16 œ j œ 0:07 PM Left margin moves to the right during printing • The print head is not moving correctly. Check that the ribbon and paper are correctly installed. See “Installing ribbon cartridge” in Chapter 2 and the sections on loading paper in Chapter 3. • Problem with the application program. Refer to your application program manual. • The adjustment lever is in the wrong position. Reset the adjustment lever. See “Adjusting the printing gap” in Chapter 3. Printer is printing beyond side edge of forms • Paper is adjusted incorrectly. Adjust both forms tractors and the paper. • Problem with the application program. Refer to your application program manual. • A print head jam caused by the ribbon or a paper jam. Make sure that the ribbon cartridge is correctly installed. See “Installing the ribbon cartridge” in Chapter 2. Clear the paper jam. Printer case is hot to the touch • Printer’s vents are blocked. Move object away from the air vents, including the bottom of the printer. Printer is noisy • The printer vibrates. Move any objects that touch the printer. Ensure that the printer is on a level, study surface. • Printer covers are open. Close covers. MAINTENANCE Essentially, your printer is a robust piece of equipment, but should be treated with a modicum of care in order to avoid malfunctions. For example: • Keep your printer in a “comfortable” environment. Roughly speaking, if you are comfortable, then the environment is suitable for your printer (see Chapter 2). • Do not subject the printer to physical shocks or excessive vibration. • Avoid over-dusty environments. Dust is the enemy of all precision mechanical devices. • To clean the exterior of the printer, use a cloth barely dampened with either water with a little detergent or a little alcohol, but do not allow any liquid to fall inside the printer. • The interior of the printer may be cleaned with a small cleaner or a compressed-air aerosol (sold for this purpose). When performing this operatrion, be sure not to bend or damage any cable connections or electronic components. 44 Chapter7.frame y [ W 45 1997 N 1 16 œ j œ 0:08 PM Chap. 7 PRINTER CONTROL COMMANDS INTRODUCTION This printer has two emulation modes: Standard/Epson mode and IBM mode. In the Standard/Epson mode, the printer emulates the Epson LX-810, or the EX-800 for color printing. In IBM mode, the printer emulates the IBM Proprinter III. Some additional command codes, which are a superset of these emulations, are also supported. The emulation can be changed by changing Electronic DIP Switch (EDS) setting A1. When A1 is ON, the printer is in Standard/Epson mode; when it is OFF, the printer is in IBM mode (see Chapter 5). In addition, when EDS switch A2 is ON, the printer can automatically sense which emulation is required and will change emulation as necessary. This chapter describes the printer’s control commands. Some commands are common to both Standard and IBM modes. Commands are grouped by function. For each command, the following information is shown: Name: the name of the command. Description: a brief explanation of the command. Mode: the mode(s) in which the command is recognized. Std. Standard/Epson mode (EDS switch A1 is ON) IBM IBM mode (EDS switch A1 is OFF) 71 Both Both Standard/Epson and IBM modes ASCII: the ASCII coding of the command. Control characters are enclosed in angle brackets: For example, <1> means character code 1. Hexadecimal: the command in hexadecimal character codes Decimal: the command in decimal character codes. Parameters for which values must be supplied are indicated by letters such as n, m or d. 45 Chapter7.frame y [ W 46 1997 N 1 16 œ j œ 0:08 PM Name Description Mode ASCII Select print quality Changes print quality to n: Ignored if the FONT LOCK mode was selected during power-up. Std. Font control commands n 1 2 27 120 n Print quality Unchanged Draft Near Letter Quality Return to EDS setting IBM <ESC> “[” “d” <1> <0> n 1B 5B 64 01 00 n 27 91 100 1 0 n Select NLQ font Ignored if the FONT LOCK mode was selected during power-up. n Font 0 Courier 1 Sanserif 2 Courier 7 Orator with small capitals 8 Orator with lower case Both Select font Both <ESC> “k” n 1B 6B n 27 107 n Print quality and Font NLQ Courier NLQ Sanserif NLQ Courier NLQ Orator with small capitals NLQ Orator with lower case Draft quality “(” “(” “F” “)” “)” d 28 28 46 29 29 d 40 40 70 41 41 d Select italic characters Selects italic printing. Std. Select upright characters Cancels italic printing. Std. Emphasized printing Emphasizes subsequent characters. Both 46 1B 78 n Print quality Draft Near Letter Quality n 0 1-127 128 - 254 255 d 0 1 2 7 8 9 <ESC> “x” n Hexadecimal Decimal <ESC> “4” 1B 34 27 52 <ESC> “5” 1B 35 27 53 <ESC> “E” 1B 45 27 69 Chapter7.frame y [ W 47 1997 N 1 16 œ j œ 0:08 PM Font control commands (continued) Name Description Mode Cancel emphasized printing Cancels emphasized printing. Both Double-strike printing Prints subsequent characters with doublestrike action. Both Cancel double-strike printing Cancels double-strike printing. Both Underlining Underlines subsequent characters when n is 1, and cancels underlining when n is 0. Both Overlining Overlines subsequent characters when n is 1, and cancels overlining when n is 0. IBM Superscript Makes subsequent characters superscripts. Both Cancel superscript or subscript Cancels superscript or subscript printing. Both ASCII <ESC> “F” Hexadecimal Decimal 1B 46 27 70 <ESC> “G” 1B 47 27 71 <ESC> “H” 1B 48 27 72 <ESC> “—” n 1B 2D n 27 45 n <ESC> “_” n 1B 5F n 27 95 n <ESC> “S” <0> 1B 53 00 27 83 0 <ESC> “T” 1B 54 27 84 Character set commands Name Description Mode Select Standard character set Std. character set. Both IBM character set IBM character set. Both Select character set #1 Selects character set #1. Both Select character set #2 Selects character set #2. Both ASCII <ESC> “t” <0> Hexadecimal Decimal 1B 74 00 27 116 0 <ESC> “t” <1> 1B 74 01 27 116 1 <ESC> “7” 1B 37 27 55 <ESC> “6” 1B 36 27 54 47 Chapter7.frame y [ W 48 1997 N 1 16 œ j œ 0:08 PM Character set commands (continued) Name Description Mode Select international character set Selects international character set n: Character sets 0 to 7 can be selected as power-up default with EDS switches E2 to E4. For char. sets, see Chapter 8. Std. n 0 1 2 3 4 5 6 7 Char. set U.S.A France Germany England Denmark I Sweden Italy Spain I n 8 9 10 11 12 13 14 64 n2 181 82 92 93 95 97 1B 52 n 27 82 n IBM <ESC>“[”“T” <4> <0> <0> <0> n1 n2 1B 5B 54 04 00 00 00 n1 n2 27 91 84 4 0 0 0 n1 n2 Code page #437 U.S.A. #850 Multi-Lingual #860 Portuguese #861 Icelandic #863 Canadian French #865 Nordic Enable printing of all character codes Enables printing of all characters in the IBM character set, including control codes. Command remains in effect for next n1 + n2 × 256 characters, (n1 and n2 are between 0 and 255). IBM Enable printing of all character codes on next character Enables printing of any character in the IBM character set. IBM Select zero style Causes subsequent zero characters to be printed either with a slash (n=0) or without a slash (n=1). Std. 48 <ESC> “R” n Hexadecimal Decimal Char. set Japan Norway Denmark II Spain II Latin America Korea Irish Legal Select IBM code page Changes code page of current IBM character set according to n1 and n2. A code page can be selected as power-up default with EDS switches E2 to E4. For code pages, see Chapter 8. n1 1 3 3 3 3 3 ASCII <ESC> “\” n1 n2 1B 5C n1 n2 27 92 n1 n2 <ESC> “^” n 1B 5E n 27 94 n <ESC> “~” n 1B 7E n 27 126 n Chapter7.frame y [ W 49 1997 N 1 16 œ j œ 0:08 PM Character size and pitch commands Name Description Mode Pica pitch In Std. mode, changes from elite or semi-condensed to pica pitch (10 cpi) or from condensed elite to condensed pica (17 cpi). In IBM mode, changes from elite or condensed to pica (10 cpi). Ignored if the PITCH LOCK mode was selected during power-up. Std. Elite pitch In Std. mode, changes from pica or semi-condensed to elite pitch (12 cpi) or from condensed pica to condensed elite (20 cpi). In IBM mode, changes from pica or condensed to elite (12 cpi). Ignored if the PITCH LOCK mode was selected during power-up. Std. Condensed printing In Std. mode, changes from pica to condensed pica (17 cpi) or from elite to condensed elite (20 cpi). In IBM mode, changes from pica to condensed pica. Ignored if the PITCH LOCK mode was selected during power-up. Both Cancel condensed printing In Std. mode, changes from condensed pica to normal pica or from condensed elite to normal elite. In IBM mode, always changes to normal pica. Ignored if the PITCH LOCK mode was selected during power-up. Both Proportional spacing Proportionally spaces subsequent characters if n is 1, and cancels if n is 0. Ignored if the PITCH LOCK mode was selected during power-up. Std. ASCII <ESC> “P” Hexadecimal Decimal 1B 50 27 80 IBM <DC2> 12 18 <ESC> “M” 1B 4D 27 77 IBM <ESC> “:” 1B 3A 27 58 <SI> 0F 15 <ESC> <SI> 1B 0F 27 15 <DC2> 12 18 <ESC> “p” n 1B 70 n 27 112 n IBM <ESC> “P” n 1B 50 n 27 80 n 49 Chapter7.frame y [ W 50 1997 N 1 16 œ j œ 0:08 PM Character size and pitch commands (continued) Name Description Mode Select print mode Changes print mode according to n1 and n2. IBM ASCII <ESC>“[”“I” <2> <0> n1 n2 Hexadecimal Decimal 1B 5B 49 02 00 n1 n2 27 91 73 2 0 n1 n2 n1 0 0 0 0 0 0 0 0 0 0 0 0 0 0 1 n2 11 18 46 57 85 92 108 116 171 172 184 185 253 254 238 Font Courier Courier Courier Courier Courier Courier Courier Courier Courier Courier Courier Courier Courier Courier Courier Mode Normal Italic Emphasized Italic emphasized Normal Italic Emphasized Italic emphasized Normal Italic Emphasized Italic emphasized Emphasized Normal Normal Select font and pitch Changes print font and pitch according to n. n 0 1 2 3 4 5 6 7 11 15 Pitch Pica Pica Pica Pica Elite Elite Elite Elite Proportional Proportional Proportional Proportional Pica condensed Pica condensed Elite condensed IBM 1B 49 n 27 73 n Font 10 CPI Draft 12 CPI Draft 10 CPI Near Letter Quality 10 CPI Near Letter Quality 10 CPI Draft Download 12 CPI Draft Download 10 CPI Draft Double-strike 10 CPI Near Letter Quality Download 10 CPI Italic Near Letter Quality 10 CPI Italic Near Letter Quality Download Expanded printing Expands subsequent characters to double width when n is 1, and cancels expansion when n is 0. Both Expanded printing for one line Expands subsequent characters in the current line to double width. Characters return to normal width after next line feed (<LF>) or next <DC4>, <VT>, <FF>, and <ESC> “W” 0 command. Both Cancel one-line expanded printing Cancels one-line expanded printing set with <SO> or <ESC> <SO>. Both 50 <ESC> “I” n <ESC> “W” n 1B 57 n 27 87 n <SO> 0E 14 <ESC> <SO> 1B 0E 27 14 <DC4> 14 20 Chapter7.frame y [ W 51 1997 N 1 16 œ j œ 0:08 PM Character size and pitch commands (continued) Name Description Mode Select master print mode Selects a combined print mode, n, the sum of the values shown below. Asterisked functions are ignored if PITCH LOCK mode was set on powerup. Std. Function Underline Italic Expanded Double strike n 128 64 32 16 Function Emphasized Condensed [*] Proportional [*] Elite [*] 1B 21 n n 8 4 2 1 Std. Select double or quadruple size Sets the size of subsequent characters according to the value of n, as shown below. Line spacing is double or quadrupled accordingly. Std. <ESC> <SP> n 1B 20 n 27 32 n <ESC> “h” n 1B 68 n 27 104 n Character size Normal size Double-high, double-wide Quadruple-high, quadruple-wide Print double-height characters Prints subsequent characters double height without moving the base line or changing the line spacing. Std. Return to normal height Cancels double-height printing. Std. Select character size Selects a combination of character height and width according to d. Double-height characters are always printed at Near Letter Quality. Both d 0 1 2 3 <ESC> “!” n Hexadecimal Decimal 27 33 n Increase character spacing Increases the space between characters by n dots (n can be from 0 – 127). n 0 1 2 ASCII Character height Single height Single height Double height Double height <ESC> “w” <1> 1B 77 01 27 119 1 <ESC> “w” <0> 1B 77 00 27 119 0 “(” “(” “S” “)” “)” d 28 28 53 29 29 d 40 40 83 41 41 d Character width Single width Double width Single width Double width 51 Chapter7.frame y [ W 52 1997 N 1 16 œ j œ 0:08 PM Character size and pitch commands (continued) Name Description Mode Select character height, width and line spacing Selects a combination of character height, width and line spacing according to n and m, as shown below. Does not move the base line. Doubleheight characters are always printed at Near Letter Quality. IBM n 0 1 2 16 17 18 32 33 34 Line spacing Unchanged Unchanged Unchanged Single Single Single Double Double Double Character height Unchanged Single height Double height Unchanged Single height Double height Unchanged Single height Double height m 0 1 2 ASCII <ESC> “[” “@” <4> <0> <0> <0> n m Hexadecimal Decimal 1B 5B 40 04 00 00 00 n m 27 91 64 4 0 0 0 n m Character width Unchanged Single width (same as <ESC> “W” 0) Double width (same as <ESC> “W” 1) Vertical position commands Name Description Mode Set line spacing to 1/8 inch Sets line feed distance to 1/8 inch. Both Set line spacing to 7/72 inch Sets line feed distance to 7/72 inch. Both Set line spacing to 1/6 inch Sets line feed distance to 1/6 inch. Std. Set line spacing to n/216 inch Sets line feed distance to n/216 inch (n is between 0 and 255). If n=0, in Std. mode the command is ignored, in IBM mode the line spacing is set to 0. Both Set line spacing to n/72 inch Sets line feed distance to n/72 inch. n is between 0 and 255 (Std. mode) or between 0 and 85 (IBM mode). If n = 0, line spacing is set to 0. In IBM mode, new line spacing takes effect after next <ESC> “2” command. Both 52 ASCII <ESC> “0” Hexadecimal Decimal 1B 30 27 48 <ESC> “1” 1B 31 27 49 <ESC> “2” 1B 32 27 50 <ESC> “3” n 1B 33 n 27 51 n <ESC> “A” n 1B 41 n 27 65 n Chapter7.frame y [ W 53 1997 N 1 16 œ j œ 0:08 PM Vertical position commands (continued) Name Description Mode Execute <ESC> “A” Sets line spacing to value defined by preceding <ESC> “A” command (or to 1/6 inch if there was no <ESC> “A”). IBM Line feed Prints current line and advances paper to next line. Both Reverse line feed Prints current line and moves paper in reverse to preceding line. Std. ASCII <ESC> “2” Hexadecimal Decimal 1B 32 27 50 <LF> 0A 10 <ESC> <LF> 1B 0A 27 10 IBM <ESC> “]” 1B 5D 27 93 Perform n/216 line feed Feeds paper n/216 inches. n is between 0 and 255. In Std. mode the print position does not move left or right. Both Perform n/216 reverse line feed Feeds paper n/216 inches in reverse. n is between 0 and 255. In Std. mode the print position does not move left or right. Std. Feed paper n lines Feeds paper n lines. n is between 0 and 127. Std. Set top of page at current position Sets current position as top-of-page. IBM Set page length to n lines Sets page length to n lines. n is between 0 and 127(Std. mode) or 1 and 64 (IBM mode). Current line becomes first line of new page. Later changes in line spacing do not alter page length. Both Set page length to n inches Sets page length to n inches. n is between 1 and 32 (Std. mode) or 1 and 64 (IBM mode). Current line becomes first line of new page. Both Set bottom margin Sets bottom margin to n lines. n is between 1 and 127 (Std. mode) or 1 and 255 (IBM mode). Bottom margin is reset when page length is changed. Both <ESC> “J” n 1B 4A n 27 74 n <ESC> “j” n 1B 6A n 27 106 n <ESC> “f” <1> n 1B 66 01 n 27 102 1 n <ESC> “4” 1B 34 27 52 <ESC> “C” n 1B 43 n 27 67 n <ESC> “C” <0> n 1B 43 00 n 27 67 0 n <ESC> “N” n 1B 4E n 27 78 n 53 Chapter7.frame y [ W 54 1997 N 1 16 œ j œ 0:08 PM Vertical position commands (continued) Name Description Mode Cancel bottom margin Cancels the bottom margin. Both Form feed Feeds paper to top of next page and moves print position to left margin. When automatic sheet feeder is in use (EDS switch B1 is OFF), current page is ejected. Both Return to top of current page Feeds paper back to top of current page. Ignored when friction feed is in use. Std. Disable paper-out detector Causes the printer to ignore the paper-out signal, allowing printing to the bottom of the page. Overrides setting of EDS switch B3. Both Enable paper-out detector Causes the printer to stop printing before the bottom of the page is reached. Overrides setting of EDS switch B3. Both Set vertical tab stops Sets new vertical tab stops at lines n1, n2, etc. (n1, n2, etc. are between 1 and 255). Up to 16 vertical tab stops can be set. Tabs must be specified in ascending order. Tabs are based on current line spacing and do not move if line spacing changes. Both Set vertical tab stops every n lines Cancels all current vertical tab stops and sets new vertical tab stops every n lines (n is between 1 and 127). Std. Set vertical tab stops in channel Sets new vertical tab stops in channel n0 (selected by <ESC> “/”). n0 is between 0 and 7. See <ESC> “B” command for parameters n1, n2, ... <0>. Std. <ESC> “b” n0 n1 n2 … <0> 1B n2 27 n2 Select vertical tab channel Selects vertical tab channel number n0 (between 0 and 7). Std. <ESC> “/” n0 1B 2F n0 54 ASCII <ESC> “O” Hexadecimal Decimal 1B 4F 27 79 <FF> 0C 12 <ESC> <FF> 1B 0C 27 12 <ESC> “8” 1B 38 27 56 <ESC> “9” 1B 39 27 57 <ESC> “B” n1 n2 ... <0> 1B 42 n1 n2 ...00 27 66 n1 n2 ... 0 <ESC> “e” <1> n 1B 65 01 n 27 101 1 n 62 n0 n1 … 00 98 n0 n1 … 0 27 47 n0 Chapter7.frame y [ W 55 1997 N 1 16 œ j œ 0:08 PM Vertical position commands (continued) Name Description Mode Vertical tab Feeds paper to next vertical tab stop and moves print position to left margin. Feeds to top of next page if current line is at or below the last vertical tab stop. If no vertical tabs stops are set, performs a line feed. Both ASCII <VT> Hexadecimal Decimal 0B 11 Horizontal position commands Name Description Mode Set left margin Sets left margin at column n (n is between 0 and 255) at current character pitch (pica if proportional spacing is selected). Later changes in pitch do not affect margin. Margin must be at least two columns left of the right margin and within the limits below: Std. Pica Elite Condensed pica Condensed elite 0< =n< = 76 0< =n< = 91 0< =n< = 130 0< =n< = 152 Pica Elite Condensed pica Condensed elite 4< =n< = 80 5< =n< = 96 7< =n< = 137 8< =n< = 160 <ESC> “l” n Hexadecimal Decimal 1B 6C n 27 108 n Expanded pica Expanded elite Expanded condensed pica Expanded condensed elite Set right margin Sets right margin at column n at current character pitch (pica if proportional spacing is selected). Later changes in pitch do not affect margin. Margin must be within the limits below: ASCII Std. 0< =n< = 38 0< =n< = 45 0< =n< = 64 0< =n< = 76 <ESC> “Q” n 1B 51 n 27 81 n Expanded pica Expanded elite Expanded condensed pica Expanded condensed elite Set left and right margins Sets the left margin at column n1 and the right margin at column n2. See the preceding commands for margin restrictions and other notes. IBM Carriage return Prints current line and sets print position to left margin (and performs a line feed, if EDS switch A4 is OFF). Both 2< =n< = 40 3< =n< = 48 4< =n< = 68 4< =n< = 80 <ESC> “X” n1 n2 1B 58 n1 n2 27 88 n1 n2 <CR> 0D 13 55 Chapter7.frame y [ W 56 1997 N 1 16 œ j œ 0:08 PM Horizontal position commands (continued) Name Description Mode Set automatic line feed Sets printer to perform carriage return and line feed each time it receives <CR> code (overriding EDS switch A4 setting). IBM Cancel automatic line feed Sets printer to perform only carriage return when it receives <CR> code (overriding EDS switch A4 setting). IBM Backspace Moves print position one column to the left (ignored if print position is already at left margin). Both Left justify Aligns subsequent text with the left margin, leaving the right margin ragged. Std. Center text Centers subsequent text between the left and right margins. Std. Right justify Aligns subsequent text with the right margin, leaving the left margin ragged. Std. Set horizontal tab stops Sets new horizontal tab stops at columns n1, n2 etc. at current character pitch (pica if proportional spacing is selected). n1, n2 etc. are between 1 and 255. Up to 32 tab stops can be set in Std. mode, up to 64 in IBM mode. Tabs must be specified in ascending order. <ESC> “D” <0> clears all tab stops. Both <ESC> “D” n1 n2 ... <0> 1B 44 n1 n2 ...00 27 68 n1 n2 ... 0 Set horizontal tab stops every n columns Cancels all current horizontal tab stops and sets new horizontal tab stops every n columns (n is between 1 and 127). Std. <ESC> “e” <0> n 1B 65 00 n Reset all tab stops Resets horizontal tab stops to power-up values (tab stop every 8 columns starting at column 9). Also clears all vertical tab stops. IBM Horizontal tab Moves print position to next horizontal tab stop. If underlining is on, tab spaces are not underlined. Both 56 ASCII <ESC> “5” <1> Hexadecimal Decimal 1B 35 01 27 53 1 <ESC> “5” <0> 1B 35 00 27 53 0 <BS> 08 8 <ESC> “a” <0> 1B 61 00 27 97 0 <ESC> “a” <1> 1B 61 01 27 97 1 <ESC> “a” <2> 1B 61 02 27 97 2 27 101 0 n <ESC> “R” 1B 52 27 82 <HT> 09 9 Chapter7.frame y [ W 57 1997 N 1 16 œ j œ 0:08 PM Horizontal position commands (continued) Name Description Mode Relative horizontal tab Moves print position a specified distance right or left (ignored if resulting position is beyond right or left margin). If n2 is in the range 0 to 63, print head moves right (n1 + n2 × 256) dots. To move left, distance in dots is subtracted from 65536 and result split into high and low bytes (n1 and n2). 1 dot = 1/120 inch (draft mode) or 1/180 inch (NLQ mode). Std. Absolute horizontal tab in inches Sets new print position to (n1 + n2 × 256)/60 inches from left margin (ignored if new position is beyond right margin). Std. Absolute horizontal tab in columns Sets new print position to a position n columns in from left margin (n is between 1 and 127). Std. ASCII <ESC> “\” n1 n2 Hexadecimal Decimal 1B 5C n1 n2 27 92 n1 n2 <ESC> “$” n1 n2 1B 24 n1 n2 27 36 n1 n2 <ESC> “f” <0> n 1B 66 00 n 27 102 0 n Graphics commands Name Description Mode Print normal-density graphics Prints bit-image graphics at 60 DPI horizontally. Image is 8 dots high and (n1 + n2 × 256) dots wide. Maximum width is 8 inches (480 dots). m1, m2, ... are 1-byte values from 0 to 255 representing 8 vertical dots, MSB at the top, LSB at the bottom. There must be (n1 + n2 × 256) bytes. Dots beyond right margin are ignored. Afterwards, printer returns to character mode. Both Print double-density graphics Prints bit-image graphics at 120 DPI horizontally (maximum 960 dots wide). See <ESC> “K” command for further information. Both Print double-density, double-speed graphics Prints bit-image graphics at 120 DPI horizontally (maximum 960 dots wide), skipping every second dot in horizontal direction. See <ESC> “K” command for further information. Both ASCII <ESC> “K” n1 n2 m1 m2 ... Hexadecimal Decimal 1B 4B n1 n2 m1 m2 ... 27 75 n1 n2 m1 m2 ... <ESC> “L” n1 n2 m1 m2 ... 1B 4C n1 n2 m1 m2 ... 27 76 n1 n2 m1 m2 ... <ESC> “Y” n1 n2 m1 m2 ... 1B 59 n1 n2 m1 m2 ... 27 89 n1 n2 m1 m2 ... 57 Chapter7.frame y [ W 58 1997 N 1 16 œ j œ 0:08 PM Graphics commands (continued) Name Description Mode Print quadruple-density graphics Prints bit-image graphics at 240 DPI horizontally (maximum 1920 dots wide), skipping every second dot in horizontal direction. See <ESC> “K” command for further information. Both Select graphics mode Selects graphics mode n0 and prints bit-image graphics in this mode. See <ESC> “K” command for information on n1, n2, m1, m2. Std. n0 0 1 2 3 4 5 6 7 <ESC> “*” n0 n1 n2 m1 m2 ... 1B 2A n0 n1 n2 m1 m2 ... Graphics mode Normal-density Double-density Double-density, double-speed Quadruple-density CRT graphics, mode I Plotter graphics CRT graphics, mode II Double-density plotter graphics (60 dots per inch) (120 dots per inch) (120 dots per inch) (240 dots per inch) (80 dots per inch) (72 dots per inch) (90 dots per inch) (144 dots per inch) Select 9-pin graphics mode Selects graphics mode n0 and prints bit-image graphics in this mode. Image is 9 dots high and (n1 + n2 × 256) dots wide. Maximum width is 8 inches. There must be 2 × (n1 + n2 256) data bytes (m1, m2 ...). See <ESC> “K” command for information on m1, m2, etc. Std. 58 1B 5A n1 n2 m1 m2 ... 27 42 n0 n1 n2 m1 m2 ... Std. 0 1 2 3 4 5 6 7 <ESC> “Z” n1 n2 m1 m2 ... Hexadecimal Decimal 27 90 n1 n2 m1 m2 ... Convert graphics density Converts graphics defined by subsequent <ESC> “K”, <ESC> “L”, <ESC> “Y” or <ESC> “Z” commands to density mode defined by <ESC> “*”. n is “K”, “L”, “Y” or “Z” (mode to be converted), m is from 0 to 7, indicating <ESC>“*” mode. m0 ASCII 1B 3F n m 27 63 n m Graphics mode Normal-density Double-density Double-density, double-speed Quadruple-density CRT graphics, mode I Plotter graphics CRT graphics, mode II Double-density plotter graphics <ESC> “?” n m (60 dots per inch) (120 dots per inch) (120 dots per inch) (240 dots per inch) (80 dots per inch) (72 dots per inch) (90 dots per inch) (144 dots per inch) <ESC> “^” n0 n1 n2 m1 m2 ... 1B 5E n0 n1 n2 m1 m2 ... 27 94 n0 n1 n2 m1 m2 ... Chapter7.frame y [ W 59 1997 N 1 16 œ j œ 0:08 PM Download character commands Name Description Mode Define draft download characters Defines one or more new characters (up to 127) and stores them in RAM. EDS switch A3 must be OFF. Draft mode must be selected before this command is used. n1 is character code of first character defined, n2 is code of the last. n1 must be equal to or less than n2. Each character is defined by an attribute byte, m0, and 11 data bytes, m1 – m11. The MSB (bit 7) of m0 is 0 if character is an ascender (entirely above the baseline), 1 if it is a descender (descending below the baseline). Bits 4–6 of m0 indicate the amount of white space in dots (0–7) to the left of the character. Bits 0–3 of m0 indicate width in dots of the character cell, including white space (4–15). White space and character cell attributes only apply to proportionally spaced characters. Each data byte represents a column of 8 dots, MSB representing the top dot, and LSB the bottom dot. Columns overlap one another but adjacent dots in a row cannot both be black. Std. Define NLQ download characters Defines one or more new characters (up to 32) and stores them in RAM. EDS switch A3 must be OFF. NLQ mode must be selected before this command is used. n1 is character code of first character defined and n2 is code of the last. n1 must be equal to or less than n2. m0 specifies the white space to the left of the character, m1 specifies character width, and m2 specifies the white space to the right of the character (all 3 in dots). Next comes character data, d1–dx. Characters are 18 dots high, each column represented by 3 bytes, so there must be 3 × m1 data bytes. Each trio of bytes represents a column of dots. First and second bytes of trio represent 16 vertical dots, MSB of first byte representing the top dot, LSB of second byte the dot 2 places above the bottom dot. The 2 MS bits of third byte represent the bottom 2 dots of the column. Adjacent dots in a row cannot both be black. Std. ASCII <ESC> “&” <0> n1 n2 m0 m1 m2 m3 ... m11 Hexadecimal Decimal 1B 26 00 n1 n2 m0 m1 m2 m3 ... m11 27 38 0 n1 n2 m0 m1 m2 m3 ... m11 <ESC> “&” <0> n1 n2 m0 m1 m2 d1 d2 ... dx 1B 26 00 n1 n2 m0 m1 m2 d1 d2 ... dx 27 38 0 n1 n2 m0 m1 m2 d1 d2 ... dx 59 Chapter7.frame y [ W 60 1997 N 1 16 œ j œ 0:08 PM Download character commands (continued) Name Description Mode Define draft download characters Defines one or more new characters (up to 127) and stores them in RAM. EDS switch A3 must be OFF. Draft mode must be selected before this command is used. Each character is defined by a character code byte, m0, two attribute bytes, m1–m2, and 11 data bytes, d1–d11. The total number of character bytes (m0–m2 and d1–d11) is (n1 + n2 × 256). Each character is represented as a row of dot columns, each column 9 or 12 dots high. m1 indicates whether character is an ascender (using topmost 8 positions of each column), or a descender (using dots 2–9 or 2–12). Bits 4–6 of m2 indicate the amount of white space in dots (0– 7) to the left of the character. Bits 0–3 of m2 indicate the width in dots (4–11) of the character cell, including white space. White space and character cell attributes only apply to proportionally spaced characters. Each data byte represents a column of 8 dots, the MSB representing the top dot, and the LSB the bottom dot. Columns overlap one another but adjacent dots in a row cannot both be black. Each character is followed by an extra blank column not included in the character cell width. IBM Define NLQ download characters Defines one or more new characters (up to 32) and stores them in RAM. EDS switch A3 must be OFF. NLQ mode must be selected before this command is used. n1, n2 and m0–m2 are the same as for the Define draft download characters (IBM) command. Each character is represented by 46 data bytes, d1–d46. Characters are 16 dots high, each column represented by 2 bytes. First and second bytes of pair represent 16 vertical dots, MSB of first byte representing the top dot, LSB of second byte the bottom dot. Columns overlap one another but adjacent dots in a row cannot both be black. Each character is followed by an extra blank column not included in the character cell width. IBM 60 ASCII <ESC> “=” n1 n2 <DC4> m0 m1 m2 d1 d2 ... d11 Hexadecimal Decimal 1B 3D n1 n2 14 m0 m1 m2 d1 d2 ... d11 27 61 n1 n2 20 m0 m1 m2 d1 d2 ... d11 <ESC> “=” n1 n2 <NAK> m0 m1 m2 d1 d2... d46 1B 3D n1 n2 15 m0 m1 m2 d1 d2... d46 27 61 n1 n2 21 m0 m1 m2 d1 d2... d46 Chapter7.frame y [ W 61 1997 N 1 16 œ j œ 0:08 PM Download character commands (continued) Name Description Mode Copy character set from ROM into RAM Copies character set n to corresponding download character RAM area, overwriting any downloaded data already there (ignored if EDS switch A3 is ON). Std. n 0 1 2 Font Courier Sanserif Courier n 7 8 ASCII <ESC> “:” <0> n <0> Hexadecimal Decimal 1B 3A 00 n 00 27 58 0 n 0 Font Orator with small capitals Orator with lower case Select download character set Selects download character set (ignored if EDS switch A3 is ON). Std. Select ROM character set Stops using download character set and returns to ROM character set (ignored if EDS switch A3 is ON). Std. <ESC> “%” <1> 1B 25 01 27 37 1 <ESC> “%” <0> 1B 25 00 27 58 0 Color selection commands Name Description Mode Select print color Selects printing color n as shown below (ignored if color ribbon is not installed). Both n 0 1 2 3 Color Black Magenta Cyan Violet n 4 5 6 Color Black Magenta Cyan Violet n 4 5 6 <ESC> “r” n Hexadecimal Decimal 1B 72 n 27 114 n Color Yellow Orange Green Select print color Selects printing color n as shown below (ignored if color ribbon is not installed). n 0 1 2 3 ASCII Color Yellow Orange Green Both “(” “(” “C” “)” “)” d 28 28 43 29 29 d 40 40 67 41 41 d 61 Chapter7.frame y [ W 62 1997 N 1 16 œ j œ 0:08 PM Other printer commands Name Description Mode Set MSB to 1 Sets most significant bit of each subsequent byte received to 1, allowing use of ASCII codes above 127. Std. Set MSB to 0 Sets most significant bit of each subsequent byte received to 0. Std. Accept MSB as is Cancels preceding commands and accepts most significant bit as it is when sent to the printer. Std. Delete last character sent Deletes last character received (ignored if character has already been printed, or if it is part of a command). Std. Cancel last line Deletes last line currently in print buffer. Both Set printer off-line Sets printer off-line (into not-ready mode). Printer disregards all subsequent characters and commands except <DC1>. Printer's ON LINE indicator does not go off. Std. ASCII <ESC> “>” Hexadecimal Decimal 1B 3E 27 62 <ESC> “=” 1B 3D 27 61 <ESC> “#” 1B 23 27 35 <DEL> 7F 127 <CAN> 18 24 <DC3> 13 19 IBM <ESC> “Q” <3> 1B 51 03 27 81 3 Set printer on-line Puts printer on-line (into ready mode). Command is ignored if printer was set off-line by pressing ON LINE key on control panel. Both Bell Sounds brief beep tone on printer. Both Bi-directional printing Makes subsequent printing bi-directional (faster than uni-directional). Both Uni-directional printing Makes subsequent printing uni-directional, ensuring maximum vertical alignment precision. Both One-line uni-directional printing Returns print head to left margin, then prints remainder of line from left to right. Bi-directional printing resumes on next line. Std. 62 <DC1> 11 17 <BEL> 07 7 <ESC> “U” <0> 1B 55 00 27 85 0 <ESC> “U” <1> 1B 55 01 27 85 1 <ESC> “<“ 1B 3C 27 60 Chapter7.frame y [ W 63 1997 N 1 16 œ j œ 0:08 PM Other printer commands (continued) Name Description Mode Manual feed Selects manual sheet feeding (ignored if EDS switch B1 is ON). Both ASCII <ESC> <EM> <0> Hexadecimal Decimal 1B 19 00 27 25 0 “(” “(” “0” “)” “)” 28 28 30 29 29 40 40 48 41 41 Auto feed Selects automatic sheet feeding from paper tray (ignored if EDS switch B1 is ON). Both <ESC> <EM> <4> 1B 19 04 27 25 4 “(” “(” “4” “)” “)” 28 28 34 29 29 40 40 52 41 41 Eject paper from ASF Ejects current page (ignored if EDS switch B1 is ON). Both <ESC> <EM> “R” 1B 19 52 27 25 82 “(” “(” “R” “)” “)” 28 28 52 29 29 40 40 84 41 41 Set print start position on ASF Skips n/6 inches at top of page (n is equal to or greater than 1). Ignored if EDS switch B1 is ON. Both <ESC> <EM> “T” n 1B 19 54 n 27 25 84 n “(” “(” “T” “)” “)” n 28 28 54 29 29 n 40 40 84 41 41 n Reset printer Re-initializes printer. Clears print buffer and resets settings to power-up values. Does not clear input buffer or change ASF selections. Both Set initial conditions Re-initializes printer to initial conditions specified by n, the sum of the values for the characteristics shown. IBM Function Disable alarm Auto CR with LF Auto LF with CR n 32 16 8 Function 12-inch forms Slashed zero Character set #2 <ESC> “@” 1B 40 27 64 <ESC>“[”“K”<3> <0> <0> <3> n 1B 5B 4B 03 00 00 03 n 27 91 75 3 0 0 3 n n 4 2 1 63 Chapter7.frame 64 y [ W 64 1997 N 1 16 œ j œ 0:08 PM Chapter8.frame y [ W 65 1997 N 1 16 œ j œ 0:21 PM Chap. 8 REFERENCE SPECIFICATIONS Printing system................. Serial Impact Dot-matrix Printing speed................... Pica Elite Draft 150 cps 180 cps Near Letter Quality 37.5 cps 45 cps Print direction................... Bi-directional, logic-seeking Uni-directional, logic-seeking (selectable) Print head......................... 9 pins Life 100 million draft characters Line spacing ..................... 1/6, 1/8, 7/72, n/72, n/216 inches Font styles ........................ Draft, Courier, Sanserif, Orator with small capitals, Orator with lower case Characters........................ ASCII 96 International 16 sets (*) IBM special 111 IBM block graphic 50 IBM code page 6 sets (**) Download 127 * USA, France, Germany, England, Denmark I, Sweden, Italy, Spain I, Japan, Norway, Denmark II, Spain II, Latin America, Korea, Irish, Legal ** #437 (USA), #850 (Multi-Lingual), #860 (Portuguese), #861 (Icelandic), #863 (Canadian French), #865 (Nordic) Number of columns Pica (10 CPI) 80 Elite (12 CPI) 96 Condensed pica (17 CPI) 137 Condensed elite (20 CPI) 160 Proportional Variable Character matrix .............. Draft NLQ Pica 9 × 11 18 × 23 Elite 9×9 18 × 19 Condensed pica 9 × 11 18 × 12 Condensed elite 9×9 18 ×10 Proportional — 18 × n Bit image dot-matrix Normal (60 DPI) Plotter graphics (72 DPI) CRT graphics type I (80 DPI) CRT graphics type II (90 DPI) Double (120 DPI) High-speed double (120 DPI)* 81 (8 (8 (8 (8 (8 (8 or or or or or or 9) 9) 9) 9) 9) 9) × × × × × × 480 576 640 720 960 960 65 Chapter8.frame y [ W 66 1997 N 1 16 œ j œ 0:21 PM Double-density plotter graphics (144 DPI) (8 or 9) × 1152 Quadruple (240 DPI)* (8 or 9) × 1920 * It is impossible to print adjacent dots in the mode marked with an asterisk (*). Paper feed .........................Friction or push tractor feed Paper feed speed................2.9 inches/second max Paper specifications Cut sheet Width Length Thickness Weight 5.5” ~ 8.5” (139.7 ~ 215.9 mm) 5.5” ~ 14.0” (139.7 ~ 355.6 mm) 0.07 ~ 0.12 mm 52 ~ 90 g/m2, 45 ~ 77 kg, 14 ~ 24 lb Fanfold (continuous) Width Length Thickness Weight Copies 4.0” ~ 10.0” (101.6 ~ 254.0 mm) Minimum 5.5” (139.7 mm) Single-ply paper 0.07 ~ 0.12 mm Total for multi-part forms 0.25 mm 52 ~ 82 g/m2, 45 ~ 70 kg, 14 ~ 22 lb Original + 2 copies Maximum buffer size .........Without Download 2 kB With Download 256 Bytes Emulations........................Standard mode: Epson LX-810/EX-800 IBM mode: IBM Proprinter III Interface............................Centronics parallel (standard) RS-232C serial (option) Ribbon type .......................On-carriage, dedicated Color ribbon (Standard) Fabric monochrome ribbon (Option) Ribbon life Color ribbon (LC9CL) 1 million characters (draft pica) Fabric monochrome ribbon (LC9HD/LC9) 1.5/1 million characters (draft pica) Long life fabric ribbon (LC9W) 2.5 million characters (draft pica) Dimensions and Weight Width 396 mm (15.59”) Depth 301 mm (11.85”) Width 120 mm (4.72”) Weight 5.3 Kg (11.7 lb) Power supply ..................... 120VAC, 220VAC, 230VAC, 240VAC, 50/60 Hz (varies according to the country of purchase) Options .............................Fabric ribbon cartridge (LC9HD/LC9) Long life fabric ribbon cartridge (LC9W) Single-bin Automatic Sheet Feeder (SF-10DT) Serial-Parallel Converter (SPC-8K) 66 Chapter8.frame y [ W 67 1997 N 1 16 œ j œ 0:21 PM PINOUT OF INTERFACE CONNECTOR The following describes the pinout of the interface connector (signals which are low when active are overlined). Parallel interface 1 2 3 4 5 6 7 8 9 10 11 12 Pin Name STROBE DATA0 DATA1 DATA2 DATA3 DATA4 DATA5 DATA6 DATA7 ACK BUSY PAPER 13 14 ~ 15 16 17 18 19 ~ 30 31 32 SELECT N/C SIGNAL GND CHASSIS +5V GND RESET ERROR 33 34 ~ 35 36 EXT GND N/C SELECT IN Function Goes from high to low (for > = 0.5 µs) when active High when active High when active High when active High when active High when active High when active High when active High when active 5 µs low pulse acknowledges receipt of data Low when printer ready to receive data High when paper out. Can be disabled with EDS setting High when printer is on-line Signal ground Chassis ground (isolated from signal ground) +5V DC output from printe Twisted pair ground return When this input signal is low, printer is reset Outputs low when printer cannot continue, due to an error External ground Always high 67 Chapter8.frame y [ W 68 1997 N 1 16 œ j œ 0:21 PM Serial Interface Pin Name 1 2 3 4 5 GND TXD RXD RTS CTS 6 7 8 ~ 10 11 N/C GND N/C RCH 12 ~ 19 20 N/C DTR 21 ~ 25 N/C 68 Function Printer’s chassis ground. This pin carries data from the printer. This pin carries data to the printer. This pin is always set space. This pin is Space when the computer is ready to send data. This printer does not check this pin. Signal ground. This printer turn this pin Space when it is ready to receive data. This line carries the same signal as pin 20. This printer turns this pin Space when it is ready to receive data. Chapter8.frame y [ W 69 1997 N 1 16 œ j œ 0:21 PM CHARACTER SETS The following tables show the Standard and IBM character sets. The hexadecimal code can be found by reading the entires at the top and left edges of the table. For example, the character “A” is in column 4 and row 1, so its hexadecimal character code is 41. This is equivalent (4 × 16 + 1 = 65) to decimal 65. Control codes recognized by this printer are indicated by abbreviations inside pointed brackets < >. Standard character set #2 69 Chapter8.frame y [ W 70 1997 N 1 16 œ j œ 0:21 PM International character sets When an international character set is selected by a command from software, the following changes are made in the Standard character set: The command for selecting the international character set is: <ESC> “R” n Where n means character code n, i.e. CHR$(n) in BASIC. The decimal values of n are: 0 1 2 3 4 5 70 U.S.A. 6 France 7 Germany 8 England 9 Denmark I 10 Sweden 11 Italy Spain I Japan Norway Denmark II Spain II 12 13 14 64 Latin America Korea Irish Legal Chapter8.frame y [ W 71 1997 N 1 16 œ j œ 0:21 PM IBM character set #2 Code Page #437 (U.S.A.) Code Page #850 (Multi-lingual) Code Page #860 (Portuguese) Other characters are identical to Code Page #437. Other characters are identical to Code Page #437. 71 Chapter8.frame y [ W 72 1997 N 1 16 œ j œ 0:21 PM Code Page #861 (Icelandic) Code Page #863 (Canadian French) Other characters are identical to Code Page #437. Other characters are identical to Code Page #437. Code Page #865 (Nordic) Other characters are identical to Code Page #437. 72 Chapter8.frame y [ W 73 1997 N 1 16 œ j œ 0:21 PM Character set #1 Other characters are identical to character set #2. The duplication of control codes enables systems with a 7-bit interface to obtain control functions when the most significant bit is set to 1 by the <ESC> “>” command. IBM special character set Additional characters can be printed by special commands. 73 aaaaaaaaaaaaaaaaaaaaaaaaaaaaa INDEX A Absolute horizontal tab, 57 Adjustment lever, 3, 16 All reset, 32 Application software, 13 Auto Emulation Change, 4, 26, 37 Auto feed command, 63 Auto Line Feed, 37 Auto line feed, 56 Auto loading position, 32 Automatic Sheet Feeder, 21, 37 B Backspace, 56 Bail lever, 3, 19, 22 Beep tones, 34 Bell command, 62 Bi-directional printing, 62 Bit image dot-matrix, 65 Bottom margin, 53 Buffer size, 66 Button and indicator functions, 23–26 C Cancel command, 62 Carriage centering, 39 Carriage return, 55 Carton contents, 8 Center text, 56 Character codes, 48 Character matrix, 65 Character pitch commands, 49–52 Character set #1, 47 Character set #2, 47 Character set commands, 47–49 Character size, 51 Character size commands, 49–52 Character spacing, 51 Character table, 39 Clamp lever, 3 Clear the buffer, 32 Code page, 40 Color commands, 61 Color printing, 4, 61 Component, 2–3 Condensed printing, 49 74 Control commands, 45– 63 Control panel, 1, 3, 4, 23–33 Copy characters, 61 D Default settings, 35–40 Dot adjustment mode, 28 Double size printing, 51 Double-density graphics, 57 Double-height characters, 51 Double-speed graphics, 57 Double-strike printing, 47 Download character commands, 59–61 Download character set, 61 Draft, 1, 4, 25, 59, 60, 65 E EDS setting, 35–40 Electronic DIP Switch (EDS) mode, 5, 13, 27, 35–40 Elite pitch, 49 Emphasized printing, 46 Emulation, 37, 66 Entry slot, 3 Expanded printing, 50 F Factory settings, 36 Fanfold forms, 15 Loading, 17–21 Paper path, 17–19 Features, 4–5 Font, 46 Font and Pitch lock mode, 28 FONT button, 20, 22 Font control commands, 46–47 Font lock mode, 4, 26, 28 Font style, 6, 65 Form feed, 30, 54 Forward micro-feed, 31 Friction feed, 21–22 Front cover, 3, 9, 11 G Graphics commands, 57– 58 Graphics density, 58 Graphics mode, 58 Graphics printing, 57–58 H Hexadecimal dump, 29 Horizontal position commands, 55–57 Horizontal tab, 56 Horizontal tab stops, 56 I IBM character set, 48, 65 IBM code page, 40, 48, 65 Ink ribbon type, 38 Interface, 12, 66 Interface connector, 3, 12–13, 67–69 International character set, 40, 48, 65 Italic characters, 46 J Justify Center, 56 Left, 56 Right, 56 L Left justify, 56 Left margin, 55 Line feed, 53 Line spacing, 52 Loading fanfold forms, 17–21 Loading single sheets, 21–22 Locating the printer, 7 Long test mode, 27 M Macro definition, 26, 33 Maintenance, 44 Manual feed command, 63 Margins Left, 55 Right, 55 Master print mode, 51 Micro-feed, 21, 22 Most Significant Bit, 62 Multi-part forms, 15 N Near Letter Quality (NLQ), 4, 38, 46, 59, 60, 65 9-pin graphics, 58 Normal-density graphics, 57 Number of columns, 65 Proportional spacing, 49 O Off-line command, 62 ON LINE button, 19, 20, 21, 22, 23 On-line command, 62 Orator font, 1, 25, 38 Other printer commands, 62–63 Overlining, 47 R RAM usage, 37 Rear cover, 3, 17 Relative horizontal tab, 57 Release lever, 3 Reset printer, 63 Reverse micro-feed, 31 Ribbon cartridge, 3, 10, 66 Right justify, 56 Right margin, 55 ROM character set, 61 P Page length, 38, 53 Paper feed, 66 PAPER FEED button, 20, 22 Paper feed speed, 66 Paper feed trouble, 42 Paper guide, 3, 12 Paper parking, 1, 4, 20, 30 Paper path Fanfold forms, 17–19 Single sheets, 21 Paper specifications, 66 Paper unparking, 20 Paper-out detector, 37, 54 Pica pitch, 49 Pinout of interface connector, 67–69 PITCH button, 25 Pitch commands, 49–52 Pitch lock mode, 4, 26, 28 Platen knob, 3, 9 POWER indicator, 19, 20, 22 Power supply, 66 Power supply trouble, 41 Power switch, 3, 17 Power-up functions, 26– 30 Print area, 15, 37 Print direction, 65 Print head, 3, 65 Print head shield, 10 Print mode, 38, 50 Print quality, 46 Print styles, 5 Printer features, 4–5 Printer placement, 7 Printing gap, 16 Printing speed, 4, 65 Q Quadruple size printing, 51 Quadruple-density graphics, 58 Quiet mode, 4 S Selection of paper, 15 Setting up, 7–14 Short test mode, 26 Single sheets, 15 Loading, 21–22 Paper path, 21 Specifications, 65–66 Standard character set, 47 Superscript, 47 Switch combination functions, 30–33 T Tear assist, 10 Tear-off function, 5, 21 Top of form, 31 Top of page, 53 Tractor, 17 Tractors, 3 Troubleshooting, 41–44 U Underlining, 47 Uni-directional printing, 62 Unpacking and inspection, 8 V Vertical position commands, 52–55 Vertical tab, 55 Vertical tab channel, 54 Vertical tab stops, 54 Z Zero style, 48 75 Customer service information If you experience any technical difficulties with your Star printer, please refer to Chapter 6, “Troubleshooting”. This chapter provides you with easy methods for diagnosing and resolving problems which you may encounter. For further technical support, you should first contact your authorized Star dealer. If you require additional support, Star Micronics offers a wide variety of technical support services. Please use one of the telephone numbers listed below, depending on which country your Star printer was purchased in. Star Micronics Technical Hotline: North America: Hong Kong: Australia: New Zealand: 1-908-572-3300 852-795-2335 61-2-748-4300 64-9-570-1470 Star Micronics FaxBack (Document Retrieval) System: Requires access to a facsimile machine or PC fax board with receive capability North America: 1-908-572-4004 Star Micronics Bulletin Board Service: Requires a computer modem North America: United Kingdom: France: Germany: Netherlands: Australia and New Zealand: 76 1-908-572-5010 44-494-461395 33-1-305807 49-69-780929 31-73-424485 61-2-748-2960 Customer response Star Micronics Co., Ltd. invites your suggestions and comments on your printer and this manual. Please address your correspondence to: Worldwide Headquarters: STAR MICRONICS CO., LTD. 20-10 Nakayoshida Shizuoka, Japan 422-91 Attn. Product Manager North and South America Markets: STAR MICRONICS AMERICA, INC. 70-D Ethel Road West Piscataway, NJ 08854 Attn. Product Manager European Market: STAR MICRONICS DEUTSCHLAND GMBH Westerbachstraße 59 D-60489 Frankfurt F.R. of Germany Attn. Product Manager U.K. Market: STAR MICRONICS U.K., LTD Star House Peregrine Business Park Gomm Road, High Wycombe Bucks. HP13 7DL, U.K. Attn. Product Manager French Market: STAR MICRONICS FRANCE S.A.R.L. 25, rue Michaël Faraday F-78182 St.-Quentin en Yvelines Cedex Attn. Product Manager Asian Market: STAR MICRONICS ASIA LTD. 18/F Tower 2, Enterprise Square 9 Sheung Yuet Road, Kowloon Bay, HONG KONG Attn. Product Manager USERS MANUAL RAINBOW COLOUR NX-1040 LC-100 COLOUR PRINTED IN HONG KONG DOT MATRIX PRINTER QA 80825023