1
ATS2000/3000/4000/4500
Control Panel
Manager’s guide
Version 1.0, April 2003
Aritech is a GE Interlogix brand.
www.aritech.com
Copyright
(c) 2003 GE Interlogix B.V.. All rights reserved. GE Interlogix B.V. grants the right to reprint this manual for internal use only.
GE Interlogix B.V. reserves the right to change information without notice.
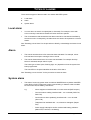
CONTENTS
Welcome ............................................................................................................................................................3
The Advisor MASTER keypad .........................................................................................................................4
The keypad...............................................................................................................................................4
The LCD display .......................................................................................................................................5
The LED’s.................................................................................................................................................5
User identification ............................................................................................................................................6
Duress................................................................................................................................................................9
Door opening option ......................................................................................................................................10
Disarming your system ..................................................................................................................................13
Active zones (When arming) .........................................................................................................................15
Types of alarms ..............................................................................................................................................16
Local alarm .............................................................................................................................................16
Alarm ......................................................................................................................................................16
System alarm..........................................................................................................................................16
What to do when there is an alarm ...............................................................................................................18
Resetting a local alarm...........................................................................................................................18
Resetting a zone in alarm.......................................................................................................................19
Further information about alarms ...........................................................................................................19
Listing past alarm events ..............................................................................................................................21
The Advisor MASTER menu ..........................................................................................................................22
1.
Panel status ..........................................................................................................................................24
2.
Active Zones .........................................................................................................................................25
3.
Zones in alarm ......................................................................................................................................26
4.
Inhibited zones .....................................................................................................................................27
5.
History ...................................................................................................................................................27
6.
Test report.............................................................................................................................................29
7.
Service menu ........................................................................................................................................31
8.
Film counters ........................................................................................................................................33
9.
List Zone names ...................................................................................................................................34
10.
Inhibit zone............................................................................................................................................35
11.
Uninhibit zone.......................................................................................................................................36
12.
Test zone ...............................................................................................................................................37
13.
Start auto Disarm test ..........................................................................................................................38
14.
Program users ......................................................................................................................................39
15.
Time and date .......................................................................................................................................47
16.
Inhibit/uninhibit RAS/DGP ..................................................................................................................49
17.
Enable / disable service technician....................................................................................................50
18.
Reset cameras ......................................................................................................................................51
20.
Door and Floor groups ........................................................................................................................51
21.
Holidays.................................................................................................................................................54
22.
Open doors ...........................................................................................................................................55
ATS2000/3000/4000/4500 Manager’s Guide
1
23.
Unlock, lock, disable and enable doors.............................................................................................55
24.
Print history ..........................................................................................................................................57
Programming records ....................................................................................................................................58
User record – Menu option 14 .......................................................................................................................59
Door group record – Menu option 20 ...........................................................................................................60
Floor group record – Menu option 20...........................................................................................................61
Holiday record – Menu option 20 ..................................................................................................................62
Alarm group record Details to be supplied by the installer ......................................................................63
Timezone record Details to be supplied by the installer ...........................................................................64
Glossary ..........................................................................................................................................................65
Index.................................................................................................................................................................67
2
ATS2000/3000/4000/4500 Manager’s Guide
WELCOME
This manual explains how to use the Advisor MASTER system if you are responsible for
managing the system. There is also a shorter user guide available that explains every day
usage.
The Advisor MASTER panel combines sophisticated design with versatility, which makes
it the leader in its field.
How your system has been programmed?
Your system has been programmed to meet your requirements. However, not all of the
features described in this guide may apply to your system. The system may also have
additional features and these are detailed separately in the user guides for that
equipment.
Depending on how the system has been programmed, some of the system features might
not be authorised to all users.
This guide details all the procedure variations, including the different responses from the
Advisor MASTER system. However, it should be noted that the procedures and Advisor
MASTER responses would be consistent throughout one system. For example, if a list is
presented in a particular way in one function, it will be presented in the same way in all
other functions.
The display text
The terminology used to describe the various parts of your premises or security system
has been programmed specifically for your organisation.
Testing the system
It is important that you regularly test your system to ensure that all installed equipment is
operating properly.
ATS2000/3000/4000/4500 Manager’s Guide
3
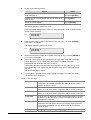
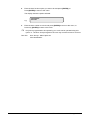
THE ADVISOR MASTER KEYPAD
Figure 1: The keypad
The keypad
0-9
ON
•
Used to enter alphanumeric information.
•
Used after entering your PIN code to tell the system that you want to arm
your area(s).
(Some arming stations may have a # as ON key)
OFF
•
Used after entering your PIN to tell the system that you want to disarm your
area(s).
(Some arming stations may have a * as OFF key)
ENTER
•
Used when information is to be processed (similar to the Enter key on a
computer).
•
Scrolls forward in the menu.
(Some arming stations may have a # as ENTER key)
MENU*
•
Displays the menu login prompt.
•
Backspace to correct an error.
•
Scrolls backwards in the menu.
(Some arming stations may only have the * without the word menu)
+
or
+
MENU+ (▲)
•
Increases the LCD contrast.
MENU+ (▼)
•
Decreases LCD contrast.
NEXT
•
Displays the next items in a menu list.
•
Updates the information displayed.
(Available on some arming stations only)
[CLEAR]
•
Exits the current function or operation and returns to alarm control prompt.
(Available on some arming stations only)
4
ATS2000/3000/4000/4500 Manager’s Guide
+
or
+
[CLEAR] + (▲)
•
Increases the keypad buzzer volume.
[CLEAR] + (▼)
LCD display
•
Decreases the keypad buzzer volume.
•
Used to display messages.
Area LED
•
Used to display the status of the areas.
The LCD display
Messages are displayed on the liquid crystal display (LCD) on the keypad. They guide
you through the functions of the Advisor MASTER SYSTEM, such as identifying
problems, the procedures necessary to rectify problems, programming functions and
other menu options. The display might also show information you have entered on the
keypad.
The first line of the display shows system information and scrolls if there are more
characters than can be displayed, depending on the arming station type. The second line
of the display shows instructions and characters you enter on the keypad.
There Are No Alarms In This Area
Code:
In some instances there can be insufficient space to display all the text being presented
(e.g. a list of areas in your building):
•
If a complete list is displayed on line 1, there is a full stop at the end of the list.
•
If the list is incomplete, there is a ">" at the end of the line and the full stop does not
appear.
By pressing [NEXT], you can then display the rest of the list and update the
information at the same time.
•
If only part of a name or location is shown, it can be moved left by entering the
applicable number preceding the text, and then pressing [ENTER].
Your system might display a custom message instead of the one shown above if it has
been programmed to do so.
e.g.:
Welcome to the ATS
Code:
The LED’s
The red LED Advisor MASTER on the Advisor MASTER keypad, together with the
information shown on the display, allows you to determine the system status at a glance.
Not all LED’s are available on all arming stations.
Area LED’s:
The area LED’s, one for each of the possible security areas, indicate the status of the
particular area.
ATS2000/3000/4000/4500 Manager’s Guide
5
ON
The area is unoccupied and armed.
OFF
The area is occupied and the security system has been set to
allow normal access.
BLINKING
An alarm has occurred in the area while the area was disarmed
(LED flashes slow) or armed (LED flashes fast)
System alarm LED’s: (available on some arming stations only)
The system alarm LED’s indicate a breach of security. One of the system alarm LED’s
flashes when an alarm has occurred (the area’s armed LED also flashes to indicate the
location of the alarm).
DISARMED alarm
Flashes when an alarm has occurred in an occupied area and
the area was disarmed.
24-HOUR alarm
Flashes when an alarm has occurred in an area where a zone
has been programmed for 24-hour alarm.
ARMED alarm
Flashes when an alarm has occurred in an armed area.
TAMPER alarm
Flashes when an alarm has occurred due to tamper.
System faults: (available on some arming stations only)
System faults are displayed on the arming station keypads if the arming station has an
LCD fitted and/or "System faults" LED’s.
Comms Fail
When there is a failure in the communications between THE
Advisor MASTER control panel and a central station.
RAS Fail
When a remote arming station is off-line.
DGP Fail
When a data gathering panel is off-line.
Battery Fail
When the auxiliary battery power is found to be low.
Trouble
Indicates a trouble in the system (RAS fail, low battery, etc).
USER IDENTIFICATION
All users of the Advisor MASTER system need PIN codes and/or cards. The PIN code
has between four and nine digits and is unique for each user. It is a combination of
numbers between 0 and 9.
The PIN code is programmed to let a user do specific tasks, such as arm or disarm the
system. The following three features are used to group functions together and
consequently determine which functions a user can access.
The Advisor MASTER system combines options for alarm and access control. Alarm
control provides options to monitor zones and determine if an alarm should occur when
an intruder is detected (depending if the area the zone is assigned to is armed or
disarmed). Access control provides options to monitor and control access to (parts) of the
premises.
Alarm groups:
Alarm groups contain options available to control the alarm system and perform functions.
6
ATS2000/3000/4000/4500 Manager’s Guide
There are many alarm groups and each one is assigned specific areas and a specific set
of functions. Your user number is assigned to an alarm group and therefore performs only
the functions of that alarm group.
Also, timezones are allocated to each alarm group. This means that the functions of an
alarm group can be further controlled by the time.
Door groups:
Door groups contain options available to gain access to the premises by controlling
doors.
There are at least 10 and up to 128 door groups in your system for controlling access to
doors. Each door group is allocated specific door numbers, and each door number is
allotted a timezone during which you can access the door.
Your user number is assigned to a door group and will therefore access only the doors of
that door group during the specified timezone(s).
Floor groups: (relevant to systems with lift controllers)
Floor groups contain options available to gain access to floors by controlling lifts.
There are at least 10 and up to 64 floor groups in your system. Each door group is
allocated specific floor numbers, and each floor number is allocated a timezone during
which the user can select a floor.
Each user number is assigned to a floor group and will therefore access only the floors of
that floor group during the specified timezone(s).
The Advisor MASTER can therefore be programmed so that a PIN code and/or card can
be used to perform any function or combination of functions during any time period.
For example:
•
An alarm group for Managers can allow access to all Advisor MASTER user
operations at all times.
•
An alarm group for a cleaner can only allow their card to disarm an area for 1 hour
between 17:00 and 23:00.
•
A door group for a night shift worker may allow their PIN code to be used to open a
door between 23:00 and 07:00 only.
Using a PIN code:
When you enter your PIN code on the Advisor MASTER keypad, each key pressed is
indicated by * on the display.
If you enter the wrong PIN code, or a code/card that is not valid at the particular arming
station, the keypad will beep quickly seven times. Correct a wrong code by pressing
[CLEAR] and enter the correct code.
If you access a menu and do not use any keys for two minutes, you will automatically exit
from the menu. It is good practice to exit the menu using 0 [ENTER] or [CLEAR] rather
than the time out facility because if someone else uses the menu before it times out, the
functions they use will be logged against your PIN code.
Users can only access the menu options that their PIN code had been authorised to
access. When they try to access an option that they are not authorised to access, they
get the message: You are not authorised to enter.
ATS2000/3000/4000/4500 Manager’s Guide
7
Also, although users might be able to access a menu option, depending on how their PIN
code has been programmed, they might not be authorised to access all the information
available on it.
See also:
8
Program Users - Menu Option 14.
ATS2000/3000/4000/4500 Manager’s Guide
DURESS
The duress function activates a silent signal to alert security personnel. For example, if
you are asked, under threat, to breach your system security (e.g. forced to disarm the
system), this function lets you do so while at the same time activating the system duress
facility. However, your Advisor MASTER system must be programmed to use it.
You use a duress digit in conjunction with your PIN code. The duress digit is the last digit
of your PIN, plus one (1).
e.g.:
PIN = 1234 - duress digit = 5
If the last digit of your PIN is 9, then the duress digit is 0.
To activate duress
1.
Enter your PIN code without the last digit (e.g. 123)
2.
Enter the duress digit, for example 5 in the case shown above.
3.
Press:
[OFF]
or [ON]
or [ENTER].
To reset duress
To reset the duress facility (i.e. to turn off the signal), enter a valid PIN code.
If duress was activated under conditions that are no longer valid (false alarm), and
it has been reset, you must contact your central station company to ensure that
they take no further action.
Using your PIN code with the duress digit still activates the functions associated
with the PIN.
ATS2000/3000/4000/4500 Manager’s Guide
9
DOOR OPENING OPTION
An Advisor MASTER keypad can be used to open a door by entering a door code.
Your door code is related to your PIN code. It varies, depending on whether your PIN
code has been programmed to allow you to arm/disarm your system, as well as open
doors.
To open a door
1.
The bottom line of the display must show:
Code:
2.
Enter your door code (see Note 3 below).
3.
Press:
[ENTER] to open the door only,
or
[OFF] to disarm the security and open the door if your full PIN
code is entered (see Notes 2 and 3 below),
or
[ON] to arm the security and open the door if your full PIN code is
entered (see Notes 2 and 3 below).
If the door can only be opened for a preset time, the display might show.
e.g.
Shunted zone
Code:
If the door is closed before the end of the maximum open time, the word “Shunted
zone" is removed from the display and the keypad sounds the warning buzzer for
three seconds to indicate that the door is no longer shunted.
If the door is not closed at the end of the shunt time, the display shows "Shunting
Ends" on the top line of the display.
The keypad sounds the warning buzzer for a preset time to let you to close the door
or re-enter your PIN code to extend the suppression time.
1. If the keypad sounds seven quick beeps when you enter your door code, an
invalid code has been entered, or the code is not valid at this arming station.
2. A door code only opens doors that are programmed to be opened by that code.
i.e. The Door Group assigned to the user might not allow access to all doors.
3. In most systems with access control, an "Alarm Code Prefix" is used. The Alarm
Code Prefix is the number of digits not to enter at the beginning of your full PIN
code to make the door code and is programmed by the installer.
e.g. Alarm Code Prefix = 2 digits. Full PIN code = 123456. Door PIN code is
therefore 3456.
For further information see also: Menu option 20, Door Groups, Arming your system
10
ATS2000/3000/4000/4500 Manager’s Guide
When to arm
You arm your premises, or areas in it, when they are unoccupied. Then if an unwanted
event occurs, such as someone forcing a door open, this sets off the alarm.
The time limit when arming
Once you have armed the system, you must leave the area within a preset time as
otherwise you will set off the alarm. The manager of the alarm system will need to inform
everyone about this time limit.
Make sure you know which route to take when leaving the premises.
When you cannot arm/disarm
You might not be able to arm/disarm specific areas in the premises because:
•
Your keypad has been programmed to arm/disarm specific areas in the premises
only. Make sure you know which keypad to use if there is more than one present in
the premises.
•
Your PIN code has been programmed to arm/disarm specific areas only of the
premises. Make sure you know which areas you can arm/disarm.
•
You cannot arm/disarm an area if it has a zone device not properly closed, such as
the magnetic contacts on a door or window. So, before arming, make sure that all
doors and windows are properly closed. If a zone is open when you arm, the keypad
will beep quickly seven times and you will get the message “Active On ….”.
To arm the system
1.
Before beginning, the display must show:
There Are No Alarms In This Area
Code:
2.
Enter your PIN code.
3.
Press [ON].
4.
The result of step 3 depends on how the system has been programmed:
•
Whether the system has been programmed to display the areas assigned to
your PIN.
•
Whether the areas to be armed are normal (see Active Zones on page 15 for
further information).
Areas not displayed:
If your system has not been programmed to display the areas assigned to your PIN
code, any of those areas that were disarmed are now automatically armed (provided
all zones were normal).
The display returns to that shown in step 1.
The area LED(s) illuminate when the arming procedure has been successful.
ATS2000/3000/4000/4500 Manager’s Guide
11
Areas displayed:
If the areas assigned to your PIN are displayed, any of those areas that are
disarmed will be listed.
0-All 1, Office 2, Boardroom 3, Workshop
Enter Area:
e.g.
5.
You have four options:
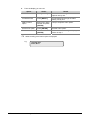
Option
Action
Result
Arm all areas
Press 0 and
[ENTER]
Arms all areas at once. Returns you
to the original display.
Arm individual
areas
Enter area number
and press
[ENTER].
Arms the selected area. If there are
more disarmed areas, they will be
displayed.
When finished
arming, press
[ENTER] again.
6.
12
Cancel
Press [CLEAR]
Exit and return to the original display.
Areas already armed, stay armed.
Display more areas
Press [NEXT]
Displays the next disarmed area in
the list. You can then select an area
to be armed, or continue to press
[NEXT].
The area LED(s) illuminate when the arming procedure has been successful.
ATS2000/3000/4000/4500 Manager’s Guide
DISARMING YOUR SYSTEM
When to disarm
If the area you want to enter is armed, you must first disarm the alarm system before you
can enter, otherwise you will set off the alarm. You will know which area is armed
because its LED on the keypad will be lit red.
The time limit when disarming
On entering the area, the system will allow you a preset time to disarm before an alarm
occurs
Disarming when there is an alarm
If there is an alarm condition when you are disarming the system, the alarm is reset. You
must then find out what caused the alarm and fix it. Use the function “Listing past alarm
events” to get a list of all the alarms that recently have happened (see page 21).
When you cannot disarm
You might not be authorised to disarm specific areas in the premises. See the earlier
section “When you cannot arm/disarm” on page 10 for more information.
To disarm the system
1.
Before commencing, if there is no alarm in the area, the display must show:
There Are No Alarms In This Area
Code:
2.
Enter your PIN code.
3.
Press [OFF].
4.
The result of step 3 depends on:
•
Whether the system has been programmed to display a list of the areas
assigned to your PIN.
Areas not displayed:
If your system has not been programmed to display a list of the areas assigned to
your PIN, all armed areas are now automatically disarmed (provided all zones were
normal). The display returns to that shown in step 1.
Areas displayed:
If a list of the areas assigned to your PIN is displayed, all armed areas are now
listed.
e.g.
0-All 1, Office 2, Boardroom 3, Workshop
Enter Area:
ATS2000/3000/4000/4500 Manager’s Guide
13
From this display you have several options:
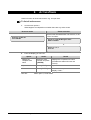
Option
Action
Result
Disarm all areas
Press O and
[ENTER]
Disarms all areas at once. Returns
you to the original display.
Disarm individual
areas
Enter area number
and press
[ENTER].
Disarms the selected area. If there
are more armed areas, they will be
displayed.
When finished
disarming, press
[ENTER] again.
Exit
Press [CLEAR]
and [ENTER]
Display more areas
5.
14
Press [NEXT]
Exit and return to the original display.
Areas already disarmed, stay
disarmed.
Displays the next armed area in the
list. You can then select an area to
be armed, or continue to press
[NEXT].
The area LED(s) extinguish when the disarming procedure has been successful.
ATS2000/3000/4000/4500 Manager’s Guide
ACTIVE ZONES
(WHEN ARMING)
You cannot arm (or disarm, if your system is programmed that way) an area unless all the
zones in that area are normal, as an active zone would usually set off an alarm. For
example, all the doors and windows must be closed.
If a zone is active while you try to arm or disarm an area, the Advisor MASTER keypad
sounds seven quick beeps and displays the active zones.
Active zones are listed either:
One at a time
e.g.
Active On 6. Front Door
NEXT or ENTER
e.g.
Active On 6, 7, 9.
Zone No:
Or
As a list of numbers
From either display:
Action
Result
Press [NEXT]
Update the list of active zones and display the next zones in the
list (if any).
Enter area number
and press
[ENTER].
Display the zone name in full.
Press [CLEAR]
Exit the function and return to the display shown when you were
attempting to arm the system.
After you have determined which zones are active, you must check these and correct the
problem (e.g. close the door), then, exit this display, and try again to arm If you are
unable to close the zone, refer to Menu option 10, Inhibit Zone.
See also:
Arming Your System
Disarming Your System
Inhibit Zone - Menu Option 10
ATS2000/3000/4000/4500 Manager’s Guide
15
TYPES OF ALARMS
There are three types of alarms used in the Advisor MASTER system.
1.
Local alarm
2.
Alarm
3.
System alarm
Local alarm
•
It occurs when an area is occupied (that is, disarmed). For example, zones with
24-hour security have been activated: a firedoor has been opened.
•
The circumstances that caused the local alarm need to be checked and rectified by
someone on site. Consequently, the alarm does not need to be reported to a central
station.
See "Resetting a local alarm" for the procedure to identify, acknowledge and reset a local
alarm.
Alarm
•
The area is armed and one of its zones has been activated. For example, a door
lock has been forced open causing a siren to sound.
•
The area is disarmed and a 24 Hour zone was activated. For example: Hold-up
button is activated, tamper switch is open.
The exact type of alarm (siren, flashing light, etc.) depends on how the system has
been programmed.
The area LED on the panel identifies the location of the alarm.
See "Resetting a zone in alarm" for the procedure to reset an alarm.
System alarm
•
The state of a security system when an Advisor MASTER device (Advisor MASTER
panel, RAS or DGP) is tampered, stops communicating, or detects a fault condition
such as mains fail, low battery, fuse fail etc.
e.g.
16
-
Alarm equipment interfered with or covers removed (DGP tamper)
-
Communications cabling interfered with - cut or shorted (DGP Fail,
RAS Fail)
-
Connections to siren speaker(s) interfered with - cut or shorted.
(Siren Fail)
-
Telephone line interfered with - cut, shorted or damaged. (Report
Fail)
-
Power supply interruption and/or overload and battery problems.
(Mains Fail, Fuse Fail, Low Battery)
ATS2000/3000/4000/4500 Manager’s Guide
•
The exact type of alarm (siren, flashing light, etc.) depends on how the system has
been programmed.
Your system has been programmed to respond to a system alarm in one of two ways:
1.
Latching System Alarms
A PIN code, which is authorised to reset system alarms, must be entered to
reset a system alarm.
The procedure to identify and reset latching system alarms is the same as the
procedure described for "Alarms".
2.
Non-Latching System Alarms
The system alarm resets automatically as soon as the condition causing the
alarm has been rectified.
The procedure to identify the system alarm details is the same as the procedure
described to Identify “Alarms”.
ATS2000/3000/4000/4500 Manager’s Guide
17
WHAT TO DO WHEN THERE IS AN ALARM
When there is an alarm, the LED of the area in alarm flashes red on the keypad. The
message “There are no alarms in this area” is no longer displayed. If it is a local alarm,
this is shown.
An area can have several zones associated with it. When there is an alarm, it is important
that you know exactly which zone is causing the problem so that you can quickly deal
with it.
Resetting a local alarm
•
The keypad emits a discontinuous tone until the local alarm is acknowledged (if
programmed).
•
The LED of the area in alarm flashes red on the keypad, depending on how it has
been programmed.
•
The display shows the following:
Local Alarm
Code:
To reset a local alarm
1.
Press [ENTER] twice.
2.
The zones causing the alarm are listed either:
One at a time
e.g.
Local Alarm On A4. Rear Fire Door
NEXT or ENTER
e.g.
Local Alarm On A4, A5, A9, NEXT
Zone No:
or
As a list of numbers
You now know which zones are causing the problem.
3.
From either display:
Option
18
Action
Result
Acknowledge the
local alarm
Press 0 and
[ENTER]
Acknowledge the local alarm (see
below). Depending on programming a
user code is required to reset.
Display the zone
name in full
Press [NEXT]
Display the complete zone name.
Update the list of
zones
Enter the zone
number and press
[ENTER]
Update the list of zones and display the
next zones in the list (if any).
ATS2000/3000/4000/4500 Manager’s Guide
4.
The display shows:
There Are No Alarms In This Area
Code:
Fix the problem (e.g. close the door).
Re-alarming: If your system has been programmed to remind you about alarms, it
will automatically re-alarm after a preset time unless the cause has been fixed, no
matter how many times you acknowledge the alarm.
When a re-alarm does occur, the letter preceding the zone number will not be
shown.
Resetting a zone in alarm
•
The LED of the area in alarm flashes red on the keypad.
•
The sirens are active (if programmed),
•
When an alarm occurs, the display There Are No Alarms In This Area disappears
from the top line. Instead you see:
Code:
Zones in Tamper Alarm are displayed with a T in front of the zone number.
To reset a zone in alarm
1.
Enter your PIN code.
2.
Press [OFF].
The display shows.
0- All 1, Area One 2, Area Two 3, Area three
Enter Area:
3.
Enter the area number of the zone in alarm (flashing LED) and press [ENTER].
The display shows:
There are no alarms in this area
Code:
4.
Determine where the alarm occurred by reviewing the quick alarm history (page 21).
5.
Fix the problem.
Further information about alarms
•
If the alarm conditions are no longer valid, and the alarm has been reset, you must
contact your central station company to ensure that they take no further action.
ATS2000/3000/4000/4500 Manager’s Guide
19
20
•
If you are unable to reset an alarm because of a faulty zone, refer to the section
Menu option 10, Inhibit zone.
•
You can only reset an alarm for an area that is assigned to your PIN code. If you are
unable to reset the alarm, ensure that the flashing area LED is for an area you can
disarm with your PIN code. If not, your attempt to reset the alarm might will result in
arming/disarming your system.
•
If you are unable to reset a system alarm because the conditions require the service
technician to attend, refer to the section on Inhibit/Uninhibit RAS/DGP (Menu option
16 on page 49).
•
The system can be programmed in such a way that certain alarms (like tamper
alarms) require a specific action from your installer. “Engineer reset req” will appear
in the display and a code will be shown. Pass this information to your installer.
ATS2000/3000/4000/4500 Manager’s Guide
LISTING PAST ALARM EVENTS
This list provides you with a quick alarm history. It is a fast and easy way to review where
alarms have happened. This information is useful when you have had to reset an alarm
without initially checking its cause.
To list past alarm events
1.
Before commencing, the display must show:
There Are No Alarms In This Area
Code:
2.
Press [ENTER] twice.
You do not need to enter your PIN code.
The display shows the following details of each alarm (the most recent alarm is
shown first):
•
The time the alarm occurred as hour and minutes - HH:MM.
•
The date the alarm occurred as day and month - DD:MM.
•
The type and location of the alarm.
e.g.
3.
*13:23 31/10 LOCAL ALARM Zone 1 Fire D> 11-Scan, 0-Exit
From the history display you can now:
Option
Action
Result
Scroll backwards
Press [ENTER]
Scroll backwards through the alarm
history one by one.
Scroll forwards
Press [NEXT]
Scroll forwards through the alarm
history one by one.
Exit
Press 0
Exits and returns to the original
display
View the complete
event description
Press 1
View the complete details for this
event.
See also:
Menu option 5, History.
ATS2000/3000/4000/4500 Manager’s Guide
21
THE ADVISOR MASTER MENU
The Advisor MASTER menu has 23 options available for performing various functions.
Some of the functions are specific only to certain installations, while others might not be
authorised to you. Therefore, you are unlikely to see all the menu options when you
access the menu, but only those which have been programmed to be available when
your PIN code is used. As manager of the system, your PIN code will have been
programmed by the installer to access a wider number of the menu options than the
general user.
If you access the menu and do not use any keys for two minutes, you will automatically
exit from the menu. It is good practice to ensure you exit the menu using 0 [ENTER] or
[CLEAR} rather than the time out facility. If anyone else uses the menu before it times
out, the functions they use would be logged against your PIN code.
If you attempt to select an option that is not authorised to your PIN, the display will show
the message: You are not authorised to enter.
Although you might be authorised to access a menu option, you might not be allowed to
access all the information it provides. You will only be allowed to access information on
the areas assigned to your PIN code.
How the menu option sections are organised in this manual
The menu options are numbered from 1 to 24 in the Advisor MASTER system. This
numbering system is also used in this manual, so menu option 1 “Panel status” is chapter
number 1 “Panel status”.
To access a menu option
1.
Before commencing, ensure that the prompt below is shown on the bottom line of
the display:
There Are No Alarms in This Area
Code:
2.
Press [MENU*].
The display shows:
To Access Menu Enter Code
Code:
3.
Enter your PIN code and press [ENTER]
The display shows:
0-Exit ENTER-Down *-Up
0-Exit, Menu:
22
ATS2000/3000/4000/4500 Manager’s Guide
4.
From the display you can now:
Option
Action
Result
Scroll forward
Press [ENTER]
Scrolls forward through the menu
options one by one.
Scroll backward
Press [MENU*]
Scrolls backward through the alarm
history one by one.
Select a menu
option
Enter menu option
number and press
[ENTER]
Jump to a specific menu option.
Exit a menu option
Press [ENTER]
Exit the menu option.
Exit the menu
Press 0 and
[ENTER]
Exit and return to the original display
shown in step 1
When scrolling, each menu option is displayed.
e.g.
10-Inhibit Zone
0-Exit, Menu:
ATS2000/3000/4000/4500 Manager’s Guide
23
1.
PANEL STATUS
Use this function to list all zones that are in alarm, tamper alarm, inhibited or active and
any system alarms.
There are menu options available that display each of these conditions separately.
However, this option can be used to check on all zones that need attention. The letter
preceding the zone number shows the status:
Code
Zone
status
Meaning
A
Alarm
An alarm has occurred at this zone and must be acknowledged
and reset.
See the section, Alarm, on page 16.
T
Tamper
alarm
An alarm has occurred at this zone due to tamper or accidental
damage. The alarm must be acknowledged and reset. See the
section, Alarm, on page 16.
i
Inhibited
The zone has been excluded from functioning as part of the
security system. It is probably broken or faulty.
a
Active
The zone is activated and needs to be checked and fixed if
necessary to ensure security is maintained. e.g. Close the door.
To list all the state of all zones: Access menu option 1.
What happens next depends on the status of the zones:
No zones in alarm, tamper, inhibited or active
Zones in alarm, tamper alarm, inhibited or
active
Zones are listed either one at a time, or as a list of
numbers:
No Alarms, Tampers, Inhibits, Active
Press ENTER
Summary On A2. Front Door Contact
NEXT or ENTER
or
Summary On A1, A3, T4, i5, i9.
Input No:
From the display you can now:
Option
Result
Display the
complete zone
name
Enter the zone
number and press
[ENTER]
Display the complete zone name
Update the list
Press [NEXT]
Update the list of zone status.
Exit
Press [ENTER]
Exit the menu option and return to the
display “Code:“.
See also:
24
Action
(Excludes the status No alarms,
tampers, inhibit, active).
Menu option 2, Zones active
Menu option 3, Zones in alarm
Menu option 4, Zones inhibited
ATS2000/3000/4000/4500 Manager’s Guide
2.
ACTIVE ZONES
Use this function to list all active zones. e.g. An open door.
To list all active zones
1.
Access menu option 2.
What happens next depends on whether there are any active zones:
No zones active
Zones are active
Active zones are listed either one at a time, or as
a list of numbers:
All Zones are Normal
Press ENTER
Active On 4, PIR IN Managers Office
NEXT or ENTER
or
Active On 1, 2, 6.
Zone No:
2.
From the display you can now:
Option
Action
Result
Display the
complete zone
name
Enter the zone
number and press
[ENTER]
Displays the complete zone name.
Update the list
Press [NEXT]
Updates the list of zone status.
Exit
Press [ENTER]
Exits the menu option and returns to the
display “Code:“.
See also:
(Excludes the status All zones are
normal).
Menu option 1, Panel status
ATS2000/3000/4000/4500 Manager’s Guide
25
3.
ZONES IN ALARM
Use this function to list all zones that are in alarm.
Alarms must be acknowledged and reset. See the section
What to do when there is an alarm on page 18.
To list all zones in alarm
1.
Access menu option 3.
What happens next depends on whether there are zones in alarm:
No zones in alarm
Zones are in alarm
Zones in alarm are listed either one at a time, or
as a list of numbers:
No Alarms
Press ENTER
Alarm On 3, Fire Escape Door
NEXT or ENTER
or
Alarm On 1, T2, 6.
Zone No:
2.
From the display you can now:
Option
Action
Result
Display the
complete zone
name
Enter the zone
number and press
[ENTER]
Displays the complete zone name.
Update the list
Press [NEXT]
Updates the list of zone status.
Exit
Press [ENTER]
Exits the menu option.
(Excludes the status No alarms).
A ‘T’ preceding the zone number identifies tamper alarms.
See also:
26
Types of alarms
Menu option 1, Panel status
What to do when there is an alarm
ATS2000/3000/4000/4500 Manager’s Guide
4.
INHIBITED ZONES
Use this function to list all inhibited zones.
You inhibit a zone to exclude it from the security system when it is broken or faulty. This
stops it causing an alarm. Use this function to determine which zones are not operating
properly and need attention.
To list all inhibited zones
1.
Access menu option 4.
What happens next depends on whether there are inhibited zones.
No inhibited zones
Zones are inhibited
Inhibited zones are listed either one at a time, or
as a list of numbers:
No Inhibited Zones.
Press ENTER
Inhibited On 4. Beam Across Bay
NEXT or ENTER
or
Inhibited On 1, 2, 6.
Zone No:
2.
From the display you can now:
Option
Action
Result
Display the
complete zone
name
Enter the zone
number and press
[ENTER]
Displays the complete zone name.
Update the list
Press [NEXT]
Updates the list of zone status.
Exit
Press [ENTER]
Exits the menu option.
See also:
(Excludes the status No inhibited
zones).
Menu option 1, Panel status
5.
HISTORY
Use this function to list past events of the system history, including alarms, access to the
menu, etc. You can determine events such as the time that an alarm occurred, the time it
was reset and who reset it, the time the system was disarmed in the morning, etc.
Alarm Events:
All events related to the alarm system.
Log Only Events:
Events not reported to the central station but are instead sent to
a local printer or computer.
e.g.: Access Granted/Denied at doors etc.
ATS2000/3000/4000/4500 Manager’s Guide
27
Example of one event:
13:49 26/11 Menu Entered at Keypad 1>
1-Scan, 0-Exit
The top line of the display shows:
•
The time of the event in hours and minutes - HH:MM.
•
The date of the event as day and month - DD/MM.
•
The type of event eg. Menu Entered.
•
The location of the event e.g. RAS 1 = Remote Arming Station 1.
•
The user's number and name (off display)
The events are displayed in reverse chronological order; i.e. the last event is the first
shown.
To list the system history
1.
Access menu option 5.
The display shows:
1-Alarm Events 2-Log Only Events
Option:
2.
Select which event list you want to look at by:
- Pressing 1 and [ENTER] to list alarm events, or
- Pressing 2 and [ENTER] to list log only events.
3.
From the Event display you can now:
Option
28
Action
Result
Scroll forward
Press [MENU*]
Scrolls forward through the event list
one by one.
Scroll backward
Press [ENTER]
Scrolls backward through the alarm
history one by one.
Exit history
Press 0
Exit event history and return to the
menu.
Scan the display to
view all details
Press 1
Scans the display to view all details for
an event (e.g. user name number and
name).
ATS2000/3000/4000/4500 Manager’s Guide
6.
TEST REPORT
Use this function to display the results of the Disarm Test or Arm Test.
Disarm test report:
The test results to see if specific zones and cameras are
operating correctly. The zones need to be programmed to
be included in the test, and operate when areas are
disarmed. All cameras are tested.
The results of the camera tests are only displayed if the
user doing the disarm test has been programmed to test
cameras. Also, Area 1 must be assigned to this user’s
Alarm Group when the user is testing Area 1.
Arm test report:
The test results to see if specific zones are operating
correctly. The zones need to be programmed to be
included in the test, and operate when areas are armed.
Where a zone is displayed as untested, it could mean that it has not been tested
because it was missed, or because it was faulty and could not be tested.
To display the results of a test
1.
Access menu option 6.
The display shows:
Test Report: 1-Disarm 2- Arm
Option:
2.
Select the test report you want by pressing:
1 [ENTER] for Disarm Test, or
2 [ENTER] for Arm Test, or
[ENTER] to return to the menu.
3.
What happens next depends on which option you chose and whether there are
untested zones/cameras:
•
Disarm test: (Zone test report is shown first.)
ATS2000/3000/4000/4500 Manager’s Guide
29
DISARM TEST
All zones tested successfully
Untested zones
Untested zones are listed either one at a time, or
as a list of numbers:
No Untested Zones
Press ENTER
Untested Disarm On 25, Reception Hold UP
NEXT or ENTER
or
Untested Disarm On 25, 26, 27.
Zone No:
All cameras tested successfully
(press ENTER to display)
Untested cameras
(press ENTER to display)
All Cameras Have Tested Successfully
Press Enter
4.
Untested Arm On 17, Rear Door Contact
NEXT or ENTER
From the display you can now:
Option
Action
Display complete zone name
Enter the zone number and
press [ENTER]
Update the list of zones and display the remaining
zone (if any)
Press [NEXT]
If zone test report is displayed, display the camera
test results (if applicable)
Press [ENTER]
Exit
Press [ENTER]
•
Arm test:
ARM TEST
All zones tested successfully
No Untested Zones
Press ENTER
Untested zones
Untested zones are listed either one at a time, or
as a list of numbers:
Untested Arm On 17, Rear Door Contact
NEXT or ENTER
or
Untested Arm On 9, 14, 17.
Zone No:
30
ATS2000/3000/4000/4500 Manager’s Guide
5.
From the display you can now:
Option
Action
Display the complete zone name
Enter the zone number and
press [ENTER]
Update the list of zones and display the remaining
zones (if any)
Press [NEXT]
Exit
Press [ENTER]
7.
SERVICE MENU
Use this function to allow the user to request a service call or to establish a connection to
a remote service centre in order to program over the telephone network. There are six
ten options available.
Table 1: Service menu options
Option
no.
1
Option name
Description
Request Service
Technician
Sends a request for a service technician to the
central station. (Not available in all reporting
formats.)
2
Disconnect
Management Software
Terminates the connection to management
software.
3
Dial Management
Software
The control panel dials the pre-programmed
service telephone number and attempts to
connect to the remote service modem in order to
allow programming changes to be made over
the telephone network. If it fails on the first try, it
will not redial.
The panel automatically drops the line if there
have been no keys pressed by the remote
service operator within the last two minutes.
4
Dial Temporary
Management Software
Allows a temporary telephone number to be
programmed and dialled for the remote
computer/RAS connection.
5
Direct (via J18)
Management Software
The control panel establishes a temporary direct
connection to a PC connected to the serial port
(J18) on the motherboard. This is a Service
Technician option only.
6
Answer Management
Software
Instructs the control panel to answer a current
dial-in attempt immediately.
7
Siren test
Triggers the internal siren for three seconds
followed by the external siren and finally the
flash
8
Voice report phone
message
If you have a voice reporting protocol on central
station 4, you can change the first telephone
number of that central station.
9
Stop voice reporting
Allows the user to stop voice reporting for any
central station programmed for Voice Reporting.
10
RAS test
Tests the LEDs, the LCD display and buzzer of
the RAS you are working with.
ATS2000/3000/4000/4500 Manager’s Guide
31
To request the service menu
1.
Access menu option 7.
The display shows:
Code Required
Code:
2.
Enter your PIN code
3.
Press [ENTER].
The display shows:
1 - Request Service Technician
0-Exit, Menu:
4.
Enter the service option number required (see table above) and press [ENTER].
In some cases this will bring up another display for more information to be entered:
Option
Request service
technician
Procedure
Press 1 and [ENTER]. The display shows:
1-Confirm Request Service Technician
0-Exit, Menu:
The control panel then sends a "Service Requested"
message to the central station.
Then press:
Dial management
software
-
1 and [ENTER] to confirm request for service
technician, or
-
0 and [ENTER] to return to the menu, or
-
[ENTER] to return to the menu.
Press 3 and [ENTER]. The display shows:
1-Confirm Dial
0-Exit, Menu:
Then press:
32
-
1 and [ENTER] to confirm that the control panel dials
the management software, or
-
0 and [ENTER] to return to the menu, or
-
[ENTER] to return to the menu.
ATS2000/3000/4000/4500 Manager’s Guide
Dial temporary
management
software
This option allows a temporary telephone number to be
programmed and dialed by the system.
Press 4 and [ENTER]. The display shows:
"*"-Pause, Ph No:
Serv No:
Then:
- Enter the temporary service telephone number (up to 10
digits) and press [ENTER], and/or
- Press [ENTER] to save the displayed telephone number
and move to the “Confirm Dial” display. Follow the
instructions described above.
Note: If this option is used to make the connection to the
remote computer, the computer operator will not be
required to use the security password to gain access to the
control panel.
8. FILM COUNTERS
Use this function to display the current frame number position on each of the security
camera films. If you maintain a log on frame counts, it will indicate whether the cameras
have operated since they were last checked.
To display the current frame number on the security camera film
1.
Access menu option 8.
The display shows, for example:
Film Counts 1: 0123 2:1077 3:0056 4:---Press ENTER
2.
Press [ENTER] to move the film count display for cameras 5 to 8.
The display shows:
Film Counts 5: ---- 6:---- 7:---- 8:---Press ENTER
3.
Press [ENTER] to return to the menu.
1.
If a camera is fitted with a film out detector and that camera does not have a
film in it, the frame count will be displayed as OUT.
OUT is removed when film is loaded.
2.
Up to eight cameras can be displayed.
A camera position that does not have a camera fitted will display the frame
count as ‘----’.
3.
A frame count can be from 0 to 9999.
ATS2000/3000/4000/4500 Manager’s Guide
33
9. LIST ZONE NAMES
Use this function to display the zone names (text that describes the zones) in your
system.
To display the zone names.
1.
Access menu option 9.
The zones are listed either:
One at a time
e.g.
Zone 1, Rear Door
Zone No:
e.g.
Zone 1, 2, 3, 4, 5, 6, 7
Zone No:
Or
As a list of numbers
2.
From either display:
Option
34
Action
Display the remaining zones in the list (if any).
Enter the zone
number and press
[ENTER]
Scroll the list
Press [NEXT]
Exit the function and return to the menu.
Press [ENTER]
ATS2000/3000/4000/4500 Manager’s Guide
10. INHIBIT ZONE
Use this function to inhibit zones and exclude them from the security system. A zone is
inhibited when it is faulty or broken (that is, it is active). By inhibiting it, you prevent it
causing an alarm until it is fixed. You can also inhibit normal zones if you know their zone
number.
An inhibited zone is by default inhibited only until the next disarm of the area to
which it belongs.
To inhibit a zone
1.
Access menu option 10.
What happens next depends on whether or not there are active zones.
No active zones
Zones are active
Active zones are listed either one at a time, or as
a list of numbers:
All Zones are Normal
Inhibit:
Active On 4, PIR In Managers Office
Inhibit :
or
Active On 1, 2, 4.
Inhibit:
2.
From the display you can now:
Option
Action
Result
Inhibit the selected
zone
Enter the zone
number and press
[ENTER]
Inhibits the selected zone (this
removes the zone from the display
and replaces it with the next active
zone in the list).
Update the list of
active zones
Press [NEXT]
Updates the list of active zones (if
any).
Exit
Press [ENTER]
Exits the menu option.
1.
If the active zones are shown as a list of numbers, it is not possible to display
the name of the zone.
2.
If an attempt is made to inhibit a zone that is already inhibited, the request
appears as if it is processed but it is not logged in the history and the zone
remains inhibited.
3.
As soon as a zone that is in alarm is inhibited, the alarm is reset.
See also:
Uninhibit zone
ATS2000/3000/4000/4500 Manager’s Guide
35
11. UNINHIBIT ZONE
Use this function to uninhibit zones and include them again in the security system. Do not
uninhibit a zone before checking the circumstances, as uninhibiting an active zone might
cause an alarm.
To uninhibit a zone
1.
Access menu option 11.
What happens next depends on whether or not there are inhibited zones.
No inhibited zones
Zones are active
Active zones are listed either one at a time, or as
a list of numbers:
All Zones are Uninhibited.
Uninhibit:
Inhibited On 4, Beam Across Loading Bay
Uninhibit:
or
Inhibited On 1, a2, 4.
Uninhibit:
2.
From the display you can now:
Option
Result
Uninhibit the
selected zone
Enter the zone
number and press
[ENTER]
Uninhibits the selected zone (this
removes the zone from the display
and replaces it with the next inhibited
zone in the list).
Update the list of
zones
Press [NEXT]
Updates the list of inhibited zones (if
any).
Exit
Press [ENTER]
Exits the menu option.
See also:
36
Action
Inhibit zone
ATS2000/3000/4000/4500 Manager’s Guide
12. TEST ZONE
Use this function to test if an individual zone is operating correctly.
To test a zone
1.
Access menu option 12.
The display shows:
Test Individual Zone:
Zone No:
2.
Enter the zone number you want to test and press [ENTER], or
press [ENTER] to exit and return to the menu.
3.
If you selected a zone, one of four responses is displayed:
•
•
•
The zone is normal
e.g.
NORMAL STATE on 12, Roller Door
e.g.
ACTIVE on 12, Roller Door
The zone is active
There is a faulty condition due to cable tamper. The cabling to the zone
shows an OPEN circuit.
e.g.
•
There is a faulty condition due to cable tamper. The cabling to the zone
shows a SHORT circuit.
e.g.
4.
OPEN on 12, Roller Door
SHORT on 12, Roller Door
Press [ENTER] to exit and return to the menu option display.
1.
If a zone is active, open or short, the keypad emits a continuous tone. When
the status of the zone is changed to normal, the display is updated and the
tone stops.
2.
If the zone is inhibited when a test is requested on it, the system uninhibits the
zone, conducts the test, and then returns the zone back to inhibited.
3.
The test must be carried out within a pre-determined time. If the test is not
completed within this time, the option is exited.
ATS2000/3000/4000/4500 Manager’s Guide
37
13. START AUTO DISARM TEST
Use this function to start the disarm test.
To start the disarm test
1.
Access menu option 13.
The display shows:
Disarm Test, NEXT For Untested
"0"-Cancel::
2.
Press:
[NEXT] to display the untested zones, or
0 and [ENTER] to cancel the arm test and move on to test completed/not completed
display.
3.
If you have pressed [NEXT], the untested zones are displayed either one at a time or
as a list:
Zones displayed one at a time
Zones displayed as a list
For example:
For example:
Untested Disarm On 4. PIR In Office
NEXT or ENTER
4.
Untested On 1, 2, 4.
Zone No:
For either display, you can now:
Option
Action
Display the description of the selected zone (when
displayed as a list of numbers only)
Enter the zone
number and press
[ENTER]
Display the remaining untested zones (if any)
Press [NEXT]
Move on to the Camera Test or Test Completed/Not
Completed display.
Press [ENTER]
5.
The display might shows information about cameras:
All Cameras Have Tested Successfully
Press ENTER
Press [ENTER] to return to the original option display.
Note that only cameras allocated to Area 1 are tested.
6.
The testing automatically stops when:
•
When all zones that are programmed to be tested during disarm test have been
tested, or
•
The time allowed for the disarm test has expired.
The display then indicates if the test is completed or not.
38
ATS2000/3000/4000/4500 Manager’s Guide
7.
The test is completed
Test Completed
Press ENTER
The test is not completed
Test Not completed
Press ENTER
Press [ENTER] to return to the menu.
14. PROGRAM USERS
!
Important: In the Alarm groups, an option for changing your own PIN only is available.
When this option is set, refer to the procedure on “Changing own PIN only” on page 47. If
the option is not set, refer to the procedure below.
Use this function to add, delete or create a user. Your system might have been set up to
require two authorised users to enter this menu.
The user programming includes a record of:
•
The control panel user (or card) number. This is a number between 1 and 11,466
(see note below), which is used by the system to link a PIN code or card to the
functions it will perform and the doors it can enter.
When programming cards, the ID number programmed in the card is the user
number (unless your system uses a card offset).
•
The user’s alarm group, which determines the user's area(s) and alarm control
functions. e.g. Manager, Staff etc.
Your own alarm group might not allow you to program PIN codes. If it does
allow use of the function, there might still be restrictions on which alarm groups
you are allowed to update.
•
The users door group, which determines which doors the user has access to.
•
The users floor group, which determines which floors the user has access to.
•
The user’s name (some users only).
•
The user’s PIN code (some users only). Note that card ID numbers are NOT
programmed as the PIN code.
Only 50 users with name, PIN code and/or card can be programmed in a
system with standard memory.
In a system with an expanded memory:
- Only the first 200 users can have their name programmed to their user
number.
- Only the first 1000 users can have a PIN code assigned to them.
- Users 1 to 1000 can have a PIN code and/or card.
ATS2000/3000/4000/4500 Manager’s Guide
39
- Users 1001 to 11,466 can only have a card.
To program user if two users are required
1.
Access menu option 14.
If your system requires two users to access this option, the display shows:
Enter Second Code
Code:
2.
Enter the second user’s PIN code.
3.
Press [ENTER].
The display shows:
1-Delete 2-Display 3-Create
Option:
4.
Select the function you want to perform, or
press [ENTER] to return to the menu.
To delete a user
1.
Access menu option 14 and press 1 to delete a user.
The display shows:
Delete User
User No:
2.
Enter the system user number and press [ENTER].
This will delete the user.
3.
Repeat step 2 to delete other users, or press [ENTER] to exit and return to the
option menu.
You cannot delete a user unless your alarm group authorises you to do so.
To display a user
1.
Access menu option 14 and press 2 to display a user.
The display shows:
Display User
User No:
2.
Enter the system user number and press [ENTER].
The display shows the user’s alarm group.
e.g.
3.
40
*-View, Alm Grp:12,Forman
Press ENTER
Press [ENTER]
ATS2000/3000/4000/4500 Manager’s Guide
The display shows the user's door group.
e.g.
4.
Door Group: 2
Press ENTER
Press [ENTER]
The display shows the user's floor group.
e.g.
5.
Floor Group: 1
Press ENTER
Press [ENTER].
If your system is programmed to assign special User Flags to users, the display will
now show the User Flags in sequence. See the section "Create (and change) a user"
for User Flag details.
The display shows the user's name (if any and the user number is 200 or less).
e.g.
6.
Press [ENTER]. The display shows the user's PIN code (if any, and if user number is
1000 or less).
e.g.
7.
Your Name is Ann Brown, (*)-End
Ann Brown
Pin Code: 1234
Press ENTER
Press [ENTER] to return to step 1.
To create (and change) a user
The procedure to create a user may vary depending on whether you are creating a user
higher than 200 or higher than 1000.
1.
Access menu option 14 and press 3 to create a user.
The display shows:
e.g.
2.
Create User
User No:
Select the system user number (card number) and press [ENTER].
The display shows the user's alarm group.
e.g.
*-View, Alm Grp:1-No Access
Alarm Group:
ATS2000/3000/4000/4500 Manager’s Guide
41
3.
Do one of the following options:
Option
Action
Select the number of the alarm group to be issued to this
user. See Note 2.
Enter the zone number
and press [ENTER]
Display the list of alarm groups that you can issue to a
user (if any).
Press [NEXT]
Move on to next display.
Press [ENTER]
The display shows the user's door group.
Card users must always have a valid door group assigned in order to perform alarm
control or door functions.
e.g.
4.
Door Group: 0
Door Group:
Enter the door group number to be issued to the user (if any), or press [ENTER] to
move to the next display.
The display shows the user's floor group.
e.g.
Floor Group: 0
Floor Group:
5.
Select the floor group number to be issued to the user (if any), or press [ENTER] to
move to the next display.
6.
If the user number that you are programming is higher than 1000, and User Flags
are not displayed in your system, then all the options available have been
programmed and the display will return to step 1.
If the system has been programmed so that users do not have name files, or if you
are programming a user higher than 200 and User Flags are not displayed, skip to
step 10.
With file names, skip to step 8.
7.
If your system is programmed to assign special user flags to the users, the display
now shows them in sequence.
Table 2: The user flags:
42
Two Cards
If set to YES, the user will always require a second valid user
code/card to be entered to perform any alarm or access control
function at Doors 17 to 64.
Guard
If set to YES, the user's code/card can only perform functions at
Doors 17 to 64 when used in conjunction with a "Visitor" code/card.
Visitor
If set to YES, the user's code/card can only perform functions at
Doors 17 to 64 when used in conjunction with a "Guard" code/card.
Trace User
If set to YES, all alarm and access functions performed by the user
at Doors 17 to 64, will cause a "Trace" message to be sent to the
management computer.
Card Only
If set to YES, the user will NOT be able to use the PIN code. This
allows the PIN code field to be used to program cards on formats
not normally compatible with the control panel, when a special
reader is used.
Privileged
If set to YES, the User's code/card will over-ride any "AntiP
b k"
t i ti
D
17 t 64
ATS2000/3000/4000/4500 Manager’s Guide
Passback" restrictions on Doors 17 to 64.
Extended
Access
If set to YES, the user will be allowed extended door access times
at Doors 17 to 64.
e.g. To allow the door to remain open longer for disabled access.
The display shows:
e.g.
YES - Two Cards
* - Change 0 - Skip
Do one of the following options:
Option
Action
Change YES to NO, or NO to YES, and display the new
setting.
Press [MENU*]
Save the displayed setting and move to the next User
Flag.
Press [ENTER]
Save the displayed setting; skip the remaining user
flags, and move on to the next step.
Press 0
The programming procedure detailed above is the same for all the user flags.
The display shows:
e.g.
e.g.
e.g.
e.g.
e.g.
e.g.
YES - Guard
* - Change 0 - Skip
YES – Visitor
* - Change 0 - Skip
YES – Trace User
* - Change 0 - Skip
YES – Card Only
* - Change 0 - Skip
YES – Privileged
* - Change 0 - Skip
YES –Extended Access
* - Change 0 - Skip
ATS2000/3000/4000/4500 Manager’s Guide
43
8.
If the user number that you are programming is higher than 1000, then all options
available have been programmed and the display returns to step 1.
If the system has been programmed so that users do not have name files, or if you
are programming a user higher than 200, skip to step 10.
The display shows.
Your Name is , (*)-End
9.
You can now enter a user’s name of up to 16 characters, by using the text option on
the keypad.
Keys 1 to 9 have alphabetical characters printed above them. To enter a letter, press
the key the number of times relative to the position of the letter. Both upper and
lower case letters are available as well as the numerical values. See Figure 2 for
details.
Do one of the following options:
Option
Action
Enter the letters of the user’s name.
Enter each letter of the
user’s name followed
by [ENTER].
Move the cursor to the position after the name.
Press [ENTER]
Save the name. (And display the new name if
programmed/changed.)
Press [MENU*]
If the name has been changed, only letters preceding
the cursor are saved.
10. When finished entering the name, press [MENU*] to save the displayed setting, and
skip the remaining user flags.
!
CAUTION: When programming name text, the [ENTER] key is ONLY used to move the
cursor. Follow the procedure carefully when programming name text. Use [MENU*] to
save and exit.
11. The display shows.
e.g.
•
44
PIN Code:
Code:
Enter the PIN code for this user (see Notes 3, 4, 5, and 6) and press [ENTER]
to save the PIN code. Then press [ENTER] again to return to step 1.
1.
You cannot create a user unless your alarm group authorises you to do so.
2.
You cannot assign an alarm group to a user unless the alarm group has the
option "Can this Alarm Group be Assigned to Users" set to YES, and your
alarm group has all the "Areas" and "User Menu Options" of the alarm group
you wish to assign. If the alarm group you wish to assign has "Alarm System
Control" and "Modem Access" set to YES, then your alarm group must also
have these features set to YES.
ATS2000/3000/4000/4500 Manager’s Guide
3.
You cannot program a PIN code or user number that already exists.
4.
You cannot program a PIN code that will conflict with another user's duress
code. (Refer to the section on Duress.)
5.
You cannot program a PIN code that will conflict with another user's door
code. (Refer to the section on Opening a Door.)
6.
A user who is allowed to both open doors and arm/disarm the system, should
have a PIN code of at least five digits. (Refer to the section on Opening a
Door.)
Figure 2: Keypad layout for entering text
Key
1st
2nd
3rd
4th
5th
6th
7th
1
A
B
C
1
a
b
c
2
D
E
F
2.
d
e
f
3
G
H
I
3.
g
h
I
4
J
K
L
4
j
k
l
5
M
N
O
5
m
n
o
6
P
Q
R
6
p
q
r
7
S
T
U
7
s
t
u
8
V
W
X
8
v
w
x
9
Y
Z
sp
9
y
z
sp
0
.
,
?
!
:
;
-
Key
8th
9th
10th
11th
12th
13th
14th
0
+
#
*
(
)
‘
“
Key
15th
16th
17th
18th
19th
20th
21st
0
_
@
&
$
£
%
/
Key
22nd
23rd
24th
25th
26th
27th
28th
0
<
>
¿
¡
§
=
¤
Key
29th
30th
0
¢
¥
(sp = space)
See also: User Identification.
!
Important: Always remember to update your "User" List when any changes are made.
Change own PIN code
The users can ONLY change their own PIN code if their Alarm Group option “Change own
PIN code” is set to ‘YES’.
ATS2000/3000/4000/4500 Manager’s Guide
45
If their Alarm Group option “Change own PIN code” is set to ‘NO’, then the user has access
to all the standard User Menu 14 menus and functions (described above), and can change
the PIN codes, Alarm Groups, Door Groups, Floor Groups and User names of other users.
1.
If their Alarm Group option “Change own PIN code” is set to ‘YES’, the user can only
change his own PIN code.
PIN Code: 1111
Code: 1234
PIN Code: 1234
Code:
2.
The user can change the code again, or press Enter to exit.
3.
Operation for all PIN code entry
If the System Option, “Disable PIN Code From Displaying“ is set to ‘YES’, the PIN code will
not be displayed. The user needs to enter the PIN code twice to change his PIN code .
PIN Codes Can Not Be Displayed
Code: XXXX
Confirm PIN Code:
Code:
4.
46
The user can change the code again, or press Enter to exit.
ATS2000/3000/4000/4500 Manager’s Guide
15. TIME AND DATE
Use this function to program a new time and date.
The time and date are not visible during normal use of the Advisor MASTER system;
however, all internal functions rely on them.
A new date or time only needs to be programmed when the Advisor MASTER system is
first installed, or if the time needs to be adjusted for daylight saving.
The time is programmed for a 24-hour clock.
Access menu option 15
The main menu shows:
Time 1-Display, 2-Set, 3-DST, 4-Adjust
0-Exit, Menu:
To check the time setting press 1
The display shows:
e.g.
Time 16:41:22 09/03/2000 Thursday
* Update, Enter
1. Press [MENU*] to get an updated time/date
2. Press [ENTER] to return to the main menu
To program a new time and date
1.
Enter option 2. The display shows:
Time & Date hh:mm:ss dd/mm/yy Xxxday
Hours:
(Where hh:mm dd/mm/yy Xxxxday are the current time and date held by the system
as hour, minute, day, month, year and day of the week.)
2.
Enter the correct hour (2 digits) and press [ENTER].
The display shows:
Time & Date hh:mm:ss dd/mm/yy Xxxday
Minutes:
3.
Enter the correct minutes (2 digits) and press [ENTER].
ATS2000/3000/4000/4500 Manager’s Guide
47
The display shows:
Time & Date hh:mm dd/mm/yy Xxxxday
Day:
4.
Enter the correct day (2 digits) and press [ENTER].
The display shows:
Time & Date hh:mm:ss dd/mm/yy Xxxday
Month:
5.
Enter the correct month (2 digits) and press [ENTER].
The display shows:
Time & Date hh:mm:ss dd/mm/yy Xxxday
Year:
6.
Enter the correct year (2 digits) and press [ENTER].
The display shows:
You cannot exit this function halfway through. Press [ENTER] on each value that
does not need to be changed until you return to the menu.
To change the DST (Daylight Saving Time)
1.
Press 3 to enter option 3
The display shows the date the time changes from wintertime to summertime
0- DISABLE, MONTH 00
START SUNDAY
2.
Select:
0: No DST
1: DST starts on FIRST Sunday of the month
2: DST starts on LAST Sunday of the month
3.
Press [ENTER], [ENTER]: to enter the month option
2- Last Sunday, Month 00
Start Month:
48
ATS2000/3000/4000/4500 Manager’s Guide
4.
Enter the month number and press [ENTER], [ENTER]
2- Last Sunday, Month 3
End Day:
5.
Select:
1: DST end at FIRST Sunday of the month
2: DST end at LAST Sunday of the month
6.
Press [ENTER], [ENTER] to accept
2- Last Sunday, Month 00
End Sunday
Enter the month number when the time changes from summertime to wintertime and
press [ENTER]
2- Last Sunday, Month 10
End Month
The programming of DST is completed
To adjust the internal clock for correct timings
Enter option 4
Daily Adjustmemt (Sec).: +0
*-Change, sec:
Press [MENU*] to change the sign and give the correction number of seconds to add or
to subtract daily. Then press [ENTER].
16. INHIBIT/UNINHIBIT RAS/DGP
Use this function to inhibit remote arming stations (RASs) and data gathering panels
(DGPs), i.e. exclude fault and tamper messages (system alarms) from a RAS or DGP to
the security system.
This function is used if a RAS or DGP has generated a system alarm, or is out of service,
and needs to be inhibited while awaiting service.
ATS2000/3000/4000/4500 Manager’s Guide
49
To inhibit/uninhibit RASs/DGPs
1.
Access menu option 16.
The display shows:
1-RAS, 2-DGP Inhibit / Uninhibit
0-Exit, Menu:
2.
Enter 1 for RAS or 2 for DGP, and press [ENTER].
•
If RAS is selected, the display shows any RAS’s that are inhibited:
No RAS's Are Inhibited
Inhibit RAS:
•
If DGP is selected, the display shows any DGP’s that are inhibited:
No DGP's Are Inhibited
Inhibit DGP:
3.
Enter the RAS/DGP number to be inhibited.
If the number entered is not recorded, it is added and displayed.
If the number entered is already recorded, it is deleted and removed from the display
or
Press [ENTER] to return to the menu.
Inhibiting a DGP does NOT inhibit the alarm zones on that DGP, but does disable
DGP off-line/on-line reporting (TAMPER switch).
Inhibiting a RAS or DGP also resets any system alarm generated by the RAS or
DGP.
See also: Types of Alarms - System Alarms
17. ENABLE / DISABLE SERVICE TECHNICIAN
Use this function to enable and disable the service technician’s code. This option is to be
used when a service technician or engineer can only gain access to the installer menu
when this option is enabled by a user.
To enable/disable the service technician code
1.
Access menu option 17.
The display shows:
0-Cancel, 1-Service In
Option:
2.
50
Use one of the following options:
ATS2000/3000/4000/4500 Manager’s Guide
Option
Action
Enable the Service Technician's code for the
programmed time period, and return to the menu.
Press 1 and [ENTER].
Cancel the Service Technician's code, and return to the
menu.
Press 0 and [ENTER]
Return to the menu.
Press [ENTER]
18. RESET CAMERAS
Use this function to reset the film frame count on a camera to zero, or to change the
frame count number on an individual camera. This is done when you have changed the
film in a camera.
To reset the cameras
1.
Access menu option 18.
The display shows:
Reset Camera Counts 0-All
Camera No:
2.
Use one of the following options:
Option
Reset the frame count for all the cameras to zero.
Press 0 and [ENTER].
Display the present count for the selected camera.
Enter the present
count for the selected
camera and press
[ENTER]
e.g.
Film Counts 1:0123
Film Count:
Return to the menu.
3.
Action
Press [ENTER]
If you have selected to display the present frame count, enter the new frame count
and press [ENTER] to return to the original camera counts display to allow zone of
another camera number, or
Press [ENTER] to return to the menu.
20. DOOR AND FLOOR GROUPS
Use this function to select and program door and floor groups.
Each door group contains a list of all doors (64 doors) and the timezone for each door
within the group. Each floor group contains a list of all floors (64 floors) and the timezone
for each floor within the group. Authorised access is only valid during the timezone.
ATS2000/3000/4000/4500 Manager’s Guide
51
To program door and floor groups
1.
Access menu option 20.
The display shows:
Groups, 1-Doors 2-Floors
Option:
2.
Select the option you want to access (1 for door groups, and 2 for floor groups), and
press [ENTER], or
press only [ENTER] to return to the menu.
Door groups: (if you selected option number 1)
1.
The display shows:
Door Groups
Group No:
Enter the door group number and press [ENTER] to move to the next display, or
press only [ENTER] to return to the initial display ("Groups, 1-Doors 2-Floors”).
2.
The display shows.
e.g.
Door Grp 1 D1-00 D2-00 D3-** D4-**
Enter Door:
Enter the door number (e.g. 3) and press [ENTER] to move to the next display, or
press only [ENTER] to return to the previous display ("Door groups”).
3.
The display shows the details of four doors starting with the door number selected.
(See Note on page 57 for details of this display)
e.g.
Door Grp 1 D3-** D4-** D5-03 D6-00
*-Dis,Tz-D3:
Use one of the following options:
Option
!
52
Action
Disable the door for this door group.
Press [MENU*]
Enter the timezone number and return to step 2.
Enter the timezone
number and press
[ENTER]
Return to step 2.
Press [ENTER]
Important! Always remember to update your "Door Group" List when any changes are
made.
ATS2000/3000/4000/4500 Manager’s Guide
Floor groups: (if you selected option number 2)
1.
The display shows:
Floor Groups
Group No:
Enter the floor group number and press [ENTER] to move to the next display, or
press only [ENTER] to return to the initial display ("Groups, 1-Doors 2-Floors”).
2.
The display shows:
e.g.
Floor Grp 1 F1-00 F2-00 F3-** F4-**
Enter Floor:
Enter the floor number (e.g. 3) and press [ENTER] to move to the next display, or
press only [ENTER] to return to the previous display ("Floor groups”).
3.
The display shows:
e.g.
Floor Grp 1 F3-** F4-** F5-03 F6-00
*-Dis,Tz-F3:
Use one of the following options:
Option
!
Action
Disable the floor for this floor group.
Press [MENU*]
Enter the timezone number and return to step 2.
Enter the timezone
number and press
[ENTER]
Return to step 2.
Press [ENTER]
Important! Always remember to update your "Floor Group" List when any changes are
made.
ATS2000/3000/4000/4500 Manager’s Guide
53
21. HOLIDAYS
Use this function to record the date of holidays. The holidays recorded here can be used
in conjunction with timezones to control access, e.g. staff who are allowed access during
normal weekdays can be denied access on weekdays declared a holiday.
The control panel can record up to 24 holiday dates.
To record a holiday
1.
Access menu option 21.
The display shows:
Holidays
Holiday No:
2.
Enter the holiday number and press [ENTER].
The display shows the holiday number and the date of the holiday numerically:
e.g.
3.
Enter the new day of the month, or press [NEXT] to scroll through the list of
holidays. When finished, press [ENTER]. The display shows the new day of the
month.
e.g.
4.
Holiday 1: 00/00/00
Day of Month:
Holiday 1: 26/00/00
Month:
Enter the new month and press [ENTER].
The display shows the new month:
e.g.
5.
Holiday 1: 26/01/00
Year:
Enter the new year and press [ENTER].
The display returns to step 1 to input the next holiday.
!
54
Important! Always remember to update your "Holidays" list when any changes are made.
ATS2000/3000/4000/4500 Manager’s Guide
22. OPEN DOORS
Use this function to open a valid door via the LCD arming station.
To open a door via the arming station
Access menu option 22.
The display shows:
Open Door
Door No:
Enter the number of the door you want to open and press [ENTER], or
Press only [ENTER] to return to the menu.
Only doors that are programmed to be opened by your code can be opened using
this option. I.e. The door group assigned to the user may not allow access to all
doors.
See also:
Door Groups - Menu Option 20.
23. UNLOCK, LOCK, DISABLE AND ENABLE DOORS
Use this function to unlock, lock disable and enable a valid door via the LCD arming
station.
The function can only be used with door numbers 17 to 64. i.e. Doors controlled by
four-door DGP’s.
The door remains in the state selected until an opposite event occurs in the system that
will change the state of that door.
e.g. Door 21 automatically unlocks at 08:00H and relocks at 17:00H (Using an "Override
Timezone")
If the user wants to arm the premises and leave at 16:00, the door can be locked using
the "lock" option, but will still automatically unlock at 08:00 again the following morning.
To unlock, lock, disable or enable a door via the arming station
1.
Access menu option 23.
The display shows:
1-Unlock 2-Lock 3-Disable 4-Enable
Option:
ATS2000/3000/4000/4500 Manager’s Guide
55
2.
Enter the door function option you want to do and press [ENTER], or
Press [ENTER] to return to the menu.
The display shows the option selected:
e.g.
3.
Unlock Door
Door No:
Enter the door number to unlock and press [ENTER] to return to the menu, or
Press only [ENTER] to return to the menu.
Only doors programmed to be opened by your code can be operated using this
option. i.e. The Door Group assigned to the user may not allow access to all doors.
See Also:
56
Door Groups - Menu Option 20.
User Identification.
ATS2000/3000/4000/4500 Manager’s Guide
24. PRINT HISTORY
Use this function to instruct the control panel to print the complete system history from
when the last print history command was issued (maximum 200 events with standard
memory or 2000 events with expanded memory).
To print complete system history
1.
Access menu option 24.
The display shows:
Print History back To 00/00/90
Enter Day:
2.
Enter the day of the month from which to start printing and press [ENTER], or
Press [ENTER] to skip this field.
If zero is entered as day of the month, the printer will start printing from the last
unprinted history.
The display shows:
Print History back To 00/00/90
Enter Month:
3.
Enter the month from which to start printing and press [ENTER], or
Press [ENTER] to skip this field.
The display shows:
Print History Back To 00/00/90
Enter Year:
4.
Enter the year from which to start printing and press [ENTER], or
Press [ENTER] to skip this field.
The printer now starts printing from the date specified.
The Advisor MASTER system will not print if the printer is not ready, e.g. OFF
LINE, OUT OF PAPER, etc.
ATS2000/3000/4000/4500 Manager’s Guide
57
PROGRAMMING RECORDS
Use the following pages to record details of the relevant data programmed for your
system that relates to:
1.
Menu option 14 - Users
2.
Menu option 20 - Door Groups
3.
Menu option 20 - Floor Groups
4.
Menu option 21 - Holidays
5.
Alarm Groups - when programming users. (Details to be supplied by your installer.)
6.
Timezones - For use in Door Groups and Floor Groups. (Details to be supplied by
your installer.)
It is suggested that you complete the details using a pencil so that you can erase
obsolete entries and thereby keep the records up to date and compact.
It might be necessary to make copies of certain record sheets where the number of
records exceeds the space allowed.
e.g. If your system uses more than two door groups or more than four timezones, etc.
It is recommended to keep this Manager’s Guide and any copies of record sheets
together in a safe place, and ensure that they are always kept up to date.
58
ATS2000/3000/4000/4500 Manager’s Guide
USER RECORD – MENU OPTION 14
Use this page to record details of the relevant user data for your system.
By using a pencil to complete these details, you can then easily erase obsolete entries
and keep the record up to date and compact.
User
Number
Alarm
Group
Door
Group
Lift
Group
ATS2000/3000/4000/4500 Manager’s Guide
Name
59
DOOR GROUP RECORD – MENU OPTION 20
Door Group N°:
Door Group N°:
Door
N°:
Time
zone:
Door
N°:
Time
zone:
Door
N°:
Time
zone:
Door
N°:
1
33
1
33
2
34
2
34
3
35
3
35
4
36
4
36
5
37
5
37
6
38
6
38
7
39
7
39
8
40
8
40
9
41
9
41
10
42
10
42
11
43
11
43
12
44
12
44
13
45
13
45
14
46
14
46
15
47
15
47
16
48
16
48
17
49
17
49
18
50
18
50
19
51
19
51
20
52
20
52
21
53
21
53
22
54
22
54
23
55
23
55
24
56
24
56
25
57
25
57
26
58
26
58
27
59
27
59
28
60
28
60
29
61
29
61
30
62
30
62
31
63
31
63
32
64
32
64
* = Disabled
60
Time
zone:
* = Disabled
ATS2000/3000/4000/4500 Manager’s Guide
FLOOR GROUP RECORD – MENU OPTION 20
Floor Group N°:
Floor
N°:
Time
zone:
Floor Group N°:
Floor
N°:
Time
zone:
Floor
N°:
Time
zone:
Floor
N°:
1
33
1
33
2
34
2
34
3
35
3
35
4
36
4
36
5
37
5
37
6
38
6
38
7
39
7
39
8
40
8
40
9
41
9
41
10
42
10
42
11
43
11
43
12
44
12
44
13
45
13
45
14
46
14
46
15
47
15
47
16
48
16
48
17
49
17
49
18
50
18
50
19
51
19
51
20
52
20
52
21
53
21
53
22
54
22
54
23
55
23
55
24
56
24
56
25
57
25
57
26
58
26
58
27
59
27
59
28
60
28
60
29
61
29
61
30
62
30
62
31
63
31
63
32
64
32
64
* = Disabled
ATS2000/3000/4000/4500 Manager’s Guide
Time
zone:
* = Disabled
61
HOLIDAY RECORD – MENU OPTION 20
Holiday Number:
Number
Date
/
Day
Holiday Number:
Number
Date
Holiday Number:
Number
Date
Number
Date
Holiday Number:
Number
Date
Holiday Number:
Number
Date
Holiday Number:
Number
Date
Holiday Number:
Number
Date
Holiday Number:
Number
Date
Holiday Number:
Number
Date
Holiday Number:
Number
Date
Holiday Number:
Number
Date
62
/
Month Year
/
Day
/
Month Year
/
Day
/
Month Year
/
Day
/
Month Year
/
Day
/
Month Year
/
Day
/
Month Year
/
Day
/
Month Year
/
Day
/
Month Year
/
Day
/
Month Year
/
Day
/
Month Year
/
Day
Holiday Number:
Month Year
/
Day
/
/
Month Year
ATS2000/3000/4000/4500 Manager’s Guide
ALARM GROUP RECORD
DETAILS TO BE SUPPLIED BY THE INSTALLER
Number:
Name:
Function Summary:
Number:
Name:
Function Summary:
Number:
Name:
Function Summary:
Number:
Name:
Function Summary:
Number:
Name:
Function Summary:
Number:
Name:
Function Summary:
ATS2000/3000/4000/4500 Manager’s Guide
63
TIMEZONE RECORD
DETAILS TO BE SUPPLIED BY THE INSTALLER
Timezone Number
.1
Start
Days:
.2
Start
Days:
.3
Start
Days:
.4
Start
Days:
.1
Start
Days:
.2
Start
Days:
.3
Start
Days:
.4
Start
Days:
.1
Start
Days:
.2
Start
Days:
.3
Start
Days:
.4
Start
Days:
.1
Start
Days:
.2
Start
Days:
.3
Start
Days:
.4
Start
Days:
64
End
SUN/MON/TUE/WED/THU/FRI/SAT/HOL
End
SUN/MON/TUE/WED/THU/FRI/SAT/HOL
End
SUN/MON/TUE/WED/THU/FRI/SAT/HOL
End
SUN/MON/TUE/WED/THU/FRI/SAT/HOL
End
SUN/MON/TUE/WED/THU/FRI/SAT/HOL
End
SUN/MON/TUE/WED/THU/FRI/SAT/HOL
End
SUN/MON/TUE/WED/THU/FRI/SAT/HOL
End
SUN/MON/TUE/WED/THU/FRI/SAT/HOL
End
SUN/MON/TUE/WED/THU/FRI/SAT/HOL
End
SUN/MON/TUE/WED/THU/FRI/SAT/HOL
End
SUN/MON/TUE/WED/THU/FRI/SAT/HOL
End
SUN/MON/TUE/WED/THU/FRI/SAT/HOL
End
SUN/MON/TUE/WED/THU/FRI/SAT/HOL
End
SUN/MON/TUE/WED/THU/FRI/SAT/HOL
End
SUN/MON/TUE/WED/THU/FRI/SAT/HOL
End
SUN/MON/TUE/WED/THU/FRI/SAT/HOL
ATS2000/3000/4000/4500 Manager’s Guide
GLOSSARY
Access control
The control of entry to, or exit from, a security area.
Active
See Normal/Active/Tamper/Inhibited
Alarm
The state of a security system when a device connected to a zone is
activated and the condition of the area is such that activation should be
signalled. E.g. a door lock is broken, causing a siren to sound.
Alarm group
Alarm groups define the options available to users, arming stations or
door reader to allow alarm control. Alarm groups are defined by a set of
areas, alarm control functions and menu options.
Zone types for area control (key switches) also make use of alarm groups.
Area
A section of a premise, which has specific security requirements. The
Advisor MASTER system allows any premise to be divided into 16 areas
of different security requirements. Each area has its own zones. A
number and a name identify each area. E.g. Area 1 Office, Area 2
Workshop, Area 3 Boardroom, etc.
Armed
The condition of an area where a change in the status of any zone (from
normal to active) causes an alarm. An area or premise is only armed
when it is unoccupied. Some zones (like vaults) can remain armed
continually.
Armed
The condition of an area or premise when it is armed (security turned on)
and unoccupied.
Arming stations (RAS)
A device that is the user’s control panel for security functions for an
area(s) or for access points (doors). The arming station can be an Advisor
MASTER keypad (LCD keypad, reader) or any other device that can be
used to perform security function, such as arm/disarm, open doors, etc.
Central station
A company that monitors whether an alarm has occurred in a security
system. A central station is located away from the premise/area it
monitors.
Control panel
An electronic device that is used to gather all data from zones on the
premises. Depending on programming and status of areas, it will generate
alarm signals. If required, alarms and other events can be reported to a
central station.
Cursor
A flashing underline character on the liquid crystal display (LCD) that
indicates where the next character entered on the keypad will appear.
DGP
Data Gathering Panel. A device that collects data from other security
devices within an area, and transfers it to the Advisor MASTER control
panel or 4-door/4-lift DGP.
Disarmed
The condition of an area when it is occupied and when the security
system has been set so that normal activity does not set off an alarm.
Door contact
A magnetic contact used to detect if a door or window is opened.
Door group
An Advisor MASTER feature that assigns a group of doors or lifts to a
user, in order to allow access to those doors/lifts. Access to each door in a
group can be restricted via a timezone.
Duress
A situation where a user is being forced to breach the system security
(e.g. forced at gunpoint to open the door). The Advisor MASTER duress
facility allows a signal to be activated (e.g. notification to a central station)
by the user. This is done by incrementing the last digit of the PIN code.
Event flags
A signal activated by a zone condition, area condition, system status or
fault condition, door command (on doors 1 to 16) or shunt condition. The
main purpose of an event flag is to activate an output.
Floor group
An Advisor MASTER feature that assigns a group of floors to a user, in
order to allow selection of floors when accessing a lift reader. Access to
ATS2000/3000/4000/4500 Manager’s Guide
65
each floor in a group can be restricted via a timezone.
History
A list of past alarm and access control events stored in memory that can
be viewed on an LCD arming station or sent to a printer.
Hold-up
A (silent) alarm that is triggered by a hold-up button. Normally it will not
trigger any siren, only send a message to a central station.
Inhibit
See Normal/Active/Tamper/Inhibited
Installer
A company that installs and services security equipment.
Keypad
A remote arming station with keys to input data (keypad). Used to
program the control panel, perform user functions, view alarms, etc.
LCD
(Liquid Crystal Display). The part of an arming station where messages
are displayed.
LED
(Light Emitting Diode). A visual indicator on an arming station which
conveys a condition, e.g.; area in alarm, communication fault, etc.
Local alarm
An alarm that is signalled only within a premise and occurs when an area
is occupied. The circumstances that cause a local alarm can be checked
and rectified by personnel on site and it is therefore unnecessary for the
alarm to be reported to a central station.
Normal/Active/Tamper/Inhibited
Describes the condition of a zone.
Normal:
Active:
Tamper:
Inhibited:
The zone is NOT activated. E.g. Fire Exit Door closed
The zone is activated. E.g. Fire Exit Door open
The zone is open or short-circuited. Someone may have
tried to tamper the security device.
The zone has been inhibited from indicating normal or
active status. It is excluded from functioning as part of the
system.
Nuisance alarm
An alarm that is triggered by a security device, without any burglar. Could
be caused by open windows, pets or incorrect projection of security
equipment.
PIN code
A 4-10 digit number given to, or selected by, a user. It is necessary to
enter a PIN code on an Advisor MASTER keypad as a pre-requisite to
perform most Advisor MASTER functions. In the Advisor MASTER
programming, the PIN code is associated with a user number which
identifies the PIN code holder to the system.
RAS
Remote Arming Station. See Arming station.
Reader
A device used for access control that can read cards to allow access.
Depending on the needs and the type of cards, the reader can for
example be a magnetic swipe reader or proximity reader.
Tamper
A situation where a zone, an arming station, control panel, DGP or
associated wiring are tampered with, or accidentally damaged. The
Advisor MASTER tamper facility activates a signal when tamper occurs.
Tamper alarms from zones are called zone tampers.
Timezone
A program setting which identifies specific timeperiods on specific days.
Timezones are allocated to Advisor MASTER functions to control the
activity of that function by time and day and are primary used to restrict
access. E.g automatically arm or disarm areas or open doors.
User
Anybody making use of the Advisor MASTER system. A unique number
that is associated with the user’s PIN code identifies users to the
ADVISOR MASTER system.
Zone
An electrical signal from a security device (PIR detector, door contact) to
the Advisor MASTER system. A zone number and name identify each
device. e.g. 14 Reception Hold-up Button, 6 Fire Exit Door.
66
ATS2000/3000/4000/4500 Manager’s Guide
INDEX
Active zones
when arming/disarming, 15
Adding a user to the system, 39
Advisor MASTER menus
accessing, 22
door and floor groups, 51
enable/disable service technician, 50
film counters, 33
history, 27
holidays, 54
inhibit zone, 35
inhibit/uninhibit RAS/DGP, 49
open door, 55
panel status, 24
print history, 57
program users, 39
reset cameras, 51
scrolling the list of menus, 23
service menu, 31
start auto arm test, 38
test report, 29
test zone, 37
time and date, 47
time out facility, 22
unauthorised access, 22
unlock, lock, disable and enable doors, 55
using PIN codes, 22
zone alarm, 26
zone text, 34
zones active, 25
Alarm events, 27
Alarm groups
description, 7
issues when programming users, 39, 44
Alarms
description, 16
disarming a zone in alarm, 19
listing alarm history, 21
listing history of events, 27
listing past alarm events, 21
listing zones, 24, 26
tamper alarm, 19
unable to reset, 20, 49
valid PIN code, 20
what to do when there is an alarm, 18
when to contact the central station company, 19
Arm test, 29
Arming the system
active zones, 15
cannot arm system, 11
preset time to leave, 11
procedure, 11
when to arm, 11
Cameras
film frame number, 33
frame count, 33
resetting cameras, 51
resetting film frame count, 51
resetting individual cameras, 51
Changing a user in the system, 41
Creating a user, 39, 41
Data gathering panels
inhibiting, 49
Date
ATS2000/3000/4000/4500 Manager’s Guide
programming, 47
Deleting a user from the system, 39, 40
DGP
inhibiting, 49
Disarm test, 29
starting auto arm test, 38
Disarming the system
active zones, 15
cannot disarm, 13
when to disarm, 13
Display text describing zones, 34
Door codes
opening doors, 10
Door groups
description, 7
selecting and programming, 51
Doors
disabling via the arming station, 55
enabling via the arming station, 55
locking via the arming station, 55
opening using PIN code, 10
opening via the arming station, 55
unlocking via the arming station, 55
Duress
activating, 9
description, 9
resetting, 9
Film counters
displaying film frame number, 33
Floor groups
description, 7
selecting and programming, 51
Holidays
recording, 54
Latching system alarms, 17
LCD display
description of message display, 5
LED’s
area LED’s, 5
blinking quickly, 6
blinking slowly, 6
on/off, 6
system alarm lights, 6
system faults, 6
what the LED’s mean, 5
Local alarms
acknowledging, 18
decription, 16
resetting, 18
Log only events, 27
Messages
LCD display, 5
Non-latching system alarms, 17
Opening doors
problems when using PIN code, 10
time limit, 10
using PIN code, 10
Overview of the Advisor MASTER system, 3
Panel status
listing active zones, 25
listing zone status, 24
procedure, 24
status codes, 24
PIN codes
67
description, 6
restrictions when using, 7
using, 7
Programming record sheets, 58
user records, 59
Programming users, 39
importance of alarm groups, 39, 44
using two cards, 40
Quick alarm history, 21
RAS
inhibiting, 49
Remote arming stations
inhibiting, 49
Scrolling the list of menu options, 23
Service menu
establishing connection to remote service centre, 31
requesting service call, 31
Service technician code
enable/disable, 50
System alarms
description, 16
inhibiting RAS/DGP, 49
latching system alarms, 17
non-latching system alarms, 17
System history
listing events, 27
printing, 57
Tamper alarms, 19
listing zones, 24
Test report
listing results, 29
Testing zones, 37
Testing zones and cameras, 29
Time
programming, 47
Two cards
definition, 40
programming a user, 40
Types of alarms
alarm, 16
local, 16
Users
adding, 39
changing, 41
creating, 39, 41
deleting, 39, 40
programming, 39
programming using two cards, 40
user flags, 42
Zone alarm
listing zones in alarm, 26
Zones
disarming when in alarm, 19
excluding from the security system, 35
faulty, 27
inhibiting, 35
listing active zones, 24, 25
listing inhibited zones, 24
listing status, 24
listing zones in alarm, 26
testing, 37
untested, 29
68
ATS2000/3000/4000/4500 Manager’s Guide
ATS2000/3000/4000/4500 Manager’s Guide
69