1
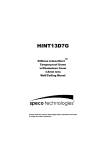
SPECO 960H
H series
Inteensifier H Indoor/Outdoor
Wedge Camera
HINT81H
Installation and
Operation Manual
User Information
CAUTION
RISK OF ELECTRIC SHOCK
DO NOT OPEN
CAUTION! TO REDUCE THE RISK OF ELECTRIC SHOCK,
DO NOT REMOVE COVER (OR BACK). NO USER
SERVICEABLE PARTS INSIDE. REFER SERVICING
TO QUALIFIED SERVICE PERSONNEL.
Explanation of two Symbols
The lightning flash with arrowhead symbol,
within an equilateral triangle, is intended to
alert the user to the presence of uninsulated
"dangerous voltage" within the product's
enclosure that may be of sufficient magnitude to constitute a
risk of electric shock to persons.
The exclamation point within an equilateral
triangle is intended to alert the user to the
presence of important operating and
maintenance-(servicing) instructions in the
literature accompanying the appliance.
THE GRAPHIC SYMBOLS WITH SUPPLEMENTAL MARKING ARE
ON THE BOTTOM OF THE SYSTEM.
"WARNING-TO PREVENT FIRE OR SHOCK HAZARD, DO NOT
EXPOSE THE UNIT TO RAIN OR MOISTURE"
2
User Information
Regulatory Notice
This equipment has been tested and found to comply with
limits for a Class A digital device, pursuant to part 15 of the
FCC Rules. These limits are designed to provide reasonable
protection against harmful interference when the equipment
is operated in a commercial environment.
This equipment generates, uses, and can radiate radio frequency
energy and, if not installed and used in accordance with the
instruction manual, may cause harmful interference to radio
communications. Operation of this equipment in a residential
area is likely to cause harmful interference in which case the
user will be required to correct the interference at their own
expense.
WARNING Changes or modifications not expressly approved
by the manufacturer could void the user's authority
to operate the equipment.
CAUTION When this camera is installed near equipment,
like a wireless communication device that emits
a strong electromagnetic field, some irregularity
such as noise on the monitor screen may happen.
• This installation should be made by a qualified service person
and should abide to all local codes.
Regulatory Notice
3
Contents
4
1.
Important Safety Instructions
6
2.
Features
7
3.
3.1.
Composition
Parts
8
8
4.
4.1.
4.1.1.
4.2.
Installation
Connection
Make the connections
Camera mounting
9
9
9
9
5.
5.1.
5.1.1.
5.1.2.
Name and Functions
Camera controls
Menu navigation
Monitoring and switches
10
10
10
6.
6.1.
6.2.
6.3.
6.3.1.
6.3.2.
6.3.3.
6.3.4.
6.3.5.
6.3.6.
6.4.
6.4.1.
6.4.2.
6.4.3.
6.5.
6.5.1.
6.5.2.
6.5.3.
6.5.4.
6.5.5.
6.6.
6.6.1.
6.6.1.1.
6.6.1.2.
Operating Camera
Camera OSD menu
PRESET
EXPOSURE
LENS (DC or ESC)
BRIGHTNESS – Adjusts brightness of the image.
SHUTTER – Adjusts the shutter speed.
FLK (FLICKERLESS)
AGC (Auto Gain Control)
INTENSIFY
WHITE BAL. – White Balance Setup
ATW
PUSH
MANUAL
DAY / NIGHT
AUTO
DAY – For color mode only.
NIGHT – For BLACK and WHITE mode only.
EXTERN
IRED
BACKLIGHT
BLC (back-light compensation), HLC (high-light compensation)
OFF – Disable
BLC – To lighten a darker part of the image.
11
11
14
14
14
14
14
15
15
15
15
15
15
15
16
16
16
17
17
18
18
18
18
18
Contents
6.6.1.3.
6.6.2.
6.6.2.1.
6.6.2.2.
6.6.2.3.
6.7.
6.8.
6.8.1.
6.8.2.
6.8.3.
6.8.4.
6.8.5.
6.8.6.
6.8.7.
6.8.7.1.
6.8.7.2.
6.8.8.
6.8.8.1.
6.8.8.2.
6.9.
6.9.1.
6.9.1.1.
6.9.1.2.
6.9.1.3.
6.9.2.
6.9.3.
6.9.4.
6.9.5.
6.9.6.
6.9.7.
6.9.8.
6.10.
6.10.1.
6.10.2.
HLC – Force blocking the bright part.
D-WDR (Digital Wide Dynamic Range), DEFOG
OFF – Disable
D-WDR
DEFOG
SPECO DNR – Digital Noise Reduction
IMAGE
SHARPNESS – To adjust SHARPNESS of the image.
CHROMA – To adjust the color intensity of the image.
MONITOR
SHADING
H-MIRROR – Horizontal image flip
POSI/ NEGA – Invert the colors of the images
MOTION – Motion detect
OFF – Disable
ON
PRIVACY
OFF – Disable
ON
SYSTEM
OSD – On Screen Display
CAM TITLE
ID DISPLAY
FONT COLOR
CAM ID – CAMERA ID (RS-485 Communication ID)
SYNC
BAUDRATE
COAXIAL
DEFECT (Pixel defect compensation)
LANGUAGE
VERSION – Camera Software History ..
EXIT
SAVE
PRESET – In the state of the EXIT, press menu button exit.
19
20
20
20
20
20
21
21
21
21
21
21
21
22
22
22
23
23
23
24
24
24
24
24
25
25
25
25
25
25
25
26
26
26
7.
7.1.
Troubleshooting
Resolving problems
27
27
8.
8.1.
8.2.
Technical Data
Specifications – HINT81H
Dimensions
28
28
29
Contents
5
1.
6
Important Safety Instructions
1.
Read these instructions.
2.
Keep these instructions.
3.
Heed all warnings.
4.
Follow all instructions.
5.
Clean only with a dry cloth.
6.
Do not block any ventilation openings. Install in accordance
with the manufacturer's instructions.
7.
Do not install unit near any heat sources such as radiators,
heat registers, stoves, or other apparatus (including
amplifiers) that produce heat.
8.
Protect the power cord from being walked on or pinched
particularly at plugs, convenience receptacles, and the point
where they exit from the apparatus.
9.
Only use attachments/accessories specified by the
manufacturer.
10.
Unplug this apparatus during lightning storms or when
unused for long periods of time.
11.
Refer all servicing to service personnel. Servicing is required
when the apparatus has been damaged in any way, such
as power supply cord or plug is damaged, liquid has been
spilled or objects have fallen into the apparatus, the
apparatus has been exposed to rain or moisture, does not
operate normally, or has been dropped.
12.
Do not install the camera in extreme temperature conditions.
Operate the camera under conditions where temperatures
are within -10°C(14°F) to +50°C(122°F). Especially be careful
for ventilation under high temperature.
Important Safety Instructions
2.
Features
1/3 inch High Sensitivity CCD
Min Illumination (F1.2, 30IRE, ICR B/W)
Works under extreme low illumination conditions:
– INTENSIFIER [X32] : Color 0.005 Lux
D-WDR (Digital Wide Dynamic Range)
Greatly improves image quality and detail even in backlight
conditions, by increasing exposure in dark areas while
decreasing it in bright areas, resulting in a corrected image
with clear details in both bright and dark areas.
Variety of convenience functions
Provides special functions for advanced manipulation of
your device, including:
–
–
–
–
–
–
–
–
–
Features
Adjustable sharpness enhancement [700 TV Lines]
Adjustable privacy mask [8 masks]
Adjustable motion detection [4 areas]
SPECO DNR [Digital Noise Reduction]
INTENSIFIER [X32]
BLC [Backlight Compensation]
POSI / NEGA
MIRROR [Horizontal]
Coaxial communication [Pelco-C]
7
3.
Composition
3. 1.
Parts
The camera unit consists of the following parts:
1
2
3
4
5
6
7
No.
1
2
3
4
5
6
7
Parts
Guide pattern
Plastic anchors
Rubber pad
Dome base
Mounting screws
Dome cover
L-wrench for dome cover mounting
• CAUTION: Installation should only be performed by
qualified service personnel in accordance with the
National Electrical Code or applicable local codes.
8
Composition
4.
Installation
4. 1.
Connection
Connecting to Power and Video
1
2
4.1.1. Make the connections
• The wire is non-polarized.
• Use 24V AC power source or 12V DC power source.
Video Output
GND
12V DC
AC
AC 24V AC
No. Function
Terminal Color
Remarks
1 Video Output Yellow
1.0 Vp-p
24V AC (±20%) / 12V DC (±10%)
2 Power Input Red
4. 2.
Installation
Camera mounting
To mount the camera:
–
Stick the guide pattern on the wall or ceiling.
–
Drill three holes according to the guide pattern then insert
anchors into the drilled holes
–
Draw out power / video wires to the connecting places.
–
Attach the camera base to the ceiling or wall using the supplied
three screws.
–
Adjust desired focus and scene by turning and moving bracket
by hand.
–
Align dome cover over base.
–
Fix the dome cover on the base by covering.
9
5.
Name and Functions
5. 1.
Camera controls
–>
1
6
–>
4
RIGHT
LEFT
<–
–>
5
DOWN
<–
RIGHT
LEFT
<–
UP
<–
3
–>
UP
DOWN
2
5.1.1. Menu navigation
No.
1
2
3
4
5
Parts
Remarks
Up
Down
Left
Right
Menu(Center)
Move the cursor up in the screen.
Move the cursor down in the screen.
Move the cursor left in the screen.
Move the cursor right in the screen.
Press straight down to open menu or set.
5.1.2. Monitoring and switches
No.
6
Parts
Remarks
Service
monitor
connector
When installing the camera, connect a
service monitor to set angle of view and
focus of the screen.
(This output cannot be used simultaneously
with the main video output.)
• N O T E : Push the Joy stick for one second, and the OSD
appears on the screen. Move the Joy Stick up, down, left
& right to control the OSD functions.
10
Name and Functions
6.
Operating Camera
6. 1.
Camera OSD menu
PRESET
SPECO TECH
INDOOR, OUTDOOR, LOW LIGHT, HALLWAY, LOBBY(D-WDR), ELEVATOR
ESC
EXPOSURE
DC
ATW
PUSH
MAIN SETUP
WHITE BAL.
MANUAL
AUTO
DAY
DAY/NIGHT
NIGHT
EXTERN
Operating Camera
LENS
ESC
BRIGHTNESS 0 ~ 20
AUTO, 1/60, 1/120, 1/250, 1/500, 1/700,
SHUTTER 1/1K, 1/1600, 1/2500, 1/5K, 1/7K,
1/10K, 1/30K, 1/60K, 1/120K
OFF, ON
FLK
0 ~ 20
AGC
INTENSIFY OFF, X2, X4, X8, X16, X32, X64, X128, X256, X512
RETURN
LENS
DC
BRIGHTNESS 0 ~ 20
1/60, 1/120, 1/250, 1/500, 1/700, 1/1K,
SHUTTER 1/1600, 1/2500, 1/5K, 1/7K, 1/10K,
1/30K, 1/60K, 1/120K
FLK
OFF, ON
AGC
0 ~ 20
INTENSIFY OFF, X2, X4, X8, X16, X32, X64, X128, X256, X512
RETURN
PUSHING
RED
BLUE
RETURN
MODE
D/N LEVEL
DELAY TIME
BURST
RETURN
MODE
RETURN
MODE
BURST
RETURN
MODE
EXTERN
DELAY TIME
BURST
RETURN
0 ~ 20
0 ~ 20
AUTO
LOW, MIDDLE, HIGH
0 ~ 15 SEC
OFF, ON
DAY
NIGHT
OFF, ON
EXTERN
EXT-L, EXT-H
0 ~ 15 SEC
OFF, ON
11
DAY/NIGHT IRED
BLC /
HLC
MODE
DELAY TIME
BURST
IR RED
LEVEL
AREA
RETURN
OFF
BLC
BACKLIGHT
HLC
MAIN SETUP
IRED
0 ~ 15 SEC
OFF, ON
INTELLI., SMART
NOT USED (INTELLI.), OFF, 1 ~ 20 (SMART)
NOT USED (INTELLI.), 0 ~ 20 (SMART)
MODE
LEVEL
DISPLAY
TOP
BOTTOM
LEFT
RIGHT
RETURN
LEVEL
RETURN
BLC
LOW, MIDDLE, HIGH
OFF, ON
0 ~ 45 (NTSC)
10 ~ 55 (NTSC)
0 ~ 208 (NTSC)
10 ~ 218 (NTSC)
LOW, MIDDLE, HIGH
OFF
D-WDR
MODE
LOW, MIDDLE, HIGH
LEVEL
RETURN
DEFOG
MODE
LOW, MIDDLE, HIGH
LEVEL
DEFOG
RETURN
SPECO DNR OFF, LOW, MIDDLE, HIGH
SHARPNESS 0 ~ 20
CHROMA 0 ~ 20
0.35, 0.40, 0.45, 0.50, 0.55, 0.60, 0.65, 0.70
GAMMA
0 ~ 20
MONITOR PED. LV.
IMAGE
RETURN
SHADING 0 ~ 20
H-MIRROR OFF, ON
POSI/NEGA POSI, NEGA
D-WDR /
DEFOG
12
D-WDR
Operating Camera
OFF
MOTION
ON
AREA
DISPLAY
SENSITIVITY
TOP
BOTTOM
LEFT
RIGHT
RETURN
1~4
OFF, ON
0 ~ 30
0 ~ 54 (NTSC)
1 ~ 55 (NTSC)
0 ~ 217 (NTSC)
1 ~ 218 (NTSC)
AREA
DISPLAY
1~8
OFF, ON
BLACK, GRAY-1, GRAY-2, GRAY-3.
GRAY-4, WHITE, YELLOW, GREEN,
BLUE, RED, CYAN, MAGENTA
0 ~ 61 (NTSC)
1 ~ 62 (NTSC)
0 ~ 238 (NTSC)
1 ~ 239 (NTSC)
OFF
IMAGE
COLOR
PRIVACY
MAIN SETUP
SYSTEM
EXIT
ON
TOP
BOTTOM
LEFT
RIGHT
RETURN
CHAR SELECT
,
CAM TITLE POSITION
,
RETURN
ENTER
OSD
ID DISPLAY OFF, ON
FONT COLOR 1 ~ 8
RETURN
0 ~ 255
CAM ID
INT
SYNC
BAUDRATE 2400, 4800, 9600, 57600, 115200
COAXIAL 15 BIT
START
DEFECT
ENGLISH, KOREAN, JAPANESE, CHINESE1, CHINESE2,
LANGUAGE SPANISH, GERMAN, FRENCH, POLISH, ITALIAN, PORTUGUESE,
CZECH, RUSSIAN, TURKISH, HUNGARIAN, GREEK
VERSION
RETURN
.
PRESET
Operating Camera
13
Using the On-Screen Display(OSD) Menu
• To access an OSD setup menu item, simply press the MENU button
to display the menu screen as shown below. Use UP and DOWN
buttons to move the cursor to a desired menu item and user
LEFT/ RIGHT buttons to change its option.
LEFT / RIGHT
SPECO TECH
UP / DOWN
PRESET
MAIN SETUP
EXIT
INDOOR
6. 2.
PRESET
This menu can be set according to the surroundingenvironment.
It is consists of INDOOR, OUTDOOR, LOW LIGHT, HALLWAY,
LOBBY(D-WDR) and ELEVATOR.
6. 3.
EXPOSURE
6.3.1. LENS (DC or ESC)
Select LENS using the the UP or DOWN button. It is possible to adjust
ESC, DC using the LEFT or RIGHT button. Select DC and Press the
MENU button. DC Lens is activated.
EXPOSURE
LENS
BRIGHTNESS
SHUTTER
FLK
AGC
SENSE UP
RETURN
DC
8
1/60
OFF
20
X4
6.3.2. BRIGHTNESS – Adjusts brightness of the image.
It is possible to adjust it within 0 ~ 20 using the LEFT or RIGHT button.
6.3.3. SHUTTER – Adjusts the shutter speed.
It is possible to adjust AUTO, 1/60, 1/120, 1/250, 1/700, 1/1K,
1/1600, 1/2500, 1/5K, 1/7K, 1/10K, 1/30K, 1/60K, 1/120K level
using the LEFT or RIGHT button.
If ESC is selected, the AUTO is automatically controlled depending
on the ambient illumination of the subject.
DC: 1/60 SEC Default
ESC: AUTO Default
NTSC SHUTTER AUTO: 1/60 ~ 120,000
14
Operating Camera
6.3.4. FLK (FLICKERLESS)
Select this when you experience picture flicker, this happens when
there is a clash with the installed lighting frequency.
ON: Hold shutter speed (NTSC: 1/100)
6.3.5. AGC (Auto Gain Control)
It is possible to adjust it within 0 ~ 20 using the LEFT or RIGHT button.
When the Low illumination: The higher the gain level, the brighter
the picture but the higher the noise.
6.3.6. INTENSIFY
It is possible to adjust with in OFF, X2, X4, X8, X16, X32, X64, X128,
X256, X512 using the LEFT or RIGHT button. When low light is used
to increase the sensitivity.
6. 4.
WHITE BAL. – White Balance Setup
– Select WHITE BAL. using the UP and DOWN buttons and then
press MENU to enter the exposure setup.
– You can setup ATW, PUSH and MANUAL.
– Select desired submenu using the UP and DOWN buttons and
use LEFT and RIGHT buttons to set the option.
6.4.1. ATW
When the Color temperature is automatically adjusted to 2,000°K to 11,000°K.
6.4.2. PUSH
If the set color temperature doesn't meet the image.
Press the MENU button to fix color temperature to specific image.
If the environment changes, readjust it.
6.4.3. MANUAL
To set a certain color temperature with RED, BLUE.
Select MANUAL using the LEFT or RIGHT button and press the MEUN
button then W.B. MANUAL is activated.
MANUAL
RED
BLUE
RETURN
9
15
RED
To adjust density of RED. (0 ~ 20)
BLUE
To adjust density of BLUE. (0 ~ 20)
Operating Camera
15
6. 5.
DAY / NIGHT
– You can set the day and night switching mode.
– Select DAY/NIGHT using the UP and DOWN buttons, and then
press MENU to enter the DAY/NIGHT setup.
– Available options are AUTO, DAY, NIGHT, EXTERN and IRED.
6.5.1. AUTO – To switch to COLOR/BLACK and WHITE automatically
upon illumination.
Select AUTO using the LEFT or RIGHT button and press the MENU
button to activate DAY/NIGHT option. Color in a normal environment,
but changes to B/W when the low illumination.
• AGC settings, if less than 10 D/N switching the hunting may occur.
• In Auto Mode D/N camera using external IR may cause
D/N filter to flicker.
DAY/NIGHT
MODE
D/N LEVEL
DELAY TIME
BURST
RETURN
AUTO
MIDDLE
3 SEC
ON
MODE
You can select between AUTO using the LEFT or RIGHT button.
D/N LEVEL (switching level from color to black and white)
Select D/N LEVEL using the UP or DOWN button.
You can adjust between LOW, MIDDLE, HIGH using the LEFT or
RIGHT button.
DELAY TIME (Day/Night switching delay time)
You can adjust between 0 ~ 15 sec changing the color or B/W.
BURST
You can select between ON/OFF using the LEFT or RIGHT button.
• Set to OFF, BURST signal disappears in the B/W state.
6.5.2. DAY – For color mode only.
The picture is always displayed in color.
16
Operating Camera
6.5.3. NIGHT – For BLACK and WHITE mode only.
Select B/W using the LEFT or RIGHT button and press the MEUN
button to activate DAY/NIGHT option.
DAY/NIGHT
MODE
BURST
RETURN
NIGHT
ON
MODE
You can select NIGHT using the LEFT or RIGHT button.
BURST
You can select between ON/OFF using the LEFT or RIGHT button.
• Set to OFF, BURST signal disappears in the B/W state.
6.5.4. EXTERN
To switch between COLOR or BLACK and WHITE depending on
external signals. Select EXT-L or EXT-H using the LEFT or RIGHT
button and press the MEUN button to activate DAY/NIGHT option.
DAY/NIGHT
MODE
EXTERN
DELAY TIME
BURST
RETURN
EXTERN
EXT-L
3 SEC
ON
MODE
You can select EXTERN using the LEFT or RIGHT button.
EXTERN
EXT signal
EXT-L EXT-H
You can adjust EXT signal Low
+3.3V
NIGHT
DAY
color or EXT signal High color
NIGHT
using the LEFT or RIGHT button. GND(0V) or open DAY
DELAY TIME (Day/Night switching delay time)
You can adjust between 0 ~ 15 sec changing the color or B/W.
BURST
You can select between ON/OFF using the LEFT or RIGHT button.
• Set to OFF, BURST signal disappears in the B/W state.
Operating Camera
17
6.5.5. IRED
To switch between COLOR or BLACK and WHITE depending on Photo
sensor or AGC data. Select IRED using the LEFT or RIGHT button
and press the MEUN button to activate DAY/NIGHT option.
DAY/NIGHT
MODE
DELAY TIME
BURST
IR LED
LEVEL
AREA
RETURN
IRED
3 SEC
ON
INTELLI.
NOT USED
NOT USED
MODE
You can select IRED using the LEFT or RIGHT button.
DELAY TIME (day/night switching delay time)
You can adjust between 0 ~ 15 sec changing the color or B/W.
BURST
You can select between ON/OFF using the LEFT or RIGHT button.
• Set to OFF, BURST signal disappears in the B/W state.
IR LED (INTELLI./ SMART)
– You can select between INTELLI. or SMART using the LEFT or
RIGHT button.
– When set to SMART, you can adjust the level and area.
– When set to INTELLI., IR LED brightness is automatically adjusted
according to the distance to the subject.
LEVEL
Adjust picture brightness of the IR function: When IR LED ON state.
AREA
Adjust picture area of the IR function: When IR LED ON state.
6. 6.
BACKLIGHT
– It is possible to adjust OFF, BLC, HLC using the LEFT or RIGHT button.
– It is possible to adjust OFF, D-WDR, DEFOG using the LEFT or RIGHT button.
6.6.1. BLC (back-light compensation), HLC (high-light compensation)
6.6.1.1. OFF – Disable
6.6.1.2. BLC – To lighten a darker part of the image.
Select BLC using the the LEFT or RIGHT button and press the MEUN
button to activate BACKLIGHT option.
18
Operating Camera
BACKLIGHT
BACKLIGHT
D-WDR/DEFOG
RETURN
OFF
OFF
BACKLIGHT
MODE
LEVEL
DISPLAY
TOP
BOTTOM
LEFT
RIGHT
RETURN
BLC
MIDDLE
OFF
12
43
50
168
– MODE: Select MODE using the UP or DOWN button. You can select
between OFF, BLC, HLC using the LEFT or RIGHT button.
– LEVEL (Adjust level of the BLC function): You can select between
LOW, MIDDLE, HIGH using the LEFT or RIGHT button.
– DISPLAY: You can see the BLC AREA using the LEFT or RIGHT button.
– TOP/ BOTTOM/ LEFT/ RIGHT (Users can specify BLC area.):
Select TOP, BOTTOM, LEFT or RIGHT using the UP or DOWN button.
You can select the AREA display using the LEFT or RIGHT button.
6.6.1.3. HLC – Force blocking the bright part.
Select HLC using the the LEFT or RIGHT button and press the MEUN
button to activate BACKLIGHT option.
BACKLIGHT
MODE
LEVEL
RETURN
HLC
HIGH
– MODE: You can select HLC using the LEFT or RIGHT button.
– LEVEL (Set the level of bright part): You can select between
LOW, MIDDLE, HIGH using the LEFT or RIGHT button.
Operating Camera
19
6.6.2. D-WDR (Digital Wide Dynamic Range), DEFOG
6.6.2.1. OFF – Disable
6.6.2.2. D-WDR
Select D-WDR using the the LEFT or RIGHT button and press the
MENU button. When there are both bright and dark areas at the same
time, this mode makes both areas distinctive.
D-WDR/DEFOG
MODE
LEVEL
RETURN
D-WDR
LOW
– MODE: Select MODE using the UP or DOWN button. You can select
between OFF, D-WDR, DEFOG using the LEFT or RIGHT button.
– LEVEL (Adjust level of the D-WDR function): You can select
between LOW, MIDDLE, HIGH using the LEFT or RIGHT button.
6.6.2.3. DEFOG
Sharpening to look around, if you look blurred due to fog around.
BACKLIGHT
MODE
LEVEL
RETURN
HLC
HIGH
– MODE: You can select DEFOG using the LEFT or RIGHT button.
– LEVEL (Adjust level of the DEFOG function): You can select
between LOW, MIDDLE, HIGH using the LEFT or RIGHT button.
6. 7.
20
SPECO DNR – Digital Noise Reduction
– To reduce the image noise especially during the low ambient
lighting conditions.
– You can adjust between OFF, LOW, MIDDLE, HIGH using the
LEFT or RIGHT button.
Operating Camera
6. 8.
IMAGE
– Select IMAGE using the UP or DOWN button and press the MENU
button to activate IMAGE option.
6.8.1. SHARPNESS – To adjust SHARPNESS of the image.
You can adjust the sharpness from 0 ~ 20 using the LEFT or RIGHT
button.
IMAGE
SHARPNESS
CHROMA
MONITOR
SHADING
H-MIRROR
POSI/NEGA
MOTION
PRIVACY
RETURN
10
10
0
OFF
POSI
OFF
OFF
6.8.2. CHROMA – To adjust the color intensity of the image.
You can adjust the gain from 0 ~ 20 using the LEFT or RIGHT button.
6.8.3. MONITOR
Please change the settings value of video appropriate to your monitor.
GAMMA
When you use CRT or LCD monitor, you can select GAMMA level.
You can select between 0.35, 0.40, 0.45, 0.50, 0.55, 0.60, 0.65,
0.70 using the LEFT or RIGHT button.
PED. LV.
You can adjust setup level from 0 ~ 20 using the LEFT or RIGHT button.
6.8.4. SHADING
Compensate for the dark parts of the image outside the Department.
You can adjust SHADING from 0 ~ 20 using the LEFT or RIGHT button.
6.8.5. H-MIRROR – Horizontal image flip
You can select from ON, OFF using the LEFT or RIGHT button.
ON: Horizontal image flip.
6.8.6. POSI/ NEGA – Invert the colors of the images
POSI: Default
NEGA: Invert the colors of the images.
Operating Camera
21
6.8.7. MOTION – Motion detect
Press the MENU button to activate MOTION option.
6.8.7.1. OFF – Disable
6.8.7.2. ON
MOTION
AREA
DISPLAY
SENSITIVITY
TOP
BOTTOM
LEFT
RIGHT
RETURN
1
ON
20
3
24
13
96
• AREA: To specify MOTION detection area.
You can select from area 1 ~ 4 position using the LEFT or RIGHT button.
• DISPLAY: You can see the MOTION area using the LEFT or RIGHT button.
ON If the motion action MOTION character on the screen is on the display.
OFF Disable
• SENSITIVITY: To setup the motion sensitivity.
You can adjust the motion sensitivity of a movement from 0 ~ 30
using the LEFT or RIGHT button.
0
Least sensitive (lowest)
30 Most sensitive (highest)
• TOP/ BOTTOM/ LEFT/ RIGHT: Users can specify MOTION detected area.
Select TOP, BOTTOM, LEFT or RIGHT using the UP or DOWN button.
You can adjust the AREA using the LEFT or RIGHT button.
TOP
Extend or reduce the upper area of the MOTION detected area.
BOTTOM Extend or reduce the bottom area of the MOTION detected area.
LEFT
Extend or reduce the left side of the MOTION detected area.
RIGHT Extend or reduce the right side of the MOTION detected area.
TOP
LEFT
1
reduce RIGHT extend
RIGHT
1
BOTTOM
• NOTE: In each area activated only when DISPLAY item is ON.
22
Operating Camera
6.8.8. PRIVACY
Select PRIVACY using the UP or DOWN button and select ON
using the LEFT or RIGHT button.
Press the MENU button to activate PRIVACY option.
6.8.8.1. OFF – Disable
6.8.8.2. ON
PRIVACY
PRIVACY
AREA
DISPLAY
SENSITIVITY
TOP
BOTTOM
LEFT
RIGHT
RETURN
AREA
DISPLAY
SENSITIVITY
TOP
BOTTOM
LEFT
RIGHT
RETURN
1
ON
BLUE
3
28
7
52
2
ON
BLUE
3
28
66
112
• AREA: To specify the PRIVACY area.
You can select from area 1 ~ 8 position using the LEFT or RIGHT button.
• DISPLAY: You can select AREA between ON, OFF using the LEFT
or RIGHT button.
ON Display the Privacy area.
OFF Disable
• COLOR: To select the color of PRIVACY masks.
You can select the color of all areas from BLACK, GRAY-1 ~ 4,
WHITE, YELLOW, GREEN, BLUE, RED, CYAN, MAGENTA using the
LEFT or RIGHT button.
• TOP/ BOTTOM/ LEFT/ RIGHT: Users can specify PRIVACY area.
Select TOP, BOTTOM, LEFT or RIGHT using the UP or DOWN button.
You can adjust the privacy zone using the LEFT or RIGHT button.
TOP
Extend or reduce the upper area of the PRIVACY detected area.
BOTTOM Extend or reduce the bottom area of the PRIVACY detected area.
LEFT
Extend or reduce the left side of the PRIVACY detected area.
RIGHT Extend or reduce the right side of the PRIVACY detected area.
TOP
LEFT
1
reduce RIGHT extend
RIGHT
1
BOTTOM
Operating Camera
23
6. 9.
SYSTEM
– Select SYSTEM using the UP or DOWN button and press the
MENU button to activate SYSTEM mode.
6.9.1. OSD – On Screen Display
Select OSD using the UP or DOWN button and press the MENU
button to activate the OSD mode.
SYSTEM
OSD
CAM ID
SYNC
BAUDRATE
COAXIAL
DEFECT
LANGUAGE
VERSION
RETURN
1
INT
2400
15BIT
START
ENG
6.9.1.1. CAM TITLE
You can adjust ON, OFF using the LEFT or RIGHT button.
Select ON and press the MENU button to activate CAM TITLE option.
• ON: To display the camera title in the upper left-hand corner on the screen.
• OFF: Disable
CAM TITLE
OSD
CAM TITLE
ID DISPLAY
FONT COLOR
RETURN
OFF
OFF
1
00000000
––––––––
,
– CHAR SELECT
,
– POSITION
ENTER – RETURN
•
,
: To select character using the up or down button. (0 ~ 9, A ~ Z)
•
,
: To select position using the LEFT or RIGHT button.
• ENTER: You can return to using the MENU button.
6.9.1.2. ID DISPLAY
Camera ID DISPLAY on the screen.
You can select between ON, OFF using the LEFT or RIGHT button.
• ON: To display camera ID in the upper right-hand corner on the screen.
• OFF: Disable
6.9.1.3. FONT COLOR
Font colors that appear on the screen.
You can adjust the FONT COLOR from 1 ~ 8 using the LEFT or RIGHT button.
24
Operating Camera
6.9.2. CAM ID – CAMERA ID (RS-485 Communication ID)
You can select between the range 000 ~ 255 using the LEFT or RIGHT button.
• NOTE: When the INITIAL is set, the CAM ID is remained
previous selected CAM ID.
6.9.3. SYNC
INT
Internal Synchronization Type.
6.9.4. BAUDRATE – To set the communication speed (bps)
You can select between 2400, 4800, 9600, 57600, 115200 using
the LEFT or RIGHT button.
• NOTE: Pelco-D compatible PROTOCOL.
• NOTE: When the INITIAL is set, the BAUDRATE is
remained previous selected BAUDRATE.
6.9.5. COAXIAL
Coaxial communication methods are supported.
• NOTE: [ PROTOCOL ] Pelco Coaxitron
6.9.6. DEFECT (Pixel defect compensation)
You can select DEFECT using the MENU button.
DEFECT DETECTOR
THRESHOLD : 00020
/
– THRESHOLD LEVEL
ENTER – DETECTOR RUN
THRESHOLD
The smaller the value, the smaller the pixels to detection and
compensation. The reference value is set to 00020.
6.9.7. LANGUAGE – To set the OSD is complimented by 16 languages.
You can change between ENGLISH, SPANISH, FRENCH, ITALIAN,
GERMAN, RUSSIAN, TURKISH, POLISH, PORTUGUESE, CZECH,
HUNGARIAN, GREEK, KOREAN, JAPANESE, CHINESE1 or CHINESE2
using the LEFT or RIGHT button.
6.9.8. VERSION – Camera Software History ..
Operating Camera
25
6. 10. EXIT
– Select EXIT using the UP or DOWN button.
You can exit out from the OSD MENU by selecting menu button.
6.10.1. SAVE
Change item is saved automatically when you change a menu.
6.10.2. PRESET – In the state of the EXIT, press menu button exit.
Located in the exit menu the menu cursor, if you press the left/right
keys, reset is displayed.
Press for more than 1 second the key.
It will be preset after PUSHING display.
RETURN
26
Select RETURN using the UP or DOWN button.
And press the MENU button.
Operating Camera
7.
7. 1.
Troubleshooting
Resolving problems
The following table is intended to help identify the causes of
malfunctions and correct them where possible.
Malfunction
Solution
No image
on screen.
Check that the power cord and line
connection between the camera and
monitor are fixed properly.
Check that you have properly connected
VIDEO cable to the camera VIDEO
output jack.
The image on the
screen is dim.
Is lens stained with dirt?
Clean your lens with soft, clean cloth.
Ensure the monitor is set up correctly.
If the camera is exposed to strong light,
change its position.
Adjust the focus.
The image on the
screen is dark.
The camera is not
working properly,
and its surface is
hot.
The image on the
screen flickers.
Troubleshooting
Adjust the contrast of the monitor.
If you have an intermediate device, set
the 75 Ohm / Hi-z correctly.
Check that you have properly connected
the camera to an appropriate power
source.
Check whether the camera is exposed
to strong sunlight or fluorescent
lighting.
27
8.
Technical Data
8. 1.
Specifications
MODEL
Signal System
Effective Pixels
ESC
Manual Shutter
Image Sensor
SPECO DNR
Intensify
Min Illumination
F1.2, 30 IRE, ICR B/W
HINT81H
NTSC
976 (H) x 494 (V)
1/60 ~ 1/120,000
1/60, 1/120, 1/250, 1/500, 1/700, 1/1K, 1/1.6K, 1/2.5K,
1/5K, 1/7K, 1/10K, 1/30K, 1/60K, 1/120K
1/3 inch High Sensitivity CCD
OFF, LOW, MIDDLE, HIGH
OFF, X2, X4, X8, X16, X32, X64, X128, X256, X512
INTENSIFIER (X32) : Color 0.005 Lux
Video Output
Sync. System
S/N Ratio
Horizontal Resolution
White Balance
D-WDR or DEFOG
BLC or HLC
AGC
Day & Night
Burst
Motion Detection
Privacy
Mirror
Sharpness
Gamma
Applicable Lens
Coaxial Communication
1.0Vp-p Composite Signal (75 ohms)
Internal Sync
52dB Min (Sharpness, AGC Off)
More 700 TV Lines
ATW/ PUSH/ MANUAL
OFF, LOW, MIDDLE, HIGH
OFF, LOW, MIDDLE, HIGH
0 ~ 20
AUTO, DAY, NIGHT, EXTERN, IRED
OFF, ON
OFF, ON (4 programmable areas)
OFF, ON (8 Programmable masks)
OFF, ON (Horizontal)
0 ~ 20
0.35, 0.40, 0.45, 0.50, 0.55, 0.60, 0.65, 0.70
Fixed Lens (f=3.6mm, F1.8)
Supports Pelco-C
ENGLISH, KOREAN, JAPANESE, CHINESE1, CHINESE2, SPANISH,
OSD Language
GERMAN, FRENCH, POLISH, ITALIAN, PORTUGUESE,
16 Languages
CZECH, RUSSIAN, TURKISH, HUNGARIAN, GREEK
Supply Voltage
24V AC (±20%) / 12V DC (±10%)
Power Consumption
180mA, 2.2W (Max) / 150mA, 1.8W (Max)
Operating Temperature -10°C to +50°C (14°F to 122°F)
/ Humidity
/ 30% ~ 80% RH
Storage Temperature -20°C to +60°C (-4°F to 140°F)
/ Humidity
/ 20% ~ 90% RH
IP
IP66
Dimensions(WxHxD) 129.8 (5.11") x 52.8 (2.07") x 118.8mm (4.67")
28
Technical Data
Dimensions
52.8 (2.07)
8. 2.
129.8 (5.11)
82.5 (3.24)
85 (3.34)
17 (0.66)
mm (inch)
Technical Data
29