1
Hi-Teach Ltd.
Info-Hub
User Manual
Version 2.7.1
Jan 2006
© 2000 Hi-teach Ltd. All Rights Reserved. 2003-11-20 www.hi-teach.com 972 9 8919849
Table of Contents
Overview............................................................................................................................... 5
General .................................................................................................................................. 5
Attachments........................................................................................................................... 5
Collaboration.......................................................................................................................... 6
Assignments (Courses) ......................................................................................................... 7
Data Items / Learning Objects ............................................................................................ 8
View a Data Item ................................................................................................................... 8
Data Item Profile .................................................................................................................... 8
Edit a Data Item ..................................................................................................................... 9
Edit a Data Item – Attributes................................................................................................ 13
Edit Data Item – Directives .................................................................................................. 14
Edit Data Item – Acknowledgments..................................................................................... 15
Edit Data Item - Deliverables ............................................................................................... 15
Templates ............................................................................................................................ 16
Topics .................................................................................................................................. 16
Edit Data Item - Attachments............................................................................................ 18
Attachment Details............................................................................................................... 18
Add/Edit Attachment ............................................................................................................ 19
File Attachments - Check-Out & Check-In........................................................................... 20
Attachments – Internet links ................................................................................................ 21
Attachments – Library links.................................................................................................. 21
Attachments – Data Item links ............................................................................................. 21
Attachments – Phases......................................................................................................... 21
Libraries.............................................................................................................................. 22
Library Types ....................................................................................................................... 22
View a library ....................................................................................................................... 22
Edit library structure............................................................................................................. 23
Question Bank ..................................................................................................................... 25
Collaboration...................................................................................................................... 26
View the Project Room ........................................................................................................ 26
Setting Item (object) as Home page item ............................................................................ 26
View a Team Room ............................................................................................................. 27
Ownership............................................................................................................................ 28
© 2000 Hi-teach Ltd. All Rights Reserved. 2003-11-20 www.hi-teach.com 972 9 8919849
View the Calendar ............................................................................................................... 29
Edit a Calendar item ............................................................................................................ 29
Student Project Registration ................................................................................................ 30
Assignments ...................................................................................................................... 31
Performing Assignments...................................................................................................... 31
Hand in Deliverables............................................................................................................ 32
Perform a Quiz..................................................................................................................... 33
View a Quiz.......................................................................................................................... 33
Edit a Phase ........................................................................................................................ 37
Edit Phase Requirements .................................................................................................... 38
Branching ............................................................................................................................ 39
Edit a Question .................................................................................................................... 42
Grades Query – Teacher View (Student Achievements)..................................................... 50
Grade Products.................................................................................................................... 51
View Quiz Results................................................................................................................ 52
Project Scoring .................................................................................................................... 52
Certificate Module................................................................................................................ 54
Tools ................................................................................................................................... 56
Select Project....................................................................................................................... 56
Catalog List.......................................................................................................................... 56
Select Interface Language................................................................................................... 57
Navigation............................................................................................................................ 58
Edit Team Members ............................................................................................................ 58
User Details ......................................................................................................................... 60
Search ................................................................................................................................. 60
Edit Topic structure.............................................................................................................. 62
Working in a Discussion Board............................................................................................ 63
Access ................................................................................................................................ 64
User Types .......................................................................................................................... 64
Roles ................................................................................................................................... 64
Library Access ..................................................................................................................... 64
Working Data Item Access .................................................................................................. 65
Administration ................................................................................................................... 66
Login Types ......................................................................................................................... 66
Edit Project .......................................................................................................................... 66
Project Catalog Data Item.................................................................................................... 67
Export to SCORM ................................................................................................................ 67
© 2000 Hi-teach Ltd. All Rights Reserved. 2003-11-20 www.hi-teach.com 972 9 8919849
Project Registration ............................................................................................................. 67
Copy Project ........................................................................................................................ 68
Project Activity (Logins) ....................................................................................................... 69
Navigation............................................................................................................................ 70
http://www.hi-teach.com/infohub/homepagelogin.asp ......................................................... 70
Appendix – Scoring Example ........................................................................................... 71
© 2000 Hi-teach Ltd. All Rights Reserved. 2003-11-20 www.hi-teach.com 972 9 8919849
Overview
Info-Hub User Manual
5
Overview
General
The Info-Hub (IH) is a collaborative e-learning knowledge management platform, providing a project
oriented self-managed environment. Learner’s engagement is assured through dynamic context
adaptation and interactive requirement for product delivery, assuring learning effectiveness. The InfoHub is composed of three main sub components: Libraries, Team Collaboration environment and
Assignment driven Learning Management System (LMS). It is interfaced to existing information
storage tanks, providing an ideal vehicle to turn tacit knowledge embedded in organizations into
evolving usable knowledge.
A Data Item (DI) is the basic element of knowledge, learning or information the Info-Hub stores. A
DI includes a rich modular and descriptive profile and one or more files of information attached to it.
The attachments can be actual files
(Word, PowerPoint, Excel…), virtual
links (URLs) or links to other objects in
the Info-Hub like a library or a DI, or
phases.
Data Items can be found in
collaborative work areas (like Teams or
Projects),
in
libraries
and
in
assignment’s phases. Data Items can
be viewed or edited by users according
to their Access Rights, which can be
general or specific.
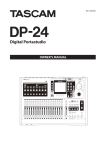
Attachments
Attachments are files or links that make up a data item, and hold the body of content. Attachments
can be of the following types:
Files – Word, Excel, PowerPoint, MS Projects and other types of files
Internet links – Links to internet or intranet
sites.
Links to data item – Provide interrelations between data items.
Links to library – Provide pointers to
existing libraries.
Note: Special files can also be used after
the specific application has been identified
© 2000 Hi-teach Ltd. All Rights Reserved. 2003-11-20 www.hi-teach.com 972 9 8919849
Overview
Info-Hub User Manual
6
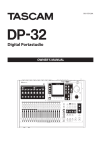
Libraries
A library is a hierarchical arrangement of data and knowledge. The
library holds the body of knowledge that supports the learning and
working process.
Libraries can include sub-libraries and contain many data items that can
be inserted, viewed or edited by users according to their access rights.
Libraries are used along with the Topics to form multiple archiving of
Data Items
Collaboration
The collaboration environment allows sharing of information between members of same group. There
are three types of groups - Team, Project or Super project, organized in hierarchical structure. The
groups allow distributed users to work collaboratively over the internet.
Each team has a private working environment or room, which includes shared calendar,
announcement board and working data items. A project has a homeroom including the similar
features applied to the project level.
© 2000 Hi-teach Ltd. All Rights Reserved. 2003-11-20 www.hi-teach.com 972 9 8919849
Overview
Info-Hub User Manual
7
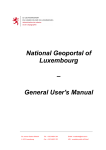
Assignments (Courses)
Each project can include a series of
assignments the user can perform, which
are made up of a series of phases. The
phases are designed to guide the user
through
the
assignment
providing
knowledge,
directions
and
dictating
requirements for product delivery or
performance of quizzes.
The relevant content and templates for
delivered products can be attached directly
to the phases or it can be provided through
links. The links can lead to information
within the Info-Hub, or outside on the Internet or Intranet.
A phase can include a requirement for product delivery (uploaded by the user – in the form of a DI) or
a multiple-choice quiz – including questions in the form of DI. Products and quizzes can be mandatory
or voluntary. The phase can require approval. In such case the user will be able to continue only after
approval of his coach.
© 2000 Hi-teach Ltd. All Rights Reserved. 2003-11-20 www.hi-teach.com 972 9 8919849
Data Items / Learning Objects
Info-Hub User Manual
8
Data Items / Learning Objects
View a Data Item
A data item is the basic unit of
the Info-Hub. It consists of a rich
modular
profile
and
attachments. The profile details
are shown on the screen when
the data item is selected. The
attachments are listed in the
attachment area or shown on
the panel, depending on the
template selected.
To view an attachment, click on
its link.
Click “More Details to view advanced profile information (writer, status, history etc.).
Data Item Profile
Property
Description
Title
Name of the learning object
Description
Textual description of the content of the learning object. (Searchable by
the Info Hub search engine)
Size
In KB
Clicking MORE DETAILS reveals:
Comment
A free comment field, for use by the authorized user
Progress Status The status of the learning object or the document.
IsPublished
A published flag according to the Learning Object state.
Controls publishing outside the context of the project.
Creation Date
created
Date on which the Learning Object or an embedded Document was
Update Date
Document updated date
Number of Hits
Number of times the Learning Object was viewed, indicates usability.
Feedback
Rating and/or feedback comments about a data item, and watching previous feedbacks.
To add Rating – Pick a number between 10 and 100 and click "Update"
To add Feedback Comments – Click "Add".
"View by" defines access to the comments – all users or only the instructor (an Administrator).
© 2000 Hi-teach Ltd. All Rights Reserved. 2003-11-20 www.hi-teach.com 972 9 8919849
Data Items / Learning Objects
Info-Hub User Manual
9
Click HISTORY to reveal a list of every action on the
item, including date and user.
Click PRINT to print the data item context only.
Template – The visual format used to present the Data
Item on the screen (see Templates).
Edit a Data Item
This panel is used to edit the properties of selected data items. The parameters are divided into five
groups (Tabs), Main Body & Attachments, Attributes, Directives, Acknowledgement and Deliverables
Main Body & Attachments
Title – The title of the item.
Description – The description of the item (see Editor on how to edit the description field).
Topics – Names of topics (or Categories) to which the Learning Object relates. The Topic list is a
hierarchical structure similar to the libraries. The topics list creates virtual libraries, whereby a Data
Item is archived in the library but is also (presented) in the topic folder. Unlike libraries, a DI can be
associated to more than one topic. A list of all the data items in a topic can be presented using the
© 2000 Hi-teach Ltd. All Rights Reserved. 2003-11-20 www.hi-teach.com 972 9 8919849
Data Items / Learning Objects
Info-Hub User Manual
10
search function, with the topic set as the only search parameter. Topics are defined in a closed final
list, for the entire Super Project by the Super project.
Template – Selects the visual format used to present the Data Item on the screen.
Send Mail – Click this button in order to send an email with the data item path in the text of the
message.
© 2000 Hi-teach Ltd. All Rights Reserved. 2003-11-20 www.hi-teach.com 972 9 8919849
Data Items / Learning Objects
Info-Hub User Manual
11
The Description Editor
The Description editor facilitates editing of formatted text. Use the advanced editor to type-in, to copy
from other sources (MS Words file, HTML web sites etc.) or to manually format texts. Make sure you
click Update to register your formatting.
Sample formats include:
This is Bold format
Right Shifted with background color underneath
Centered and Underlined
The following text formats may be changed using the Description Editor:
• Character size
• Cut, Copy & Paste (import & export formatted MS Words or Explorer HTML web page)
• Character formatting (Italics, Bold, Underline)
• Text color
• Background Color
• Paragraph alignment , which is bi-directional (Arabic, Hebrew and English)
• Numbers and Bullets automatic formatting
• Insert Microsoft Office products
• Insert hyperlinks
• Insert an embedded image link
• Direction Right-to-Left or Left-to-Right
• Toggle HTML view to change from preview to HTML code
To edit mark the text with the mouse (or arrows) and select the desired icon, as done with MS
Word when typing is in insertion mode, i.e. new text is added pushing aside the existing text
Max size of description field is 4,000 characters (in formatted form), approx. one full page of
formatted text. For a user with an authorization of "Team Leader" and above, the max. size of
characters is 7,800. However, in order to avoid overloading the system, it is recommended to limit
the text as much as possible. A character counter at the bottom designates used characters space
out of total 4,000/7,800 allowed
To add an Image link, move the cursor to where you want the image to appear, click the "add
image" button and enter the image Internet URL. A pointer link to the image Internet-address will
be placed in the formatted text. The image is not copied into Info-Hub but is linked to it
dynamically.
To Hyper-link to another web page first mark the area you wish to hyperlink, then click the "add
hyperlink" button (Chain icon) and enter its full Internet URL.
© 2000 Hi-teach Ltd. All Rights Reserved. 2003-11-20 www.hi-teach.com 972 9 8919849
Data Items / Learning Objects
Info-Hub User Manual
12
Use the standard Copy Cut & Paste buttons designated with scissors, document-copy and
clipboard icons to access Copy, Cut and Paste functions. It can be used internally in the
Description field or to and from other MS Text handling products such as MS Words
Direction – Default is set by the Language selection of the main project.
Attachments
Are documents that are linked to a data item, and are accessible from it. These can be added or
edited in the “Attachments” area. An attachment is characterized by:
Title
Hits
Updated
Size
Click "More" to reveal :
Creation Date
Date on which the Learning Object or an embedded Document was created
Created By Creator name
Updated By Name of the last updating person.
Viewed
Last time the Learning Object was viewed
To add an attachment, click "Add" on the attachment list. Select attachment type (File or various link
types), proceed to select the file type, browse to select the specific file, name the attachment (Default
will be the original file name) and click "Update"
To create a new data item, click “Add” on the top of the items list.
To edit an item, click “Edit” when the item is viewed, or select “Edit” in the ”Action” menu.
© 2000 Hi-teach Ltd. All Rights Reserved. 2003-11-20 www.hi-teach.com 972 9 8919849
Data Items / Learning Objects
Info-Hub User Manual
13
Edit a Data Item – Attributes
This area is used to edit properties: user-defined characteristics of a data item:
Comment – An additional descriptive text of the item.
Status – In progress, Final or Approved
Priority – High, Regular or Low
Start Date & Duration – The data item will be presented from the Start Date for Duration days. Empty
the duration field to ignore these settings.
Template – The visual format used to present the Data Item on the screen (see Templates).
Comment
A free comment field, for use by the authorized user
No.
A unique number used for reference to the Learning Object from anywhere
within the super project
Publish
Release of the Data Item for use in other projects and links within the
project by means of the reference number (See No. here)
Creation Date
Date on which the Learning Object or an embedded Document was created
Created By
Creator name
Update Date
Document updated date
Updated By
Name of the last updating person.
Number of Hits
Number of time the Learning Object was viewed, indicates usability.
© 2000 Hi-teach Ltd. All Rights Reserved. 2003-11-20 www.hi-teach.com 972 9 8919849
Data Items / Learning Objects
Info-Hub User Manual
14
Last View Date
Last time the Learning Object was viewed
IsPublished
A published flag according to the Learning Object state. Controls publishing
outside the context of the project, and linkage using the Ref. Number, No.
To edit these properties click “Attributes” in the data editing panel.
Edit Data Item – Directives
:
This area is used to edit Directives properties of a data item:
Objectives
Describes educational, pedagogic or deductive characteristics and virtues of
the Learning Object.
Relation
objects, if any.
Defines the relationships between the learning object and other learning
Coverage
Learning Object.
Describes the span or extent like: time, Culture, Geography applicable to the
Difficulty
Language
Difficulty level scaled 1 to 5 of the Learning Object
Arabic
The primary LO language
English
French
German
Hebrew
Italian
Russian
© 2000 Hi-teach Ltd. All Rights Reserved. 2003-11-20 www.hi-teach.com 972 9 8919849
Spanish
Data Items / Learning Objects
Info-Hub User Manual
15
Edit Data Item – Acknowledgments
:
This area is used to edit Acknowledgment properties of a data item:
Publisher
Describes the institute or organizations responsible for the Learning Object.
Contributor
People or organizations which contributed to the learning object
Rights
Describes Intellectual Property rights regarding the resources of this object.
Source
Determines the sources from which the Learning Object was derived
Copyright and Other Restrictions Describes the intellectual property rights, conditions and
restrictions regarding further use of the Learning Object
Edit Data Item - Deliverables
This area is used to define the Title and Description of a data item required from the user or student.
The file type and expected size can be defined here.
© 2000 Hi-teach Ltd. All Rights Reserved. 2003-11-20 www.hi-teach.com 972 9 8919849
Data Items / Learning Objects
Info-Hub User Manual
16
Templates
Templates are used to define the format
used to present an item on the screen.
The template determines the location of
the attachments on the screen, and which
details of the profile are shown.
The template can be updated by pressing
“Select”, near the template name when
editing the item. Click on the required
template, press “Select” to submit your
changes.
Note: Templates apply to Learning Objects, Data Items, Assignment Phases or Quiz Question.
Note: Special templates can be edited upon request (Contact Hi-Teach customer service)
Topics
© 2000 Hi-teach Ltd. All Rights Reserved. 2003-11-20 www.hi-teach.com 972 9 8919849
Data Items / Learning Objects
Info-Hub User Manual
17
Topic are arranged in hierarchy of knowledge to support easy archiving and retrieval. A DI can be
associated with many topics and can be retrieved via the Library tree, the topic tree or a search for
content and key words.
© 2000 Hi-teach Ltd. All Rights Reserved. 2003-11-20 www.hi-teach.com 972 9 8919849
Edit Data Item - Attachments
Info-Hub User Manual
18
Edit Data Item - Attachments
Attachment Details
The following information is available for each attachment:
Title – The title of the attachment.
Type - Attachment type: File, Internet link, Data Item link or Library link.
Size – The size of the attachment file.
Created / Updated – When and who created or updated the attachment.
Viewed – The date the attachment was last viewed.
Hits - The number of times the attachment was viewed.
History – Listing every action done on the attachment including date and user.
Click the blue arrow to view hidden details.
`
© 2000 Hi-teach Ltd. All Rights Reserved. 2003-11-20 www.hi-teach.com 972 9 8919849
Edit Data Item - Attachments
Info-Hub User Manual
19
Add/Edit Attachment
Title The title of the attachment.
Type – The type of attachment.
The panel changes after the type of attachment is selected:
File
File Type – Defines the type of file: Word, Excel, Image, PowerPoint, etc.
Show Open – is an indication to display the file open (in a frame) or as a link in the link list (phase
links, data item links, etc..)
Upload – Click “Browse” to select a file from your computer or network.
Internet Link
URL - Internet or Intranet URL (http://www.the-linked-location.com).
Library Link
Select Library – Click “Select Library” to select an existing library from the library map. Links can be
created only to libraries that are Published (see Edit Library Structure).
Data Item Link
No. (Number) – The Doc-Number of the linked data item (links can only be made to published data
items).
Phase Link
A linked Phased data item (links can only be made to published Phases).
Click “Update” to submit your changes.
Click “Add” at the top of the attachment list to create a new attachment or select “Edit” in the “Action”
menu of the attachment list to edit an existing attachment.
Project Link
A link to a team in the current or another project, provided the user has access to the target
object.The new project will open in a new window, thus not distructing the source learning rout.
Project – The project in which the team is.
Team – The team to be linked.
© 2000 Hi-teach Ltd. All Rights Reserved. 2003-11-20 www.hi-teach.com 972 9 8919849
Edit Data Item - Attachments
Info-Hub User Manual
20
Attachments - Files
Files are the main type of data item attachments. The files can be almost any type of Microsoft file
(Word, Excel, PowerPoint…). Any specific non-standard file type can be used after an introduction by
the Super Project Administrator.
Attachments can be viewed by clicking their links or icons that
indicate the file type. Files may be viewed directly on the browser
screen depending on the Data Item template selected.
When viewing a file attachment, the file is downloaded from the
internet to your computer. The following panel allows you to save
the file on your computer, or to open it on the screen. In the first
case you get the option to choose the saving location on your
computer. In the second case only a temporary file is opened on
your computer and it will be lost as soon as you close the file or
viewing application.
Important Note: Remember to save the file on your computer in a specified location. If you opened
the file without saving it first, your changes are made on a temporary file and will be lost unless you
manually choose “Save As...” in your viewing application. This is standard practice but the context of
the Info-Hub and your computer working together over the Internet requires attention, to avoid loss of
data.
File Attachments - Check-Out & Check-In
This feature enables collaborative work on a file. The check-out and check-in features are used to edit
file attachments by one user at a time. Other users can still view the file but they cannot modify it at
the same time. This way a ‘Master’ holding control of the document is defined. To check out an
attachment use the following process:
Check-Out – Marks the document as checked-out.
Download the file - choose “Save this file to disk” to save the file on your computer.
Edit the file – Modify the file
Check-In – Upload a new file. Alternatively you can release the checked out status and leave the
existing uploaded file intact. Click “OK” to upload your modified file back into the Info-Hub, or click
“Cancel” to leave the current file in place and release the Checked Out status.
While the file is checked-out, other users can see that it is being edited, by whom and since when. A
red “V” mark appears near the attachment and the specific details are shown. This feature is
important for team collaboration – it offers a simple method for multiple users to process a file in turns
in a coordinated manner.
An attachment can be marked as check-out without actually downloading it, and can be checked-in
without uploading it. Use this option to lock and unlock a file in the system.
A checked-out file can only be checked-in by the user who checked it out, or by an administrator.
Fast lane check-in can be done by double clicking the “V” mark in the DI edit screen
Important Note: When you check in a document you override the current document stored in the
Info-Hub. Erroneous Check In may destroy important files you and your team have been working on
for a while. Exercise care and attention when checking in files.
© 2000 Hi-teach Ltd. All Rights Reserved. 2003-11-20 www.hi-teach.com 972 9 8919849
Edit Data Item - Attachments
Info-Hub User Manual
21
Attachments – Internet links
Internet link Data Item Attachments are used to point to material in the internet or intranet.
Attachments can be viewed by clicking on their links or on the internet link icon. They can be viewed
directly on the screen according the template selected.
Note: Linked internet sites are opened in a new browser window.
Attachments – Library links
A library link is a type of attachment, pointing the user to an existing published library in the Info-Hub
where more relevant material can be found.
Library links can be viewed by clicking their links or folder icons. When viewing a library link, the
library will open and its content will be displayed.
Note: When clicking on a library link, the position of the user in the Info-Hub is switched to the new
library location and the previous location is lost. To return to the previous position use the browser
“Back” button.
Attachments – Data Item links
A Data Item Link is a type of attachment, pointing the user to another data item in the Info-Hub,
creating inter-relations between the data items.
Data Item Links can be viewed by clicking their links or their shortcut icon. When viewing a data item
link, it will be open and presented in accordance with its display template.
Note: When clicking on a Data Item Link, the position of the user in the Info-Hub is switched to the
new data item location and the previous location is lost. To return to the previous position use the
browser “Back” button.
Attachments – Phases
Phase Link is a type of attachment pointing the user to another Phase in the Info-Hub, creating interrelations between the Assignments.
Phase Links can be viewed by clicking their links or their shortcut icon. When viewing a data item link,
it will be opened and presented in accordance with its display template.
Note: When clicking on a Phase Link, the position of the user in the Info-Hub is switched to the new
data item location and the previous location is lost. To return to the previous position use the browser
“Back” button.
© 2000 Hi-teach Ltd. All Rights Reserved. 2003-11-20 www.hi-teach.com 972 9 8919849
Libraries
Info-Hub User Manual
22
Libraries
Library Types
The following seven different types of content libraries and hierarchical content structures exist:
Data – General content
How To - For methodology on how to perform tasks
Glossary - Short Glossaries on relevant subjects
FAQ - Frequently Asked Questions
My Library - A personal portfolio of user libraries
Question Bank – A bank of questions used for quizzes.
View By Topics – A view of all the content as categorized by the topic hierarchy.
To enter and view, select the root library type from the main menu on the left bar.
View a library
Libraries, made up of sub-libraries and data items, can be viewed and edited from this panel which
has three areas:
Navigation - Shows the position within the library tree, it allows navigation by clicking the links.
Sub-Libraries - Lists the sub-libraries. Click the link to view or “Edit” to modify.
Content – Lists the data items within a library and allows:
- Overview of the item profile by clicking the blue arrow
- View the item by clicking the link
- Modify the item using "Action".
© 2000 Hi-teach Ltd. All Rights Reserved. 2003-11-20 www.hi-teach.com 972 9 8919849
Libraries
Info-Hub User Manual
23
The Data Items can be sorted (Decending or acceding order) by pressing the title on the top bar.
Edit library structure
This panel allows editing the following properties of the selected sub-libraries:
Title – The title of the library.
Body - The description of the library.
Sort – The location of this sub library in its root library.
Publish – Enables links to be created to this library.
Super project – Enables sharing with other projects in the same super project (can be set only by
super administrators).
Access - The access rights (see Library access).
Select the sub-library from the list to edit it, or insert a new sub-library by clicking “Add”.
Click “Update” to submit your changes
The comment in the "Body" will show up on a small window when the cursor is placed over the library
name during normal use, it hints the user at the expected content and use of the Sub Library.
To edit sub-libraries click “Edit” in the sub-libraries area.
Access allows the administrator to modify the access rights of the library
© 2000 Hi-teach Ltd. All Rights Reserved. 2003-11-20 www.hi-teach.com 972 9 8919849
Libraries
Info-Hub User Manual
© 2000 Hi-teach Ltd. All Rights Reserved. 2003-11-20 www.hi-teach.com 972 9 8919849
24
Libraries
Info-Hub User Manual
25
Question Bank
Use this option to create a bank of questions which can be used for quizzes.
Sub libraries provide two options: Move and Edit Questions.
Move Questions
Used to move questions from the question bank and/or assignments to a target Bank Library.
Select the question source library, the question(s) to be moved, and the target library.
Note –– See Import Question in Assignments on how to move questions to assignments .
Edit Questions
Used to add questions to a Bank. See "Edit a Question" to learn how to edit question types.
© 2000 Hi-teach Ltd. All Rights Reserved. 2003-11-20 www.hi-teach.com 972 9 8919849
Collaboration
Info-Hub User Manual
26
Collaboration
View the Project Room
This panel shows the home page of a project. The items shown are personal or belong to project or
super project (see Ownership), and can be filtered using the ownership filter on the upper right part of
the panel. The panel includes the following areas:
Teams- A list of teams that belong to the project.
Calendar - The coming events.
News – The latest updated news
Working data items – The latest updated working Data Items that belong to the Project (See Access)
Discussion Board – The active discussion boards of the project.
Press “More” in each area to view the full list. Click on an item’s link to view it.
The project room is automatically shown when you enter the project. It can also be selected through
“Home” in the main menu.
Setting Item (object) as Home page item
The info-hub enables users with proper access
rights to present a data item to all the users of a project,
setting it to become a Home page Item. This is done in the
team area.
Team Room > XXXX> Working Data Items, > Edit Item Action
© 2000 Hi-teach Ltd. All Rights Reserved. 2003-11-20 www.hi-teach.com 972 9 8919849
Collaboration
Info-Hub User Manual
27
View a Team Room
This panel shows an overview of the selected team room. The items shown are personal, team,
project or super project (see Ownership), and can be filtered using the ownership filter on the upper
part of the panel. The panel includes the following areas:
Team Members – A list of members of the selected team.
Calendar – The coming events.
News – The latest updated news.
Working data items – The latest updated working data items.
Press “More” in each area to view the full list. Click on an item’s link to view it.
The team is selected from the main menu, or from the list of teams in the project room.
© 2000 Hi-teach Ltd. All Rights Reserved. 2003-11-20 www.hi-teach.com 972 9 8919849
Collaboration
Info-Hub User Manual
28
Ownership
Four data Ownership categories allow simple filtering of the presented data. The effected data types
are Calendar Items, News and Working Data Items. Every item belongs to one of the following
Data Filtration on ROI – Region of Interest
To filter the data on the screen use the tick filter marks
Personal – Private data which can be edited only by the user.
Team – Team data is presented in the team room, the entire team can edit it.
Project – Project data is presented in the project room and in every room of a team that belongs to
the project. Project data can be created or edited only by an administrator.
Super Project – Data that is presented in every room of a project and team that belong to the Super
Project. Super Project data can be created or edited only by a super administrator.
Assignments – Timed Assignment are presented on the Calendar. (Default is without assignments
when entered from a project/team calendar or with assignments when entered from My calendar).
Each category is marked with a different color, which is used to represent all items in that category.
The Ownership filter in the upper right part of the working room allows the user to filter which types of
data are presented on screen.
Note: The writer can change the access of an item to allow viewing or editing by different groups (see
Working Data Item Access).
© 2000 Hi-teach Ltd. All Rights Reserved. 2003-11-20 www.hi-teach.com 972 9 8919849
Collaboration
Info-Hub User Manual
29
View the Calendar
This panel is used to view the calendar events. The events can be personal, team, project or super
project and assignments (see Ownership). The presentation can be filtered using the ownership filter
on the upper part of the panel.
Click on the arrows or select a month / year to change the presented dates.
Click on the event name to see more details. Press “E” to edit an existing event.
Click “More” in the calendar area of the team or project room to enter this panel.
Click “With Assignments” – to get the assignments in the calendar display according to the
assignments' publication dates.
Edit a Calendar item
Calendar item properties can be edited through
this panel:
Belongs to – Determines the ownership of the
event: personal, team, project or super project
(see Ownership).
Title – Title of the event.
Description – Description of the event.
Day & Month – Date (Day and Month) of the
event.
From & To – Time (Hour and Minute) of the event
(Start, End).
Click “Update” to submit your changes. Click “Delete” to delete the event.
Click “Add” in the calendar panel to add a new event, or click “E” to edit an existing event.
© 2000 Hi-teach Ltd. All Rights Reserved. 2003-11-20 www.hi-teach.com 972 9 8919849
Collaboration
Info-Hub User Manual
Student Project Registration
To register to a Project log in to the Info hub through the project catalog, and click
the register button to register to the registration team.
To actually access the project, the user will be moved to an active team by the
course administrator (See manage users)
If the project has a registration form (See project edit catalog data item/project
registration) download the Project Registration Form, fill it up, and upload it (Click
Upload button in the projects catalog data item).
© 2000 Hi-teach Ltd. All Rights Reserved. 2003-11-20 www.hi-teach.com 972 9 8919849
30
Assignments
Info-Hub User Manual
31
Assignments
Assignments of processes serve to guide learners in a learning route or any other flow where teams
and individuals interact with knowledge and with each other.
Performing Assignments
This panel walks the user through e-learning or other assignment flow in steps made up of multiple
phases. The phases are special Data Items which present instructions and requirements of the
selected phase and include the following information:
General Assignment Information – Heading of the Assignment (Course) subject and goal.
Note: The heading will be presented on all the assignment phases and thus should be very short.
Specific Phase Information – An explanation of what the user is required to do in this specific
phase. The phase functions as a carriage envelope for a Learning object. As such (= DI) it includes
all the characteristics of a DI empowered with learning requirements.
Phase Attachments – More explanations and other resources needed to accomplish the
requirements. The attachments can be files, internet links or links to existing libraries or data items.
Product Requirement – The specific details of the product that should be handed in, and the credit
and actual score. Press “Add” to submit a product, or “View” to view and edit and existing product.
Quiz Requirement – Details about a required quiz (credit and actual score, and maximum quiz
duration in minutes). Press “Perform” to enter the quiz, or “View” to view it after completion.
An assignment is selected from assignment list in the main menu bar. The yellow arrows are used for
navigation to the next or previous phase.
© 2000 Hi-teach Ltd. All Rights Reserved. 2003-11-20 www.hi-teach.com 972 9 8919849
Assignments
Info-Hub User Manual
32
Hand in Deliverables
The assignment panel displays details about the product requirement:
Points – The credit (number of points) of the product.
Title – Title of the product.
Description – Description of the product.
Max Size – Maximum size of the product attachments (in KB).
Type – Indication if this is a team product (see Team Product).
Delivery date: Date and hour (+ note how many days are left)
Local time: current date and hour
My Product - Click “Add” to hand in a product.
My Score – The score given by the coach to your
product.
The uploaded product can be edited until the coach
has graded it (see Editing Data Items).
Note: A delivered product can be viewed by the submitting user (or by the coach or administrator) The
Add button changes to "View" after submission. Click “View” to view and edit an existing product.
© 2000 Hi-teach Ltd. All Rights Reserved. 2003-11-20 www.hi-teach.com 972 9 8919849
Assignments
Info-Hub User Manual
33
Perform a Quiz
The quiz panel displays details about the quiz:
Points – The credit (number of points) of the quiz.
Duration – The maximum time allowed for performance of the quiz in minutes (optional).
My Score – The user's score on the quiz.
Click “Perform” to enter the quiz.
The quiz includes a number of questions of various types. A question is a learning object, including
attachments, template and other characteristics of a DI.
Every question is worth a number of credit points. Questions may have attachments containing
relevant information.
If a time limit appears in the corner of the panel, the user must complete the quiz within this time
limit. Click “Submit” to hand in your results and view the alert box to see your grade. Click “OK” to
return to the Phase.
Click "Back" in the upper part to return to the phase.
View a Quiz
If “View” is available in the assignment panel – the user can review his quiz answers along with the
correct answers and explanations, which the editor of the quiz may have added. This is available only
after the user has submitted his answers.
In the quiz review panel a green “V” marks correct user answers and a red “X” marks incorrect user
answers. Explanations of the answers may also appear.
© 2000 Hi-teach Ltd. All Rights Reserved. 2003-11-20 www.hi-teach.com 972 9 8919849
Assignments
Info-Hub User Manual
34
Edit an Assignment
This panel is used to edit assignment properties:
Title – Title of the assignment.
Description – Description of the assignment.
Start Date & Duration – Users will be able to perform the assignments from the Start Date until the
end of the Duration days. Clear the duration field to ignore these settings.
Show Always – Determines whether the assignment will also be viewable outside its time limits.
Click “Update” to submit your changes.
Select “Edit Assignments” in the main menu bar, or “Edit” when viewing the required assignment to
access this panel. The panel is available only to users who fill the “Edit Assignment” role (see Roles).
Weight – Is the weight of the assignment in the Overall Project Score (See project scoring).
Pass Grade – Is the minimum Pass Score boundary required in all the assignment phases (deliveries
& quizzes)
Display Group – Another hierarchy of assignments. The selection is between the existing Topics in
the project, and all assignments which were defined to the same Display Group Topic will be
displayed under that topic when a user enters an assignment.
Topics – The assignments will be searchable according to the set topics. More than one topic can be
chosen.
Display Group – Assign display group to group the assignments/routs according to the dispay grpoup
they belong to, thus effectively adding a third hierarchy level Display group>Assignment>Phase
© 2000 Hi-teach Ltd. All Rights Reserved. 2003-11-20 www.hi-teach.com 972 9 8919849
Assignments
Info-Hub User Manual
© 2000 Hi-teach Ltd. All Rights Reserved. 2003-11-20 www.hi-teach.com 972 9 8919849
35
Assignments
Info-Hub User Manual
36
An assignment can be viewed or
performed by members of the groups
to which it was assigned.
Assignment Ownership is set in the
“Belongs To” area:
Super-Project – All users that belong
to the super project.
Project – All users that belong to the
project.
Teams – All users that belong to the
selected teams.
After “Belongs To” is set, the following can be defined:
Mandatory – Determines whether the phase requirements are mandatory, (progress beyond the
specific mandatory phase requires completion of that phase). Alternatively the requirements are
optional.
Sort – The order of the assignment in the assignment list.
© 2000 Hi-teach Ltd. All Rights Reserved. 2003-11-20 www.hi-teach.com 972 9 8919849
Assignments
Info-Hub User Manual
37
Edit a Phase
This panel is used to edit Properties of a phase:
Title – The title of the phase.
Description – The description of the phase.
Sort – The order of the phase within the assignment.
Topics - Names (chosen from closed list) of topics which the Learning Object is referring to.
Template – The visual format used for the phase panel (similar to Data Items - see Templates).
Included – Determines whether the phase will appear in the assignment, or will be hidden. This is an
editorial management tool for phases that should not be included for deductive consideration.
Approval – Determines the need for approval before a user can progress to the next phase.
Published - Stating if this phase DI can be used outside the assignment.
View Weight – The points (credit) a student gets for viewing this phase.
Pass grade – The minimum pass grade for the phase based on the total view, quizzes, Deliverables
credit.
Re Phase – The minimum grade required to redo the phase, based on the total view, quizzes,
Deliverables credit
Weight - Is the current phase's weight in the assignment
Click “Update” to submit your changes.
To access the panel, use “Edit Phases” in the edit assignments panel, or “Edit” when viewing the
required phase panel. The panel is available only to users in “Edit Assignment” role (see Roles).
© 2000 Hi-teach Ltd. All Rights Reserved. 2003-11-20 www.hi-teach.com 972 9 8919849
Assignments
Info-Hub User Manual
38
Edit Phase Requirements
Similar to editing a learning object (DI)
Attributes
Attachments
Directives
Acknowledgments
The Deliverable product requirements' details are:
Deliverable – mark the box if a product is
required, the following will appear:
Title – The title of the product.
Description – The description of the product.
Points – The credit (number of points) of the
product.
Team Deliverable – Whether the product will be handed in by a team (see Team Products).
Max Size – Maximum size of the product
attachments (in KB).
Delivery date - DD:MM:YYYY
Time - TT:MM
Click UPDATE to save changes
© 2000 Hi-teach Ltd. All Rights Reserved. 2003-11-20 www.hi-teach.com 972 9 8919849
Assignments
Info-Hub User Manual
39
Branching
Branching – Used to direct learners according to their performance in the prior phase, allows
adaptive learning.
Destination Phase – The branching target phase.(must be published) in same assignment, or a
different one in the same project / course. Move to the Target Phase via click on "Next Phase".
Source Object – The object (assignment, phase or quiz) to which the conditioning applies.
Conditioning – Six conditions are available:
Grade > Grade higher than the defined minimum for the source object will redirect learner
to the target phase.
Grade < - Grade lower than the maximum defined for the source object will redirect learner
to the target phase
Passed – Grade higher than the pass-grade of the source object will redirect learner to the
target phase
Failed – Grade lower than the pass-grade of the source object will redirect learner to the
target phase
Completed – A fully completed source object (read, answer quizzes & uploaded products
in the source object will redirect learner to the target phase
Not Completed – An incomplete source object( read, answer quizzes or uploaded
products) will redirect learner to the target phase
Click "Add" to add branching. The following details appear:
Source Object – The object to which the conditioning apply.
Condition – The branching condition.
Grade – The condition's grade.
Branch To – The destination phase.
© 2000 Hi-teach Ltd. All Rights Reserved. 2003-11-20 www.hi-teach.com 972 9 8919849
Assignments
Info-Hub User Manual
40
Click "Update" to create branching.
Click "Action" and "Edit" to edit branching.
Click "Action and "Delete" to delete branching.
It is possible to create several branches on the same source object. Each branch will appear as a
separate line in the phase it was defined in. The highest hierarchy branch will apply – for example,
a branch with the assignment as its source object will apply even if there is another branch with the
phase as its source object.
© 2000 Hi-teach Ltd. All Rights Reserved. 2003-11-20 www.hi-teach.com 972 9 8919849
Assignments
Info-Hub User Manual
41
Edit a Quiz
Quiz - The box which appears if a quiz is required, The following will appear
A quiz is a set of questions. Each question is a learning object empowered by relevant test
properties.
Prior requirements – The requirements prior to this quiz.
Success Criteria – What are the success criteria from the quiz
Weight – The credit (number of points, as part of the entire phase) of the quiz.
Pass Grade – The minimum pass grade of the quiz.
Requiz Grade – The minimum grade required for requiz.
Requiz on failure – Allow another performance of the quiz (Requiz)
Quiz type – An exercise or an actual quiz.
Presentation – The quiz's layout:
Quiz Page – A quiz in another page in the same browser window.
Full Screen – A quiz in a new browser window hiding browser options like Print.
In Phase – the quiz appears within the phase itself.
Allow View – Whether the quiz can be viewed after it is delivered.
Quiz Date – Date and time of when the quiz is available, in the following format - DD:MM:YYYY
TT:MM
Duration – The maximum time allowed to perform the quiz (in minutes).
Random Enables random choice of questions from the quiz, according to the predefined level of
difficulty. (note: number of presented questions should be smaller than the number of questions of the
same difficulty available in the quiz)
Edit Questions – click to enter the edit questions panel
Note: When product or quiz requirement are removed from a phase, delivered user products or quiz
results may be lost. The system will ask for confirmation if this is about to happen.
© 2000 Hi-teach Ltd. All Rights Reserved. 2003-11-20 www.hi-teach.com 972 9 8919849
Assignments
Info-Hub User Manual
Edit a Question
Radio Button Type
A single answer type question.
This panel is used to edit quiz questions:
Question – The presented question.
Description – as in Learning objects (DI)
Question type – Question Type. A Radio Buttons type is shown.
© 2000 Hi-teach Ltd. All Rights Reserved. 2003-11-20 www.hi-teach.com 972 9 8919849
42
Assignments
Info-Hub User Manual
43
Correct answer – Marks the correct answer for this question.
Answer – Add as many answers as needed.
Answer is required Question must be answered to submit the quiz.
Add Answer - Click this button to add another answer to the question.
Random answer order – Display the answers in a random order in the question layout
Number labels – is an indication of whether to display labels to the quiz answers.
Answer layout style – Selects the layout of the answer (Number of rows & columns)
Num of rows – Enables layout rows selection
Sort – stating the order of the questions
Weight – The credit points for the question.
Answer Explanation – An explanation viewable after quiz submission.
Options – Sets the answer sort order, or delete an answer.
Attachments
Directives
Acknowledgments
Attention – Make use of the property Difficulty under directive to enable application of random quiz.
Click “Update” to submit your changes.
Click “Add” to add another question
Random – a quiz containing questions can be randomized
Click to enable random selection out of the questions
An Edit button appears
Click “Edit” to randomize
Choose number of questions in each difficulty level to be included in the quiz.
Click “Update”
The Info-hub will prevent illegal definitions
Label type
The label type question is not truly a question but rather serves as a textual separator between
questions to form a sub quiz header.
Check box type
© 2000 Hi-teach Ltd. All Rights Reserved. 2003-11-20 www.hi-teach.com 972 9 8919849
Assignments
Info-Hub User Manual
A multiple answer question
Minimum to choose – the minimum options required.
Maximum to choose – the maximum options allowed
© 2000 Hi-teach Ltd. All Rights Reserved. 2003-11-20 www.hi-teach.com 972 9 8919849
44
Assignments
Info-Hub User Manual
Select list
Similar to the Checkbox type but displayed as a select list.
Combo list
Similar to Radio Button but displayed as a select list.
© 2000 Hi-teach Ltd. All Rights Reserved. 2003-11-20 www.hi-teach.com 972 9 8919849
45
Assignments
Info-Hub User Manual
46
Free text
Free text is a single answer where key words are expected in the answer.
Field Type - To set multi line or single line free text question type.
Num of rows – The number of rows used for the question text field.
Num of columns – The number of columns used for the question text field
Default value – A default text displayed with the quiz.
Click Keyword to set the required answers keywords (See keyword section).
Free text single line, with validation options
Validation - The validation check for question field value (None / Number/ Email / Text / Date).
Minimum – the minimum value (for number validation).
Click Keyword to set answers keywords
© 2000 Hi-teach Ltd. All Rights Reserved. 2003-11-20 www.hi-teach.com 972 9 8919849
Assignments
Info-Hub User Manual
47
Date
This question type is used for a date type answer .
Correct date – The correct answer date.
Earliest date allowed – The earliest correct date.
Last date allowed – is the latest correct date.
HotSpot
In this question type the student is required to identify a part (hot spot) or several parts of a picture.
Each hot spot can be separately weighted. After editing, click “Browse” to upload the picture.
© 2000 Hi-teach Ltd. All Rights Reserved. 2003-11-20 www.hi-teach.com 972 9 8919849
Assignments
Info-Hub User Manual
48
Keywords
Keywords are used in order to grade a free text question.
Any one of the Keywords found in the user's free text answer is credited as partial a correct answer.
Keyword panel
New – Add a new keyword.
Update – update the current keywords
Click the checkbox to enable the delete button
Click the delete button to delete keywords.
To Import a Question
The Question Bank is a pool of questions which can be used (imported) in a quiz.
To import a question click Action in the Questions panel followed by Import Question. Select a
question(s) from the Bank libraries and click Import Questions.
© 2000 Hi-teach Ltd. All Rights Reserved. 2003-11-20 www.hi-teach.com 972 9 8919849
Assignments
Info-Hub User Manual
49
Grades Query – Student View
The panel is used to display information regarding current logged in user performance/completion/
attendances of assignments/phases/Quizzes/Deliverables.
Click Export Record to export current user records to an Excel CSV file.
© 2000 Hi-teach Ltd. All Rights Reserved. 2003-11-20 www.hi-teach.com 972 9 8919849
Assignments
Info-Hub User Manual
50
Grades Query – Teacher View (Student Achievements)
The panel is used to query the system for information regarding users’ performance in assignments.
The following parameters can be set:
Assignment – Search for specific or all assignments.
Phase – Selects the phases of a specific assignment.
Search – All products, Graded products, Un-graded products, Quiz results, or Quiz answers (the
statistical distribution of answers to a specific quiz).
Team – Specific or all teams.
User – Specific or all users.
After setting the required query parameters, click “Search” to get the search results. The results will
include statistical analysis and a list of records that meet the query profile.
Student Record – After specifying a student you can view his record sheet, including all
assignments, phases, quizzes and deliverable product. Used to view, asses and grade student work.
Authorized users, filling the “Review assignments” role, can access this panel through “Grades” in the
main menu.
© 2000 Hi-teach Ltd. All Rights Reserved. 2003-11-20 www.hi-teach.com 972 9 8919849
Assignments
Info-Hub User Manual
51
Grade Products
This panel is a result of the Grades query, and allows authorized users to view and grade users’
products, and to communicate with the student.
Click “View” to enter a user’s product. You can edit the user product details and attachments,
communicate with the user, and allow him to update his work.
Return to the Grades query results to enter a user score. Enter the score in the score input box,
choose if user passed this product, and click “Update” to submit the score.
After scoring a product, the user will no longer be able to update the product.
Click on a quiz's grade allows authorized users to change a learner's grade in a certain quiz.
Note: Press the titles of the list to sort the list by assignment, student name, or grade.
Click Export to export current search grade records to an Excel CSV file.
© 2000 Hi-teach Ltd. All Rights Reserved. 2003-11-20 www.hi-teach.com 972 9 8919849
Assignments
Info-Hub User Manual
52
View Quiz Results
This panel is a result of the Grades query, and allows authorized users to view users’ quiz results.
Click “View” to enter a user’s quiz.
Use the Grades query to view statistical distribution of the answers to a specific quiz by selecting
“Quiz Answers” in the search type.
Click Export to export current search grade records to an Excel CSV file.
Note: Press the titles of the list to sort the list by assignment, student name, or grade.
Project Scoring
This module has two purposes:
1. To have conditions between learning objects (not implemented yet).
2. For a student to get a grade on a course and have a certificate published.
© 2000 Hi-teach Ltd. All Rights Reserved. 2003-11-20 www.hi-teach.com 972 9 8919849
Assignments
Info-Hub User Manual
53
Normalizing Scoring
To simplify scoring, the learning objects are normalized (project, learning route, and phases).
Each learning route has a specific weight relative to the other routes.
Each phase has a specific weight within the learning route.
The learning objects' scores, are normalized to provide 100 as a full score for each phase, learning
route as well as in the entire project (course). See the attached appendix with an example of the use
of quiz weights and certification.
Scoring Flow
1. In the Project Edit Screen
• Provide a project a percentage weight (weight is normalized). This is used for calculating
the Super Project score (A group of courses, used for an over all certification).
• Set the project Pass score, student record will be compared to Pass requirement to
establish and issue a certification.
2. In the Learning Route Edit Screen
• Set the learning routes' weight, used to calculate Project Score (weight is normalized).
• Set the learning routes' pass grade which will be used to establish whether the student
successfully passed the learning route.
3. In the Phase Edit Screen
Phase Section
• Set the phase weight, used to calculate the score of the learning route (Normalized), similar
to Learning Route and Project weights.
• Unlike the projects and learning routes score, the phase score is composed of four
elements: View; Quiz 1 & 2 and product Delivery Weights. (normalized)
The phase score is divided between these elements (These parts are optional and they do
not have to be included in every phase)
Quiz / Delivery / View Phase
• Set the phase view weight, to give the user a credit just for viewing the phase.
• Set the Quiz or Delivery weights. (not obligatory)
• Provide a phase a Pass grade.
The scoring normalization logic is repeated within Quiz Questions, as well as within multiple
(correct) answers.
Recalculate
Use this option to recalculate users' grades in a case when weights of learning routes, assignments
etc. are changed after users have already been graded for the course or parts of it.
To recalculate all grades of a project, click on the Recalculate… in the Edit Project panel. This will
recalculate each user's relevant grades according to the new weights.
© 2000 Hi-teach Ltd. All Rights Reserved. 2003-11-20 www.hi-teach.com 972 9 8919849
Assignments
Info-Hub User Manual
54
Certificate Module
General
There is one certificate template per project.
A certificate is published for a user that scored higher than the Passed grade set for the project.
A certificate template is uploaded in the edit project screen (See edit project).
Certificate Template
An MS Word document with an image of the desired Certificate and empty fields.
The document holds the following dynamic bookmarks:
• Publication date & expiration date (expiration date = Publication date + 2)
• User name (As show in the example above)
• Project name
• User number 1 & 2
• Team (organization unit) + Team Leader (unit manager)
• Grade
Note: The template can be adaptively set. Contact Hi-Teach Customer support to fit templates
Publication
Certifications are issued offline according to windows task scheduler (recommended once a day) by
an external EXE program.
Publication process
After the course has ended, certifications can be issued. When the system publishes a certification it
also creates the filled up certifications, sends them to the set printer (On the administrator's client
computer) and saves a cloned copy of the template with the bookmarks values as simple text.
Publish Certificate
Enter Publish Certificate under Admin to view the status of certification for all users.
Use the select boxes on the top to filter users who passed/failed the course, or users of a specific
team.
Use the check boxes near each user mark specific users for which certifications should be printed.
Print Certificates – prints certificates for the selected users.
Print Report – prints the current displayed report.
© 2000 Hi-teach Ltd. All Rights Reserved. 2003-11-20 www.hi-teach.com 972 9 8919849
Assignments
Info-Hub User Manual
55
Note: Publish Certificate panel becomes active only after a certificate template is uploaded.
© 2000 Hi-teach Ltd. All Rights Reserved. 2003-11-20 www.hi-teach.com 972 9 8919849
Tools
Info-Hub User Manual
56
Tools
Select Project
This project selection panel, shows up after
the Log In, for users who are members of a
number of projects
The list of projects a user belongs to is
shown grouped into the different superprojects.
Click a name of a super-project, project and
team to view what’s new in that arena
(coming events, news, updated items).
Press “Go” to enter a project.
The panel is also used when Switch
Project is selected from the main menu.
Press “Logout” to logout of the Info-Hub.
Catalog List
This panel is shown up after a course catalog button in the login screen is selected; It shows the
Project Catalog data items (See Edit Project > Catalog Data Item).
© 2000 Hi-teach Ltd. All Rights Reserved. 2003-11-20 www.hi-teach.com 972 9 8919849
Tools
Info-Hub User Manual
Select Interface Language
The Info-Hub supports multiple bi-lingual applications. Each
application can have two user selectable interface languages.
The default language is set in the super project.
The user can change the interface language by clicking “Switch
Language” in the main menu.
Note: The content itself will remain in the language it was
originally written in.
© 2000 Hi-teach Ltd. All Rights Reserved. 2003-11-20 www.hi-teach.com 972 9 8919849
57
Tools
Info-Hub User Manual
58
Navigation
The navigation bar appears on the top of the panel. It is used to indicate the current location in the
Info-Hub map. It also serves to move to a different location in the Info-Hub.
The bar is made up of two parts:
Location Type – Main indication of location (Team Room, Libraries, Assignments…)
Location – A string of hierarchical locations, clickable to backtrack to locations on the list
Example 1:
You are viewing Satellite and remote sensing Library in the data library
Example 2:
You are learning the stereo base phase of the Radatsat assignment
Example 3:
You are working at the Hi-teach team on the Imagesat project
Edit Team Members
This panel, which is accessed from the Edit icon on the team bar, is used to manage and edit team
members:
Team Members – List the current team
members (Full Name, User Name User
and User Type)
User Type – Can be changed by the
Project Administrator, who can also
update the user's password.
© 2000 Hi-teach Ltd. All Rights Reserved. 2003-11-20 www.hi-teach.com 972 9 8919849
Tools
Info-Hub User Manual
59
Action – Enables the following actions:
Update user details – All user details can be updated by the Project Administrator
Create New User – All the new user details will be filled in. Info Hub User name must be unique.
Manage User – Users from other existing teams or from external sources can be imported to the
team using a template Excel (downloadable) or CSV formats (Use Action Import/Export users)
Move – A user can be moved to a different team or to an Alumni team.
Delete – A user can be removed from a team
© 2000 Hi-teach Ltd. All Rights Reserved. 2003-11-20 www.hi-teach.com 972 9 8919849
Tools
Info-Hub User Manual
60
User Details
This panel allows editing of the user details:
User Name – Is determined when the user is created and cannot be changed.
Password – The password you will use in order to login. You must fill in the “Password” field and the
“Confirm Password” field in order to change the password.
First & Last Name – The user's first and last name.
E-mail – The e-mail address (used for communication).
Phone – Phone number (area code and phone number).
Click “Advanced” to enter more optional details.
Click “Browse” and choose an
image representing you.
Click “Update” to submit your
changes.
Note: The user details can be
viewed by clicking on a name of
a user in the team member list or
in the contact list. The details can
be edited by the user in “My
Details” or by the administrator
when editing team members.
Search
The search function enables retrieval of Data Items. By default, the Search is used in a basic form
which lets you enter keywords to be searched. When clicking the "Advanced" button, you may select
from the following search parameters which can be combined:
Search parameters
Free Text appearing in the Data Item (DI) description, and in any of the DI properties (Attributes,
Directives, Acknowledgments or Deliverables)
Search In allows selection of library data items, News Data items, Working Data items and
assignment phases.
Topics narrows the search to a specific Topic from the existing list, see Topics in Edit DI (Data Item).
Updated enables narrowing of the Update Time window
© 2000 Hi-teach Ltd. All Rights Reserved. 2003-11-20 www.hi-teach.com 972 9 8919849
Tools
Info-Hub User Manual
61
Advanced Search opens up a group of Advanced Search features including:
Created By – Name of the user who first created the DI (Data item)
Status – Filters DIs according to their status (In Progress, Final or Approved)
Language – Searches in accordance with the language as set in the DI Directive
Type Selects the File Type (Words, Excel etc.)
Updated By – Enables filtering according to the users who updated the DI
Priority – Filtering according to the priority set in the DI Attributes
Difficulty - the difficulty set in the DI directives
No - (Number) is the reference number given to a DI when published, and is indicated on the DI
Attribute
Viewed By - Enables filtering according to the users who viewed the DI
Note – After searching, one can access the found DI by clicking on them. When the DI opens a
"Back" button in the upper part, will return to the search result window without re running the search.
© 2000 Hi-teach Ltd. All Rights Reserved. 2003-11-20 www.hi-teach.com 972 9 8919849
Tools
Info-Hub User Manual
62
Edit Topic structure
This panel is accessible only by administrators . to edit the properties of the selected sub-topic:
Title – The title of the topic.
Description - The description of the topic.
Default – Indication that each new data item created will be associated with this topic by default
To edit a topic tree select the topic in the left panel topic tree; note the sub-topics in the upper right
panel of the screen. Select the sub-topic to be edited from the list. To insert a new sub-topic click
Add.
Click Update to submit the changes
© 2000 Hi-teach Ltd. All Rights Reserved. 2003-11-20 www.hi-teach.com 972 9 8919849
Tools
Info-Hub User Manual
63
Discussion Boards
This panel is used to view the discussion boards of the project.
There are three types of discussion boards:
Teams – A private discussion board for each Team.
Project subjects - Discussion board subjects relevant to the entire Project (managed by discussion
board managers).
Super project subjects – Discussion board subjects relevant to the entire Super Project (managed
by the super project administrator).
To enter the discussion boards select “Discussion Boards” in the main menu.
Click the name of a specific discussion board subject to enter it.
Working in a Discussion Board
This panel shows a hierarchical list of messages in the discussion board, ordered by descending
insert date and time.
Each message has a Title, Updated Date, Update User, and Body (visible when clicking the blue
arrow). The item may have attachments with more information.
Click “Action” to respond to a message, edit, delete or add an attachment to your message.
To start a new thread of messages click “Add” on the top of the list.
To find a text string in the messages fill the search box, and press “Find Text”.
Note: Messages that have responses cannot be deleted. A message can be deleted or edited only by
the user who inserted that message or by a discussion board manager.
© 2000 Hi-teach Ltd. All Rights Reserved. 2003-11-20 www.hi-teach.com 972 9 8919849
Access
Info-Hub User Manual
64
Access
User Types
Users have access that defines the data items they can view and edit, and also the functions they can
perform in the system. The access rights are dependant on their user type, defined by their
membership in the team. The rights gradually grow from the most limited level (“Guest”) to the widest
range or access rights, which is "Administrator. The default level is "User",
The user type affects the access rights the user has in the project (see Roles), in the libraries (see
Library Access) and with team or project working data items (see Working Data Item Access).
Note: The user type can be edited by administrators in the “Edit Members” panel, which can be
entered through “Edit” in the team member area of the team room.
Roles
There are administrative roles in the Info-Hub that
can be delegated to levels lower than
administrator:
Librarian – Edit library content and structure.
Team coach – View & Edit working data items
accessible to coaches.
Edit assignments – Edit assignments and
quizzes.
Review assignment products – View and grade
user advancement.
Manage discussion boards - Edit content of and
structure of discussion boards.
The default user type for these roles is “Administrator”. The administrator can delegate the access to
share administration load.
The system examines the highest level of user type the user holds in the project, and accordingly
determines the roles this user can perform.
Note: The role levels can be edited by administrators in the “Edit Project” panel, accessible from the
main menu.
Library Access
The authorization to view a library and its content and to
add content to that library can be set by the administrator.
The viewing rights determine if users of a certain User Type
can view a library and its content (see User Type). If the
user type is lower than set for a specific library, that library
will be hidden from him. The user will not see hidden
libraries and search results will not include content from
hidden libraries.
The adding rights determine if the user can add material to
a specific library.
© 2000 Hi-teach Ltd. All Rights Reserved. 2003-11-20 www.hi-teach.com 972 9 8919849
Access
Info-Hub User Manual
65
The default levels (initially “Guest” for viewing and “User” for adding) affects every new library, it can
be set by administrators in the “Access” area of the “Edit Project” panel.
A librarian can update the settings for a specific library from the “Edit Library” panel by pressing
“Access”.
Working Data Item Access
Access in the team and project room is specific for each item, and can be updated using this panel by
any user who can edit the item.
The access sets the level of sharing for the Data
Item, within the Team, Project or Super Project. It
can be set to allow viewing and editing of the item
by a growing circle:
Writer – The user that originally created the item
(always on).
Coach – Users with coach role (see Roles).
Team – Members of the team to which the item
belongs.
Project – All of the users in the Project to which
the item belongs.
Super Project – All of the users in the Super
Project to which the item belongs.
Belongs to Project – Marks whether the item
belongs to the Project and can be set by an
administrator. An item belonging to the project is
shown in the project room and in the rooms of all the teams in the project.
Examples:
- Giving the Project editing rights for a data item will allow any project member to edit the item.
- Removing all the rights and leaving only the Writer checked will make the item personal (viewable
only by the writer).
© 2000 Hi-teach Ltd. All Rights Reserved. 2003-11-20 www.hi-teach.com 972 9 8919849
Administration
Info-Hub User Manual
66
Administration
Login Types
The Info-Hub supports two types of logins: Regular username & password and LDAP login.
Regular login – Fill in username and password and click "Enter".
LDAP login - Login automatically to the Info hub when you log in to Windows (Active Directory
support). Refer to Hi-Teach Tech Support about using this feature.
Edit Project
The Right panel is used to upload a registration form, project image or project certificate for
that project.
Look up project certifications, registration for more details.
Project Image will overwrite super project image.
The Left panel is used to edit Properties of a project
Properties of a project:
Title – The title of the project.
Description – The description of the project.
Learning Route driven - an indication to direct the user to last viewed learning route phase. If the
user didn’t view any phases redirect user to the first project phase.
Show In Catalog – Is an indication to display this project in the project catalog screen.
Mandatory - An indication that the project must be completed for Super Project.
Weight – Is the current project weight within the Super Project grade
Pass Grade – Is the minimum pass grade for the project.
© 2000 Hi-teach Ltd. All Rights Reserved. 2003-11-20 www.hi-teach.com 972 9 8919849
Administration
Info-Hub User Manual
67
Click Update to submit your changes.
Click on Action to open a window with the following options:
Click Catalog Data Item to update the Project Data Item of the project catalog shown
Click Copy Data to copy the project content (libraries & assignments)
Click Recalculate to recalculate all the grades according to recent changes in the weights of quizzes,
products, phases and assignments. Worning: editing a quize after it has been performed by students
may alter and corrupt their record!
Project Catalog Data Item
This Data Item holds an explanation about the Project (Course).
It is used for users who need details about the project as well as for registration.
(Register button and download/upload project registration form)
Note - The Project Catalog DI can not be deleted
Export to SCORM
Allows export of SCORM compatible Learning Objects .
Project Registration
When a new project is created, a registration team is created, and in it a Registration Forms' Working
Data Item.
This data item and the registration team hold a list of users that are registered to the project.
The project registration team and registration forms DI cannot be deleted
Note - Users that are connected only to the registration team cannot enter the project in the
catalog/select project screens. They must be associated with a learning team ("Class") by the course
administrator.
© 2000 Hi-teach Ltd. All Rights Reserved. 2003-11-20 www.hi-teach.com 972 9 8919849
Administration
Info-Hub User Manual
68
Copy Project
Use this feature to copy a whole project or parts of a project either to another project or within the
same project. The content of the project which can be copied includes both assignments and libraries.
In Edit Project, click on Copy Data… to enter the copy wizard.
Select the wanted option(s) in each window and use the Previous and Next buttons to navigate
through the wizard.
© 2000 Hi-teach Ltd. All Rights Reserved. 2003-11-20 www.hi-teach.com 972 9 8919849
Administration
Info-Hub User Manual
69
Project Activity (Logins)
The Info-Hub can keep trace of users' activity by tracking the data items viewed or modified by
individual users. Such tracking activity is costly in terms of accumulated memory space and is turned
on by a special request (Contact Hi-Teach Support)
The Project Activity View is available to Administrators only. To view the recorded Project Activity
select Project Activity in the Admin menu (rightmost tab on the top bar). A table depicting specific
user Name, E-mail Login Counter and Last Login Date will be presented.
Click the username, on the left to view the user details. Click the eye icon or the number on the right
to present a complete list of that individual's entries dates.
For further history
Use the History button on every Data Item in the system to track views
and updates for individual items.
Use Search and select Advanced and Viewed By or Modified By or
Created by to locate all Data Items edited by a specific user.
© 2000 Hi-teach Ltd. All Rights Reserved. 2003-11-20 www.hi-teach.com 972 9 8919849
Administration
Info-Hub User Manual
70
Navigation
Ability to add a portal type navigation capability to the Info-Hub independent of the regular Navigation
menus. The internet page can be also used externaly linked from outside the Info-Hub avoiding the
need to log in, and presentingg selected Data Items from within an Info-Hub project.
The Navigation tree has a hierarchy of two levels.
To access the 'external' site:
http://www.hi-teach.com/infohub/homepagelogin.asp
Setting up an external navigation page requires Hi-Teach Tech Support.
© 2000 Hi-teach Ltd. All Rights Reserved. 2003-11-20 www.hi-teach.com 972 9 8919849
Appendix – Scoring Example
Info-Hub User Manual
71
Appendix – Scoring Example
Assigning Weights
The first stage of the scoring process is assigning weights
to the components of the project.
The current project has two Assignments (1st Demo
Assignment and 2nd Demo Assignment), each including
phases and weights as described in the following design
table:
If we take, for example, the second assignment:
Its weight in the overall project score is 35% (see Edit an Assignment to define assignment's weight
in the project score).
The assignment is composed of four phases:
Phase 1, Phase 2, Phase 3 and Phase 4.
Each phase has a weight in the assignment. For example, the weight of Phase 2 is 40% of the total
Second Assignment (see Edit a Phase to define a phase's weight in the assignment). The total
weight of all four phases is 100% (Note – if the weights the editor defined do not add up to 100%,
they will be normalized when calculating the grade. That is, their weight will be calculated relatively to
the total weights sum).
The grade of each phase is composed of one or more of the four components defined in the table:
View weight, Deliverable Weight, Quiz 1 and Quiz 2.
For example, phase 3 is composed of all four components (the weight of each component in the
phase is written in parenthesis): view weight (20%), deliverable weight (30%), quiz 1 (20%) and quiz 2
(30%). In contrast, Phase 4 is composed of only two components: view weight (70%), and quiz 1
(30%). The total sum of the phases' components is 100% (note – here too if the weights the editor
defined do not add up to 100%, they will be normalized when calculating the grade).
Calculating and Viewing the Grades
The grades are calculated according to the defined weights.
A student can view his/her grades in My Info-Hub > My Record.
© 2000 Hi-teach Ltd. All Rights Reserved. 2003-11-20 www.hi-teach.com 972 9 8919849
Appendix – Scoring Example
Info-Hub User Manual
72
The following example is a part of the student's record showing only the 2nd Demo Assignment.
My Record shows the weight of each of the project's components, the grade the student achieved and
the relative contribute of each component (Total Score), and it parallels the following two Excel
screenshots:
© 2000 Hi-teach Ltd. All Rights Reserved. 2003-11-20 www.hi-teach.com 972 9 8919849
Appendix – Scoring Example
Info-Hub User Manual
73
The first Excel screenshot shows the student's grades in each of the phase's components.
The second Excel screenshot shows the calculation of the phases and assignments according to the
grades of the phase's components and the weights (defined in the first Excel screenshot).
To exemplify how the grades are calculated, we'll take phase 3 which includes all four components.
First, the grade of each of the components is multiplied by its relative weight in the phase:
View Weight – 100 (the view weight is always 100) * 20% = 20
Deliverable – 87 * 30% = 26.1
Quiz 1 – 100 * 20% = 20
Quiz 2 – 21 * 30% = 6.3
The result of each of these calculations is the relative contribute of this component to the phase's
grade.
In order to get the total grade of the phase, the relative contributes should be summed up:
20 + 26.1 + 20 + 6.3 = 72.4. We can see in the summary row of My Record that this is indeed the
student's grade in phase 2. The same grade also appears in the calculations Excel screenshot.
Similarly to the phase's grade components, the relative contributes of the phases are calculated by
multiplying the grade of each phase by its weight in the assignment.
© 2000 Hi-teach Ltd. All Rights Reserved. 2003-11-20 www.hi-teach.com 972 9 8919849
Appendix – Scoring Example
Info-Hub User Manual
74
Grades – Teacher's View
A teacher can view his/her students' grades through the Admin > Grades screen. Only a user who
has the appropriate authorization in the project (who is allowed to check deliverables) can view this
screen. This screen enables viewing the grades of a number of students and their statistics, and also
sorting and filtering the grades.
© 2000 Hi-teach Ltd. All Rights Reserved. 2003-11-20 www.hi-teach.com 972 9 8919849