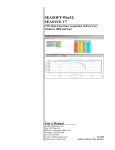
1
Smart Talk
Software
______________
User's Manual
Version 1.31
Date: Aug 2005
2071 Malaview Ave, Sidney, British Columbia, Canada V8L 5X6
Tel: +1-250-656-0771 Toll Free: 1-800-663-8721 Fax: +1-250-655-3655
Email: [email protected]
www.AppliedMicrosystems.com
2071 Malaview Ave, Sidney, British Columbia, Canada V8L 5X6
Tel: +1-250-656-0771 Toll Free: 1-800-663-8721 Fax: +1-250-655-3655
Email: [email protected]
www.AppliedMicrosystems.com
Smart Talk Software
User's Manual
TABLE OF CONTENTS
1.
INTRODUCTION..............................................................................................................1
1.1
OVERVIEW ..................................................................................................................................................1
1.1.1 Supported Instruments .............................................................................................................................1
1.1.2 Supported Sensors....................................................................................................................................1
1.2
MANUAL APPROACH ...................................................................................................................................1
2.
INSTALLATION...............................................................................................................2
2.1
SYSTEM REQUIREMENTS .............................................................................................................................2
2.2
INSTALLING SMART TALK ...........................................................................................................................2
2.3
CONNECTING THE INSTRUMENT TO A COMPUTER ........................................................................................2
2.3.1 RS-232 Serial Connection........................................................................................................................2
2.3.2 USB Connection.......................................................................................................................................3
3.
USING SMART TALK .....................................................................................................4
3.1
3.2
3.3
3.4
3.4.1
MAIN MENU ................................................................................................................................................4
CONFIGURE INSTRUMENT ............................................................................................................................5
DOWN LOAD DATA .....................................................................................................................................6
VIEW DATA .................................................................................................................................................8
Load File ..................................................................................................................................................9
3.4.1.1
3.4.1.2
3.4.1.3
3.4.2
Export ........................................................................................................................................................ 10
Next and Previous Cast.............................................................................................................................. 11
Real or Raw Displayed Format.................................................................................................................. 11
Start Real Time Data..............................................................................................................................12
3.4.2.1
3.4.2.2
Options....................................................................................................................................................... 13
Capture Data .............................................................................................................................................. 14
3.4.3 Exit .........................................................................................................................................................15
3.5
COMMUNICATIONS SETTINGS ....................................................................................................................15
3.6
CONFIGURATION .......................................................................................................................................15
3.7
SENSOR CALIBRATION...............................................................................................................................16
4.
CONFIGURATION FILES ............................................................................................18
4.1
OVERVIEW ................................................................................................................................................18
4.2
CREATING A STANDARD INSTRUMENT ......................................................................................................18
4.2.1 General Setup.........................................................................................................................................22
4.2.1.1
4.2.1.2
4.2.2
External Sensors ....................................................................................................................................22
4.2.2.1
4.2.2.2
4.2.2.3
4.2.2.4
4.2.2.5
4.2.2.6
4.2.3
Pressure...................................................................................................................................................... 22
Temperature............................................................................................................................................... 22
Sound Velocity .......................................................................................................................................... 22
Conductivity .............................................................................................................................................. 23
DO2 ............................................................................................................................................................ 23
pH .............................................................................................................................................................. 23
Calculated Parameters ..........................................................................................................................23
4.2.3.1
4.2.3.2
4.3
Info page .................................................................................................................................................... 22
Time channel ............................................................................................................................................. 22
Computed Sound Velocity ......................................................................................................................... 23
Density....................................................................................................................................................... 24
IMPORTANT NOTES REGARDING CONFIGURATION FILES...........................................................................24
Applied Microsystems LTD
In-situ Real-time Detection Measurement
i
Smart Talk Software
5.
User's Manual
ADDING ADDITIONAL SENSORS .............................................................................25
APPENDIX A SENSOR CALIBRATIONS ..............................................................................28
A.1.
A.2.
DO2 CALIBRATION ....................................................................................................................................28
PH CALIBRATION ......................................................................................................................................31
Applied Microsystems LTD
In-situ Real-time Detection Measurement
ii
Smart Talk Software
User's Manual
1. INTRODUCTION
This manual describes the Applied Microsystems Ltd. Smart Talk Software. It covers the
software installation and basic functionality as well as an explanation of configuration files and
instructions for modifying your instrument configuration. This document is meant to be used in
conjunction with:
•
•
1.1
The Instrument User’s Manual, and
The configuration documentation provided for the specific instrument purchased.
OVERVIEW
Smart Talk is a Microsoft Windows based program, which allows the user to communicate to an
Applied Microsystems’ instrument through the computer’s serial port or USB port depending on the
instrument.
The user can identify the instrumentation, select and modify the instrument’s configuration file, view
data from the instrument, set the logging parameters and transfer data to the computer’s hard drive.
The user can also manage logged data files stored internally on the instrument by downloading to the
computer’s hard drive and deleting these files from the instrument’s memory. In addition, Smart
Talk allows the user to calibrate some optional sensors such as Dissolved Oxygen (DO2) and pH
1.1.1
Supported Instruments
Smart Talk supports the following Applied Microsystems’ instruments:
•
•
•
•
•
•
SVP-16
STD-12 Plus
Tide and Wave Gauge
SVPlus
CTDPlus
Smart
o SV&P
o SV&T
o SV
o Pressure
o Temperature
o C&T
o CTD
•
•
•
•
EMP2000 Environmental Monitoring Probe
Micro
o SVT&P
o SV&P
o SV&T
o SV
o Pressure
o Temperature
o C&T
o CTD
SVPlus V2
CTDPlus V2
Applied Microsystems LTD
In-situ Real-time Detection Measurement
1
Smart Talk Software
1.1.2
User's Manual
Supported Sensors
Smart Talk supports the following Applied Microsystems’ sensors and Third-Party sensors
integrated with Applied Microsystems’ instruments:
•
•
•
•
•
•
•
•
•
1.2
Pressure (P)
Temperature (T)
Conductivity (C)
Sound Velocity (SV)
Computed Sound Velocity
Computed Salinity
Computer Density
Battery Voltage
pH
•
•
•
•
•
•
•
•
•
Dissolved Oxygen (DO2)
OBS
Redox
Transmissometer
Fluorometer
Licor
Tide and Wave
Current Speed
Heading
MANUAL APPROACH
This manual has been written with the assumption that the user has had some exposure to
Windows™ on IBM compatible computers, and is moderately computer literate with a working
knowledge of computer operation and terminology. While it is possible to operate Smart Talk
Software without these qualifications, some computer experience will greatly assist the user to pass
through the learning curve more rapidly.
Applied Microsystems LTD
In-situ Real-time Detection Measurement
1
Smart Talk Software
User's Manual
2. INSTALLATION
2.1
SYSTEM REQUIREMENTS
To use Smart Talk, the following computer requirements must be met:
•
•
•
•
2.2
Pentium compatible computer or higher.
Microsoft Windows 95™, Windows 2000™, or Windows XP™ operating system.
4 Mbytes of free hard drive space.
A serial communications port (or USB port for some instruments).
INSTALLING SMART TALK
Smart Talk should be installed on the computer's hard disk. This can be accomplished in Windows
by performing the following steps:
1. Insert the “User Documentation” CD shipped with your instrument into the CD drive of your
computer.
2. Browse to the Smart Talk folder on your CD.
3. Double-click the ins.exe file found inside the folder.
4. Select “Next” to start the installation program.
5. Follow the prompts in the installation program.
The default directory setting is “Program Files\SmartTalk”. The Smart Talk icon will be placed in
the Start menu under Programs. The program is now installed and can be launched by double
clicking on the program icon.
2.3
2.3.1
CONNECTING THE INSTRUMENT TO A COMPUTER
RS-232 Serial Connection
Using the data cable supplied with each instrument, connect the instrument to a free serial port on
the computer. Connect the instrument’s power connections to an appropriate power supply, if
required.
The COM port should be configured using the Communications Settings button on the main menu
(refer to Section 3.5)
Applied Microsystems LTD
In-situ Real-time Detection Measurement
2
Smart Talk Software
2.3.2
User's Manual
USB Connection
In addition to standard communications with the instrument, the USB connector allows for faster
transfers of data log files from the instrument to the computer. To use the USB connector, a
USB driver must first be installed on the computer. Refer to the “USB Driver Installation
Guide” found on your “User Documentation” CD.
To communicate using the USB connector:
1. Plug the USB cable into the computer and into the USB socket on the instrument’s
endcap.
2. Allow Windows to load the driver and create a COM port for the USB (Windows 98 may
freeze for a few seconds while the driver loads. Right-click the mouse anywhere on the
screen and wait for the menu to appear which will indicate that the load is finished).
3. Power-up the instrument either by applying external power through the data cable or by
plugging in the shorting plug.
4. Open up Smart Talk and configure the port through the Communication Settings button
on the main menu (refer to Section 3.5).
Note: Windows 98 users: When finished communicating with the instrument, shut down Smart
Talk before unplugging the USB cable to ensure the USB port disconnects properly. Failure to
do so may result in the USB port crashing and the need to restart the computer to repair it.
Applied Microsystems LTD
In-situ Real-time Detection Measurement
3
Smart Talk Software
User's Manual
3. USING SMART TALK
Note: Refer to Section 2.2 for installing the Smart Talk Software prior to use.
Upon start-up of the Smart Talk Software, the Smart Talk Main Menu is displayed in a window.
3.1
MAIN MENU
The main menu consists of 6 buttons that provide access to all of the major command/functions
within the application:
•
•
•
•
•
•
Configure Instrument – allows the user to configure an instrument’s operational parameters:
o Set clock,
o Set sampling time (interval) for real-time operation, and
o Clear memory, set sampling interval or logging increment, or set log file name for
logging operation.
Download Data – allows the user to transfer and delete data/files stored on a logging
instrument.
View Data – allows the user:
o View and export instrument data files previously downloaded from an instrument
and stored on the computer, or
o View and capture (in a .csv file) real-time data output from instrument,
Communications Settings – allows the user to configure and monitor the communications
ports that are being used by Smart Talk. The com port that a specific instrument is
connected must be activated before it can be it can be seen by Smart Talk. Upon activation,
the instrument is interrogated and instrument header and status displayed.
Configuration – allows the user to open a configuration file for an instrument. The
configuration file is supplied with each new instrument on the Document CD in the Smart
Talk folder. After each calibration, the configuration file must be updated by the user by:
o Downloading the updated configuration file from the Applied Microsystems web-site
and storing it in the Smart Talk directory or
o Using Smart Talk to update the calibration coefficients in the configuration file from
the supplied calibration certificated.
Sensor Calibration – allows the user to calibrate optional sensors such as DO2 and pH.
Applied Microsystems LTD
In-situ Real-time Detection Measurement
4
Smart Talk Software
User's Manual
Selecting a button opens another data entry window specific to that command/function. The
command/functions and their data view/entry windows are described in more detail in the following
sections.
Note:
1. An instrument can only be viewed by or configured from Smart Talk once the
communications port is activated and the communications settings are appropriately set.
2. Although multiple instruments and ports can be connected to the computer and activated at
any one time, Smart Talk can only communicate with one instrument at a time. Within each
of the top level command/function windows, the user will be prompted to select the specific
port/ instrument of interest.
3.2
CONFIGURE INSTRUMENT
When the Configure command/button is selected, the Select Instrument for Configuration window
appears. A list of the instruments that are currently connected to the computer on an active COM
port is presented.
From this window, the user can:
1. Refresh - force Smart Talk to interrogate each communications port and verify its status.
2. Configure - interrogate the instrument and display the instrument’s configuration settings in
a new pop-up window (see below).
3. Cancel - close this window.
To select the instrument to be configured, highlight the COM port and Instrument and click the
Configure button.
Applied Microsystems LTD
In-situ Real-time Detection Measurement
5
Smart Talk Software
User's Manual
Note:
1. The Configure button will only be enabled when the appropriate instrument is selected.
2. If no COM ports are listed or “No Instrument” is displayed in the Instrument column:
a. Exit this window and go to the Communications Setting function to check that the
communications settings appropriately setup for the instrument (baud rate and
detection mode).
b. Try cycling the power off and then on to the instrument. Allow a minimum of 5
seconds between turning the power off and then on.
A Configuration window is displayed for the instrument selected. The Configuration window title,
format and content displayed will vary based on the instrument type. The example shown is for a
SVPlus V2 instrument.
To configure the instrument, change the settings to the desired values and click the Configure button.
Smart Talk will program the instrument and reload the settings for user verification.
Press the Exit Button when complete to return to the Main Menu.
3.3
DOWN LOAD DATA
When the Download Data command/button is selected, the Select Instrument for Downloading Data
window will appear. A list of the instruments that are currently connected to the computer on an
active COM port is presented.
Applied Microsystems LTD
In-situ Real-time Detection Measurement
6
Smart Talk Software
User's Manual
From this window, the user can:
1. Refresh - force Smart Talk to interrogate each communications port and verify its status.
2. Select - interrogate the instrument and display the instrument’s memory file contents and the
computer’s default storage file directory in a new pop-up window (see below).
3. Cancel - close this window.
Note:
1. The Configure button will only be enabled when the appropriate instrument is selected.
2. If no COM ports are listed or “No Instrument” is displayed in the Instrument column:
a. Exit this window and go to the Communications Setting function to check that the
communications settings appropriately setup for the instrument (baud rate and
detection mode).
b. Try cycling the power off and then on to the instrument. Allow a minimum of 5
seconds between turning the power off and then on.
To select the instrument to be interrogated, highlight the COM port and Instrument and select the
Select button.
The Download Files window is displayed showing the memory contents for the selected instrument
and the computer’s default storage file directory (Programs\SmartTalk\download). To download:
1. Select the appropriate file or files,
2. Choose or create the destination directory that the file(s) are to be transferred to, and
3. Click the Transfer File(s) button.
Applied Microsystems LTD
In-situ Real-time Detection Measurement
7
Smart Talk Software
User's Manual
Smart Talk will display the progress of the transfer.
To delete files, select the appropriate files and click the Delete File(s) button. Clicking the Exit
button will close this window and return to the Main Menu.
3.4
VIEW DATA
When the View Data command/button is selected, the View Data window will appear.
Applied Microsystems LTD
In-situ Real-time Detection Measurement
8
Smart Talk Software
User's Manual
From here, using the buttons on the bottom half of the window, the user can:
1. View data stored in file (downloaded from a logging instrument or captured from a real-time
instrument) by clicking on Load File button,
2. View data from an instrument in real-time by clicking on Start Real Time Data button, or
3. Exit this function by clicking on the Exit button and return the Main Menu.
Until a logged data file has been loaded or real-time data viewing has been initiated:
•
•
The other buttons are not available.
The View Data area shows blank rows and columns and the Instrument and Data Capture
Status Fields are inactive.
The function of the buttons and status fields and the data format are described in the following subsections.
3.4.1
Load File
If Load File is selected, the Open window is appears which presents a standard Microsoft
Windows™ file format for selecting files.
The default file directory is
Programs\SmartTalk\Download and file type is Aml Data Files (*.rw, (.raw, *.ram).
Note: The log file from the instrument must have already been downloaded to the computer in order
to view it with Smart Talk.
Applied Microsystems LTD
In-situ Real-time Detection Measurement
9
Smart Talk Software
User's Manual
To load a file, select a specific file and click open. The View Data window will re-appear with
the Data Area formatted with a data header and data. Data is displayed in a table format with each
channel in a separate column. Each new cast is marked with a blank row containing the caption
identifying the cast number.
The scroll bar on the right-hand side allows scrolling to any section of the data file. The Export, New
Cast, Previous Cast and Raw Data / Real Data buttons on the lower task bar become active. Each
of these functions is described below.
3.4.1.1 Export
This button/function allows the user to export the current view of the data to a .csv file for use with a
spreadsheet program. There are two options for the data format:
•
Comma Separated Values – exports the data using scientific notation
Applied Microsystems LTD
In-situ Real-time Detection Measurement
10
Smart Talk Software
•
User's Manual
Formatted Comma Separated Values – exports the data using decimal notation
3.4.1.2 Next and Previous Cast
Used with downloaded log files, these buttons allow the user to jump to the next or previous cast for
data files that contain multiple casts.
3.4.1.3 Real or Raw Displayed Format
This button allows the user to toggle between REAL data (data computed using the sensors’
coefficients) or RAW data (uncompensated data coming directly from the sensors).
Applied Microsystems LTD
In-situ Real-time Detection Measurement
11
Smart Talk Software
3.4.2
User's Manual
Start Real Time Data
If Start Real Time Data is selected, the Select Instrument for Real Time Data is displayed with a
list of the instruments that are currently connected to the computer on an active COM port presented.
From this window, the user can:
1. Refresh - force Smart Talk to interrogate each communications port and verify its status.
2. Select - interrogate the instrument and initiate communication with the instrument and start
displaying real-time data output in the View Data window (see below).
3. Cancel - close this window.
Note:
1. The Configure button will only be enabled when the appropriate instrument is selected.
2. If no COM ports are listed or “No Instrument” is displayed in the Instrument column:
a. Exit this window and go to the Communications Setting function to check that the
communications settings appropriately setup for the instrument (baud rate and
detection mode).
b. Try cycling the power off and then on to the instrument. Allow a minimum of 5
seconds between turning the power off and then on.
To start real-time data collection, highlight the COM port and Instrument and click on the Select
button. Data will start to be displayed in the View Data window. The data fields and data rate at
which data is received and displayed by SmartTalk is defined by the instrument settings. The data is
displayed in a table format with each channel in a separate column. Each new cast is marked with a
blank row containing the caption identifying the cast number. The instrument name, number of data
Applied Microsystems LTD
In-situ Real-time Detection Measurement
12
Smart Talk Software
User's Manual
casts and data scans collected are displayed in the status fields at the bottom left of the View Data
window.
In this function, other buttons/functions are available as follows:
• The data format can be toggled between REAL and RAW using the Real Data / Raw Data
button. The button changes function depending on the current data format.
• The data can be captured and stored on the computer using the Capture Data function.
• The Instrument Scan/Sample settings and SmartTalk Capture Configuration settings can be
viewed and changed using the Options function/button.
• Real Time Data collection can be stopped using the Stop Real Time Data (toggles between
Stop and Start Real Time Data).
• The function can be exited using the Exit button. The Real Time Data collection is
terminated upon exit.
The Options and Capture Data buttons/functions are described in more detail in the following subsections.
3.4.2.1 Options
This function allows you to configure the following options:
•
•
•
The rate at which data is captured.
The name and location of the capture file.
Access to the Configure Instrument window described in Section 3.2.
Applied Microsystems LTD
In-situ Real-time Detection Measurement
13
Smart Talk Software
User's Manual
An Instrument’s Options window is displayed for the active instrument. The window format and
content displayed will vary based on the instrument type.
3.4.2.2 Capture Data
The Capture Data function stores real time data to a .csv file for use with a spreadsheet program. If
the filename already exists, the new data will be appended to the file. Each time the capture is
enabled, a new header containing the sensor’s name and units will be stored in the file. The captured
data will be stored in the currently displayed format. The Options button allows you to change the
destination directory and capture file name. Click the Capture Data button to turn the capture
function on and off. The Capture State and Capture file name are displayed in the status fields at the
bottom of the View Data window.
Applied Microsystems LTD
In-situ Real-time Detection Measurement
14
Smart Talk Software
3.4.3
User's Manual
Exit
Clicking the Exit button will leave the View Data window and bring you back to the Main Menu.
3.5
COMMUNICATIONS SETTINGS
The Communications Settings function allows the user to examine and modify the settings of the
communications ports that are being used by Smart Talk. Each communications port is on a
separate tab. Clicking on a COM port tab displays the current state of that COM port. The Settings
section allows the user to configure the initial state of the COM port. To allow Smart Talk to use the
COM port, put a check mark in the Activate Port box. To have Smart Talk automatically start
interrogating the COM port when the program first starts put a check mark in the Use Port on
Startup box. When SmartTalk is given control of an instrument, it will automatically interrogate the
communications port for an instrument. If no instrument is present, Smart Talk will retry every five
seconds until if finds one.
From the File menu of this screen, the user can create or modify an instrument’s configuration file.
For more information on configuration files, refer to Section 4.
3.6
CONFIGURATION
Selecting the Configuration function allows the user to open a configuration file (.cfg) for an
instrument. Configuration file names are generally in the form of the instrument type followed by
the serial number (e.g. SvPlusV2_750.cfg). Selecting a configuration file will open up a window
similar to the one below:
Applied Microsystems LTD
In-situ Real-time Detection Measurement
15
Smart Talk Software
User's Manual
The main configuration window displays the instrument’s type and serial number. There are a series
of tabs along the bottom of the window corresponding to each parameter that the instrument is
capable of measuring. If the instrument has a large number of parameters, the arrow buttons to the
right of the tabs can be used to scroll through the various parameters. Selecting a tab displays the
parameter’s settings including its coefficients, precision, serial number, and other options for that
parameter. Calculated parameters also have configuration tabs, which allow the user to specify
equations and dependant variables.
To recalibrate an instrument, the new coefficients need to be entered. For most sensors, changes to
the coefficients can be made easily by copying a column of coefficients from a spreadsheet and
pasting the coefficients into the configuration window using the paste button.
Also located in the parameter’s settings are the settings for the display positions of each parameter.
These positions indicate where in the data stream the parameter will appear. These values should
not be changed unless the instrument’s configuration has been modified. An example of this would
be the removal or addition of sensors to the instrument.
Refer to Section 4 for more information on how to use configuration files.
3.7
SENSOR CALIBRATION
The Sensor Calibration function allows the user to calibrate optional sensors such as DO2 and
pH. Clicking this button prompts the user to connect to the instrument these sensors are attached
Applied Microsystems LTD
In-situ Real-time Detection Measurement
16
Smart Talk Software
User's Manual
to. Once connected, the program displays a list of sensors capable of being calibrated. Refer to
APPENDIX A for detailed sensor calibration procedures.
Applied Microsystems LTD
In-situ Real-time Detection Measurement
17
Smart Talk Software
User's Manual
4. CONFIGURATION FILES
4.1
OVERVIEW
To communicate with an Applied Microsystems Ltd. instrument, Smart Talk requires a
configuration file. This file contains a listing of all sensors that are installed on a specific instrument
and stores information about the sensors such as coefficients, sensor options, and where the sensor
data is to appear in the data stream.
To create a configuration file, the following information is required:
•
•
•
The type and serial number of the instrument
The serial numbers for all sensors that are installed on the instrument
The calibration coefficients for the sensors
The last 2 items can be found in the “Calibrations” folder on the “User Documentation” CD provide
with the instrument.
Note: If Smart Talk is shipped with the instrument, the instrument’s configuration file will be
included with the software.
4.2
CREATING A STANDARD INSTRUMENT
Important: When a configuration file is created or changed, Smart Talk must be restarted before the
changes will take affect.
If required, to create a configuration file, use the following procedure:
Note: In this example, a configuration file for a standard SVPlus V2 instrument is created.
1. Power up the instrument and connect to the computer using either the serial or USB
connector.
2. Start the Smart Talk software and click the Communication Settings button.
Applied Microsystems LTD
In-situ Real-time Detection Measurement
18
Smart Talk Software
User's Manual
3. Click on the tab corresponding to the COM port that the instrument is connected to. If the
configuration file is missing, the Status field will indicate so. If the status field says “Idle”,
then the instrument cannot be found. Refer to Section 3.2 for troubleshooting instructions.
4. Click on the File menu and select Create Configuration File.
5. The following blank Sensor Configuration window is displayed. A blank configuration file
is created and the user can add sensors and set instrument parameters as required.
Applied Microsystems LTD
In-situ Real-time Detection Measurement
19
Smart Talk Software
User's Manual
6. Enter the instrument type and serial number. In this case, it’s an SVPlus V2 with serial
number 750. Place a check beside File System Supported and RealTime Monitoring.
7. Click on Add and select “Default Sensors”. A group of tabs labelled with the default sensors
will appear at the bottom of the screen.
8. Click on the tab for each sensor and enter the information as required. Most sensor
configurations have the following fields:
Applied Microsystems LTD
In-situ Real-time Detection Measurement
20
Smart Talk Software
User's Manual
Coefficients
Enter the sensor coefficients here
(found in the Calibrations folder on
your “User Documentation” CD)
Active Sensor
Used with
EMP2000’s, indicates
that a sensor is
electrically connected
to the water. Do not
select for instrument’s
other than
EMP2000’s
Decimal Places
Enter the number of
digits after the decimal
you wish to display for
this sensor
Burst Sensor
Used with TWG’s,
indicates if this
sensor should be
included in the burst
data. Do not select
for instrument’s
other than TWG’s
Description
Enter a
description for
the sensor
channel or
reference used
Serial number
Enter the sensor’s serial
number here (found in
the Calibrations folder on
your “User
Documentation” CD)
Position
These fields indicate where in
the Raw data stream you want
the sensor data to appear
Refer to the following sections for additional configuration options for the most common
parameters.
Applied Microsystems LTD
In-situ Real-time Detection Measurement
21
Smart Talk Software
4.2.1
User's Manual
General Setup
4.2.1.1 Info page
File System Supported
Select this option if your instrument is capable of logging data
internally.
Real Time Monitoring
Indicates if an instrument is capable of real time monitoring. Select
this option for most instruments.
Sensor has calibration
mode
Used with SmartSV’s, allows the sound velocity sensor to output
calibration information.
RS485 ASCII mode
Indicates that the instrument is connected to a half-duplex
communications system.
4.2.1.2 Time channel
Use Computer’s Clock
Use the computer’s clock instead of the instrument’s internal clock.
Date Included With
Time
Indicates that a date field is included in the output stream (some
older instruments do not output the date in their data stream).
Select this option for most instruments.
4.2.2
External Sensors
4.2.2.1 Pressure
Latitude
Enter your geographical latitude to introduce a gravitational offset
in the pressure.
Units
Select which units you would like to use to display pressure data.
Temp. Comp.
Select this option if your pressure sensor is temperature
compensated.
SVP-16
Indicates that the sensor is attached to an SVP-16 instrument.
4.2.2.2 Temperature
SVP-16
Indicates that the sensor is attached to an SVP-16 instrument.
4.2.2.3 Sound Velocity
Type of Sound Velocity Select which model of sound velocity sensor you have.
Sensor
Applied Microsystems LTD
In-situ Real-time Detection Measurement
22
Smart Talk Software
User's Manual
4.2.2.4 Conductivity
Micro Sensor
Select this option if the conductivity cell is from the Micro family
of sensors.
Dual Conductivity
Mode
Select this option if the conductivity cell was calibrated in both salt
and fresh water.
Fresh/Salt Selection
Enabled if Dual Conductivity Mode is selected. Indicates whether
the instrument is set for using the conductivity cell in fresh or
salt water.
4.2.2.5 DO2
Display Format
Select which units to use to display DO2 data.
Display Raw Data
Always
Select this option if Raw values are to always be displayed, even
when viewing Real Time data from the instrument. Useful for
post-processing of DO2 data.
Air Temperature
Used in sensor calibration, the air temperature that the “air
saturation point” is taken at.
Raw DO2
Used in sensor calibration, the Raw DO2 value recorded at the “air
saturation point”.
Computed Air
Saturation
The air saturation in mg/L as calculated based on the Air
Temperature entered.
DO2 Zero Point
Used in sensor calibration, the Raw value obtained from leaving the
DO2 sensor in a sodium sulphite solution for several minutes.
4.2.2.6 pH
Dependent Channels
4.2.3
Select which sensors to use for the dependent channels.
Calculated Parameters
All calculated parameters require Dependent Channels to calculate their values from. Use the
drop down boxes to select which sensor is to be used for each dependent channel.
For some computed parameters, additional information is required.
4.2.3.1 Computed Sound Velocity
Equation Type
Select which equation to use to calculate sound velocity values.
Applied Microsystems LTD
In-situ Real-time Detection Measurement
23
Smart Talk Software
User's Manual
4.2.3.2 Density
Equation Type
4.3
Select which equation to use to calculate density values.
IMPORTANT NOTES REGARDING CONFIGURATION FILES
•
Every Raw sensor channel and reference channel must have a unique position number. If
two items share the same position number, the data will not display correctly. The
exception to this is sensors with only one reference channel (e.g. pressure). Reference
Channel 1 and Reference Channel 2 must share the same number in this case.
•
If the date is included in the output stream, it will appear in position 2. The first sensor
or parameter must start at position 3. This will be the case for most instruments.
•
When viewing real time data with Smart Talk in either Raw or Real mode and a sensor
column is missing or the column is present but no data is shown, double-check the
configuration file and look for the following criteria:
o All position numbers are in numerical order, with time in position 1 and the first
sensor in position 3 (position 2 is assumed by the date field).
o No position numbers are missing.
o No position numbers are duplicated.
o All serial numbers are entered and correct.
•
If any changes are made to a configuration file, Smart Talk must be restarted for the
changes to take effect.
Applied Microsystems LTD
In-situ Real-time Detection Measurement
24
Smart Talk Software
User's Manual
5. ADDING ADDITIONAL SENSORS
On new instruments supplied with Smart Talk, the configuration file is already included with the
software; there is no additional work required by the user. To add additional sensors, the new
sensors must be added to the configuration file.
In this example, we’ll add a pH sensor with serial number 7135 to a SVPlus V2.
1. Open Smart Talk and click on the Configuration button.
2. Select the configuration file for the instrument and open it.
3. Click on the tab for the Sound Velocity sensor, then click the Add button.
4. Select pH. This will place a tab for the pH sensor after the Sound Velocity sensor.
Applied Microsystems LTD
In-situ Real-time Detection Measurement
25
Smart Talk Software
User's Manual
5. Enter the coefficients and serial number for the sensor where indicated. The coefficients
can be found in the calibration record shipped with your sensor. Select Temperature as a
Dependent Channel.
6. Look at the Sound Velocity tab and notice that position 8 is the highest one indicated.
This means that the pH sensor should appear next, at position 9. Go back to the pH
Applied Microsystems LTD
In-situ Real-time Detection Measurement
26
Smart Talk Software
User's Manual
sensor and make this change. You will now need to increase the battery channel’s
position to 10.
7. Click on the Save button to save the changes to the configuration file. Close down Smart
Talk and restart for the changes to take effect.
8. To ensure that you have done everything correctly, view data from the instrument and
check that all data is correct. Click on the View Data button on the main screen and then
click on Start Real Time Data. Connect to your instrument and watch the data being
displayed. If the data looks incorrect or a channel is missing, go back to the
configuration file and double-check all the settings. Pay particular attention to the
channel position numbers and make sure no numbers are missing or duplicated.
Applied Microsystems LTD
In-situ Real-time Detection Measurement
27
Smart Talk Software
User's Manual
APPENDIX A Sensor Calibrations
A.1.
DO2 Calibration
The Smart Talk program can be used to perform an “Air Saturation Calibration” of the DO2
Sensor. When the DO2 sensor is left to stand in air with a stable temperature, the DO2 sensor
reaches air saturation. This saturation value is constant for given ambient temperatures and is
used as the high point in the DO2 calibration. Smart Talk must also have the DO2 sensor’s zero
point which is obtained by placing the DO2 sensor in an oxygen depleted solution of Sodium
Sulfite (Na2SO3). Once Smart Talk has these two values, calibration coefficients are calculated
and used to compute Real DO2 data values.
1. Using Smart Talk, monitor the RAW DO2 channel.
2. Place the DO2 sensor in a solution of Sodium Sulfite and let stand for 15 minutes or until
the RAW values stabilize. Note the DO2 Raw value. Rinse the DO2 sensor in fresh water
and let it stand in air at room temperature.
3. From the main Smart Talk Menu, Click on Configuration.
4. Load the instrument’s Configuration File (a copy of the configuration file is supplied in
the Config folder in the Smart Talk directory).
Applied Microsystems LTD
In-situ Real-time Detection Measurement
28
Smart Talk Software
User's Manual
5. From the Sensor Configuration menu, click DO2.
6. Enter the DO2 Zero Point value (from the Sodium Sulfite solution in step 2)
7. Click the Save button to save the information and exit this screen.
Applied Microsystems LTD
In-situ Real-time Detection Measurement
29
Smart Talk Software
User's Manual
8. From the main menu click the Sensor Calibration button.
9. In the Sensor Selection window, highlight DO2 and click
OK.
10. Place the DO2 sensor in air away from drafts and
temperature fluctuations.
11. Monitor the Raw DO2 readings until they stabilize (± 20
counts).
12. Click Calibrate DO2.
Smart Talk records the instruments DO2 raw value and air temperature using the instrument’s
temperature sensor. These values, along with the DO2 sensor’s zero point, are used to create the
coefficients used to output real DO2 values.
Note: If desired, the air temperature can be measured and entered into the software manually.
Applied Microsystems LTD
In-situ Real-time Detection Measurement
30
Smart Talk Software
A.2.
User's Manual
pH Calibration
The pH sensor's output changes as it ages and should therefore be periodically checked and
recalibrated. The frequency of calibrating depends on the amount the sensor is used and the level
of accuracy required. Smart Talk can be used as an easy tool for calibrating pH sensors since it
automatically calculates the new coefficients and stores them in a calibration record for the
sensor.
Materials Required:
•
Six containers of known pH solutions. These should be close to pH 2, 4, 6, 8, 10 and 12.
The containers should be large enough to immerse the pH sensor.
•
One container of distilled water. The distilled water is used to rinse the pH sensor
between baths.
•
Squirt bottle filled with distilled water. Also used to rinse the pH sensor between pH
baths.
Procedure:
Calibration of the pH sensor should be done at room temperature. If the sensor is dried out,
soak it in a solution of pH 4 for 24 hours before calibrating.
1. Click on the Sensor Calibration button on the main menu of Smart Talk and select pH
from the sensor list. The pH calibration screen will be displayed:
Applied Microsystems LTD
In-situ Real-time Detection Measurement
31
Smart Talk Software
User's Manual
2. Immerse the pH sensor in the container of distilled water and gently agitate.
3. Squirt the sensor well with more distilled water.
4. Air dry the sensor so the solutions will not become diluted. A small can of clean, low
pressure, compressed air is suitable for this.
5. Immerse the sensor into the least acidic of the known pH solutions (pH 12) and specify
the pH in the pH Standard window.
6. Watch the pH sensor’s reading in the pH RAW count window.
7. When the RAW number has stabilized (±100 counts), enter the point into the calibration
sheet by clicking the Store Point button.
8. Repeat steps 2 to 7 using all six known pH solutions. If you mistakenly store a point,
highlight the erroneous point and click the Delete Point button.
9. When you are finished, your chart should look similar to below:
Applied Microsystems LTD
In-situ Real-time Detection Measurement
32
Smart Talk Software
User's Manual
10. Click the Calibrate pH button to generate the coefficients and determine the RMS Error
of your calibration.
11. If the RMS Error is acceptable, click the Save button to save the calibration. Smart Talk
will now use this calibration to generate Real values for the pH channel.
Applied Microsystems LTD
In-situ Real-time Detection Measurement
33