1
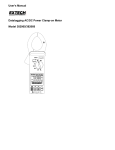
LIST OF PRODUCTS
* Digital Multimeter
* Digital AC & AC/DC Clampmeter
* AC Clamp Adaptor
* AC/DC Current Adaptor
* Transistorised Electronic Analog & Digital
*
*
*
*
*
*
*
*
*
*
*
*
*
Insulation Resistance Testers(upto 10 KV)
Digital Sound Level Meter & Sound Level
Calibrator
Digital contact & Non-contact Type
Tachometer
Digital Non-contact (infrared) Thermometer
Thermo Hygrometer
Thermo Anemometer
Wood & Paper Moisture Meter
Distance Meter
Digital Hand Held Temperature Indicators
Digital Lux Meter
Network Cable Tester
Power Factor Regulator
Maximum Demand Controller/Digital Power
Meter
Earth Resistance Tester
17, Bharat Industrial Estate, T. J. Road, Sewree (W),
Mumbai-400015. INDIA
Sales Direct: 24156638 Tel.:(022)2412 4540, 2418 1649 Fax:2414 9659
E-mail : [email protected], Website : www.kusamelectrical.com,
www.kusam-meco.co.in
An ISO 9001:2008 Company
DIGITAL
MULTIMETER
KM 6050
OPERATION
MANUAL
we damage them or “burn them out”. If you incorrectly
TABLE OF CONTENTS
TITLE
1. GENERAL DESCRIPTION
PAGE
SAFETY................................................................1
CAUTION & SAFETY SYMBOL...........................2
GENERAL SPECIFICATION................................3
ELECTRICAL SPECIFICATION...........................4
ELECTRICAL SYMBOLS....................................8
KM 6050 Digital Multimeter is featured with precise
design, convenient operation, high performance
multifunction, a new protection holster and big LCD
display. To avoid improper operation, the current
jack applies mechanical protection device. Only
when you select current measurement, the mA or
20A jack is open accordingly. Otherwise this jack
is closed to avoid inserting the test lead wrong.
“VW
Hz” is equipped with PTC heat sensitive
element at the input terminal and this has efficient
protection for the Function / Range switch. You
can select different models to measure DCV, DCA,
ACV, ACA, Resistance, Capacitance, Frequency,
Temperature, Diode, hFE and Continuity. This
type can be applied in engineering project,
experiment test, production test work in the open
air, and electrical repairs, etc.
MULTIMETER STRUCTURE..............................9
2. SAFETY PRECAUTIONS AND PROCEDURES
MEASUREMENT PROCEDURE........................10
MAINTENANCE..................................................23
TEST CERTIFICATE..........................................25
WARRANTY........................................................26
1) For your own safety and that of the apparatus,
you must read and follow the procedure
described in this instruction manual.
2) Never use the instrument before replacing the
back cover, or having the risk of electronic
shock.
3) If any unusual condition of testing end and
attachment of the meter such as breakage,
deformation, fracture, foreign substance, no
display, etc, do not conduct any measurement.
4) You must first take out the test leads before
changing to different current measuring
positions and then turn the function / range
switch so as to avoid damaging mechanical
protection device.
1
5) Never input signal level exceeding the limit
value to avoid
shock or damaging the
instrument.
6) Don’t turn the function / range switch when
taking measurement.
7) The potential difference between the
measurement common terminal COM and earth
should not exceed 1000V to avoid electric
shock.
8) Take extreme care if the tested voltage is over
DC 60V and AC 42V to avoid electric shock.
9) When symbol “
” occurs on the LCD, it
indicates low battery.
Battery should be
replaced to ensure measurement accuracy.
10) Fuse inside must be in a good condition and
they must be replaced, if necessary, with an
indentical model.
Terms in this manual
!
Warning: Identifies conditions and actions that
could result in serious injury or
even death to the user.
Caution: Identifies conditions and actions that
could cause damage or Malfunction
in the instrument.
3. GENERAL SPECIFICATIONS
¢
Low power consumption CMOS double
integration, A/D transform integrated circuit,
Auto zero Calibration, Auto polarity display,
Data hold, low battery and Over-range
indication.
¢
DC Basic Accuracy : ±0.05
¢
Capacitance measurement : 0.1~200m
F
¢
Test lead jack mechanical protection function
and full range over-load protection function.
¢
Auto power off function : The meter will shut off
automatically about 15minutes after power is
on to avoid forgetting to turn off the meter after
using it.
¢
Max reading : 19999(4½)
¢
LCD Display : 70 x 48mm big screen, high
contrast, Word height : 28mm
¢
Power : one 9V battery.
¢
Low battery indication : “
left top of the LCD.
” will occur on the
¢
Dimension : 192 x 88 x 42mm
¢
Weight : approx 400g (including battery and
holster).
¢
Environmental condition :
Operation Temperature : 0oC ~ 40oC
Relative Humidity : <85%
Storage Temperature : -10oC~50%
Relative humidity : < 85%
2
3
4. ELECTRICAL SPECIFICATIONS
Accuracy : ± (% reading + digit) one year warranty.
Environment temperature : 23oC ± 5oC
Relative humidity
: <75%
DC VOLTAGE
Range
Accuracy
Resolution
200 mV
10
m
V
100 m
V
2
V
±(0.05% + 5)
20
V
1
mV
200
V
10 mV
±(0.1% + 5)
1000 V
100 mV
Input impedance : 10MW
Overload protection : 250V, (for 200mV)
DC or AC peak value.
1000V (for other ranges)
AC VOLTAGE
Range
Accuracy
Resolution
100 m
V
2
V
20
V
1
mV
±(0.8% + 10)
200
V
10 mV
±(1.2% + 15)
1000 V
100 mV
Input impedance : 2MW
Frequency Range : 40Hz ~ 400Hz
Overload protection : 250V, (for 200mV)
DC or AC peak value.
1000V (for other ranges)
Display : Average value (Sine RMS)
4
DC CURRENT
Range
Accuracy
Resolution
100
2
mA
±(0.5% + 2)
20 mA
1
±(0.75% + 5)
200 mA
10
±(2% + 10)
20
A
1
Overload protection : 0.2A / 250VFuse.
Max input current : 20A(15 seconds max.)
Voltage drop measurement :
Full-range voltage drop : 200mV
nA
m
A
m
A
mA
AC CURRENT
Range
2
mA
20 mA
200 mA
20
A
Accuracy
±(0.8% + 10)
±(1.5% + 10)
±(2% + 10)
Resolution
100
nA
1
10
1
m
A
m
A
mA
Overload protection : 0.2A / 250VFuse.
Max input current : 20A (15 seconds max.)
Voltage drop measurement :
Full-range voltage drop : 200mV
Frequency Range : 40Hz ~ 400 Hz
Display : Average Value ( Sine RMS)
5
RESISTANCE
FREQUENCY
Range
Range
Accuracy
Resolution
±(0.2%
+
5)
0.01 W
200 W
0.1 W
2
KW
20 KW
1
W
±(0.2% + 1)
200 KW
10
W
2
MW
100 W
20 MW
±(0.5% + 5)
1
KW
200 MW
±(0.5% + 10)
10 KW
Overload protection : 250V, DC or AC peak value.
Open circuit Voltage : <1V
(2.8V in the 200MW
position).
Note : It is normal that the test lead short-circuit
displays approx. 10 digits in the 200MW
position. Please deduct these 10 digits from
reading when measuring.
20 kHz
Accuracy
±(2% + 5)
TRIODE HFE PARAMETER MEASUREMENT
Range
hFE
Description
It can measure NPN or
PNP type transistor
triode hFE parameter.
Accuracy
nF
nF
±(2.5% + 10)
nF
m
F
±(5% + 3)
200 m
F
Resolution
0.1 pF
1
10
100
10
Frequency measurement : Approx 400Hz.
Voltage measurement : Approx 40mV.
pF
pF
pF
nF
Test Condition
1b approx
10m
A,
Vec approx
Indication range:0-1000 b
2.8V
DIODE AND CONTINUITY MEASUREMENT
Range
Range
1Hz
Voltage Protection : 250V DC or AC peak value.
Input sensitivity : 150 mV RMS.
Description
Test Condition
CAPACITANCE
2
20
200
2
Resolution
Indicate approx
forward voltage
drop of diode
The buzzer inside
sounds when
continuity
Resistance is
Forward-way
current is approx
1mA, contrayway voltage is
approx 2.8V
Open Circuit
Voltage is
approx 2.8V
<30 W
Overload protection : 250V DC or AC peak value.
6
7
ELECTRICAL SYMBOLS
6. MULTIMETER STRUCTURE
DC Current or Voltage
1
AC Current or Voltage
Diode
7
Buzzer
4
10
Low Battery
!
2
Cautions
Double Insulation
Earth (Ground)
Danger High Voltage
9
Cx
PNP
5
E
E
NPN
20A
mA VW
Hz COM
B
B
3
C
C
E
E
8
6
1. LCD display
2. Function / range selection
3. Test lead jack
4. Power switch
5. Triode measurement jack
6. Test lead jack resistance board
7. Backlight button
8. Test leads socket : VW
. Hz
9. Capacitance Socket.
10. Data Hold.
8
9
7. MEASUREMENT PROCEDURE
Press POWER key. If the battery is low “
”
symbol will display on the left top of LCD. Now you
need to replace the battery.
Select the function and range needed.
1. DC Voltage Measurement :
KM 6050
Remark :
A. If the tested voltage value is unknown, you
should select the highest range.
B. When only “1” occurs, it means the input
voltage has exceeded the selected range,
please select a higher range.
C. “ ! ” indicates not to measure voltage over
1000V. Although it may display the digit, it
may damage the meter.
D. Take extreme care when measuring high
voltage.
2. AC Voltage Measurement :
HOLD
LIGHT
POWER
W
Auto
Power off
200
2K 20K 200K
KM 6050
2M
20M
200M
20kHz
hFE
200m
2m
A
2
200
1000
20
1000
20
A
V
20
20m
200m
200
200m
V
20
20m
2n
200m
2m
200n 20n
Cx
W
Auto
Power off
F
HOLD
LIGHT
POWER
2
2m
200
2K 20K 200K
2M
20M
200M
20kHz
hFE
PNP
E
E
NPN
20A
mA VW
Hz COM
E
2
200
1000
20
1000
20
E
A
V
20
20m
200m
C
C
200m
2m
A
B
B
200
200m
V
20
20m
2
2m
2n
200m
2m
200n 20n
F
Cx
PNP
E
E
NPN
20A
mA VW
Hz COM
B
B
C
C
E
E
(1) Set the function / range switch in DCV range.
(2) Insert the black test lead into COM jack, and
the red test lead into exposed test lead jack
(VW
Hz jack). Connect the test lead to the
tested load or the signal resources in parallel.
The meter will indicate the polarity of the red
test lead at the same time as it indicates the
voltage reading.
10
(1) Set the function / range switch on ACV range.
(2) Insert the black test lead into COM jack, and
the red lead into exposed test lead jack
(VW
Hz jack). Connect the test lead to the
tested load or signal.
11
Remark :
Remark :
A. Refer to DCV measurement remarks
A, B,C, D.
B. “ ! ” indicate not to measure the voltage over
1000V. Although it is possible to display the
reading, it will probably damage the meter.
3. DC Current Measurement :
KM 6050
A. If
the current value is unknown before
measurement, select the highest range.
B. When only “1” occur that indicates the tested
current has exceeded the selected range.
You should select a higher range.
C. When doing mA jack input, overload may melt
the fuse inside. Now replace the Fuse. The
Fuse specifications is 0.2A / 250V.
D. When doing 20A jack input, time for inputing
the highest current 20A should not exceed 15
seconds.
4. AC Current Measurement :
W
Auto
Power off
200
2K 20K 200K
2M
20M
200M
20kHz
hFE
2
V
20
20m
200
200m
1000
20
200
200m
HOLD
LIGHT
POWER
V
20
20m
2
2m
W
Auto
Power off
2n
200m
2m
200n 20n
200
F
Cx
2K 20K 200K
2M
20M
200M
20kHz
hFE
E
E
NPN
20A
B
mA VW
Hz COM
E
200
1000
20
1000
20
E
A
V
20
200m
C
C
2
20m
B
Load
200m
2m
A
PNP
Supply
1000
20
A
Load
200m
2m
A
KM 6050
Supply
HOLD
LIGHT
POWER
200
200m
V
20
20m
2
2m
2n
200m
2m
200n 20n
F
Cx
PNP
E
E
NPN
12
mA VW
Hz COM
C
C
(1) Remove the test lead and set the function /
range switch on DCA range.
(2) Insert the black test lead into COM jack and
the red one into the exposed test lead jack
(mA jack or 20A jack). Connect the test lead
to the tested circuit in series. The meter will
indicate the polarity of the red test lead at the
same time as the meter indicate the current
reading.
20A
B
B
E
E
(1) Remove the test lead and set the function / range
switch on ACA range position. Refer to DCA
measurement (1).
(2) Insert the black test lead into COM jack and the
red test lead into the exposed test lead jack (mA
jack or 20A jack). Connect the test lead to the
tested circuit in series.
13
Remark :Refer to DCA measurement remarks
A, B, C, D.
5. Resistance Measurement :
D. 200MW
position, there are about 10 digits
when the red & black test leads are in shortcircuit. Deduct these digits from the reading
when measuring.
KM 6050
HOLD
LIGHT
POWER
W
Auto
Power off
200
2K 20K 200K
6. Capacitance measurement :
2M
20M
200M
20kHz
hFE
200m
2m
A
2
V
20
20m
KM 6050
200
200m
1000
20
1000
20
A
C. You should turn off the power when measuring
resistance in the circuit, and discharge the
capacitors on the tested circuit.
200
200m
V
20
20m
2
2m
2n
200m
2m
200n 20n
F
Cx
E
E
NPN
20A
mA VW
Hz COM
W
Auto
Power off
B
B
200
C
C
E
2K 20K 200K
2M
20M
200M
20kHz
E
HOLD
LIGHT
POWER
PNP
hFE
200m
2m
A
2
200
200m
1000
20
Capacitor
Cx
1000
20
A
200
200m
2
2m
Remark :
A. When doing open circuit input, the meter is in
the state of over-range, and only the highest
digit “1” is displayed.
B. When the tested resistance is over 1MW
, it
takes a few seconds to stabilize the reading.
It is normal for the HW
measurement.
14
V
20
20m
(1) Set the function / range switch on W
range
position needed.
(2) Insert the black test lead into COM jack and
the red test lead into the exposed VW
Hz jack
(The red test lead is the positive polarity of the
measurement circuit). Connect the test lead
to the two ends of the tested resistance.
V
20
20m
2n
200m
2m
200n 20n
F
Cx
PNP
E
E
NPN
20A
mA VW
Hz COM
B
B
C
C
E
E
(1) Set the function / range switch on the range
position needed, waiting for the meter’s Auto
zero-calibration. It is normal that about 10
digits are left in 2 nF.
(2) Discharge the capacitor.
(3) Insert the capacitor under test into “Cx” jack
and measure (It doesn’t need the test lead).
15
Remark : !
A. Discharge the loaded capacitors, and then
measure.
B. It takes more time when measuring big
capacitors.
C. Measurement unit : 1pF=106m
F; 1nF=103m
F.
D. Don’t insert the capacitors with high voltage
into the test jack direct.
B. If the tested signal is too strong, you should
use the external attenuation so as not to
damage the meter.
C. Working in the noisy place, you had better
use the shielded cable if you measure the
small signal.
8. Transistor hFE parameter measurement
7. Frequency Measurement:
KM 6050
KM 6050
HOLD
LIGHT
POWER
W
Auto
Power off
200
2K 20K 200K
2M
20M
200M
20kHz
hFE
2m
A
2
W
200
200
2
2m
2n
200m
2m
200n 20n
NPN
20M
200M
200m
2m
A
2
200
1000
20
B
1000
20
A
200
200m
E
E
NPN
20A
2
E
E
E
E
PNP
E
E
NPN
E
A. “ ! ” Never supply the voltage over 250V to
the input terminal. If the voltage value is
1000V RMS, you can get the measurement
result, but that will exceed the accuracy
range of the meter.
16
mA VW
Hz COM
C
C
Remark:
20A
B
B
(1) Set the function/range switch on Hz position.
(2) Insert the black test lead into COM jack and the
red test lead or the cable into the test lead
jack (VW
Hz jack).
F
Cx
C
C
2n
200m
2m
200n 20n
C
C
mA VW
Hz COM
B
B
V
20
20m
2m
PNP
V
20
20m
200m
B
F
Cx
E
E
V
20
20m
2M
hFE
PNP
1000
200m
2K 20K 200K
20kHz
V
200
1000
20
20
HOLD
LIGHT
POWER
Auto
Power off
20
20m
200m
A
Insert Leads
in this socket.
200m
E
(1) Set the function/range switch on hFE position.
(2) First make sure the hFE is PNP type or NPN
type and then insert the leads E, B, C
into the respective sockets of the meter.
(3) The meter displays approx hFE value.
The measurement condition is : base current
is approx 10m
A, Vce approx 2.8V.
17
9. Diode
measurement :
Remark :
KM 6050
A. When the two test leads are in open-circuit
state, it will display over-range
(only “1” is displayed).
HOLD
LIGHT
POWER
200
2K 20K 200K
2M
20M
200M
20kHz
hFE
200m
2m
A
2
V
20
20m
200
200m
1000
20
1000
20
A
B. Current going through the tested components
is approx 1mA.
W
Auto
Power off
200
200m
V
20
20m
10. Continuity Test :
2
2m
2n
200m
2m
200n 20n
F
Cx
PNP
E
E
NPN
20A
mA VW
Hz COM
KM 6050
B
B
C
C
E
E
(1) Set the function/range switch on the
position.
HOLD
LIGHT
POWER
W
Auto
Power off
200
2K 20K 200K
2M
20M
200M
20kHz
hFE
200m
2m
A
2
200
1000
20
(2) Insert the black test lead into COM socket
and the red test lead into the exposed
test lead socket (VW
Hz jack, and pay
attention that the inner power of the red test
lead is “+”polarity). Connect the red test lead
to the two ends of the tested Diode, and the
meter display Diode’s Forward-way voltage
drop. The unit is “volt”; It will display overrange if the diode is connected in an opposite
direction.
18
1000
20
A
V
20
20m
200m
200
200m
V
20
20m
2
2m
2n
200m
2m
200n 20n
F
Cx
PNP
E
E
NPN
20A
mA VW
Hz COM
B
B
C
C
E
E
19
(1) Set the function / range on
position.
(2) Insert the black test lead into COM socket and
the red one into VW
Hz jack, and connect the
test lead to the two ends of the circuit to be
tested.
(3) If the resistance value between the two points
to be tested is below 30W
, the buzzer will
sound.
Remark :
You must cut off the power before you check
the tested circuit. It will cause the meter to
display wrong reading if the circuit is charged.
11) Data Hold Function :
The Hold function allows operator to hold the
displayed digital values. When this function is
enabled the display shows the “H” symbol. The
Hold function will be disabled if the Hold key is
pressed again or the position of the rotary switch
is changed.
12) Mechanical Protection Function :
Before inserting the test lead, turn the function/
“
“ in the following table means
the socket is closed. The black test lead can be
inserted into “COM” jack.
Position of
Function/Range
Switch
Test lead blocked by the
blocking board
VW
Hz
mA
20A
AC / DC Voltage
AC/DC Current
Except 20A
AC / DC Current
20A
Resistance
Capacitance F
Triode hFE
parameter
Frequency Hz
If you find the rotary switch doesn’t move, that’s
because you forget to pull out the test lead. Don’t
force the switch to move. You must pull out the
test lead before turning the rotary switch or the
meter’s mechanical protection system may be
damaged.
range switch in a circle (360o) and observe the
motion of the resistance board. This will help you
to get familiar with the meter’s function. Model
KM 6050 digital Multimeter is provided with the
mechanical protection function device as follows:
20
21
13.
Backlight Function
The meter is featured with backlight function for
better use when the environment light is dim.
Press the “LIGHT” button to enable the
backlight, push it again to turn off the light.
14.
Select the display angle of the meter :
8.
MAINTENANCE
It is a precise electronic multimeter. Please
take care to do the maintenance well.
1. Don’t connect to the voltage over 1000 DCV or
1000 ACV.
2. Don’t forget to pull out the test lead before
turning the function / range switch so as not to
KM 6050 provided with protection holsters,
which can support the meter in different angles as
well as protect the meter. This is convenient to
observe the reading.
damage the mechanical protection system.
3. Don’t use the meter before replacing the back
cover of it.
4. Battery replacement : Pull out the test lead and
turn off the power before replacing the battery.
5. Fuse replacement : Press the off key to turn off
the instrument, and disconnect the test leads
from the input terminals. Remove the back
cover screws and open the back cover.
Replace the fuse / fuses with new fuse of the
same type and rating : 0.2A / 250V.
6. Remove the battery and put it in a dry and airy
place if the meter is not used for a long time.
7. Don’t change the inner circuit to avoid damage
the meter.
22
23
MUMBAI
9. ACCESSORIES
TEST CERTIFICATE
DIGITAL MULTIMETER
1. User’s Manual
2. One Holster
3. One pair test lead
This Test Certificate warrantees that
the product has been inspected and
tested in accordance with the published
specifications.
The instrument has been calibrated by
using equipment which has already
been calibrated to standards traceable
to national standards.
KM 6050
MODEL NO. ___________
SERIAL NO. ___________
DATE: ___________
QC
ISO 9001
REGISTERED
24
KUSAM-MECO
PASS
25
WARRANTY
Each “KUSAM-MECO” product is warranted to be
free from defects in material and workmanship
under normal use & service. The warranty period is
one year (12 months) and begins from the date of
despatch of goods. In case any defect occurs in
functioning of the instrument, under proper use,
within the warranty period, the same will be rectified
by us free of charges, provided the to and fro freight
charges are borne by you.
This warranty extends only to the original buyer or
end-user customer of a “KUSAM-MECO” authorized
dealer.
THIS WARRANTY IS BUYER’S SOLE AND
EXCLUSIVE REMEDY AND IS IN LIEU OF ALL
OTHER WARRANTIES, EXPRESS OR IMPLIED,
INCLUDING BUT NOT LIMITED TO ANY IMPLIED
WARRANTY OF MERCHANTABILITY OR
FITNESS FOR A PARTICULAR PURPOSE.
“KUSAM-MECO” SHALL NOT BE LIABLE FOR
ANY SPECIAL, INDIRECT, INCIDENTAL OR
CONSEQUENTIAL DAMAGES OR LOSSES,
INCLUDING LOSS OF DATA, ARISING FROM
ANY CAUSE WHATSOEVER.
All transaction are subject to Mumbai Jurisdiction.
This warranty does not apply for damaged Ic’s,
fuses, burnt PCB's, disposable batteries, carrying
case, test leads, or to any product which in “KUSAMMECO’s” opinion, has been misused, altered,
neglected, contaminated or damaged by accident or
abnormal conditions of operation or handling.
“KUSAM-MECO” authorized dealer shall extend this
warranty on new and unused products to end-user
customers only but have no authority to extend a
greater or different warranty on behalf of “KUSAMMECO”.
“KUSAM-MECO’s” warranty obligation is limited, at
option, free of charge repair, or replacement of a
defective product which is returned to a “KUSAMMECO” authorized service center within the
warranty period.
26
G 17,Bharat Industrial Estate, T. J. Road,
Sewree (W), Mumbai - 400 015. INDIA.
Sales Direct : (022) 24156638
Tel. : (022) 24124540, 24181649.
Fax : (022) 24149659
Email : [email protected]
Website : www.kusamelectrical.com,
www.kusam-meco.co.in
27