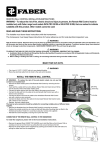
1
SUNLIGHT READABLE LCD MONITOR
GenStar™
UB-20W-NX-xx
USER’S MANUAL
Manual P/N: 01-850
Ver. 1.6
2
TABLE OF CONTENTS
1.0
Safety Information.......................................................................... 4
2.0
Overview ....................................................................................... 8
2.1
Features.......................................................................................................................................................10
2.2
™
Intelligent Backlight Controller Summary ..............................................................................................11
2.3
ICARUS™/DAEDALUS™ Summary ........................................................................................................13
3.0
Contents ........................................................................................ 15
4.0
Installation..................................................................................... 16
4.1
Fuse Block Installation................................................................................................................................16
4.1.1
Fuse Requirements................................................................................................................................17
4.2
5.0
LCD Monitor Installation ..........................................................................................................................18
Connections ................................................................................... 19
5.1
Power ..........................................................................................................................................................19
5.2
Video ...........................................................................................................................................................19
5.3
Serial/IBC....................................................................................................................................................19
5.4
Remote Brightness Interface .......................................................................................................................20
5.5
Fans.............................................................................................................................................................20
6.0
Operation ...................................................................................... 21
6.1
On/Off.........................................................................................................................................................21
6.2
On-screen Display (OSD) Controls ...........................................................................................................21
6.3
Brightness Controls ....................................................................................................................................22
6.3.1
6.3.2
Local Brightness Potentiometer ............................................................................................................22
Remote Brightness Interface .................................................................................................................23
6.4
Built-in Test (BIT) Indicators.....................................................................................................................24
6.5
Intelligent Backlight Controller Interface ................................................................................................25
6.5.1
6.5.2
6.6
™
Serial Port .............................................................................................................................................25
IrDA Port..............................................................................................................................................25
OSD Functions...........................................................................................................................................26
6.6.1
Brightness and Contrast .......................................................................................................................26
6.6.2
Auto Adjust ..........................................................................................................................................27
6.6.3
Position .................................................................................................................................................28
6.6.4
Image Adjust.........................................................................................................................................29
6.6.5
Color Control ........................................................................................................................................30
6.6.6
Tool .......................................................................................................................................................31
6.6.7
6.7
General Digital™ Corporation
Information ...........................................................................................................................................32
Attaching Fiber Optic Receiver Mounting Brackets..................................................................................33
GenStar™ User’s Manual
3
TABLE OF CONTENTS
7.0
Troubleshooting ........................................................................... 34
8.0
Maintenance ................................................................................. 36
8.1
Cooling System ...........................................................................................................................................36
8.1.1
Cooling Fans .........................................................................................................................................37
8.1.1.1
Center Air Intake Fan Maintenance..................................................................................................37
8.1.1.2
Exhaust Fan Maintenance.................................................................................................................38
8.1.2
Removable HEPA Filter .......................................................................................................................39
8.1.2.1
HEPA Filter Maintenance.................................................................................................................39
8.2
Power Supply..............................................................................................................................................40
8.2.1
Power Supply Maintenance..................................................................................................................40
8.3
Cleaning Antireßective Glass .....................................................................................................................41
9.0
Specifications................................................................................ 42
10.0
Mechanical Drawing ..................................................................... 44
11.0
Agency Approvals ........................................................................ 45
12.0
Warranty ....................................................................................... 46
13.0
Appropriate Usage Policy ............................................................. 47
14.0
Proprietary Notice and Liability Disclaimer.................................. 48
15.0
Contacting General Digital™ ........................................................ 49
Appendices
Appendix A
Appendix B
Appendix C
Appendix D
Appendix E
Appendix F
Appendix G
Calibration Tips.......................................................................................................... 50
Pedestal Installation .................................................................................................. 53
Accessories/Spare Parts ........................................................................................... 54
Labeling....................................................................................................................... 55
Additional Safety Instructions for Service Personnel........................................... 56
Part Number ConÞguration ..................................................................................... 57
Alternate Calibration Tips (STARS) ........................................................................ 58
G-1.0
Display Alignment Test Pattern ................................................................................................................58
G-2.0
TDW 20.1” Display Calibration Preview ..................................................................................................60
G-3.0
Appendix H
STARS Tower Display Calibration Procedure...........................................................................................61
Acronyms Used in this Manual ............................................................................... 66
General Digital™ Corporation
GenStar™ User’s Manual
1.0
4
SAFETY INFORMATION
The following symbols are used throughout this manual to alert users of important information
concerning the proper care and handling of the LCD monitor.
This symbol warns users that uninsulated voltage within the unit may have sufÞcient magnitude
to cause electric shock. Therefore, it is dangerous to make any kind of contact with any part inside
this monitor.
This symbol alerts users that important literature concerning the operation and maintenance of this
unit has been included. Therefore, it should be read carefully in order to avoid any problems.
General Digital™ Corporation
GenStar™ User’s Manual
5
WARNING
1) Refrain from disassembling the LCD monitor as high voltage components are contained within.
Contact with these components may result in a fatal electric shock, Þre or severe damage to
the monitor.
2) If irregular phenomenon (such as smoke, abnormal smell or sound, etc.) is noticed during
continuous use, immediately disengage power to the LCD monitor. Continued operation may
result in Þre or electric shock.
3) Allow adequate ventilation around the LCD monitor so that heat can properly dissipate. Do not
block ventilated openings or place the monitor near a radiator or other heat sources. Do not put
anything on top of the monitor.
4) Metal parts of the LCD monitor may become hot during operation and should therefore be
handled with care.
5) Keep foreign objects away from ventilation slots to prevent Þre or electric shock. If a foreign
object should happen to fall inside the LCD monitor, immediately disengage power to the
monitor.
6) Keep liquids from entering the LCD monitor to prevent Þre or electric shock. If any liquid
material comes in contact with the internal electronics, immediately disengage power to the
monitor.
7) Use of the LCD monitor under any power voltage other than the indicated voltage may result in
Þre, electric shock or damge to the monitor.
8) Use of unspeciÞed fuses may result in Þre, electric shock or damage to the monitor.
9) Storage or use of the LCD monitor in areas subject to severe shock or vibration may result in Þre,
electric shock or damage to the monitor.
10)
Storage or use of the LCD monitor in areas exposed to hazardous chemicals or chemical vapors
may result in Þre or electric shock.
11)
Placement of the LCD monitor or heavy objects on the power cord may result in Þre or electric
shock.
12)
Applied force or folding of the power cord may result in Þre or electric shock.
13)
Fully insert power cable into polarized AC outlet and LCD monitor inlet. Use the LCD monitor’s
polarized plug with an extension cord receptacle or other outlets ONLY when the prongs can be
fully inserted. InsufÞcient insertion of power cable may cause Þre or electric shock.
14)
Handle with care when transporting. Save packaging for transporting.
REFER ANY NECESSARY SERVICING TO QUALIFIED SERVICE PERSONNEL.
General Digital™ Corporation
GenStar™ User’s Manual
6
CAUTION
It should be noted that an LCD (Liquid Crystal Display) has the following specific characteristics. These
characteristics are not indicative of a defect or malfunction.
a) The performance of the LCD monitor may be affected by changes in the ambient (room) temperature.
b) The LCD uses cold cathode tubes for the backlights. Optical characteristics such as brightness or
uniformity will change during the LCD’s lifetime.
c) Uneven brightness and/or small spots may appear depending on different display patterns.
1) Electrostatic discharges may cause damage to the LCD monitor and, therefore, care should be
taken in this regard.
2) The LCD display surface and backlight is made of a fragile glass material. Excessive pressure to
the LCD display surface should be avoided. (shock ≤ acceleration 55 G x 11 ms)
3) Storage or use of the LCD monitor in areas exposed to equipment that generates heat may result
in Þre or damage to the monitor.
4) Placement of the LCD monitor on slanted or unstable surfaces could cause the monitor to fall,
resulting in possible damage and/or injury.
5) Storage of the LCD monitor in humid or dusty places may result in Þre or electric shock.
6) Failure to replace air Þlter according to recommended schedule may result in Þre or electric
shock.
7) Displaying a Þxed pattern for an extended period of time may cause image burn-in.
8) Handle connectors and cables with care.
9) The power cable connector is the primary means of detaching the system from the power
supply. The LCD monitor should be placed close to a power outlet that is easily accessible.
10)
When operating the LCD monitor with its universal input power supply, use a power supply
cord that matches the power supply voltage of the AC power outlet being used. The power
supply cord you use must have been approved by and comply with the safety standards of
your country.
11)
The monitor is intended to be operated only with a power supply provided by General Digital™.
12)
In the UK, use a BS-approved power cord with molded plug having a black (5A) fuse installed
for use with this monitor. If a power cord is not supplied with this monitor, please contact
your supplier.
13)
The ßuorescent tube in the LCD monitor contains mercury. Please follow the bylaws or rules of
your local municipality to dispose of this tube properly.
14)
When used near a radio or television, the LCD monitor may generate noise in the device. Also,
equipment generating strong magnetic forces near the LCD monitor may generate noise in the
LCD monitor.
15)
General Digital will not take any responsibility for scratches, dents or other damages made
by customer.
™
REFER ANY NECESSARY SERVICING TO QUALIFIED SERVICE PERSONNEL.
General Digital™ Corporation
GenStar™ User’s Manual
7
RECOMMENDED USAGE
CORRECT PLACEMENT AND ADJUSTMENT OF THE MONITOR CAN REDUCE EYE,
SHOULDER AND NECK FATIGUE. CHECK THE FOLLOWING WHEN YOU POSITION THE
MONITOR:
1) For optimum performance, allow the LCD monitor 20 minutes to warm-up.
2) Adjust the monitor height so that the top of the screen is at or slightly below eye level. Your eyes
should look slightly downward when viewing the middle of the screen.
3) Position the LCD monitor no closer than 16” and no further than 28” from your eyes. The
optimal distance is 23” for the GenStar™ monitor.
4) Rest your eyes periodically by focusing on an object at least 20’ away. Blink often.
5) Position the monitor at a 90° angle to windows and other light sources to minimize glare and
reßections. Adjust the monitor tilt so that ceiling lights do not reßect on your screen.
6) Adjust the monitor’s brightness and contrast controls to enhance readability.
7) Avoid displaying Þxed patterns on the monitor for long periods of time to avoid image
persistence (after-image effects).
8) Get regular eye checkups.
General Digital™ Corporation
GenStar™ User’s Manual
2.0
8
OVERVIEW
General Digital™ introduced the GenStar™ UB-20W-NX family of 20.1” RGB Industrial LCD
monitors in response to the growing need for a high performance LCD monitor that can operate in
bright ambient light or direct sunlight conditions. Model Number UB-20W-NX-xx was speciÞcally
designed to address the demanding needs of “mission critical” applications (commercial and
industrial) such as Air TrafÞc Control monitoring where its unique set of advanced features are
required.
Internal to the LCD monitor is an intelligent video controller that permits the device to operate
from analog video sources and function as a seamless replacement for the traditional CRT. The
LCD monitor will interface with virtually any host computer (PC/AT, VME, STD, Workstations,
etc.) provided its video controller (analog) supports VESA standards for VGA, SVGA, XGA and
SXGA resolutions (up to 120 Hz vertical refresh/160 MHz dot clock). In addition, the LCD monitor
will support EIA-RS-343-compatible analog RGB color video at any timing set over the vertical and
horizontal frequencies listed (see section 9.0, SpeciÞcations). The intelligent video controller (internal
to the monitor) enables the device to operate from separate, composite or sync-on-green video
inputs. A membrane pad located behind a hinged access panel on the front bezel activates intuitive
on-screen menus that allow technicians to calibrate the monitor.
™
The GenStar UB-20W-NX-xx features an AMTFT LCD display with a large 20.1” diagonal viewing
area, a maximum resolution of 1280 x 1024 pixels, and the best viewing angle (±80°) in the
LCD industry. General Digital™ integrates its own proprietary SmartBright™ Backlight module to
augment the display’s brightness from 150 nits to a maximum of 1000 nits, making it suitable
for operation in direct sunlight. A 1000:1 dimming circuit allows operators to vary the brightness
from full off to maximum brightness via a local potentiometer or a remote brightness interface.
The optical performance of the LCD display is further embellished by optically bonding a 62%
neutral density contrast enhancement Þlter to the surface of the LCD glass. While the Þlter reduces
the maximum brightness to 620 nits, it improves the contrast ratio to ≈ 6:1 @ 6000 foot-candles, a
characteristic equally important as brightness to sunlight readability. The Þlter is also treated with
an etched antireßective coating (OCLI) to further reduce surface reßections. The optical bonding
material is index matched to reduce the number of reßective surfaces (air gaps) between the operator
and the surface of the LCD display, thereby optimizing the optical clarity while minimizing surface
reßection. The optically bonded Þlter also produces a secondary beneÞt: it creates a protective
surface over the face of the LCD display that guards the fragile liquid crystal material.
The SmartBright™ Backlight module consists of 31 cold cathode ßuorescent bulbs (CCFT) that are
stacked horizontally and housed within a rugged aluminum enclosure mounted to the back of the
LCD panel. Integral to the backlight enclosure is a custom-engineered heat sink that dissipates
the heat generated from the CCFTs away from the temperature sensitive liquid crystal material.
Two externally mounted exhaust fans draw Þltered (HEPA) ambient air through the SmartBright™
Backlight assembly (over the CCFTs) via a series of internal bafßes. An additional cooling fan directs
ambient (room) air across the heat sink and other internal electronics, exhausting airßow through a
series of ventilation holes located on the back of the enclosure. The SmartBright™ Backlight assembly
is powered by a pair of redundant DC–AC inverters. Each of the inverters produces high voltage
output in excess of 2000 volts AC and drives up to 16 bulbs (alternating bulb pattern). In the event
that a single inverter fails, the other inverter will continue to produce uniform brightness across
the entire viewing surface. Failure of any of the 31 individual bulbs will not adversely affect the
performance of the other CCFTs.
™
Another unique property of the GenStar UB-20W-NX-xx LCD monitor is its ability to anticipate
™
and/or diagnose component failures. The integration of General Digital’s proprietary Intelligent
™
Backlight Controller (IBC) promotes the practice of “intelligent replace before fail.” The primary
function of the microprocessor-based controller is to regulate the brightness of the SmartBright™
Backlight CCFTs and maintain the internal ambient temperature of the device via control of the
General Digital™ Corporation
GenStar™ User’s Manual
9
backlight inverters/dimming circuitry and the three cooling fans. Optical and thermal sensors
located throughout the monitor provide performance feedback to the IBC to facilitate the proper
control of the electronics. Equally important is the IBC’s secondary function of monitoring and
reporting the status of the LCD monitor. The IBC monitors and records a variety of data including
runtime hours, min/max ambient temperatures, over-temp conditions, bulb brightness/decay as
well as component failures (fan, bulb and inverter). Built-In Test (BIT) LEDs are located on the front
bezel to report Power Good, fan failure and over-temperature conditions. In addition, important
conÞguration data is also maintained including the serial number, Þrmware revision number,
warranty expiration dates, date of repair/replacement, etc. This data is stored in non-volatile
memory for real-time and historical analysis. The data can be retrieved and analyzed via General
Digital’s™ ICARUS™ or DAEDALUS™ software utilities. A detailed description of the Intelligent
Backlight Controller™ and its software utilities is provided in section 2.2, Intelligent Backlight
Controller Summary.
In an effort to facilitate Þeld maintenance, General Digital™ has mounted the three cooling fans,
the AC switching (universal input) power supply, and HEPA Þlter on the rear of the monitor’s
enclosure. All mounting hardware, interconnect cabling, and Þlters are externally accessible for
replacement by a trained service technician. In the event of failure, technicians can quickly and
easily replace the defective components, minimizing downtime and costly shipping expenses,
without opening the enclosure or voiding the standard warranty. Authorized replacement parts and
™
cables can be purchased directly from General Digital .
The LCD display and its associated electronics are housed in a rugged aluminum enclosure that
is ideal for both commercial and industrial applications. The enclosure is treated with a durable
black matte powder coat Þnish (low reßectivity). Eight (four pairs) mounting holes are provided
on the vertical sides of the enclosure to facilitate a variety of standard and custom pedestals, yokes
and articulating arms. In addition to the aforementioned membrane calibration pad, BIT LEDs, and
brightness potentiometer, users have access to an On/Off rocker switch and IrDA port on the front
of the device. The optional IrDA port facilitates data downloading and Þrmware uploads from/to
the Intelligent Backlight Controller™ when used in conjunction with the DAEDALUS™ software.
Interface connectors for video, power, remote brightness control, IBC (serial port) and the cooling
fans are accessible from the rear of the enclosure.
General Digital™ Corporation
GenStar™ User’s Manual
2.1
10
FEATURES
▪ Color AMTFT LCD Display
» Large, 20.1” Diagonal Viewing Area
» Wide ±80° (horizontal & vertical) Viewing Angle
» Unlimited Colors
▪ Seamless Replacement for CRT
» Compatible with most PC/AT, VME, STD or Workstations
» Multifrequency Support of Analog Color Video Signals for VESA standards for VGA, SVGA,
XGA and SXGA Resolutions up to 160 MHz Dot Clock
▪ SmartBright™ Backlight Module
» 1000 nits Brightness at LCD surface
» Engineered Cooling/Monitoring
• Three Cooling Fans
– Externally Serviceable/Replaceable
• Custom Heat Sink
• HEPA Þlter
– Externally Serviceable/Replaceable
▪ Local and Remote Brightness Control
» 1000:1 Dimming Ratio (maximum)
» Programmable (at factory) Dimming Control
» Programmable Minimum and Maximum Brightness from <1 Nit to >1000 Nits (limits are
affected by contrast Þlter type)
» Brightness Compensation Algorithm Adjusts for Temperature Change and Bulb Decay
» Remote Control Overrides Local Control
• Normal, Nighttime and Sunlight Modes of Operation
▪ Optically Bonded Enhancement Filter
» 62% Contrast Filter (limits brightness to 620+ nits) at Viewing Surface
» 72 Gloss Etch A/R Coating
» Protective Glass
▪ Intelligent Backlight Controller™
» Serial or IrDA (optional) Interface for Download/Upload
▪ ICARUS™ “Intelligent Replace Before Fail” Software
▪ Status LEDs
»
»
»
»
Power Good
Video Standby
Fan Good/Fan Failure
Temperature Good/Over-Temperature (see section 6.4, Built-in Test Indicators)
▪ Power Supply
» Universal Input, AC Switching
• Externally Serviceable
▪ Rugged Aluminum Enclosure
»
»
»
»
Black Matte Powder Coat Finish (low reßectivity)
Hinged Access Panel for Membrane Calibration Pad
Eight Threaded Mounting Holes
Optional Mounting Brackets for Fiber Optic Receiver
General Digital™ Corporation
GenStar™ User’s Manual
2.2
11
INTELLIGENT BACKLIGHT CONTROLLER™ SUMMARY
1) Monitors/Regulates SmartBright™ Backlight CCFTs
» Microprocessor-based controller incorporates dimming control and brightness compensation
algorithms
Development of custom Þrmware is available on a contract basis
Samples CCFT brightness (real time) via 15 optical sensors located on backlight bulbs
Regulates/limits maximum brightness to prolong longevity/uniformity of bulbs
Automatically adjusts “kick-off” voltage to prevent bulbs from misÞring
Date/time stamped log of maximum brightness in 50 nit intervals (1000, 950, 900, etc.) to
provide advance warning of bulb decay
Date/time stamped log of individual bulb failures
•
»
»
»
»
»
2) Local Brightness Potentiometer
» Manual control of brightness from minimum to maximum brightness (1000:1 max.)
3) Remote Brightness Control
» Interface provided which supports an optional Remote Brightness Control Box
• When attached, the Remote Brightness Control Box assigned exclusive control of brightness
» Two types of Remote Brightness Control Boxes available
• Manual brightness potentiometer (P/N: 850-021-70)
• Manual brightness potentiometer with multi-position switch
– Switch 1: Nighttime (default = min.–200 nits at surface of LCD)
– Switch 2: Normal (default = 201–700 nits at surface of LCD)
– Switch 3: Sunlight (default = 701–max. nits at surface of LCD)
– Switch 4: Manual (default = min. to max.)
– Brightness range for each switch setting is programmable
4) Monitors Ambient Temperature (Internal to LCD Monitor)
» Monitors temperature of SmartBright™ Backlight/LCD Assembly
• Date/time stamped log of maximum operating temperature
• Date/time stamped log of minimum operating temperature
• Date/time stamped log of over-temperature condition
• Date/time stamped log of under-temperature condition
» Monitors temperature of Electronics Compartment
• Date/time stamped log of maximum operating temperature
• Date/time stamped log of minimum operating temperature
• Date/time stamped log of over-temperature condition
• Date/time stamped log of under-temperature condition
» Intelligent fan control (two exhaust fans, one intake fan)
• Fans started when ambient temperature of backlight reaches 35° C
– Accelerates maximum brightness from cold start or from low brightness reference
• Fan speed function of ambient temperature (temperature sensitive)
General Digital™ Corporation
GenStar™ User’s Manual
12
5) Monitors Fan Performance
» Date/time stamped log of fan failures (each fan individually monitored)
6) Monitors SmartBright™ Backlight Inverters (2)
» Date/Time stamped log of individual inverter failures
7) Runtime Hours
» Records total runtime hours for system
» Records total runtime hours for fans
8) Stores ConÞguration and Installation History
» ConÞguration Data
• Date of manufacture
• Serial number of LCD monitor
™
Revision number of Intelligent Backlight Controller Þrmware (Flash)
• Serial number of major electronic assemblies/components
• Warranty expiration date of major electronic assemblies/components
• PC software revision number
» Installation Data
• Installation dates (date of manufacture or repair/replacement) of major
assemblies/components
•
9) Firmware Upgrades
» Intelligent Backlight Controller™ Þrmware can be upgraded via use of ICARUS™ or
DAEDALUS™ IRBF software
™
• ICARUS supports serial interface only
™
• DAEDALUS supports serial and IrDA interface
10)
Failure Log Download
» Data can be downloaded and analyzed exclusively with ICARUS™ or DAEDALUS™ IRBF
software
™
• ICARUS supports serial interface only
™
• DAEDALUS supports serial and IrDA interface
General Digital™ Corporation
GenStar™ User’s Manual
2.3
ICARUS /DAEDALUS SUMMARY
™
™
13
▪ Hardware Requirements
» PC or Laptop with a monitor capable of a minimum of 800 x 600 resolution
» PC or Laptop with a serial port
™
» PC or Laptop with an IrDA port (DAEDALUS only)
▪ Hardware Compatibility
» Compatible with General Digital™ Intelligent Backlight Controller™ only
▪ Software Compatibility
» Windows 98®
One software license per unit required
General Digital™ Corporation
GenStar™ User’s Manual
14
ICARUS™ DAEDALUS™
FEATURES
Help Menu......................................................................................................................
!
!
!
Balloon help through context ...........................................................................................
Retrieve performance data from IBC directly or from saved files .........................................
!
!
Displays IBC status ..........................................................................................................
!
!
Information displayed on a single, easy to read screen.................................................
!
!
Displays critical events in an interactive form ...............................................................
!
Provides an overview for each event .......................................................................
!
Provides recommended solution/action ..................................................................
!
User can assign an alias name to each monitor for easier reference ..................................
!
User can ask IBC for its device information .......................................................................
!
!
Saves data from IBC in date-stamped file .........................................................................
!
!
Users can display a printable (generic) summary of failures/warnings ................................
!
!
Users can type/paste comments into a printable/savable comment window
with automatic time stamping of comments ......................................................................
!
View installation dates/warranty expiration for all major electronics ...................................
!
!
Set installation date/warranty period for replaced parts .....................................................
!
!
Password protected/issued by General Digital™ Service Department ..............................
!
!
Data exportable ..............................................................................................................
!
ASCII tables, CRLF terminated with user-selectable delimiters........................................
!
Excel spreadsheets .....................................................................................................
!
Graphs (analytical data comparison)................................................................................
!
Advanced Reports (supports sorting, filtering in tabular form) for analysis ...........................
!
Flash upgrade of IBC firmware ........................................................................................
!
!
Serial interface support...............................................................................................
!
!
IrDA interface support ................................................................................................
!
Illustrations (on screen) of components identifying current condition using three status colors
!
Erase IBC memory (requires verified data download and General Digital™-issued password)
!
Customizable backgrounds (skins) ...................................................................................
!
!
!
Performance data is sent over internet to General Digital database servers
for analysis and archiving ................................................................................................
!
!
Database Analysis ...........................................................................................................
By subscription only
Internet-based registration process ...................................................................................
™
Analysis of data to identify item replacement before failure...........................................
By subscription only
Analysis of predicted MTBF vs actual MTBF ..................................................................
By subscription only
Failure analysis vs bill of materials ..............................................................................
By subscription only
Site by site analysis.....................................................................................................
By subscription only
E-mail alerts ..............................................................................................................
By subscription only
On-line service manual with step by step instructions.........................................................
Future
™
Technical support information and link to General Digital’s service web page ...................
General Digital™ Corporation
!
GenStar™ User’s Manual
3.0
15
CONTENTS
Your new ßat panel LCD monitor includes the following standard equipment:
1 – GenStar™ 20.1” Sunlight Readable RGB Industrial LCD Monitor, Model No. UB-20W-NX-xx
1 – Video Cable, HD15 → 5 BNC
1 – AC Line Cord
1 – ICARUS™ Installation Software CD (includes User’s Manual in PDF format)
1 – Shipping Container
Note: Please save your custom-designed shipping container for warranty
returns as needed. Shipping in an unauthorized container will void the
warranty.
General Digital™ Corporation
GenStar™ User’s Manual
4.0
4.1
16
INSTALLATION
FUSE BLOCK INSTALLATION
WARNING! TO PREVENT RISK OF ELECTRIC SHOCK, REMOVE AC POWER
CABLE BEFORE PROCEEDING WITH FUSE BLOCK INSTALLATION ADJUSTMENT.
1) ConÞgure the fuse block on the line entry Þlter according to the directions provided below and
the table on the following page. The factory default setting is 115 VAC, single-phase operation.
a) Locate the Line Entry Module – The line entry module is installed on the rear of the LCD
monitor within the power supply enclosure.
b)Remove the Fuse Block – Using a small screwdriver, carefully lift the tab on the hinged fuse
cover and open. Insert the screwdriver into the notch on top of the red fuse block and twist to
loosen. Remove the fuse block (see Figure 4-1).
c) Install the Fuse – Insert a fuse and fuse clip for the required voltage as shown in Figure 4-2 .
Note: For single-phase operation, the fuse clip attaches on the side opposite the fuse.
Notch
Red Fuse Block
Hinged Fuse Cover
Figure 4-1: Line Entry Module
Fuse clip
Configured for
115 VAC, Single-Phase
(with fuse clip)
Configured for
230 VAC, Single-Phase
(with fuse clip)
Configured for
230 VAC, Dual-Phase
(no fuse clip)
Figure 4-2: Fuse Block
General Digital™ Corporation
GenStar™ User’s Manual
4.1.1
17
FUSE REQUIREMENTS
AC PRIMARY
VOLTAGE
FUSE
FUSE
VOLTAGE AMPERAGE
FUSE
TYPE
FUSE SIZE
U.S. & CANADA/EUROPE
NO. OF
FUSES
FUSE
CLIP
115 Single-Phase
250 VAC
5 Amps
Fast-Acting
1¼” x ¼”/
5 x 20 mm
1
Yes
230 Single-Phase
250 VAC
5 Amps
Fast-Acting
1¼” x ¼”/
5 x 20 mm
1
Yes
230 Dual-Phase
250 VAC
5 Amps
Fast-Acting
1¼” x ¼”/
5 x 20 mm
2
No
General Digital™ Corporation
GenStar™ User’s Manual
4.2
18
LCD MONITOR INSTALLATION
This LCD monitor is conÞgured with threaded inserts (¼-20 x 5/16”), four each located on the left
and right sides of the enclosure. These inserts are provided to facilitate a variety of standard or
custom options.
For your safety, General Digital™ recommends that any mounting apparatus deployed use at least
two of the inserts (per side) to attach to the LCD monitor. Use a ßat washer and split ring locking
washer with the appropriate length ¼-20 screw to attach the mounting apparatus to the monitor.
Important Note: Use the upper and lower inserts on each side if only four mounting points are
utilized.
1) Utilizing the mounting holes supplied on the LCD monitor, attach your pedestal, articulating
arm or other mounting apparatus to the monitor. See Appendix B for detailed mounting
instructions for General Digital™/UL-approved apparatus.
2) Attach a shielded video cable (connected at one end to your computer or workstation) to the 5
BNC connectors located on the rear of the LCD monitor.
3) Attach the supplied AC line cord to the AC socket located on the rear of the LCD monitor.
4) Plug the AC line cord into an AC outlet.
5) Turn on the LCD monitor by pressing the On/Off rocker switch located on the front bezel.
Note: Initially, the monitor will execute a built-in test (BIT) that will cause the three LEDs to cycle
from green to yellow and to red. After completing the BIT, the Power LED should turn green if the
monitor has been connected to a valid power source. The Video LED will also turn green if a valid
video source has been supplied. Refer to section 6.4, Built-in Test Indicators, for a complete summary
of the Status LEDs.
6) You are now ready to operate your GenStar™ Sunlight Readable Industrial LCD Monitor.
General Digital™ Corporation
GenStar™ User’s Manual
5.0
CONNECTIONS
5.1
POWER CONNECTOR
19
GD Part Number: 16-033
Description:
AC Line Entry Filter, 6 Amp, Dual Voltage Selectable, EMI/RFI Shielded
5.2
VIDEO CONNECTOR
GD Part Number:
Description:
Manufacturer:
Mfr. P/N:
5.3
Enclosure
Mating Connector
30-521
BNC, Socket, 75 Ω
Amp
222132-1
Generic
BNC, Plug, 75 Ω
Generic
Generic
SERIAL/IBC CONNECTOR
Enclosure
Mating Connector
GD Part Number: 30-045
Manufacturer:
Amphenol
Mfr. P/N:
DE-9S
30-026
Amphenol
DE-9P
Signal Pinout:
Signal
Pin Number
1
2
3
4
5
6
7
8
9
General Digital™ Corporation
N/C
RX
TX
N/C
Ground
N/C
N/C
N/C
N/C
GenStar™ User’s Manual
5.4
REMOTE BRIGHTNESS INTERFACE CONNECTOR
GD Part Number:
Description:
Manufacturer:
Mfr. P/N:
5.5
Enclosure
Mating Connector
30-356
6-pin Circular, Socket, Locking
Hirose
RM12BRD-6S
30-357
6-pin Circular, Plug, Locking
Hirose
RM12BPG-6PH
20
FAN CONNECTORS
GD Part Number: 30-520
Description:
Socket, 2.5 mm dia.
General Digital™ Corporation
GenStar™ User’s Manual
6.0
21
OPERATION
The operation and calibration of the GenStar™ is described in detail in the paragraphs that follow.
(See Appendices A & G for calibration tips.)
6.1
ON/OFF
Power to the LCD monitor is controlled by a rocker switch (double-pole, double-throw) located on
the front bezel (lower left). AC power (external source) is connected to the device via a fused IEC
connector.
6.2
ON-SCREEN DISPLAY (OSD) CONTROLS
A 7-button membrane pad (see Figure 6-1) functions as the user operation and calibration interface
for your LCD Monitor. The membrane pad is located immediately below the active matrix LCD
display, protected by a hinged access panel that is secured by two captive fasteners. Actuation of any
of the cursor (directional) buttons will activate a series of intuitive on-screen menus that will allow
operators to optimize the performance of the LCD monitor. A summary of the buttons is provided
in the table below.
MEMBRANE PAD
CONTROL
RESET
Resets to default values. If pressed while the OSD is off, this function will cause the OSD menu
to be rotated 90 degrees the next time the OSD is activated. Subsequent use of the RESET button
(while OSD is off) will return the OSD to its normal position the next time it is activated.
←
Moves the OSD Cursor to the left (when cursor is on Menu Tag Line), or
Reduces value of selected item.
→
Moves the OSD cursor to the right (when cursor is on Menu Tag Line), or
Increases value of selected item.
↑
Moves the OSD cursor up one item.
↓
Moves the OSD cursor down one item.
ENTER
Saves current settings.
EXIT
Exits selected item, or
Exits OSD if cursor is pointing to Menu Tag Line.
Note: Pressing ←, →, ↑, ↓, ENTER, or EXIT buttons will activate the OSD menu.
Figure 6-1: Illustration of 7-button Calibration Pad
General Digital™ Corporation
GenStar™ User’s Manual
6.3
22
BRIGHTNESS CONTROL
The brightness of the LCD monitor can be controlled via one of two mechanisms – a local
potentiometer or a remote brightness interface. A description of each of these controls is provided
below.
6.3.1
LOCAL BRIGHTNESS POTENTIOMETER
A Brightness Potentiometer on the front bezel (lower right) provides operators with a manual
control to vary the brightness of the LCD monitor. This potentiometer will allow the brightness to
be adjusted from its minimum to its maximum setting (1–1000 nits typical). The potentiometer is
internally controlled by General Digital’s™ Intelligent Backlight Controller™. Although the monitor’s
backlights are capable of producing greater brightness, the Intelligent Backlight Controller™ limits
the maximum brightness to 1000 nits (affected by type of contrast Þlter) to prolong the life of the
bulbs and reduce internal heat. In the event that the backlight assembly is unable to produce a mean
brightness of 1000 nits (due to aging or failure), the event is recorded in non-volatile memory. This
data is available to service and maintenance personnel using with General Digital’s™ ICARUS™ or
DAEDALUS™ software utilities.
Typical Performance
▪ Backlights require 3–4 minutes to reach maximum brightness from a cold start at room
temperature
▪ If the backlights are rapidly dimmed from the maximum setting to the minimum setting, they will
require 10–15 minutes to achieve absolute minimum brightness (at room temperature)
See Application Note #01-400 for additional technical data regarding dimming control and
brightness compensation.
General Digital™ Corporation
GenStar™ User’s Manual
6.3.2
23
REMOTE BRIGHTNESS INTERFACE
The LCD monitor is conÞgured with a Remote Brightness Interface on the rear of the enclosure. This
6-pin connector allows operators to attach a Remote Brightness Box that can control the brightness
of the LCD monitor. When installed, the Remote Brightness Box will override the Local Brightness
Potentiometer to avoid conßict. Like the Local Brightness Potentiometer, the Remote Brightness
Interface is also controlled by the Intelligent Backlight Controller™. The Remote Brightness Interface
is designed to support a 3-position selection switch, as well as a Brightness Potentiometer. The
switch allows operators to set the brightness to one of three operational modes (Daytime, Sunlight,
Nighttime). Each of these modes provides a range of brightness that is appropriate for the prevailing
ambient lighting conditions. The potentiometer allows users to vary the brightness over the range
deÞned by each operational mode. The brightness range of each mode can be programmed and
modiÞed via the ICARUS™ and DAEDALUS™ software utilities.
A schematic for the Remote Brightness Interface is provided in Figure 6-2 below. Please note that
this interface is designed to support up to a 35-foot cable. Remote brightness controls can be
purchased as an accessory directly from General Digital™.
Figure 6-2: Remote Brightness Interface Schematic
General Digital™ Corporation
GenStar™ User’s Manual
6.4
24
BUILT-IN TEST (BIT) INDICATORS
The LCD monitor is integrated with intelligence (Intelligent Backlight Controller™) that allows the
device to monitor and report its own health to the operators and service/maintenance personnel.
In addition to recording the self-health data to non-volatile memory on the Intelligent Backlight
Controller™, certain diagnostic information is also visually communicated to the operator via three
BIT LEDs (located on front bezel). The table below summarizes the functionality of the three BIT
LEDs.
General Digital™ Corporation
GenStar™ User’s Manual
6.5
25
INTELLIGENT BACKLIGHT CONTROLLER INTERFACE
The GenStar™ is equipped with an Intelligent Backlight Controller™ that saves system/component
failures and performance history into non-volatile memory. This data can be retrieved through a
serial port or an IrDA port. A description of each port follows.
6.5.1
SERIAL PORT
A DE-9 connector is provided on the rear of the LCD monitor to provide serial communication
between the Intelligent Backlight Controller™ and a diagnostic PC (e.g., laptop). The serial port
allows for data retrieval as well as ßash (Þrmware) upgrades. The monitor will not permit
downloading of data or Flash upgrades unless a licensed copy of General Digital’s™ ICARUS™ or
DAEDALUS™ software (see section 2.3, ICARUS™/DAEDALUS™ Summary) is purchased (one license
per unit).
The serial interface will support the following communication parameters established at the PC:
Communication Port:
Baud Rate:
Parity:
Data Bits:
Stop Bits:
COM 1–4
1200 through 57.6 K
N
8
1
The serial port requires a straight-through (non-null modem) DE-9P (plug) to DE-9S (socket) cable
run from the PC to the monitor.
The ICARUS™ and DAEDALUS™ software utilities require a Windows 98® operating system.
6.5.2
IrDA PORT
An optional infrared (IrDA) communication port is integrated into the front bezel of the LCD
monitor. Monitors purchased with the DAEDALUS™ software will be able to download data
or upload Flash upgrades from/to the Intelligent Backlight Controller™ without requiring a
physical connection (e.g., serial port), provided the diagnostic PC (e.g., laptop) supports IrDA
communication and is conÞgured with a Windows 98® operating system.
General Digital™ Corporation
GenStar™ User’s Manual
6.6
OSD FUNCTIONS
6.6.1
BRIGHTNESS & CONTRAST
26
Brightness
Contrast
Operation:
When the BRIGHTNESS & CONTRAST icon is highlighted on the Tag Line, use the ↓
button to select the performance characteristic that you wish to modify. Once selected,
use the → and ← buttons to increase or decrease the value of the Brightness or Contrast
settings. If AUTO is selected, press the ENTER button to execute this function. Press the
EXIT button once to save values and return to the Tag Line. Press the EXIT button again
to turn off the OSD Menu. Press the RESET button to restore the default values.
Brightness: This function has been disabled. Brightness is controlled exclusively by the brightness
potentiometer.
Contrast:
The contrast control range is from about 0% to 100%. The factory default setting is
100%.
Note: Adjustments to the contrast may affect the monitor’s overall brightness.
Auto:
General Digital™ Corporation
The AUTO ADJUST CONTRAST function automatically adjusts the contrast to the most
suitable value when compared to the input video signal swing. For example, when the
input video signal swing is over 0.70 V p-p, contrast is adjusted to a similar value.
GenStar™ User’s Manual
6.6.2
27
AUTO ADJUST
Operation:
When the AUTO icon is highlighted on the Tag Line, use the ENTER button to execute
the automatic adjustment of the vertical and horizontal positioning of the display
image as well as the resizing of the display for optimal viewing. Press the EXIT button
once to save the values and return to the Tag Line. Press the EXIT button again to
turn off the OSD Menu.
Auto Adjust: The AUTO ADJUST function automatically interprets the video input signal and
attempts to adjust the following:
The number of pixels in each horizontal line (Size).
The vertical positioning of the image.
The horizontal positioning of the image.
Repeat the AUTO ADJUST function as many times as necessary to properly display the
image or move the cursor to the right and select the IMAGE ADJUST icon to manually
adjust these settings.
Note: General Digital™ recommends displaying a background with a 50% gray pattern
(alternating pixels on and off) before adjusting the horizontal size. If the size setting is incorrect,
you will see vertical bars on the display. (See Appendix A for calibration tips.)
General Digital™ Corporation
GenStar™ User’s Manual
6.6.3
28
POSITION
Horizontal
Vertical
Operation:
When the POSITION icon is highlighted on the Tag Line, use the ↓ button to select
the performance characteristic that you wish to manually modify. Once selected, use
the → and ← buttons to increase or decrease the horizontal and vertical position of the
displayed image. If AUTO is selected, press the ENTER button to execute this function.
Press the EXIT button once to save values and return to the Tag Line. Press the EXIT
button again to turn off the OSD menu. Press the RESET button to restore the default
values.
Horizontal: Adjusts the horizontal position of the displayed image. Decreasing the value will move
the image to the left; conversely, increasing the value will move the image to the right.
Vertical:
Adjusts the vertical position of the displayed image. Decreasing the value will move
the image down; conversely, increasing the value will move the image up.
Auto:
The AUTO ADJUST POSITION function automatically adjusts both the horizontal and
vertical positioning of the display image.
General Digital™ Corporation
GenStar™ User’s Manual
6.6.4
29
IMAGE ADJUST
Size
Fine Tune
Operation:
When the IMAGE ADJUST icon is highlighted on the Tag Line, use the ↓ button to select
the performance characteristic that you wish to modify. Once selected, use the → and ←
buttons to increase or decrease the value of the Horizontal Size or Fine Tune settings. If
AUTO is selected, press the ENTER button to execute this function. Press the EXIT button
once to save values and return to the Tag Line. Press the EXIT button again to turn off
the OSD Menu. Press the RESET button to restore the default values.
Size:
Adjusts the internal pixel clock or the number of pixels in each horizontal line.
Note: General Digital™ recommends displaying a background with a 50% gray pattern
(alternating pixels on and off) before adjusting the Horizontal Size. If the size setting is
incorrect, you will see a series of vertical bars displayed across the screen. Adjust the value of
this setting until all of the vertical bars disappear before attempting to Þne tune the image.
Fine Tune:
Adjusts the phase or the exact point in time where the digitizers sample the video input
signal. It is very important to sample the pixels at their centers; otherwise an unstable
picture will result.
Note: General Digital™ recommends displaying a background with a 50% gray pattern
(alternating pixels on and off) before adjusting the Fine Tune.
Auto:
The AUTO ADJUST IMAGE function automatically adjusts the Horizontal Size and
Fine Tune. Repeat until image is satisfactory or manually calibrate using the functions
described above.
Note: General Digital™ recommends displaying a background with a 50% gray pattern
(alternating pixels on and off) before utilizing the AUTO ADJUST IMAGE function. (See
Appendix A for calibration tips.)
General Digital™ Corporation
GenStar™ User’s Manual
6.6.5
30
COLOR CONTROL
Operation:
When the COLOR CONTROL icon is highlighted on the Tag Line, use the ↓ button
to select the color preset function. Using the → and ← buttons, users can select
from Þve preset color temperatures. Users can edit the preset values for each of the
individual colors by pressing the ↓ button until the individual color you wish to edit
is highlighted. Once highlighted, the color value can be edited by pressing the → and
← buttons. Once changes have been made to a preset, the default description will be
changed to USER. Press the RESET button to restore the default values.
Warning: General Digital™ ships each monitor using preset #2 (7500). We recommend that
users do not attempt edit preset #2.
General Digital™ Corporation
GenStar™ User’s Manual
6.6.6
31
TOOL
Operation:
When the TOOL icon is highlighted on the Tag Line, use the ↓ button to select the OSD
position tools. Once selected, use the → and ← buttons to increase or decrease the value
of the horizontal and vertical position settings. If ALL RESET is selected, press the ENTER
button to execute this function. Press the EXIT button once to save values and return to
the Tag Line. Press the EXIT button again to turn off the OSD Menu. Press the RESET
button to restore the default values.
←OSD→:
Adjusts the horizontal position of the OSD menu.
↑
OSD:
Adjusts the vertical position of the OSD menu.
↓
All Reset:
General Digital™ Corporation
Resets the OSD menu position to its default setting.
GenStar™ User’s Manual
6.6.7
INFORMATION
Operation:
General Digital™ Corporation
32
When the INFORMATION icon is highlighted on the Tag Line, the OSD will display
information pertaining to the resolution, frequency (horizontal and vertical) and type
of sync signal (SEP = separate sync, SOG = sync-on-green) that the video controller has
interpreted from the video input signal.
GenStar™ User’s Manual
6.7
ATTACHING FIBER OPTIC RECEIVER MOUNTING BRACKETS
33
Available optionally for the GenStar™ is a pair of aluminum mounting brackets that facilitate the
installation of a (customer supplied) Þber optic video receiver unit. Secure the brackets (with the
supplied mounting hardware) to the monitor via the four mounting studs provided on the rear
of the enclosure.
General Digital™ Corporation
GenStar™ User’s Manual
7.0
34
TROUBLESHOOTING
FAILURE:
No Image, No Power LED
CAUSE:
Defective Power Supply, Defective Internal Cabling or Defective/Disconnected AC
Line Cord
SOLUTION:
A. Verify that the line cord is properly connected to an AC power source (i.e., wall
outlet).
B. Inspect AC line cord for physical damage or replace.
C. Check the fuse.
D. Replace power supply.
E. If the image does not return, contact General Digital™ Service Department for a
Return Material Authorization (RMA).
FAILURE:
No Image, Power LED Orange
CAUSE:
Invalid Video Source or Video Cable Disconnected
SOLUTION:
Orange LED indicates video Standby mode. Check that video cables are properly
attached. Check timing of video sources to ensure video mode in use is supported
by this monitor.
FAILURE:
No Image, Power LED Red
CAUSE:
Defective Internal Video Controller Board or Failed Internal Cabling
SOLUTION:
Contact General Digital™ Service Department for a Return Material Authorization
(RMA).
FAILURE:
No Image, Power LED Green
CAUSE:
Brightness Potentiometer
SOLUTION:
Turn the Brightness Potentiometer clockwise to increase backlight brightness
FAILURE:
No Image, Power LED Green
CAUSE:
Defective Display, Backlight Inverter or Internal Connection
SOLUTION:
Contact General Digital™ Service Department for a Return Material Authorization
(RMA).
FAILURE:
Dim Display
CAUSE:
OSD Settings
SOLUTION:
Check Brightness and Contrast settings. If the settings are too low the display will
appear to be dim or difÞcult to read.
General Digital™ Corporation
GenStar™ User’s Manual
35
FAILURE:
Dim Display
CAUSE:
Defective Backlights
SOLUTION:
Check LCD monitor total runtime hours. Backlight brightness will be reduced
as the bulbs age. Contact General Digital™ Service Department for advisement/
replacement.
FAILURE:
Image Persistence
CAUSE:
Image Left on Screen for Extended Period of Time
SOLUTION:
Image persistence is when a “ghost” of an image remains on the screen even after the
monitor has been turned off. Unlike CRT monitors, LCD monitors’ image persistence
is not permanent. To alleviate image persistence, turn the monitor off for as long
as the image was displayed. Note: As with all personal display devices, General
Digital™ recommends using a screen saver at regular intervals whenever the screen
is idle.
FAILURE:
Flickering Pixels
CAUSE:
Defective LCD Panel or Internal Cable
SOLUTION:
Contact General Digital™ Service Department for a Return Material Authorization
(RMA).
FAILURE:
Vertical Bars or Flickering Pixels
CAUSE:
Video Cable
SOLUTION:
Reconnect and/or replace the external video cables.
FAILURE:
Vertical Bars or Flickering Pixels
CAUSE:
OSD Settings
SOLUTION:
Activate the OSD menu. Select the Auto Setup function. If this does not correct the
problem, continue. Display a 50% gray pattern on the LCD display. If vertical bands
are evident, activate the OSD menu. Adjust the Image Size function until the vertical
bands vanish. Use the Tuning function to Þne tune the image. See Appendix A for
calibration tips.
FAILURE:
Fan LED Red
CAUSE:
Defective Fan or Fan Connection
SOLUTION:
Verify fan cable is properly connected to main enclosure. Replace fan assembly if
necessary.
FAILURE:
OSD is rotated 90° from normal
CAUSE:
OSD rotation enabled
SOLUTION:
Pressing the RESET button (while OSD is off) will return the OSD to its normal
position the next time it is activated.
General Digital™ Corporation
GenStar™ User’s Manual
8.0
8.1
36
MAINTENANCE
COOLING SYSTEM
The LCD monitor is capable of operation in direct sunlight as a result of optimization of
both contrast and brightness. Brightness augmentation is accomplished by two methods: optical
bonding of enhancement Þlters to the LCD, and implementation of General Digital’s™ proprietary
SmartBright™ Backlight Assembly.
In layman’s terms, the SmartBright™ Backlight Assembly consists of 31 cold cathode ßuorescent
bulbs that produce extraordinary light output that is focused behind the LCD display to generate
high brightness (>1000 nits) at the display surface. The SmartBright™ Backlight Assembly requires
180 watts to perform its task. As a consequence, a tremendous amount of internal heat is generated
immediately behind the LCD, and indirectly in the electronics chamber. In order to protect the
thermally sensitive LCD display and other electronics from high ambient temperatures, General
Digital™ has custom engineered a cooling system that is both efÞcient as well as Þeld serviceable.
Cool ambient air is drawn across the SmartBright™ Backlight Assembly, its cold cathode ßuorescent
bulbs and the liquid crystal material through a series of bafßes that isolate the airßow from the
rest of the device. The air is drawn through a Þltered (HEPA) intake vent and exhausted by two
cooling fans (Fan #1 and Fan #2). The HEPA Þlter screens airborne stimuli from getting between
the LCD diffusers and enhancement Þlms, preventing contamination of the viewing surface as well
maximizing the light output. A heat sink is mounted to the backlight assembly to dissipate heat
away from the LCD display. An additional cooling fan (Fan #3) directs external ambient air onto
the heat sink, across the control electronics and out a series of ventilation holes. This airßow does
not require any special Þltering.
The instructions that follow will describe the recommended maintenance for Þeld serviceable
components of the aforementioned cooling system.
General Digital™ Corporation
GenStar™ User’s Manual
8.1.1
37
COOLING FANS
The two exhaust fans and the single intake fan are externally mounted to the rear of the LCD
monitor’s enclosure to facilitate Þeld replacement without requiring the enclosure to be opened
(violation of standard warranty). Note: Fan failures are recorded in non-volatile memory on the Intelligent
Backlight Controller™ or can be visually identiÞed by the BIT LEDs. The fans can be easily replaced
by detaching the locking connector and removing the four mounting screws. Replacement fan
assemblies can be purchased directly from General Digital™.
8.1.1.1
Center Air Intake Fan Maintenance
1) Unplug the fan power connector by Þrst unscrewing the knurled nut at the base of the
connector, then pulling up (away from the enclosure). See Figure 8-1.
2) Remove the four panhead Phillips screws # from the four corners of the fan assembly.
3) Remove the malfunctioning fan and replace with a new fan. Be sure to properly align the fan’s
air ßow indicator (arrow found on side of fan) such that it is pointing toward the enclosure.
4) Place Þnger guard $ on top of fan.
5) Reattach the fan and Þnger guard using the four previously removed panhead Phillips screws
#. Use a small drop of 222 Loctite on the end of each screw, tightening to a torque of 3 inch
pounds.
WARNING: Overtightening the fans can cause premature bearing failure.
6) Plug the fan’s power connector into the enclosure and secure by tightening the knurled nut.
Figure 8-1
General Digital™ Corporation
GenStar™ User’s Manual
8.1.1.2
38
Exhaust Fan Maintenance
1) Unplug fan power connector by Þrst unscrewing the knurled nut at the base of the connector,
then pulling up (away from the enclosure). See Figure 8-2.
2) Remove the four panhead Phillips screws # from the four corners of the fan assembly.
3) Remove the malfunctioning fan and replace with a new fan. Be sure to properly align the
fan’s air ßow indicator (arrow found on side of fan) such that it is pointing away (exhausting)
from the enclosure.
4) Place Þnger guard $ on top of fan.
5) Reattach fan and Þnger guard using the four previously removed panhead Phillips screws #.
Use a small drop of 222 Loctite on the end of each screw, tightening to a torque of 3 inch
pounds.
WARNING: Overtightening the fans can cause premature bearing failure.
6) Plug the fan’s power connector into the enclosure and secure by tightening the knurled nut.
Figure 8-2
General Digital™ Corporation
GenStar™ User’s Manual
8.1.2
39
REMOVABLE HEPA FILTER
The HEPA Þlter is installed in a removable bracket that facilitates periodic replacement. For a typical
ofÞce environment, General Digital™ recommends that the Þlter be replaced every four months. The
frequency of replacement may vary depending on the cleanliness of the operating environment.
8.1.2.1
HEPA Filter Maintenance
1) Remove air Þlter assembly from the back of enclosure by pulling on the two black nylon
fasteners located on the sides of the Þlter assembly. See Figure 8-3.
2) Remove the six ßathead Phillips screws % from the back of the air Þlter assembly. See Figure 8-4.
3) Replace the air Þlter media & keeping the media in the milled area of intake air Þlter frame ',
with the nylon mesh part of the Þlter against the frame.
4) Reassemble the air Þlter frame using the six previously removed ßathead Phillips screws,
placing a small drop of 222 Loctite on each screw.
5) Reattachment of the air Þlter assembly requires that the nylon fasteners $ be in their “out”
position before placing the assembly onto the enclosure.
6) Place the air Þlter assembly onto the enclosure, then press down on the fasteners securing the
air Þlter assembly in place.
Figure 8-3
Figure 8-4
General Digital™ Corporation
GenStar™ User’s Manual
8.2
40
POWER SUPPLY
The universal input AC switching power supply is externally mounted to the rear of the LCD
monitor’s enclosure to facilitate Þeld replacement without requiring the enclosure to be opened
(violation of standard warranty).
8.2.1
POWER SUPPLY MAINTENANCE
1) Remove the power supply shroud % from the back of the enclosure by unscrewing the four
panhead Phillips screws #. See Figure 8-5.
2) Lift the shroud % from the enclosure and place on the left side of the power supply.
3) Remove the AC cable from the bottom of the power supply $. See Figure 8-6.
4) Remove the DC cable from the top of the power supply $.
5) Remove the power supply by unscrewing the three panhead Phillips screws % from the middle
of the power supply heat sink and the two panhead Phillips screws # from the bottom.
6) Attach new power supply (Þgure 8-6) noting cable polarities. Use a small drop of 222 Loctite
at the bottom threads of each screw.
Figure 8-5
BLACK & GREEN WIRES
DC POWER CABLE
Figure 8-6
General Digital™ Corporation
GenStar™ User’s Manual
8.3
41
CLEANING ANTIREFLECTIVE GLASS
The LCD display is protected/augmented by a glass Þlter with an etched antireßective coating that
is optically bonded to the surface of the display. General Digital™ recommends that the glass Þlter be
periodically cleaned to maintain a sharp and crisp image for operators.
Recommended Cleaning Agents:
▪ Windex® with Ammonia D
▪ Alcohol
▪ Glass Cleaners with foaming agents (e.g., camera lens cleaners)
▪ Acetone
Cleaning Agents to Avoid:
▪
Soap
▪
Agents with grit (e.g., Ajax®, Comet®)
▪
MEK
▪
Keytones
▪
Oil-based cleaners
ACTUAL PROCEDURE USED BY GENERAL DIGITAL™ FACTORY TECHNICIANS
1) Due to the nature of the cleaning agents mentioned above, the display surface should be as cool
as possible, otherwise streaking will occur. This can be accomplished by either turning off the
monitor or dimming the brightness and allowing several minutes for the display to cool.
2) Using 409® Glass & Surface Cleaner, spray the front surface of the monitor. Using Bounty® paper
towels, wipe the central portion of the display surface using light pressure in a circular motion,
and wipe the edges in a left and right/up and down pattern.
3) Spray the display again with the 409® Cleaner. Using a Techclean™ Wiper (Tech Spray®
P/N: 2350-100), fold width-wise once, then fold lengthwise three times.
4) Pour a small amount of acetone into a container (approximately 1/8” of acetone in the bottom)
wide enough to dip the folded wipe lengthwise .
5) Dip the folded edge of the wipe into the acetone and wipe the display glass, squeegee-style,
from top to bottom, working right to left.
Note: Don’t let the acetone come into contact with any painted surfaces. If it does, wipe dry immediately.
General Digital™ Corporation
GenStar™ User’s Manual
9.0
42
SPECIFICATIONS
DISPLAY
Type ............................................. Active Matrix TFT
Viewing Area (diagonal) ................ 20.1”
Maximum Resolution ..................... 1280 x 1024 Pixels (SXGA)
Number of Colors ......................... Unlimited
Brightness ..................................... 1000+ cd/m² at display surface (max.)
620 cd/m² at filter surface (max.)
Viewing Angle ............................... ±80° Horizontal, ±80° Vertical
INPUT SIGNALS
Video Signals ................................ Analog Red, Green, Blue
Sync Signals.................................. Separate Horizontal Sync & Vertical Sync, Composite Sync, and Sync-On-Green
Frequency Range........................... 24.0 kHz to 80 kHz (H-Sync)
56.0 Hz to 76.0 Hz (V-Sync)
Vertical Refresh Rate ...................... VGA, SXGA, XGA, SXGA to VESA Standards up to 120 Hz
Dot Clock (pixel clock) ................... 160 MHz (max.)
Graphics Formats.......................... Standard VGA, SVGA, XGA, SXGA
Graphics Auto Mode Detect ........... VGA, SVGA, XGA, SXGA
CONTROLS AND CONNECTORS
Video Connector ........................... 5 BNC, Socket, 75 Ω
Serial (IBC) Connector ................... D-sub., 9 pin, Female
AC Power...................................... AC Socket (IEC), Fused and On/Off Rocker Switch
Calibration Controls Available ....... Reset, Proceed, Enter, Exit, ←, →, ↑, ↓
Calibration Control Interface.......... 7-button Membrane (standard)
Local Brightness Control ................ Potentiometer
Remote Brightness Control ............. 6-pin Circular, Locking (Hirose: RM12BRD-6S)
Memory Settings............................ Settings are Stored in Non-Volatile Memory
POWER
Power Consumption ...................... <200 Watts (max.)
Input Voltage................................. 90–132, 180–264 VAC/47–63 Hz
ENVIRONMENTAL
Exhaust Fan (x2), Intake Fan (x1) .... 80 mm x 80 mm, 34 cfm, 27 dB
Operating Temperature ................. 0° to 50° C
Storage Temperature ..................... –20° to 60° C
PHYSICAL
Enclosure Dimensions (H x W x D).. 17.0” x 19.5” x 5.375” (excluding optional Fiber Optic Receiver)
Mounting ...................................... ¼-20 x 0.31” deep threaded inserts, 4 places on left and right sides
Weight (operating)......................... <34 lbs. (excluding optional Fiber Optic Receiver)
Specifications subject to change without notice or obligation.
General Digital™ Corporation
GenStar™ User’s Manual
43
SUPPORTED DISPLAY MODES
PRESET
NO.
H-SYNC
FREQUENCY
1
24 kHz ≤ fH ≤ 30.8 kHz
2
30.8 kHz ≤ fH < 33 kHz
V-SYNC
FREQUENCY
fV < 65 Hz
65 Hz ≤ fV
3
SYNC POL.
HS
VS
DISPLAY
MODE
REMARK
640 x 480 (56)
NEC PC-9800
640 x 480 (60)
VGA
+
–
720 x 350 (70)
VGA
–
+
720 x 400 (70)
VGA
fV < 58 Hz
800 x 600 (56)
VESA STANDARD
6
58 Hz ≤ fV < 63 Hz
800 x 600 (60)
VESA STANDARD
7
63 Hz ≤ fv < 70 Hz
640 x 480 (66)
MACINTOSH
8
70 Hz ≤ fV < 73 Hz
640 x 480 (72)
VESA STANDARD
9
73 Hz ≤ fV
640 x 480 (75)
VESA STANDARD
800 x 600 (75)
VESA STANDARD
fV < 70 Hz
1024 x 768 (60)
VESA STANDARD
70 Hz ≤ fV
800 x 600 (72)
VESA STANDARD
4
5
33 kHz ≤ fH < 43 kHz
10
43 ≤ fH < 47.2 kHz
11
47.2 kHz ≤ fH < 51 kHz
12
13
51 kHz ≤ fH < 54 kHz
14
54 kHz ≤ fH < 57.5 kHz
15
1024 x 768 (66)
VESA STANDARD
fV < 65 Hz
1280 x 960 (60)
VESA STANDARD
65 Hz ≤ fV
1024 x 768 (70)
VESA STANDARD
70 Hz ≤ fV
1024 x 768 (75)
VESA STANDARD
16
57.5 kHz ≤ fH < 62 kHz
17
62 kHz ≤ fH < 64 kHz
1280 x 1024 (60)
VESA STANDARD
18
64 kHz ≤ fH < 70 kHz
1280 x 1024 (60)
NEC EWS4800
19
70 kHz ≤ fH < 76 kHz
fV < 70 Hz
1280 x 1024 (67)
SUN
70 Hz ≤ fV
1280 x 960 (75)
VESA STANDARD
20
21
76 kHz ≤ fH < 81 kHz
1280 x 1024 (75)
VESA STANDARD
22
81 kHz ≤ fH
1280 x 1024 (76)
SUN (135 MHz)
General Digital™ Corporation
GenStar™ User’s Manual
10.0
MECHANICAL DRAWING
General Digital™ Corporation
44
GenStar™ User’s Manual
11.0
AGENCY APPROVALS
45
UL1950 ................... APPROVED
FCC Class A .......... APPROVED
General Digital™ Corporation
GenStar™ User’s Manual
12.0
46
LIMITED WARRANTY
Seller warrants that upon delivery to the Buyer, the product sold thereunder shall be free of defects in materials
and workmanship and that such product shall substantially conform to the speciÞcations provided by Seller.
This Warranty commences on the date of delivery to the Buyer unless another time for commencement has been
negotiated between Seller and Buyer prior to such delivery. Should the product be delivered through a third
party (UPS, USPS, Federal Express, etc.), the warranty period shall commence on the date that such third party
receives the product unless another time for commencement has been negotiated between Seller and Buyer
prior to such delivery. The duration of the Warranty shall be twelve (12) months from the date of delivery
as set forth above. This Warranty shall be effective only if Seller receives notice of such defects in materials
and workmanship during the period of the Warranty stated above. After Seller receives such notice, Buyer
shall obtain a Return Material Authorization (hereafter RMA) number. To obtain an RMA number, Buyer
shall contact General Digital™ Corporation’s Customer Service Department, with the model number(s), serial
number(s), and original purchase order number(s) of the product(s). Buyer shall include a brief description of
the problem or failure mode experienced. Buyer shall mark the outside of the package containing the product
or products, conspicuously, with the letters “RMA” and the number assigned by General Digital™ Corporation.
Any packaged returned without “RMA” and the RMA number clearly visible will be rejected at Seller’s
receiving dock. After Buyer has provided notice and obtained the appropriate RMA number, Buyer shall return
the product, upon request, to General Digital™ Corporation, 160 Chapel Road, Manchester, Connecticut 06040,
not later than thirty (30) days after Seller’s receipt of notice of the alleged problem or failure mode. Buyer
shall prepay all transportation charges for return of the product(s) to Seller. Seller shall pay for the cost of
sending the product(s) back to Buyer. Transportation charges to Buyer shall be deemed Best Way and any
other transportation charges shall be at the Buyer’s cost. All costs of customs clearance, shipping, and any other
related charges for transportation outside of the contiguous 48 United States shall be at the Buyer’s expense.
After Buyer’s compliance, Seller shall, at Seller’s option, repair or replace the product(s).
Excluded from this Warranty are all problems or failures resulting from:
– Improper or inadequate maintenance of the product by the Buyer.
– Unauthorized modiÞcation of the product by any means.
– Operation of the product outside its environmental speciÞcations.
– Neglect, misuse, or abuse of the product.
– ModiÞcation or integration with other components not covered by a Seller warranty when such integration
increases the likelihood of problems, failures, or damage.
FURTHER, THIS WARRANTY IS BETWEEN SELLER AND BUYER ONLY, AND DOES NOT EXTEND TO
BUYER’S CUSTOMERS OR USERS OF BUYER’S PRODUCTS. IN ADDITION, AND IN THE EVENT THAT
BUYER INTEGRATES SELLER’S PRODUCT WITH COMPONENTS MANUFACTURED OR SUPPLIED BY
ANY OTHER COMPANY, THIS WARRANTY SHALL ONLY RELATE TO DEFECTS IN MATERIALS AND
WORKMANSHIP OF SELLER’S PRODUCT AND NOT TO PROBLEMS WITH OR FAILURES OF SELLER’S
PRODUCT CAUSED BY OTHER COMPONENTS INTEGRATED WITH IT.
Seller’s rendering of technical advise and/or assistance or Seller’s performance of service work in connection
with Buyer’s order of the product(s) shall not change or enhance this warranty in any way. Buyer’s reliance on
Seller’s skill or judgment to select or furnish suitable goods shall be at Buyer’s risk.
Seller shall not be liable for any direct, indirect, special incidental, or consequential damages including, but
not limited to, loss of proÞts and/or destruction of other property, caused by any application of the product(s)
and/or its integration with other components. Seller’s liability shall be limited to the amount paid by the Buyer
for the product(s).
SELLER SPECIFICALLY EXCLUDES ANY AND ALL OTHER WARRANTIES, WRITTEN OR ORAL,
INCLUDING, BUT NOT LIMITED TO, IMPLIED WARRANTIES OF MERCHANTABILITY AND FITNESS
FOR A PARTICULAR PURPOSE.
General Digital™ Corporation
GenStar™ User’s Manual
13.0
APPROPRIATE USAGE POLICY
47
General Digital™ Corporation components should not be used in medical devices with life support
functions, safety equipment (or similar applications where component failure would result in loss of
life or physical harm), aerospace equipment, telecommunication equipment (trunk lines) or nuclear
power control equipment. Contact a General Digital™ representative before using General Digital™
devices for any applications other than those recommended by General Digital™. General Digital™
assumes no responsibility for any damage resulting from the use of a General Digital™ device which
does not comply with the instructions and precautions speciÞed in this manual.
General Digital™ Corporation
GenStar™ User’s Manual
14.0
PROPRIETARY NOTICE AND LIABILITY DISCLAIMER
48
The information disclosed in this document, including all designs and related materials, is
the valuable property of General Digital™ Corporation and/or its licensors, as appropriate,
reserve all patent, copyright and other proprietary rights to this document, including all design,
manufacturing, reproduction, use and sales rights thereto, except to the extent said rights are
expressly granted to others.
The General Digital™ product(s) discussed in this document are warranted in accordance with
the terms of the Limited Warranty Statement accompanying each product. However, actual
performance of each such product is dependent upon factors such as system conÞguration, customer
data and operator control. Since implementation by customers of each product may vary, the
suitability of speciÞc product conÞgurations and applications must be determined by the customer
and is not warranted by General Digital™ Corporation.
To allow for design and speciÞcation improvements, the information in this document is subject to
change at any time without notice. Reproduction of this document or portions thereof without prior
approval of General Digital™ is prohibited.
General Digital™ Corporation
GenStar™ User’s Manual
15.0
49
CONTACTING GENERAL DIGITAL™
General Digital™ wants you to be completely satisÞed with your product. Please feel welcome to
contact us should you require any of our services.
General Digital™ Corporation
8 Nutmeg Road
South Windsor, CT 06074
Phone .......860.282.2900
Toll-Free...800.952.2535
Fax ............860.282.2244
Web .......... http://www.GeneralDigital.com
Hours of Operation: Monday–Friday, 9:00 AM – 5:00 PM EST
SALES
Phone .......860.282.2900, Option 1
Fax ............860.282.2244
[email protected]
SERVICE
Phone .......860.282.2900, Option 4
Fax ............860.282.0198
[email protected]
In your correspondence with the Service Department, please provide the following information:
▪
Company name
▪
Company address
▪
Contact name
▪
Contact phone and fax numbers
You can expect to receive a reply within one business day.
General Digital™ Corporation
GenStar™ User’s Manual
50
APPENDIX A
CALIBRATION TIPS
Irrespective of the LCD monitor type or model that you have purchased from General Digital™, all
LCD monitors employ a multi-frequency input that should be calibrated for each video mode you
wish to support. If performed properly, the calibration procedure need only be performed once.
Each LCD monitor features an internal controller that has the ability to store calibration settings
in non-volatile memory. Following the calibration procedure detailed below, a table of settings is
created for each video mode calibrated. The appropriate calibration values are recalled each time the
LCD monitor switches between the calibrated video modes. The sequence of calibration described in
the following paragraphs should be repeated for each video mode you intend to support.
1. SELECTING THE PROPER VIDEO MODE
Begin by conÞguring your video controller, operating system and or application program to run in
the desired video mode (e.g., 640 x 480, 800 x 600, 1024 x 768, 1280 x 1024).
Example: Host computer running Windows 98® Operating System with a 20” diagonal, SXGA
resolution LCD monitor.
a)
b)
c)
d)
e)
f)
g)
h)
Select the Windows Start button.
Select Settings.
Select Control Panel.
Select the Display icon.
Select the Settings window.
Using the sliding bar, select the maximum resolution of the LCD display (1280 x 1024 pixels).
Select Advanced Properties.
Select the appropriate refresh rate. General Digital™ recommends a 60 Hz refresh rate for
optimal performance. Higher frequencies may produce ghosting or introduce other anomalies.
2. TEST SCREEN
General Digital™ recommends that you display a test pattern on the screen that will emphasize
irregularities and facilitate proper calibration adjustments. A pattern of alternating on and off pixels
produces the desired effect (see Figure A-1). If you do not know how to create a test pattern, most
Windows® Operating Systems offer a 50% Gray Pattern as standard wallpaper or background.
Figure A-1
General Digital™ Corporation
GenStar™ User’s Manual
51
3. ADJUSTING HORIZONTAL SIZE (WIDTH)
The most critical adjustment that must be made is the HORIZONTAL SIZE (often referred to as
WIDTH). This setting is responsible for adjusting the number of pixels on a horizontal line. When
the SIZE setting is improperly adjusted, the 50% gray test pattern that you created in Step 2 will
demonstrate an interference pattern typically referred to as a moiré pattern (see Figure A-2). The
moiré pattern will consist of a series of vertical bars across the screen. The thickness of the bars is
inversely proportional to the number of bars. Step 1 in Figure A-2 illustrates an LCD monitor whose
horizontal size setting is off by 4 pixels, resulting in a moiré pattern consisting of 8 vertical bars. The
SIZE setting should be decreased repeatedly until all of the vertical bars are eliminated.
Figure A-2
4. FINE TUNE (PHASE ADJUST)
This adjustment controls where the A/D adapter samples the video input waveform. Improper
adjustment will result in artifacts on the screen that appear to be moving. User’s may refer to this
affect as “sparkling”, “marching ants” or “waterfall” effects. Adjust the FINE TUNE (PHASE) setting
in both directions until the optimum effect is achieved.
5. HORIZONTAL AND VERTICAL POSITIONING
Use the HORIZONTAL and VERTICAL position settings (see section 6.6.3, Position) to adjust the image
so that it is centered properly on the display.
General Digital™ Corporation
GenStar™ User’s Manual
52
6. COLOR TEMPERATURE AND GAMMA ADJUSTMENT (Not available on all models)
Inherently, LCD displays do not support a color gamut as large as a traditional CRT. Unless
operators use sophisticated instrumentation to measure the color output of the LCD display,
calibration of the color gamut is subjectively performed. General Digital™ offers a simple calibration
technique that has proven to yield desirable results.
Below is a standard gamma chart used for color correction (see Figure A-3). This chart consists of
four rectangular images; one image for each of the primary colors (red, green, blue) and one image
for gray. At the center of each image is a rectangular bar that is displayed at 50% luminance of
the surrounding area. The surrounding area contains a checkerboard pattern of alternating 100%
luminance pixels and black pixels.
In a darkened room, adjust the individual color settings for the red, green and blue outputs until
the center bar appears to blend into the surrounding area. Finally, adjust the brightness and contrast
until the gray bar disappears.
Red
Green
Blue
Gray
Figure A-3
Note: Repeat steps 1–5 for each video mode you wish to use. If necessary, a gamma chart may be downloaded
from our web site at http://www.gendig.com/hardware/gamma.html.
General Digital™ Corporation
GenStar™ User’s Manual
53
APPENDIX B
PEDESTAL INSTALLATION (GD P/N: 90-142)
This LCD monitor is conÞgured with four threaded inserts (¼-20 x 5/16”) located on the left and
right sides of the enclosure. These inserts are provided to facilitate a variety of standard or custom
options.
For your safety, General Digital™ recommends that any mounting apparatus deployed use at least
two of the inserts (per side) to attach to the LCD monitor. Use a ßat washer and split ring locking
washer with the appropriate length ¼-20 screw to attach the mounting apparatus to the monitor.
Important Note: Use the upper and lower inserts on each side if only four mounting points are
utilized.
Slide one locking split ring washer and then one ßat washer onto each of the four supplied
¼-20 x ½” screws.
Slide the LCD monitor into the U-shaped mounting bracket of the desktop pedestal.
Align the upper and lower threaded inserts on both sides of the LCD monitor with the mounting
holes of the U-shaped bracket.
Attach the bracket to the LCD monitor using the prepared hardware (see Figure B-1).
Attach to top and bottom screws
on each side
Figure B-1
General Digital™ Corporation
GenStar™ User’s Manual
54
APPENDIX C
ACCESSORIES/SPARE PARTS
GD P/N
DESCRIPTION
10-090
LCD Display DC/DC Converter (PCB)
10-091
Power Supply
12-125
SmartBright™ Backlight Assembly (Excluding Inverters and Dimming Circuitry)
61-019
Fuse, Replacement
70-531
Analog Video Adaptor (PCB)
70-529
Backlight Inverter Assembly (PCB)
▪ Two Inverters
▪ Dimming Circuitry
90-142
Desktop Pedestal Kit for 20” Standalone Monitor
90-205
Intelligent Baclight Controller™ (2 Board Set)
▪ Main Board with Fan Controller, P/N 70-530
▪ Optical Sensor PCB (Attaches to Backlight), P/N 70-528
850-021-15
LCD Display Assembly
▪ 20.1” AMTFT LCD Display
» BEF and DBEF Modifications Included
▪ Optically Bonded 62% Filter with Etch A/R
▪ SmartBright™ Backlight, P/N 12-125
850-021-17
Fan Assembly (Intake and Exhaust)
▪ Fan, 80 mm x 80 mm, 35 cfm, 27 dBa
▪ Finger Guard
850-021-37
HEPA Air Filter, Replacement
TBD
LCD Display Assembly
▪ 20.1” AMTFT LCD Display
» BEF and DBEF Modifications Included
▪ Optically Bonded 62% Filter with Etch A/R
▪ Display (BEF/DBEF) Transportation/Storage Plate
▪ Shipping Box
General Digital™ Corporation
GenStar™ User’s Manual
APPENDIX D
55
LABELING
General Digital™ Corporation
GenStar™ User’s Manual
56
APPENDIX E
ADDITIONAL SAFETY INSTRUCTIONS FOR SERVICE PERSONNEL
WARNING
Disconnect AC line cord before servicing or disassembling the LCD monitor.
Never operate the LCD monitor unless fully assembled.
Keep all objects away from the three cooling fans. The cooling fans can be enabled/disabled without
warning.
Handle backlight assembly with care. The backlight assembly contains fragile glass and traces of
mercury. If broken, dispose according to the bylaws or rules of your local municipality.
Never make direct contact with the inverter PCB while the system is under power. The onboard
DC–AC inverters can produce life-threatening voltages (>2000 VAC). The voltage output connectors
are potted with clear RTV to prevent accidental contact. Never remove the RTV from the power
connectors. If the RTV is gouged or missing, immediately cease operation and return defective
Inverter PCB for rework in accordance with the appropriate manufacturing procedure.
For additional instructions, reference the installation and safety instructions contained in this
manual.
General Digital™ Corporation
GenStar™ User’s Manual
57
APPENDIX F
PART NUMBER CONFIGURATION
The following chart denotes the available part number conÞgurations of GenStar™ model
UB-20W-NX-xx.*
CONFIGURATION OPTIONS
UB-20W-NX-
CONFIGURATION IDENTIFIER, xx
00 01 02 03 04 05 06 07 08 09 10
ENCLOSURE
Standard ....................................................... !
!
!
BEZEL
Bezel: Standard w/Hinged Door...................... !
!
Bezel: Standard w/o Hinged Door...................
Bezel: Panel Mount w/Hinged Door.................
!
Bezel: Panel Mount w/o Hinged Door..............
Bezel: Custom/Other......................................
ENCLOSURE COLOR/BEZEL COLOR
Black Powder Coat/Black Powder Coat ............ !
!
!
Unpainted/Black Powder Coat ........................
LOGO
No Logo ........................................................ !
!
!
GD Logo .......................................................
FILTER
!
Clear Float ....................................................
62% Neutral Density....................................... !
!
SOFTWARE UTILITIES
ICARUS™....................................................... !
DAEDALUS™ .................................................
!
90-850- 021-3
90-850-021-1
90-850-041
!
None.............................................................
GD PART NUMBER
*Compliant with Raytheon Spec. No. G771816
General Digital™ Corporation
GenStar™ User’s Manual
58
APPENDIX G
ALTERNATE CALIBRATION (STARS)
G-1.0
DISPLAY ALIGNMENT TEST PATTERN
G-1.1
Test Pattern Requirements
The display calibration test procedure, described herein for the 20.1” GenStar™, requires the
availability of a video test pattern generated within the display video chain.
The test pattern is used to enable the display horizontal SIZE and video FINE tune (phase) to be
correctly aligned to the analog video input signal from the video graphics card.
In the STARS TDW the test pattern is provided as an output from the STARS display controller
via the 1K video graphics card.
The calibration test pattern is provided as MAP #33 with a radar range setting of 40 nm.
G-1.2
Test Pattern Format
The test pattern consists of a bit map of closely spaced radar range rings, surrounded by a peripheral
box, in which the sides of the box consists of the extreme outermost horizontal (top and bottom)
and vertical (left and right) lines displayed. The Peripheral Box test pattern and the Range Rings test
pattern are as shown in Figure G-1.
Range Rings
Peripheral Box
Figure G-1
G-1.3
Description of Peripheral Test Box
The peripheral box is used to enable the video display horizontal SIZE and horizontal POSITION
calibration controls to be adjusted such that all 1280 pixels in the horizontal direction and all 1024
lines in the vertical direction are utilized.
General Digital™ Corporation
GenStar™ User’s Manual
G-1.4
59
Description of Radar Range Ring Test Pattern
Radar range ring MAP #33 provides a high density test pattern of closely spaced range rings that
are set to provide a 240 nautical miles (nm) radar range map with a spacing of 1/4 nm between
each range ring.
The Radar Range ring test pattern is used as a backdrop to identify any vertical interference bands,
which will appear on the display when there is a width/phase difference between the incoming
video signal and the display’s internally generated video sample clock.
Note: The test pattern may also have a diagonal interference pattern superimposed on the display that divides
the display into four quadrants Left, Right, Top, and Bottom. See Figure G-1. This is caused by artifacts
produced by the way the range ring circles are digitally constructed. These diagonal artifacts do not hinder the
use of the test pattern and should be ignored.
General Digital™ Corporation
GenStar™ User’s Manual
G-2.0
60
TDW 20.1” DISPLAY CALIBRATION PREVIEW
The following is a brief description of the GDC 20.1” display parameters that require calibration.
G-2.1
Display Horizontal Size Calibration
The horizontal SIZE control is used to adjust the number of pixels in a horizontal line to be exactly
1280 pixels. When the SIZE setting is improperly adjusted, the radar range ring map will show
the type of interference/vertical moiré patterns pictured in Figures G-2 through G-7. The moiré
pattern consists of a series of vertical bars equally spaced across the width of the screen. The
thickness of the bars is inversely proportional to the number of bars. If there are eight bars, then
the width setting is off by 4 pixels.
Figures G-2 through G-7 show the progressive change in the banding as the display horizontal
SIZE is optimized. Figure G-2 shows a condition in which the size of the display is signiÞcantly
larger or smaller than that required to just Þll the display screen, while Figure G-7 shows the
required condition in which the correct horizontal pixel count has been achieved, all vertical
bars have been eliminated and the left and right quadrants of the display (see Figure G-1), are
uniformly bright.
Note: At this stage of the calibration, video noise and waterfall effects may be visible on the display screen.
These video artifacts are removed in the following display FINE tune calibration.
G-2.2
Display Fine Tune (Phase) Calibration
The video FINE tune phase adjustment control is used to determine where the display samples
the input video waveform. Any misalignment of the phase will result in artifacts on the screen
that appear to move, sparkle or waterfall. The FINE tune setting is optimum when all video noise
artifacts have disappeared and the left and right quadrants of the display (see Figure G-1) are both
uniformly bright and at peak brightness.
Note: If two peak brightness settings are achieved, select the setting that has the least red content.
G-2.3
Display Centering
The horizontal and vertical POSITION controls are used to center the displayed image in both the
horizontal and vertical directions.
General Digital™ Corporation
GenStar™ User’s Manual
G-3.0
61
STARS TOWER DISPLAY CALIBRATION PROCEDURE
Read all of the instructions in this section before proceeding.
G-3.1
Prerequisites
The procedure to be followed is straight forward, and can be completed expeditiously utilizing
the On-screen Display (OSD) and the 7-button membrane calibration pad, which is located on the
display front panel, behind the hinged door.
Two internally generated system test patterns need to be provided on the display screen in order
to perform the required display calibration. These include a range ring test pattern and a peripheral
box, which outlines the display extremities. The peripheral box is provided by any window that
contains the STARS Compass Rose. The Radar Range Ring Test Pattern is stored as a map in
MAP #33.
G-3.2
Calibration Setup
All entries are performed at the keyboard of a functional/on-line TDW position.
Notes:
▪
▪
< > means the function key on the keyboard or Display Control Bar (DCB)
“Select” means move the trackball cursor over the <ITEM> to be selected and press <ENTER>.
1) “Iconify” (close out) all windows.
a) With the trackball cursor, select the icon button for each window (the small dot at the upper
right corner of each window).
Note: The “preview list” window cannot be iconiÞed.
2) Turn on the Display Control Bar (DCB).
On the keyboard, toggle the DCB to ON
<DCB>
3) Turn off weather, if displayed.
a) <WX> C <ENTER>
4) Select any Compass Rose window as the Peripheral Box.
a) Position the Display Control Bar (DCB) across the top of the display so that the border of the
Compass Rose box deÞnes the left and right sides of the display.
b) Select <BRITE> on the DCB and press <ENTER> on the trackball.
c) On the DCB, select <CMP> and press <ENTER> on the trackball.
d) Set the intensity of the Compass Rose to 100% brightness and press <ENTER> on the
trackball.
e) Select <DONE>.
General Digital™ Corporation
GenStar™ User’s Manual
5.
62
Select the Radar Range Ring Test Pattern (MAP #33).
a) On the keyboard, set the display range scale to have a forty mile range.
<RANGE> 40 <ENTER>
b) On the keyboard, select the Radar Range Ring Test Pattern, Map #33.
<MAPS> 33 <ENTER>
Observe that the ring test pattern map is displayed.
c) Set Brightness setting to maximum (100%).
On the DCB, select <BRITE>.
On the DCB, select <MAPB>.
Move the trackball up to increase the test map brightness to maximum (100%).
On the keyboard, select <ENTER>.
Select <DONE> on the DCB.
d) On the keyboard, toggle the DCB to Off.
<DCB>.
General Digital™ Corporation
GenStar™ User’s Manual
G-3.3
63
Calibration Procedure
1) On the display front panel menu pad behind the hinged door, select <ENTER> to present the
On-Screen Display (OSD). (See Figure G-8 for notes on the position and orientation of the OSD.)
2) On the displayed OSD menu selection Tag Line, select <AUTO> by using the Left or Right
arrows on the Display Menu Pad, (see Figure G-8) and press the <ENTER> button.
3) If any vertical banding is present on the display, (See Figures G-2 through G-7), select the
Horizontal <SIZE> adjust button via the OSD Tag line and the Up and Down arrows on the
Display Menu Pad.
4) Adjust the left and right arrows on the Display Menu Pad to increase the horizontal distance
between the vertical bands until the bands have been completely removed and the left and right
quadrants on the display are uniform in brightness (See Figure G-1).
5) On the OSD menu selection Tag Line, select the <FINE> tune button.
6) Adjust the left and right arrows on the display menu pad to remove any video noise or waterfall
effects, and to peak the brightness of the display. If two peak brightness settings are achieved,
select the setting that has the least red content.
7) On the keyboard, de-select the Radar Range Ring Test Pattern.
<MAPS> 33 <ENTER>
8) On the OSD Tag line, select the horizontal <POSITION> button.
9) On the Display Menu Pad, adjust the left and right arrows to center the display horizontally
within the display bezel.
10) On the OSD Tag line, select the vertical <POSITION> button.
11) On the Display Menu Pad, adjust the LEFT and RIGHT arrows to center the display vertically
within the display bezel.
12) Press the <EXIT> button to save the values entered and to return to the main menu.
13) Press the <EXIT> button again to turn off the OSD.
General Digital™ Corporation
GenStar™ User’s Manual
64
DISPLAY PHASE ALIGNMENT USING RANGE RING TEST PATTERN
(Width and Phase Alignment Out of Phase to In Phase)
Range Rings
Peripheral Box
Vertical Bands
Figure G-2
Figure G-3
Figure G-4
Figure G-5
Figure G-6
Figure G-7
General Digital™ Corporation
GenStar™ User’s Manual
OSD DISPLAY FUNCTIONS AND OSD DISPLAY ORIENTATION
65
Display Front Panel 7-button Calibration Pad
ON-SCREEN DISPLAY (OSD)
Tag Line
Brightness
Contrast
Auto Adjust X & Y
Position and H Size
Manual H & V Position
Manual Image Adjust
H Size and Fine Tune
Color Control
Tool Icon: OSD Position
Left/Right and Up/Down
General Digital™ Corporation
GenStar™ User’s Manual
APPENDIX H
66
ACRONYMS USED IN THIS MANUAL
AC........................... Alternating Current
AMTFT .................. Active Matrix Thin Film Transfer
A/R ........................ Antireßective
BEF ......................... Brightness Enhancement Film
BIT .......................... Built-in Test
CCFT ...................... Cold Cathode Fluorescent Tube
CRT......................... Cathode Ray Tube
DBEF ...................... Dual Brightness Enhancement Film
DC........................... Direct Current
IBC.......................... Intelligent Backlight Controller
IRBF........................ Intelligent Replace Before Fail
IrDA ....................... Infrared Data Association
LCD ........................ Liquid Crystal Display
LED......................... Light Emitting Diode
MTBF...................... Mean Time Between Failure
OSD ........................ On-screen Display
PCB......................... Printed Circuit Board
RGB ........................ Red Green Blue
STARS .................... Standard Terminal Automated Replacement System
SVGA ..................... Super Video Graphics Array (800 x 600 pixels)
SXGA...................... Super Extended Graphics Array (1280 x 1024 pixels)
VGA ....................... Video Graphics Array (640 x 480 pixels)
XGA........................ Extended Graphics Array (1024 x 768 pixels)
General Digital™ Corporation
GenStar™ User’s Manual
67
GenStar™
UB-20W-NX-xx
July 2001
General Digital™ Corporation
GenStar™ User’s Manual