1
Chapter 2 : Cross Stitch Essentials
you do this directly pixel by pixel. When
digitizing a fill, you do so via the Select Fill
Style dialog. The method is the same. See
Types of cross stitch for details.
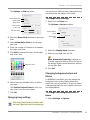
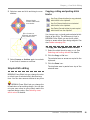
Click in the
quadrant to be
filled
To set cross stitch orientation
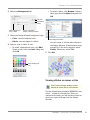
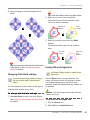
To create mini cross stitches, click the corner
where you want your stitch to start.
Click here to
place a stitch in
this corner
To create elongated cross stitches, click the
corner where you want your stitch to start.
Click here to place
stitch on this side
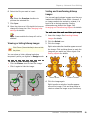
To create three-quarter cross stitches, click
the corner where you want the quarter stitch
to be.
Selecting cross stitch colors
To create half cross stitches, click the corner
where you want your stitch to start.
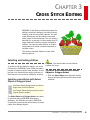
BERNINA Cross Stitch allows you to set up an
unlimited number of color slots. New objects are
digitized using the currently selected color. You
can change color before or after digitizing.
BERNINA® Embroidery Software also lets you
Click here to make a / stitch
Click here to make a \ stitc manage the thread colors in your Color Chart.
Select from a range of commercial thread
charts. Adjust the exact number of colors in the
To create quarter cross stitches, click the
Color Chart as required. Add extra slots as
corner where you want your stitch to start.
required.
Click here to start
in this corner
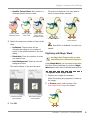
Selecting stitch colors
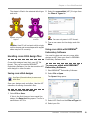
Use Color Palette (Stitch and Color
bar) to select a stitch color.
You can select stitch colors from the Color
Palette before digitizing, or apply a new color
to selected areas.
BERNINA® Cross Stitch : Onscreen Manual
13