1
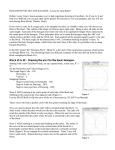
Yaesu FT-8800R 'Quickstart'
Manual
Mar 2013
de VE7DSN
Of course, at the start of an incident, we will
use conventional handwritten messaging.
For this, we use the FT-8800 dual band
VHF/UHF transceiver
This session outlines how to switch on, tune,
operate the FT-8800 as an “voice” based rig.
Digital operation will be shown elsewhere.
Power up the station
- Remove front and back covers, set aside
- Verify VHF transceiver is connected to a VHF antenna
- Verify AC power plug is plugged into a power source
- Turn on 12vdc power
supply
- Turn on power master
switch (back of unit)
Turn on the Transceiver
- Turn on, tune the VHF Transceiver ( details next slide )
Starting the Transceiver
-Press and hold 'Pwr” button (2 sec)
Press 'V/M button to select 'memory Channels
-Press left dial knob to select left bank
- Rotate dial knob to select channel ( see next slide)
- Adjust volume and squelch to taste.
Assumes channel is pre programmed in memory. If not, see reference
Six pre-programmed memory Channels
The FT8800 uses about 50 pre-programmed memory channels. Six well used
ones are:
Ch Freq
Call
Remarks
07 147.28+ VE7PQA Voice Repeater Primary
Parksville IRLP
08 145.37- VE7RPQ Voice Repeater Secondary
Parksville
10 147.32+ VE7SPR Voice Repeater Saltspring Isl EMBC access
11 147.24+ VE7KU
Voice Repeater Mt Arrowsmith – solar power
13 147.43 - VE7DJA Voice Repeater Nanaimo
Isl Trunk system
04 144.49S VA7MIR-10 Packet Radio digital messaging
( see 'FT8800- comprehensive memory channel list ' for the full list )
Voice procedure hints
Speak slowly and clearly
Pause every 3 to 5 words when messaging
If assigned, identify with your 'tactical' callsign,
otherwise the stations formal callsign
'Check In' with net control every half hour
Maintain the logbook and copies of formal messages
Summary
This slide set reviewed the key features you need know
to use the FT-8800R transceiver in 'voice' mode.
More detailed instructions can be found in the printed
manual which should be located in the lower tray of this
Grab and Go box.
Alternatively, close this slide show and return to the
main page and select the virtual manual.
Technicians – Please move on to the next slide for details of programming
the FT-8800
FT 8800 - Checklist setup for Technicians
As technical staff one needs to know more than just how to turn the
FT-8800 on and select a frequency from memory.
The following slides provides a checklist 'step by step procedures for
setting additional functions of the radio, such as setting up to use a new
repeater or, possibly, restoring a radio to normal operation after an
individual, in desperation, has resorted to random pressing of buttons
and rendered the radio unusable.
FT 8800 - Checklist setup for Technicians
The following skills are needed:
- Within a band set up:
- a specific frequency
.
- repeater offset (or simplex)
- tone
- Assign the frequency to a memory channel
- 'Fine Tune' by adjusting some 'Menu' items for optimal operation
Active Band Selection
.
The FT-8800 features a 'left' side and 'right' side transceiver. Only one can
transmit at a time so we must select which side we want to use. By local
convention we choose to use 2m on the left side, 430 on the right
The active band is indicated by the 'MAIN' symbol
To change the active band:
[ Quick Press ] the DIAL knob for the side you wish to use
Note the 'MAIN' symbol moves to the side you wish to be active
Band Selection p 21
The FT8800 covers 5 bands (144, 250,360, 430,
430 850 Mhz)
.
[ Quick Press ] SET button to enter 'set mode'
[ Press & Hold ] DIAL knob – rotate to desired band
Memory or VFO Selection
The FT8800 can transmit directly from the VFO settings or
from frequencies stored in any of 6 memory banks.
.
[ Quick Press ] V/M button for left or right side radio to switch from
VFO to Memory ( Memory mode shows channel numbers)
Frequency Set p 22
The FT8800 can be tuned by rotating the DIAL knob or by
direct microphone keypad entry. For keypad entry see p22
of user manual.
.
Rotate DIAL knob until desired receive frequency is displayed
Note:
A [quick press ] dial knob toggles between Mhz and 25 Khz steps
Repeater Shift p 27
The FT8800 is normally set to 'ARS' or Automatic Repeater
.Shift. When you dial in a repeater output frequency you will
see the shift indicated in the top line of the display.
If you wish to change the 'shift' or change to simplex please
see Menu #33 (RPT.MOD) elsewhere in this slide set.
Tone Set p 29 1/2
Repeaters usually require that a sub audible tone be
transmitted to access the repeater. The next 2 slides outline
the procedure.
.
[ Quick Press ] SET button to enter 'set' mode
Rotate DIAL knob to select Menu #41 (TONE M)
[ Quick Press ] DIAL knob – Rotate to display ENC
Tone Set p 29 2/2
[ Quick Press ] DIAL knob – rotate clockwise to select Menu #40 (Tone F)
.
[ Quick Press ] DIAL knob – Rotate to display tone one needs
[ Press & Hold ] DIAL knob to save and exit to normal operation
Next we look at saving this setup to a memory channel
Write VFO to Memory p 34
Verify that the frequency setup on the VFO functions correctly
before you consider committing it to a memory channel.
.
Be aware that you could overwrite an already committed
memory channel. It might be a good idea ensure the new
channel is placed above the existing active channels. ( see the
frequency list, elsewhere in the G&G box )
[ Press Hold ] SET button ( 1/2 sec )
Rotate DIAL to select desired channel (within 10 secs)
[ Quick Press ] SET button to save the frequency to chosen channel
Additional Features
The following slides outline how to use FT-8800 Menus to
.
enhance emergency communications. You will need to scroll
through the slides to find the one that addresses your issue (s).
Menu #2 ARS (Automatic Repeater Shift p 27
Sets a standard offset for a repeater or, some unusual
shift ( 600mhz VHF or 5Mhz UH F are standard )
[ Quick Press ] SET button to enter 'set mode'
.
Rotate DIAL to select Menu #2 ARS
[ Quick Press ] DIAL knob – rotate to select Off or On
[ Press Hold ] DIAL knob ( 1/2 sec ) to save setting and exit
Menu #5 Beep p 24
Sets wether or not the radio 'beeps' when you press a
button or key
[ Quick Press ] SET button to enter 'set mode'
.
Rotate DIAL to select Menu #5 BEEP
[ Quick Press ] DIAL knob – rotate to select Off or On
[ Press Hold ] DIAL knob ( 1/2 sec ) to save setting and exit
Menu #9
Dimmer p 25
Sets the brightness of the screen background
[ Quick Press ] SET button to enter 'set mode'
.
Rotate DIAL to select Menu #9 DIMMER
[ Quick Press ] DIAL knob – rotate to select one of 4 levels
[ Press Hold ] DIAL knob ( 1/2 sec ) to save setting and exit
Menu #16
Hyper p 63
Enables/Disables Autmatic Writing feature to Hyper
Memory. ( Best to avoid this one – leave on manual )
.
[ Quick Press ] SET button to enter 'set mode'
Rotate DIAL to select Menu #16 Hyper
[ Quick Press ] DIAL knob – rotate to select Manual or Auto
[ Press Hold ] DIAL knob ( 1/2 sec ) to save setting and exit
Menu #22 Lockt p 64
Enables/Disables PTT button locking to prevent
unintended transmission
.
[ Quick Press ] SET button to enter 'set mode'
Rotate DIAL to select Menu #22 LOCKT
[ Quick Press ] DIAL knob – rotate to select one of OFF, BANDR,
BANDL, BOTH
[ Press Hold ] DIAL knob ( 1/2 sec ) to save setting and exit
Menu #22 Lockt p 64
Enables/Disables PTT button locking to prevent
uninteded transmission
.
[ Quick Press ] SET button to enter 'set mode'
Rotate DIAL to select Menu #22 LOCKT
[ Quick Press ] DIAL knob – rotate to select one of OFF, BANDR,
BANDL, BOTH
[ Press Hold ] DIAL knob ( 1/2 sec ) to save setting and exit
Menu #24 Mute p 64
Enables/Disables the Audio Mute feature by reducing
volume of non active sub band
.
[ Quick Press ] SET button to enter 'set mode'
Rotate DIAL to select Menu #24 MUTE
[ Quick Press ] DIAL knob – rotate to select one of OFF, TX,
RX, TX/RX (see manual p. 64 for details )
[ Press Hold ] DIAL knob ( 1/2 sec ) to save setting and exit
Menu #32 Rf Sql p 65
Adjusts the RF SQL threshold level
.
[ Quick Press ] SET button to enter 'set mode'
Rotate DIAL to select Menu #32 RF SQL
[ Quick Press ] DIAL knob – rotate to select one of :
OFF / S-2 / S-5 / S-9 / S-FULL
(see manual p. 64 for details )
[ Press Hold ] DIAL knob ( 1/2 sec ) to save setting and exit
Menu #33 Rpt-Mod p 65
Adjusts the Repeater offset shift direction
.
[ Quick Press ] SET button to enter 'set mode'
Rotate DIAL to select Menu #33 - RPT.MOD
[ Quick Press ] DIAL knob – rotate to select one of :
RPT.OFF / RPT. - / RPT +
(see manual p. 64 for details )
[ Press Hold ] DIAL knob ( 1/2 sec ) to save setting and exit
Menu #36 Rpt - Shift p 66
Adjusts the Repeater offset magnitude from 0.00 to
99.95Mhz in 50 Khz steps ( 600khz is normal )
.
[ Quick Press ] SET button to enter 'set mode'
Rotate DIAL to select Menu #36 SHIFT
[ Quick Press ] DIAL knob – rotate to select shift in 50Khz steps
[ Press Hold ] DIAL knob ( 1/2 sec ) to save setting and exit
Menu #38 - Step p 66
Adjusts the Synthesizer steps ( 15khz is normal )
.
[ Quick Press ] SET button to enter 'set mode'
Rotate DIAL to select Menu #38 - STEP
[ Quick Press ] DIAL knob – rotate to select:
5.0k / 10.0 k / 12.5 k / 20.0k / 25.0k / 50.0k
[ Press Hold ] DIAL knob ( 1/2 sec ) to save setting and exit
Menu #40 – Tone F p 67
Adjusts the CTCSS Tone Frequency ( District 69
mainly uses 100hz or 141.3hz )
.
[ Quick Press ] SET button to enter 'set mode'
Rotate DIAL to select Menu #40 – TONE F
[ Quick Press ] DIAL knob – rotate to select: one of 50 available
tones
[ Press Hold ] DIAL knob ( 1/2 sec ) to save setting and exit
Menu #41 – Tone M p 67
Selects the Tone Encoder and /or Decoder mode.
.
[ Quick Press ] SET button to enter 'set mode'
Rotate DIAL to select Menu #41 – TONE M
[ Quick Press ] DIAL knob – rotate to select: one of:
OFF / ENC / ENC.DEC / DCS (see manual p 67, for details )
[ Press Hold ] DIAL knob ( 1/2 sec ) to save setting and exit
Menu #42 - Tot p 67
Sets the Time-Out Timer between 1 and 30 minutes .
.
[ Quick Press ] SET button to enter 'set mode'
Rotate DIAL to select Menu #42 – TOT
[ Quick Press ] DIAL knob – rotate to select: one of:
OFF / or 1 – 30 minutes
[ Press Hold ] DIAL knob ( 1/2 sec ) to save setting and exit
Menu #44 – Wid.Nar p 68
Adjusts the mic gain ( Deviation ) to suit wide or
narrow band operation (hams usually use WIDE )
.
[ Quick Press ] SET button to enter 'set mode'
Rotate DIAL to select Menu #44 – WID.NAR
[ Quick Press ] DIAL knob – rotate to select: one of:
WIDE / NARROW ( can be set independently for each band )
[ Press Hold ] DIAL knob ( 1/2 sec ) to save setting and exit
Questions or Comments ???
Tnx fer ur attn de VE7DSN