1
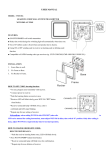
Registering a new remote wireless control unit.
1. Power off the whole clock. Wait for 10 seconds for the power to decay.
2. Un-screw the bottom left back section from the clock (when looking from the back)
3. On the receiver interface module, set the 3 switches to:Switch
Setting
M1
OPEN (UP)
M2
OPEN (UP)
SET
GND (DOWN)
4. Power up the clock
5. After 5 seconds, press any key on the new remote control unit for one second.
6. Wait 5 seconds.
7. Power off the clock. Wait for 10 seconds for the power to decay.
8. On the receiver interface module, set the 3 switches to:Switch
Setting
M1
GND (DOWN)
M2
GND (DOWN)
SET
OPEN (UP)
9. Power up the clock.
10. After the power-up sequence is complete (it takes about 25 seconds), test the new remote
control unit.
Erasing all remote control units.
11. Power off the whole clock. Wait for 10 seconds for the power to decay.
12. Un-screw the bottom left back section from the clock (when looking from the back)
13. On the receiver interface module, set the 3 switches to:Switch
Setting
M1
OPEN (UP)
M2
GND (DOWN)
SET
GND (DOWN)
14. Power up the clock
15. Wait 10 seconds.
16. Power off the clock. Wait for 10 seconds for the power to decay.
17. On the receiver interface module, set the 3 switches to:Switch
Setting
M1
GND (DOWN)
M2
GND (DOWN)
SET
OPEN (UP)
18. Now you can register a new remote control unit as per the previous section, (start at item
3).
Sporting Designs Ltd. User Manual for Polo Clock Page 12 of 14