1
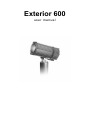
Exterior 600 u s e r m a nu a l ©1998, 2000 Martin Professional A/S, Denmark. All rights reserved. No part of this manual may be reproduced, in any form or by any means, without permission in writing from Martin Professional A/S, Denmark. Printed in Denmark. P/N 35000020, Rev. E table of CONTENTS Introduction and Safety 4 Safety precautions ...................................................................................................................4 About this manual ....................................................................................................................4 Lamp Installation 5 Compatible lamps ....................................................................................................................5 Maximum lamp usage..............................................................................................................5 Installing the lamp....................................................................................................................5 Optimizing lamp alignment ......................................................................................................6 AC Power Connection 7 Tapping the power supply........................................................................................................7 Wiring the mains lead ..............................................................................................................8 Data Connection 9 Recommended cable...............................................................................................................9 Building the data link................................................................................................................9 Terminating the link .................................................................................................................9 Installation 10 Location and orientation ........................................................................................................10 Fastener spacing and type ....................................................................................................10 Adjusting pan and tilt .............................................................................................................10 Address, Settings, and Software 11 About the MPBB1 Uploader...................................................................................................11 Setting address and mode.....................................................................................................12 Setting personalities ..............................................................................................................13 Programming MC-X scenes...................................................................................................13 Running a test sequence .......................................................................................................16 Calibrating effects ..................................................................................................................16 Manual control .......................................................................................................................16 Installing software ..................................................................................................................16 Stand-alone Operation 18 Stand-alone settings .............................................................................................................18 General procedure for changing stand-alone settings...........................................................19 Programming a single fixture .................................................................................................19 Synchronizing stand-alone operation ....................................................................................20 Controller Operation 21 Martin RS-485 control............................................................................................................21 DMX-512 control....................................................................................................................21 Operating the lamp ................................................................................................................21 Operating the mechanical effects ..........................................................................................22 Cold weather operation..........................................................................................................22 Operating status ....................................................................................................................23 Basic Service and Maintenance 24 Opening and closing the electronics section .........................................................................24 Replacing fuses .....................................................................................................................24 Changing lenses ....................................................................................................................24 Maintaining the seal...............................................................................................................25 Cleaning the housing .............................................................................................................25 Changing the mains lead .......................................................................................................25 DMX Protocol 26 Troubleshooting 27 Specifications 28 3 section 1 INTRODUCTION AND SAFETY Thank you for selecting the Martin Exterior 600. This automated luminaire combines a range of architectural lighting effects with extremely bright output in an attractive aluminum housing designed for permanent outdoor installation. Safety precautions The Exterior 600 is not for domestic use. It presents potential risks due to electric shock, heat and ultraviolet radiation burns, lamp explosion, falls, high-intensity light, and fire. A thorough understanding of the dangers, genuine concern for safety, and attention to detail are required to prevent accidents. Read this manual before powering or installing the fixture, follow the safety precautions listed below and observe the warnings in this manual and printed on the fixture, and always double check the safety conditions. If you have questions about how to operate the Exterior 600, please contact your Martin dealer for assistance. • ALWAYS disconnect the fixture from AC power and allow it to cool for 20 minutes before: - Changing the transformer or ballast settings - Installing or removing the lamp - Checking or replacing fuses - Removing any cover or part from the fixture • ALWAYS keep combustible materials at least 1 meter (39 inches) away from the fixture. Keep flammable materials well away from the fixture. • For protection against dangerous electric shock, ALWAYS ground (earth) the fixture electrically. Use only a source of AC power that complies with local building and electrical codes. • Replace defective or worn out lamps immediately. Replace working lamps before usage exceeds the maximum service life. • ALWAYS use at least one fastener in each of the 4 curved mounting slots in the base. • ALWAYS refer any service operation not described in this manual to a qualified technician. • NEVER illuminate surfaces within 1 meter (39 inches) of the fixture. • NEVER place filters or other materials over the lens or front glass plate. • NEVER operate the fixture if the ambient temperature (Ta) exceeds 40° C (104° F). • NEVER stare directly into the light. • NEVER operate the fixture without all lenses and covers installed: an unshielded lamp emits dangerous UV radiation that can cause burns and eye damage, and it can explode without warning. • NEVER modify the fixture or install other than genuine Martin accessories. About this manual This user manual covers the Exterior 600 with version 1.5 software. The latest Exterior 600 news, documentation, and software is available from the Martin Professional web site at http://www.martin.dk. 4 Exterior 600 section 2 LAMP INSTALLATION This section describes how to install and adjust a lamp. Compatible lamps The Exterior 600 is designed to use the lamps listed below. Installing other lamps may damage the fixture. Lamp Average life Replace by Color temp. Output P/N Philips MSD 575 2000 h 2200 h 6000K 78 lm/w 97010202 Philips MSR 575/2 1000 h 1200 h 7200K 85 lm/w 97010201 Osram HSR 575/2 1000 h 1200 h 6000K 85 lm/w 97010200 Maximum lamp usage The quartz bulb weakens over time, significantly increasing the risk of lamp explosion. Replace the lamp no later than indicated in the table above. Installing the lamp WA R N I N G ! Always disconnect the fixture from AC power and allow it to cool before installing the lamp. For protection against lamp explosion, allow a hot lamp to cool for at least 2 minutes before removing the access plate. Lamp adjustment Lamp Installation 5 1. Isolate the fixture from AC power. If it is hot, allow it to cool for at least 2 minutes before proceeding. The lamp is under high pressure when hot and can explode: use safety goggles to protect your eyes. 2. Remove the nut from the long bolt at the top of the fixture and remove the bolt. Loosen the bottom bolt slightly, if necessary, and tilt the rear section back no more than 45° to avoid damaging the electrical conduit beneath the fixture. 3. Remove the 4 Allen screws from the lamp access plate. Remove the access plate and the rubber seal. 4. Remove the 2 Phillips screws from the lamp-socket assembly. Gently pull out the assembly. 5. If changing the lamp, remove the old lamp from the socket. 6. Holding the new lamp by its ceramic base - do not touch the glass - insert it firmly and squarely into the lamp socket. 7. Clean the glass bulb with the wipe supplied with the lamp, particularly if your fingers touched the glass. A clean, lint-free cloth wetted with alcohol may also be used. 8. Re-insert the lamp assembly. Replace the 2 Phillips screws. 9. Optimize lamp alignment and then close the fixture as described below. Optimizing lamp alignment The lamp holder is adjusted at the factory; precise alignment may be necessary due to slight variations between lamps. 6 1. Apply power to the fixture and allow it to reset. Strike the lamp. 2. Remove the nut from the long bolt at the top of the fixture and remove the bolt. Tilt the rear section back no more than 45° to avoid damaging the electrical conduit beneath the fixture. 3. Remove the 4 Allen screws from the lamp access plate. Remove the access plate and the rubber seal. 4. Center the hot-spot (the brightest part of the beam) by turning the 3 adjustment screws one at a time to move the hot-spot diagonally across the beam. If there is no hot-spot, adjust until the light is even. 5. To reduce the hot-spot, pull the lamp back towards you by turning all three screws clockwise 1/4turn at a time until the light is evenly distributed. 6. If the light is brighter around the edge than it is in the center, or if light output is low, the lamp is too far back in the reflector. Move the lamp forward by turning the adjustments screws counterclockwise 1/4-turn at a time until the light is bright and evenly distributed. 7. Check the condition of the lamp access seal. Replace with a new one (P/N 20620050) if the seal is torn, cracked or brittle. 8. Place the seal on the back of the lamp access plate. Insert the 4 Allen screws through the plate and install. Tighten the Allen screws with a torque of 6 N.m (4.5 Ft-Lbs). With this torque, the seal will be compressed by about one-third. 9. Tilt the rear section into position and replace the long bolt and lock nut. Exterior 600 section 3 A C PO W E R C O N N E C T I O N The Exterior 600 is available with a standard power supply for operation at 200/230/245 V, 50 Hz and 208/227 V, 60 Hz; and with a special transformer for operation at 277 V, 60 Hz. This section describes how to tap the power supply for the local AC voltage and frequency and how to connect the Exterior 600 to AC power. Do not connect the Exterior 600 to an electrical dimmer system: doing so can damage the electronics. IMPORTANT! Check voltage and frequency settings before applying power. Ta p p i n g t h e p o w e r s u p p l y Ve r i f y s e t t i n g s The voltage and frequency settings must match the local AC power supply! The factory-set power supply tappings are printed on the serial number label on the back plate. Operating at the incorrect power setting can result in poor light output, greatly reduced lamp life, overheating and damage to the fixture. If the setting does not match your local AC voltage and frequency, then the power supply must be retapped as described below. Ch a ngi ng vo ltag e a nd f req ue ncy se tt in gs , s ta nd a rd powe r su pp ly Local AC Supply Frequency 50 Hz Transformer Ballast Voltage Setting Terminal Setting Terminal 200-210 V 210 V 4 200 V / 50 Hz 7 210-220 V 210 V 4 230 V / 50 Hz 10 220-235 V 230 V 6 230 V / 50 Hz 10 235-240 V 230 V 6 245 V / 50 Hz 12 240-260 V 250 V 8 245 V / 50 Hz 12 200-217 V 210 V 4 208 V / 60 Hz 4 217-240 V 230 V 6 227 V / 60 Hz 7 60 HZ WA R N I N G ! Disconnect the fixture from AC power before removing any cover. 1. Make sure the Exterior 600 is isolated from AC power. Remove the 10 Allen screws from the rear cover plate. Pull off the plate and seal. 2. Find the row in the above table with the local AC frequency and voltage. Follow the row to the right to find the correct transformer and ballast tappings. For example, with a local AC supply of 230V, 50 Hz, the correct transformer tapping is terminal 6 and the correct ballast tapping is terminal 10. 3. To tap the transformer, move the 2 BROWN wires to the correct terminal. Terminals are identified on the transformer in front of the connection tabs. 4. To tap the ballast, move the single BROWN wire to the correct terminal. 5. Check the condition of the seal. Replace with a new one (P/N 20600020) if the seal is torn, cracked or brittle. AC Power Connection Ballast Transformer 7 6. Insert the Allen screws through all holes in the cover and seal. Place the cover firmly against the body. 7. Adjust the straight sides of the seal so that they stick out a little bit, just enough so that you can feel the seal when you run a finger across the joint. 8. Cross-tighten the cover bolts. The correct torque for these bolts is 6 N.m (4.5 Ft-Lbs). With this torque, the seal will be compressed by about one-third. Ch a ngi ng vo ltag e a nd f req ue ncy se tt in gs , 2 7 7 V s up ply Local AC Frequency Transformer Ballast Voltage Setting Terminal 218-241 V 230 V see label 265-290 V 277 V see label 218-241 V 230 V see label 265-290 V 277 V see label 50 Hz 60 Hz Setting Terminal 230 V / 50 Hz 10 227 V / 60 Hz 7 1. Make sure the Exterior 600 is isolated from AC power. Remove the 10 Allen screws from the rear cover plate. Pull off the plate and seal. 2. Locate the BROWN wire that connects the mains filter to the transformer. Move this wire to the transformer terminal labelled for the desired setting, 230 or 277 V. Do not move the brown wire that leads to the ballast. 3. To tap the ballast, move the single BROWN wire to terminal 7 for 60 Hz operation, or to terminal 10 for 50 Hz operation. 4. Replace the cover as described in the previous procedure. Wiring the mains lead The Exterior 600 is equipped with a 3-meter (10 ft.) length of 3-conductor 1.5 mm2 (~16 AWG) electrical cable for connection to the AC power supply. See “Changing the mains lead” on page 25 if another lead is required. WARNING! For protection from dangerous electric shock, the fixture must be grounded (earthed). The AC mains supply shall be fitted with a fuse or circuit breaker and ground-fault protection. 8 Wire (EU) Wire (US) Pin Marking Screw (US) brown black live “L” yellow or brass blue white neutral “N” silver yellow/green green ground green 1. Verify that the power supply is tapped for the local AC voltage and frequency. 2. Verify that the feed cable is undamaged and rated for the current requirements of all connected devices. 3. To connect the Exterior 600 to an electrical outlet or cable, install an appropriate grounding-type cord cap on the mains lead. Connect the yellow/green wire to ground (earth), the brown wire to live (hot), and the blue wire to neutral. The above table shows some possible pin identification schemes; if the pins are not clearly identified, or if you have any doubts about proper installation, consult a qualified electrician. 4. Consult a qualified electrician if the Exterior 600 is to be connected directly to building wiring. There shall be a switch in the circuit to turn power off when the fixture is not in use or is being serviced. Exterior 600 section 4 DATA CONNECTION T his section describes how to connect fixtures to a controller and other devices, and how to term in ate the data link . F or data connection, the E xterior 600 has tw o 4.5 m eter (15 ft.) trailing cables w ith locking 3-pin X L R connectors. D ATA P I N - O U T Pin 1: shield Pin 2: signal - (cold) Pin 3: signal + (hot) Recommended cable Use only cable designed for RS-485 devices. The cable shall be suitable for outdoor use. It shall have low capacitance and a characteristic impedance of 85 to 150 ohms. It shall be electrically shielded and have at least 1 twisted pair of wires. The minimum wire size is 0.2 mm (24 AWG) for runs up to 300 meters (1000 ft.) and 0.322 mm (26 AWG) for runs up 500 meters (1640 ft.). Building the data link To c o n n e c t t h e c o n t r o l l e r 1. DMX controllers: Connect a data cable to the controller’s data output. If the cable has a 3-pin male plug and the controller has a 5-pin female socket, use a 5-pin male to 3-pin female adaptor cable (P/N 11820005) or replace the 3-pin plug with a 5-pin plug. The pin-out is the same for 3-pin and 5-pin plugs. Pins 4 and 5 are not used. Martin RS-485 protocol controllers (3032): First, connect a 3-pin “swapper” cable (P/N 11820006) to the controller’s data output; then, connect a regular data cable to the swapper cable. A swapper cable connects pin 2 to pin 3 and pin 3 to pin 2. 2. If the controller is located in a central position between 2 or more fixtures, you may split the link into branches using a splitter such as the Martin 4-Channel Opto-Isolated RS-485 Splitter/Amplifier. Do not use a “Y” connector to split the link. 3. Lead the data cable from the controller to the first fixture. Plug the cable into the fixture cable with the male XLR connector. If the cable from the controller has a 5-pin plug, replace it with a 3pin plug or insert a 5-pin male to 3-pin female adaptor cable (P/N 11820005). To c o n n e c t a d d i t i o n a l f i x t u r e s 1. Connect the output (female) of the fixture closest to the controller to the input (male) of the next fixture. (If connecting to another type of fixture with reversed-polarity (pin 3 cold), such as the PAL 1200, insert a swapper cable between the two fixtures.) 2. Continue connecting fixtures output to input. Up to 32 fixtures may be connected on a serial link. If more fixtures are required, use another controller output, if available, or an RS-485 amplifier. Te r m i n a t i n g t h e l i n k Link termination is achieved by inserting a 120 ohm resistor across the signal + (hot) and signal - (cold) wires; it is important for trouble-free communication. If a splitter is used, terminate each branch of the link. The easiest way to terminate the link is to insert a male termination plug into the data output cable of the last fixture. A termination plug is simply an XLR connector with a 120 ohm resistor soldered across pins 2 and 3. Permanent link termination can be achieved by placing a 120 ohm resistor across the terminals for the hot and cold data wires on the connection block inside the electronics section. Data Connection 9 section 5 INSTALLATION This section briefly describes how to anchor the Exterior 600. The Exterior 600’s base allows the fixture to manually be panned 50° and tilted +/- 40°. NOTICE! It is the installer’s responsibility to determine the anchoring method. Location and orientation The Exterior 600 may be installed outdoors, in any orientation. It shall be located at least 1 meter (39 in.) away from the surface to be illuminated and any combustible materials. The aluminum housing reaches temperatures up to 80° C (176° F): the fixture should not be located where it can accidentally be touched. To achieve the full tilt range, the fixture must be installed on a pedestal at least 12 cm (4.7 in) long. To achieve the full pan range, the fixture must be anchored with 4 fasteners that can be loosened, spaced at 90° intervals as described below. The Exterior 600 requires free-circulating air for cooling. Do not locate the fixture in an unventilated space. Fastener spacing and type WARNING! Verify that the structure can bear at least 10 times the weight of all installed fixtures. Use at least one fastener in each of the 4 curved mounting slots. The fixture is designed to be anchored with four 10 mm (3/8 in.) bolts. Additional bolts may be used but the pan range will be reduced. Evenly space the bolts at 90° intervals, centered on a 170 mm (6 and 11/16 in.) circle, so that one bolt passes through each curved slot in the foot of the base. The specific hardware will depend on the installation. Consult a qualified engineer to determine a suitable anchoring method and to verify that the structure can safely bear at least 10 times the fixture’s weight. In general, use high quality corrosion resistant fasteners such as zinc-plated steel, grade 8.8 or better, together with either self-locking nuts or nuts and lock-washers. Adjusting pan and tilt 10 1. To adjust the pan, loosen the anchor bolts slightly so that the fixture can turn. Manually adjust the pan position and retighten the bolts. 2. To adjust the tilt, loosen both tilt locks on either side of the base. Position the fixture and retighten the tilt lock nuts. Exterior 600 section 6 ADDRESS, SETTINGS, AND SOFTWARE This section describes how to set the fixture address and other settings, calibrate effects, run a test routine, and install software updates. The effects of personality settings are described in section 8. About the MPBB1 Uploader Settings are changed using a Martin MPBB1 uploader that has been loaded with the Exterior 600’s control software, which is available for download from the Martin web site, and connected to the fixture or the data link. The software version loaded in the fixture and the MPBB1 must be the same. Note: Software for the standard Exterior 600 (files named “EX600XXX.MU2”) is not the same as for the Exterior 600 Compact (files named “EX60CXXX.MU2”). Be sure to install the correct software in the uploader before use. The uploader has 2 modes: single-fixture, where it sends instructions only to the fixture at a specific address; and allfixtures, where it sends to all same-type fixtures on the link. Communication is one-way; from the uploader to the fixture, so there is no way to read the address or settings. There is, however, a utility for finding fixture addresses. Please see the MPBB1 manual for additional instructions. To s e t f i x t u r e s v i a t h e s e r i a l l i n k To change settings on all Exterior 600s at the same time, connect the MPBB1 to the data link and use all-fixtures mode. If you set the address in all-fixtures mode, all Exterior 600s will be set to the same address. To change the settings of an individual fixture via the serial link, use single-fixture m ode. T he fixture’s address m ust be know n and no other fixture m ay have the sam e address. O therw ise, if you can apply pow er only to the fixture you w ant to set and you can turn off all others, use all-fixtures m ode: only the E xterior 600 that is pow ered on w ill be set. To s e t a f i x t u r e v i a d i r e c t c o n n e c t i o n An individual fixture can also be set by connecting its data input (male) directly to the MPBB1’s output. To avoid setting other Exterior 600s on the link, disconnect the fixture’s data output. Navigation The settings menu is shown below. Press the MPBB1’s arrow keys to scroll through the menu. Press [Enter] to select items or [Menu] to escape. A few settings, such as fixture address, require an extra confirmation. 36(7 G$GU 0$GU $G- &$/ 567 G#2) /#21 76(4 ()63 ) 63(& 6$ 7,0( G/2) (1$E +285 35(4 0,1 G,0 &2/ &<$1 0$* <(/ )526 =220 /$03 G5(6 /,7( (1$E /(9 /R)) 0#2) $/21 $// <#2) $872 G,0 $6+7 &<$1 6&87 0$* ())E <(/ &2/ %($0 =220 6+87 7,0( (1$E 6757 6723 0&0; 35(5 :$,7 35(6 )$G( 35(7 &0,1 35(8 &0$; 35(9 00,1 35(: 00$; <0,1 <0$; )526 =220 0$67 Address, Settings, and Software 11 Setting address and mode The fixture address and control mode must be selected before the Exterior 600 will respond correctly to a controller. The fixture address, also known as the start channel, is the first channel used to receive instructions from the controller. The Exterior 600 requires 8 channels in DMX mode 1 and 9 channels in DMX mode 2. It uses 2 channels in Martin mode. The control modes are described on page 21. Fixture addresses may be set in any order. Two Exterior 600s may share the same address; however, they will receive the same instructions and independent control will not be possible. To s e t m o d e a n d a d d r e s s i n s i n g l e - f i x t u r e m o d e FIXT dMX current address SING settings 1. Plug the serial link into the “DMX/RS-485 OUT” socket on the MPBB1. 2. Apply power to the Exterior 600 and the MPBB1. 3. Use the arrow keys to select FI XT from the MPBB1 menu. Press [Enter]. 4. Select the current mode, dMX or MA RT. Press [Enter]. 5. Select SIN G. Press [Enter]. 6. Scroll to the fixture’s current DMX or Martin address. Press [Enter]. 7. To set the mode, select P SET. Press [Enter]. Select the desired mode - DM X1 , DMX2 , or MA RT - and press [Enter]. 8. To set a new DMX address, select dAd r . Press [Enter]. Scroll to the new address. Press [Enter]. Press [Enter] again when SUR E is displayed to confirm. 9. To set a new Martin address, select M Adr . Press [Enter]. Scroll to the new address. Press [Enter]. Press [Enter] again when S URE is displayed to confirm. 10. Disconnect the MPBB1 and reconnect the serial link. To s e t m o d e a n d a d d r e s s i n a l l - f i x t u r e s m o d e FIXT 12 dMX ALL settings 1. Plug the data input cable (male) of the fixture to set into the “DMX/RS-485 OUT” socket on the MPBB1. Disconnect the data output cable from the serial link. Alternatively, connect the serial link to the MPBB1 at any convenient point and make sure that power is applied only to the desired fixture. 2. Use the arrow keys to select FI XT from the MPBB1 menu. Press [Enter]. 3. Select the current mode, dMX or MA RT. Press [Enter]. 4. Select ALL . Press [Enter]. 5. To set the mode, select P SET. Press [Enter]. Select the desired mode - DM X1 , DMX2 , or MA RT - and press [Enter]. 6. To set an address, select dA dr , for a DMX address, or MA dr , for a Martin address. Press [Enter]. Scroll to the new address. Press [Enter]. Press [Enter] again when SURE is displayed to confirm. 7. Disconnect the MPBB1 and reconnect the serial link. Exterior 600 Setting personalities Personality Effects speed DMX lamp off DMX reset Automatic lamp on Path Normal, full speed operation. SAFE Reduced speed operation. ON Enable DMX lamp off command. OFF Disable DMX lamp off command.* ON Enable DMX reset command. OFF Disable DMX reset command.* ON Lamp strikes within 90 seconds of power on. OFF Strike lamp with controller command. ON Enable automatic protocol detection. OFF Disable automatic protocol detection. ON Effect wheels turn the shortest direction.* OFF Effect wheels always turn same direction.* ON Shutter “helps” dimmer black out. OFF Shutter not affected by dimmer commands. ON Enable feedback on effect wheels. OFF Disable feedback on effect wheels. SPEC/dLOF SPEC/dRES SPEC/ALON SPEC/AUTO Shortcuts SPEC/SCUT Effects feedback FAST EFSP Automatic protocol detection Automatic shutter Effect (Default settings shaded.) Options SPEC/ASHT SPEC/EFFb * Setting may be overridden via DMX. See the protocol for details. 1. Select FI XT from the MPBB1 menu. Press [Enter] to continue or [Menu] to escape. 2. Select the mode, dMX or MA RT. Press [Enter]. 3. Select single-fixture ( S ING ) or all-fixtures (ALL ) mode. Press [Enter]. If you selected singlefixture mode, scroll to the address of the fixture to set. Press [Enter]. 4. Navigate to the personality setting to adjust. Press [Enter]. 5. Select the desired option. Press [Enter]. Programmin g MC-X scenes Seven scenes - combinations of colors and effects - can be programmed and stored in the Exterior 600’s electronic memory. These scenes are programmed using a Martin MPBB1 uploader. Once programmed, scenes are executed using the Martin MC-X remote control. The MC-X, which sends DMX commands with a special start-code on channel 1, also has functions to blackout the light and to engage the Exterior 600’s stand-alone mode. Please refer to the MC-X user manual for information about executing scenes. Scene parameters The table below shows the options available for MC-X scene programming. Parameter Dimmer Color filter Cyan Path d IM C OL C YAN Options Effect 0 - 255 Full closed Æ full open W HIT Open C TC CTC filter R Ed Red G REE Green B LUE Blue 0 - 255 White Æ Cyan Address, Settings, and Software 13 Parameter Path Options Effect Magenta M AG 0 - 255 White Æ Magenta Yellow YEL 0 - 255 White Æ Yellow ON Frost on Frost F ROS O FF Frost off 0 - 255 Wide Æ narrow ON Lamp power on O FF Lamp power off Zoom Z OOM Lamp L AMP To p r o g r a m s c e n e s 1. Connect the serial link, or the DMX input of the fixture to be programmed, to the uploader’s DMX / RS 485 output. Apply power to the uploader first and then the fixtures. 2. To program all connected fixtures, or to program a single connected fixture at an unknown address, follow the steps in the table below. If programming a single fixture with this method, disconnect any other identical fixtures from AC power and/or the data link. Press Times Display Menu as needed go to top of menu (display stops changing) varies up / down as needed select fixture menu FIXT Enter 1 enter menu dMX Enter 1 enter menu ALL Enter 1 enter menu PSET 3. To program a single fixture with a known DMX address, use the following procedure. The uploader user manual describes how to find an address. Press Menu Times as needed To go to top of menu (display stops changing) Display varies up / down as needed select fixture menu FIXT Enter 1 enter menu dMX Enter 1 enter menu ALL down 1 select single fixture mode SING Enter 1 enter address selection menu 001 up / down as needed scroll to the fixture’s DMX address varies Enter 1 set uploader to fixture’s DMX address PSET 4. Select a scene to program. Press Times up / down as needed select MC-X menu MC-X Enter 1 enter menu PRE1 up / down as needed select scene from 1 to 7 varies Enter 1 enter effect menu dIM 5. 14 To To Display Program the dimmer level. Press Times up / down as needed To select dimmer level menu Display dIM Enter 1 enter menu 0 up / down as needed adjust dimmer level 0-255 Enter 1 save setting and continue dIM Exterior 600 6. Program the color wheel color. Press Times up / down as needed select color wheel menu COL Enter 1 enter menu WHIT up / down as needed select color varies Enter 1 save setting and continue COL 7. To Display Set CMY color. Press Times up / down as needed select cyan menu CYAN Enter 1 enter menu 0 up / down as needed set cyan level 0-255 Enter 1 save setting and continue CYAN down 1 select magenta menu MAG Enter 1 enter menu 0 up / down as needed set magenta level 0-255 Enter 1 save setting and continue MAG down 1 select yellow menu YEL Enter 1 enter menu 0 up / down as needed select yellow level 0-255 Enter 1 save setting and continue YEL 8. To Display Turn frost on/off. Press Times To Display up / down as needed select frost menu FROS Enter 1 enter menu OFF up / down as needed turn frost on or off ON/OFF Enter 1 save setting and continue FROS 9. Set zoom. Press Times To Display up / down as needed select zoom menu ZOOM Enter 1 enter menu 0 up / down as needed select zoom level 0-255 Enter 1 save setting and continue ZOOM 10. Program a lamp off command in one scene if you want to control lamp power with the MC-X. Otherwise, set the lamp command to ON in each scene. Press Times To Display down 1 select lamp menu LAMP Enter 1 enter menu ON up / down as needed program lamp on or lamp off command ON/OFF Enter 1 save setting and continue LAMP 11. Repeat steps as necessary to program scenes 1 to 7. When finished, turn off and disconnect the uploader. Address, Settings, and Software 15 Running a test sequence The test sequence allows you to test the fixture without a controller. 1. Select FI XT from the MPBB1 menu. Press [Enter]. 2. Select the mode, dMX or MA RT. Press [Enter]. 3. Select single-fixture ( S ING ) or all-fixtures (ALL ) mode. Press [Enter]. If you selected singlefixture mode, scroll to the address of the fixture to test. Press [Enter]. 4. Navigate to TS EQ . Press [Enter]. Press [Enter] again to confirm. Calibrating effects The calibration menu allows you to adjust the effects for total uniformity between fixtures: it is not a substitute for mechanical adjustment, which shall only be performed by a qualified technician. 1. Select FI XT from the MPBB1 menu. Press [Enter] to continue or [Menu] to escape. 2. Select the mode, dMX or MA RT. Press [Enter]. 3. Select SIN G . Press [Enter]. Scroll to the fixture address. Press [Enter]. 4. Navigate to CA L . Press [Enter]. 5. Select effect to calibrate: dimmer ( d O F ), cyan (C OF ), magenta (M O F ), or yellow (Y O F ). Press [Enter]. 6. Adjust from 1 to 255. Press [Enter] to save the calibration. Manual control The adjustment menu (AdJ) provides manual control for making mechanical adjustments and is for service technicians. The menu provides functions to reset the fixture (RST ), turn on and off the lamp (L ON , Lo FF ), and move all effects to their OPEN, SPOS (sensor), and APOS (adjustment) positions, together (ALL ) or individually. Installing software The latest control software for the Exterior 600 is available from your Martin dealer and the Martin web site at http:// www.martin.dk. Software is uploaded to the Exterior 600 using an uploader such as the Martin MPBB1. Please refer to the uploader manual for instructions on preparing the uploader for use. Normal upload 1. Connect the MPBB1 to the fixture or serial link as if connecting a controller. 2. Power up the fixtures and allow them to reset. Turn on the MPBB1. 3. Use the arrow keys to select U PLd from the MPBB1 menu. Press [Enter] to continue or [Menu] to escape. 4. Select DMX or Martin protocol. If the fixtures are set for auto protocol detection, either protocol may be used. If not, the protocol must match the fixture PS ET setting. 5. Press [Enter]. The LEDs on the Exterior 600s are steady yellow to indicate an upload is in progress. When the upload is complete, the MPBB1 displays dO NE and the fixtures reset. Boot mode upload If the data is corrupted during transmission, a check-sum error occurs that causes the fixture to switch to boot mode in preparation for a second upload attempt. Execute a boot-mode upload as described in the uploader manual. If an upload attempt is interrupted, the fixture must be powered off for at least 10 seconds before a second upload can be attempted. When the fixture is powered on, a check-sum error occurs that causes it to switch to boot mode in preparation for the second upload attempt. Select boot mode upload on the uploader. If the software in memory is corrupted, software can be installed using the “hard-boot” setting, which is enabled by moving a jumper on the circuit board. This upload procedure is also used to install software if it includes an update of the boot sector. 16 Exterior 600 1. Disconnect the fixture from AC power. Open the electronics section as described on page 24. 2. On the circuit board, move jumper PL121 to pins 1 and 2 (hard boot setting) as shown. 3. Connect the fixture’s data input (male) to the MPBB1. Apply power to the uploader first and then to the fixture. È PIN 1 È PL104 PL121 normal setting È PIN 1 È PL104 PL121 hard boot setting 4. Select U PLd from the MPBB1 menu and press [Enter]. Select boo t . Press [Enter] to start the upload. When the upload is finished, the MPBB1 displays dO NE and the fixture resets with the new software. 5. Disconnect the fixture from the electricity, move the jumper back to the normal setting, and close the electronics section as described. Address, Settings, and Software 17 section 7 STAND-ALONE OPERATION This section describes how to operate the Exterior 600 without a controller in stand-alone (SA) mode in which the fixture executes random color changes at set intervals and speeds at a set time and/or light level. An MPBB1 Uploader is used to program the stand-alone settings. Please see “About the MPBB1 Uploader” on page 11. Stand-alone settings SA setting Options Effect Clock set: hour TIME/HOUR 0-23 Sets the current hour. Clock set: minute TIME/MIN 0-59 Sets the current minute. SA on/off SA/ENAb ON-OFF Enables/disable other SA settings. Turn SA off on slave fixtures. Light sensor on/off SA/LITE/ENAb ON-OFF Toggles light-level control. Light level SA/LITE/LEV 0-255 Sets the light trigger level. 0 is darkest, 255 is brightest. When setting, light switches on/off at current level. Clock on/off SA/TIME/ENAb ON-OFF Toggles clock control. Start hour SA/TIME/STRT/HOUR 0-23 Sets the start hour. Start minute SA/TIME/STRT/MIN 0-59 Sets the start minute. Stop hour SA/TIME/STOP/HOUR 0-23 Sets the stop hour. Stop minute SA/TIME/STOP/MIN 0-59 Sets the stop minute. Wait time SA/WAIT 1 sec60 min Sets the time between color changes. Set wait time = fade time for continuous change. Fade time SA/FAdE 0-60 Sets the fade time in seconds. Minimum cyan Minimum magenta Minimum yellow SA/CMIN SA/MMIN SA/YMIN 0-255 Sets the minimum amount of each color to use in the random color. Must be less than or equal to maximum. Maximum cyan Maximum magenta Maximum yellow SA/CMAX SA/MMAX SA/YMAX 0-255 Sets the maximum amount of each color to use in the random color. Must be greater than or equal to the minimum. Frost on/off SA/FROS ON-OFF Toggles the frost filter. Zoom level SA/ZOOM 0-255 Sets the zoom level. 0 = full flood. Master on/off SA/MAST ON-OFF Toggles master signal transmission. 1 Same color on master and slave. 13 Master CMY mix maps to slave MYC. 25 Master CMY mix maps to slave YCM. 37 Master CMY mix maps to slave MCY. 49 Master CMY mix maps to slave CYM. 61 Master CMY mix maps to slave YMC. Slave address 18 Path dAdr Exterior 600 General procedure for changing stand-alone settings 1. Plug the fixture’s data input cable (male) into the 3-pin “DMX/RS-485 OUT” socket on the MPBB1. Disconnect the data output cable if it is connected to other fixtures. 2. Apply power to the fixture and the MPBB1. 3. Select FIX T from the MPBB1 menu. Press [Enter]. 4. Select dMX . Press [Enter]. 5. Select ALL . Press [Enter]. 6. Use the arrow keys to navigate to the desired menu item. Press [Enter] to select the item or submenu, or press [Menu] to escape. 7. When all the settings have been made, disconnect the data input cable from the MPBB1. Reconnect the output cable to the data link or next fixture if applicable. Programmin g a single fixture To e n a b l e o r d i s a b l e s t a n d - a l o n e m o d e 1. To enable stand-alone mode, switch SA /ENA b to ON . 2. Turn the fixture off. Stand-alone operation is enabled when you turn the fixture back on. 3. Stand-alone mode can be disabled temporarily by turning the fixture off, or, if connected to a controller, by sending control signals. Stand-alone operation resumes when the fixture has been turned off and then turned back on again. 4. To permanently disable stand-alone mode, switch S A/E NAb to OFF. To s e t t h e t r i g g e r a n d i n t e r n a l c l o c k Stand-alone operation can be set for a time of day, using the built-in clock, or for a light level, using the built-in light sensor. If both the clock and the light sensor are used, operation starts, within the times set, as soon as it is darker than the light-level setting. Operation stops at the stop time or when the ambient light is brighter than the light-level setting, whichever comes first. To avoid false triggering by sudden light changes, for example from automobile headlights, the light level must remain above or below the trigger threshold for 5 minutes. 1. To use the light trigger, set SA /LIT E/E NAb to ON . Then navigate to SA/ LIT E/L EV and select a trigger level from 0 (darkest) to 25 5 (brightest). The light toggles on and off as you scroll past the current light level. 2. To use the clock, set S A/T IME /EN Ab to ON . Navigate to S A/TI ME/ STR T/H OUR and select the start hour from 0 (midnight) to 2 3 (11 PM), then set SA/ TIME /ST RT/ MIN from 0 to 59 . Set the stop hour and minute with SA /TIM E/S TOP /HO UR and SA/ TIM E/ ST OP/ MIN . 3. To set the correct time, set TI ME/ HOUR to the correct hour, using 24-hour time, and set TI ME/ MIN to the correct minute. To p r o g r a m s t a n d - a l o n e e f f e c t s 1. Set a wait time from 1 second to 1 hour using S A/W AIT. This is the time a color is applied. 2. Set the fade time from 0 to 60 seconds using SA/ FAdE . The fade time is the time it takes to change from one color to another. If the fade time and wait time are the same, the colors change continuously. 3. Set the minimum and maximum amount of cyan to use in the random color mix from 0 (none) to 255 (full) with SA /CM IN and SA/ CMA X . Note: The minimum value must be less than or equal to the maximum value. Setting both values to 0 excludes the color from the mix and setting them to 255 causes the color to be fully applied all the time. 4. Similarly, set the minimum and maximum levels of magenta and yellow. 5. Apply the frost filter if desired with S A/F ROS . 6. Set the zoom level using SA /ZO OM . 0 = full flood and 25 5 = full spot. Stand-alone Operation 19 Syn chro nizing stan d-alone operation Synchronous stand-alone operation of several Exterior 600s may be achieved by linking them together and using the master/slave function in which one unit - only - transmits control signals to the others. Standard Exterior 600s are compatible with Compact models in master/slave configuration. If both types are used, select one of the standard Exterior 600s to be the master fixture if you want to use the frost and/or zoom options. To l i n k a n d t e r m i n a t e f i x t u r e s Synchronous operation requires that the fixtures be connected on a data link. Terminating the link on both ends is recommended when there is no controller. To terminate the first fixture, plug a 3pin female XLR plug with a 120 ohm resistor soldered across pins 2 and 3 into its input (male) cable. To terminate the last fixture, plug a 3-pin male XLR plug with a 120 ohm resistor across pins 2 and 3 into its output (female) cable. To s e l e c t a n d p r o g r a m t h e m a s t e r f i x t u r e No more than one fixture may be the master. Any fixture on the link, however, regardless of its position, may be the master, so select the fixture that is easiest to access. 1. Program the master fixture as described above for single fixtures. 2. Switch S A/M AST to O N . This causes the master fixture to transmit control signals to the slaves. To p r o g r a m s l a v e f i x t u r e s A slave fixture must be set up in DMX mode 1 or 2, automatic protocol detection (A UTO ) must be turned off, and it must have one of the DMX addresses listed below. See “To set mode and address in all-fixtures mode” on page 12 if you need to change the settings. The DMX address determines how the slave’s color relates to the master’s color. The slave’s stand-alone settings must be disabled so it can controlled by the master fixture. 20 1. Connect the input of the slave fixture to the output of the MPBB1. Disconnect the fixture’s output from the serial link. 2. Using the MPPB1, switch SA /EN Ab to O FF. This disables the other stand-alone settings. 3. Navigate to dA dr and set the slave address to 1, 13, 25, 37, 49, or 61. No other addresses may be used for slave fixtures. Set the address to 1 to have the slave execute the same color as the master. Set the address to 13, 25, 37, 49, or 61 to have the slave execute a different color. The color relationship for each address is shown in the table of stand-alone settings. 4. Disconnect the MPBB1 and reconnect the data link. 5. Turn the fixture off. The stand-alone settings take effect when the fixture is turned back on. Exterior 600 section 8 CONTROLLER OPERATION This section describes the Exterior 600’s control modes, effects, and the personality options available for customizing them. The LED display and cold weather operation are also covered. Mar tin RS-485 con trol The Exterior 600 is controllable with the Martin 3032 controller. Though the Exterior 600 is not implemented in the 3032 software, it may be set up in the controller as a MAC 600. Use the beam-shaper 1 control to operate the zoom. For the fixture to respond, either the protocol setting must be set to Martin (P SET > M ART ), or automatic protocol detection must be enabled (S PEC > A UTO > O N ). DMX-512 control The Exterior 600 is can be controlled by any USITT DMX-512 (1990) protocol controller. The controller must send a start code of 0 at the beginning of every packet. Tr a c k i n g v e r s u s v e c t o r c o n t r o l The Exterior 600 has 2 DMX control modes: tracking and tracking/vector control. Tracking/vector control contains all features of both modes and is recommended if there is room for the additional DMX channel. With tracking control, fades are programmed using the controller’s fade time. The controller divides the fade into small pieces that the fixture “tracks.” The Exterior 600 has a digital filter algorithm that averages several updates to ensure smooth movement. Vector control provides a way to program fades on controllers without programmable fade times. With vector control, instead of breaking up the movement into many small positions, the controller sends one position value along with a speed value that is programmed on a separate channel. Vector control may provide smoother fades than tracking control with some controllers, particularly on very slow fades. Switching control modes (mode 2 only) Refer to the DMX protocol for channel 9, the speed channel, on page 26. To enable tracking control in tracking/vector mode (mode 2), set channel 9 to “Tracking” (DMX 0 - 2). To switch to vector control, set the controller’s fader (if applicable) to 0 and set a speed using the DMX values from 3 to 245. Tracking control can also be enabled with or without shortcuts, regardless of the personality setting, with the DMX values from 246 to 251. You may switch between tracking and vector control, but you cannot use them both at the same time. When using tracking control, set the speed channel to a tracking value. When using vector control, set the controller fade time to 0. Blackout speed (mode 2 only) The Exterior 600 features a special “blackout speed” for the color wheel and beam shaper. When “Blackout while moving is selected” on channel 9, the shutter closes while the color wheel and/or beam shaper moves at full speed. Blackout speed does not apply to the dimmer, CMY wheels, or the zoom module. If DMX values from 252 - 255 are selected, these effects “snap” at full speed but the shutter remains open. Operating the lamp Lamp on With the default setting, the lamp remains off until a “lamp on” command is sent from the controller. To have the lamp strike automatically within 90 seconds of powering on, switch the Automatic Lamp On personality to on (SPE C > ALO N > ON ). A large peak of electric current is drawn for an instant when striking a discharge lamp. Striking many lamps at once may cause a voltage drop large enough to prevent lamps from striking and/or trip circuit breakers. When striking multiple lamps, program a sequence that strikes lamps one at a time at 5 second intervals. If Automatic Lamp On is enabled, there is a delay of up to 90 seconds that is determined by the fixture address. Controller Operation 21 Lamp off The lamp can be turned off from the controller by sending a “lamp off” command on channel 1. If the DMX Lamp Off personality is off (SPE C > dL OF > O FF ), the command only works if each of the CMY channels (3, 4, and 5) is set to a DMX value from 230 to 232. After being turned off, the lamp must cool for at least 8 minutes before it can be turned back on. “Lamp on” commands sent within 8 minutes of a “lamp off” command are stored and then executed after the time has elapsed. Operating the mechanical effects The mechanical effects reset to their “home” position when the Exterior 600 is powered on. They can also be reset from the controller on channel 1. If the DMX Reset personality is off (SPEC > dRES > OFF), the reset command only works if each of the CMY channels is set to a DMX value from 230 to 232. An on-the-fly position correction system automatically corrects the position of the effect wheels. This feature can be disabled by turning effects feedback off (SPEC > EFFb > OFF), but this is not recommended. Color wheel The color wheel has red, green, and blue dichroic color filters plus a 5600K to 3400K color correction filter and open white. It may be used together with CMY color mixing to increase color saturation. The wheel scrolls continuously, allowing for split-color effects, or in full steps. It also rotates continuously in both directions at different speeds. The Shortcuts (SPEC > S CUT ) setting determines whether the wheel takes the shortest path to the next position or turns in one direction only. The setting may be overridden on the speed channel in mode 2. Setting the color speed to “blackout” in mode 2 causes the shutter to black out the light while the wheel moves. CMY subtractive color mixing The CMY color mixing system is based on graduated cyan, magenta, and yellow color filters. A continuous range of mixed colors may be achieved by varying the amount of each filter from 0 to 100%. Note that mixing 3 colors results in a loss of light - the light is blacked out when all 3 colors are fully applied. For maximum brightness, mix only 2 colors at a time. The Shortcuts (S CUT ) setting determines whether the wheels take the shortest path to the next position or turn in one direction only. The setting may be overridden on the speed channel in vector mode. Dimmer The mechanical dimmer provides smooth, high-resolution 100 percent dimming. Shutter The high-speed mechanical shutter opens and closes the light instantly. Light can be flashed at up to 8 Hz and there is a DMX-callable random strobe function. If the auto shutter function is enabled (S PEC > A SHT > O N ), the shutter, which is faster than the dimmer, automatically closes when the dimmer receives a command to close “instantly,” to provide faster blackouts. Zoom The Fresnel lens may be driven forwards or backwards to vary the size of the beam. The zoom function has little effect with the optional 65° diffuser lens installed. Beam shaper and frost The beam shaper flattens and widens the beam into an oval, which rotates 90°. The frost filter softens the beam. As it is on the same wheel as the beam shaper, the 2 effects cannot be combined. The beam shaper and frost have little effect when used with the optional 65° diffuser lens. Cold weather operation When the temperature is expected to fall below freezing, the electronics must be kept warm by leaving the fixture on. The lamp, however, may be switched off. 22 Exterior 600 Operating status Under normal operation, the LED display indicates the status of the mechanical effects and the control data. Two steady green LEDs indicates proper operation. A red or unlit LED indicates an error. Special conditions are also indicated. Both LEDs flash yellow while the fixture is resetting. During a software upload, both LEDs are steady yellow. LED 1 LED 2 SENSOR The LEDs flash off for a brief instant at regular intervals. This is to prevent false readings when the light sensor samples the ambient light level. S u m m a r y, L E D 1 • • • • Steady green: Fixture ready, mechanical effects OK. Flashing red and green: Fixture ready with one or more errors. Contact a service technician. Flashing yellow: Reset in progress. Steady yellow: Software upload in progress. S u m m a r y, L E D 2 • • • • • Off: No data. Steady green: Data OK. Steady red: Invalid data. Flashing yellow: Reset in progress. Steady yellow: Software upload in progress. Controller Operation 23 section 9 BASIC SERVICE AND MAINTENANCE T his section describes additional service procedures. Procedures not described shall be referred to a qualified technician. WA R N I N G ! Disconnect the fixture from AC power before removing any cover. Openin g and closing th e electronics section 1. Disconnect the fixture from AC power. 2. To open, remove the 10 Allen screws from the rear cover plate. Pull off the plate and seal. Ballast Transformer 3. Before closing, check the condition of the seal. Replace with a new one (P/N 20600020) if the seal is torn, cracked or brittle. Fuse 4. To close, insert the Allen screws through all holes in the cover and seal. Place the cover firmly against the body. Adjust the straight sides of the seal so that they stick out a little bit, just enough so that you can feel the seal when you run a finger across the joint. 5. Cross-tighten the cover bolts with a torque of 6 N.m (4.5 Ft-Lbs). With this torque, the seal will be compressed by about one-third. Replacing fuses The Exterior 600 has 4 fuses. The main fuse is located in a fuse holder inside the electronics section, to the left of the ballast. The fuses for each of the 3 low-voltage power supplies are located on the printed circuit board. 1. Make sure the Exterior 600 is isolated from AC power. Open the electronics section. 2. To remove the printed circuit board from the fixture, remove 2 screws from the aluminum bracket and pull the board out. 3. Locate and replace the defective fuse with one of the same size and rating. 4. Close the electronics section before applying power. Changing lenses There are 3 front lenses for the Exterior 600. The standard lens provides a beam angle of 22° to 38°, where the edge of the beam is the circle with 10 percent of the center intensity. The optional narrow angle lens provides a beam angle of 18° to 25°. The optional wide angle diffuser “lens” provides a 65° beam angle. 24 1. Disconnect the fixture from AC power. Remove the front aluminum plate - not the glass - by removing the 10 Allen screws. 2. The lens assembly is secured by 3 brackets along the rim. Remove 2 of the brackets and slide the lens out. 3. If replacing the narrow or standard Fresnel lens with the wide angle diffuser lens, completely remove all 3 rim brackets and store them together with the lens. The diffuser is secured with the rim brackets (P/N 17200280) that are included in the kit. 4. Position the new lens on the zoom module. Replace the rim brackets. 5. Before closing, check the condition of the seal. Replace with a new one (P/N 20600020) if the seal is torn, cracked or brittle. 6. To replace the front plate, insert the Allen screws through all holes in the plate and seal. Place the plate firmly against the body. Adjust the straight sides of the seal so that they stick out a little bit, just enough so that you can feel the seal when you run a finger across the joint. Exterior 600 7. Cross-tighten the Allen screws with a torque of 6 N.m (4.5 Ft-Lbs). With this torque, the seal will be compressed by about one-third. Maintaining the seal The Exterior 600 has an IP rating of 65: it is protected against dust and can withstand low pressure water jets. To maintain protection against dust and water: 1. Replace any seal that becomes brittle or shows visible signs of wear. 2. Verify that seals are flush with, or protrude slightly above, the surface of the aluminum covers. 3. Verify that cable pass-through fittings are tightened both to the casing and the cable. 4. Tighten the end plates and the lamp access plate with a torque of 6 N.m (4.5 Ft-Lbs). With this torque, the seals will be compressed by about one-third. Cleaning the housing The Exterior 600’s aluminum housing can be cleaned with mild detergents such as those for washing cars. 1. Disconnect the fixture and allow it to cool. 2. Visually check that the seals are in good condition. 3. Rinse off loose dirt with a garden hose or low pressure water spray. 4. Wash the aluminum using a mild detergent and a soft brush or sponge. Do not use abrasive cleaners. 5. Rinse. Changing the mains lead The mains lead may be replaced with a longer or heavier gauge cable if necessary. The pass-through fitting seals around cables from 3.5 to 9.8 mm (5/32 - 3/8 in.) in diameter. 1. Make sure the Exterior 600 is isolated from AC power. Remove the 10 Allen screws from the rear cover plate. Pull off the plate and seal. 2. Remove the 2 screws from the aluminum circuit-board bracket and pull the circuit board out. 3. Unplug the power cable’s brown lead from the back of the main fuse holder. Remove the green/ yellow lead from the grounding bolt located above the ballast. Disconnect the blue lead from the connection block located in front of the transformer. 4. Loosen the large outer nut on the mains lead pass-through fitting. Cut zip ties as necessary and pull the mains lead out of the fixture. Transfer the outer pass-through nut to the new cable and then insert the new cable through the fitting. Pull the cable into the fixture and cut to 52 cm (20 in.) from the inside of the pass-through. 5. Remove 28 cm (11 in.) of outer insulation. Lead the cable between the fuse holder and housing. 6. Install a 6.3 mm (1/4 in.) insulated female spade terminal on the live lead (brown), and plug the lead into the back of the main fuse holder. 7. Install a ring terminal on the ground lead (green/yellow), place the terminal on the grounding bolt over the ballast, and replace the nut. 8. Strip 6 mm (1/4 in.) of insulation from the neutral lead (blue) and screw the lead into the neutral terminal of the connection block in front of the transformer. 9. Replace the printed circuit board. Bundle the wires together as before with zip ties. 10. Verify that both nuts on the pass-through fitting are tight. Check the condition of the seal for the back cover. Replace with a new one (P/N 20600020) if the seal is torn, cracked or brittle. 11. Insert the Allen screws through all holes in the cover and seal. Place the cover firmly against the body. Adjust the straight sides of the seal so that they stick out a little bit, just enough so that you can feel the seal when you run a finger across the joint. 12. Cross-tighten the cover bolts. The correct torque for these bolts is 6 N.m (4.5 Ft-Lbs). With this torque, the seal will be compressed by about one-third. Basic Service and Maintenance 25 appendix a DMX PROTOCOL Start code = 0 DMX channel 1 * If the command is disabled, set channels 3, 4, and 5 (CMY) from 230 to 232. 2 3 4 5 6 7 8 9 (Mode 2 only) 26 Value Percent Function 0 - 19 20 - 49 50 - 112 113 - 127 128 - 147 148 - 167 168 - 187 188 - 207 208 - 217 218 - 227 228 - 237 238 - 247 248 - 255 0-7 8 - 19 20 - 44 44 - 50 50 - 58 58 - 65 66 - 73 74 - 81 82 - 85 85 - 89 89 - 93 93 - 97 97 - 100 Shutter, Strobe, Reset, Lamp On/Off Shutter closed Shutter open Strobe, fast Æ slow Shutter closed Random strobe, fast Random strobe, medium Random strobe, slow Shutter closed Reset fixture* Shutter closed Lamp power on Shutter closed Lamp power off* Note: T ≥ 5 seconds 0 - 255 0 - 100 Intensity 0 Æ 100% 0-255 0 - 100 Cyan White Æ Cyan 0-255 0 - 100 Magenta White Æ Magenta 0-255 0 - 100 Yellow White Æ Yellow 0 - 40 40 - 80 80 - 120 120 - 160 0 - 16 16 - 31 31 - 47 47 - 63 Color Wheel Continuous Scroll White Æ Color 1 Color 1 Æ Color 2 Color 2 Æ Color 3 Color 3 Æ Color 4 161 - 165 166 - 170 171 - 175 176 - 180 181 - 185 63 - 65 65 - 67 67 - 69 69 - 71 71 - 73 Stepped Scroll Color 4 Color 3 Color 2 Color 1 White 186 - 214 215 - 243 73 - 84 84 - 95 Rotation CW, fast Æ slow CCW, slow Æ fast 244 - 247 248 - 251 252 - 255 96 - 97 97 - 98 99 - 100 Random Color (Uses CMY) Random color fast Random color medium Random color slow 0-2 3 - 170 171 - 255 0-1 1 - 67 67 - 100 Beam Shaper Open Beam shaper left Æ right Frost 0 - 255 0 - 100 Zoom Wide Æ narrow 0-2 3 - 245 246 - 248 249 - 251 252 - 255 0-1 1 - 96 96 - 97 98 - 98 99 - 100 Exterior 600 Speed Tracking Fast Æ slow Tracking, no shortcuts (override SCUT ON) Tracking, shortcuts on (override SCUT OFF) Dimmer, CMY, and zoom: fast (no blackout), Color wheel and beam shaper: blackout while moving appendix b TR O U B L E S H O O T I N G Problem One or more of the fixtures is completely dead. Fixtures reset correctly but all respond erratically or not at all to the controller. Fixtures reset correctly but some respond erratically or not at all to the controller. Lamp does not strike. Lamp cuts out intermittently. Probable cause(s) Remedy Fixture not powered on. Check that power is switched on and cables are plugged in. Primary fuse blown (located besides the ballast). Disconnect fixture and replace fuse. Secondary fuse(s) blown (located on PCB inside the fixture base). Disconnect fixture. Check fuses on PCB and replace. The controller is disconnected from the data link. Connect controller. XLR pin-out of the controller does not match pin-out of the first fixture on the link (signal is reversed). Install a phase-reversing cable between the controller and the first fixture on the link. Bad data link connection Inspect connections and cables. Correct poor connections. Repair or replace damaged cables. Data link not terminated with 120Ω termination plug. Insert termination plug in output jack of the last fixture on the link. Incorrect addressing of the fixtures. Check fixture address and protocol settings. One of the fixtures is defective and disturbs data transmission on the link. Bypass one fixture at a time until normal operation is regained. Have the defective fixture serviced by a qualified technician. XLR pin-out on fixtures does not match (pins 2 and 3 reversed). Install a phase-reversing cable between the fixtures. The ballast and transformer settings do not match local AC voltage and frequency. Disconnect fixture. Check ballast and transformer settings and correct if necessary. Lamp missing or blown Install new lamp. Lamp is too hot. Allow lamp to cool for at least 8 minutes. Fixture is too hot. Allow fixture to cool. The ballast and transformer settings do not match local AC voltage and frequency. Disconnect fixture. Check ballast and transformer settings and correct if necessary. Defective fan. Refer to service technician. Troubleshooting 27 appendix c SPECIFICATIONS Physical • • • • Length............................................................................................................................................ 636 mm (25.0 in) Width ............................................................................................................................................. 375 mm (14.8 in) Height ............................................................................................................................................ 421 mm (16.6 in) Weight.............................................................................................................................................48 kg (105.6 lbs) Compatible lamps • • • Osram HSR 575/2............................................................................................................... 1000 h, 6000K, 85 lm/w Philips MSD 575 ................................................................................................................ 2000 h, 6000K, 75 lm/w Philips MSR 575/2.............................................................................................................. 1000 h, 7200K, 85 lm/w Pe rfor m an c e • Light output (6” Fresnel lens, MSR 575/2) ........................................................................................20,000 lumens Thermal • Maximum ambient temperature (Ta) ................................................................................................. 40° C (104° F) • Maximum surface temperature .......................................................................................................... 80° C (176° F) Co ntro l a nd p ro gr a m mi ng • • • • • • Data pin-out ............................................................................................... pin 1 shield, pin 2 cold (-), pin 3 hot (+) Receiver .................................................................................................................................. Opto-isolated RS-485 Setting and addressing .............................................................................................. remotely w/ MPBB1 Uploader Protocols ................................................................................................. USITT DMX-512 (1990), Martin RS-485 DMX speed control ................................................................................................................ tracking and/or vector DMX channels......................................................................................................................................................8-9 Connections • • • AC input...................................................................................................... 3 m (9.8 ft.) trailing cable w/o cord cap Data input ....................................................................................4.5 m (14.7 ft.) trailing cable w/ 3-pin XLR male Data output ...............................................................................4.5 m (14.7 ft.) trailing cable w/ 3-pin XLR female Maximu m pow er and current • • • • • • 28 @ 200 V, 50 Hz..................................................................................................................................... 640 W, 4.0 A @ 230 V, 50 Hz..................................................................................................................................... 670 W, 3.6 A @ 245 V, 50 Hz..................................................................................................................................... 660 W, 3.4 A @ 208 V, 60 Hz..................................................................................................................................... 640 W, 4.0 A @ 227 V, 60 Hz..................................................................................................................................... 670 W, 3.6 A @ 277 V, 60 Hz (requires 277 V power supply)................................................................................... 725 W, 3.3 A Exterior 600 Design standards • • • • Canadian safety.......................................................................................................................... CSA C22.2 NO 166 EU EMC ......................................................................................................................................50 081-1, 50 082-1 EU safety .....................................................................................................................EN 60598-1, EN 60598-2-17 US safety........................................................................................................................................... ANSI/UL 1573 Construction • • • • • • Housing....................................................................................................................................... extruded aluminum Finish .................................................................................................................. Anodized, natural aluminum color Front glass...................................................................................................................... 6 mm anti-reflection coated Base ........................................................................................................................................... 6 mm stainless steel Housing-to-base attachment ............................................................. 2 stainless steel M10 bolts, A2 DIN 933, 18.8 Protection factor ................................................................................................................................................IP 65 Installation • • • • • • Mounting points.............................................................................. 4 curved 10 mm (3/8 in) slots on 85 mm radius Orientation ........................................................................................................................................................... any Swivel .............................................................................................................................................................+/- 25° Tilt (pedestal mounted)...................................................................................................................................+/- 40° Minimum distance to combustible materials........................................................................................... 1 m (39 in) Minimum distance to illuminated surfaces.............................................................................................. 1 m (39 in) Optional accessories • • • • • • • Narrow angle 8” Fresnel lens ............................................................................................................. P/N 91610014 Wide angle diffuser “lens” kit............................................................................................................. P/N 91610011 Narrow angle 8” Fresnel lens ............................................................................................................. P/N 41204010 MPBB1 Uploader ............................................................................................................................... P/N 90758410 MC-X Controller, 220 - 245 V / 50 Hz............................................................................................... P/N 90718200 MC-X Controller, 110 - 120 V / 60 Hz............................................................................................... P/N 90718300 MAC 600 Diffusion/color filter adaptor ............................................................................................. P/N 91611001 Selected spare parts • • • • • • • • • Exterior 600 seal kit (8 pcs.)............................................................................................................... P/N 91611017 Seal for alu. gable, Exterior 600 (4 pcs. included in seal kit)............................................................. P/N 20600020 Seal 1 for front lens, Exterior 600 (2 pcs. included in seal kit) .......................................................... P/N 20620060 Seal for lamp replacement, Exterior 600 (1 pc. included in seal kit) ................................................. P/N 20620050 Seal for bracket, Exterior 600 (1 pc. included in seal kit) .................................................................. P/N 20600010 Main fuse ...................................................................................................6.3 A / 250 V time delay, P/N 05020020 Fuse F601 .................................................................................................5.0 A / 250 V time delay, P/N 05020018 Fuse F602 ..................................................................................................4.0 A / 250 V time delay, P/N 05020016 Fuse F603 ..............................................................................................0.315 A / 250 V time delay, P/N 05020004 To r q u e s • • • End plate Allen bolts ...................................................................................................................6 N.m (4.5 Ft-Lbs) Lamp access plate........................................................................................................................6 N.m (4.5 Ft-Lbs) Front glass ring ................................................................................................................. 3 - 4 N.m (2.2 - 3 Ft-Lbs) Specifications 29 6WDUWýFRGHý ýí ,PSOHPHQWHGýIURPý&38ýVRIWZDUHýYHUVLRQýíïê 25 C HANNEL L I G H T 50 S HUTTER 1 2 closed Exterior 600 DMX Protocol 75 100 125 150 B/O S TROBE fast closed 200 R ANDOM S TROBE ← open 175 med 225 B/O 250 R ESET B/O L AMP B/O L AMP O FF * ON * > 5 sec. slow D IMMER 10 20 30 40 open 50 60 70 80 90 3 0% C YAN * 100% C 4 0% M AGENTA * 100% O L O R 5 0% YELLOW * 100% C ONTINUOUS R OTATION R ND . C OLOR f m s C ONTINUOUS C OLOR S CROLL 6 (1) CTC, DMX 40 (0) white, DMX 0 25 B E A M 7 0° (open) 8 flood 50 (2) red, DMX 80 75 (3) green, DMX 120 100 125 4 S TEPPED S CROLL 3 2 1 0 cw ← 175 200 150 B EAM S HAPER ccw → 225 90° 250 F ROST spot Z OOM 10 20 30 40 S P E E D (4) blue, DMX 160 50 60 70 80 90 E FFECTS S PEED T 9 (mode 2 only) T 25 50 75 100 dimmer, CMY, zoom ← TS TF color wheel, beam shaper ← TS TF «·» 125 150 175 200 225 f 250 * Set CMY from 230 to 232 to override disabled function. T = tracking mode (0-2 & 246-251) S = shortcuts off (246-248) F = shortcuts on (249 -251) «·» = blackout speed (252-255) ← = variable speed, points to fast