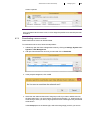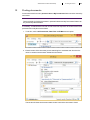
1
T-SYSTEMS MULTIMEDIA SOLUTIONS ADMINISTRATION MANUAL DOCULIFE DESKTOP 5.6 DATE: 16.03.2015 © Document Future AG 03/2015 Document Future AG holds the copyright to this documentation. No part of this documentation may be reproduced, regardless of the method used (e.g., printing, photocopy, microfilm), without previous written consent from Document Future AG. No part of this documentation may be processed, copied, or distributed with the use of electronic systems without previous written consent from Document Future AG. http://www.documentfuture.com Administration manual Desktop Table of contents iii Table of contents 1 Introduction 5 2 Formatting and layout used throughout this documentation 6 3 General security information 7 3.1 3.2 3.3 Anti-virus protection Saving passwords Using mobile devices 7 7 7 4 Administrator tasks 8 5 Terms and definitions 9 5.1 5.2 5.3 5.4 5.5 Tenant Solution Files Register Document 9 9 10 10 10 6 Open System Configuration 11 6.1 6.2 6.3 6.4 Overview Templates and User Management Common update settings Display and manage add-ins 11 11 13 13 7 Permissions concept 14 7.1 7.2 7.3 7.4 Overview of the permissions concept Types of access permissions Users Groups 14 15 16 16 8 Managing users 18 8.1 8.2 8.3 8.4 8.5 8.6 8.8 8.9 Requirement Adding users User types Guidelines for strong passwords Assigning management information Managing users 8.6.1 Resetting passwords 8.6.2 Changing the groups for a user 8.6.3 Sharing scanning activation files 8.6.4 Providing an additional user account for a user 8.6.5 Editing user information Closing a user account 8.7.1 When to close an account 8.7.2 Deactivating a user account 8.7.3 Reactivating a user account 8.7.4 Deleting a user account Overview of technical users Displaying technical users 18 18 22 22 22 24 24 26 27 28 30 31 31 31 33 34 35 36 9 Managing groups 37 9.1 9.2 9.3 9.4 9.5 Overview Adding a user group Showing the members of a group Displaying group memberships Groups used to provide access permissions 37 37 40 40 41 8.7 iv Table of contents 9.6 9.7 Administration manual Desktop Technical groups Deleting groups 42 44 10 SECplus / SECmezzanine key administration 45 10.1 10.2 10.3 10.4 Overview Locking tenants Granting permissions for locking a tenant Changing keys 45 45 47 48 11 Inboxes 51 11.1 11.2 11.3 11.4 Overview Personal inboxes Group inboxes Managing inboxes 11.4.1 Adding inboxes to the inbox overview 11.4.2 Opening and working with a user’s inbox 11.4.3 Group inbox 51 51 51 52 52 53 54 12 Finding documents 57 13 Solution administration 58 13.1 13.2 13.3 Overview Saving templates in the filesystem Creating searches 13.3.1 Creating searches 13.3.2 Making available to all users Choice lists 13.4.1 Overview 13.4.2 Opening a choice list 13.4.3 Changing the label for an index value 13.4.4 Adding index values 13.4.5 Editing and adding nodes 13.4.6 Deleting index values and nodes Updating templates Solution updates Saving and publishing changes Revoking published templates Feature set 13.9.1 Feature set overview 13.9.2 Adding a feature set 13.9.3 Feature set 58 58 60 60 60 61 61 61 62 63 64 66 67 68 70 72 72 72 72 73 14 Audit 74 14.1 14.2 14.3 Overview Searching for events Calls for events 74 75 76 15 Administration rights 79 15.1 15.2 Administrator Granting management permissions 79 79 16 Index 81 13.4 13.5 13.6 13.7 13.8 13.9 Administration manual doculife Desktop 1 1 Introduction 5 Introduction This documentation describes how to manage a doculife tenant with Desktop Version 5.6. It is intended for end-user administrators. In order to be able to understand this documentation, the user must be familiar with the use of doculife and with the user manual for doculife Desktop. Please note: The administrator functions that are available will depend on the solution being used and the extent of your administrator rights. If you have any questions, please contact doculife Support. All the examples and screenshots in this manual are based on the default configuration for doculife and therefore may not be an exact match for your actual setup. For additional information on structures, metadata, the permissions concept, and customordered parameter configurations, please refer to the solution descriptions for the solutions you are using. 6 2 2 Formatting and layout used throughout this documentation Administration manual doculife Desktop Formatting and layout used throughout this documentation This section goes over the most important formatting and layout choices used throughout the online help. The purpose of these choices is to enable you to get started quickly. Buttons, icons, menu commands, keys, window titles, messages, and prompts These are all shown in bold. In addition, key names are written in uppercase letters (e.g., ENTER). Notes Notes contain additional information and are indicated as follows: Please note: This is a note. Definitions Definitions for terms and structure specifications are indicated as follows: The definition for the term “print server” would be provided here. Tip Useful shortcuts, additional options, and special settings are indicated as follows: Tip: This is a tip. Important “Important:” is used to point out information that is important for the process or workflow in question or for ensuring that an instruction can be carried out. Examples Examples of individual functions are indicated as follows: Example: This is an example. Instructions / step-by-step instructions When there are multiple instructions / step-by-step instructions, they will be numbered in ascending order. Instructions that only require one single action are indicated with the arrow icon. Administration manual doculife Desktop 3 3 General security information 7 General security information This section contains general security information concerning the use of doculife. Make sure to read it carefully. 3.1 Anti-virus protection doculife does not provide any additional anti-virus protection. This means that documents and e-mails transferred todoculife will not be checked for malware in doculife. Make sure to check all documents and e-mails for malicious code on the computer before storing them in doculife. Attention: risk of data loss Use an anti-virus product that monitors your data, e-mail, and Internet communications and protects your computer from attacks. 3.2 Saving passwords Due to security reasons, users have to enter their password every time they log in to their doculife account (i.e., connect to the system). It is possible to configure the system in such a way that users will be able to save their password for a tenant. Attention: risk of misuse of data Saving login information can enable unauthorized users to access your data. Please make absolutely sure that saving login information is allowed by your company’s security policies before doing so. 3.3 Using mobile devices Mobile devices are more vulnerable to malware and spyware attacks. Users are responsible for the security of their own devices. Attention: risk posed by unauthorized data mining and access Make sure to only load apps from trustworthy sources on your device. Use appropriate software designed to protect you from spyware and similar attacks. 8 4 4 Administrator tasks Administration manual doculife Desktop Administrator tasks doculife tenants are managed by the Administrator user. Administrators activate doculife tenants and load the desired solution. After setup, managing a doculife tenant includes: Creating and managing users and user groups Creating and managing group inboxes Maintaining choice lists and templates Loading new solutions and updating existing solutions Please note: You account must be associated with the corresponding tenant in order for you to be able to use the various administrator permissions. Administration manual doculife Desktop 5 Terms and definitions 5.1 Tenant 5 Terms and definitions 9 In doculife, tenants are units that are organizationally and technically independent of each other. Please note: Throughout this document, the term “tenant” is used the same way as it is used in IT. It describes how an organizational unit is mapped in doculife. In doculife, the processing of files, registers, and documents for the individual tenants is kept strictly separate, as is the data storage for each tenant. Moreover, all access is based on tenant-specific access permissions. The following applies when it comes to tenants: The user interfaces, structures, search templates, search result lists, choice lists, and index values for a tenant’s files, registers, and documents are independent of other tenants A tenant’s user and permissions management is independent of other tenants Languages can be selected in a tenant-specific and user-specific way One or more solutions can be run for a single tenant Specific recognition solutions can be optionally integrated for a tenant 5.2 Solution A solution is a DMS application installed specifically for a tenant. The following applies to solutions: One or more solutions can be run for a single tenant independently of each other Each solution will feature its own permissions scheme File, register, and document index fields; search templates; search result lists; and choice lists can be individually modified and expanded for each solution. In each of the solutions for a tenant, the repository can be independently structured with files, registers, and documents independently of the tenant’s other solutions The administrator is the one who selects and loads solutions the first time a tenant is activated. Please note: For more information on loading solutions, please refer to the “Initial activation” section in the doculife – Getting started documentation. Loaded solutions can be modified by: Having the administrator provide new searches, templates, and choice list contents Updating the solution with custom modifications made and provided by the solution’s vendor 10 5.3 5 Terms and definitions Administration manual doculife Desktop Files In solutions installed for a doculife tenant, documents are stored in files (folders), which can be subdivided into registers. This means that documents with various formats (e.g., PDF, Office, e-mails) can be grouped together and stored in a file and its registers. Documents can be stored in files either without a specific structure or following a specific storage structure. In fact, registers can be used to create as many hierarchical storage structures as necessary in a file. Files have index fields, which can be used to store index values (metadata) that describe the files. Files can be assigned to a variety of file types. Each file type has a series of custom index fields that depend on the intended use of the corresponding file within the business. Any number of file types can be used in a solution. 5.4 Register Registers (subfolders) are used to subdivide files in order to store documents that logically belong together (in terms of format and/or content) in their own separate location. In addition, registers can contain their own registers. Registers have index fields that can be used to store index values (metadata) describing the corresponding register. Registers can be assigned to various register types. Each register type has a series of custom index fields that depend on the register’s intended use. Any number of register types can be used in a solution. 5.5 Document A document is an individual information object stored for a specific doculife tenant. doculife supports both digitized objects and objects originally created in an electronic format. Documents have index fields that can be used to store index values (metadata) describing the corresponding document. In order to specify its type in greater detail, a document can be assigned to a specific document type. This assignment will make it possible to use index fields specific to the document type. Any number of document types can be used in a solution. Administration manual doculife Desktop 6 Open System Configuration 6.1 Overview 6 Open System Configuration 11 The functions available for managing users, groups, and solutions can be accessed through Settings, System Configuration. 6.2 Templates and User Management Current profile The name of the tenant / profile with which you are currently logged in Published Update from: The date and time of the latest published template update Last complete update: The date and time of the most recent complete update Synchronize to Server Function for manually updating all templates and choice lists. 12 6 Open System Configuration Administration manual doculife Desktop Please note: It is recommended to have the program run updates automatically and to manually synchronize the templates and choice lists only when necessary. User Management Opens the menu for managing users and groups. Share scanning activation Generates the scanning key required in order to activate the direct scanning integration feature. Editing choice lists Opens the dialog box used to edit choice lists. Thesaurus Management Opens a dialog box that can be used to edit and manage the thesaurus (optionally available). Configuration Tool Opens a configurator (optionally available) for editing templates. Show Configurator in toolbar Adds an icon to the toolbar that can be used to start the configurator (optionally available). Save Templates to Filesystem Opens the dialog box used to save templates locally. Synchronize Templates from Filesystem Opens a dialog box that can be used to synchronize template changes and additions made locally with templates being used actively. Save/Publish Templates Opens a dialog box that can be used to save and publish edited templates. Remove published templates Undoes the last template publication. Load solution Opens a dialog box that can be used to load a solution from the filesystem. Add feature set for account Function for loading a tenant-specific configuration. This configuration will provide tenant parameter configurations that are independent of the solutions being used. Delete feature set for account Function for deleting a tenant-specific configuration. Administration manual doculife Desktop 6.3 6 Open System Configuration 13 Common update settings Update mode Every time Desktop starts, the program will check whether there are any new or changed templates on the server that need to be transferred and used. The following options are available: Automatic: When starting Desktop, the program will automatically check whether there are any new templates on the server and load them. This is the recommended setting. Always: The program will check all the settings on the server at cyclic intervals. This may take a few minutes. Manual: The program will not check automatically whether there are any new or changed templates on the server. If you select this option, updates will have to be carried out manually. Recommended for experienced users only. 6.4 Display and manage add-ins This list shows the add-ins that have been installed. To install an add-in, click on Install Add-In and select the add-in (*AddIn.zip) in the Windows File Explorer. To uninstall an add-in, right-click on it and then click on Uninstall. Please note: Add-ins required in order for Desktop to work properly cannot be uninstalled. 14 7 Permissions concept Administration manual doculife Desktop 7 Permissions concept 7.1 Overview of the permissions concept doculife features an easy-to-understand, fine-grained, role-based permissions concept for files, registers, and documents that is designed with real-life applications in mind. In it, data access and editing permissions are defined in detail using a permissions scheme and are then managed at the group level. Data access and editing permissions Access permissions for editing files, registers, and documents (data access and editing permissions) are grouped together and provided for user groups (roles). Users are assigned to these groups based on their responsibilities and authorization levels and are assigned permissions (data access and editing permissions) for their work in the DMS. Confidentiality levels The required confidentiality levels and the extent of the data access and editing permissions for a user group are determined based on the specific existing security requirements for the documents that will be stored in doculife. The following are determined during the process: Who is allowed to view which files and documents Who is allowed to edit these files and documents and to what extent they are allowed to do so The following confidentiality levels will be defined in a doculife standard solution by default: Confidential: For confidential files and documents Default: For day-to-day business files and documents Public: For generally accessible files and documents Only me: For files and documents to which only you, as the author, will have access at first, but for which you can “unlock” access for other users in a targeted manner. Permissions scheme The system-side relationships between the defined confidentiality levels for files, registers, and documents and the various user groups are referred to as a “permissions scheme.” A per- Administration manual doculife Desktop 7 Permissions concept 15 missions scheme represents a solution’s permissions system in summarized form and is the basis for managing users and groups. 7.2 Types of access permissions The following types of access permissions are available in doculife: Permission Description Create (C) Creating files Read (R) Searching, browsing (viewing contents), viewing properties, viewing attachments, showing permissions, viewing document contents, showing document versions Author Document (A) Creating documents Write (W) Editing properties, creating registers, adding documents and links, checking documents out/in, editing document contents Delete (D) Deleting files, removing links, removing / deleting documents Security (S) Changing permissions, taking over ownership The permissions assigned to a group are grouped together and shown as follows in an object’s properties (Properties, Access Rights, Access Rights column): Access permission Description of permissions Read access Searching, browsing (viewing contents), viewing properties, viewing attachments, showing permissions, viewing document contents, showing document versions In addition to the rights that come with read access: Read/write access Read / Write / Delete Editing items, changing item properties, checking documents in and out, creating and deleting links, creating new items In addition to the rights that come with read/write access: Delete Items Full access In addition to the rights that come with read/write/delete access: Setting and modifying access permissions, taking over ownership permissions for an item 16 7.3 7 Permissions concept Administration manual doculife Desktop Users doculife distinguishes between: Business users Technical users Business users Business users are people who are assigned to one or more user groups based on their responsibilities and authorization levels (role). If a user is added to a user group in the User Management screen, all the permissions assigned to that group in the permissions scheme will be assigned to the user automatically. In addition to the permissions directly associated with the user group, the user will also be assigned all the (indirect) permissions for the groups to which the user group belongs. Please note: Users should be assigned to a user group that corresponds to their role in the business process as set out in the permissions concept. The process owner in the relevant company is responsible for selecting the user group. A user can be a member of multiple user groups, including user groups from more than one solution. Please note: When a doculife tenant is deployed, no business users (users) other than the Administrator user will be set up. Do not change the technical groups to which the administrator is assigned by default, as doing so may mean that the permissions required for administrative tasks may not be available in certain circumstances. Among the various settings for a user account, there is the option of defining a user or user group with management permissions for the account. If a user or user group is given management permissions for a user account, only the Administrator user and the user / user group members with the aforementioned management permissions will be able to add the user account to groups. Important: Special administrator rights are required in order to be able to manage users. Please refer to the Administration rights section as well. Technical user Technical users provide system functions that are available on all the solutions for a tenant. Please note: When a doculife tenant is deployed, the system will set up all technical users automatically. 7.4 Groups doculife distinguishes between: User groups (roles) Groups used to provide access permissions Technical groups Administration manual doculife Desktop 7 Permissions concept 17 User groups Users are assigned to a user group based on their responsibilities and authorization levels (role). When a user is assigned to a user group, the user receives the group’s permissions (data access and editing permissions) for working in the DMS. This means that each user group is used to group together all the users who need the same data access and editing permissions for files, file types, registers, and documents belonging to a specific confidentiality level. The naming syntax for user groups is as follows: Solution assignment information or solution-specific code Information on the access permissions’ scope or a role name Code Role, R, or User for “user group” Please note: To find out which user groups are available, please refer to the description for your solution. There is the option of defining a user or user group with management permissions for each user group. If a user or user group is given management permissions for a user group, only the Administrator user and the user / user group members with the aforementioned management permissions will be able to add users to the group. Groups used to provide access permissions Groups used to provide access permissions are also referred to as “permission groups.” The naming syntax for permission groups is as follows: Solution assignment information or solution-specific code Information on the access permissions’ scope and/or a solution-specific extension Code G for “group” Please note: To find out which permission groups are available, please refer to the description for your solution. There is the option of defining a user or user group with management permissions for each permission group. If a user or user group is given management permissions for a permission group, only the Administrator user and the user / user group members with the aforementioned management permissions will be able to add users or groups to the group. Technical groups Technical groups provide essential permissions for internal system processes and the groups associated with them. 18 8 Managing users 8 Managing users 8.1 Requirement Administration manual doculife Desktop In order for you to be able to manage a tenant’s users, your account must be associated with the corresponding tenant. Please note: Only administrators are allowed to manage users. The administrator creating and managing users is responsible for documenting their creation and management. 8.2 Adding users Follow the steps below to add a new user: 1. In Desktop, open the Users management screen by clicking on Settings, System Configuration, User Management. 2. Select the Users radio button and then click on Add... Administration manual doculife Desktop 8 Managing users 19 3. You will be able to enter the new user’s information in the dialog box that appears. 4. Select a user type. Important: When selecting the user type, keep the licenses available to you in mind. 5. Enter the following information for the new user: Login:The user’s login name Important: Spaces and special characters (ä ö ü * ? : < > \ /) are not permitted in the login name. Technical user names cannot be used as a login name. If signature-based authorization is used, the label used for the owner when the signature was issued must be used as the login name. Name: The user’s display name in doculife Description: Optional Managed by: optional (if necessary, select the corresponding management information for the user. Please refer to the “Assigning management information” section) Password: The user’s password (not used if a signature is used for authorization 20 8 Managing users Administration manual doculife Desktop purposes) Repetition: Enter the user’s password again (not used if a signature is used for authorization purposes) Please note: Make sure that the password follows the guidelines for strong passwords. 6. When you are done, click on OK. If the Show password characters check box is enabled, the password’s characters will be shown in order to make it easier to ensure that the passwords match. If the Send login data to user check box is enabled, the login information will be created after this dialog box is closed so that it can be sent. 7. Send the login information or save it so that you can send it later on. The login information can be printed out, saved in PDF format, or sent by e-mail. Once you are done, close the window with the login information. If you choose to send the information by e-mail, an activation file will be generated for the user account at the same time and will be provided so that you can send it. Please note that you can send the activation file, login information, and password separately. 8. To assign data access and editing permissions to the user, assign the user to one or more user groups. Simply click on OK in the prompt that appears to this effect. 9. Select the user and enter the name of the group to which you want to add the user into the lower search box. It is not necessary to enter the whole name, i.e., entering part of it will be enough. When you do this, all groups with a name containing the text you entered will be shown. Administration manual doculife Desktop 8 Managing users 21 In the Groups pane on the bottom right, select the relevant user group(s). Then click on the left arrow icon to add the group(s) to the Member of groups pane. Please note: When assigning a user to a user group, make sure to keep the permissions scheme in mind. To find out which user groups are available and what their permissions are, please refer to the description for your solution. 10. Click on Apply to confirm the changes you have made and close the User Management and Settings screens by clicking on OK. 22 8.3 8 Managing users Administration manual doculife Desktop User types Whenever you create a user, you will have to assign him or her to a user type. The table below shows all available user types. User type Description Full user User who accesses the program using Desktop Full user & mobile User who accesses the program using Desktop and the mobile client Web user User who only accesses the program using WebClient Web user & mobile User who accesses the program using WebClient and the mobile client Web user (read-only) User who accesses the program using WebClient, but with read permissions only Web user (read-only) & mobile User who accesses the program using WebClient and the mobile client, but with read permissions only Infrequent user User who accesses doculife only occasionally Infrequent user & mobile User who uses the mobile client to access doculife only occasionally Infrequent user (readonly) User who accesses doculife only occasionally and with read permissions only Infrequent user (readonly) & mobile User who uses the mobile client to access doculife only occasionally and with read permissions only Self- service user User who is only allowed to use the self-service mode Self- service user User who is also allowed to use the self-service mode on the mobile client Important: When selecting a user type, keep the licenses available to you in mind. 8.4 Guidelines for strong passwords Passwords must meet the following criteria: A password must not be blank. It must have at least eight characters. The password must be made up of at least three different character groups (lowercase letters, uppercase letters, numbers, symbol characters). Especially strong passwords will include characters from all four groups. The password must not be one of the last seven passwords used. 8.5 Assigning management information Among the various settings for a user account, there is the option of defining a user or user group with management permissions for the account. If a user or user group is given management permissions for a user account, only the Administrator user and the user / user group members with the aforementioned management permissions will be able to add the user account to groups. To add this management information to a user account, follow the steps below: Administration manual doculife Desktop 8 Managing users 1. If: You are creating a new user, click on Select user or group. You are adding management information to an existing user account, select the account and click on Management. 23 24 8 Managing users Administration manual doculife Desktop 2. In the window that appears, enter the name of the user or user group that will manage the user. 3. Click on Search. The user / user group will be shown. 4. Select the user / user group and confirm your selection by clicking on OK. 5. Continue with the user creation process or click on Apply to confirm the changes you have made and close the Usersmanagement window by clicking on OK. 8.6 Managing users 8.6.1 Resetting passwords If a user forgets their password, you can use this function to provide the user with a new temporary password. To do so, follow the steps below: 1. Open the Usersmanagement screen by clicking on Settings, System Configuration, User Management. 2. Select the Users radio button. Enter the user’s name into the search box and click on Show. The user you are looking for will be shown. Administration manual doculife Desktop 8 Managing users 25 3. Select the user by clicking on them. Click on Password or Login data... 4. In the password dialog box that appears, enter the new password and then click on OK. If you opened the dialog box by clicking on Login data, the login data will be generated in such a way that it will be ready to be sent out. 5. In the prompt that appears, click on OK. Please note: When entering a new password, the password must not be one of the last seven passwords used. Notify the user of the fact that their password has been changed and to provide them with the new password, making sure to observe your company’s password rules. 26 8.6.2 8 Managing users Administration manual doculife Desktop Changing the groups for a user To change the groups for a user, follow the steps below: 1. Open the Usersmanagement screen by clicking on Settings, System Configuration, User Management. 2. Select the Users radio button. Enter the user’s name into the search box and click on Show. The user you are looking for will be shown. 3. Select the user by clicking on them. The Member of groups pane below will show the groups to which the user belongs. 4. Enter the name of the group to which you want to add the user into the lower search box. It is not necessary to enter the whole name, i.e., entering part of it will be enough. When you do this, all groups with a name containing the text you entered will be shown. In the Groups pane on the bottom right, select the relevant user group(s). Then click on the left arrow icon to add the group(s) to the Member of groups pane or remove the groups you do not want from the pane by clicking on the right arrow icon. Administration manual doculife Desktop 8 Managing users 27 5. Click on Apply to confirm the changes you have made and close the Usersmanagement window by clicking on OK. 8.6.3 Sharing scanning activation files In order to be able to use the direct scanning integration feature in Desktop, the scanning integration feature must first be activated. If the scanning integration feature was not automatically activated while the user account was activated, it will be necessary to activate it separately. To do this, the corresponding user will have to import a scanning key after clicking on Settings, Profiles, Load Scanning login data. These scanning keys can be generated by clicking on Settings, System Configuration, Share scanning activation. 1. Click on Settings, System Configuration, Share scanning activation. 2. Save the generated *.iasc activation file. 3. Close the Settings window by clicking on OK. 4. Send the file to the user so that they can import it. 28 8 Managing users Administration manual doculife Desktop Please note: If the Share scanning activation function is disabled (after you change computers, for example), you can re-enable it by loading the activation key used to activate the tenant. 8.6.4 Providing an additional user account for a user If, for example, you work with doculife both as an administrator and as part of your normal work, it is recommended to use an additional user account for non-administrative tasks. All you have to do in order to perform the tasks corresponding to the administrator role and to the “normal user” role is to set up an additional user account in the existing setup. 1. Administrators only Give the existing account a name that clearly indicates that it is an administrator account. To do this, go to Settings, Profiles, and select the existing account. 2. Click on Change and append the word “administrator” to the account name and then save the change by clicking on OK. 3. Go to the User Management screen and create a new user. Then assign the user to the relevant user group(s) based on the user’s functional role within the business. 4. In Desktop, go to Settings, Profiles and click on Add... Administration manual doculife Desktop 8 Managing users 29 5. In the dialog box that appears, enter your login information and click on Login or click on Activate a new account and activate the user account with the corresponding activation file. 30 8 Managing users Administration manual doculife Desktop 6. Close the Settings window by clicking on OK. 7. You will now be able to select the additional user account in the lower left pane in Desktop. 8.6.5 Editing user information The user information entered when creating a user can be edited at any time. The following can be changed: The type of user Name Description To change the user information for an account, follow the steps below: 1. Open the Usersmanagement screen by clicking on Settings, System Configuration, Usersmanagement. Enter the user’s name into the search box and click on Show. The user you are looking for will be shown. 2. Select the user by clicking on them and click on Edit. 3. You will be able to make the changes you want in the next window. Administration manual doculife Desktop 8 Managing users 31 4. To confirm your changes, click on OK. 8.7 Closing a user account 8.7.1 When to close an account Close a user account: When a user leaves the organization in an organized fashion: After the user’s tasks and documents are transferred to their successor. Immediately as soon as you become aware of a user leaving due to unforeseeable circumstances. Immediately whenever there is an “imminent danger situation” related to the user. 8.7.2 Deactivating a user account Please note: Before deactivating a user account, check to make sure that every single step required in order to prepare for deactivating the account has been completed. Before deactivating the user account, take control of the account and monitor the whole process. Remove the user from all user groups. Follow the steps below to deactivate a user account: 1. In Desktop, open the Users management screen by clicking on Settings, System Configuration, User Management. 2. Call up the user you want and take control of the user account by resetting its password. 3. Log in with the new login information. 32 8 Managing users Administration manual doculife Desktop 4. Check the contents in the user’s personal inbox. Forward these contents to the user’s replacement if necessary or move them to their final storage location. Once you are done, empty the recycle bin completely. 5. Check whether the user still has documents checked out. If possible, check these documents back in from the user’s workstation or cancel the checkout. 6. Check whether there are any tasks that have not been completed or that are currently pending under Tasks. Find out who will be responsible for completing these tasks. 7. Check whether there is any data stored in the My Documents folder. If there are any documents in it, find out what should be done with them. Once you are done, empty the folder completely. 8. Check the user’s recycle bin. Find out whether any documents in it are still needed or whether they should be permanently deleted. Restore any documents that are still needed and delete all others. Once you are done, empty the recycle bin completely. 9. Remove all links from the user’s My Workplace and library. 10. Go to Settings, Inbox, Settings and disable the option allowing the inbox to receive emails. Disable the option allowing the inbox to be used for external forwarding. Empty the list of whitelisted forwarding and sender addresses. 11. Go to Settings, Inbox, Settings and delete all the group inboxes to which the user had access. 12. Close the user account, log in as an administrator, and open the Usersmanagement screen. 13. Call up the user’s account and remove it from all groups. 14. Click on Deactivate. 15. In the prompt that appears, click on OK. 16. Click on Apply to confirm the changes you have made and close the User Management and Settings screens by clicking on OK. The user will be shown as being deactivated the next time the Usersmanagement Administration manual doculife Desktop 8 Managing users 33 screen is opened. Please note: Once you deactivate the user account, it will no longer be possible to access their personal workplace. 8.7.3 Reactivating a user account Deactivated user accounts can be reactivated. To reactivate a user account, follow the steps below: 1. In Desktop, open the Users management screen by clicking on Settings, System Configuration, User Management. 2. Call up the deactivated user account you want and click on Reactivate. 3. In the prompt that appears, click on OK. 4. Select the user and enter the name of the group to which you want to add the user into the lower search box. It is not necessary to enter the whole name, i.e., entering part of it will be enough. When you do this, all groups with a name containing the text you entered will be shown. In the Groups pane on the bottom right, select the user group(s) to which you want to 34 8 Managing users Administration manual doculife Desktop add the user. Then click on the left arrow icon to add the group(s) to the Member of groups pane. 5. Click on Apply to confirm the changes you have made. 6. Edit the user data for the account if necessary. Click on Edit to open the corresponding dialog box. Click on OK to confirm the changes you make. 7. If necessary, select new management information for the user. To do so, click on Manage. Enter the name of the user or user group that will manage the user into the search box. Click on Search. The user / user group will be shown. 8. Select the user / user group and confirm your selection by clicking on OK. 9. Assign the user a new password. Click on Password or Login data... In the password dialog box that appears, enter the new password and then click on OK. Notify the user of the fact that their login data has been changed and provide them with the new data. 10. Close the Usersmanagement window by clicking on OK. 8.7.4 Deleting a user account Please note: Deleting user accounts is not recommended for doculife installations in which BusinessOwnerG has not been implemented.In general, it is recommended to only delete user accounts if they have never been used before. To delete a user, follow the steps below: Administration manual doculife Desktop 8 Managing users 35 1. In Desktop, open the Users management screen by clicking on Settings, System Configuration, User Management. 2. Call up the user account you want. Important: Make sure that the user account has not been used yet. If the user account has already been used, carry out all the steps required in order to deactivate the user (please refer to the “Deactivating a user account” section) before deleting the account. 3. Select the user account and click on Delete. 4. In the prompt that appears, click on OK. 5. Close the User Management window by clicking on OK. 8.8 Overview of technical users Technical users provide system functions that are available on all the solutions for a tenant. The following technical users are used in doculife: Name Description Audit Audit/event service - Logs application events triggered by users and technical users in the audit EmailService E-mail service – Runs the e-mail-based functions available in the DMS Export Export service - Provides contents for full-text searches Import Import service – Imports the files and metadata delivered by the IMA system components and through third-party system web services into the DMS MDI MDI service – Processes information delivered through web services 36 8 Managing users Name Administration manual doculife Desktop Description (Master Data Integration interface) OSAdmin Technical administration user SystemService System service for archiving processes TempAccess Automatically enables temporary access when the latter is granted; not used indoculife as of this writing Template Technical user for managing templates u1 - un Upload user 1 to n Please note: When a doculife tenant is deployed, the system will set up all technical users automatically. Technical users cannot be managed using the Usersmanagement screen. 8.9 Displaying technical users To have the system display technical users as well, enable the Show also technical users and groups option in the User Management screen. Important: If you enable this option, business users and technical users will both be shown together. Administration manual doculife Desktop 9 Managing groups 9.1 Overview 9 Managing groups 37 In order to make the task of managing groups easier, users need to be added to one or more user groups based on their role. User groups receive permissions by belonging to one or more groups used to provide access permissions (permission groups). Permission groups get their access permissions from the technical groups to which they belong. When a user is assigned to a user group or a group is assigned to another group, all the permissions defined in the permissions scheme will be assigned to the user / to the first user group automatically. When a user or user group is assigned to a user group, the user / the first group will not only become a member of the user group to which it has been assigned (direct membership), but will also inherit any memberships corresponding to that user group. In other words, the user / user group will also become a member of the groups to which the parent user group belongs (indirect membership). 9.2 Adding a user group Additional user groups can be added to solutions. Please note: Make sure to add new user groups only in accordance with the permissions system corresponding to the solution being used. If you have any questions, please contact your solution vendor or doculife Support. Follow the steps below to add a user group to a solution: 1. Open the User Management screen by clicking on Settings, System Configuration, User Management. 2. Select the Groups radio button and click on Add... 3. In the dialog box that appears, enter the information required in order to create the group. 38 9 Managing groups Administration manual doculife Desktop Name: Name of the group Please note:Spaces and special characters (ä ö ü * ? : < > \ /) are not permitted in group names. Add code letter R (for user groups) at the end of the name. Complete Name: The group’s display name in doculife Description: Optional Managed by: Management information - optional 4. Close the dialog box by clicking OK. 5. To assign data access and editing permissions to the group, select the group and then enter the name of the group to which you want to add the original group into the lower search box. It is not necessary to enter the whole name, I.e., entering part of it will be enough. When you do this, all groups with a name containing the text you entered will be shown. To have the program also show technical groups, enable the Show also technical users and groups option. Please note: If you enable this option, business groups and technical groups will both be shown together. In the Groups pane on the bottom right, select the user group(s) to which you want to add the group. Then click on the left arrow icon to add the group(s) to the Member of groups pane. Click on Apply to confirm your selection. Administration manual doculife Desktop 9 Managing groups 39 6. Close the User Management window by clicking on OK. Please note: If you do not add the newly added group to another group, the group will not have any data access or editing permissions. Once you are done, open the Usersmanagement screen and assign users to the group you created based on their functional role within the business. To do this, call up each user account individually and add it to the group (Member of groups). 40 9.3 9 Managing groups Administration manual doculife Desktop Showing the members of a group Follow the steps below to find out which users currently belong to a group: 1. Open the User Management screen by clicking on Settings, System Configuration, User Management. 2. Select the Groups radio button, enter the name of the group you want into the search box, and click on Show. 3. Then select the group and click on Members. Group members will be shown with their name, login, and a “Membership through” comment that explains how they are a member of the group. 4. Click on Close to exit the list. 9.4 Displaying group memberships When a user is assigned to a user group or a group is assigned to another group, all the permissions defined in the permissions scheme will be assigned to the user / to the first user group automatically. When a user or user group is assigned to a user group, the user / the first group will not only become a member of the user group to which it has been assigned (direct membership), but will also inherit any memberships corresponding to that user group. In other words, the user / user group will also become a member of the groups to which the parent user group belongs (indirect membership). Please note: The user groups to which other user groups are assigned by default (selection when a custom solution is activated or loaded) should not be altered, as the solution(s) installed for a tenant may stop working properly under certain circumstances. To display the groups to which a user or group is assigned, follow the steps below: 1. Open the User Management screen by clicking on Settings, System Configuration, User Management. Administration manual doculife Desktop 9 Managing groups 41 2. To view the groups to which a user belongs, select the Users radio button.Enter the user’s name into the search box and click on Show. To view the technical groups to which the user belongs, enable the Show also technical users and groups option. 3. Select the user in order to look at the groups to which they belong. The corresponding memberships will be shown. Direct memberships will be shown using black text, while indirect memberships will be shown using gray text. 4. To view the groups to which a group belongs, select the Groups radio button.Enter the group’s name into the search box and click on Show. To view the technical groups to which the user belongs, enable the Show also technical users and groups option. 5. Select the group in order to look at the groups to which it belongs. The corresponding memberships will be shown. Direct memberships will be shown using black text, while indirect memberships will be shown using gray text. Making individual changes to the implemented permissions concept and the permissions scheme is possible at any time. For more detailed information, please contact your solution vendor or doculife Support. 9.5 Groups used to provide access permissions Groups used to provide access permissions are also referred to as “permission groups.” They provide user groups with solution-specific permissions for creating and editing objects based on the permission system’s permissions scheme. 42 9 Managing groups Administration manual doculife Desktop In solutions with a single-level security context, user groups are directly assigned to technical groups with creation permissions. The following technical groups with creation permissions will be available for each solution: Group with permission to create files (DossierCreatorG) Group with permission to create registers (SubdossierCreatorG) Group with permission to create documents (DocCreatorG) To have the system display these groups, enable the Show also technical users and groups option in the Usersmanagement screen. In solutions with a multi-level security context, user groups are assigned to solution-specific permission groups. These permission groups provide permissions indirectly through their membership in technical groups with creation permissions. Additional permission groups can be added to solutions. Please note: Make sure to add permission groups only in accordance with the permissions scheme corresponding to the permissions system of the solution being used. If you have any questions, please contact your solution vendor or doculife Support. 9.6 Technical groups Technical groups provide essential permissions for internal system processes and the groups associated with them. Technical groups with creation permissions that apply to all solutions: Used to provide all user groups with the permissions assigned according to the permissions scheme, e.g., for creating items belonging to classes used commonly (file, e-mail, multimedia). Technical groups with function permissions that apply to all solutions: These bundle internal system permissions for the use of DMS functionalities based on a defined group hierarchy (group is a member of group) and provides them to the user groups based on the permissions scheme. Technical groups with creation permissions that apply to all solutions Name Description BusinessFolderCreatorG Group that provides permissions for creating files, registers DocCreatorG Group that provides permissions for creating basic-class documents (computer files, e-mail, multimedia) Technical groups with function permissions that apply to all solutions Name Description ACLAdminG Group that groups together the permissions for managing permissions AdminAccessG Group used to provide administration rights for accessing all data AdminOperationG Group used to provide permissions for select administrative functions (audit, reports, choice lists) Administration manual doculife Desktop 9 Managing groups 43 Name Description ArchiveDenyG Technical DMS archive group ArchiveG Group used to provide permissions for archiving items ArchiveOwnerG Technical DMS archive group BusinessUserG Group that provides user groups with the required permissions for using DMS applications ChoicelistAdminG Group used to provide permissions for managing choice lists DisableSystemG Technical DMS system administration group LDAPAdminG Group used to provide permissions for managing users and groups LDAPBusinessAdminG Group used to provide limited permissions for managing users and groups LockDenyG Reserved, not used indoculife as of this writing LockOwnerG Reserved, not used indoculife as of this writing ManagementG Group used to provide permissions for editing solution configurations OSAdminG Technical DMS administrator group OSUserG Technical DMS user group PrintG Group used to provide permissions for using an optional print service; not used in doculife as of this writing ReactivationG Group used to provide permissions for reactivating archived items ReportG Group used to provide permissions for the server-side reporting functionalities SettingAdminG Technical DMS system administration group TechnicalUserG Group used to provide permissions for the functionalities for technical users TempAccessG Group used to provide permissions for granting temporary access; not used in doculife as of this writing TemplatesAdminG Group used to provide permissions for managing templates ViewAuditG Group used to provide permissions for viewing audits To have the system display technical groups as well, enable the Show also technical users and groups option in the User Management screen. Please note: The assignment of technical groups to other technical groups should not be altered, as the solution(s) installed for a tenant may stop working properly under certain circumstances. 44 9.7 9 Managing groups Administration manual doculife Desktop Deleting groups Please note: In certain cases, deleting a group may cause the solution(s) installed for a tenant to stop working properly. If you have any questions, please contact your solution vendor or doculife Support. Technical groups cannot be deleted. Important: Before deleting a group, make sure to first remove all users from that group. To delete a group, follow the steps below: 1. In Desktop, open the Users management screen by clicking on Settings, System Configuration, User Management. 2. Call up the group you want. 3. Select the group and remove it from all groups. Click on Apply. 4. Then click on Delete. 5. In the prompt that appears, click on OK. The group will be deleted. Administration manual doculife Desktop 10 SECplus / SECmezzanine key administration 10 SECplus / SECmezzanine key administration 10.1 Overview 45 Please note: The following functions are available for doculife SECplus and SECmezzanine tenants only. When documents are transferred between a client and the doculife cloud service using the transport layer, they are encrypted as well (HTTPS/SSL). Once the documents are on the server, a full text index is generated on the server and the documents are stored in a secure, tamper-proof repository after being encrypted with 256-bit AES. Finally, the corresponding metadata, as well as the full text index itself, is stored in encrypted databases. Generally speaking, encryption on the server is organized in such a way that the operator does not have any access to document, metadata, and encryption contents. Please note: For more information on how encryption works and its scope, please contact your solution vendor or hosting provider. The user is the one who sets the aforementioned key, as well as the one who manages it and uses it to unlock the tenant. This ensures that: Authorized users can prevent any access to the corresponding data by locking the tenant Technical staff and IT administrators will not have any access to the customer’s data, since the tenant is automatically fully locked when technical work is being performed and the data for the tenant cannot be viewed as a result. The following applies in terms of how the key is used and managed: The administrator sets the key during initialization (first use with the *.idac activation key) The tenant can be locked at any time by any user with the corresponding permissions The tenant can be unlocked by any user who has the corresponding key The key can be changed by any user who has locking permissions 10.2 Locking tenants To lock a tenant, follow the steps below: 1. Select the Lock account option on the bottom left of the Desktop. 46 10 SECplus / SECmezzanine key administration Administration manual doculife Desktop 2. Select the type of lock you want. Lock - The tenant will be locked after any ongoing actions being carried out by users are completed, e.g., ongoing file imports with drag & drop Lock immediately - The tenant will be locked immediately Any user actions that are still ongoing will be aborted 3. In the prompt that appears, click on OK. The tenant is now locked. Administration manual doculife Desktop 10.3 10 SECplus / SECmezzanine key administration 47 Granting permissions for locking a tenant To grant permissions for locking a tenant, add the corresponding user to the AdminOperationG technical group. Please note: Assigning the user to the AdminOperationG group will give them additional permissions. Before adding the user, make sure that their functional role in the business process allows for these permissions to be assigned to them. For more information regarding the permissions associated with belonging to these groups, please refer to the chapter "Granting management permissions". Important: The key can be changed by any user who has locking permissions. 48 10.4 10 SECplus / SECmezzanine key administration Administration manual doculife Desktop Changing keys Please note: Make sure that the user making the change safely stores the key afterwards and notifies other key owners. This is especially important, as locked tenants cannot be unlocked without a valid key and keys cannot be reset by administrators. The key can be changed by any user who has locking permissions. 1. Click on Settings, Profiles. Select your user account, and click on Change. 2. Click on Change key. 3. Change the key. Confirm by clicking on OK. Administration manual doculife Desktop 10 SECplus / SECmezzanine key administration 4. Save or print the key. Confirm the prompt reminding you to safely store the key by enabling the corresponding checkbox,then click on OK. 49 50 10 SECplus / SECmezzanine key administration Administration manual doculife Desktop 5. Confirm the key change by clicking on OK. Important: Once the key is changed, the tenant will be locked and will need to be unlocked by someone with the appropriate permissions. Administration manual doculife Desktop 11 Inboxes 11.1 Overview 11 Inboxes 51 Inboxes are an important tool in the teamwork between users and user groups. Inboxes can be used to assign incoming documents to a user or user group for review and editing. Moreover, using the forwarding DMS function in conjunction with inboxes makes it possible to initiate, carry out, and monitor agile workflows for editing and approving documents. Inboxes are also e-mail inboxes for the corresponding enabled doculife e-mail addresses. There are two types of inboxes in doculife: Personal inboxes Group inboxes Personal and group inboxes are created automatically in doculife when a user or group is created. A personal inbox is automatically activated and enabled the first time the corresponding user logs in. Meanwhile, group inboxes must be activated and enabled by the administrator before they can be used. 11.2 Personal inboxes A personal inbox is automatically activated and enabled the first time the corresponding user logs in. A personal inbox: contains documents forwarded to the user for editing is the inbox for the user’s doculife e-mail address can be used as a default scan input folder The contents in a personal inbox can only be viewed and edited by the corresponding user. 11.3 Group inboxes Every user group has its own group inbox, and the members of a user group can connect to the corresponding group inbox and view and edit its contents. A group inbox: Contains documents forwarded to the group for editing Is the inbox doculifefor the group’s e-mail address Can be used as a default scan input folder Group inboxes are created automatically when a group is set up. However, before the group inbox can be used, the administrator needs to activate it. 52 11 Inboxes Administration manual doculife Desktop 11.4 Managing inboxes 11.4.1 Adding inboxes to the inbox overview Follow the steps below to get an overview of the inboxes that are available and the inboxes that are in use: 1. Click on the Settings menu option and then on Inbox. The following screen will show the inboxes to which you (the administrator) have access. Your personal inbox will be named Inbox. 2. Click on Add. 3. Enter the name of the user or user group you want into the Group/User field and click on Search. Administration manual doculife Desktop 11 Inboxes 53 The relevant user and user group inboxes will be shown in the bottom pane. group inboxes will be displayed as follows: Grey: Disabled inbox Black: Enabled inbox Personal inboxes will be displayed as follows: Grey:After the user is created, but only until the user logs in for the first time Black: Black font colour afterwards 4. If you select an inbox and close the dialog box by clicking on OK, the inbox will be added to your Inbox Management overview. 11.4.2 Opening and working with a user’s inbox Please note: The functionality for viewing the contents of personal inboxes can only be used by administrators. A user’s personal inbox can only be opened and viewed by that user. However, certain circumstances (such as the user being absent for an extended period of time unexpectedly) may make it necessary for an administrator to open or empty a personal inbox in order to make it possible for other users to access the documents in the inbox so that they can work with them. 54 11 Inboxes Administration manual doculife Desktop Opening personal inboxes To view the full contents of a user’s personal inbox, add the inbox to your Inbox Management overview. Open the inbox under My Workplace. Once you are done, remove the inbox from your Inbox Management overview. Simply select the inbox and click on Remove. Working with personal inboxes Take control of the user account by changing the user password in the Usersmanagement screen. Log in to the DMS with the user account. Tip: To make sure you won’t get mixed up with other inboxes to which you have access, use a separate instance of Desktop portable to log in. Click on Forward to make the relevant documents accessible to the people who need to work on them or drag and drop them onto a different file. Reset the user account’s password once you are done. Make sure to notify the user accordingly. 11.4.3 Group inbox 11.4.3.1 Enabling group inboxes Follow the steps below to enable a group inbox so that it can be used by the members of a user group: Open the screen used to manage inboxes by clicking on Settings, Inbox, Add. 1. In the Group/User field, enter the name of the user group for which you want to enable a group inbox. Then click on Search. 2. The inbox that will be enabled will be shown in the pane at the bottom. Then click on OK. Administration manual doculife Desktop 11 Inboxes 55 The group inbox will be enabled and added to your Inbox Management view. Once the inbox is enabled, all members of the corresponding user group will be able to add the group inbox to their workplace by clicking on Settings, Inbox, Add. 3. If you will not be needing the enabled group inbox later on, you can remove it from your Inbox Management view. Simply select the inbox and click on Remove. Please note: For more information on how to use inboxes, please refer to the user manual for doculife Desktop. 11.4.3.2 Opening and working with group inboxes Group inboxes can only be opened and worked with by members of the corresponding user group. However, certain circumstances (such as all the members of the user group being absent) may make it necessary for an administrator to open or empty a personal inbox in order to make it possible for other users to access the documents in the inbox so that they can work with them. Opening group inboxes To view the full contents of a group inbox, add the inbox to your Inbox Management overview. Open the inbox under My Workplace. Working with group inboxes Use the Usersmanagement screen to add yourself to the relevant group. Open the group inbox and click on Forward to make the relevant documents accessible to the people who 56 11 Inboxes Administration manual doculife Desktop need to work on them or drag and drop them onto a different file. Once you are done, remove the inbox from your Inbox Management overview. Simply select the inbox and click on Remove. Restore the permissions for working with the group inbox to the way they were previously by removing yourself from the corresponding group in the Usersmanagement screen. Administration manual doculife Desktop 12 12 Finding documents 57 Finding documents Documents stored in a user’s personal inbox or My Documents folder cannot be viewed by other users. Please note: The functionality for finding documents in personal inboxes and My Documents folders can only be used by administrators. If necessary, an administrator can find out which user has a specific document stored in their personal inbox or My Documents folder. 1. To do this, use the All Documents, Data Files and E-Mails search option. 2. Enter the name of the document you are searching for or a relevant term from the document’s contents into the search field and run the search. The results will show the document and the inbox in which the document is found. 58 13 Solution administration 13 Solution administration 13.1 Overview Administration manual doculife Desktop Solutions can be customized and expanded at any time. You can do the following yourself: Customize and expand choice lists Create searches and make them available to all users Modify templates found in the solution or Send templates found in the solution to your solution vendor so that they can carry out a change request Order an update or a custom solution (*.zip) Order a customized feature set from your solution vendor Customizations carried out by you, as well as change requests, updates, and individual solutions, can be made available to all users by using the Save/Publish Templates function. 13.2 Saving templates in the filesystem Please note: Advanced administrator rights are required in order to be able to save templates in the filesystem. Back up your current solution before: Editing choice lists Making searches available to other users Modifying templates found in the solution Loading a change request or a custom solution To back up the solution you are currently using, follow the steps below: 1. Click on Settings, System Configuration. Click on Save Templates to Filesystem. Administration manual doculife Desktop 13 Solution administration 59 2. In the next dialog box, select a storage location and confirm your selection by clicking on OK. 3. In the prompt that appears, click on OK. 60 13 Solution administration Administration manual doculife Desktop Important: Give the download a unique name. Store it safely Direct changes to templates should not be made using the original templates. Instead, copy the folder with the templates before making changes. 13.3 Creating searches 13.3.1 Creating searches doculife Desktop users can create personal search templates for themselves in addition to the default searches available. Administrators can make their own personal search templates available to all users as default searches. Please note: For information on how to create new searches, please refer to the “Working with personal search templates” section found in the user manual for doculife Desktop. 13.3.2 Making available to all users To make a search template available to all users, follow the steps below: 1. To create the search template, follow the steps in the “Working with personal search templates” section of the user manual for doculife Desktop. 2. Select the option Available for all. 3. Save the search template using the name you want to use in order to make the template available to all users (e.g. file number search). Administration manual doculife Desktop 13.4 Choice lists 13.4.1 Overview 13 Solution administration 61 Choice lists make it possible to provide users with selectable entries for file, register, and document index fields. Values not included in a choice list cannot be entered into the index field associated with the choice list. Choice lists can either be simple (single-level) choice lists or cascaded (multi-level) choice lists. Important: When working with cascaded choice lists, please note that nodes cannot be selected as index values. Please note: To find out which choice lists are available and the input screens in which they are used, please refer to the description for your solution. 13.4.2 Opening a choice list To open a choice list in order to edit it, follow the steps below: 1. Click on Settings, System Configuration. Then click on Edit Choicelists. 62 13 Solution administration Administration manual doculife Desktop 2. In the leftmost pane, select the choice list that you want to edit. The pane in the middle will show the index values in that list. 13.4.3 Changing the label for an index value To change an index value’s label, follow the steps below: 1. In the Values to select pane, select the index value for which you want to change the label. The following will be shown under Value to edit: Administration manual doculife Desktop 13 Solution administration 63 Value – (attribute value) The internal name that the system uses to identify which index value is being edited Languages – The actual label that will be displayed, in various languages 2. Enter the label(s) you want into the corresponding Languages fields. Click on Refresh to confirm the changes you have made. 3. To leave the dialog box, click on Save to confirm your changes. 4. To leave the dialog box, click on Close and then close the Settings dialog box by clicking on OK. 13.4.4 Adding index values Values (internal system values) must be unique within their choice list. Special characters (ä ö ü * ? : < > \ /) are not permitted in these names. Before editing a choice list, make sure to become familiarized with the system being used for the corresponding values (it is recommended to keep using the same system). Moreover, before entering a value, make sure that it is not being used already. Please note: Please note: For more information on the system and values used, please refer to the description for your solution. To add an index value to a choice list, follow the steps below: 1. Select the following as the starting point: The name of the choice list, in the All ChoiceLists pane, if the list is a single-level choice list The node to which you want to add the index value, in the Values to select pane, if the choice list is a cascaded choice list 64 13 Solution administration Administration manual doculife Desktop 2. Enter the value (internal system value) for the new index value into the Value field. Enter the label(s) you want into the corresponding Languages field(s). Then click on Add. Important: If you are editing a single-level choice list, the Value field will be empty after you select the starting point. If you are editing a cascading choice list, the Value field will already be filled out. To add a new index value, overwrite the contents in the field. 3. To leave the dialog box, click on Save to confirm your changes. To leave the dialog box, click on Close. 13.4.5 Editing and adding nodes Values (internal system values) must be unique within their choice list. Special characters (ä ö ü * ? : < > \ /) are not permitted when naming values. Before editing a choice list, make sure to become familiarized with the system being used for the corresponding values (it is Administration manual doculife Desktop 13 Solution administration 65 recommended to keep using the same system). Moreover, before entering a value, make sure that it is not being used already. Please note: For more information on the system and values used, please refer to the description for your solution. You can add new index values to the nodes in a cascading choice list at any time. Follow the steps below to add a new index value to a node: 1. In the All ChoiceLists pane, select the name of the choice list you want. In the Values to select pane, select the entry to which you want to add a new level. 2. Enter the value (internal system value) for the new sub-level entry (index value) into the Value field. Enter the label(s) you want into the corresponding Languages field(s). Click on Add... Important: If you are editing a cascading choice list, the Value field will already be filled out. To add a new index value, overwrite the contents in the field. 3. To leave the dialog box, click on Save to confirm your changes. To leave the dialog box, click on Close and then close the Settings dialog box by clicking on OK. Tip: To change the order of the entries, use the Move up and Move down buttons. 66 13 Solution administration Administration manual doculife Desktop Node labels can be changed. In addition, new index values can be added to nodes. Please refer to the Adding index values and Changing the label for an index value sections. Please note: If there is an existing index value and a sub-level with additional index values is added to it in the ChoiceList Maintenance dialog box, the original index value will become a node. Node labels cannot be used in the index fields for files, registers, or documents. If the label for an index value is already being used in files, registers, and/or documents before the change, the node’s value will be shown. A new index value will have to be assigned to the corresponding index field. 13.4.6 Deleting index values and nodes Please note: It is recommended not to delete any index values or nodes before consulting with your solution vendor. Index values and nodes can both be deleted. To delete an index value or node from a choice list, follow the steps below: 1. In the Values to select pane, select the name of the index value or node you want to delete and click on Delete. Important: When you delete a node, the entries underneath that node will also be deleted. 2. Click on Save to confirm the changes you have made. To leave the dialog box, click on Close. Administration manual doculife Desktop 13 Solution administration 67 Please note: If the label for an index value is already being used in files, registers, and/or documents before the change, the index value’s value will be shown after the index value is deleted. This also means that you will not be able to search for files, registers, or documents using the label anymore. A new index value will have to be assigned to the corresponding index field. 13.5 Updating templates When it comes to templates that are locally stored on the filesystem, you can modify them yourself or send them to your solution vendor so that they can carry out a change request (custom update). Please note: Do not modify templates without first being briefed and trained by your solution vendor on how to do so. Improperly modifying templates may have a negative impact on the proper operation of the solution(s) installed for a tenant. To transfer updated templates to doculife, use the Synchronize Templates from Filesystem function. To transfer the updated templates, follow the steps below: 1. Click on Settings, System Configuration. Click on Synchronize Templates from Filesystem. 2. In the next dialog box, select a storage location for the updated templates and confirm your selection by clicking on OK. 68 13 Solution administration Administration manual doculife Desktop 3. In the prompt that appears, click on OK . 13.6 Solution updates If you order updates or custom solutions from your solution vendor, the solution vendor will provide them in the form of a ZIP file (*.zip). To load a ZIP file (*.zip), follow the steps below: 1. Click on Settings, System Configuration. Click on Load solution. 2. In the dialog box that appears, click on Load from file. Administration manual doculife Desktop 13 Solution administration 69 3. Select the solution’s ZIP file (*.zip) in the filesystem and start the loading process by clicking on Open. 4. Enable the checkbox next to “Are you really sure, these changes can’t be reverted” Then click on Yes. The solution will be loaded (this may take some time depending on how big it is). 5. Once the loading process is complete, close the System Configuration and Settings windows by clicking on OK. 70 13 Solution administration Administration manual doculife Desktop Important: The settings will not be updated until users restart their Desktop. When they restart it, the settings will be automatically updated and the modified solution will be provided. 13.7 Saving and publishing changes Only the administrator will be able to access the changes and additions you make to choice lists, searches, templates, and templates provided by your solution vendor after they are created / synchronized from the filesystem. The administrator will be able to verify the corresponding choice lists, searches, and/or templates before the changes and/or additions are published. This ensures that it will be possible to make corrections without affecting users’ work. Changes and additions can: Be saved in doculife Be saved and published in doculife Important: Changes and additions will not be available to users until they are published. To save changes and additions, follow the steps below: 1. Click on Settings, System Configuration. Click on Save/Publish Templates. 2. To simply save the changes/additions, click on Save templates to server. 3. The changes will be transferred to the server. In the prompt that appears, click on OK. Administration manual doculife Desktop 13 Solution administration 71 Important:The transferred changes will not be available to users until they are published. 4. Once you are done, close the System Configuration and Settings windows by clicking on OK. To publish changes and additions, follow the steps below: 1. Click on Settings, System Configuration. Click on Save/Publish Templates. 2. To publish the changes/additions, click on Save templates to server and publish. 3. The changes will be transferred to the server and published. In the prompt that appears, click on OK. Important: The settings will not be updated until users restart their Desktop. When they restart it, the settings will be automatically updated and the modified solution will be provided. 4. Once the loading process is complete, close the System Configuration and Settings windows by clicking on OK. 72 13.8 13 Solution administration Administration manual doculife Desktop Revoking published templates Please note: When published templates are revoked, all templates will be removed from your tenant and will cease to be available to users. To restore the tenant’s proper functioning, you will need to load and publish the templates again. It is recommended to use this function only after consulting with your solution vendor. To revoke published templates, follow the steps below: 1. Click on Settings, System Configuration. Select Remove published templates. 2. To remove the templates, click on Yes in the prompt that appears. 3. Once the process is complete, close the System Configuration and Settings windows by clicking on OK. 13.9 Feature set 13.9.1 Feature set overview The feature set for a tenant can be customized as required for your company’s specific needs. Among other things, the layout used for My Workplace and the range of functionalities in Manage accounts... can be configured as necessary. Feature sets will be provided by your solution vendor upon request. 13.9.2 Adding a feature set Follow the steps below to add a feature set: 1. Click on Settings, System Configuration. Select Add feature set for account. 2. In the next dialog box, search for the location where the feature set (*.idac) is stored. Select the feature set and click on Open. Administration manual doculife Desktop 13 Solution administration 73 3. The configuration will be enabled After enabling the feature set, close the System Configuration and Settings windows by clicking on OK. 13.9.3 Feature set Follow the steps below to remove a feature set and restore the corresponding default settings: 1. Click on Settings, System Configuration. Select Delete feature set for account. 2. In the prompt that appears, click on OK. 3. After removing the feature set, close the System Configuration and Settings windows by clicking on OK. 74 14 Audit 14 Audit 14.1 Overview Administration manual doculife Desktop Please note: Special administrator rights are required in order to be able to view an audit. Please make sure to observe your company’s policies concerning access to confidential and personal data. All actions concerning files, registers, documents, and user management in doculife are logged. These actions, which are also referred to as events, can be viewed by authorized users using WebClient. The date and time, as well as the name of the user who performed the corresponding action, will be shown for each event. Events can be exported in the form of a CSV file (*.csv). In the case of files, some of the information that can be traced includes: Which user created or deleted a file and when Which user accessed a file and when Which user made changes to a file and when Which user changed the corresponding access permissions and when In the case of registers, some of the information that can be traced includes: Which user created or deleted a register and when Which user accessed a register and when Which user moved a register and when Which user changed the corresponding access permissions and when In the case of documents, some of the information that can be traced includes: Which user created or deleted a document and when Which used accessed a document and when Which user checked out a document or cancelled a checkout and when Which user created an attachment for a document and when Which user moved a document and when Which user changed the corresponding access permissions and when In terms of user management, some of the actions that can be traced for specific users include: When a user was created, deactivated, reactivated, or deleted When a user was added to or removed from a group When management information was added to a user or modified for that user In addition, some of the information that can be traced for groups includes: Administration manual doculife Desktop 14 Audit 75 When a group was created or deleted When a group was added to or removed from a group When management information was added to a group or modified for that group 14.2 Searching for events To search for events, follow the steps below: 1. Open WebClient and click on the Audit tab. 2. Enter the search criteria you want into the Events search template and click on Search. Created (from) / (to): The timeframe during which the event occurred Title: The document’s title Dossier Name: The dossier’s title Action: The action’s (event’s) name User: The name of the user who triggered the event DMS ID (Source): The object’s unique ID in doculife Important: If you use the DMS ID criterion for your search, make sure to enter the full ID (e.g., 08068148-9a87-1c77-e053-474c1dacd3d3). In the case of documents, queries using the DMS ID will only return events for the documents’ latest version. If you want the events to include events for versions, use the document name (Title) for your search. The corresponding events will be shown. 76 14 Audit Administration manual doculife Desktop By default, the hit list will show, for example, the date and name of the event, the name of the user who triggered the event, the DMS ID, the corresponding object name, and the old and new index values in an action-specific manner. Please note: To find out what the exact elements in the hit lists will be, please refer to the description for your solution. If you are interested in custom search templates and hit lists, please contact your solution vendor. 14.3 Calls for events The following table lists all event calls that can be analyzed for files: Name Description Dossier.Create File created Dossier.Delete.Request File deletion confirmation prompt Dossier.Delete File deleted Dossier.PrivilegedUsersUpdate Not available by default Dossier.Retrieve File retrieved Dossier.SecurityUpdate File access permissions updated Dossier.Update File index values changed Dossier.Update.Property Changed file index values Dossier.OwnerUpdate File owner changed The following table lists all event calls that can be analyzed for registers: Name Description Folder.Create Register created Folder.Delete.Request Register deletion confirmation prompt Administration manual doculife Desktop 14 Audit Name Description Folder.Delete Register deleted Folder.Move Register moved Folder.Retrieve Register retrieved Folder.SecurityUpdate Register access permissions updated Folder.Update Register index values changed Folder.Update.Property Changed register index values Folder.OwnerUpdate Register owner changed 77 The following table lists all event calls that can be analyzed for documents: Name Description Document.Attachment Attachment added Document.CancelCheckout Document checkout cancelled Document.ChangeDossier Document moved to dossier Document.ChangeSecurityParent New access permissions applied after moving the document Document.Checkin Document checked in Document.Checkout Document checked out Document.Create Document created Document.CreateAndFile File imported and document created Document.Delete.Request Document deletion confirmation prompt Document.Delete Document deleted Document.File Document was moved or linked Document.PrivilegedUsersUpdate Not available by default Document.Retrieve Document retrieved Document.SecurityUpdate Document access permissions updated Document.Softdeleted Document moved to Recycle Bin Document.Unfile Document link removed Document.Update Document index values changed Document.Update.Property Changed document index values Document.Undelete Document restored from Recycle Bin Document.OwnerUpdate Document owner changed The following table lists all events that can be analyzed for user management: 78 14 Audit Administration manual doculife Desktop Name Description UsersMgmt.Group.Attributes.Set Management information set for group UsersMgmt.Group.Create Group created UsersMgmt.Group.Delete Group deleted UsersMgmt.Membership.GroupGroups.Add Group added to group UsersMgmt.Membership.GroupGroups.Remove Group removed from group UsersMgmt.Membership.GroupUsers.Add User added to group UsersMgmt.Membership.GroupUsers.Remove User removed from group UsersMgmt.User.Attributes.Set Management information set for user UsersMgmt.User.Create User created UsersMgmt.User.Delete User deleted UsersMgmt.User.Disabled User deactivated UsersMgmt.User.Enabled User reactivated UsersMgmt.User.Locked User locked UsersMgmt.User.Password.Set User password changed UsersMgmt.User.Unlocked User unlocked Administration manual doculife Desktop 15 Administration rights 15.1 Administrator 15 Administration rights 79 The Administrator user has all the permissions for managing the tenant and the solutions being used. In order to ensure that this user will be able to perform their administration tasks, they are a direct member of the following groups in doculife by default: AdminAccessG AdminOperationG BusinessUserG DisableSystemG LDAPAdminG StandardErrorInboxG StandardInboxG Please note: Do not change the groups to which the Administrator user is assigned as shown above, as doing so may mean that the permissions required for administrative tasks may not be fully available under certain circumstances. If necessary, the Administrator user must be added to the following groups so that they will be able to use the corresponding Desktop functions: AdvancedTemplatesAdminG - Functions for saving templates on the filesystem and synchronizing template changes from the filesystem AdvancedLDAPAdminG - Function for deleting users and groups LibaryManagementG - Function for sharing libraries Please note: If the aforementioned groups are not created automatically when the solution is loaded, they will need to be created manually if required. Important: In order to be able to customize the access permissions for files, registers, and documents, membership in the corresponding user groups will also be required in line with the permissions system. 15.2 Granting management permissions The administrator can grant management permissions for administration functions to other users. To do this, the user needs to be added to the relevant groups. Granting user management permissions LDAPAdminG - Grants permissions for managing all users and groups, resetting passwords, and sharing scanning activations LDAPBusinessAdminG - Grants permissions for creating users and groups, managing assigned users and groups, and sharing scanning activations Granting editing permissions for choice lists 80 15 Administration rights Administration manual doculife Desktop ChoiceListAdminG - Grants permissions for editing choice lists Granting managing permissions for templates TemplateAdminG - Grants permissions for saving and publishing templates, revoking published templates, loading solutions, and loading and removing feature sets Granting permissions for viewing audits ViewAuditG - Grants permissions for viewing audits Granting permissions for sharing libraries LibaryManagementG - Enables the function for sharing libraries Granting permissions for viewing user access details BusinessInfoG - Grants permissions for showing all members with access to an object Granting advanced administrator rights AdminOperationG - Grants permissions for managing technical groups, locking SECplus and SECmezzanine tenants, editing choice lists, saving and publishing templates, revoking published templates, loading solutions, loading and removing feature sets, archiving, and viewing audits Notes: Please refer to the description for your solution for more information on deviating assignments when granting management permissions Administration manual doculife Desktop 16 16 Index 81 Index A P Audit Events Overview Searching for events Passwords guidelines Resetting Permissions concept Confidentiality levels Data access and editing permissions Overview Permissions scheme Permissions system Access permissions Personal inbox Opening and working with 76 74 75 C Choice lists Adding index values Adding nodes Changing the label for an index value Deleting an index value editing 61 63 64 62 66 61 D R Direct user group Displaying group memberships Document Register 40 10 F Files Finding documents Formatting and layout used throughout this documentation 10 57 6 G General security information Group inbox Enabling Opening and working with Groups Deleting Permission groups Technical groups User groups Viewing permission groups 7 51 54 55 44 17 17 17 41 I Inboxes Adding to the inbox overview 52 22 24 14 14 14 14 15 51 53 10 S Search Creating Making available to all users SECplus/SECmezzanine Changing keys Granting permissions for locking a tenant Locking tenants Sharing scanning activation files Solution Solution administration Feature set Loading a feature set Overview Publishing changes Removing a feature set Revoking published templates Saving templates Solution updates Updating templates System configuration Overview update settings System Configuration Add-ins User management 60 60 45 48 47 45 27 9 72 72 58 70 73 72 58 68 67 11 13 13 11 82 16 Index Administration manual doculife Desktop T Technical groups Overview Technical user Technical users Displaying Technical Users Overview Tenant 42 16 36 35 9 U User Assigning management information Editing user information User types User account Closing an account Deleting Reactivating When to close an account User group adding Showing the members of a group Users Adding Additional user account Business users Changing the groups for a user 22 30 22 31 34 33 31 37 40 16 18 28 16 26 OUR CONTACT DATA: Please call us. Monday till Friday 9:00 a.m. – 5:00 p.m. +49 351 4188 5841 Or write us to [email protected]