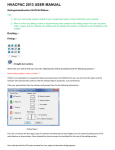
1
Edition: C20130815A
Uneven Surface Inkjet Printer
User Manual
XiaMen Sojet Electronics Co.,Ltd.
IMPORTANT
To ensure the best printing quality, we recommend using only our specified Elfin series of
cartridges and the corresponding accessories. Any malfunction or poor printing quality
caused by improper use of other kinds of inks or accessories will be not be guarranteed.
Safety Precautions
There is high voltage inside the machine when it is live. Maintenance or disassembly by
unqualified or unauthorized person is strictly prohibited, so as not to cause any accident.
Machine must be reliably grounded by connecting the grounding wire for the machine during
equipment setup. Unreliable grounding will result in machine failure that the machine cannot
work normally.
Do not expose ink to direct sunlight or high temperature (35℃ above). The heat of direct
sunlight or high temperature will affect ink’s storage life and print quality.
If you get ink spill on the eyes or skin during use, please clean your eyes or skin by clean
water.
Ink leakage inside printer can result in burnout damage to the machine. Switch off the
machine and unplug it from power outlet when there’s ink leakage inside printer. Contact
qualified service technician for test and repair.
Warning Signs
Caution: The sign “
” indicates information for caution of possible damage to hardware
of inkjet printer or data loss.
Attention: The sign “
” indicates important notes helpful for your trouble-free operation
of the machine.
02
Introduction
Content
Chapter One: Important Precautions for Using ElfinIC
06
1.1 Important Setup Precautions
06
1.2 Important Operation Precautions
06
Chapter Two: Setup and Installation Instructions
07
2.1 Parts List
08
2.2 Set up the Equipment
09
2.2.1 Set up Printer, Deflector and Anti-Shock Mechanism
09
2.2.2 Setup Procedures for Side Printing
09
2.2.3 Setup Procedures for Down Printing
10
2.2.4 Screen 90° Flip Mechanism
11
2.3 Cartridge Installation (42ml)
Chapter Three: ElfinIC Introduction
12
13
3.1 ElfinIC Printer
13
3.2 Technical Specifications
14
Chapter Four: How to Use the Printer and the Check Work before/after Use 15
4.1 How to Use the Printer
15
4.2 Check Work before Use
15
4.3 Check Work after Use
15
Chapter Five: Printer Operation Instructions
16
5.1 Main Interface
16
5.2 Printing Management
17
5.2.1 Find/Preview Data
17
5.2.2 Start Printing / Printing Report
17
5.2.3 Printing Delay
17
5.2.4 Print Initial Values
18
5.2.5 Stop Printing
18
03
5.3 New/Edit Data
19
5.3.1 New/Edit Data
19
5.3.2 Add Text Object
20
5.3.3 Add Production Date Object
20
5.3.4 Add Expiration Date Object
20
5.3.5 Add Image Logo Object
21
5.3.6 Add Counter Object
21
5.3.7 Add Shift Code Object
21
5.3.8 Add Barcode Object
22
5.3.9 Delete Data or Object
23
5.4 System Management
24
5.4.1 System Setting
24
5.4.2 Edit Options
25
5.4.3 Printing Options
26
5.4.4 User Management
27
5.4.5 Special Features
28
5.4.6 Screen Touch Correction
28
5.5 Tools Management
29
5.5.1 Image Management
29
5.5.2 System Upgrade
29
5.5.3 System Backup
30
5.5.4 System Record
30
5.5.5 About Equipment
30
5.5.6 System Reset
31
5.6 Edit Input Method Options
32
5.7 Status Bar
33
Chapter Six: Care and Maintenance
34
6.1 Printer Care and Maintenance
34
6.2 Ink Cartridge Care and Maintenance
34
Chapter Seven: Troubleshooting
35
7.1 Troubleshooting for Ink Cartridge
35
7.2 Troubleshooting for Printer
36
Appendix 1: Terms and Definitions
37
04
Please read this manual carefully before you use this equipment.
Introduction
Thank you for your purchase of ElfinIC Uneven Surface Inkjet Printer. We want you to get helpful
information for your work with this equipment; therefore we would like to explain a little bit about how
to use this machine by this user manual by the following content:
Important precautions for use of the machine
Introduction of printer: Parts and components of the machine
Setup and Installation Instructions: Instructions for Equipment Setup and Cartridge Installation.
How to use the printer and the check work before/after use of the printer: explanations of general
operation and startup/shutdown.
Operation instructions: explanations on how to new/edit data for printing, and how to adjust
printer settings.
Care and Maintenance: Care and maintenance for printer and cartridge
Troubleshooting: Common failures occurred and solutions
Appendix 1 - Terms and Definitions: Definitions for terms used in this document.
Please read this user manual carefully before first use of the printer for full understanding and
attention of important information so that you will get maximum use from your new equipment. This
will also help you have a quick reference to related sections when you have any problems during
use.
Note 1: If you cannot solve the problem encountered during use, please contact us for assistance.
Note 2: The information contained herein is subject to change without notice. The amended
information will be updated in user manual by new edition.
Note 3: Any machine failure or damage caused by user’s negligence in following this manual will not
be covered by the warranty.
05
Chapter One: Important Precautions for Using ElfinI
Welcome to use ElfinIC Uneven Surface Inkjet Printer. In order to protect your personal safety and
user rights, ensure correct installation and operation, and full play of the machine, it is important that
you read the precautions carefully.
1.1 Important Setup Precautions
1.1.1 Use exclusive power supply for the equipment. Do not share same power supply with other
equipment. Besides, Installation of an additional UPS is recommended.
1.1.2 Mount the support in sound and stable place. Do not choose the location that will be easily
affected by shock or sway.
1.1.3 Choose well-working conveyor belt for high print quality.
1.1.4 Add deflector to the printer for production line setup in order to prevent any printing object
hitting the nozzle plate to cause damage.
1.1.5 Make sure the printer is well grounded.
1.1.6 Maintain the distance between deflector and printing object at 0.5-2.5mm as recommended.
1.1.7 Make sure to insert and remove the ink cartridge by an angle of 15 degree so as not to cause
damage to the cartridge.
1.1.8 Make sure the setup environment is tidy and clean. Clean the dust on printer from time to time
when dusty environment is unavoidable.
1.2 Important Operation Precautions
1.2.1 Do not poke or impact the touch screen sharply.
1.2.2 Do not cover up the built-in photocell. Otherwise the printer doesn’t print.
1.2.3 Use Non-woven to wipe the nozzle plate when the print is not clear or dots are missing.
1.2.4 Set print delay value for best print result when print position changes (see Section 5.2.3).
1.2.5 Do not insert or remove ink cartridge while the machine is in printing process so as not to cause
damage to the cartridge.
1.2.6 Do not use compressed air for cleaning the touch screen. High pressure of the compressed air
will damage the touch screen.
1.2.7 Do not use compressed air for direct or indirect cleaning of the ink cartridge. High pressure of
the compressed air will damage the nozzle plate.
1.2.8 Read Chapter Seven for troubleshooting when there’s failure occurs. If you cannot solve the
problem encountered, contact your local dealer or our after-sale service.
Note: Depending on properties, some ink cartridge may require to be removed from printer after
use. Turn off the machine and remove the cartridge from printer. Wipe the printhead clean with
Non-woven; cap the printhead with the designed cap for prevention of the nozzles from clogging.
(Contact our after-sale service for information of ink properties.)
06
Chapter Two: Installation and Setup Instructions
This chapter will illustrate how to set up the equipment and how to install an ink cartridge. Firstly
please check the machine parts by looking at the packing picture and parts list.
Packing Picture
Outer box
07
2.1 Parts List
Once you have unpacked your machine, check to make sure that you have all the parts shown here.
1、Printer
2、9mm Deflector
4、Power cord
5、Power adapter
7、Steel tube
10、inner hexagon spanner
8、bi-direction bracket
3、USB disk
6、Grounding wire
9、bi-pass clamp
11、A. M8*15screw: 6pcs
(for bi-direction bracket)
B. M4*8screw: 3pcs
(for anti-shock mechanism)
08
2.2 Set up the Equipment
2.2.1 Set up printer, deflector, and anti-shock mechanism
2
Note: In normal printing,
throw distance is 12.7mm,
while need to print on small
curve surface, we can
change to a 9mm deflector.
1
Step 2: Replace with
9mm reflector and tighten
the screws.
Note: In normal printng, the distance
between deflector and printhead is 3mm,
if want better print result, and meanwhile
the object will not make contact with the
printhead, we may adjust the distance to
1.5mm.
Step 1: Unfasten the 4 pieces
M3 screws and take the standard
deflector off.
Change Deflector
Adjust Deflector
2.2.2 Setup Side Printing
Note: See Section 2.2.3 Setup for Down Printing for grounding wire connection.
A. Setup Side Printing Way 1:
5
Step 5: Insert the printer to the steel tube, secure the
printer by tightening the M8 screw to finish the equipment
setup.
Note: Users can change the bi-pass clamp direction for
side printing, down printing setup.
4
3
Note: while the throw
distance need to be slightly
adjust, user can unfasten the 4
pieces of M3 screws, adjust
the position slightly and then
tighten the screws.
Step 4: Insert the other
steel tube into the bi-pass
clamp, secure the steel tube by
tightening one piece of M8 or
manual screw on clamp.
Step 3: Set the bi-pass
clamp onto the steel tube,
secure the clamp by
tightening one piece of M8
or manual screw.
2
Step 2: Insert one steel tube to the
L shape bracket, secure the steel
tube by tightening 2 pieces of M8
screws.
1
Step 1: Mount the L shape bracket to the
conveyor belt platform by securing four pieces
of M8 screws in sequence.
09
5
B. Setup Side Printing Way 2:
Step 5: Insert the printer to the steel tube, secure the
printer by tightening the M8 screw to finish the equipment
setup.
Note: Users can change the bi-pass clamp direction for
side printing, down printing setup.
1
4
Step 4: Insert the other
steel tube into the bi-pass
clam, secure the steel tube
by tightening one piece of
M8 or manual screw on
clamp.
2
3
Step 1: Secure the bi-direction
bracket to the conveyor belt platform
by tightening four pieces of M8
screws in sequence.
Step 2: Insert one steel tube to the
bi-directional bracket, secure the steel tube
by tightening two pieces of M8 screws.
Step 3: Set the bi-pass clamp onto
the steel tube, secure the clamp by
tightening one piece of M8 or manual
screw.
2.2.3 Setup Down Printing
Note: See Section 2.2.2 Setup for Side
Printing for same steps.
Use an M3 screw to connect
grounding wire to the printer,
secure the screw to make sure the
printer is well grounded.
10
2.2.4 Screen 90° Flip Mechanism
Unfolding
Flip screen outward until 90°.
Listen for a click indicating the screen
has snapped to place.
Folding up
2
1
Step 1: Press the positioning
button on the printer.
Step 2: Flip screen board
inward until the screen board
closed to printer.
11
2.3 Cartridge Installation (42ml)
1
2
Step 1: Insert
cartridge to printer by
an angle of 15
degree.
Step 2: Close the cartridge clip to
secure (see next figure).
Cartridge removal: Open the cartridge
clip, remove cartridge from printer by
an angle of 15 degree.
12
Chapter Three: ElfinⅠCIntroduction
3.1 ElfinⅠCPrinter
5 inch touch screen
Ink cartridge
Cartridge clip
USB 2.0 port
Ethernet port
DB15 port
Power input
Nozzle plate
90° flip mechanism
Springback Mechanism Block
Springback Mechanism
Deflector
(replaceable, detail see section 2.2.1)
13
3.2 Technical Specifications
A. Performance Values
Item
Technical source
Specifications
HP TIJ 2.5 Thermal Ink Jet technology
Dimension
(H*W*D):170*143*106mm/ 6.7*5.6*4.17inch;
Print heights
Two steel tubes:
Φ16mm*350mm, and Φ16mm*280mm.
Input: AC 90V-240V/50-60HZ, 60W;
Output: 12V DC / 5A;
Power cord length: 1.8m;
Power adapter cord length: 1.2m
1-12.7mm;
Print speed
0~60m/min(300DPI)
support size
Power supply
Print resolution
Print application
Connection Ports
Interface
Ink management
Mounting
Product Certification
Environment
requirement
Note
Deflector not
included
Clamp and bracket
not included
With power adapter
50~600DPI
Barcode, alphabetic, numeric, image logos,
date/time, expiration date, shift code, counter, lot-box
code
1.Ethernet port;
2.USB2.0 port;
3.DB15 port.
5inch full-color large LCD touch screen with
resolution 800*480.
1.Automatically recognizes ink types, and identifies
optimum printing parameters for each ink type;
2. Guarantees the using of genuine original HP ink;
3. Automatic measuring system for the usage of ink.
Standard side, downward and anti-shock support.
CE, FCC.
1. Working environment: -10°C~ +55°C; 10%-85%RH;
2. Storage environment: -25°C~ +80°C; 10%-90%RH.
B. Features:
Item
Languages
Font
Barcode
Date format
Counter
Print speed
Built-in photocell
Multi-management
Specifications
Chinese, English, Japanese, French,
Spanish, Portuguese and Russian.
Note
German,
Default font is Arial; allow users to load fonts they
need.
UPCA, UPCE, EAN13, EAN8, INT25, CODE39,
CODE128, EAN128, PDF417, DATAMATRIX, QR.
Variety of date formats available
Flexible setting for common counter, lot-Box code
counters.
Print speed can be set, automatically tested, or set
and tested by external encoder.
Good for simple print, no external photocell needed.
Multi-level password protection (Operator, Technician
and administrator).
C. Ink Solutions:
1. Support 42ml, 370ml, 350ml cartridges of HP TIJ2.5 technology;
2. Support ink of various colors: black, red, green, yellow and blue;
3. Support porous, semi-porous and non-porous substrates.
14
Chapter Four: How to Use the Printer and
the Check Work before/after Use
In this Chapter, you will learn how to use the printer, including check work before and after use.
4.1 How to Use the Printer
Sq #
1
Procedure
cartridge
Installation
2
Turn on
printer
3
Main
Interface Printing
Management
4
Select data Start printing
5
Printing
report
6
Stop printing
7
Switch off
Instructions
Insert cartridge into the printer stall by an angle of 15 degree, close cartridge clip
to secure. (see 2.3 Cartridge Installation)
Connect power adapter to
printer power input, switch
on power, printer enters
initialization startup.
After initialization startup,
“main interface” appears
(see Section 5.1).
to enter
Click
“Printing Management” (see
Section 5.2).
Select a file on data list, click
to Start printing.
When printing starts, the
button change to the icon
for stop printing,
meanwhile a printing report
appears.
to stop
Click
printing, printing report exits,
and the button returns to
“Start printing” status.
Exit printing, and switch off power.
4.2 Check Work before Use
Sq #
1
2
3
4
5
Item
Printer
support
Printer
position
cartridge
Power input
Printer status
Check Work
Is the support securely mounted?
Is the printer orientation correct? Is the nozzle plate parallel to printing object? Is
the throw distance controlled within 0.5-2.5mm?
Is the cartridge wiped clean? Has the cartridge been installed to printer?
Is the printer input voltage normal?
Check status bar, is the equipment status normal?
4.3 Check Work after Use
Sq #
1
2
Item
Printer
Power Status
cartridge
Check Work
Is the printer power switched off?
Is the cartridge removed from printer and wiped clean and printhead capped?
15
Chapter Five: Printer Operation Instructions
This chapter explains how to operate printer interface, including Printing Management, Data
Management, System Management, Tools Management, and Status Bar.
5.1 Main Interface
Switch on power,
printer starts
initialization
startup. After
initialization
startup, “main
interface” appears
(see Figure 1).
Setting
Management
Printing
Management
Status bar
Data
Management
Tools
Management
(Figure 1)
To find and preview data, start/stop printing, set printing delay value, and set
Printing
Management printing initial values (see Section 5.2).
Data
To Find/Preview, File-new, Edit, Delete data (see Section 5.3).
Managemen
To manage system setting, editing options, printing options, user authority, and
System
Management screen correction setting (see Section 5.4).
Tools
To manage image logo, system upgrade, system backup, system record,
Management equipment default restoring, system resetting (see Section 5.5).
Status bar
Display information of ink, equipment, USB, encoder, external photocell, and
Ethernet status (see Section 5.7).
16
5.2 Printing Management
Click
on main interface
to enter printing management
(see Figure 2)
Zoom in
Preview
interface
Zoom
out
Scroll bar
Start
printing
Page up
Printing
delay
Initial
values
for printing
File name
Search
Keywords entering bar
Page
Down
Return
(Figure 2)
5.2.1 Find/Preview Data (see Figure 2)
A. Find data
Find by Pageup/Pagedown/keywords.
B. Preview data
Preview data by locating or selecting a file of data to display on preview interface;
data located/selected will be displayed in sequence on preview interface, and can
be viewed scaled up and down by times of 1 and 2.
Note: Drag the scroll bar horizontally to view the data when it exceeds the screen horizontally.
5.2.2 Start Printing / Printing Report
Click
button to start
printing. When printing starts, a
printing report appears (see Figure 3).
Printing report: It is the timely record
of printing in process, including data
file name in process, print output
quantity, counter value, shift code,
system time. The printing report
exits when printing stops.
Stop
printing
Printing
report
(Figure 3)
5.2.3 Printing Delay
Click
, printing delay
setting interface appears (see
Figure 4)
See Appendix 1: Terms
and Definitions 1 for more
information.
(Figure 4)
A. Printing delay default value: 30mm;
B. Printing delay value range: 0.0-999.9mm;
C. It is allowed to set printing delay value during printing process: the newly set value becomes valid for
immediately next printing.
D. Printing delay value for each message are independent from one another, the delay setting for current
data file will not affect another data file.
17
5.2.4 Print Initial Values
Click
, a printing initial
values setting interface appears
(see Figure 5).
See Appendix 1: Terms
and Definitions 2 for more
information.
(Figure 5)
5.2.5 Stop Printing
Click
to stop printing and exit printing report, return to Start Printing status (see Figure 2).
Note: Printer automatically stops printing when there is case as power-off, out of ink, alarming etc.
18
5.3 New/Edit Data
Click
on main interface to
enter data management interface (see
Figure 6).
New
Edit
Delete
(Figure 6)
5.3.1 New/Edit Data
Click
or
on Data Image Logo
Management interface to enter data
Expiration
date
edit interface (see Figure 7).
A. New: text, counter, shift, production
date, expiration date, image logo,
barcode.
B. Edit: data in printing process cannot
be edited.
C. File name: maximum 15 characters,
empty file name or repeated file name
not allowed.
Production
date
Text
Add
objects
Counter
Delete
objects
File name
Shift code
barcode
(Figure 7)
Click
to save data
when finish editing, a check box
appears to ask “Are you sure you want
to save the message? Cancel, Yes,
No” (see Figure8).
If you click “
”, the machine
will remain on editing interface.
(Figure 8)
Note: “MSG001” is default data in system, not editable and not erasable.
The system allows maximum 500 files of data (including default MSG001).
The system does not save empty data.
19
5.3.2 Add Text Object
Click
to add text object, see Figure 9.
Horizontal
scale
Height
Click
to enter text editing interface:
Text
A. Font: default font Arial, support 2 fonts at
Edit
same time, Arial and one alternative font.
B. Height: 1-12.7mm;
Vertical
C. Text horizontal scale: 1-300%;
scale down
D. Text content cannot exceed 25 characters. locationand
up
Vertical scale up and
location down
Click
to enter text adjustment
interface.
E. Coordinate location: adjustable range for
X axis 0-3000mm; for Y axis, 0-12.7mm.
F. Text orientation: 0°, 90°, 180°, 270°.
Four orientations adjustable.
G. Font effects: bold, italy, underline,
strikeout, four effects adjustable.
(Figure 9)
Coordinate
position
Orientation
Adjust
Font effect
(Figure 10)
Note: Please refer to this Section (Section 5.3.2) regarding how to add objects as “production date”,
“expiration date”, ”image Logo”, ”counter”, ”shift code”, but the content of “production date”, “expiration
date”, ”counter”, ”shift code” cannot be revised or adjusted directly when you add, and the font, height,
content and font effect of “image Logo” cannot be revised directly. There is no option of horizontal
scale“
” for “logo” and “barcode”.
5.3.3 Add Production Date
Click
date”.
to add object “production
Click
to enter date format setting,
choose a format by arrow up and down (see
Figure 11).
Date format
Adjust
(Figure 11)
5.3.4 Add Expiration Date
Click
date.
to add object of expiration
Click
to enter date format setting
and days to expire (scope: 0~9999)
(see Figure 12).
Days to
expire
(Figure 12)
20
5.3.5 Add Image Logo
Click
to add object
image Logo.
Select a logo on file list by page up
and down (see Figure 13).
Image
file list
(Figure 13)
Note: When there is no image file found,
a message box appears to prompt image
import (see Figure 14).
See Section 5.5.1 Image Management
for image logo import.
(Figure 14)
5.3.6 Add Counter
Click
to add object counter.
Click
to for option of common
counter, box number, lot number.
A. Click
for common counter setting:
minimum value, maximum value, stepping
value, repetition number (see Figure 15).
B. Click
and
for option of box
number and lot number setting: minimum
value, maximum value, stepping value for box
number and lot number (see Figure 16).
Note: There is no repetition number for box
number or lot number.
Common
counter
Box No.
Lot No.
Stepping
value
Repetition
number
(Figure 15)
Minimum
value
Maximum
value
(Figure 16)
5.3.7 Add Shift Code
Click
to add object “shift code”.
Click
to enter setting
(see Figure 17).
Shift code: shift name and time for setting.
Shift name: maximum five characters.
Shift time: four different times for setting. Shift
code varies according to different time periods.
(Figure 17)
21
5.3.8 Add Barcode
Click
to add object “barcode”.
A. Click
to enter barcode edit:
Barcode type, horizontal scale level, barcode
height, barcode text (see Figure 18).
Barcode
height
Barcode
type
Horizontal
scale level
Barcode
text
(Figure 18)
B. Click
to enter barcode
adjustment: coordinate location, text
orientation, text display/hide, text height,
error correction level, white space level
(see Figure 19, 20).
Note: Setting options may differ depending
on different barcode types.
Text display
Text height
: Text display;
(Figure 19)
: Text hide;
~
~
: error correction
level;
: white space
level.
Error
correction
level
White
space level
(Figure 20)
C. Click
to enter barcode
setting: barcode can include data source of
production date, expiration date, counter
and shift code (see Figure 21).
(Figure 21)
22
5.3.9 Delete Object or Delete Data
Select an object on data editing interface,
click
to delete the object, a dialog
box appears to prompt if you are sure that
you want to delete (see Figure 22).
(Figure 22)
Select a file on the list on data
management interface, click
to
delete the file, a dialog box appears to
prompt if you sure that you want to delete
(see Figure 23).
Note: data in printing process cannot be
deleted.
(Figure 23)
23
5.4 System Management
Click
to enter system
management (See Figure 24).
Special
Features
User
management
Printing options
Editing options
System
setting
Screen
correction
(Figure 24)
5.4.1 System Setting
Click
on system management
interface to enter system setting (see
Figure 25).
System
Language
System time
Screen saver
time
Daylight
saving time
unit
(Figure 25)
A. System language
B. System time
C. Screen saver time
Standard language in delivery country as default language.
Manufacture time as default time, can be set by user.
see Appendix 1: Terms and Definition 3.
1) System default 5 minutes, 4 options for changeover: 5minutes, 3 minutes,
1minute, OFF.
2) If screen saver is optioned OFF, screen enters standby status if inactive
for 1hour.
3) Screen becomes active when there’s alarm or error.
D. unit
Switch between mm and inch.language in delivery country as default language.
E. Daylight saving time
Three modes for setting: OFF, European summer time, US summer time.
24
5.4.2 Edit Options
Click
on system management interface to enter edit options setting interface.
A. Click
to enter production date
and expiration date format setting (see
Figure 26).
Note: six common date formats default,
forty-four more formats addable for user.
The six default date formats not editable
and cannot be deleted.
Date format
New format
Edit format
Delete format
(Figure 26)
Click
or
in date format setting
interface, new or edit date format, date
format edit interface appears
(see Figure 27).
(Figure 27)
B. Click
to enter special time
setting (see Figure 28).
Customer year
see Appendix 1: Terms and
Definitions 4, 5.
Date transition
time setting
Pre-zero in
date/time
Special time
setting
(Figure 28)
1) Customer Year setting: round number within 0~9999;
2) Date transition time setting: system default normal zero o’clock as date transition time to next date,
users can set different time as date transition time.
3) Pre-zero in date/time: four options: OFF, empty preposition, empty postposition, centered without zero.
(e.g. 2012/05/09, 2012/_5/_2, 2012/5_/2_, 2012/5/2).
C. Click
to enter counter
setting (see Figure 29).
Production
counter
Counter
pre-zero
Counter alarm
Counter reset
System time
(Figure 29)
1) Production counter: setting extent: 0~99999999.
2) Pre-zeros: four options: OFF, empty preposition, empty postposition, centered without zero
(e.g. 0001, ___1, 1___, 1).
3) Counter alarm: ON or OFF option. When counter alarm is turned ON, the machine will stop printing,
sound alarm and prompt message that print number reaches maximum value.
4) Counter reset: ON or OFF option. All counters will start from initial values if the counter reset is turned ON.
25
5.4.3 Printing Options
Click
on system management interface to enter printing option setting.
A. Click
to enter nozzle
maintenance setting (see Figure 30).
Nozzle
maintenance
Pre-purge
Clean
printhead
(Figure 30)
Note: 1) Pre-purge: four shifts: OFF, low, medium, high. see the following figures:
--OFF;
--Low;
--Medium;
--High.
2) Clean Printhead: Spray 300 rows of ink dots at one time. This function is invalid while printer is printing.
see Appendix 1: Terms and Definitions 6, 7.
Printing
direction
B. Click
to enter printhead
setting (see Figure 31).
Nozzle setting
Channel
switch
Printing
Recovery
(Figure 31)
3 Note: printing direction: system default from left to right.
1) Four directions optional: left-to-right, right-to-left, mirror sides of left-to-right and right-to-left, see figures as follows:
--Left-to-right;
--Right-to-left;
-Mirror side of left-to-right;
2) channel switch: Left channel, Right channel, Dual channel, see the figures as follows:
--Left channel;
--Right channel;
3) Printing Recovery: when the set is
--Mirror side of right-to-left.
--Dual channel.
, printer will resume printing automatically when the power
continue. The default setting is
.
Note: When the printing contains counter, and the Printing Recovery setting is "ON", operator need to check on
the counter value and do needful adjustment.
see Appendix 1: Terms and Definitions 8.
C. Click
to enter production line
setting (see Figure 32).
Line speed: system default 30m/min;
Adjustable scope 1~150m/min;
DPI: system default 300DPI; adjustable
scope 50~600DPI.
Line speed
DPI
Line speed
setting
Run speed
test
(Figure 32)
26
Click
on line speed setting
interface to run speed test
Speed
(see Figure 33, 34).
Test object
length
Run speed test
Line speed test: input test object length
0~3000mm, click
to enter speed test
startup interface, then start production line,
put test object onto production line, the
photocell will be sensing the object, and the
Give up
Save
(Figure 33)
machine will calculate line speed
automatically. Click
to save current
speed test result. Click
, current
speed test value will not be saved. If test
repeated, system will take average value of
multiple results. Click
test, and click
Stop speed
test
to stop speed
or
to save or
give up test result.
(Figure 34)
Note: if external encoder is connected, system can detect automatically, and switch line speed
interface to encoder DPI setting interface. User cannot programme line speed setting
when external encoder is connected.
5.4.4 User Management
Click
on system management interface to enter user management (see Figure 35).
A. User permission management switch:
system default OFF. A login dialogue box User name
requests user name and password for
User
access to operation of the printer when
permission
machine power is switched on.
switch
Password
B. User name: different names for different
access permission. Administrator is of
Password
best authority, with access to all settings
confirmation
including password modification.
Engineer is with access to data
management and printing management;
and operator is with access to printing
management only.
C. Password and password confirmation:
administrator creates user name and set
password. Maximum 15 characters for
password. Default administrator
password “888888”.
(Figure 35)
Note: Please contact local dealer or our company for printer unlocking when you forget
administrator password.
27
5.4.5 Special Features
Click
on system management interface to enter “Special Features” setting.
A. Click
to enter “Continuous
printing” setting (see Figure 36).
See Appendix 1: Terms and
Definitions 9 for more information.
1) Continuous output times: system default
0 (OFF). Adjustable scope 0~9999.
Note: 0 is equal to OFF; 9999 equal to
infinite.
2) Output interval: system default OFF,
adjustable scope 0~999mm.
Continuous
printing
Continuous
output times
Output
interval
(Figure 36)
B. Click
to enable “Special
Features” (see Figure 37).
Note: Enable special features by
registration code.
Enable Special
Features
Registration
code
(Figure 37)
5.4.6 Screen Touch Correction
Click
on system
management interface to enter screen
touch correction (see Figure 38).
Note: Please correct screen touch when
there’s inaccurate touch phenomenon.
Icon “+” appears on different location on
screen guides you the screen correction.
The interface exits after screen touch
correction finished, and a message
appears to prompt screen touch correction
success or failure for your attention.
(Figure 38)
28
5.5 Tools Management
Click
on main interface to enter
tools management interface
(see Figure 39).
About printer
System record
Backup
management
Upgrade
management
Image Logo
System reset
(Figure 39)
5.5.1 Image Management
Click
to enter image Logo
management interface
(see Figure 40).
Image import: import image from USB
or Ethernet.
Image format: Solid color BMP;
Image height: 0-75 pixel point.
Image length: 0-999mm.
File list of
Image Logo
Import image
Delete image
(Figure 40)
Note: 1) System prompts and cuts the excess part if the imported image exceeds borders.
2) Image import cannot be executed when pixel points exceed 100.
3) Image Logo document route: USB Disk/InkJet/Logo.
5.5.2 System Upgrade
Click
to enter upgrade
management interface
(see Figure 41).
Users can upgrade the software,
add or change languages and fonts
by USB.
Upgrade
document list
Software upgrade
Language
upgrade
Font upgrade
Execute upgrade
(Figure 41)
A. Software
upgrade
System automatically searches for software upgrade documents in designated folder and displays
the upgrade documents by list. User can select anyone in the list for upgrade.
Document route: USB Disk/InkJet/Upgrade/Application.
B. Language
upgrade
System is loaded with multiple languages upon delivery. User can add one more
language if needed. Document route: USB Disk/InkJet/Upgrade/Language.
C. Font
upgrade
System supports two fonts; user can add another font besides the default Arial.
Document route: USB Disk/InkJet/Upgrade/Font.
Note: Software upgrade documents, language documents, font documents can only be identified when
they are packed by the conversion tools provided by our company. The language documents, font
documents are not replaceable and cannot be deleted.
29
5.5.3 System Backup
Click
to enter backup
management (see Figure 42).
A. Import backup: Import all the
documents except system record to
printer by USB.
B. Export backup: Export the
documents including input data,
machine settings, images, system
record, excluding software, fonts,
languages, status, and user
management.
Import
backup
Execute
import
Export
backup
Execute
export
(Figure 42)
Note: Please check USB connection status and disk space is normal when execute backup import and
export. Backup document route: USB Disk/InkJet/Backup.
5.5.4 System Record
Click
to enter system record viewing
interface (see Figure 43). All operation
activities including operator, operation and
operation time will be shown.
(Figure 43)
1) The printing activities: printing start and stop, initial values.
2) The data new, edit and delete activities.
System record
information includes:
3) All operation activities in system management
(including touch screen correction).
4) Image import and delete activities, system upgrade, backup,
and reset activities.
Note: System record does not include querying and viewing activities.
5.5.5 About Equipment
Click
to enter equipment information
viewing interface (see Figure 44).
Information displays current hardware
version, software version, machine serial
number, dealer code, company Logo,
company name and website.
(Figure 44)
30
5.5.6 System Reset
Click
on tools
management interface to enter system
reset management (see Figure 45).
Click
to execute system
reset. You need to enter administrator
password for permission to reset
execution (see Figure 46).
(Figure 45)
(Figure 46)
Note: System reset is to restore all defaults.
1) Restore all the settings to defaults, clear all data and images.
2) Maintain software version in current version; restore language and font to default.
After system reset, system parameters are as follows:
Item #
1
Item
Parameter
Language
English
2
System time
Manufacture time
3
Screen saver time
5 minutes
4
Unit
Metric/mm
5
Daylight saving time
OFF
6
Customer year
OFF
7
Date transition time setting
OFF
8
Pre-zero in date/time
OFF
9
Pre-zero in counter
OFF
10
Counter alarm
OFF
11
Counter reset
OFF
12
Pre-purge
OFF
13
Clean printhead
Standby
14
Printing direction
Left-to-right
15
Channel switch
Left channel
16
Line speed
30m/min
17
DPI
300DPI
18
User permission management OFF
19
Continuous output times
0 OFF
20
Data management
Only system default data Msg001
21
Printing delay
30mm
22
Printing initial value
Counter initial value and data source current value.
31
5.6 Edit Input Method Options
A keypad appears when user clicks the editing bar. Keypad of Uppercase, lowercase, numeric, or
common symbols for changeover (see Figure 47, 48, 49, 50).
A. Uppercase: uppercase keypad is
pre-set keypad to appear
(see Figure 47).
(Figure 47)
B. Lowercase: click
to
change between uppercase and
lowercase (see Figure 48).
(Figure 48)
C. Numeric and common symbols:
Click
to change
between numeric or common symbols
input (see Figure 49).
(Figure 49)
D. More symbols: click
on
numeric/common symbols keypad for
more symbols (see Figure 50).
(Figure 50)
Input changeover key
Numeric/common symbols and alphabetic input changeover key.
Remove key (clear all input)
Delete (delete one character)
Hide keypad
32
5.7 Status Bar (See Figure 1)
Ink information includes dynamic and static information.
Static information includes cartridge serial number, client code,
cartridge type.
Dynamic information:
1) ink original volume, and prospect print output for current data.
2) Ink remaining percentage, prospect print output for current data.
Ink
information
Ink status icons include:
1) Normal (
): Normal ink status.
2) warning (
): ink amount lower than 10%;
3) Error (
Equipment
status
USB
information
): wrong cartridge, cartridge not installed, or ink used up.
Hardware and software status in printer.
(e.g. Printing not started )
Automatically displays by icon for equipment normally connected to USB port.
Support three devices: USB disk, mouse, and keyboard.
Status: not connected (gray), normal connection (green), warning (yellow).
Normally connected equipment will be displayed by icon
mouse, or
USB disk,
keyboard.
When encoder is
Encoder
information
Photocell
information
Ethernet
information
Displays encoder
or photocell
connection status
as unconnected
(gray) and
normally
connected
(green).
connected, click
encoder signal test
interface appears.
,
When photocell is
connected, click
photocell signal test
interface appears.
,
The printer connection to computer is realized by
Ethernet port, therefore realizes equipment
operation and upgrade transmission on PC end.
Information includes display IP, mask code,
MAC, gateway, controlled network host IP.
Status includes: Unconnected (gray);
Normally connected (green, interaction with PC software normal);
Warning (yellow, interaction with PC software wrong, connection failure,
software on PC not activated, computer not switched on etc.).
33
Chapter Six: Care and Maintenance
Printer is a precision machine. To keep your machine work properly and bring facilitation to your production; to keep your
machine in good condition and extend equipment life, it is important to carry out proper care and maintenance on machine
from time to time.
6.1 Printer Care and Maintenance
6.1.1 Make sure power cord, power adapter cord, grounding wire is in good condition. Make sure the contact of each cord
or wire is reliable.
6.1.2 Make sure the screw for grounding wire is secured and the grounding is reliable.
6.1.3 Make sure the equipment is not displaced. Make sure the nozzle plate is parallel to printing object, and printing
distance is controlled within 0.5-2.5mm. (Please use the designed tools provided by our company to secure the
mounting support).
6.1.4 Clean ink cartridge: wipe nozzle plate with Non-woven to keep nozzles clean and unclogged. (Please refer to ink
cartridge care and maintenance for instructions).
6.1.5 Keep touch screen clean. Do not hit touch screen sharply.
6.1.6 Keep machine surface and ports clean.
6.1.7 Check status bar, make sure equipment icon is normal and there’s no alarming status on status bar. (In case of alarm
status, check troubleshooting for solution)
6.1.8 When machine is turned off, make sure to remove the cartridge from printer, clean the nozzle plate and cap the
printhead, and place the cartridge in safe environment. (Please refer to cartridge care and maintenance for
instructions).
6.2 Ink Cartridge Care and Maintenance
Maintain correct methods for use and storage of the cartridge will keep the cartridge work with best print quality and extend
cartridge life. Please always follow instructions in Ink Cartridge Care and Maintenance. The warranty will not cover damage
or failure caused by negligence in following our care and maintenance instructions.
6.2.1 Ink volatilizes slowly if the cartridge is decapped. Keep new and undecapped cartridge in its original package. Decap
new cartridge only when it is to be used.
6.2.2 Try to use up ink as soon as possible once the cartridge is decapped to prevent blockage because ink become dry
on nozzle plate very soon.
Note: Due to property difference, different inks have different dry time and care and maintenance methods. Contact our
after-sale service for more information.
6.2.3 If ink in cartridge is not used up at a time after decapped, remove the cartridge from printer and cap the printhead and
store it in airtight container provided by our company. (Storage temperature is room temperature).
Note: Do not use adhesive tape to seal the printhead, and do not store cartridge in soft plastic bag.
6.2.4 Nozzle plate is delicate. Do not touch or clean nozzle plate with anything sharp or rough so as not to scratch nozzle
plate.
6.2.5 Use the Non-woven provided by our company to wipe and clean nozzle plate.
Note: Wipe nozzle plate with the printhead facing down. Move the printhead in the direction of nozzle channel. Move the
printhead in the direction across nozzle channel will damage the nozzles.
6.2.6 Do not shake ink cartridge or expose it to vibration. Shake or vibration will get air run into cartridge and affect print
quality.
To ensure best print quality, contact our company’s after-sale service for information of instructions for different inks.
34
Chapter Seven: Troubleshooting
Note 1: The table below lists the most commonly seen problems and the solutions to each. If there’s any other problem,
contact your local dealer or our after-sale service for assistance.
Note 2: The table below is for reference only because causes for each problem may differ depending on individual situation
such as setup environment, operation demand.
7.1 Troubleshooting for Ink Cartridge
Sr.#
1
Problem
Problem
1. Nozzle blockage
The print has or damage.
broken line or
white line.
2. Cartridge not in
good contact with
printer.
Solutions
A. See Section 6.2 Ink
Cartridge Care and
Maintenance, wipe and
clean nozzle plate with
Non-woven;
B. See Section 5.4.3,
purge the nozzles by the
option “Clean Printhead”.
2
A. Check status bar if
there’s alarm of low ink.
B. Send back to our
company for test.
3
The print is
totally blank.
See Section 5.7 to check
ink status: is ink used up?
4
Unable to
identify ink
cartridge.
If the problem is still
unsolved:
Check if there’s any
spring-loaded connectors
depressed in Driver board;
Check if there’s
contamination on cartridge
contact plate.
Remove the cartridge and
re-insert.
The print is
complete at
Ink starvation or air
first, and then bubbles blocking
becomes
nozzles.
incomplete
Ink used up or total
nozzle blockage.
Comments
1. Connectivity
problem on printer
(defect or damage)
Remove cartridge and
re-insert.
2. Cartridge dealer
code mistake.
Remove cartridge and
re-insert.
If problem is unsolved:
Check if there’s any
spring-loaded connectors
depressed in driver board.
Check if there’s
contamination on cartridge.
Check if there’s
contamination on ISM card.
Check if there’s any
connector depressed on
ISM card board.
35
7.2 Troubleshooting for Printer
Sr.#
Problem
Cause
1.No power input;
1
Printer
cannot be
switched on
Solutions
Comment
A. Make sure AC power
input on adapter is
correct, DC output on
adapter is well connected
with printer.
B. Check if power adapter
light is normal. Replace a
new adapter if light is
dead, dim or blinking.
2. Printer switch not
turned on.
Make sure the printer
power switch is turned
ON.
3. Equipment
damage.
Contact local dealer or
after-sale service.
Click “Start printing”
1. Printing not started. button to start printing.
2. No data for printing.
Select a file and click
“Start printing” button.
3. Printing delay value Check if the printing delay
value is normal.
too big.
2
Printer
does not
print
4. Cartridge not
installed.
5. Cartridge installed
but used up or
damaged.
Install a cartridge.
Check cartridge status
according to Section 5.7, If ink used up, or cartridge
is ink used up or cartridge dealer code wrong, replace a
new cartridge.
dealer code wrong?
Cover up the photocell to
check according to 5.2.2
6. Photocell not works. to see if there’s variation
in print output quantity in
printing report.
7. Encoder is
connected but
damaged.
Check if the encoder and
its connection wire are in
good condition; check if
the production line is
running well.
When the external equipment
is photocell, click
for
photocell signal test interface,
test if photocell works.
When the external equipment
is encoder, click
for
encoder signal test interface,
move encoder to check if the
encoder works.
36
Appendix 1: Terms and Definitions
Sr.#
Term
Definition
Comment
It is the distance from the point when E.g. Printing delay value is 30mm,
photocell senses the printing object
printer starts printing at 30mm point after
to the point when printing starts.
the photocell senses the printing object.
User can adjust the value to alter the
print position on printing object.
1
Printing delay
2
Printing
initial value
It is beginning value in printing
process for print data.
E.g. Set the initial value as 9, the counter
counting starts from 9 for first print.
3
Screen
saver time
It is a power saving function, the
screen will automatically turn off and
enter standby mode when the screen
is inactive for a time period as set.
E.g. Set the screen saver time as one
minute. The screen will automatically
turn off and enter standby mode if the
screen becomes inactive for one minute.
It is the special year on customer
demand. Customer can change the
year in date format by any round
number within scope.
E.g. The system date is 2012/07/31.
Supposed the date by customer is
2010/07/31, customer can set the year in
date as 2010. Then the date shown on
the print will be 2010/07/31.
4
5
6
7
Customer
year
Date
transition
time setting
Pre-purge
Clean
Printhead
When system time reaches certain
point, the printout date and time will
be that of the next date.
E.g. Current date and time is
“2012/07/31 13:00”, set the date
transition time as “18:00”. The printout
date and time will be “2012/08/01 00:00”
after 18:00.
Ink becomes dry on nozzle plate
during use. The dried ink will make
the print not clear for half of first
character. To prevent this
phenomenon, user can turn this
function ON.
When Pre-purge function is turned ON,
printer will spray a little ink at optioned
level during idle period in printing
process to keep nozzle plate warm and
moist so as to eliminate dried ink
phenomenon.
Customer can use this function to
purge nozzles.
Purge whole nozzle plate, make sure
nozzles are unblocked.
E.g. At option of single-channel printing,
when there are damage in left channel
nozzle or there are missing dots in print
by left channel, user can switch to right
channel printing.
At option of dual-channel printing, left
channel and right channel will work at
same time for printing to achieve darker
print and best print quality.
8
Channel
switch
Customer can switch for different
channel to achieve best print quality
according to print need and nozzle
channel condition.
9
Continuous
printing
Multiple outputs of same print during
one session of period photocell
sensing the print object.
37
Uneven Surface Inkjet Printer
XiaMen Sojet Electronics Co.,Ltd.
Add: Room 402 4/F, Hong Ye Building,Chuang Ye Park,
Torch Hi-Tech Industrial Development Zone, XiaMen, Fujian, China
Tel: +86-592-5771357 Fax: +86-592-5565048
E-mail: [email protected]
Website: www.sojet-tech.com
Zip code: 361006