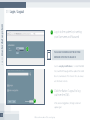
1
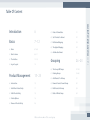
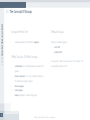
rasin user manual master data system © screenlinx - member of the eventa group www.screenlinx.de rasin master data system rasin MDM £ 2 $ € © screenlinx - member of the eventa group ✓ Introduction 6 Basics 7 - 12 00 Basics 07 - 08 01 Basic Features 09 - 11 02 The Interface 12 - 13 03 Login / Logout 14 05 Create A Variant Base 21 06 Set A Product As Variant 22 07 Edit Variant Mapping 23 08 The Applied Mapping 24 09 Add Another Variant 25 Grouping 26 - 23 00 The Concept Of Groups 27 - 28 Product Management 15 - 23 01 Creating Groups 29 - 30 02 Add Products To A Group 31 00 Introduction 16 03 Remove Products From A Group 32 01 Add A New Product Entry 17 04 Edit Products In Groups 33 02 Edit A Product Entry 18 05 Delete A Whole Group 34 03 Further Options 19 04 Remove A Product Entry 20 © screenlinx - member of the eventa group rasin master data system Table Of Content 3 rasin master data system Exporting 00 The Concept of Exporting 36 01 Existing Export Templates 37 - 39 02 Create New Export Templates 40 - 42 03 Export Template: HTML / CSS 43 - 45 04 Export Template Upload 46 - 47 05 Pick A Product For Editing 06 Editing A Product 07 Pass Back To Rework 08 Send To Lector 54 55 56 57 09 Lector Area - Proof Products 58 10 Answer Questions / Pass Back To Rework 59 11 Setting Re-Lector Intervall 60 12 Send Back To Rework 61 62 Workflow 48 - 61 13 Finished Products 00 The Concept Of Workflow 49 01 Elements Of The Workflow Module 50 Creating Users 63 - 65 Add or create a new user 38 - 40 Service 66 - 67 02 Workflow Groups 4 35 - 47 03 Workflow State 52 04 Starting A Workflow Process 53 51 © screenlinx - member of the eventa group introduction master data system screenlinx rasin rasin master data system Introduction Master Data Management Reduce the complexity of data sharing and keep it as simple as possible! Create a consistent and user friend- The management of master data is increasingly becom- ly surface and take long-term advantages of the poten- ing important in all kinds of sectors, however especially tial of our newly developed MDM Solution: rasin MDM the master data of products is one of the main challenges: Since the master data of products has to be accessible during the whole lifetime of a product, it is necessary to cross system boundaries and update, exchange, synchronize and transfer data from wherever you are. We support you in building and managing company-wide available product master data and provide a cross-border online-platform that allow the organization’s different applications and users to seamlessly share a common master data resource. 6 Your Benefits On the following pages you will find more information about the benefits of MDM, such as: ●● the sharing of data in common without reformatting or duplication ●● the quick synchronisation of data across an organisation without system boundaries ●● the web-based and consistent, user friendly interface ●● provide immediate, tangible results ●● along with many other long-term advantages © screenlinx - member of the eventa group About rasin MDM Basic Features At a basic level, MDM seeks to ensure that an organization ●● A web-based master data management does not use multiple versions of the same master data in ●● Creation and maintenance of particular product different parts of its operations. groups and units Furthermore our MDM aims to improve the quality ●● Preparation and management of templates consistent ●● Useful and simple export function (Microsoft EXCEL, of data through classifications and identification of data as well as a simple data-reconciliation. Processes offered in our online MDM System in- for shops like amazon, ebay,..) ●● Creation of numerous administration user groups clude a system-wide data collection, data transformation, and single users with certain privileges (e.g. system normalization and distribution of product description administrator or editor) data within the whole company. MDM will enable a ●● central administration of product data in its whole description depth. Through the use of templates and views you can provide only selected data, which is recently required rasin master data system 00 Basics Upload function for product images or product manuals ●● High user friendliness through a multidimensional search function in a particular system. The standardized master data also supports the electronic data exchange between your systems as well as to suppliers and customers. © screenlinx - member of the eventa group 7 rasin master data system 00 Basics rasin MDM Data Sources Users @ collecting data standardizing storing, cleansing presentation Data Governance The MDM platform allows the organization’s different Updates are easier to implement since MDM tools keep applications and users to seamlessly share a common master data synchronized and therefore enable better master data resource through a single interface, without data analysis and governance. reformatting or duplication. 8 © screenlinx - member of the eventa group Creating A Data Set Creating Admin & User Profiles As a start, you can create navigation entries in your ●● Administrate diverse user groups and profiles main navigation ●● You can create numerous login accounts, ●● Add numerous subentries in your navigation ●● Either users or admins with defined access rights ●● Create groups to classify your entries and keep track ●● User data can easily be added or edited, e.g. contact ●● on them rasin master data system 01 Basic Features information ●● Entries can be created faster with item templates ●● Furthermore they can be linked either to an internal ●● An overview of all users / editors and administrators in a list, incl. search engine existing page or an external web page © screenlinx - member of the eventa group 9 rasin master data system 01 Basic Features Managing Your Data Multifunctional Export Tool ●● ●● Categorize and classify your products on the basis data easily in different output types: of explicit attributes and ●● Fasten your publication process and export your Enrich the descriptive data with further content and ●● Excel, CSV, PDF, HTML material ●● For online shops, e.g. Magento ●● Thus create a firm basis for your product master data ●● Select various elements of a data set and define their ●● Create groups to classify your entries and keep track export destination on them ●● Use item templates to create your entries faster ●● Furthermore, entries can be linked either to an internal existing page or an external web page 10 © screenlinx - member of the eventa group sea rch Target Specific Publishing Internal Search Engine ●● ●● Seamlessly share a common master data resource to specific target groups on a web platform ●● The multifunctional search function ensures a high user friendliness and improved efficiency You can easily provide customized content for ●● Editors can perform a search for a keyphrase various internal and external user groups ●● The results will return all the content elements with ●● Entries can be created faster with item templates ●● Furthermore they can be linked either to an internal existing page or an external web page rasin master data system 01 Basic Features the phrase included ●● Narrow search results by activating / deactivating certain options © screenlinx - member of the eventa group 11 rasin master data system 02 The Interface A E B C 12 D © screenlinx - member of the eventa group A Search bar with latest search A. B. B Navigation links for workflow groups, all groups and products C. C Sub-menu for administration, export options, news and bug reports D. D Logout button to log off safely from the system rasin master data system 02 The Interface E News area where you can see E. new products in the database or the latest changes © screenlinx - member of the eventa group 13 rasin master data system 00 Login / Logout A Log in to the system by inserting A. your Username and Password A PLEASE USE THE REFRESH BUTTON OF YOUR BROWSER AFTER YOU’VE LOGGED IN Due to everyday modifications, it is recommended that you refresh the page and thus update the stored data in your browser. This ensures that you always use the newest version. A. B Click the Button ‘Logout‘ to log out from the CMS B After you have logged out, the login screen will appear again. 14 © screenlinx - member of the eventa group product management master data system screenlinx rasin rasin master data system 00 Introduction Product Management Functions: This chapter covers the creation of new products to the • Add a new product entry system, the removal, the setting options and the general • Remove a product entry management of product data. • Insert and edit product content A new function is the connecting of products, that is the • Add product content in several different languages creation of so-called variants: It enables you to easily adopt • Create copies of a product entry content of another product, that is almost identical or to • Create a base variant big parts similar to yours. By the help of mapping masks • Create variants and adopt content of a similar you can select the fields whose contents differ from the product (the base variant) original, base variant. All remaining fields will be adopt- • Edit the variant mapping mask ed from the base variant’s content, which makes it easy • Remove product from base variant for you to maintain a single product base for numerous similar products. 16 © screenlinx - member of the eventa group A The “Add” Symbol Click on the navigation entry “products” to open the icon toolbar. Next, click on the - icon to create a new navigation / content entry. B A Insert Name Insert the desired product name in the description field and choose a template file in the dropdown rasin master data system 01 Add A New Product Entry below. The newest template is always selected by default. B CLICK ON THE “SAVE” BUTTON TO ADD THE NEW NAVIGATION ENTRY. © screenlinx - member of the eventa group 17 rasin master data system 02 Edit A Product Entry C Start Editing Now click on the name of the newly created product entry in the navigation to open the product page. C The fields will appear faded-out. To start editing, you will first have to click on the “Edit on” button on the top. Either that, or you first click on the product name and wait until the icon toolbar has shown up. By this, you can simply click on the pencil symbol , which is the second one, and directly start editing the content. (Leave your cursor a few seconds on the symbol to read the ALT-text of the icons.) D The Product Page D The product page consists of several different sections. On top of the page you find the admin navigation area, which includes the most important functions: “Edit on / off”, “Save”, “Put to archive”, “Create a copy”, “Notes”, “Workflow state”, “Add to ERP” and “View Alfresco page”. To save your product’s content, you can either click on the “Save” button on top, or click on the disc-symbol in the left navigation area: 18 © screenlinx - member of the eventa group E Content Language Also, you can choose which language(s) you want to edit in the two dropdowns below the button navigation. It is possible to display and edit the content of two languages at the same time. This is quite useful, if you want to directly translate one language into another one. E F F Archive Product Data This, for example, is a very useful function, if you want to undo all changes of a session and switch to an older version of the product data. rasin master data system 03 Further Options Whenever you think it’s necessary, click on the “Put to archive” button in the top navigation. The current version of your product data will be listed below the “versions” headline. From now on you can edit or remove every single archive or even compare the differences of two versions. For this, select two different versions and click on the “show differences” button. © screenlinx - member of the eventa group 19 rasin master data system 04 Remove A Product Entry G If you want to remove a product entirely from the data mangement system (!), click on the product name in the navigation to open the icon toolbar and click on the red delete symbol: G H Removing A Product H Of course you will first asked to confirm the deletion of the product. Only after clicking “OK” the product will be removed from the system. PLEASE CAREFULLY CONSIDER THE REMOVAL OF A PRODUCT - THE DATA CANNOT BE RESTORED! 20 © screenlinx - member of the eventa group A A Create A Variant Base Open the product you want to set as a variant base. That is, you plan to adopt some of the content of this specific product to another one. Example: There are two products which only differ in name, color and GTIN (naturally!). Click on the button “create variant”. B B rasin master data system 05 Create A Variant Base You will be notified that the product has been created as a variant base. On the “VariantBase” label on top of the page you can recognize such products at first glance. © screenlinx - member of the eventa group 21 rasin master data system 06 Set A Product As Variant C Open the product whose content is similar to the product you have set as “base variant” (here: #1499) Below the language selectors you will find the label “Add to variant”. Select the required base variant from the dropdown - the one you’ve set in chapter 01 - #1499. C D The current product has now been added as a variant of product #1499, as you can also recognize on the label on top of the page. E From the current page you can quickly switch to the base variant by clicking on it’s name on the top of the page (“Variant of: ... ”) or select it from the dropdown below. D E 22 Select The Base Variant © screenlinx - member of the eventa group F F Depending on what is set in the variant mapping of the base variant, the product fields are now filled with either information of the base variant or original product information. You can edit the mask by clicking on the button “variant mapping”. G G H H Variant Mapping By default, the first line is set to “EAN (GTIN) Code” - this must not be changed, since every product can only have one specific GTIN. Click on the following fields and select other fields whose content differs from the base variant. For example: Product Name, Main Colour, Product Title and Product Pictures. rasin master data system 07 Edit Variant Mapping • Update-Button: Click here to save the mapping mask and apply it to the product page. • Refresh-Button: If you have all numbers selected until the last line and want to add some more, click “refresh”. • Reload-Button: Undo the last change in the mapping. © screenlinx - member of the eventa group 23 rasin master data system 08 The Applied Mapping I I The Mapping Result Now let’s go back to the product page in edit mode. You will notice that it’s only possible to edit the dark fields, those you have selected before in the variant mapping. J J The remaining, uneditable fields are filled with content of the base variant. Those can only be edited on the page of the base variant. You want to change this content? Take a look at Chapter 02 - E. 24 © screenlinx - member of the eventa group K K Further Product Variants Let’s assume you want to quickly add another variant to an existing one (e.g. the same product in a different color): Click on the “Add new to variant” button on top of the page. L L M A copy (variant) of the whole product is made and also shows up in the variants dropdown with a new product number. rasin master data system 09 Add Another Variant The GTIN field will probably be empty, since it is selected in the variants mapping by default. As explained in the previous chapter, you can edit the variants mapping either before or after adding a new variant. M © screenlinx - member of the eventa group 25 grouping master data system screenlinx rasin © screenlinx - member of the eventa group The New Grouping Module Group Examples: In groups you can collect and sort specific products to Winter: This group contains all products for the winter create yourself a better overview. You can assign every season. product to multiple groups, because the product entry in the group is not a copy of the product data. It is a New Listed: This group contains all products that you have reference to the data, which allows you, for instance, to already added to the system and should be reviewed by edit the data inside a group and it will automatically be another editor. rasin master data system 00 The Concept Of Groups changed in the original data set and any other reference. Order PO123456: This group contains all products that are Please note: You cannot create new products inside to be delivered in a special amazon product order. a group, you can only collect existing products. Check missing data: Products, that still lack some information and have to be completed. © screenlinx - member of the eventa group 27 rasin master data system 00 The Concept Of Groups Groups Are Not For: • Default Groups: Grouping products from different suppliers What You Can Do With Groups: There are two default groups: • with GTIN • without GTIN This provides a better overview about the products that • Add products (i.e. if another product should join the are already listed with a GTIN. group) • Remove products (i.e. if you finished a product in the “check missing data” group) 28 • Rename groups • Delete groups • Export all products inside of one group © screenlinx - member of the eventa group A Click on the arrow A. icon on the left to “groups” to see all existing groups. B Click on the “groups” headline. B. C Click on the “add new group” C. B rasin master data system 01 Creating Groups icon. C A © screenlinx - member of the eventa group 29 rasin master data system 01 Creating Groups A Insert a name for the new group. A. B Click on “AddNewGroup”. B. A B E C 30 D C Click on the new entry in the C. group listing. D Click on the “edit” D. icon to add products to the group or edit the group settings. E 1. Press “add” to select products. E. (described on following page.) 2. Press “list” to show all products inside the group. 3. Insert a new name and press “rename” if you want to change the group name. © screenlinx - member of the eventa group If you click “add”, as mentioned on the previous page, this window appears. A A Select a template A. The products, you want to add to the group, should be based on that template. The newest template is always selected as default. B B Select the products Use the CTRL-Key to select multiple products. C rasin master data system 02 Add Products To A Group Add products Click “add” to assign the selected products to the group. After that the products will be listed in group listing on the left. C YOU CAN ALWAYS ADD NEW PRODUCTS TO THE GROUP IF NECESSARY - JUST SELECT THE GROUP FROM THE LISTING - PRESS ‘EDIT‘ AND ADD NEW PRODUCTS © screenlinx - member of the eventa group 31 rasin master data system 03 Remove Products From A Group Remove a single product from the group. A A Open a group in the navigation A. and click on the product you want to remove. Click on the “remove element from group” icon. B Remove multiple products from the group. A Click on a group name and then A. click the “edit group” icon now press on the “list” button. B Select all products you want to B. remove from the group. A C Press the “remove” button. C. C 32 © screenlinx - member of the eventa group If you want to edit the product data you can do so directly from the group listing. Your changes will be saved in the root data of the product. A Click on the product you want A. to modify. B Click on the “edit” B. icon. rasin master data system 04 Edit Products In Groups A B © screenlinx - member of the eventa group 33 rasin master data system 05 Delete A Whole Group If a whole group is not needed anymore, you can delete it. A A. Select a group from the group listing. B B. Press the “delete group” B A 34 © screenlinx - member of the eventa group icon. exporting master data system screenlinx rasin rasin master data system 00 The Concept Of Exporting The New Export Tool Export Functions: The new export tool enables the user to work even faster • Multidimensional and fast search function. and more dynamically. You can export the whole data in • Several output types possible. (.xls, .csv,..) one single Exel or CSV document for quick adjustments • Select one of the default export templates, or and completion with a maximum of compatibility to all • Easily create and save your own, individual systems. export templates. Boost your trading power, increase the value and • Create multilingual lists. speed up your work flow with this user-friendly and • Add your own additional text to a column. complications reducing software. • Insert your own specific delimiter. • Add as many columns and rows as you like. Export the required data with a default export template or create your own individual template. 36 © screenlinx - member of the eventa group A Click on the “Export” button to A. open the export module. On the export page you will see a couple of fields that make it easier to find the products you are looking for. A © screenlinx - member of the eventa group rasin master data system 01 Existing Export Templates 37 rasin master data system 01 Existing Export Templates A Filter template, category & group A. A B C D If you have products in different groups (i.e. Toys / Sporting goods...) you can select the template the products are based on. You also select any category or group to filter your results. B. B Sort by date E.g. if you only want to see products, that have been created the last month, select “created after ...”. C Other search options C. You can also search for a specific word that is part of the product content or title, or simply search for a full or a partial GTIN. Furthermore, you can look for products, that are marked as Magento or OpenERP products. D. D Sort results by To make it easier to find the listed products, you can change the “Sorted by” dropdown. GTIN up/down sorts the products based on GTIN number. Content up/down sorts the products alphabetically, based on the product name. 38 © screenlinx - member of the eventa group G Select output type & language A. Export as .csv or .excel-data file. Choose the default output language. H Elements A. • Select any existing template, e.g. “01” • Click “View mapping” to take a look at the selected export template mask. (Explanation follows on the next page.) • G I Options • • H I J J Select whether the header is shown or not rasin master data system 01 Existing Export Templates Check “Strip HTML tags” if you want a clean product description without any HTML tags. Value delimiter (global): Set the desired delimiter symbol for your output file. Start exporting BASED ON THE COUNT OF PRODUCTS THIS CAN TAKE A WHILE. © screenlinx - member of the eventa group 39 rasin master data system 02 Create New Export Templates A The export module is very flexible, i.e. you are free to place any information in any column of the exported CSV File. A A View mapping A. B As explained on the previous page, you have to click on the “View mapping” button to display the template mask. Select “none” as template mask to create your own. D B Select column content Click on the main item field and start typing to find and select your desired content for the particular column (A, B, C...). C Insert specific delimiter If you want another delimiter than the global / default one (defined at the bottom: “,”), insert any symbol you like. E.g. “x” or “/” or “|” .. 40 © screenlinx - member of the eventa group D Refresh page to add new rows A. If you have inserted all information in column “A” and need a second row in - just click the “refresh” button at the bottom of the page. This, for example, allows you to add additional lines with the same information in other languages. E Click on the language field to select the required language from the dropdown. If you select “xx - Default”, the above selected “output language” will be used automatically. E F G Select language rasin master data system 02 Create New Export Templates Add fix text Select “fix text” from the main item dropdown to add your own additional text to the particular column. In the shown example, column “J” of the export list contains the words “e.g. brand name” for each selected product. F G D Add more columns If you have completed the last column/line (here: K / 11) and need a few more, just click the “Refresh” button on the bottom. © screenlinx - member of the eventa group 41 rasin master data system 02 Create New Export Templates H Your new template is finished? A. I Don’t forget to save your template when you have finished editing your own mask. Go to the top and insert a proper name next to “Save as:”. H I Save the new template Click the “Save” button on the left. Your export template is now saved and can be used for further export actions. JUST FOLLOW THE DESCRIPTION HOW TO EXPORT DATA AND SELECT YOUR NEW TEMPLATE WHEN NEEDED. 42 © screenlinx - member of the eventa group Special HTML tags Attributes <mdm-loop></mdm-loop> // Products, which are choosen in the export, are depict in this loop. * Explanation on the basis of: <mainitem <mdm-next></mdm-next> // More products withhin one loop. Z.B. <mdm-loop> <header> <mdm-next> <mdm-next> <footer> </mdm-loop> -> Two products on one page, with the same header and footer (simplified) <mdm-pdf></mdm-pdf> // Only the export as PDF. Example: <mdm-pdf size=’a4’ orientation=’portrait’> </mdm-pdf> orientation = ‘portrait’ (Hochformat) oder ‘landscape’ (Querformat) <mainitem [attributes]> </mainitem> [mainitem id] | [html tags] id=’10300’ignore=’yes’ images=’0’ resize=’yes’ height=’80px’> ID = Specific Fieldvalue from the MDM, here: Product pictures - ‘10300’ Diffrent spelling possible: <mainitem> 500 </mainitem> -> Productcategorie expensed IMAGES = 0 -> Mainimage, 1 = PT01, 2 = PT02, usw. default = 0 IGNORE = yes -> ignored, if product picture is not avalible | default: IGNORE = NO rasin master data system 03 Export Template: HTML / CSS | RESIZE = yes -> Picture size should be changed -> Height or width: e.g. height = 80px | default=no © screenlinx - member of the eventa group 43 rasin master data system 03 Export Template: HTML / CSS 44 Attributes WIDTH / HEIGHT = number | default = 300 -> new picture width or height More attributes possible: B-WIDTH = number B-HEIGHT = number default=15 (barcode-height) | default=1 (barcode-width) TYPE = value / name -> Name / Value of mainitems BARCODEIMAGE = png / gif / jpg IGNORE = yes / no | default=no - if mainitem value is empty, ignore entire <mainitem></mainitem> IMAGES = ’0;1;5’ | default=0 - image number (0-main, 1 - first image of PTxx)- used only if mainitem is from image type BARCODE = yes / no | default=no - create barcode (use barcodetype and barcodeimage) BARCODETYPE = ean13 / int25 / upca / code128 / ean8 / postnet | default = ean13 © screenlinx - member of the eventa group | default=jpg Example Page: <!DOCTYPE html PUBLIC “-//W3C//DTD XHTML 1.0 Transitional//EN” “http://www.w3.org/TR/xhtml1/DTD/xhtml1-transitional.dtd”> <html xmlns=”http://www.w3.org/1999/xhtml”> <head> <meta http-equiv=”Content-Type” content=”text/html; charset=utf-8” /> <title>Template</title> <style type=”text/css”> ....</style> </head> <body> <mdm-pdf size=’a4’ orientation=’portrait’></mdm-pdf> <div id=”wrapper”> </div> </mdm-next> </div> <div class=”footer”> © by screenlinx.de </div> <mdm-loop><!-- MDM LOOP --> <div class=”header”> ...... <div class=”content”> <img src=’%s’ /> </mainitem> </div> <div class=”category”> <h2><mainitem>3900</mainitem></h2> <ul> <li><b>Product Category: </b> <mainitem>500</mainitem></li> <li><b>Product Type: </b> <mainitem>3700</mainitem></li> </ul> rasin master data system 03 Export Template: HTML / CSS </mdm-loop><!-- / MDM LOOP --> </div> </div> <mdm-next> <div class=”mainitem”> <mainitem id=’10300’ ignore=’yes’ images=’0’ resize=’yes’ width=’400px’> </body> </html> © screenlinx - member of the eventa group 45 rasin master data system 04 Export Template Upload 46 Add a new export template In the admin area you can get to the “Export-Template” site. To add a new export template, select “none” in the “select export template” dropdown. After that, you have to enter a name for the created template and load the HTML-file vor the export as HTML- or as PDF-file. In this case we load up a HTML-file, which has been optimized for the PDF-file export (second field). Pictures, which are embedded to the template (e.g. “logo. jpg”) have to be zipped and seperatly uploaded in the lowermost field (“TUROK.zip”). © screenlinx - member of the eventa group Use the new template In the admin area you can get to the “Export-Template” site. Go to the “Export” page and select the products, you want to export. On the bottom of the page, you first choose the output type “export from template (html)”. Now you will see some more options, from which you can select the output language and the saved HTML-template file (“TUROK TEMPLATE PDF”). rasin master data system 04 Export Template Upload “Split after: 1” creates an automatic pagebreak after the loops. In this case it is necessary. The selected template has been optimized for the PDFexport, thus you have to choose “to pdf” as output subtype from the dropdown. The PDF-file will be generated after clicking on the “Export” button. © screenlinx - member of the eventa group 47 workflow master data system screenlinx rasin © screenlinx - member of the eventa group The Benefits of the Workflow Process This workflow process repeats itself until the product is marked as “checked” by the lector. In the section “workflow groups”, product data can be Every editor has its own “working group”. While work- added step by step, and reviewed by a qualified person. A ing on the product, the data set is stored within his own new product will automatically be added in the workflow group an cannot be edited by another user. Thus it is no group “new” and can be picked by any editor to insert the longer possible that two editors are working on the same necessary data. When the editor has finished his work, he product at the same time. has to move the product to the “lector” group - where a qualified user will check the inserted data. rasin master data system 00 The concept of workflow Follow this tutorial to learn how a product is handled in the new workflow module. If the data is correct, the lector will either mark the product as finished (for each language) or add some comments and send the product back to the “Rework” Group (or to a special editor). © screenlinx - member of the eventa group 49 rasin master data system 01 Elements of the workflow module A Workflow Groups A. See which products are new or need to be reworked. Furthermore, editors can pick products for edit- B ing and lectors can assign the products to editors. A C B The button “Workflow State” A. Press this button to open the product specific workflow state popup window. C Workflow state window A. In this window you can change the state of a product and add notes. Also you can assign the product to specific users or lectors, or mark the product as finished. 50 © screenlinx - member of the eventa group A A The workflow process is divided into different groups: Group “new”: If a new product is created by a system administrator, the product will automatically be added to the group “new”. Thus everyone can see that there is a new product to be edited. Group “rework”: If a product already exists but is not yet finished, it will be assigned to the “rework” group by an administrator of lector. A product can also be part of the rework group, because an editor was not able to fill in the required information and had to pass the product back to rework. B rasin master data system 02 Workflow groups Group “lector”: If an editor has finished editing and would like the lector to review the product, he has to assign the product to the “lector” group. User specific groups: Depending on your user profile, you can see all or only your own user groups. In this specific group you will see a list of products you picked from “new” or “rework” for editing. If a product is listed in such a specific group it will no longer be displayed in “new” or “rework” and thus cannot be taken by anyone else. © screenlinx - member of the eventa group 51 rasin master data system 03 Workflow state B B The workflow state window gives you an overview about the current product state. The dropdown “reassign to” allows you to assign the product to a specific user. You can also change the state of the product depending on the language. The field “independent” implies all data fields, which do not depend on a specific language. You have the following possibilities: Rework: The data is not yet finished and should be reworked - the product will automatically be listed in the rework group (if not assigned to a specific user). Temporary finished: An editor can mark a product as temporary finished if he wants to send the product to a lector for review. Buttons: Send to Lector - Send the product to the lector group for reviewing. Unassign - Send the product back to the rework group or remove completely from the workflow process (if already placed in rework). Change state - Press this button to publish your changes. 52 Cancel - Close the workflow state window. Not required: A lector can mark a language as “not required” if there is no need for a translation. Checked: A lector can mark a language as “checked” if the specific language is complete. Notes: This field will show you product related notes from other editors or lectors. © screenlinx - member of the eventa group There are two possibilities of starting a workflow process: If you are logged in with the required user rights (admin or lector), you can start the workflow process by creating a new product - the new product will then automatically be placed in the “new” group. You can also select an existing product, open the “workflow state” window and change the state values to “rework”. Then click on the “change state” button and rasin master data system 04 Starting a workflow process close the window. The product has now been moved to the “rework” group in workflow groups. The product is now part of the workflow process - this has no effect on viewing or exporting the data - however all editors now can see that the product needs some rework. © screenlinx - member of the eventa group 53 05 Pick a product for editing rasin master data system In this step you’re logged in as an user called “Test Editor” with editor rights. Thus, the lector group cannot be seen anymore. However, what we see is this: • there are no new products (empty group) • there are two products in the rework group • there are no products you’re currently working on (group “Test Editor (47)”) To edit a specific product from the “rework” group, you first have to select it and then click on the first button “assign to me”. * The “edit on” button has a very important function from now on. Please always click on that button when you start working on a product, even when you’re just doing some web research or collect your information in some other editor outside the MDM symstem. As long as your work is concerning the product, you should be in “edit on” mode - thus we can easily collect the The product will now move into your personal user group: “Test Editor (47)”. While this product is stored within your group, it cannot be edited by anyone else. To start off with editing, simply press the “edit on” * button. time you and other editors are working on products. 54 © screenlinx - member of the eventa group Remember that the product is currently in your own group, thus it is important that you save your changes once you’ve finished editing (for now). First, you should change the current state in the “Workflow State” window: If you have completed all necessary language independent fields, change the “independent” dropdown to “temporary finished”. Similarly, if you have finished all necessary German fields, change the rasin master data system 06 Editing a product dropdown to “temporary finished”, too. If you haven’t completed all necessary English fields, do NOT change the particular dropdown,. etc. Save you changes by pressing the “change state” button. Close the window - the product still stays in your personal group, because you may want to finish your work later. © screenlinx - member of the eventa group 55 rasin master data system 07 Pass back to rework If you are not able to complete a product, you can easily pass it back to the “rework” group and let someone else finish the work. To do so, please set the current states and add an additional note below, to let others know what information is missing, for instance. Save your changes with the “change state” button. Then reopen the window and press “unassign” - you can also use the “Unassign” button in the product listing, as shown before. As the product has been sent back to the “rework” group, it is no longer part of your personal user group and someone else can continue editing. 56 © screenlinx - member of the eventa group If you think you have finished editing, or want to ask the lector a question: • first change the state for each language • add a note in the below textarea • click on the “send to lector” button rasin master data system 08 Send to Lector Now the product is neither visible in your personal group, nor in the “rework” group, since it has been moved to the “lector” group. © screenlinx - member of the eventa group 57 rasin master data system 09 Lector area - proof products You are now logged in as an user with special lector rights. The “lector” group is now visible and it already contains the previous product, which has been sent by the editor for review. Also, you can see all personal editor groups - the lector receives an overview about who is currently editing which products. You are now logged in as “Test-Lector” and currently you don’t have any products to review, thus you click on the button “assign to me”. The product now moves from the general “lector” group to our personal “Test-Lector” group and we can now start reviewing. 58 © screenlinx - member of the eventa group The lector will now read all data and look for mistakes. In this example the editor has left a question: He wants to know if more languages are required. The lector thinks also French is needed, while Spain and Chinese are not important, the German and English fields are without any mistakes and are marked as “checked”. rasin master data system 10 Answer questions & pass back to rework Furthermore the independent fields have to be reworked. Thus, the lector has to open the “Workflow State” window and change each state of the languages. To answer the question, the lector has to add a new note click on the “view and edit notes” button. To save the new note, click on the “change state” button. © screenlinx - member of the eventa group 59 rasin master data system Setting re-lector intervall 60 Since there are two languages marked as “checked”, the system will ask you for an expiration period, when saving. This means that the product will automatically be send to the lector group after the given expiration period. The lector now can take a look at the data and send it back to rework if necessary. © screenlinx - member of the eventa group In the previous step the lector has answered some questions and changed the state. Since there are two states marked as “rework”, the product should be send back to the “rework” group: the lector has to press the “unassign” button (right image) or the “remove from group” button (left image). The product will now move back to the “rework” group. rasin master data system 12 Send back to rework Sometimes it makes more sense to send the product directly to the last or a specific (for example french speaking) editor - in this case the lector can use the Workflow state window. Press the “Back to Test Editor” Button to send the product to the last editor who worked on the product. OR: Select a specific user from the dropdown. © screenlinx - member of the eventa group 61 rasin master data system 13 Finished Products A product is finished if a lector marked all languages as “checked” or “not important”. In this case the product will automatically be removed from workflow module. The product can now be reassigned to the workflow by a lector or will automatically be moved when the recheck interval expires. You can see which state a product has without opening the workflow window: The small icon bar on top of the product header shows you the current state of every language. red: rework green: checked grey: not important 62 © screenlinx - member of the eventa group add user master data system screenlinx rasin rasin master data system Creating New Users 64 A Press the “Admin” button to open A. the admin configuration area. A B B Press the “User edit” button to B. open the user administration. If you want to edit a user’s profil information directly, use the search field to find the user. © screenlinx - member of the eventa group A To create a new user click the A. “Add” button on top. Insert all the necessary user information and “save” A B the new user. C B Click on the “Edit” button on the B. right to simply edit the information of a specific user. rasin master data system Creating New Users C If you want to delete any unnecesC. sary user, click on the “Delete” button. © screenlinx - member of the eventa group 65 rasin master data system Service Contact Postal Address Please do not hesitate to contact us: eventa Aktiengesellschaft Am Grundwassersee 1 Phone: +49 8801 / 9119-0 82402 Seeshaupt Fax: +49 8801 / 9119-290 Germany Email: [email protected] Web: screenlinx.eu Monday to Friday between 9 a.m and 7 p.m. As a customer you can also reach our 24h service hotline which you can find in our online service portal. 66 © screenlinx - member of the eventa group www.rasin.de screenlinx GmbH am grundwassersee 1 82402 seeshaupt germany If you have any questions, comments or business proposals, do not hesitate to contact us at [email protected] © screenlinx GmbH, 2013, All rights reserved.