1
REMOTE CONTROL OF DEVICES WITH A GPIB AND MATLAB
Mälardalens Högskolan
REMOTE CONTROL OF
DEVICES WITH A GPIB AND
MATLAB
Iván Pedraza Gutiérrez
Mälardalens Högskolan
21 Januari 2006
C level
1
REMOTE CONTROL OF DEVICES WITH A GPIB AND MATLAB
Mälardalens Högskolan
Abstract
The central idea of this project is the remote control of a Network Analyzer ZVB and
the remote control of a Labjack U12. To do this we are going to use a GPIB cable to
cennect the computer with the Network Analyzer. The Labjack will be directly
connected in the USB port.
To control this devices we are going to program a Graphical User Interface with
Matlab. We will have a window with several buttons, listboxes, popup menus, axes and
togglebuttons, with everyone of this components will be possible to do a different
function on the Network Analyzer.
The signals will be emitted from the out-port of the Network Analyzer and will be
received for one of the sixteen antennas which are connected to the in-ports. Once the
received signal is in the Network Analyzer, we can change the number of points, the
power, the bandwidth, the start and the stop frequency, etc. Also it is possible to save
and load one signal, the signal will be stored in one array which will contain three files
( frequency, magnitude and phase) and a number of columns as big as the number of
points.
2
REMOTE CONTROL OF DEVICES WITH A GPIB AND MATLAB
Table of Contents
Mälardalens Högskolan
Page
1 Introduction......................................................................................................... 6
2 Hardware...............................................................................................................
10
2.1 GPIB......................................................................................................10
2.1.1 Introduction............................................................................10
2.1.2 The communication principle.................................................12
2.1.3 GPIB Signals and Lines.........................................................13
2.1.3.1 Data Lines................................................................13
2.1.3.2 Handshake Lines.....................................................13
2.1.3.3 Interface Management Lines...................................13
2.1.4 GPIB Devices.........................................................................14
2.1.5 GPIB Data..............................................................................14
2.1.6 GPIB Limitations....................................................................15
2.1.7 GPIB Restrictions...................................................................15
2.1.8 SCPI.......................................................................................16
2.2 GPIB-USB.............................................................................................17
2.3 Labjack U12..........................................................................................18
2.3.1 Hardware Description.............................................................18
2.4 Agilent (HP) 8761B..............................................................................20
2.5 Network Analyzer.................................................................................21
3 The Graphical User Interface...............................................................................23
3.1 Introduction...........................................................................................23
3.2 How a Graphical User Interface Works................................................23
3.2.1. Components...........................................................................23
3.2.2. Figures...................................................................................23
3.2.3. Callbacks...............................................................................23
3.3 Graphical User Interface Components..................................................24
3.3.1 Text Fields..............................................................................24
3.3.2 Edit Boxes...............................................................................24
3.3.3 Pushbuttons.............................................................................24
3.3.4 ToggleButtons.........................................................................24
3.3.5 Popup Menus..........................................................................24
3.3.6 List Boxes...............................................................................25
3.4 Graphical User Interface with Matlab...................................................26
3.4.1 Connect / Disconnect..............................................................26
3.4.1.1 Connect....................................................................27
3.4.1.2 Disconnect...............................................................27
3.4.1.2.1 Default values...........................................27
3.4.2 Collect all Traces....................................................................27
3.4.2.1 Colours.....................................................................28
3.4.2.2 Steps........................................................................28
3.4.3 Collect one Trace....................................................................29
3.4.4 New Trace..............................................................................29
3.4.4.1 Active Traces in Remote Control............................30
3.4.4.2 Traces, Channels, and Diagram Areas....................30
3.4.4.3 Remote control........................................................31
3.4.5 Delete Trace............................................................................32
3
REMOTE CONTROL OF DEVICES WITH A GPIB AND MATLAB
Mälardalens Högskolan
3.4.5.1 Remote control........................................................32
3.4.6 Trace.......................................................................................32
3.4.6.1 Remote control........................................................32
3.4.7 Meas Port ...............................................................................32
3.4.7.1 S-Parameters.............................................................
33
3.4.7.2 Multiport Parameters...............................................33
3.4.7.3 Remote control.........................................................34
3.4.8 Format.....................................................................................35
3.4.8.1 Cartesian Diagrams..................................................35
3.4.8.1.1 dB Mag......................................................36
3.4.8.1.2 Phase.........................................................36
3.4.8.1.3 Real...........................................................36
3.4.8.1.4 Imag..........................................................37
3.4.8.2 Polar Diagrams........................................................37
3.4.8.2.1 Polar..........................................................37
3.4.8.3 Smith Chart..............................................................38
3.4.8.3.1 Smith.........................................................38
3.4.8.4 Remote control.........................................................38
3.4.9 Number of Points....................................................................39
3.4.9.1 Remote control........................................................40
3.4.10 Power....................................................................................40
3.4.10.1 Range.....................................................................40
3.4.10.2 Remote control......................................................40
3.4.11 Bandwidth.............................................................................41
3.4.11.1 Range......................................................................41
3.4.11.2 Remote control......................................................41
3.4.12 Start Frequency....................................................................41
3.4.12.1 Range.....................................................................41
3.4.12.2 Remote control......................................................41
3.4.13 Stop Frequency.....................................................................42
3.4.13.1 Range.....................................................................42
3.4.13.2 Remote control......................................................42
3.4.14 Antenna.................................................................................42
3.4.15 Save Antenna........................................................................43
3.4.16 Load Antenna.......................................................................44
4 How to create a GUI with Matlab........................................................................46
4.1 What is Matlab? ...................................................................................46
4.2 How to create a GUI with Matlab.........................................................46
4.2.1 Handles...................................................................................46
4.2.2 Objects properties....................................................................
46
4.2.3 GUIDE in Matlab...................................................................47
4.2.3.1 Property editor.........................................................48
4.2.3.2 Alignment Editor.....................................................49
4.2.3.3 Menu Editor.............................................................49
4.2.3.4 Callback Editor.........................................................50
5 Summary..............................................................................................................52
6 Future Development.............................................................................................53
4
REMOTE CONTROL OF DEVICES WITH A GPIB AND MATLAB
Mälardalens Högskolan
7 Result and Discussion..........................................................................................54
Acknowledgment....................................................................................................55
References...............................................................................................................56
APPENDIX.............................................................................................................57
Appendix 1: Source Code...........................................................................57
Appendix 2: GPIB Characterictics..............................................................74
Appendix 3: Labjack Functions (with Matlab)...........................................76
Appendix 4: Network Analyzer, Commond Commands............................78
Appendix 5: SCPI Command Tables..........................................................79
5
REMOTE CONTROL OF DEVICES WITH A GPIB AND MATLAB
Mälardalens Högskolan
REMOTE CONTROL OF DEVICES WITH A GPIB AND MATLAB
1. INTRODUCTION
We are going to use a Graphical User Interface (GUI) with Matlab to control a Network
Analyzer and a Labjack U12, and a GPIB (general purpose interface bus) to connect the
computer with the Network Analyzer.
There are sixteen antennas, to obtain this sixteen antennas we have used the mulplexor
HP 8761B, with the multiplexors and the Labjack U12 we can select one of the different
antennas.
The signals are going to be emited from one of the Network Analyzer outport, this is
received for other antenna which will be in a bucket that contains water or water and oil.
What we want is pick up the microwaves, emited for the antenna which is in the
outport, in one of the receiving antennas (inport).
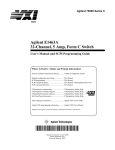
Figure 1: Bucket and Antennas
6
REMOTE CONTROL OF DEVICES WITH A GPIB AND MATLAB
Mälardalens Högskolan
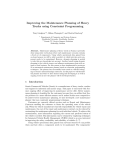
Figure 2: Oil Bucket
To receive the signals we have to select the receiving antenna using the Labjack U12,
when the antenna has already been selected, the signal will pass for the multiplexors and
will arrive to the Network Analyzer for the inport selected, once the signal is in the
Network Analizer we can work with this.
The sixteen antenas are going to be separeted in two groups of eight antennas per group,
it wants to say that we need one outport and two inports.
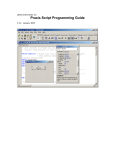
Figure 3: Antennas
7
REMOTE CONTROL OF DEVICES WITH A GPIB AND MATLAB
Mälardalens Högskolan
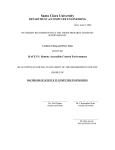
Figure 4: Antennas
To Start the communication between the computer and Network Analyzer the first thing
that we have to do is create a GPIB variable and open it. Once the communication has
been established we have to select one antenna and to create a new trace for this
antenna. Then we have to select the measurements ports ( to do this, we have to look in
which group is the selected antenna). When we have done this, and has been asigned
one trace with one antenna, we can see the different received signals.
It is possible to save the traces, the results saved are stored in an array that contains
three files and a number of columns as big as the number of points of the trace that we
want to save. The first file contains the frequency in every point of the trace.
f=(stop freq-start freq)/number of points;
for i=1:point
j=(f*i)+sta;
s(i)=j;
end
%frequency for every point
%array of frequency
The second file contains the measurements in magnitude, and the third file contains the
measurements in phase.
The different hardware elements are:
•
•
•
•
•
•
Network analyzer.
Sixteen antenas.
Labjack USB.
Ordenador portátil.
GPIB-B USB.
Fourteen multiplexores 8761 B.
8
REMOTE CONTROL OF DEVICES WITH A GPIB AND MATLAB
Mälardalens Högskolan
Figure 5: Operation Diagram
Figure 6: Components Hardware
9
REMOTE CONTROL OF DEVICES WITH A GPIB AND MATLAB
Mälardalens Högskolan
2. HARDWARE
2.1 GPIB
2.1.1 Introduction
In 1965, Hewlett-Packard designed the Hewlett-Packard Interface Bus ( HP-IB ) to
connect their line of programmable instruments to their computers. Because of its high
transfer rates (nominally 1 Mbytes/s), this interface bus quickly gained popularity. It
was later accepted as IEEE Standard 488-1975, and has evolved to ANSI/IEEE
Standard 488.1-1987. Today, the name G eneral Purpose Interface Bus (GPIB) is more
widely used than HP-IB. ANSI/IEEE 488.2-1987 strengthened the original standard by
defining precisely how controllers and instruments communicate. S tandard Commands
for Programmable Instruments (SCPI ) took the command structures defined in IEEE
488.2 and created a single, comprehensive programming command set that is used with
any SCPI instrument.
Figure 7: GPIB Cable
The ANSI/IEEE Standard 488-1975, now called IEEE 488.1, greatly simplified the
interconnection of programmable instrumentation by clearly defining mechanical,
electrical, and hardware protocol specifications. For the first time, instruments from
different manufacturers were interconnected by a standard cable. Although this standard
went a long way towards improving the productivity of test engineers, the standard did
have a number of shortcomings. Specifically, IEEE 488.1 did not address data formats,
status reporting, message exchange protocol, common configuration commands, or
10
REMOTE CONTROL OF DEVICES WITH A GPIB AND MATLAB
Mälardalens Högskolan
device-specific commands. As a result, each manufacturer implemented these items
differently, leaving the test system developer with a formidable task.
IEEE 488.2 enhanced and strengthened IEEE 488.1 by standardizing data formats,
status reporting, error handling, Controller functionality, and common commands to
which all instruments must respond in a defined manner. By standardizing these issues,
IEEE 488.2 systems are much more compatible and reliable. The IEEE 488.2 standard
focuses mainly on the software protocol issues and thus maintains compatibility with
the hardware-oriented IEEE 488.1 standard.
Figure 8. Structure of the GPIB Standards
Figure 9: GPIB Cable
2.1.2 The communication principle
A GPIB instrument receives its information from another device. Usually this is the
system controller. The instrument distinguishes between events, commands, queries and
data.
11
REMOTE CONTROL OF DEVICES WITH A GPIB AND MATLAB
Mälardalens Högskolan
Figure 10: Information Types
•
Events: The GPIB bus has a number of special control lines which allow fast
and simple passing of primitive information, called events. This primitive
information is also called ‘Interface Events’ or ‘Interface Messages’ because
they are initiated and processed by the interface hardware. An example of an
event is the IFC (InterFace Clear) event, Which forces the instrument to be able
to listen to the system controller.
•
Commands: Commands are strings which cause the instrument to perform an
action, such as taking measurements or activate a motor.
•
Queries: Queries are strings which cause the instrument to generate response.
Queries usually do not cause an instrument to perform an action. Queries always
end with a question mark (?).
•
Data units: Data units are used to pass information. Data can be in the form of
parameters which come with commands or queries to the instrument. Data can
also be in the form of response from an instrument.
The GPIB bus operates block oriented, multiple commands, queries and data strings
units can be combined into one line of text. An instrument will start executing
commands and queries if a complete line of text has been received.
To know when a complete line is transferred, the EOI (End Or Identify) event has to be
generated simultaneously when the last byte is send.
12
REMOTE CONTROL OF DEVICES WITH A GPIB AND MATLAB
Mälardalens Högskolan
2.1.3 GPIB Signal and Lines
The GPIB interface system consists of 16 signal lines and eight ground-return or shielddrain lines. The 16 signal lines, discussed below, are grouped into data lines (eight),
handshake lines (three), and interface management lines (five) (see Figure 2).
Figure 11: GPIB Signals and Lines
•
2.1.3.1 Data Lines: The eight data lines, DIO1 through DIO8, carry both data
and command messages. The state of the Attention (ATN) line determines
whether the information is data or commands. All commands and most data use
the 7-bit ASCII or ISO code set, in which case the eighth bit, DIO8, is either
unused or used for parity.
•
2.1.3.2 Handshake Lines: Three lines asynchronously control the transfer of
message bytes between devices. The process is called a 3-wire interlocked
handshake. It guarantees that message bytes on the data lines are sent and
received without transmission error.
o NRFD (not ready for data) - Indicates when a device is ready or not
ready to receive a message byte. The line is driven by all devices when
receiving commands, by Listeners when receiving data messages, and by
the Talker when enabling the HS488 protocol.
o NDAC (not data accepted) - Indicates when a device has or has not
accepted a message byte. The line is driven by all devices when
receiving commands, and by Listeners when receiving data messages.
o DAV (data valid) - Tells when the signals on the data lines are stable
(valid) and can be accepted safely by devices. The Controller drives
DAV when sending commands, and the Talker drives DAV when
sending data messages.
•
2.1.3.3 Interface Management Lines: Five lines manage the flow of
information across the interface:
o ATN (attention) - The Controller drives ATN true when it uses the data
lines to send commands, and drives ATN false when a Talker can send
data messages.
13
REMOTE CONTROL OF DEVICES WITH A GPIB AND MATLAB
Mälardalens Högskolan
o IFC (interface clear) - The System Controller drives the IFC line to
initialize the bus and become CIC.
o REN (remote enable) - The System Controller drives the REN line,
which is used to place devices in remote or local program mode.
o SRQ (service request) - Any device can drive the SRQ line to
asynchronously request service from the Controller.
o EOI (end or identify) - The EOI line has two purposes - The Talker uses
the EOI line to mark the end of a message string, and the Controller uses
the EOI line to tell devices to identify their response in a parallel poll.
2.1.4 GPIB Devices
Each GPIB device must be some combination of a Talker, a Listener, or a Controller. A
Controller is typically a board that you install in your computer. Talkers and Listeners
are typically instruments such as oscilloscopes, function generators, multimeters, and so
on. Most modern instruments are both Talkers and Listeners.
•
Talkers: A Talker transmits data over the interface when addressed to talk by
the Controller. There can be only one Talker at a given time.
•
Listeners: A Listener receives data over the interface when addressed to listen
by the Controller. There can be up to 14 Listeners at a given time. Typically, the
Controller is a Talker while one or more instruments on the GPIB are Listeners.
•
Controllers: The Controller specifies which devices are Talkers or Listeners. A
GPIB system can contain multiple Controllers, one of which is designated the
System Controller. However, only one Controller can be active at a given time.
The current active controller is the Controller-In-Charge (CIC). The CIC can
pass control to an idle Controller, but only the System Controller can make itself
the CIC.
When the Controller is not sending messages, then a Talker can send messages.
Typically, the CIC is a Listener while another device is enabled as a Talker.
Each Controller is identified by a unique board index number. Each Talker/Listener is
identified by a unique primary address ranging from 0 to 30, and by an optional
secondary address, which can be 0 or can range from 96 to 126.
2.1.5 GPIB Data
There are two types of data that can be transferred over the GPIB: instrument data and
interface messages:
•
Instrument data: Instrument data consists of vendor-specific commands
that configure your instrument, return measurement results, and so on.
For a complete list of commands supported by your instrument, refer to
its documentation.
•
Interface messages: Interface messages are defined by the GPIB
standard and consist of commands that clear the GPIB bus, address
devices, return self-test results, and so on.
14
REMOTE CONTROL OF DEVICES WITH A GPIB AND MATLAB
Mälardalens Högskolan
Data transfer consists of one byte (8 bits) sent in parallel.The data transfer rate across
the interface is limited to 1 megabyte per second. However, this data rate is usually not
achieved in practice, and is limited by the slowest device on the bus.
2.1.6 GPIB Limitations
Asynchronous read and write operations are not supported. Therefore, Agilent GPIB
objects do not support the following toolbox functionality:
•
The readasync function.
•
The async flag for the fprintf and fwrite functions.
•
BytesAvailableAction and OutputEmptyAction properties.
•
The End Or Identify (EOI) line is not asserted when the End-Of-String (EOS)
character is written to the hardware. Therefore, when the EOSMode property is
configured to write and the EOIMode property is configured to on, the EOI line
is not asserted when the EOSCharCode property value is written to the
hardware.
•
All eight bits are used for the EOS comparison. Therefore, the only value
supported by the CompareBits property is 8.
•
A board index value of 0 is not supported.
•
An error is not reported for an invalid primary address. Instead, the read and
write operations will time out.
2.1.7 GPIB Restrictions
To achieve the high data transfer rate that the GPIB was designed for, you must limit
the number of devices on the bus and the physical distance between devices. The
following restrictions are typical:
•
A maximum separation of 4 m between any two devices and an average
separation of 2 m over the entire bus.
•
A maximum total cable length of 20 m.
•
A maximum of 15 devices connected to each bus, with at least two-thirds
powered on.
For high-speed operation, the following restrictions apply:
•
All devices in the system must be powered on.
•
Cable lengths must be as short as possible with up to a maximum of 15 m
of cable for each system.
15
REMOTE CONTROL OF DEVICES WITH A GPIB AND MATLAB
•
Mälardalens Högskolan
There must be at least one equivalent device load per meter of cable.
If you want to exceed these limitations, you can use a bus extender to increase the cable
length or a bus expander to increase the number of device loads. You can order bus
extenders and expanders from National Instruments.
2.1.8 SCPI
On April 23, 1990, a group of instrument manufacturers announced the SCPI
specification, which defines a common command set for programming instruments.
Before SCPI, each instrument manufacturer developed its own command sets for its
programmable instruments. This lack of standardization forced test system developers
to learn a number of different command sets and instrument-specific parameters for the
various instruments used in an application, leading to programming complexities and
resulting in unpredictable schedule delays and development costs. By defining a
standard programming command set, SCPI decreases development time and increases
the readability of test programs and the ability to interchange instruments.
SCPI is a complete, yet extendable, standard that unifies the software programming
commands for instruments. The first version of the standard was released in mid-1990.
Today, the SCPI Consortium continues to add commands and functionality to the SCPI
standard. SCPI has its own set of required common commands in addition to the
mandatory IEEE 488.2 common commands and queries. Although IEEE 488.2 is used
as its basis, SCPI defines programming commands that you can use with any type of
hardware or communication link.
SCPI specifies standard rules for abbreviating command keywords and uses the IEEE
488.2 message exchange protocol rules to format commands and parameters. You may
use command keywords in their long form (MEASure) or their short form shown in
capital letters (MEAS).
SCPI offers numerous advantages to the test engineer. One of these is that SCPI
provides a comprehensive set of programming functions covering all the major
functions of an instrument. This standard command set ensures a higher degree of
instrument interchangeability and minimizes the effort involved in designing new test
systems. The SCPI command set is hierarchical, so adding commands for more specific
or newer functionality is easily accommodated.
Figure 12: The SCPI Instrument Model
16
REMOTE CONTROL OF DEVICES WITH A GPIB AND MATLAB
Mälardalens Högskolan
2.2 GPIB-USB
The compact National Instruments GPIB-USB transforms any computer with a USB
port into a full-function, IEEE 488.2 controller that can control up to 14 programmable
GPIB instruments.
The small size and light weight of the NI GPIB-USB make it ideal for portable
applications using a laptop computer or other applications in which the computer has no
available internal I/O slots.
The GPIB-USB works with Windows 2000/XP/Me/98 or Linux computers with a USB
port.
The GPIB-USB does not require a GPIB cable for connecting to your instruments. You
can attach it directly to the GPIB port on your instrument and then connect the USB
cable to the USB port on your computer. If you have multiple instruments in a daisy
chain or star configuration, attach any cables that connect to the other instruments first,
and then piggyback the GPIB-USB as the last connector in the stack.
Figure 13
Figure 14: GPIB-USB
17
REMOTE CONTROL OF DEVICES WITH A GPIB AND MATLAB
Mälardalens Högskolan
2.3 Labjack U12
LabJacks are USB/Ethernet based measurement and automation devices which provide
analog inputs/outputs, digital inputs/outputs, and more. LabJacks provide an easy to
use interface between computers and the physical world.
2.3.1 Hardware Description
The external features of the LabJack U12 are:
•
•
•
•
USB connector
DB25 digital I/O connector (D lines)
Status LED
30 screw terminals.
The USB connection provides power and communication. No external power supply is
needed. The +5 volt connections available at various locations are outputs, do not
connect a power supply.
The DB25 connector provides connections for 16 digital I/O lines, called D0-D15. It
also has connections for ground and +5 volts. All connections besides D0-D15, are
provided by the 30 screw terminals. Each individual screw terminal has a label, AI0
through STB.
AI0 – AI7: The LabJack U12 has 8 screw terminals for analog input signals. These can
be configured individually and on-the-fly as 8 single ended channels, 4 differential
channels, or combinations in between. Each input has a 12-bit resolution and an input
bias current of ±90 µA.
Single-Ended: The input range for a single ended measurement is ±10 volts.
Differential channels can make use of the PGA to provide gains up to 20, giving an
effective resolution greater than 16-bits. In differential mode, the voltage of each AI
with respect to ground must be between ±10 volts, but the range of voltage difference
between the 2 AI is a function of gain (G) as follows:
G=1 ±20 volts
G=8 ±2.5 volts
G=2 ±10 volts
G=10 ±2 volts
G=4 ±5 volts
G=16 ±1.25 volts
G=5±4 volt
G=20 ±1 volt
AO0 & AO1: The LabJack U12 has 2 screw terminals for analog output voltages. Each
analog output can be set to a voltage between 0 and the supply voltage (+5 volts
nominal) with 10-bits of resolution.
IO0 – IO3: Connections to 4 of the LabJack’s 20 digital I/O are made at the screw
terminals, and are referred to as IO0-IO3. These 4 channels include a 1.5 k Ω series
resistor that provides overvoltage/short-circuit protection.
D0 – D15: Connections to 16 of the LabJack’s 20 digital I/O are made at the DB25
connector, and are referred to as D0-D15. These 16 lines have no overvoltage/short18
REMOTE CONTROL OF DEVICES WITH A GPIB AND MATLAB
Mälardalens Högskolan
circuit protection, and can sink or source up to 25 mA each (total sink or source current
of 200 mA max for all 16). All digital I/O are CMOS output and TTL input except for
D13-D15, which are Schmitt trigger input.
CNT: The input connection to the 32-bit counter is made at screw-terminal CNT. The
counter is incremented when it detects a falling edge followed by a rising edge, and is
capable of counting frequencies up to at least 1 MHz.
CAL & STB: These terminals are used during testing and calibration. The CAL
terminal is a 2.5 volt reference.
+5V: The LabJack has a nominal +5 volt internal power supply. Power can be drawn
from this power supply by connecting to the +5V screw-terminals, or the +5V pins on
the DB25 connector. The total amount of current that can be drawn from the +5V pins,
analog outputs, and digital outputs, is 450 mA for most desktop computers and selfpowered USB hubs. Some notebook computers and bus-powered hubs will limit this
available current to about 50 mA.
GND: The GND connections available at the screw-terminals and DB25 connector
provide a common ground for all LabJack functions.
Figure 15: Labjack U12
19
REMOTE CONTROL OF DEVICES WITH A GPIB AND MATLAB
Mälardalens Högskolan
2.4 Agilent (HP) 8761B
Is a single-pole, double-throw coaxial switch with excellent electrical and mechanical
characteristics for 50 ohm transmission systems operating from dc to 18 GHz. It
features broadband operation, long life, low SWR, excellent repeatability, and magnetic
latching solenoids. The Agilent 8761B switch is small and lightweight, making it ideal
for applications where space is limited. Because of its versatility and excellent electrical
performance, it is well suited for automated testing and systems applications.
-User specified connectors (over 250
-Unterminated.
-Break-before-make.
-Excellent repeatability (typically 0.03 dB
-Insertion loss: < 0.5 dB to 12.4 GHz,
-Isolation: > 50 dB to 12.4 GHz,
- Environmentally rugged.
possible
combinations).
after 1,000,000 cycles).
< 0.8 dB to 18 GHz.
> 45 to 18 GHz.
Figure 16: HP 8761B
20
REMOTE CONTROL OF DEVICES WITH A GPIB AND MATLAB
Mälardalens Högskolan
2.5 Network Analyzer
The Vector Network Analyzer ZVB covering the frequency range from 300 kHz to 8
GHz and 10 MHz to 20 GHz has been designed for universal measurements on passive
and active components. Especially for multiport measurements and measurements on
balanced devices the ZVB simplifies vector analysis. Featuring comprehensive
measurement functions, outstanding specifications, high measurement and data transfer
speeds plus remote-control capability, the ZVB is the ideal instrument for both
development and production.
Figure 17: Network Analyzer ZVB
Multiport
•
•
•
Instruments with 2,3 and 4 ports
Multiport capability
Ability of balanced measurements
Outstanding specifications
•
•
•
20 001 points per trace
Dynamic range better than 123 dB
Power sweep range 50 dB
Speed
•
•
•
•
•
Measurement time <8 ms (201 points)
Switching between channels <1 ms
Switching between setups <10 ms
Data transfer time <0.7 ms (201 points via RSIB)
Simultaneous measurement of more than one DUT
User Interface
•
•
Intuitive Windows-based mouse operation
Operation using hardkeys and softkeys
21
REMOTE CONTROL OF DEVICES WITH A GPIB AND MATLAB
•
•
•
Mälardalens Högskolan
High number of channels and traces
Parallel setup administration
Operating wizards for e.g. balanced measurements and calibrations
Connectivity
•
•
•
•
•
Compatibility with conventional design tools
Trace data exchange between PC and R&S ZVB in both directions
Remote control via GPIB and LAN
Digital I/O port
USB connectors
22
REMOTE CONTROL OF DEVICES WITH A GPIB AND MATLAB
Mälardalens Högskolan
3. THE GRAPHICAL USER INTERFACE
3.1 Introduction
A graphical user interface (GUI) is a pictorial interface to a program. A good GUI can
make programs easier to use by providing them with a consistent appearance and with
intuitive controls like pushbuttons, list boxes, sliders, menus, and so forth. The GUI
should behave in an understandable and predictable manner, so that a user knows what
to expect when he or she performs an action. For example, when a mouse click occurs
on a pushbutton, the GUI should initiate the action described on the label of the button.
3.2 How a Graphical User Interface Works
A graphical user interface provides the user with a familiar environment in which to
work. This environment contains pushbuttons, toggle buttons, lists, menus, text boxes,
and so forth, all of which are already familiar to the user, so that he or she can
concentrate on using the application rather than on the mechanics involved in doing
things. However, GUIs are harder for the programmer because a GUI-based program
must be prepared for mouse clicks (or possibly keyboard input) for any GUI element at
any time. Such inputs are known as events, and a program that responds to events is
said to be event driven. The three principal elements required to create a MATLAB
Graphical User Interface are:
•
3.2.1. Components: Each item on a MATLAB GUI (pushbuttons, labels, edit
boxes, etc.) is a graphical component. The types of components include
graphical controls (pushbuttons, edit boxes, lists, sliders, etc.), static elements
(frames and text strings), menus, and axes.
Graphical controls and static elements are created by the function uicontrol, and
menus are created by the functions uimenu and uicontextmenu. Axes, which are
used to display graphical data, are created by the function axes.
•
3.2.2. Figures: The components of a GUI must be arranged within a figure,
which is a window on the computer screen. In the past, figures have been created
automatically whenever we have plotted data. However, empty figures can be
created with the function figure and can be used to hold any combination of
components.
•
3.2.3. Callbacks: Finally, there must be some way to perform an action if a user
clicks a mouse on a button or types information on a keyboard. A mouse click or
a key press is an event, and the MATLAB program must respond to each event
if the program is to perform its function. For example, if a user clicks on a
button, that event must cause the MATLAB code that implements the function
of the button to be executed. The code executed in response to an event is
known as a call back. There must be a callback to implement the function of
each graphical component on the GUI.
23
REMOTE CONTROL OF DEVICES WITH A GPIB AND MATLAB
Mälardalens Högskolan
3.3 Graphical User Interface Components
This section summarizes the basic characteristics of common graphical user interface
components. It describes how to create and use each component, as well as the types of
events each component can generate.
3.3.1 Text Fields
A text-field is a graphical object that displays a text string. You can specify how the text
is aligned in the display area by setting the horizontal alignment property. By default,
text fields are horizontally centered. A text field is created by creating a uicontrol whose
style property is 'edit'. A text field may be added to a GUI by using the text tool in the
Layout Editor. Text fields do not create callbacks, but the value displayed in the text
field can be updated in a callback function by changing the text field's String property.
3.3.2 Edit Boxes
An edit box is a graphical object that allows a user to enter a text string. The edit box
generates a callback when the user presses the Enter key after typing a string into the
box. An edit box is created by creating a uicontrol whose style property is 'edit'. An edit
box may be added to a GUI by using the edit box tool in the Layout Editor.
3.3.3 Pushbuttons
A pushbutton is a component that a user can click on to trigger a specific action. The
pushbutton generates a callback when the user clicks the mouse on it. A pushbutton is
created by creating a uicontrol whose style property is 'pushbutton'. A pushbutton may
be added to a GUI by using the pushbutton tool in the Layout Editor.
3.3.4 Toggle Buttons
A toggle button is a type of button that has two states: on (depressed) and off (not
depressed). A toggle button switches between these two states whenever the mouse
clicks on it, and it generates a callback each time. The 'Value' property of the toggle
button is set to max (usually 1) when the button is on, and min (usually 0) when the
button is off.
A toggle button is created by creating a uicontrol whose style property is toggle button.
A toggle button may be added to a GUI by using the toggle button tool in the Layout
Editor.
3.3.5 Popup Menus
Popup menus are graphical objects that allow a user to select one of a mutually
exclusive list of options. The list of options that the user can select among is specified
by a cell array of strings, and the 'Value' property indicates which of the strings is
currently selected. A popup menu may be added to a GUI by using the popup menu tool
in the Layout Editor.
24
REMOTE CONTROL OF DEVICES WITH A GPIB AND MATLAB
Mälardalens Högskolan
3.3.6 List Boxes
List boxes are graphical objects that display many lines of text and allow a user to select
one or more of those lines. If there are more lines of text than can fit in the list box, a
scroll bar will be created to allow the user to scroll up and down within the list box. The
lines of text that the user can select among are specified by a cell array of strings, and
the' Value' property indicates which of the strings are currently selected. A list box is
created by creating a uicontrol whose style property is 'listbox'. A list box may be added
to a GUI by using the listbox tool in the Layout Editor.
List boxes can be used to select a single item from a selection of possible choices. In
normal GUI usage, a single mouse click on a list item selects that item but does not
cause an action to occur. Instead, the action waits on some external trigger, such as a
pushbutton. However, a mouse double-click causes an action to happen immediately.
Single-click and double-click events can be distinguished using the SelectionType
property of the figure in which the clicks occurred. A single mouse click will place the
string 'normal' in the SelectionType property, and a double mouse click will place the
string' open' in the SelectionType property.
25
REMOTE CONTROL OF DEVICES WITH A GPIB AND MATLAB
Mälardalens Högskolan
3.4 Graphical User Interface with Matlab
3.4.1 Connect / Disconnect (Togglebutton)
Figure 18: Connect
Figure 19: Disconnect
Connect / Disconnect is a toggle button, this is a type of button that has two states: on
(depressed) and off (not depressed). A toggle button switches between these two states
whenever the mouse clicks on it, and it generates a callback each time. The 'Value'
26
REMOTE CONTROL OF DEVICES WITH A GPIB AND MATLAB
Mälardalens Högskolan
property of the toggle button is set to max (usually 1) when the button is on, and min
(usually 0) when the button is off.
A toggle button is created by creating a uicontrol whose style property is toggle button.
A toggle button may be added to a GUI by using the toggle button tool in the Layout
Editor.
•
3.4.1.1 Connect: the togglebutton is not depressed (off), all the graphical
interface components are disable, less ‘Load’ ( it´s possible load an antenna
previously save without connecting with the Network Analyzer). The GPIB
object does not exist.
•
3.4.1.2 Disconnect: the toggle button is depressed (on), all the graphical
interface components are enable. Also creates a GPIB object and opens it. The
default values are given here.
o 3.4.1.2.1 Default values
•
•
•
•
•
•
•
•
Format: Magnitud.
Start frequency: 300 KHz.
Stop frequency: 8GHz.
Number of points: 200.
Active trace: 1.
Inputbuffersize: 50000.
Measurement ports: S11.
Channel: 1.
3.4.2 Collect all Traces (Pushbutton)
Figure 20: Collect all Traces
Plots all traces assigned to a particular channel.
27
REMOTE CONTROL OF DEVICES WITH A GPIB AND MATLAB
Mälardalens Högskolan
3.4.2.1 Colours
b: blue
m: magenta
g: green
y: yellow
r: red
k: black
c: cian
The PLOT command, if no colour is specified, makes automatic use of the colours
specified by the axes ColorOrder property. The default ColourOrder is listed in the
table above for colour systems where the default is blue for one line, and for multiple
lines, to cycle through the first six colours in the table.
3.4.2.2 Steps
•
CALCulate<Ch>:PARameter:CATalog?
Returns the trace names and measurement parameters of all traces assigned to a
particular channel.
Response: String parameter with comma-separated list of trace names and
measurement parameters, e.g. 'CH4TR1,S11,CH4TR2,S12'. The measurement
parameters are returned according to the naming convention of
CALCulate<Ch>:PARameter:SDEFine. The order of traces in the list reflects
their creation time: The oldest trace is the first, the newest trace is the last trace
in the list.
•
findstr(f,’Trc<n>’)
Find one string within another. It has to be done for every trace.
•
hold on
Holds the current plot and all axis properties so that subsequent graphing
commands add to the existing graph.
Sets the NextPlot property of the current figure and axes to "add".
28
REMOTE CONTROL OF DEVICES WITH A GPIB AND MATLAB
Mälardalens Högskolan
3.4.3 Collect one Trace (Pushbutton)
Figure 21: Collect One Trace
Plots the active trace with the default colour (blue).
3.4.4 New Trace (Pushbutton)
Figure 22: New Trace
29
REMOTE CONTROL OF DEVICES WITH A GPIB AND MATLAB
Mälardalens Högskolan
Creates a new trace in the current diagram area and assigns it to the current channel.
The new trace is created with the trace and channel settings of the former active trace
but displayed with another color.
A trace is a set of data points displayed together in the diagram area. The individual data
points are connected so that each trace forms a continuous line.
The default names for new traces are Trc <n>, where <n> is the selected trace.
3.4.4.1 Active Traces in Remote Control
In manual control there is always exactly one active trace, irrespective of the number of
channels and traces defined. The active channel (channel 1 ) contains the active trace.
In remote control, each channel contains an active trace (unless the channel contains no
trace at all), so the notion of active channel is meaningless. This principle actually
simplifies the remote control command syntax, because it allows the active trace in a
particular channel to be referenced by means of the channel suffix. No additional trace
identifier is needed; there is no need either to distinguish channel and trace settings
using mnemonics or suffixes.
The active traces are handled as follows:
•
After a preset (*RST), the analyzer displays a single diagram area with the
default trace no. 1 named TRC1. The trace is active in manual and in remote
control.
•
In manual control, a new, added trace automatically becomes the active trace.
•
In remote control, the first trace assigned to a channel remains the active trace
until another trace in the channel is explicitly selected as the active trace
•
As a consequence, the active traces for manual and remote control may be
different, even within the same channel.
3.4.4.2 Traces, Channels, and Diagram Areas
Like in manual control, traces can be assigned to a channel and displayed in diagram
areas. There are two main differences between manual and remote control:
•
A trace can be created without being displayed on the screen.
•
A channel must not necessarily contain a trace. Channel and trace configurations
are independent of each other.
The following frequently used commands create and delete traces, channels, and
diagram areas:
30
REMOTE CONTROL OF DEVICES WITH A GPIB AND MATLAB
Mälardalens Högskolan
Figure 23: Commands Table
In this graphical interface all traces are in the same digital area.
A diagram area is a rectangular portion of the screen used to display traces. Diagram
areas are arranged in windows; they are independent of trace and channel settings. A
diagram area can contain a practically unlimited number of traces, assigned to different
channels (overlay mode).
•
3.4.4.3 Remote control:
CALCulate<Ch>:PARameter:SDEFine <Trace Name>, < Meas Parameter>
DISPlay:WINDow<Wnd>:TRACe<WndTr>:FEED
31
REMOTE CONTROL OF DEVICES WITH A GPIB AND MATLAB
Mälardalens Högskolan
3.4.5 Delete Trace (Pushbutton)
Figure 24: Delete Trace
Deletes the current trace and removes it from the diagram area. Delete Trace is disabled
if the setup contains only one trace: In manual control, each setup must contain at least
one diagram area with one channel and one trace.
•
3.4.5.1 Remote control: CALCulate<Ch>:PARameter:DELete <Trace>
3.4.6 Trace
Selects an existing trace as the active trace of the channel. All trace commands without
explicit reference to the trace name act on the active trace.
It is possible that the selected trace does not exist, this is the case when a new trace has
to be create.
The active traces for manual and remote control may be different, even within the same
channel.
•
3.4.6.1 Remote control: CALCulate<Ch>:PARameter:SELect <Trace>
3.4.7 Meas Port (Listbox)
Assigns a measurement parameter to an existing trace.
The measurement ports are:
S11, S12, S13, S14, S21, S22, S23, S24, S31, S32, S33, S34, S41, S42, S43, S44.
32
REMOTE CONTROL OF DEVICES WITH A GPIB AND MATLAB
Mälardalens Högskolan
Normal mode S-parameters S<out><in>, where <out> and <in> denote the output and
input port numbers of the DUT. To avoid ambiguities, <out> and <in> must be either
both 1-digit numbers (e.g. 21) or both 2-digit numbers (e.g. 2121 or 0133).
3.4.7.1 S-Parameters
S-parameters are the basic measured quantities of a network analyzer. They describe
how the DUT modifies a signal that is transmitted or reflected in forward or reverse
direction. For a 2-port measurement the signal flow is as follows:
Figure 25: S-Parameters
If the source and load ports are not ideally matched, part of the transmittedwaves are
reflected off the receiver ports so that an additional a2 contribution occurs in forward
measurements, an a1 contribution occurs in reverse measurements.
The four 2-port S-parameters can be interpreted as follows:
•
S11 is the input reflection coefficient, defined as the ratio of the wave quantities
b1/a1, measured at PORT 1 (forward measurement with matched output and a2
= 0).
•
S21 is the forward transmission coefficient, defined as the ratio of the wave
quantities b2/a1 (forward measurement with matched output and a2 = 0).
•
S12 is the reverse transmission coefficient, defined as the ratio of the wave
quantities b1 (reverse measurement with matched input, b1,rev in the figure
above and a1 = 0) to a2.
•
S22 is the output reflection coefficient, defined as the ratio of the wave
quantities b2 (reverse measurement with matched input, b2,rev in the figure
above and a1 = 0) to a2, measured at PORT 2.
3.4.7.2 Multiport Parameters
The multiport S-parameters extend the standard 2-port S-parameters to a larger number
of incoming and outgoing waves. For a 4-port DUT.
Figure 26
33
REMOTE CONTROL OF DEVICES WITH A GPIB AND MATLAB
Mälardalens Högskolan
Where again ai (i = 1 to 4) denote the incident, bi (i = 1 to 4) denote the outgoing
waves, and the Sparameters are expressed as S<out>< in>.
The indices of the S-parameters described so far number the output and input ports of a
DUT; the parameters are referred to as single-ended S-parameters.
The S-parameter description can also be used to differentiate between different
propagation modes of the waves at the output and input ports.
This results in the so-called mixed mode S-parameters. The analyzer measures either
single-ended or mixed mode S-parameters.
Figure 27: Port Configuration
•
3.4.7.3 Remote control
CALCulate<Ch>:PARameter:MEASure "<Trace_Name>", "S11" | "S12" | "S13" |
"S14" | "S21" | "S22" | "S23"| "S24" | "S31" | "S32" | "S33" | "S34" | "S41"| "S42" |
"S43" | "S44"
34
REMOTE CONTROL OF DEVICES WITH A GPIB AND MATLAB
Mälardalens Högskolan
3.4.8 Format (Popupmenu)
Figure 28: Format
A display format defines how the set of (complex) measurement points is converted and
displayed in a diagram. The display formats in the Trace – Format menu use the
following basic diagram types:
•
Cartesian (rectangular) diagrams are used for all display formats involving a
conversion of the measurement data into a real (scalar) quantity, i.e. for dB Mag,
Phase, Delay, SWR, Lin Mag, Real, Imag and Unwrapped Phase.
•
Polar diagrams are used for the display format Polar and show a complex
quantity as a vectorin a single trace.
•
Smith charts are used for the display format Smith and show a vector like polar
diagrams but with grid lines of constant real and imaginary part of the
impedance.
•
Inverted Smith charts are used for the display format Inverted Smith and show a
vector like polar diagrams but with grid lines of constant real and imaginary part
of the admittance.
3.4.8.1 Cartesian Diagrams
Cartesian diagrams are rectangular diagrams used to display a scalar quantity as a
function of the stimulus variable (frequency / power / time).
•
The stimulus variable appears on the horizontal axis (x-axis), scaled linearly
(sweep types Lin Frequency, Power, Time, CW Mode) or logarithmically (sweep
type Log Frequency).
35
REMOTE CONTROL OF DEVICES WITH A GPIB AND MATLAB
•
Mälardalens Högskolan
The measured data (response values) appears on the vertical axis (y-axis). The
scale of the y-axis is linear with equidistant grid lines although the y-axis values
may be obtained from the measured data by non-linear conversions.
Figure 29: Cartesian Diagram
3.4.8.1.1 dB Mag
Selects a Cartesian diagram with a logarithmic scale of the vertical axis to display the
magnitude of thecomplex measured quantity.
•
Properties: The stimulus variable appears on the horizontal axis, scaled linearly.
The magnitude of the complex quantity C, i.e. |C| = sqrt ( Re(C)2 + Im(C)2 ),
appears on the vertical axis, scaled in dB. The decibel conversion is calculated
according to dB Mag(C) = 20 * log(|C|) dB.
•
Application: dB Mag is the default format for the complex, dimensionless Sparameters. The dB-scale is the natural scale for measurements related to power
ratios (insertion loss, gain etc.).
3.4.8.1.2 Phase
Selects a Cartesian diagram with a linear vertical axis to display the phase of a complex
measured quantity in the range between –180 degrees and +180 degrees.
•
Properties: The stimulus variable appears on the horizontal axis, scaled linearly.
The phase of the complex quantity C, i.e. _ (C) = arctan ( Im(C) / Re(C) ),
appears on the vertical axis. _ (C) is measured relative to the phase at the start of
the sweep (reference phase = 0°). If _ (C) exceeds +180° the curve jumps by –
360°; if it falls below –180°, the trace jumps by +360°. The result is a trace with
a typical sawtooth shape. The alternative Phase Unwrapped format avoids this
behavior.
•
Application: Phase measurements, e.g. phase distortion, deviation from
linearity.
3.4.8.1.3 Real
Selects a Cartesian diagram to display the real part of a complex measured quantity.
36
REMOTE CONTROL OF DEVICES WITH A GPIB AND MATLAB
Mälardalens Högskolan
•
Properties: The stimulus variable appears on the horizontal axis, scaled linearly.
The real part Re(C) of the complex quantity C = Re(C) + j Im(C), appears on the
vertical axis, also scaled linearly.
•
Application: The real part of an impedance corresponds to its resistive portion.
3.4.8.1.4 Imag
Selects a Cartesian diagram to display the imaginary part of a complex measured
quantity.
•
Properties: The stimulus variable appears on the horizontal axis, scaled linearly.
The imaginary part Im(C) of the complex quantity C = Re(C) + j Im(C), appears
on the vertical axis, also scaled linearly.
•
Application: The imaginary part of an impedance corresponds to its reactive
portion. Positive (negative) values represent inductive (capacitive) reactance.
3.4.8.2 Polar Diagrams
Polar diagrams show the measured data (response values) in the complex plane with a
horizontal real axis and a vertical imaginary axis. The grid lines correspond to points of
equal magnitude and phase.
•
The magnitude of the response values corresponds to their distance from the
center. Values with the same magnitude are located on circles.
•
The phase of the response values is given by the angle from the positive
horizontal axis. Values with the same phase on straight lines originating at the
center.
Figure 30: Polar Diagram
3.4.8.2.1 Polar
Selects a polar diagram to display a complex quantity, primarily an S-parameter or ratio.
37
REMOTE CONTROL OF DEVICES WITH A GPIB AND MATLAB
Mälardalens Högskolan
•
Properties: The polar diagram shows the measured data (response values) in the
complex plane with a horizontal real axis and a vertical imaginary axis. The
magnitude of a complex value is determined by its distance from the center, its
phase is given by the angle from the positive horizontal axis. In contrast to the
Smith chart, the scaling of the axes is linear.
•
Application: Reflection or transmission measurements.
3.4.8.3 Smith Chart
The Smith chart is a circular diagram that maps the complex reflection coefficients Sii
to normalized impedance values. In contrast to the polar diagram, the scaling of the
diagram is not linear. The grid lines correspond to points of constant resistance and
reactance.
•
Points with the same resistance are located on circles.
•
Points with the same reactance produce arcs.
Figure 31: Smith Chart
3.4.8.3.1 Smith
Selects a Smith chart to display a complex quantity, primarily a reflection S-parameter.
•
Properties: The Smith chart is a circular diagram obtained by mapping the
positive complex semi-plane into a unit circle. Points with the same resistance
are located on circles, points with the same reactance produce arcs. If the
measured quantity is a complex reflection coefficient (S11, S22 etc.), then the
unit Smith chart represents the normalized impedance. In contrast to the polar
diagram, the scaling of the diagram is not linear.
•
Application: Reflection measurements
3.4.8.4 Remote control: CALCulate<Ch>:FORMat <format>
38
REMOTE CONTROL OF DEVICES WITH A GPIB AND MATLAB
Mälardalens Högskolan
3.4.9 Number of Points (Edit Text)
Figure 32: Number of Points
Sets the total number of measurement points per sweep. The minimum number of points
is 2.
Together with the sweep range defined with the Stimulus settings, this parameter
defines the grid of sweep points. The sweep points are equidistantly distributed over the
entire sweep range: The step width between two consecutive sweep points is constant
on a linear scale (sweep types Lin.
Frequency, Time and CW Mode) or on a logarithmic scale (sweep types Log.
Frequency and Power).
In Segmented Frequency sweeps, the number of points can be set independently for
each segment.
As an alternative to the Number of Points, the Stimulus Step Size can be set.
A large number of points improves the resolution of the trace but increases the
measurement time.
A small number of points causes wide trace segments so that the out-of tolerance
regions can appear wider as they are.
The overall measurement time is composed of a hardware settling time at the beginning
of the sweep plus the sum of the measurement times at each individual sweep point.
This implies that the measurement time increases roughly linearly with the number of
points.
39
REMOTE CONTROL OF DEVICES WITH A GPIB AND MATLAB
Mälardalens Högskolan
After changing the channel settings or selecting another measured quantity, the analyzer
needs some time to initialize the new sweep. This preparation period increases with the
number of points and the number of partial measurements involved.
All analyzer settings can still be changed during sweep initialization. If necessary, the
analyzer terminates the current initialization and starts a new preparation period.
•
3.4.9.1 Remote control: [SENSe<Ch>:]SWEep:POINts
3.4.10 Power (Edit Text)
Figure 33: Power
The channel power determines the output power at the test ports if a Frequency Sweep
or a Time Sweep is active. The setting has no effect in Power Sweep mode, where the
source power is varied over a continuous range.
The selected channel power applies to all source ports used in the active channel.
Power sets the output power at the test port that supplies the stimulus for the active
channel.
The channel power can be varied over a wide dynamic range. This leaves enough
flexibility to include an attenuation or gain in the test setup.
•
3.4.10.1 Range: –40 dBm to +10 dBm. The exact range depends on the analyzer
model; refer to the data sheet [dBm]. UP and DOWN increment/decrement the
source power in 0.1-dB steps.
•
3.4.10.2 Remote control:
SOURce<Ch>:POWer[:LEVel][:IMMediate][:AMPlitude]
40
REMOTE CONTROL OF DEVICES WITH A GPIB AND MATLAB
Mälardalens Högskolan
3.4.11 Bandwidth (Popupmenu)
Defines the Meas Bandwidth for each individual sweep segment.
The measurements bandwidth are:
- 10Hz, 100Hz, 1000Hz, 10000Hz, 100000Hz, 500000Hz
The selected bandwidth and selectivity applies to all filters used in the current channel.
This makes sense because the measurement speed is limited by the slowest filter in the
channel. In Segmented Frequency sweeps, the bandwidth and selectivity can be set
independently for each segment.
A high selectivity and a small filter bandwidth both suppress the noise level around the
measurement frequency and thus increase the dynamic range. On the other hand the
time needed to acquire a single measurement point increases for small filter bandwidths
and high selectivity. For small bandwidths, the filter settling time, which is inversely
proportional to the bandwidth, is responsible for the predominant part of the
measurement time.
The characteristics of the high selectivity filter makes it particularly suitable for
isolating unexpected spurious responses or known mixer products.
•
3.4.11.1 Range: 1 Hz to 5 MHz [Hz]. UP and DOWN increment/decrement the
bandwidth in 1-2-5 steps for each decade. The analyzer rounds up any entered
value between these steps and rounds down values exceeding the maximum
bandwidth.
•
3.4.11.2 Remote control:
[SENSe<Ch>:]BANDwidth|BWIDth[:RESolution]
3.4.12 Start Frequency (Edit Text)
Defines the start frequency for a frequency sweep which is equal to the left edge of a
Cartesian diagram. Is the lowest value of the sweep variable.
If the start frequency entered is greater than the current stop frequency, the stop
frequency is set to the start frequency plus the minimum frequency span.
If Points was set to 1, then the Stop frequency would be set equal to the Start frequency,
but it is not possible becuse the minimum number of points is 2.
•
3.4.12.1 Range: Depending on the instrument model [Hz]. The increment
(parameters UP or DOWN) is 0.1 kHz. In this case the minimum start frequency
is 300 Khz.
•
3.4.12.2 Remote control: [SENSe<Ch>:]FREQuency:STARt <start_frequency>
41
REMOTE CONTROL OF DEVICES WITH A GPIB AND MATLAB
Mälardalens Högskolan
3.4.13 Stop Frequency (Edit Text)
Defines the stop frequency for a frequency sweep which is equal to the right edge of a
Cartesian diagram. Is the highest value of the sweep variable.
The Stop frequency must be greater than the Start frequency, the Span must be >1 Hz.
A sweep must contain at least two different sweep points.
If the stop frequency entered is smaller than the current start frequency, the start
frequency is set to the stop frequency minus the minimum frequency span.
•
3.4.13.1 Range: Depending on the instrument model [Hz]. The increment
parameters UP or DOWN) is 0.1 kHz. In this case the maximum stop frequency
is 8Ghz.
•
3.4.13.2 Remote control: [SENSe<Ch>:]FREQuency:STOP <stop_frequency>
3.4.14 Antenna
Selects an antenna betwen the 16 antennas. To select an antenna the Labjack U12 has to
be connected with the PC.
It does not need a GPIB conexion because it is independent of the GPIB.
•
The function EDIGITALOUT
Easy function. This is a simplified version of DigitalIO that sets/clears the state
of one digital output. Also configures the requested pin to output and leave it
that way. Execution time for this function is 50 ms or less.
Note that this is a simplified version of the lower level function DigitalIO, which
operates on all 20 digital lines. The DLL (ljackuw) attempts to keep track of the
current direction and output state of all lines, so that this easy function can
operate on a single line without changing the others. When the DLL is first
loaded, though, it does not know the direction and state for the lines and assumes
all directions are input and output stares are low.
•
Matlab Syntax: [errorcode idnum] = EDigitalOut(idnum, demo, channel,
writeD, state)
42
REMOTE CONTROL OF DEVICES WITH A GPIB AND MATLAB
Mälardalens Högskolan
3.4.15 Save Antenna (Pushbutton)
Figure 34: Save Antenna
Saves the antenna to the binary "MAT-file" named “Antenna<number>.mat”. The data
may be retrieved with LOAD.
With the command “uiputfile” it is possible display a dialog box for the user to fill in
and returns the filename and path strings and the index of the selected filter.
When the antenna is saved, the file contains an array with three files and a number of
culumns as big as the number of points. The first column contains measurements in
frequency, the second contains measurements in magnitude and the third contains
measurements in phase.
43
REMOTE CONTROL OF DEVICES WITH A GPIB AND MATLAB
Mälardalens Högskolan
Figure 35: Array
With this array is possible to see the measurements of every point.
3.4.16 Load Antenna (Pushbutton)
Figure 36: Load Antenna
Retrieves all variables from a file given a full pathname or a MATLABPATH relative
partial pathname.
The command “uigetfile” displays a dialog box for the user to fill in, and returns the
filename and path strings and the index of the selected filter.A successful return occurs
only if the file exists. If the user selects a file that does not exist, an error message is
44
REMOTE CONTROL OF DEVICES WITH A GPIB AND MATLAB
Mälardalens Högskolan
displayed, and control returns to the dialog box. The user may then enter another
filename, or press the Cancel button.
Figure 37: Trace Loaded
It is possible to load one antenna without connecting with the Network Analyzer
because the file is load from the PC.
45
REMOTE CONTROL OF DEVICES WITH A GPIB AND MATLAB
Mälardalens Högskolan
4. HOW TO CREATE A GUI WIT MATLAB
4.1 What is Matlab?
MATLAB is a numerical computing environment and programming language.
Created by The MathWorks, MATLAB allows easy matrix manipulation, plotting of
functions and data, implementation of algorithms, creation of user interfaces, and
interfacing with programs in other languages. Although it specializes in numerical
computing, an optional toolbox interfaces with the Maple symbolic engine, making it a
full computer algebra system.
4.2 How to create a GUI with Matlab
4.2.1 Handles
Every object in Matlab has a handle. The screen identificator is an integer while the
graphical elements are float. Matlab can have several windows, but only one of them is
the active window, and every window can have several axes but only ones are the active
axes. Matlab draws in the active axes and in the active screen.
4.2.2 Objects properties
All the objects in Matlab have different properties with default values that are use unless
the users change them (not all default values can be changed). There are properties that
can have any value and others that only can have a limited group of values (for example
on and off).
With the functions get and set is possible to consult and change this values.
•
Function set(H)
Returns or displays all property names and their possible values for the object
with handle H. The return value is a structure whose field names are property
names of H, and whose values are cell arrys of possible property valuesor empty
cell arrays.
The default value for an object property can be set on any of an object´s
ancestors by setting the PropertyName formed by concatenating the string
‘default’, the object type, and the property name.
•
Function get(H)
Returns a structure where each field name is the name of a property of H and
each field contains the value of that property.
46
REMOTE CONTROL OF DEVICES WITH A GPIB AND MATLAB
Mälardalens Högskolan
4.2.3 GUIDE in Matlab
To start a GUIDE the best option is: File → New → GUI
Figure 38: Menu
When we open the program, appears the GUIDE Quick Start in the screen, where is
possible select between:
•
•
Create a new GUI.
Open existing GUI.
If the selected option is create a new GUI, in the screen will appear the Guide Control
Panel (GCP) that contains different parts.
Figure 39: Guide Control Panel
47
REMOTE CONTROL OF DEVICES WITH A GPIB AND MATLAB
Mälardalens Högskolan
The first part is the toolbar, that contains three big modules of GUIDE: Aling Objects,
Menu Editor and Property Inspector.
The second part contains the user interface components:
Figure 40: Interface Components
And the third part is the design area.
4.2.3.1 Property editor
The property editor is associated with one or several elements, but only one can be
opened in the same time. In this window is possible to change the properties of every
element.
Figure 41: Property Inspector
48
REMOTE CONTROL OF DEVICES WITH A GPIB AND MATLAB
Mälardalens Högskolan
4.2.3.2 Alignment Editor
The alignment editor is an auxiliary tool which allows that the controls which are
situated in the window over the design area appear aligned. Before doing it, it is
necessary to select the objects.
Figure 42: Alignment Editor
4.2.3.3 Menu Editor
The Menu Editor has two parts but the operation is the same, with one difference, a
menu which is introduced with Menu Bar will appear active in the figure, while with the
Context Menu will appear when we clic the right button over the figure.
Figure 43: Menu Editor
49
REMOTE CONTROL OF DEVICES WITH A GPIB AND MATLAB
Mälardalens Högskolan
Figure 44: Menu Editor Components
4.2.3.4 Callback Editor
The callback editor allows to define the form in which the different controls respond to
the events.
The Callback Editor is automaticly opened the first time that the file *.fig is saved. It
consist in several code lines which are saved in a file *.m with the same name that the
figure. One part of the code is automaticly generated for the GUIDE, in this code
appears the functions callback associated with every control.
Figure 45: Callback Editor
The callback programming is one of the more important parts when a GUI is developed,
since it defines the way in which the programm will work when the user causes an event
over one of the controls.
50
REMOTE CONTROL OF DEVICES WITH A GPIB AND MATLAB
Mälardalens Högskolan
The callback steps can be done using functions or using strings of characters that
contains the Matlab commands. The first case is the best one because the functions have
a work space different of the main work space, with this is avoided to create conflicts
with the variables’ names. Other advantage is that this way is faster than the other way.
To reference the Matlab elements the user have to use handles (A function handle is a
MATLAB value that provides a means of calling a function indirectly. You can pass
function handles in calls to other functions (often called function functions). You can
also store function handles in data structures for later use).
It is very important to start initiating all the variables with default values. The best place
to do this is the *_OpeningFunction that is run before doing visible the figure.
Figure 46: OpeningFunction
51
REMOTE CONTROL OF DEVICES WITH A GPIB AND MATLAB
Mälardalens Högskolan
5. Summary
The objective of this project is the remote control of different components as the
Network Analyzer, the Labjack... . This is an advantage because it is not necessary to
have the hardware in front to work.
With this kind of graphical interfaces, the user can control the components without the
need to know nothing about it, and how are the menus in the Network Analyzer. This
cause that everybody can use this graphical interface.
This is the first time in this university that Matlab GUI is used to control a Network
Analyzer with a GPIB. The previous projects similar to this one were made with
Labview.
To use this kind of graphical interface is necessary the installation of “Instrument
Control Toolbox”, that is a collection of M-file functions built on the Matlab technical
computing environment, although in this case is not necessary because Matlab 6.5
default contains it. Also is necessary the installation of “Measurement and Automation
Explorer” that provides access to all the National Instruments.
52
REMOTE CONTROL OF DEVICES WITH A GPIB AND MATLAB
Mälardalens Högskolan
6. Future Development
A future development of this project could be the increase of the number of antennas.
To do this, it would be necessary to change the listboxes “Antenna”, “Trace” and the
pushbutton “Collect all Traces”, we should write some lines of code but it would be
easy because the code would be similar to the rest of the callback´s code.
If the number of antennas in every group of antennas were very big, we would be able
to add a new channel. We could have one group of antennas in one channel and the
other group of antennas in a different channel. It should be in this way because if the
number of antennas in every channel is very big, there would not be space in the screen
to represent the traces.
To add a new chanel is neccesary to create a new listbox where we can select between
the different channels. It would not be neccesary to change the rest of the function
because they are ready for this change.
53
REMOTE CONTROL OF DEVICES WITH A GPIB AND MATLAB
Mälardalens Högskolan
7. Result and discussion
The first step in the project was to look up manuals about Matlab because i had never
worked with this program. It was very easy to find the Matlab´s Manuals, to do this i
used internet and the library. Once i knew something about Matlab looked up severals
manuals about the GPIB, the Network Analyzer and the Labjack U12 with Matlab,
because is possible to use this devices with other programs.
Then i started programming the Graphical User Interface, at first it was very difficult for
me becuse i could not connect my laptop with the network analycer, but when i did this,
the rest was very fast. In the manuals i could see how were the callbacks for the
diferents GUI components.
I had some problems:
•
To connect with the Network Analyzer.
•
To plot several traces in the same axes. To do this, finally i used the command
“hold on”.
•
To save the antenna in a file. At first i had a “edit menu” where i had to insert
the file manually, but then, i saw that i could use the fuction “uiputfile” that
creates a save file dialog box where is possible to select the file with the mouse.
Some considerations:
•
We have to disconnect before closing the window of the graphical interface.
•
If the number of traces is very big, is possible that we can not see the first trace
because it is cover for the other traces (we are using the function “holl on”).
•
A large number of points improves the resolution of the trace but increase the
measurement time.
•
A small number of points causes wide traces segments so that the out-of
tolerance regions can appear wider as they are.
•
When we save an antenna, we lost the first measurement, it is because there is a
frequency in the point number cero, and when we save an antenna the array
starts in the point number one, so we lost the measurement in the start
frequency. It is not significant because we are losing one point between two
thousand points (it is a normal number of points although default is two
hundred). This problem would be significant if the number of points were very
small, but with a small number of points we can not do nothing because the
resolution is very bad.
54
REMOTE CONTROL OF DEVICES WITH A GPIB AND MATLAB
Mälardalens Högskolan
Acknowledgment
I would like to thank to MDH and the university of Alcala de Henares for the
opportunity of doing here my project.
I would like to thank Mikael Ekstrom, Peder Norin and Denny Aberg for the support
during my project.
I would like to thank Alfonso Parra for his help.
Also big thanks for Isabel Rodriguez and my family for their patient, support and
understanding during my study.
55
Mälardalens Högskolan
REMOTE CONTROL OF DEVICES WITH A GPIB AND MATLAB
References
Brian R. Hunt, Ronald L.Lipsman, Jonathan M. Rosenberg. A Guide to Matlab for
Beginners and experienced Users.
Javier Atencia, Raúl Nestar. Aprenda Matlab6.0 como si estuviera en primero.
Escuela superior de Ingenieros Industriales. Universidad de Navarra.
Patrick Marchand, O. Thomas Holland. Graphics and GUIs with Matlab.
Javier García de Jalón, José Ignacio Rodríguez, Alfonso Brazales. Aprenda Matlab 5.3
como si estuviera en primero.
Escuela Técnica Superior de Ingenieros Industriales Universidad Politécnica de Madrid.
Agilent Technologies
Programmer’s Guide.
8712ET/ES
and
8714ET/ES
RF
Network
Analyzers.
Rohde & Schwarz. Operating Manual Vector Network Analyzers
R&S® ZVA 8 / ZVA 24, R&S® ZVB 4 / ZVB 8 / ZVB 20, R&S® ZVT 8
Torres Ramírez Luis Alberto. Introducción a la Programación Visual con Matlab.
NI-488.2TM. GPIB Analyzer User Manual.
Víctor Domínguez Báguena Ma Luisa Rapún Banzo. Matlab en cinco lecciones de
Numérico.
Universidad de Navarra. http://www.unavarra.es/personal/victor dominguez/
Fernando Seco Granja. Conexión de instrumentos de medida con GPIB.
http://www.iai.csic.es/users/fseco/teaching/gpib.pdf
Network Analyzer ZVB. http://www.roschi.rohde-schwarz.com
GPIB-USB. http://sine.ni.com/nips/cds/view/p/lang/en/nid/11397
Building GUIs with MATLAB (December 1996). http://www.mathworks.com
MATLAB Function Calls for the LabJack U12
http://gram.eng.uci.edu/~dreinken/MAE106/MATLAB%20Function%20Calls.pdf
Agilent (HP) 8761B. http://www.ntecusa.com/
56
REMOTE CONTROL OF DEVICES WITH A GPIB AND MATLAB
Mälardalens Högskolan
APPENDIX
Appendix 1: Source Code
function varargout = proy(varargin)
% PROY M-file for proy.fig
%
PROY, by itself, creates a new PROY or raises the existing
%
singleton*.
%
%
H = PROY returns the handle to a new PROY or the handle to
%
the existing singleton*.
%
%
PROY('CALLBACK',hObject,eventData,handles,...) calls the local
%
function named CALLBACK in PROY.M with the given input arguments.
%
%
PROY('Property','Value',...) creates a new PROY or raises the
%
existing singleton*. Starting from the left, property value pairs are
%
applied to the GUI before proy_OpeningFunction gets called. An
%
unrecognized property name or invalid value makes property application
%
stop. All inputs are passed to proy_OpeningFcn via varargin.
%
%
*See GUI Options on GUIDE's Tools menu. Choose "GUI allows only one
%
instance to run (singleton)".
%
% See also: GUIDE, GUIDATA, GUIHANDLES
% Edit the above text to modify the response to help proy
% Last Modified by GUIDE v2.5 21-Mar-2006 11:52:53
% Begin initialization code - DO NOT EDIT
gui_Singleton = 1;
gui_State = struct('gui_Name',
mfilename, ...
'gui_Singleton', gui_Singleton, ...
'gui_OpeningFcn', @proy_OpeningFcn, ...
'gui_OutputFcn', @proy_OutputFcn, ...
'gui_LayoutFcn', [] , ...
'gui_Callback', []);
if nargin & isstr(varargin{1})
gui_State.gui_Callback = str2func(varargin{1});
end
if nargout
[varargout{1:nargout}] = gui_mainfcn(gui_State, varargin{:});
else
gui_mainfcn(gui_State, varargin{:});
end
% End initialization code - DO NOT EDIT
function proy_OpeningFcn(hObject, eventdata, handles, varargin)
% --- Executes just before proy is made visible.
57
REMOTE CONTROL OF DEVICES WITH A GPIB AND MATLAB
Mälardalens Högskolan
handles.output = hObject;
% disable buttons that would send controller commands if pressed
% disable text boxes as well
set(handles.edit1,'Enable','off');
set(handles.edit2,'Enable','off');
set(handles.edit3,'Enable','off');
set(handles.edit4,'Enable','off');
set(handles.listbox1,'Enable','off');
set(handles.listbox2,'Enable','off');
set(handles.listbox3,'Enable','off');
set(handles.popupmenu1,'Enable','off');
set(handles.popupmenu2,'Enable','off');
set(handles.pushbutton1,'Enable','off');
set(handles.pushbutton2,'Enable','on');
%load
set(handles.pushbutton3,'Enable','off');
set(handles.pushbutton4,'Enable','off');
set(handles.pushbutton5,'Enable','off');
set(handles.pushbutton6,'Enable','off');
% Update handles structure
guidata(hObject, handles);
% UIWAIT makes proy wait for user response (see UIRESUME)
% uiwait(handles.figure1);
% --- Outputs from this function are returned to the command line.
function varargout = proy_OutputFcn(hObject, eventdata, handles)
% varargout cell array for returning output args (see VARARGOUT);
% hObject handle to figure
% eventdata reserved - to be defined in a future version of MATLAB
% handles structure with handles and user data (see GUIDATA)
% Get default command line output from handles structure
varargout{1} = handles.output;
function togglebutton1_Callback(hObject, eventdata, handles)%CONNECT / DISCONNECT
state=get(handles.togglebutton1,'Value'); %returns toggle state of togglebutton1
if state==1
% enable buttons that would send controller commands if pressed
% enable text boxes as well
set(handles.edit1,'Enable','on');
set(handles.edit2,'Enable','on');
set(handles.edit3,'Enable','on');
set(handles.edit4,'Enable','on');
set(handles.listbox1,'Enable','on');
set(handles.listbox2,'Enable','on');
set(handles.listbox3,'Enable','on');
set(handles.popupmenu1,'Enable','on');
set(handles.popupmenu2,'Enable','on');
set(handles.pushbutton1,'Enable','on');
set(handles.pushbutton2,'Enable','on');
set(handles.pushbutton3,'Enable','on');
set(handles.pushbutton4,'Enable','on');
58
REMOTE CONTROL OF DEVICES WITH A GPIB AND MATLAB
Mälardalens Högskolan
set(handles.pushbutton5,'Enable','on');
set(handles.pushbutton6,'Enable','on');
sta=0.3;
%default start frequency
handles.varsta=sta;
form='magn';
%default format
handles.varform=form;
sto=8000;
%default stop frequency
handles.varsto=sto;
x=1;
%default channel
handles.varx=x;
w=1;
%default trace
handles.varw=w;
point=200;
%default number of points
handles.varpoint=point;
s=11;
%default meas port
handles.vars=s;
%starts the communication with the network analyzer using the GPIB.
set(handles.togglebutton1,'string','Disconnect','backgroundcolor','default');
g=gpib('ni',0,1);
%creates a new GPIB variable
handles.varg=g;
%store
x=handles.varx;
w=handles.varw;
sta=handles.varsta;
sto=handles.varsto;
point=handles.varpoint;
form=handles.varform;
guidata(hObject,handles);
%creates a structure containing handles to all of the objects
g.inputBufferSize=100000;
%input buffer
g.outputBufferSize=100000;
%output buffer
g.EOIMode='on';
%input data
g.EOSMode='none';
%output data
fopen(g);
%starts the communication with the network analyzer.
fprintf(g,'calc%d:par:sel "Trc%d"',[x,w]);
%default trace (Trc1)
fprintf (g,'sens%d:freq:star %dMhz;*wai',[x,sta]); %default start frequency (300Khz)
fprintf (g,'sens%d:freq:stop %dMhz;*wai',[x,sto]); %default stop frequency (8Ghz)
fprintf (g,'sens%d:swe:poin %d;*wai',[x,point]); %default number of points (200)
fprintf(g,'calc%d:form %s;*wai',[x,form]);
%default format (magnitude)
else
% disable buttons that would send controller commands if pressed
% disable text boxes as well
set(handles.edit1,'Enable','off');
set(handles.edit2,'Enable','off');
set(handles.edit3,'Enable','off');
set(handles.edit4,'Enable','off');
set(handles.listbox1,'Enable','off');
set(handles.listbox2,'Enable','off');
set(handles.listbox3,'Enable','off');
set(handles.popupmenu1,'Enable','off');
set(handles.popupmenu2,'Enable','off');
set(handles.pushbutton1,'Enable','off');
set(handles.pushbutton2,'Enable','on');
%load
set(handles.pushbutton3,'Enable','off');
set(handles.pushbutton4,'Enable','off');
59
REMOTE CONTROL OF DEVICES WITH A GPIB AND MATLAB
Mälardalens Högskolan
set(handles.pushbutton5,'Enable','off');
set(handles.pushbutton6,'Enable','off');
%closes the communication
set(handles.togglebutton1,'string','Connect','backgroundcolor','default');
g=handles.varg;
fclose(g);
delete(g);
clear g;
end
function listbox1_CreateFcn(hObject, eventdata, handles)
% hObject handle to listbox1 (see GCBO)
% eventdata reserved - to be defined in a future version of MATLAB
% handles empty - handles not created until after all CreateFcns called
% Hint: listbox controls usually have a white background on Windows.
%
See ISPC and COMPUTER.
if ispc
set(hObject,'BackgroundColor','white');
else
set(hObject,'BackgroundColor',get(0,'defaultUicontrolBackgroundColor'));
end
% --- Executes on selection change in listbox1.
function listbox1_Callback(hObject, eventdata, handles) %ANTENNA---->LABJACK
g=handles.varg;
contents=get(handles.listbox1,'string'); %returns listbox1 contents as cell array
con=contents{get(handles.listbox1,'value')}; %returns selected item from listbox1
switch (con)
case '1'
EDigitalOut(-1, 0, 7,1,1) %configures the requested pin to output and leave it that way
EDigitalOut(-1, 0, 9,1,1)
EDigitalOut(-1, 0, 11,1,1)
pause
case '2'
EDigitalOut(-1, 0, 7,1,1)
EDigitalOut(-1, 0, 9,1,1)
EDigitalOut(-1, 0, 11,1,0)
pause
case '3'
EDigitalOut(-1, 0, 7,1,1)
EDigitalOut(-1, 0, 9,1,0)
EDigitalOut(-1, 0, 12,1,1)
pause
case '4'
EDigitalOut(-1, 0, 7,1,1)
EDigitalOut(-1, 0, 9,1,0)
EDigitalOut(-1, 0, 12,1,0)
pause
case '5'
EDigitalOut(-1, 0, 7,1,0)
EDigitalOut(-1, 0, 10,1,1)
EDigitalOut(-1, 0, 13,1,1)
pause
60
REMOTE CONTROL OF DEVICES WITH A GPIB AND MATLAB
Mälardalens Högskolan
case '6'
EDigitalOut(-1, 0, 7,1,0)
EDigitalOut(-1, 0, 10,1,1)
EDigitalOut(-1, 0, 13,1,0)
pause
case '7'
EDigitalOut(-1, 0, 7,1,0)
EDigitalOut(-1, 0, 10,1,0)
EDigitalOut(-1, 0, 14,1,1)
pause
case '8'
EDigitalOut(-1, 0, 7,1,0)
EDigitalOut(-1, 0, 10,1,0)
EDigitalOut(-1, 0, 14,1,0)
pause
case '9'
EDigitalOut(-1, 0, 8,1,1)
EDigitalOut(-1, 0, 1,1,1)
EDigitalOut(-1, 0, 3,1,1)
pause
case '10'
EDigitalOut(-1, 0, 8,1,1)
EDigitalOut(-1, 0, 1,1,1)
EDigitalOut(-1, 0, 3,1,0)
pause
case '11'
EDigitalOut(-1, 0, 8,1,1)
EDigitalOut(-1, 0, 1,1,0)
EDigitalOut(-1, 0, 4,1,1)
pause
case '12'
EDigitalOut(-1, 0, 8,1,1)
EDigitalOut(-1, 0, 1,1,0)
EDigitalOut(-1, 0, 4,1,0)
pause
case '13'
EDigitalOut(-1, 0, 8,1,0)
EDigitalOut(-1, 0, 2,1,1)
EDigitalOut(-1, 0, 5,1,1)
pause
case '14'
EDigitalOut(-1, 0, 8,1,0)
EDigitalOut(-1, 0, 2,1,1)
EDigitalOut(-1, 0, 5,1,0)
pause
case '15'
EDigitalOut(-1, 0, 8,1,0)
EDigitalOut(-1, 0, 2,1,0)
EDigitalOut(-1, 0, 6,1,1)
pause
case '16'
EDigitalOut(-1, 0, 8,1,0)
EDigitalOut(-1, 0, 2,1,0)
EDigitalOut(-1, 0, 6,1,0)
pause
61
REMOTE CONTROL OF DEVICES WITH A GPIB AND MATLAB
Mälardalens Högskolan
end
function pushbutton3_Callback(hObject, eventdata, handles) %COLLET ALL TRACES
%plots all the traces
x=handles.varx;
%channel number
g=handles.varg;
hold off;
%returns to the default mode whereby PLOT commands erase the previous
plots and reset all axis
fprintf (g,'calc1:par:cat?');
%Returns the trace names and measurement parameters of all
traces assigned to a particular channel.
f=fscanf(g);
if (findstr(f,'Trc1'))
%finds one string within another.
fprintf(g,'calc%d:par:sel "Trc1"',x); %select the trace as the active trace.
fprintf(g,'CALC%d:DATA? FDAT',x);
%Reads the current response values of the active
data trace FDAT:formatted trace data
y=str2num(fscanf(g));
%converts string matrix to numeric array.
plot(y,'b');
%blue
hold on;
%holds the current plot and all axis properties so that subsequent graphing
commands add to the existing graph
grid on;
%grid lines
end
if (findstr(f,'Trc2'))
fprintf(g,'calc%d:par:sel "Trc2"',x); %select the trace as the active trace.
fprintf(g,'CALC%d:DATA? FDAT',x);
y=str2num(fscanf(g));
plot(y,'g');
%green
hold on;
grid on;
end
if (findstr(f,'Trc3'))
fprintf(g,'calc%d:par:sel "Trc3"',x); %select the trace as the active trace.
fprintf(g,'CALC%d:DATA? FDAT',x);
y=str2num(fscanf(g));
plot(y,'r');
%red
hold on;
grid on;
end
if (findstr(f,'Trc4'))
fprintf(g,'calc%d:par:sel "Trc4"',x); %select the trace as the active trace.
fprintf(g,'CALC%d:DATA? FDAT',x);
y=str2num(fscanf(g));
plot(y,'c');
%cyan
hold on;
grid on;
end
if (findstr(f,'Trc5'))
fprintf(g,'calc%d:par:sel "Trc5"',x); %select the trace as the active trace.
fprintf(g,'CALC%d:DATA? FDAT',x);
y=str2num(fscanf(g));
plot(y,'m');
%magenta
hold on;
grid on;
end
62
REMOTE CONTROL OF DEVICES WITH A GPIB AND MATLAB
Mälardalens Högskolan
if (findstr(f,'Trc6'))
fprintf(g,'calc%d:par:sel "Trc6"',x); %select the trace as the active trace.
fprintf(g,'CALC%d:DATA? FDAT',x);
y=str2num(fscanf(g));
plot(y,'y');
%yellow
hold on;
grid on;
end
if (findstr(f,'Trc7'))
fprintf(g,'calc%d:par:sel "Trc7"',x); %select the trace as the active trace.
fprintf(g,'CALC%d:DATA? FDAT',x);
y=str2num(fscanf(g));
plot(y,'k');
%black
hold on;
grid on;
end
if (findstr(f,'Trc8'))
fprintf(g,'calc%d:par:sel "Trc8"',x); %select the trace as the active trace.
fprintf(g,'CALC%d:DATA? FDAT',x);
y=str2num(fscanf(g));
plot(y,'b');
hold on;
grid on;
end
if (findstr(f,'Trc9'))
fprintf(g,'calc%d:par:sel "Trc9"',x); %select the trace as the active trace.
fprintf(g,'CALC%d:DATA? FDAT',x);
y=str2num(fscanf(g));
plot(y,'g');
hold on;
grid on;
end
if (findstr(f,'Trc10'))
fprintf(g,'calc%d:par:sel "Trc10"',x); %select the trace as the active trace.
fprintf(g,'CALC%d:DATA? FDAT',x);
y=str2num(fscanf(g));
plot(y,'r');
hold on;
grid on;
end
if (findstr(f,'Trc11'))
fprintf(g,'calc%d:par:sel "Trc11"',x); %select the trace as the active trace.
fprintf(g,'CALC%d:DATA? FDAT',x);
y=str2num(fscanf(g));
plot(y,'c');
hold on;
grid on;
end
if (findstr(f,'Trc12'))
fprintf(g,'calc%d:par:sel "Trc12"',x);
fprintf(g,'CALC%d:DATA? FDAT',x);
y=str2num(fscanf(g));
plot(y,'m');
hold on;
grid on;
63
REMOTE CONTROL OF DEVICES WITH A GPIB AND MATLAB
Mälardalens Högskolan
end
if (findstr(f,'Trc13'))
fprintf(g,'calc%d:par:sel "Trc13"',x); %select the trace as the active trace.
fprintf(g,'CALC%d:DATA? FDAT',x);
y=str2num(fscanf(g));
plot(y,'y');
hold on;
grid on;
end
if (findstr(f,'Trc14'))
fprintf(g,'calc%d:par:sel "Trc14"',x); %select the trace as the active trace.
fprintf(g,'CALC%d:DATA? FDAT',x);
y=str2num(fscanf(g));
plot(y,'k');
hold on;
grid on;
end
if (findstr(f,'Trc15'))
fprintf(g,'calc%d:par:sel "Trc15"',x); %select the trace as the active trace.
fprintf(g,'CALC%d:DATA? FDAT',x);
y=str2num(fscanf(g));
plot(y,'b');
hold on;
grid on;
end
if (findstr(f,'Trc16'))
fprintf(g,'calc%d:par:sel "Trc16"',x); %select the trace as the active trace.
fprintf(g,'CALC%d:DATA? FDAT',x);
y=str2num(fscanf(g));
plot(y,'g');
hold on;
grid on;
end
function popupmenu1_CreateFcn(hObject, eventdata, handles)
% hObject handle to popupmenu1 (see GCBO)
% eventdata reserved - to be defined in a future version of MATLAB
% handles empty - handles not created until after all CreateFcns called
% Hint: popupmenu controls usually have a white background on Windows.
%
See ISPC and COMPUTER.
if ispc
set(hObject,'BackgroundColor','white');
else
set(hObject,'BackgroundColor',get(0,'defaultUicontrolBackgroundColor'));
end
% --- Executes on selection change in popupmenu1.
function popupmenu1_Callback(hObject, eventdata, handles) %FORMAT
form=handles.varform; %format
x=handles.varx;
%channel
g=handles.varg;
contents=get(handles.popupmenu1,'string'); %returns popupmenu1 contents as cell array
con=contents{get(handles.popupmenu1,'value')}; %returns selected item from popupmenu1
64
REMOTE CONTROL OF DEVICES WITH A GPIB AND MATLAB
Mälardalens Högskolan
switch (con)
case 'Magnitud'
fprintf(g,'calc%d:form magn;*wai',x); %Defines how the measured result at any sweep
point is post-processed. MAGNITUDE
form='magn';
handles.varform=form;
guidata(hObject,handles);
case 'Phase'
fprintf(g,'calc%d:form phas;*wai',x); %PHASE
form='phas';
handles.varform=form;
guidata(hObject,handles);
case 'Smith'
fprintf(g,'calc%d:form smit;*wai',x); %SMITH
form='smit';
handles.varform=form;
guidata(hObject,handles);
case 'Re'
fprintf(g,'calc%d:form real;*wai',x); %REAL
form='real';
handles.varform=form;
guidata(hObject,handles);
case 'Im'
fprintf(g,'calc%d:form imag;*wai',x); %IMAGINARY
form='imag';
handles.varform=form;
guidata(hObject,handles);
case 'Polar'
fprintf(g,'calc%d:form pol;*wai',x); %POLAR
form='pol';
handles.varform=form;
guidata(hObject,handles);
end
function listbox2_CreateFcn(hObject, eventdata, handles)
% hObject handle to listbox2 (see GCBO)
% eventdata reserved - to be defined in a future version of MATLAB
% handles empty - handles not created until after all CreateFcns called
% Hint: listbox controls usually have a white background on Windows.
%
See ISPC and COMPUTER.
if ispc
set(hObject,'BackgroundColor','white');
else
set(hObject,'BackgroundColor',get(0,'defaultUicontrolBackgroundColor'));
end
% --- Executes on selection change in listbox2.
function listbox2_Callback(hObject, eventdata, handles) %MEAS PORT
%assigns a measurement parameter to an existing trace.
s=handles.vars;
%meas port
w=handles.varw;
%trace
x=handles.varx;
%channel
65
REMOTE CONTROL OF DEVICES WITH A GPIB AND MATLAB
Mälardalens Högskolan
g=handles.varg;
contents=get(handles.listbox2,'string'); %returns listbox2 contents as cell array
con1=contents{get(handles.listbox2,'value')}; %returns selected item from listbox2
switch (con1)
case 'S11'
fprintf(g,'calc%d:par:meas "Trc%d","s11"',[x,w]); %assigns a measurement parameter to
an existing trace.
s=11;
handles.vars=s;
guidata(hObject,handles);
case 'S12'
fprintf(g,'calc%d:par:meas "Trc%d","s12"',[x,w]);
s=12;
handles.vars=s;
guidata(hObject,handles);
case 'S13'
fprintf(g,'calc%d:par:meas "Trc%d","s13"',[x,w]);
s=13;
handles.vars=s;
guidata(hObject,handles);
case 'S14'
fprintf(g,'calc%d:par:meas "Trc%d","s14"',[x,w]);
s=14;
handles.vars=s;
guidata(hObject,handles);
case 'S21'
fprintf(g,'calc%d:par:meas "Trc%d","s21"',[x,w]);
s=21;
handles.vars=s;
guidata(hObject,handles);
case 'S22'
fprintf(g,'calc%d:par:meas "Trc%d","s22"',[x,w]);
s=22;
handles.vars=s;
guidata(hObject,handles);
case 'S23'
fprintf(g,'calc%d:par:meas "Trc%d","s23"',[x,w]);
s=23;
handles.vars=s;
guidata(hObject,handles);
case 'S24'
fprintf(g,'calc%d:par:meas "Trc%d","s24"',[x,w]);
s=24;
handles.vars=s;
guidata(hObject,handles);
case 'S31'
fprintf(g,'calc%d:par:meas "Trc%d","s31"',[x,w]);
s=31;
handles.vars=s;
guidata(hObject,handles);
case 'S32'
fprintf(g,'calc%d:par:meas "Trc%d","s32"',[x,w]);
s=32;
handles.vars=s;
66
REMOTE CONTROL OF DEVICES WITH A GPIB AND MATLAB
Mälardalens Högskolan
guidata(hObject,handles);
case 'S33'
fprintf(g,'calc%d:par:meas "Trc%d","s33"',[x,w]);
s=33;
handles.vars=s;
guidata(hObject,handles);
case 'S34'
fprintf(g,'calc%d:par:meas "Trc%d","s34"',[x,w]);
s=34;
handles.vars=s;
guidata(hObject,handles);
case 'S41'
fprintf(g,'calc%d:par:meas "Trc%d","s41"',[x,w]);
s=41;
handles.vars=s;
guidata(hObject,handles);
case 'S42'
fprintf(g,'calc%d:par:meas "Trc%d","s42"',[x,w]);
s=42;
handles.vars=s;
guidata(hObject,handles);
case 'S43'
fprintf(g,'calc%d:par:meas "Trc%d","s43"',[x,w]);
s=43;
handles.vars=s;
guidata(hObject,handles);
case 'S44'
fprintf(g,'calc%d:par:meas "Trc%d","s44"',[x,w]);
s=44;
handles.vars=s;
guidata(hObject,handles);
end
function popupmenu2_CreateFcn(hObject, eventdata, handles)
% hObject handle to popupmenu5 (see GCBO)
% eventdata reserved - to be defined in a future version of MATLAB
% handles empty - handles not created until after all CreateFcns called
% Hint: popupmenu controls usually have a white background on Windows.
%
See ISPC and COMPUTER.
if ispc
set(hObject,'BackgroundColor','white');
else
set(hObject,'BackgroundColor',get(0,'defaultUicontrolBackgroundColor'));
end
% --- Executes on selection change in popupmenu5.
function popupmenu2_Callback(hObject, eventdata, handles) %BANDWIDTH
%this subsystem sets the bandwidth of the IF measurement filter (resolution bandwidth)
x=handles.varx;
%channel
g=handles.varg;
contents=get(handles.popupmenu2,'string'); %returns popupmenu2 contents as cell array
con1=contents{get(handles.popupmenu2,'value')}; %returns selected item from popupmenu2
67
REMOTE CONTROL OF DEVICES WITH A GPIB AND MATLAB
Mälardalens Högskolan
switch (con1)
case '10'
fprintf (g,'sens%d:band 10;*wai',x); %set a resolution bandwidth of 10Hz
case '100'
fprintf (g,'sens%d:band 100;*wai',x); %set a resolution bandwidth of 100Hz
case '1000'
fprintf (g,'sens%d:band 1000;*wai',x); %set a resolution bandwidth of 1000Hz
case '10000'
fprintf (g,'sens%d:band 10000;*wai',x); %set a resolution bandwidth of 10000Hz
case '100000'
fprintf (g,'sens%d:band 100000;*wai',x); %set a resolution bandwidth of 100000Hz
case '500000'
fprintf (g,'sens%d:band 500000;*wai',x); %set a resolution bandwidth of 500000Hz
end
function pushbutton4_Callback(hObject, eventdata, handles) %COLLET ONE TRACE
%plots the selected trace
x=handles.varx;
%channel
g=handles.varg;
hold off;
fprintf(g,'CALC%d:DATA? FDAT',x);
data trace FDAT:formatted trace data
y=str2num(fscanf(g));
plot(y);
grid on;
%Reads the current response values of the active
function listbox3_CreateFcn(hObject, eventdata, handles)
% hObject handle to listbox3 (see GCBO)
% eventdata reserved - to be defined in a future version of MATLAB
% handles empty - handles not created until after all CreateFcns called
% Hint: listbox controls usually have a white background on Windows.
%
See ISPC and COMPUTER.
if ispc
set(hObject,'BackgroundColor','white');
else
set(hObject,'BackgroundColor',get(0,'defaultUicontrolBackgroundColor'));
end
function listbox3_Callback(hObject, eventdata, handles) %SELECT TRACE
%Select an existing trace as the active trace of the chanel.
x=handles.varx;
%channel
w=handles.varw;
%trace
g=handles.varg;
contents=get(handles.listbox3,'string'); %returns listbox3 contents as cell array
con1=contents{get(handles.listbox3,'value')}; %returns selected item from listbox3
switch (con1)
case '1'
w=1;
%number of channel
fprintf(g,'calc%d:par:sel "Trc%d"',[x,w]); %select the trace as the active trace.
handles.varw=w;
guidata(hObject,handles);
%stores the specified data in the figure's application
data.
68
REMOTE CONTROL OF DEVICES WITH A GPIB AND MATLAB
Mälardalens Högskolan
case '2'
w=2;
%number of channel
fprintf(g,'calc%d:par:sel "Trc%d"',[x,w]); %select the trace as the active trace.
handles.varw=w;
guidata(hObject,handles);
%stores the specified data in the figure's application
data.
case '3'
w=3;
%number of channel
fprintf(g,'calc%d:par:sel "Trc%d"',[x,w]); %select the trace as the active trace.
handles.varw=w;
guidata(hObject,handles);
%stores the specified data in the figure's application
data.
case '4'
w=4;
%number of channel
fprintf(g,'calc%d:par:sel "Trc%d"',[x,w]); %select the trace as the active trace.
handles.varw=w;
guidata(hObject,handles);
%stores the specified data in the figure's application
data.
case '5'
w=5;
%number of channel
fprintf(g,'calc%d:par:sel "Trc%d"',[x,w]); %select the trace as the active trace.
handles.varw=w;
guidata(hObject,handles);
%stores the specified data in the figure's application
data.
case '6'
w=6;
%number of channel
fprintf(g,'calc%d:par:sel "Trc%d"',[x,w]); %select the trace as the active trace.
handles.varw=w;
guidata(hObject,handles);
%stores the specified data in the figure's application
data.
case '7'
w=7;
%number of channel
fprintf(g,'calc%d:par:sel "Trc%d"',[x,w]); %select the trace as the active trace.
handles.varw=w;
guidata(hObject,handles);
%stores the specified data in the figure's application
data.
case '8'
w=8;
%number of channel
fprintf(g,'calc%d:par:sel "Trc%d"',[x,w]); %select the trace as the active trace.
handles.varw=w;
guidata(hObject,handles);
%stores the specified data in the figure's application
data.
case '9'
w=9;
%number of channel
fprintf(g,'calc%d:par:sel "Trc%d"',[x,w]); %select the trace as the active trace.
handles.varw=w;
guidata(hObject,handles);
%stores the specified data in the figure's application
data.
case '10'
w=10;
%number of channel
fprintf(g,'calc%d:par:sel "Trc%d"',[x,w]); %select the trace as the active trace.
handles.varw=w;
guidata(hObject,handles);
%stores the specified data in the figure's application
data.
case '11'
69
REMOTE CONTROL OF DEVICES WITH A GPIB AND MATLAB
Mälardalens Högskolan
w=11;
%number of channel
fprintf(g,'calc%d:par:sel "Trc%d"',[x,w]); %select the trace as the active trace.
handles.varw=w;
guidata(hObject,handles);
%stores the specified data in the figure's application
data.
case '12'
w=12;
%number of channel
fprintf(g,'calc%d:par:sel "Trc%d"',[x,w]); %select the trace as the active trace.
handles.varw=w;
guidata(hObject,handles);
%stores the specified data in the figure's application
data.
case '13'
w=13;
%number of channel
fprintf(g,'calc%d:par:sel "Trc%d"',[x,w]); %select the trace as the active trace.
handles.varw=w;
guidata(hObject,handles);
%stores the specified data in the figure's application
data.
case '14'
w=14;
%number of channel
fprintf(g,'calc%d:par:sel "Trc%d"',[x,w]); %select the trace as the active trace.
handles.varw=w;
guidata(hObject,handles);
%stores the specified data in the figure's application
data.
case '15'
w=15;
%number of channel
fprintf(g,'calc%d:par:sel "Trc%d"',[x,w]); %select the trace as the active trace.
handles.varw=w;
guidata(hObject,handles);
%stores the specified data in the figure's application
data.
case '16'
w=16;
%number of channel
fprintf(g,'calc%d:par:sel "Trc%d"',[x,w]); %select the trace as the active trace.
handles.varw=w;
guidata(hObject,handles);
%stores the specified data in the figure's application
data.
end
function pushbutton6_Callback(hObject, eventdata, handles) %NEW TRACE
%creates a new trace and deletes the old trace.
x=handles.varx;
%channel
w=handles.varw;
%trace
g=handles.varg;
fprintf(g,'calc%d:par:del "Trc%d"',[x,w]);
%deletes the old trace
fprintf(g,'calc%d:par:sdef "Trc%d","s11"',[x,w]); %creates a new trace
fprintf(g,'disp:wind1:trac%d:feed "Trc%d"',[w,w]); %assigns the trace to the window1
fprintf(g,'calc%d:par:sel "Trc%d"',[x,w]);
%selects the trace as the active trace
handles.varw=w;
guidata(hObject,handles);
function pushbutton5_Callback(hObject, eventdata, handles) %DELETE TRACE
%deletes a trace with a specified trace name and channel
x=handles.varx;
%channel
70
REMOTE CONTROL OF DEVICES WITH A GPIB AND MATLAB
w=handles.varw;
%trace
g=handles.varg;
fprintf(g,'calc%d:par:del "Trc%d"',[x,w]);
Mälardalens Högskolan
%deletes the trace
function edit1_CreateFcn(hObject, eventdata, handles)
% hObject handle to edit1 (see GCBO)
% eventdata reserved - to be defined in a future version of MATLAB
% handles empty - handles not created until after all CreateFcns called
% Hint: edit controls usually have a white background on Windows.
%
See ISPC and COMPUTER.
if ispc
set(hObject,'BackgroundColor','white');
else
set(hObject,'BackgroundColor',get(0,'defaultUicontrolBackgroundColor'));
end
function edit1_Callback(hObject, eventdata, handles) %NUMBER OF POINTS
%defines the total number of measurements points per sweep
point=handles.varpoint; %number of points
x=handles.varx;
%channel
g=handles.varg;
get(hObject,'String');
%returns contents of edit1 as text
point=str2double(get(hObject,'String'));
%returns contents of edit1 as a double
fprintf (g,'sens%d:swe:poin %d;*wai',[x,point]); %changes the number of points
handles.varpoint=point;
guidata(hObject,handles);
function edit2_CreateFcn(hObject, eventdata, handles)
% hObject handle to edit2 (see GCBO)
% eventdata reserved - to be defined in a future version of MATLAB
% handles empty - handles not created until after all CreateFcns called
% Hint: edit controls usually have a white background on Windows.
%
See ISPC and COMPUTER.
if ispc
set(hObject,'BackgroundColor','white');
else
set(hObject,'BackgroundColor',get(0,'defaultUicontrolBackgroundColor'));
end
function edit2_Callback(hObject, eventdata, handles) %POWER
%defines the power of the internal signal source
x=handles.varx;
%channel
g=handles.varg;
get(hObject,'String');
%returns contents of edit2 as text
p=str2double(get(hObject,'String')); %returns contents of edit2 as a double
fprintf (g,'sour%d:pow %d;*wai',[x,p]); %sets the internal source power
function edit3_CreateFcn(hObject, eventdata, handles)
% hObject handle to edit3 (see GCBO)
% eventdata reserved - to be defined in a future version of MATLAB
% handles empty - handles not created until after all CreateFcns called
71
REMOTE CONTROL OF DEVICES WITH A GPIB AND MATLAB
Mälardalens Högskolan
% Hint: edit controls usually have a white background on Windows.
%
See ISPC and COMPUTER.
if ispc
set(hObject,'BackgroundColor','white');
else
set(hObject,'BackgroundColor',get(0,'defaultUicontrolBackgroundColor'));
end
function edit3_Callback(hObject, eventdata, handles) %START FREQUENCY
%defines the start frequency sweep which is equal to the left edge of acartesian diagram
sta=handles.varsta; %start frequency
x=handles.varx;
%channel
g=handles.varg;
get(hObject,'String');
%returns contents of edit3 as text
sta=str2double(get(hObject,'String'));
%returns contents of edit3 as a double
fprintf (g,'sens%d:freq:star %dMhz;*wai',[x,sta]); %sets start frecuency
handles.varsta=sta;
guidata(hObject,handles);
function edit4_CreateFcn(hObject, eventdata, handles)
% hObject handle to edit4 (see GCBO)
% eventdata reserved - to be defined in a future version of MATLAB
% handles empty - handles not created until after all CreateFcns called
% Hint: edit controls usually have a white background on Windows.
%
See ISPC and COMPUTER.
if ispc
set(hObject,'BackgroundColor','white');
else
set(hObject,'BackgroundColor',get(0,'defaultUicontrolBackgroundColor'));
end
function edit4_Callback(hObject, eventdata, handles) %STOP FREQUENCY
%defines the stop frequency sweep which is equal to the left edge of a cartesian diagram
sto=handles.varsto; %stop frequency
x=handles.varx;
%channel
g=handles.varg;
get(hObject,'String'); %returns contents of edit4 as text
sto=str2double(get(hObject,'String')); %returns contents of edit4 as a double
fprintf (g,'sens%d:freq:stop %dMhz;*wai',[x,sto]); %sets the stop frequency
handles.varsto=sto;
guidata(hObject,handles);
function pushbutton1_Callback(hObject, eventdata, handles) %SAVE ANTENNA
form=handles.varform; %format
sto=handles.varsto; %stop frequency
sta=handles.varsta; %start frequency
point=handles.varpoint; %number of points
x=handles.varx;
%channel
g=handles.varg;
f=(sto-sta)/point;
%frequency for every point
72
REMOTE CONTROL OF DEVICES WITH A GPIB AND MATLAB
Mälardalens Högskolan
for i=1:point
j=(f*i)+sta;
s(i)=j;
%array of frequency
end
fprintf(g,'calc%d:form magn;*wai',x); %changes the format to magnitude to store every point
fprintf(g,'CALC%d:DATA? FDAT',x);
mag=str2num(fscanf(g));
%array of magnitud
fprintf(g,'calc%d:form phas;*wai',x); %changes the format to phase to store every point
fprintf(g,'CALC%d:DATA? FDAT',x);
pha=str2num(fscanf(g)); %array of phase
fprintf(g,'calc%d:form %s;*wai',[x,form]); %changes at the start format
m(1,:)=s;
%stores the frequency in the first file of "m"
m(2,:)=mag;
%stores the magnitude in the second file of "m"
m(3,:)=pha;
%stores the phase in the third file of "m"
% creates a save file dialog box to store plotted data saved in "m"
[FileName,PathName] = uiputfile('Antenna.mat','Save antenna as...');
if FileName == 0 %when you clic cancel
return;
end
FileNameAndPathString = [PathName FileName];
% saves the data in "m" variable in the user specified
% filename and location
save(FileNameAndPathString,'m');
function pushbutton2_Callback(hObject, eventdata, handles) %LOAD
hold off;
[FileName,PathName] = uigetfile('*.mat','Load'); %display the load file dialog box
if FileName == 0
return;
end
FileNameAndPathString = [PathName FileName];
load (FileNameAndPathString);
plot(m(1,:),m(2,:));
%plots the second file of "m" (magnitude)
grid on;
xlabel('FREQUENCY (Mhz)');
ylabel('MAGNITUDE');
73
REMOTE CONTROL OF DEVICES WITH A GPIB AND MATLAB
Mälardalens Högskolan
Appendix 2: GPIB Characterictics
GPIB PIN-OUT
24-Pin GPIB Bus PinOut [IEEE488 Pinout]
Pin # Signal Names Signal Description
Pin # Signal Names Signal Description
1
DIO1
Data Input/Output Bit 1 13
DIO5
Data Input/Output Bit 5
2
DIO2
Data Input/Output Bit 2 14
DIO6
Data Input/Output Bit 6
3
DIO3
Data Input/Output Bit 3 15
DIO7
Data Input/Output Bit 7
4
DIO4
Data Input/Output Bit 4 16
DIO8
Data Input/Output Bit 8
5
EIO
End-Or-Identify
17
REN
Remote Enable
6
DAV
Data Valid
18
Shield
Ground (DAV)
7
NRFD
Not Ready For Data
19
Shield
Ground (NRFD)
8
NDAC
Not Data Accepted
20
Shield
Ground (NDAC)
9
IFC
Interface Clear
21
Shield
Ground (IFC)
10
SRQ
Service Request
22
Shield
Ground (SRQ)
11
ATN
Attention
23
Shield
Ground (ATN)
12
Shield
Chassis Ground
24
Single GND Single Ground
IEEE-STD-488 I/O Characteristics
Single Type
Digital Value
Input Voltage High:
VIH = 3.4 volts typical, 2.4 volts minimum
Input Voltage Low:
VIL = 0.22 volts typical, 0.4 volts maximum
Input Current High:
IIH = 2.5mA maximum
Input Current Low:
VIL = -3.2mA maximum
Output Voltage High: VOH = 3.4 volts typical, 2.5 volts minimum
Output Voltage Low: VOL = 0.22 volts typical, 0.5 volts maximum
Output Current High: IOH = -5.2mA maximum
Output Current Low: IOL = 48mA maximum
74
REMOTE CONTROL OF DEVICES WITH A GPIB AND MATLAB
Mälardalens Högskolan
GPIB Connector Mechanical Dimensions
IEEE488 Data Bus Transfer Timing
GPIB Bus Handshake Timing
75
REMOTE CONTROL OF DEVICES WITH A GPIB AND MATLAB
Mälardalens Högskolan
Appendix 3: Labjack Functions (with Matlab)
EAnalogIn: Reads the voltage from one analog input.
EAnalogOut: Sets the voltage on both analog outputs.
ECount: Reads and resets the counter.
EDigitalIn: Reads the state of one digital input.
EDigitalOut: Sets the state of one digital output.
AISample: Reads the voltages from 1,2, or 4 analog inputs. Also controls/reads the 4
IO ports.
AIBurst: Reads a specified number of scans (up to 4096) at a specified scan rate (up to
8192 Hz) from 1,2, or 4 analog inputs. First, data is acquired and stored in the
LabJack’s 4096 sample RAM buffer. Then, the data is transferred to the PC.
AIStreamStart: Starts a hardware timed continuous acquisition where data is sampled
and stored in the LabJack RAM buffer, and can be simultaneously transferred out of the
RAM buffer to the PC application. A call to this function should be followed by
periodic calls to AIStreamRead, and eventually a call to AIStreamClear.
AIStreamRead: Waits for a specified number of scans to be available and reads them.
AIStreamStart should be called before this function and AIStreamClear should be called
when finished with the stream.
AIStreamClear: This function stops the continuous acquisition. It should be called
once when finished with the stream.
AOUpdate: Sets the voltages of the analog outputs. Also controls/reads all 20 digital
I/O and the counter.
AsynchConfig: Configures the LabJack U12 D lines for asynchronous communication.
Asynch: Writes then read half-duplex asynchronous data on 1 of two pairs of D lines.
Basically RS232 communication.
BitsToVolts: Converts a 12-bit (0-4095) binary value into a LabJack voltage.
Volts=((2*Bits*Vmax/4096)-Vmax)/Gain where Vmax=10 for SE, 20 for Diff.
VoltsToBits: Converts a voltage to it's 12-bit (0-4095) binary representation.
Bits=(4096*((Volts*Gain)+Vmax))/(2*Vmax)
Counter: Controls and reads the counter. The counter is disabled if the watchdog timer
is enabled.
DigitalIO: Reads and writes to all 20 digital I/O.
GetDriverVersion: Returns the version number of ljackuw.dll.
GetErrorString: Converts a LabJack errorcode, returned by another function, into a
string describing the error.
GetFirmwareVersion: Retrieves the firmware version from the LabJack.
GetWinVersion: Uses a Windows API function to get the OS version.
ListAll: Searches the USB for all LabJacks, and returns the serial number and local ID
for each.
LocalID: Changes the local ID of a specified LabJack. Changes will not take effect
until the LabJack is re-enumerated or reset, either manually by disconnecting and
reconnecting the USB cable or by calling ReEnum or Reset.
NoThread: Disables thread creation. Use with TestPoint on Windows 98/ME.
PulseOut: Creates pulses on any/all of D0-D7.
PulseOutStart: Starts a pulse output similar to PulseOut, but does not wait for it to
finish.
PulseOutFinish: Waits for the finish of a pulse output started with PulseOutStart.
PulseOutCalc: Used to calculate cycle times for the pulse output functions.
76
REMOTE CONTROL OF DEVICES WITH A GPIB AND MATLAB
Mälardalens Högskolan
ReEnum: Causes the LabJack to electrically detach from and re-attach to the USB so it
will re-enumerate. The local ID and calibration constants are updated at this time.
Reset or ResetLJ: Causes the LabJack to reset after about 2 seconds. After resetting the
LabJack will re-enumerate.
SHT1X: Retrieves temperature and/or humidity readings from an SHT1X sensor.
SHTComm: Generic low-level function to send and receive up to 4 bytes to/from an
SHT1X sensor.
SHTCRC: Checks the CRC on an SHT1X communication.
Synch: Performs SPI communication with a slave device.
Watchdog: Controls the LabJack watchdog function. When activated, the watchdog can
change the states of digital I/O if the LabJack does not successfully communicate with
the PC within a specified timeout period. This function could be used to reboot the PC
allowing for reliable unattended operation. The 32-bit counter (CNT) is disabled when
the watchdog is enabled.
ReadMem: Reads 4 bytes from a specified address in the LabJack's nonvolatile
memory.
WriteMem: Writes 4 bytes to the LabJack's 8,192 byte nonvolatile memory at a
specified address. The data is read back and verified after the write. Memory 0-511 is
used for and calibration data. Memory from 512-1023 is unused by the LabJack and
available for the user (this corresponds to starting addresses from 512-1020). Memory
1024-8191 is used as a data buffer in hardware timed AI modes (burst and stream).
77
REMOTE CONTROL OF DEVICES WITH A GPIB AND MATLAB
Mälardalens Högskolan
Appendix 4: Network Analyzer, Commond Commands
Common commands are taken from the IEEE 488.2 (IEC 625-2) standard. These
commands have the same effect on different devices. The headers of these commands
consist of "*" followed by three letters. Many common commands are related to the
status reporting system.
78
REMOTE CONTROL OF DEVICES WITH A GPIB AND MATLAB
Mälardalens Högskolan
Appendix 5: SCPI Command Tables
79
REMOTE CONTROL OF DEVICES WITH A GPIB AND MATLAB
Mälardalens Högskolan
80
REMOTE CONTROL OF DEVICES WITH A GPIB AND MATLAB
Mälardalens Högskolan
81
REMOTE CONTROL OF DEVICES WITH A GPIB AND MATLAB
Mälardalens Högskolan
82
REMOTE CONTROL OF DEVICES WITH A GPIB AND MATLAB
Mälardalens Högskolan
83
REMOTE CONTROL OF DEVICES WITH A GPIB AND MATLAB
Mälardalens Högskolan
84