1
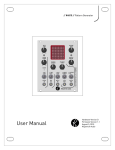
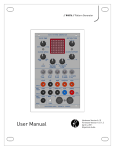
SEQ-03 Module
Operating Manual
Table of Contents
1 Introduction.............................................................................3
2 Setup.......................................................................................4
3 General....................................................................................5
4 First start - track types.............................................................6
5 Track Mute..............................................................................9
6 Record Mode.........................................................................10
7 Working with bars.................................................................13
8 Loading and saving sequences..............................................14
Loading Patterns..................................................................14
Saving patterns....................................................................14
9 Shift-functions.......................................................................15
9.1 Shift-functions with options..........................................15
LastStep..........................................................................15
ClkDiv............................................................................15
TrkMode.........................................................................16
Direction.........................................................................16
Quantization...................................................................16
LFO wave.......................................................................17
Sync I/O..........................................................................17
Shuffle............................................................................17
9.2 Shift-functions without options.....................................18
ClrBar.............................................................................18
RemBar...........................................................................18
ClrPatt.............................................................................18
InitPattern.......................................................................18
SeqMode1.......................................................................18
SeqMode2.......................................................................19
StartMode.......................................................................19
SEQ-03 Operating Manual
Page 2
1 Introduction
MFB's SEQ-03 module is a step-sequencer which is equally
suited to trigger drum modules as well as to play and control
synthesizers. In addition, each of the 12 available tracks may
serve as an AR-envelope or LFO.
The SEQ-03 offers three operational modes that cover different
applications:
1. Mode 1: This mode allows every track to be used either
as CV- or gate-track, AR-envelope or LFO. Sequences
can be up to four bars in length with an adjustable
number of steps per bar. The speed, i.e. clock division is
set globally for all tracks. Shuffle is available but only
for use with the internal clock or at external clock with
24ppq resolution. Each track has a dedicated output.
2. Mode 2: The modus equals mode 1 but is fixed to a
length of one bar. In exchange, this mode allows for
poly-rhythmical patterns. Each track may have an
individual number of steps as well as individual clock
division. Shuffle is not available in this mode.
3. Mode 3: This mode is dedicated to control synthesizers
when wanting to adjust CV values and gate-information
per step simultaneously. There are two outputs assigned
per track. Track 1 uses jacks CG1 for CV- and CG2 for
gate output. Accordingly, this mode offers only six
tracks. The track types are fixed in this mode.
SEQ-03 Operating Manual
Page 3
Note: Switching operational modes forces the currently
selected pattern to be initialized, i.e. all programmed step will
be lost.
2 Setup
MFB's SEQ-03 is fully compatible to Doepfer’s A-100 modular
system - in size, bus-power and CV/Gate voltage. Connect the
10-pin MFB-cable to a corresponded 16-pin jack on the
mainframe bus. Supply voltage needs to be +/- 12 volts. The
wattage is +25/-5mA, the module size is 20HP (half pitches)
equivalent to 101,3mm.
Attention: Please, check for correct polarity! The colored side
of the connector-cable needs to point downwards (-12 V)!
SEQ-03 Operating Manual
Page 4
3 General
We have been trying to develop a complex sequencer in a
compact module format that is still easy to use. Hopefully, we
have succeeded. However, it is still necessary for you to
familiarize yourself with the basic principles of operating the
SEQ-03.
The SEQ-03 will always be either in Mute Mode, where every
track can easily be muted, or in Record Mode. This mode
allows programming of the steps. In mute-mode the track-LED
will be lit green, in record-mode the Track-LED will be lit red.
By pressing Shift the red LEDs will always indicate the
sequencer operational mode. Step-LED 14 will additionally
indicate the start-mode (see below). By pressing the stepbuttons, you may directly call up the functions ClrBar,
RemBar, ClrPatt, Init Patt, SeqMode1, SeqMode2,
SeqMode3 and StartMode or a function with additional
options to choose from. These so-called shift-functions are
LastStep, ClkDiv, TrkMode, Direction, Quantize, LFO
Wave and Shuffle. Here, the corresponding Step-LED and
Shift-LED will be lit red. By using the step-buttons, the desired
option can be selected until Shift is released to leave this menu.
SEQ-03 Operating Manual
Page 5
4 First start - track types
Upon switching on the unit, the SEQ-03 will always enter
sequencer mode 1. The track-LED will be lit green and the
step-buttons 1-12 can be used to mute the corresponding
tracks. The initial sequence has a length of one bar. The BarUpLED will be lit green, indicating that you are located in bar 1.
The internal clock is initially selected and the clock- and startjacks serve as outputs (to select an external clock, see clock
settings). Press Start to start the sequencer.
The SEQ-03 offers four track types. Here is an exemplary
introduction...
CV-Spur
To use track 1 as a CV-track, connect a cable to the CG1 jack
output and patch it to the CV-input of another module, e.g. an
oscillator. Now, press Start to start the internal clock while
adjusting the speed using the tempo control.
Setting up and programming a CV-track
To set this track up as a CV-track, carry out the following steps:
1. Press and hold the Track button
2. Press Step 1 to select track 1
3. Release both buttons
4. Press a Step button to assign a step - the Step-LED
flashes green
5. Para1 adjusts the CV value
6. Para2 adjusts the Portamento value
7. Repeat 4-6 to define further steps
SEQ-03 Operating Manual
Page 6
Editing multiple steps
To edit several steps simultaneously, press and hold Select
while pressing the corresponding step-buttons. All steps being
selected and flashing can now be edited at the same time.
Gate-Track
Connect a cable to the second track (CG2) and patch it to the
gate-input of an envelope or a comparable module.
Setting up and programming a gate-track
To set this track up as a gate-track, carry out the following
steps:
1. Press and hold the Track button
2. Press Step 2 to select track 2
3. Release both buttons
4. Press and hold Shift
5. Press Step 3 (TrkMode)
6. Release both buttons
7. Press Step 2
8. Press Shift to leave shift-mode
9. Press a Step button to assign a step - the Step-LED
flashes green
10. Para1 adjusts the gate intensity
11. Para2 adjusts the gate length
12. Repeat 9-11 to define further steps
SEQ-03 Operating Manual
Page 7
AR-envelope
Connect a cable to the third track (CG3) and patch it to the CVinput of an oscillator or another CV-controllable module.
Setting up and programming an AR-envelope track
To set this track up as an AR-envelope, carry out the following
steps:
1. Press and hold the Track button
2. Press Step 3
3. Release both buttons
4. Press and hold Shift
5. Press Step 3
6. Release both buttons
7. Press Step 3
8. Press Shift
9. Press a Step button to assign a step - the Step-LED
flashes green
10. Para1 adjusts the attack time
11. Para2 adjusts the release time
12. Repeat 9-11 to define further steps
SEQ-03 Operating Manual
Page 8
LFO-Track
Connect a cable to the fourth track (CG4) and patch it to
another CV-input of a module.
Setting up and programming an LFO-track
To set this track up as an LFO, carry out the following steps:
1. Press and hold the Track button
2. Press Step 4
3. Release both buttons
4. Press and hold Shift
5. Press Step 3
6. Release both buttons
7. Press Step 4
8. Press Shift
9. Press a Step button to assign a step - the Step-LED
flashes green
10. Para1 adjusts the LFO tempo
11. Para2 adjusts the LFO intensity
12. Repeat 9-11 to define further steps
5 Track Mute
Press the Track button repeatedly until the track-LED is lit
green to enter Mute mode. Now, tracks 1-12 can be muted
using the corresponding Step buttons. A muted track is
indicated by a red LED for that step.
Note: In sequencer operational modes 1 and 2, the 12 tracks
can be muted using step-buttons 1-12 with the corresponding
step-LEDs being lit red. In operational mode 3 only six tracks
are available. Use step-buttons 1-6 to mute these tracks.
SEQ-03 Operating Manual
Page 9
6 Record Mode
Pressing the Track button repeatedly until the track-LED is lit
red to enter Record mode.
Selecting and programming a track
Select a track first by carrying out the following steps:
1. Press and hold Track
2. Select the track by pressing the corresponding Step
button
3. Release both buttons
The steps are set using the corresponding Step buttons. Press
and hold Select to adjust several steps simultaneously.
The step-LED of the step set last will flash green. While the
step-LED is lit green, two parameters can be adjusted using
the potentiometers Para1/Para2. With the parameters being
set, select the next step to edit. Alternatively, press Select to
avoid displacing the parameters.
Track-Parameters
The parameters that can be adjusted using Para1 and Para2
depend upon the track-type being selected
CV-track
Para1:
Para2:
CV, depending on the quantize-parameter:
3,5,7 octaves in semitones or
0-8 volts with no quantization
Portamento
SEQ-03 Operating Manual
Page 10
Gate-track
Para1:
Para2:
Gate-voltage, adjustable from 6.5 to ca.
9.5 volts, all MFB-drum-modules offer dynamic
triggering to control the output volume
Gate-length, adjustment range 4-250ms
Note: Depending on the tempo, gates may
overlap and merge two succeeding gate triggers
into one.
AR-envelope
The envelopes use an exponential type of control. The
maximum output is 8 volts.
Para1:
Para2:
Attack-time,
Adjustment range: ca. 2.5-700ms
Release-time,
Adjustment range: ca. 2.5-700ms
LFO
An individual waveform shape can be selected per LFO, being
valid for all steps of a track. However, the amplitude and the
tempo can be set per step.
A special feature is the non-existing neutral zero-line for the
LFO which rather oscillates between zero volts and the defined
maximum value (Para2). As with all other track types,
parameters 1 and 2 are programmable. In addition, the LFO is
reset with each step, making lively "LFO-sequences" possible.
Para1:
Para2:
Tempo: ca. 8s to 10Hz
CV, depending on the quantize-parameter:
3, 5 or 7 octaves in semitones or
0-8 volts with no quantization
SEQ-03 Operating Manual
Page 11
Editing existing steps
Each programmed step can be edited at any time. In addition, it
is also possible to edit multiple steps at once. This way, new
steps as well as existing steps can be edited in one move.
1. Press and hold Select
2. Press all step-buttons for the steps to be edited,
existing or new one
3. Release Select
4. Adjust Para1 and/or Para2. All steps will now share
the same value.
5. Press Select again to leave edit-mode. All Step-LEDs
should now be lit permanently.
Note: With CV-tracks, the control voltage may not only be
altered by the Para1-control but also using the BarUp and
BarDown buttons. This action works relatively to allow
transposing a full sequence up or down.
SEQ-03 Operating Manual
Page 12
7 Working with bars
Switching between bars
Switch between bars using BarUp- and BarDown.
Copying bars
Initially, a new pattern has a length of one bar. By pressing
BarUp, the contents of the first bar will be duplicated (with bar
2 being selected), allowing to create fast variations. By
pressing Shift additionally, just an empty bar will be added.
Note: This operation is only possible in operational modes 1
and 3.
Individual bars may also be deleted or shifted (see Shiftfunctions).
In record-mode, moving LEDs will indicate that the selected
bar is currently played.
Both LEDs for BarUp- and BarDown display the currently
selected track:
BarUp green, BarDown off: Bar 1
BarUp red, BarDown off:
Bar 2
BarUp off, BarDown green: Bar 3
BarUp off, BarDown red:
Bar 4
SEQ-03 Operating Manual
Page 13
8 Loading and saving sequences
The SEQ-03 allows storing a total of 48 patterns, being
organized in three banks of 16 patterns each. To switch
between banks carry out the following steps:
1. Press and hold Shift
2. Pressing LoadPatt will advance the bank selection by
one. The LED will display the currently selected bank.
3. Release Shift-Taste when the desired bank has been
reached
LoadPatt-LED
Off: Bank 1
Green: Bank 2
Red: Bank 3
Loading Patterns
1. Press and hold LoadPatt - the last selected pattern is
indicated by a green step-LED
2. Step buttons 1-16 select the patterns of the current bank
3. Release LoadPatt - the pattern will be switched upon
the next bar
Saving patterns
1. Press and hold SavePatt - the last selected pattern is
indicated by a green step-LED
2. Step buttons 1-16 select the patterns of the current bank
3. Release SavePatt - the pattern is saved and the
SavePatt-LED will flash red shortly
SEQ-03 Operating Manual
Page 14
9 Shift-functions
9.1 Shift-functions with options
To adjust these functions carry out the following steps:
1. Press and hold Shift
2. Press the corresponding Step button to select a function
3. Release Shift
4. Shift LED + Step LED will flash red
5. Adjust the option using the Step buttons
6. Confirm by pressing Shift
LastStep
Use step-button 1-16 to set the number of steps per bar. With
the exception of SeqMode2 this setting affects all tracks - no
matter if in mute- or record-mode. In SeqMode2 the number of
steps can be set per track. Depending whether you are in muteor record-mode, all tracks or just the currently selected track
will be adjusted.
ClkDiv
The step buttons 1-16 are used to set the clock divider:
Step 1: 1 = 96th
Step 9: 24 = 4th
Step 2: 2 = 48th
Step 10: 32 ½ triplets
Step 3: 3 = 32th
Step 11: 48 ½
Step 4: 4 = 16th triplets
Step 12: 64 2/3
Step 5: 6 = 16th
Step 13: 96 1
Step 6: 8 = 8th triplets
Step 14: 128 1 1/3
Step 7: 12 = 8th
Step 15: 192 2
Step 8: 16 = 4th triplets
Step 16: 288 4
With the exception of SeqMode2 this setting affects all tracks SEQ-03 Operating Manual
Page 15
no matter if in mute- or record-mode. In SeqMode2 the
number of steps can be set per track.
Depending whether you are in mute- or record-mode, all tracks
or just the currently selected track will be adjusted.
TrkMode
This function is only available in operational modes
SeqMode1 and SeqMode2. In SeqMode3 all track-types are
fixed (see SeqMode3).
Depending whether you are in mute- or record-mode, all tracks
or just the currently selected track will be adjusted.
Step 1: CV-track
Step 2: Gate-track
Step 3: AR-envelope
Step 4: LFO
Direction
This option sets the order of the sequencer steps being played.
Step 1: up
Step 2: down
Step 3: alternating
Step 4: random
Depending whether you are in mute- or record-mode, all tracks
or just the currently selected track will be adjusted.
Quantization
This option sets the adjustment range for Para1.
Step 1:
Step 2:
Step 3:
Step 4:
3 octaves, quantized in semitones
5 octaves, quantized in semitones
7 octaves, quantized in semitones
not quantized, ca. 0-8 volts
SEQ-03 Operating Manual
Page 16
Depending whether you are in mute- or record-mode, all tracks
or just the currently selected track will be adjusted.
LFO wave
This option sets the waveform shape for a track being used as
LFO in record-mode.
1
2
Step 1: saw tooth ascending Step 3: sine
Step 2: saw tooth descending Step 4: square
Sync I/O
This option selects the clock source.
Step 1: internal clock, clock out: 16th, tempo control active
Step 2: internal clock, clock out: 24ppq
Step 2: external clock, 16th
Step 3: external clock 24ppq
Shuffle
This option sets the shuffle intensity by pressing step-buttons
1-16:
Step 1: no shuffle
Steps 2-16: 15 shuffle-intensity
This function is only available in operational modes
SeqMode1 and SeqMode3. With the clock source being set to
external, Shuffle is only possible with Sync I/O-mode being set
to external 24ppq.
Note: ClockDiv should be set to 16th!
SEQ-03 Operating Manual
Page 17
9.2 Shift-functions without options
To adjust these functions carry out the following steps:
1. Press and hold Shift
2. Press Step
3. Release both buttons
4. The function is carried out
ClrBar
In record-mode, the current track will be deleted. In mutemode, all steps of the current bar will be deleted in all tracks.
RemBar
This function removes a bar. Here, the following bars are
moved forward in time respectively. A sequence of originally
four bar length will turn into a three bar sequence.
ClrPatt
This function deletes all steps of the selected pattern. However,
all track-settings such as TrkMode, Quantize, LFO Wave,
LastStep, Direction and ClkDiv are being kept.
InitPattern
This function initializes the selected pattern. Here, all steps are
deleted and all track-settings are reset to their initial states.
SeqMode1
The sequencer is set to operational mode 1.
SEQ-03 Operating Manual
Page 18
SeqMode2
The sequencer is set to operational mode 2.
SeqMode3
The sequencer is set to operational mode 3.
Note: Switching operational modes forces the currently
selected pattern to be initialized, i.e. all programmed step will
be lost. To keep your pattern, please save in advance.
StartMode
This function adjusts the behavior of the Start/Stop-jack.
Depending on sync I/O setting, this jack serves as input or
output.
Step-LED red/off
SEQ-03 Operating Manual
DIN sync-mode/ MFB-mode
Page 19