1
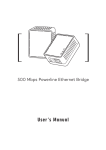
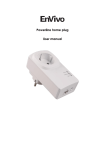
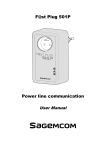
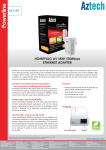
SIMPLENET
USER MANUAL
MODEL 506663
manhattan-products.com
MH-506663/536670-UM-1112-01
INTRODUCTION
Thank you for purchasing the Manhattan SimpleNet (Powerline AV500 Ethernet
Adapter), Model 506663. The Starter Kit, Model 506670, features a pair of units,
the minimum number required to operate the devices.
®
This device allows you to create a high-speed network for your home or office
by simply plugging it into any electrical outlet. You immediately create a network
using the existing AC power lines that enables high-speed, crystal-clear streaming
of 1080p high-definition (HD) video — great for such popular items as networkenabled gaming consoles and digital media devices.
There’s no need to drill holes in walls, pull cable through the attic or basement, or
pay for a contractor. Just plug the SimpleNet into the wall, connect it to your router,
and you have now created a network within your home. Attach multiple computers
to the network by simply plugging them into additional SimpleNet adapters.
Because there is no special wiring required, SimpleNet adapters can be installed
with minimal expense. And you can move them to different locations without
having to reconfigure the adapters or your network. Plus, SimpleNet uses 128-bit
encryption for the protection of you and your family.
Detailed instructions in this user manual make installation reasonably quick and
simple, so you’ll soon be enjoying the benefits of all these additional features:
• The latest generation of Powerline technology with higher throughput and
enhanced security
• Up to 500 Mbps network data rates and data security through 128-bit encryption
• Enables high-quality video streaming, VoIP and gaming over a home network
• Plug and Play (no drivers required)
• Software-free security configuration with a simple push of a button
• HomePlug AV compliant; compatible with HomePlug AV adapters*
• Three-Year Warranty
* The SimpleNet is not compatible with the Powerline Turbo Ethernet Bridge, but
the two items can co-exist on the same power line without interfering with one
another.
2
INITIAL SETUP
The SimpleNet adapter allows you to connect a device that has an Ethernet port
to a building’s power line network; that is, the wiring system that runs throughout
a home, office, etc. In operation, this “bridge” is completely transparent: It simply
passes data from the Ethernet port along the wiring network. In turn, any
additional Ethernet-enabled devices may be connected to that bridge — and thus
to other devices similarly connected through SimpleNet adapters — as in the
examples below.NOTE: Each SimpleNet adapter needs to pair with at least one
other such device in order to create a working system.
SimpleNet
Powerline
AV Ethernet
Adapter
SimpleNet /
Powerline
SimpleNet
Powerline
AV Ethernet
Adapter
SimpleNet
Powerline
AV Ethernet
Adapter
3
Setup
The SimpleNet adapter is a Plug and Play device. By
simply pressing a button, you can securely connect to
the Internet or to other devices (computers, Blu-ray
players, game consoles, etc.) on a network.
1. Use the included Ethernet cable to connect the
adapter to your modem or router. If you’re setting up
Security /
Ethernet port
Reset button
with the Starter Kit, connect one of the two included
adapters to your modem or router.
2. Plug each adapter into an AC power outlet near the device which you’ll be
connecting to that particular adapter. Caution: Don’t plug SimpleNet adapters
into a power strip or outlet that uses surge protection, as this may prevent them
from working properly.
3. Once a SimpleNet adapter is
SimpleNet
Powerline
connected and powered, it will
AV Ethernet
Adapter
search for other SimpleNet
adapters (bridges) connected to
SimpleNet /
Powerline
the same wiring system in your
building. When another adapter
is found, the PL (Powerline)
LED on the front panel will light.
Remember that you need at
least two SimpleNet adapters
SimpleNet
SimpleNet
connected to the building’s
Powerline
Powerline
AV Ethernet
AV Ethernet
Adapter
wiring system for this to work.
Adapter
Note: If the PL LED lights red,
it means that a connection’s
been established, though not
necessarily at optimum speed.
The connection speed should
still be fast enough for online
gaming and video streaming.
Security/Reset button: This button has two functions:
•As a Security button, it’s part of the procedure for generating an individual
Powerline network group under a multiple-nodes environment. Refer to the
Network Setup instructions below.
•As a Reset button, it’s used to clear all data and restore all settings to the factory
default values. Note: The adapter must be plugged in to restore it to factory
defaults. Press the Reset button until the LEDs begin to flash.
4
INDEPENDENT NETWORK SETUP
Each SimpleNet adapter is set with a default security key so it automatically links
to all other such devices sharing the same electrical lines. If there are other such
devices in the building (in an office or apartment building, perhaps), you may want
to create your own individual (independent) network group so others’ SimpleNet
devices can’t connect to your network.
Creating a New Independent Network (Network AB)
As shown below, two unassociated SimpleNet adapters (Adapter A and Adapter B)
form a new network: Network AB.
Adapter A
Adapter B
1. Press and hold the Security button on Adapter A for 10 seconds. Release it when
the Power (PWR) LED flashes. The password to Adapter A has just been erased,
and the device must now be linked to your network to adopt the new network
security key.
2. Press and hold the security button on Adapter B for 10 seconds and release it
when the Power LED flashes. The password to Adapter B has just been erased,
and this second device also must now be linked to your network to adopt the new
network security key. Note: At this point, Adapters A and B are not networked.
3. Press and hold the Security button on Adapter A for 2 seconds. The Power LED
starts to flash.
4. Within 2 minutes of the Power LED on Adapter A beginning to flash, press and
hold the Security button on Adapter B for 2 seconds. Adapter A and Adapter B
are now networked together.
5
Adding Adapter C to Existing Network AB (Network
ABC)
As shown below, one unassociated Adapter (C) is added to expand an existing
network: Network AB.
Adapter A
Adapter B
Adapter C
1. Press and hold the Security button on Adapter C for 10 seconds. Release it when
the Power light flashes. The password to Adapter C has just been erased and the
device must now be linked to your network to adopt the new network security key.
2. Press and hold the security button on Adapter A for 2 seconds. The Power LED
on Adapter A starts to flash.
3. Within 2 minutes of the Power LED on Adapter A beginning to flash, press and
hold the Security button on Adapter C for 2 seconds, then release it. Adapters
A, B and C are now networked to each other.
6
Removing Adapter B from the ABC Network and
Joining with Adapters D & E (Network BDE)
As shown below, a networked Adapter (B) is removed from one existing network
(ABC) and added to another (forming BDE).
Adapter
A
Adapter
B
Adapter
B
Adapter
C
Adapter
D
Adapter
E
Electrical Wiring
1. Press and hold the Security button on Adapter B for 10 seconds. Release it when
the Power LED flashes. The password to Adapter B has just been erased and
removes itself from Adapters A & C.
2. Press and hold the Security button on Adapter D for 2 seconds.
3. Within 2 minutes of the Power LED on Adapter D beginning to flash, press and
hold the Security button on Adapter B for 2 seconds, then release it. Adapter B
and Adapter D are now connected to each other, which in turn becomes part of
Network BDE.
7
TROUBLESHOOTING
If any of the SimpleNet adapters in your network have difficulty communicating
with one another, consider the following suggestions.
• Try power-cycling the unit by unplugging it from the wall for 10 seconds and
plugging it in again.
• Press the Reset button for 2 seconds on each unit you’re trying to connect. The
LEDs will flash as the units reset and attempt to link using default factory
settings.
• Try plugging the device into an adjacent plug.
• SimpleNet adapters work best when plugged directly into a wall outlet.
Connecting them to a power strip or surge protector may degrade network
performance or completely stop network signals.
• Don’t connect SimpleNet adapters to GFI-protected outlets, as some outlets will
filter out the signal.
• Don’t use SimpleNet adapters in areas with excessive heat.
• Certain fluorescent or incandescent lights are noise sources on the electrical
circuit and can degrade performance.
• If your building has more than one circuit breaker box, your SimpleNet adapters
may not be able to connect between the different boxes. In this case, connect
one SimpleNet device to a power outlet located on each of the circuit boxes.
Connect Ethernet cable between each of the SimpleNet devices to link the
different circuits together. This will allow devices from different circuit breaker
boxes to connect.
8
SPECIFICATIONS
Standards
• IEEE 1901 / HomePlug AV
• IEEE 802.3 10Base-T
• IEEE 802.3u 100Base-TX
Certifications
• HomePlug AV Powerline
• FCC Part 15, Part B, Class B
• CE
• RoHS
General
• 10/100 Mbps RJ45 port
• AC power line port
• Chipset: Qualcomm Atheros AR7420
• 500 Mbps PHY rate max.
• 128-bit AES Link Encryption with key management for secure power line
communications
• OFDM modulation
• 1024/256/64/16/8 - QAM, QPSK, BPSK, ROBO carrier modulation
• Frequency band: 2 – 50 MHz
LEDs
• Power
• Power line Link/Activity
• Ethernet Link/Activity
Power
• Dimensions: 64 (L) x 46.5 (W) x 24.5 (H) mm (2.5 x 1.8 x 1.0 in.)
• Weight: 0.3 kg (0.66 lbs.)
• Operating temperature: 0 – 40°C (32 – 104°F)
• Operating relative humidity: 10 – 90%, non-condensing
• Storage temperature: -10 – 70°C (14 – 158°F)
• Storage relative humidity: 10 – 90%, non-condensing
Minimum System Requirements
• Existing Manhattan SimpleNet Ethernet Adapter
• TCP/IP protocol
• CD-ROM drive
• Configuration utility requires Windows XP, Vista, Windows 7 or Windows 8
9
WASTE ELECTRICAL & ELECTRONIC EQUIPMENT
Disposal of Electric and Electronic Equipment
(applicable in the European Union and other European countries with separate collection systems)
This symbol on the product or its packaging indicates that this product
shall not be treated as household waste. Instead, it should be taken to
an applicable collection point for the recycling of electrical and electronic
equipment. By ensuring this product is disposed of correctly, you will help
prevent potential negative consequences to the environment and human health,
which could otherwise be caused by inappropriate waste handling of this product.
If your equipment contains easily removable batteries or accumulators, dispose of
these separately according to your local requirements. The recycling of materials
will help to conserve natural resources. For more detailed information about
recycling of this product, contact your local city office, your household waste
disposal service or the shop where you purchased this product. In countries
outside of the EU: If you wish to discard this product, contact your local authorities
and ask for the correct manner of disposal.
COMPLIANCE STATEMENTS
FCC Class B
This equipment has been tested and found to comply with the limits for a Class B
digital device, pursuant to Part 15 of Federal Communications Commission (FCC)
Rules. These limits are designed to provide reasonable protection against harmful
interference in a residential installation. This equipment generates, uses and can
radiate radio frequency energy and, if not installed and used in accordance with
the instructions, may cause harmful interference to radio communications. However,
there is no guarantee that interference will not occur in a particular installation. If
this equipment does cause harmful interference to radio or television reception,
which can be determined by turning the equipment off and on, the user is encouraged
to try to correct the interference by one or more of the following measures:
• Reorient or relocate the receiving antenna.
• Increase the separation between the equipment and the receiver.
• Connect the equipment to an outlet on a circuit different from the receiver.
• Consult the dealer or an experienced radio/TV technician for help.
FCC Radiation Exposure Statement
This equipment complies with FCC radiation exposure set forth for an uncontrolled
environment. To avoid the possibility of exceeding FCC radio frequency exposure
limits, human proximity to the antenna shall not be less than 20 cm (8 inches)
during normal operation. The antenna(s) used for this transmitter must not be co10
located or operating in conjunction with any other antenna or transmitter.
The equipment version marketed in the U.S. is restricted to usage of channels 1-11.
R&TTE
This device complies with the requirements of R&TTE Directive 1999/5/EC.
The ETSI version of this device is intended for home and office use in Austria,
Belgium, Denmark, Finland, France, Germany, Greece, Ireland, Italy, Luxembourg,
the Netherlands, Portugal, Spain, Sweden and the United Kingdom, and is also
authorized for use in EFTA member states Iceland, Liechtenstein, Norway and
Switzerland.
11
© IC Intracom. All rights reserved.
Manhattan is a trademark of IC Intracom, registered in the U.S. and other countries.