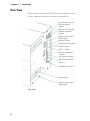
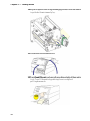
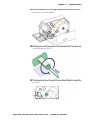
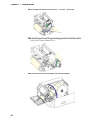
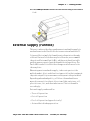
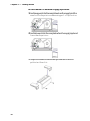
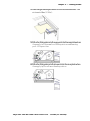
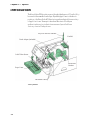
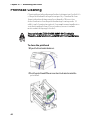
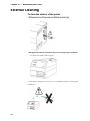
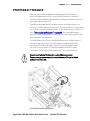
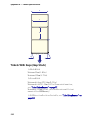
1
Intermec 条码打印机免费服务热线:400-1199-021
User’s Guide
EasyCoder® PX4i
Bar Code Label
Printer
(IPL Version)
User’s Guide
EasyCoder® PX4i
Bar Code Label
Printer
(IPL Version)
IntermecTechnologiesCorporation
WorldwideHeadquarters
600136thAve.W.
Everett,WA98203
U.S.A.
www.intermec.com
Theinformationcontainedhereinisprovidedsolelyforthepurposeofallowingcustomersto
operateandserviceIntermec-manufacturedequipmentandisnottobereleased,reproduced,or
usedforanyotherpurposewithoutwrittenpermissionofIntermecTechnologiesCorporation.
Informationandspecificationscontainedinthisdocumentaresubjecttochangewithoutprior
noticedanddonotrepresentacommitmentonthepartofIntermecTechnologiesCorporation.
©2003-2008byIntermecTechnologiesCorporation.Allrightsreserved.
ThewordIntermec,theIntermeclogo,Norand,ArciTech,CrossBar,DataCollectionBrowser,
dcBrowser,Duratherm,EasyCoder,EasyLAN,EnterpriseWirelessLAN,EZBuilder,
Fingerprint,i-gistics,INCA(underlicense),InterDriver,IntermecPrinterNetworkManager,
IRL,JANUS,LabelShop,MobileFramework,MobileLAN,Nor*Ware,Pen*Key,PrecisionPrint,
PrintSet,RoutePower,TE2000,TrakkerAntares,UAP,UniversalAccessPoint,andVirtual
WedgeareeithertrademarksorregisteredtrademarksofIntermecTechnologiesCorporation.
ThereareU.S.andforeignpatentsaswellasU.S.andforeignpatentspending.
Throughoutthismanual,trademarkednamesmaybeused.Ratherthanputatrademark(™or®)
symbolineveryoccurrenceofatrademarkedname,westatethatweareusingthenamesonlyin
aneditorialfashion,andtothebenefitofthetrademarkowner,withnointentionof
infringement.
KimduraisaregisteredtrademarkofKimberlyClark.
MicrosoftisaregisteredtrademarkofMicrosoftCorporation.
ValeronisaregisteredtrademarkofValéronStrengthFilms,anITWCompany.
WindowsisatrademarkofMicrosoftCorporation.
ii
Document Change Record
Thispagerecordschangestothisdocument.Thedocumentwas
originallyreleasedasVersion-01.
Version
Number Date
-01
-02
-001
EasyCoder PX4i Bar Code Label Printer User’s Guide (IPL Version)
iv
EasyCoder PX4i Bar Code Label Printer User’s Guide (IPL Version)
Contents
BeforeYouBegin.....................................................x
SafetySummary..............................................x
Donotrepairoradjustalone.............................x
Firstaid.............................................x
Resuscitation.........................................x
Energizedequipment...................................x
SafetyIcons................................................xi
GlobalServicesandSupport....................................xi
WarrantyInformation.................................xi
WebSupport........................................xii
TelephoneSupport...................................xii
ServiceLocationSupport..............................xiii
WhoShouldReadThisManual................................xiii
RelatedDocuments.........................................xiii
1 Introduction
DescriptionofEasyCoderPX4iPrinter....................................2
SafetySummary.....................................................2
ProductIdentification.................................................3
2 Installation
.......................................................5
UnpackingthePrinter.................................................6
FrontView..................................................7
RearView...................................................8
MediaCompartment..........................................9
PrintMechanism............................................10
ConnectingthePrinter...............................................11
Computer..................................................11
RS-232SerialInterface........................................11
USBInterface...............................................11
ControlsandIndicators..............................................12
IndicatorLamps.............................................12
Display....................................................13
Keyboard..................................................14
Beeper....................................................14
EasyCoder PX4i Bar Code Label Printer User’s Guide (IPL Version)
3 Starting Up
.....................................................15
SwitchingOnthePrinter.............................................16
4
Loading
.................................................17
Media
Tear-Off(Straight-Through)..........................................18
Cut-Off..........................................................23
Peel-Off(Self-Strip).................................................28
InternalBatchTakeup(Roll-to-Roll)....................................34
ExternalSupply(Fanfold)............................................41
5
Loading
Ribbon
..........45
for
Thermal
Transfer
Printing
LoadingRibbon....................................................46
6 Setting Up
........................................53
the Printer
Description.......................................................54
DefaultSetup......................................................55
SerialCommunication..............................
..........
SetupParamet
BaudRate.................................
ers..........
.............
.........
.............
DataBits.................................
.............
..........
..
Parity...................................
......
Protocol.................................
..........
Test/Service.....................................
...........
Testprint................................
...........
DataDump.................................
.......
MemoryReset..............................
.........
LSSTest..................................
.........
Media............................................
........
MediaType................................
........
PaperType................................
.........
LabelLengthDots..........................
.........
59
59
61
61
61
61
61
61
62
56
56
56
57
57
57
57
vi
EasyCoder PX4i Bar Code Label Printer User’s Guide (IPL Version)
Sensitivity(MediaSensitivityNumber)....................62
Darkness...........................................62
LabelRestPoint......................................62
FormAdjDotsX.....................................62
FormAdjDotsY.....................................62
RibbonLow.........................................62
PaperLow..........................................63
Configuration...............................................63
PowerUpEmulation..................................63
PrintSpeed.........................................63
Cutter(option)......................................63
LabelTakenSensor(option)............................64
ReturningtoFactoryDefaultSetup.....................................64
7 Setup Mode
NavigatinginSetupMode............................................68
SetupModes.......................................................69
8 Options
Introduction.......................................................74
Liner/BatchTakeupKit..............................................75
PaperCutter.......................................................75
FanfoldGuides.....................................................76
MediaRollRetainer.................................................76
3-inchAdapter.....................................................77
LabelTakenSensor..................................................77
InterfaceBoards....................................................77
9 Troubleshooting
IntermecReady-to-WorkIndicator......................................80
EasyCoder PX4i Bar Code Label Printer User’s Guide (IPL Version)
Troubleshooting....................................................83
10 Maintaining the Printer
PrintheadCleaning.................................................88
ExternalCleaning..................................................92
CleaningtheLabelStopSensor........................................93
ReplacingthePrinthead..............................................95
MediaJams......................................................100
11 Adjustments
NarrowMedia....................................................102
PrintheadPressure.................................................103
LabelStopSensor.................................................104
A Technical Data
B Media Specifications
MediaRollSize...................................................114
Media..........................................................
Non-AdhesiveStrip(ContinuousStock).........................
Self-AdhesiveStrip(ContinuousStock)..........................
Self-AdhesiveLabels(GapStock)...............................
TicketsWithGaps(GapStock)................................
TicketsWithBlackMark(MarkStock)..........................
C Interfaces
RS-232Interface..................................................124
ProtocolForTheDefaultSetup................................124
InterfaceCable............................................125
USBInterface....................................................125
viii
OptionalInterfaces.................................................126
D Media Sensitivity Number
TheMediaSensitivityNumber(MSN)..................................130
DeterminingthePrinter’sCurrentMediaSensitivitySetting...........130
ChangingthePrinter’sCurrentMediaSensitivitySetting.............130
DeterminingtheMSNforIntermec-ApprovedMediaandRibbons.....131
DeterminingtheMSNforOtherMediaandRibbons...............131
MediaSensitivityNumbersforIntermec-ApprovedMediaandRibbons..132
EasyCoder PX4i Bar Code Label Printer User’s Guide (IPL Version)
Before You Begin
Before You Begin
Thissectionprovidesyouwithsafetyinformation,technical
supportinformation,andsourcesforadditionalproduct
information.
Safety Summary
Yoursafetyisextremelyimportant.Readandfollowall
warningsandcautionsinthisdocumentbeforehandling
andoperatingIntermecequipment.Youcanbeseriously
injured,andequipmentanddatacanbedamagedifyoudo
notfollowthesafetywarningsandcautions.
Do not repair or adjust alone
Donotrepairoradjustenergizedequipmentaloneunder
anycircumstances.Someonecapableofprovidingfirstaid
mustalwaysbepresentforyoursafety.
First aid
Alwaysobtainfirstaidormedicalattentionimmediately
afteraninjury.Neverneglectaninjury,nomatterhow
slightitseems.
Resuscitation
Beginresuscitationimmediatelyifsomeoneisinjuredand
stopsbreathing.Anydelaycouldresultindeath.Towork
onornearhighvoltage,youshouldbefamiliarwith
approvedindustrialfirstaidmethods.
Energized equipment
Neverworkonenergizedequipmentunlessauthorizedbya
responsibleauthority.Energizedelectricalequipmentis
dangerous.Electricalshockfromenergizedequipmentcan
causedeath.Ifyoumustperformauthorizedemergency
workonenergizedequipment,besurethatyoucomply
strictlywithapprovedsafetyregulations.
x
Before You Begin
Safety Icons
Thissectionexplainshowtoidentifyandunderstandthe
warnings,cautions,andnotesthatareinthisdocument.
YoumayalsoseeiconsthattellyouwhentofollowESD
procedures.
Awarningalertsyouofanoperatingprocedure,practice,
condition,orstatementthatmustbestrictlyobservedtoavoid
deathorseriousinjurytothepersonsworkingonthe
equipment.
Acautionalertsyoutoanoperatingprocedure,practice,
condition,orstatementthatmustbestrictlyobservedto
preventequipmentdamageordestruction,orcorruptionor
lossofdata.
Thisiconappearsatthebeginningofanyprocedureinthis
manualthatcouldcauseyoutotouchcomponents(suchas
printedcircuitboards)thataresusceptibletodamagefrom
electrostaticdischarge(ESD).Whenyouseethisicon,youmust
followstandardESDguidelinestoavoiddamagingthe
equipmentyouareservicing.
Note:Noteseitherprovideextrainformationaboutatopicor
containspecialinstructionsforhandlingaparticularconditionor
setofcircumstances.
Global Services and Support
Warranty Information
TounderstandthewarrantyforyourIntermecproduct,visitthe
Intermecwebsiteatwww.intermec.comandclickSupport>
ReturnsandRepairs>Warranty.
Disclaimerofwarranties:Thesamplecodeincludedinthis
documentispresentedforreferenceonly.Thecodedoesnot
necessarilyrepresentcomplete,testedprograms.Thecodeis
provided“asiswithallfaults.”Allwarrantiesareexpressly
disclaimed,includingtheimpliedwarrantiesofmerchantability
andfitnessforaparticularpurpose.
EasyCoder PX4i Bar Code Label Printer User’s Guide (IPL Version)
Before You Begin
Web Support
VisittheIntermecwebsiteatwww.intermec.comtodownload
ourcurrentmanuals(inPDF).Toorderprintedversionsofthe
Intermecmanuals,contactyourlocalIntermecrepresentativeor
distributor.
VisittheIntermectechnicalknowledgebase(Knowledge
Central)atwww.intermec.comandclickSupport>Knowledge
Centraltoreviewtechnicalinformationortorequesttechnical
supportforyourIntermecproduct.
Telephone Support
TheseservicesareavailablefromIntermec.
In the USA and
Canada call 1-800755-5505 and
Services
OrderIntermec·Placeanorder.
products
OrderIntermecOrderprinterlabelsand
media
Orderspare
parts
Technical
Support
Service
Servicecontracts·Askaboutanexisting
contract.
·Renewacontract.
·Inquireaboutrepair
billingorotherservice
invoicingquestions.
xii
Before You Begin
OutsidetheU.S.A.andCanada,contactyourlocalIntermec
representative.Tosearchforyourlocalrepresentative,fromthe
Intermecwebsite,clickAboutUs>ContactUs.
Service Location Support
Forthemostcurrentlistingofservicelocations,clickSupport>
ReturnsandRepairs>RepairLocations.
FortechnicalsupportinSouthKorea,usetheafterservice
locationslistedbelow:
AWOOSystems
102-1304SKVentium
522Dangjung-dong
Gunpo-si,Gyeonggi-doKorea,South435-776
Contact:Mr.SinbumKang
Telephone:+82-31-436-1191
E-mail:[email protected]
INInformationSystemPTDLTD
6thFloor
DaeguVentureCenterBldg95
Shinchun3Dong
Donggu,DaeguCity,Korea
E-mail:[email protected]@gw.idif.co.kr
Who Should Read This Manual
ThisUser’sGuideprovidesyouwithinformationaboutthe
featuresoftheEasyCoderPX4iprinterandhowtoinstall,
configure,operate,maintain,andtroubleshootit.
Related Documents
TheIntermecwebsiteatwww.intermec.comcontainsour
documents(asPDFfiles)thatyoucandownloadforfree.
To download documents
1VisittheIntermecwebsiteatwww.intermec.com.
2ClickSupport>Manuals.
3IntheSelectaProductfield,choosetheproductthatyou
wanttodownloaddocumentationfor.
ToorderprintedversionsoftheIntermecmanuals,contact
yourlocalIntermecrepresentativeordistributor.
EasyCoder PX4i Bar Code Label Printer User’s Guide (IPL Version)
Before You Begin
xiv
1
Introduction
ThischapterintroducestheEasyCoderPX4iprinterandcovers
thefollowingtopics:
·DescriptionofEasyCoderPX4iPrinter
·SafetySummary
·ProductIdentification
EasyCoder PX4i Bar Code1
Label Printer User ’ s Guide
(IPL Version)
Chapter 1 — Introduction
Description of EasyCoder PX4i Printer
TheEasyCoderPX4iprinterisahigh-volumethermaltransfer
printerwithaprintheadresolutionof
8dots/mm(203dots/inch)or16dots/mm(406dots/inch),
dependingonwhichprintheadisinstalled.Themaximumprint
widthis112mm(4.5in)witheitherprinthead.
TheEasyCoderPX4iprinteroffersalargenumberofuseful
features:
·Highspeedprintingupto300mm/sec(12in/sec)
·FlashmemorySIMMsforfirmware,fonts,andbarcodes
·Built-inCompactFlashmemorycardadapter
·Built-inRS-232andUSBinterfaces
·Provisionforoneortwoextrainterfaceboardsincluding
wiredorwirelessEasyLANconnectionsandparallelinterface
·Keyboardanddisplaywithbacklight
·Supportfornetworkmonitoringthroughoptionalsoftware
tools
Alargenumberoffactory-installedorfield-installableoptionsare
available,sotheprintercanbeconfiguredforawiderangeof
applications.See“Options”onpage73,formoreinformation.
TheprinterisdesignedtoworkwiththeIntermecInterDriver
andIntermecLabelShop.TheInterDriverallowsyoutoprint
labelsfromstandardMSWindowsapplications,forexample
MicrosoftOffice.IntermecLabelShopisaseriesoflabeldesign
programsthatworkundervariousversionsofMSWindows.
TheEasyCoderPX4iprinterdescribedinthismanualsupports
theIntermecProgrammingLanguage(IPL)v2.30orlater.The
EasyCoderPX4iprinterthatsupportsIntermecFingerprint
v8.30isdescribedinitsownUser’sGuide.
Safety Summary
IntermecassumesnoresponsibilityregardingtheCEDirectiveif
theprinterishandled,modified,orinstalledinanywayother
thanthatdescribedinIntermec’smanuals.
·Readthismanualcarefullybeforeconnectingtheprinter.
2
Chapter 1 — Introduction
·Movingpartsareexposedwhenthesidedoorsareopen,so
ensurethatthedoorsareclosedbeforeyouoperatetheprinter.
·Donotremovetheleft-handcover.Dangerousvoltage!
·Donotremovethebottomplate.Dangerousvoltage!
·Donotputyourfingersinsidetheprintmechanismwhenthe
powerison.
·Placetheprinteronanevensurfacewhichcansupportits
weightofapproximately13kg(28.5lb)plussupplies.
·Donotspraytheprinterwithwater.Ifyouareusingahoseto
cleanthepremisesinanindustrialenvironment,removethe
printerorprotectitcarefullyfromsprayandmoisture.
·Carefullyreadthewarningtextontheenvelopebeforeusinga
cleaningcard.
Product Identification
Themachinelabelisattachedtotheprinter’srearplateand
containsinformationontype,model,andserialnumberaswell
asACvoltage.Italsocontainsregulatoryagencymarkings
indicatingcompliancewithspecificagencyregulations,ifany.
EasyCoder PX4i Bar Code Label Printer User’s Guide (IPL Version)
Chapter 1 — Introduction
4
2
Installation
ThischapterexplainshowtounpackandinstalltheEasyCoder
PX4iprinterandalsodescribestheprinter’svariouspartsin
detail.Itcoversthefollowingtopics:
·UnpackingthePrinter
·ConnectingthePrinter
·ControlsandIndicators
EasyCoder PX4i Bar Code5
Label Printer User ’ s Guide
(IPL Version)
Chapter 2 — Installation
Unpacking the Printer
Beforeyouinstalltheprinter,unpackandexamineitforpossible
damageormissingparts.
To unpack the printer
1Opentheboxandlifttheprinterout.
2Checkthattheprinterhasnotbeenvisiblydamagedduring
transportation.Keepthepackingmaterialsincaseyouneedto
moveorreshiptheprinter.
3Checkthelabelontheprinter’srearplate,whichgivesthe
voltage,thepartnumber,andtheserialnumber.
4Checkthatanyoptionsyouorderedareincluded.
5Checkthatalltheaccessoriesareincluded:
·IntermecEasyCoderPX4iprinter
·Adapterfor3inmediarollcore
·Powercord
·Qualitycheckcard
·Cleaningcard
·Compactdisk(CD)withsupportingsoftware,additional
manuals,andproductinformation.
6Checkthatthetypeofpowercordisappropriateforthelocal
standard.Theprinterworkswithin90to265VAC,
50to60Hz.
7Iftheprinterhasbeendamagedinanywayduring
transportation,reportthedamagetothecarrierimmediately.
8Ifthedeliveryisincorrectoranypartsaremissing,reportit
immediatelytothedistributor.
6
Chapter 2 — Installation
Front View
Atthefrontoftheprinterarethedisplaywindow,theindicator
lamps,andthekeyboard.Thesefeaturesallowtheoperatorto
controlandsetuptheprintermanually.
Thefrontdoorisheldbyasnap-lock.Openthefrontdoorto
viewthevariouspartsontheprinter’sfront.
Referto“Options”onpage73,forinformationonpossible
optionaldevicesfittedontheprinter’sfront.
Indicator lamps
Display window
Keyboard
Connector
for optional
cutter
Print mechanism
Front door
Side door
Front View
EasyCoder PX4i Bar Code Label Printer User’s Guide (IPL Version)
Chapter 2 — Installation
Rear View
TherearplatecontainstheOn/Offswitch,theACpowercord
socket,andvariousinterfaceconnectorsandslots.
Provision for EasyLAN
Wireless antenna
(option)
Provision for EasyLAN
Ethernet connection
(option)
Intake slot for external
media supply
Memory card slot
Provision for two optional
interface boards
On/Off Switch
Bar code wand socket
("wand:")
AC Power cord socket
RS-232 serial interface
("uart1:")
USB Interface ("usb1:")
Machine label
Intake slot for external
media supply
Rear View
8
Chapter 2 — Installation
Media Compartment
Themediacompartmentiscoveredbythesidedoorwhichcan
beopened180°downwardstoprovidecompleteaccesstothe
mediaandribbonloadingarea.Thedoorisheldclosedbya
magneticlock.Itcanbecompletelyremovedbyopeningitand
thenpullingitforward.
Themediacanbesuppliedfromarotatinghuborfroman
externalsupplyoffanfoldedmediabehindtheprinter.Formore
information,see“Options”onpage73.
Side door
Ribbon supply hub
Ribbon rewind hub
Slack absorber
Media Compartment
EasyCoder PX4i Bar Code Label Printer User ’s Guide (IPL Version)
Chapter 2 — Installation
Print Mechanism
Theprintmechanismfeaturesahigh-performancethermal
printheadwithquick-mountfittingstofacilitatereplacement.
Pressure arm
locking knob
Printhead
pressure
adjustment
knob
Edge
guide
Pressure
arm
Thermal printhead
Tear bar
Upper label stop sensor
guide (removable)
lever
Lower label stop sensor guide
(removable)
Label stop sensor
position adjustment
screw
Print Mechanism
10
Chapter 2 — Installation
Connecting the Printer
To connect the printer to power
1PlacetheprinteronalevelsurfacenearanACoutlet.You
shouldbeabletoaccesstheback,front,andsidesofthe
printerasnecessarytoloadsuppliesandremovetheprintout.
2Checkthattheprinterisswitchedoff.
3Connectthepowercordfromthesocketontherearplateto
anelectricaloutlet(90to265VAC).
Computer
TheEasyCoderPX4iprinterisfittedwithone9-pinD-style
subminiature(DB9)socketfortheRS-232serialinterfaceport
andoneclassBconnectorfortheUSBinterfaceport.Formore
informationaboutports,see“Interfaces”onpage123.
RS-232 Serial Interface
Beforeyoucanusetheserialinterface,youmayneedtosetupthe
communicationparameters,suchasbaudrate,parity,etc.as
describedin“SettingUpthePrinter”onpage53.
USB Interface
TheprintersupportsUSBv1.1.Thereisnocommunication
setupforUSB.Formoreinformation,referto“Interfaces”on
page123.
Optional Interface and Network Boards
Fordetails,see“InterfaceBoards”onpage77.Referto“Setting
UpthePrinter”onpage53,“NavigatinginSetupMode”on
page68,and“OptionalInterfaces”onpage126forconnection
andsetupinstructions.
Theprintercanbesettoscanallcommunicationports.Whenit
detectsincomingdataonaport,theprinterautomatically
switchestousethatportforbothinputandoutput.Pressitoget
informationontheactivecommunicationchannels.
SwitchoffbothPCandprinterbeforeconnectingthemtogether.
EasyCoder PX4i Bar Code Label Printer User’s Guide (IPL Version)
Chapter 2 — Installation
Controls and Indicators
TheEasyCoderPX4iprinterhasseveralwaysofcommunicating
directlywithitsoperator:threecoloredLEDs,adisplaywindow,
amembrane-switchkeyboard,andabeeper.
Display and controls
Indicator Lamps
TheindicatorsarecoloredLEDs(LightEmittingDiodes)andare
usedforthefollowingpurposes:
Power(solidgreen)indicatesthatthepowerison.
Status(solidgreen)indicatesthattheprinterisreadyforuse.
12
Chapter 2 — Installation
Status(flashinggreen)indicatesthattheprinteris
communicating.
Status(solidred)indicatesanerrorcondition(see
“Troubleshooting”onpage79).
IntermecReady-to-Workindicator(blue;on,blink,oroff).The
indicatorhasthreedifferentstates:On,Blinking,andOff.When
theindicatorisOn,theprinterisreadyforuse.Whenthe
indicatorisblinking,theprintermaybeinitializing,waitingfor
externalresources,orinneedofuserattention.Whenthe
indicatorisoff,theprinterisnotreadytooperate.
Display
ThedisplaywindowcontainsanLCD(LiquidCrystalDisplay)
withbackgroundilluminationandtwolinesoftext,eachwith16
characters.Itshowsamessagewhencertainerrorsoccurand
guidestheoperatorthroughupgrading,startup,andsetup.The
followingerrorsarereported:
Error Messages and Conditions
Message Displayed
PAUSE
PAPEROUT
RIBBONOUT
PRINTHEADUP/PRESSPrintheadlifted
FEED
OPEN&SHUTCUTTERCuttererror
RIBBONFITTED
PAPERFAULT
PSUERROR
PSUOVERTEMP
PRINTHEADHOT
EasyCoder PX4i Bar Code Label Printer User’s Guide (IPL Version)
Chapter 2 — Installation
Keyboard
Thekeyboardisofthemembrane-switchtypeandhassevenkeys.
ThekeyboardissupplementedbyalargeFeed/Pausebutton.
Somekeyshavehard-codedfunctionsinthestartupandsetup
modes.
Keyboard Buttons
Button
Feed/Pausebutton
+
Displayerrormessages
andcommunicationchannelinformation.
Scrollbetweentypesofinformationafter
pressingi.Possibleerrormessagesand
informationonactivecommunications
channelsareshowninaloop.
Beeper
Thebeeperacknowledgesthatakeyhasbeenpressed.Optionally,
anaudiblealarmcanbeenabledusinganIPLcommand.Itwill
startbeepingatpaperoutandribbonoutandwillcontinue
beepinguntilthestartofreload.
14
3
Starting Up
Thischapterexplainshowtostartuptheprinterafterinstallation
orafterhavingbeenswitchedoff.
EasyCoder PX4i Bar Code15
Label Printer User ’ s Guide
(IPL Version)
Chapter 3 — Starting Up
Switching On the Printer
Beforeswitchingontheprinter,makethenecessaryconnections,
andcheckthattheprintheadisengaged.
SwitchonthepowerusingtheOn/Offswitchontherearplate.
The“Power”LEDonthefrontpanellightsupwhenthepoweris
on.Waitforafewmomentswhiletheprinterloadstheprogram
andrunssomeself-diagnostictests.TheDisplayWindowwill
showthefollowingprogressindicator.
Starting
Afterashorttime,theprinterisinitialized.Theprogressofthe
initializationisindicatedbyanincreasingnumberofcolonson
thelowerlineinthedisplay.
Initializing
:::
Whentheinitializationiscompleted,alabelisfedout.The
followingmessage,whichistheIPLversionnumber,appearsin
theDisplayWindow,indicatingthattheprinterisreadyfor
operation.
IPL 2.30
16
4
Loading Media
Thischapterexplainshowtoloadtheprinterwithvariouskinds
ofcontinuous,gap,ormarkmediaforthefollowingmodesof
operation:
·Tear-Off(Straight-Through)
·Cut-Off(Cutter)
·Peel-Off(Self-adhesiveStrip)
·InternalBatchTakeup(Roll-to-Roll)
·ExternalSupply(FanfoldorContinuousStock)
EasyCoder PX4i Bar Code17
Label Printer User ’ s Guide
(IPL Version)
Chapter 4 — Loading Media
Tear-Off (Straight-Through)
TheEasyCoderPX4iprintercanprintonlabels,tickets,tags,and
continuousstockinvariousforms.Thissectiondescribesthecase
whenthemediaistornoffmanuallyagainsttheprinter’stearbar.
Thismethodisalsoknownas“straight-throughprinting.”
Tear-offcanbeusedfor:
·Non-adhesivecontinuousstock
·Self-adhesivecontinuousstockwithliner
·Self-adhesivelabelswithliner(gaporcontinuousstock)
·Ticketswithgaps(gapstock),withorwithoutperforations
·Ticketswithblackmarks(markstock),withorwithout
perforations
Anoptionallabeltakensensorcanholdtheprintingofthenext
copyinthebatchuntilthepresentcopyhasbeenremoved.For
moreinformation,see“LabelTakenSensor”onpage77.
18
Chapter 4 — Loading Media
To load media for tear-off operation
1Openthefrontandsidedoors.
2Turntheprintheadliftlevercounter-clockwisetoraisethe
printhead.
3Removeanyemptycorefromthemediasupplyhub.
EasyCoder PX4i Bar Code Label Printer User’s Guide (IPL Version)
Chapter 4 — Loading Media
4Inthecaseofamediarollwitha76mm(3in)core,fitan
adapteronthemediasupplyhub.
5Fitanewrollofmediaontothemediasupplyhubandpush
therollinwardsasfarasitwillgo.
6Routethemediaunderneaththeslackabsorberandforward
towardstheprintmechanism.Theslackabsorbercanbe
rotatedforbetteraccessandthensnap-lockedinopen
position.
20
Chapter 4 — Loading Media
7Routethemediathroughtheprintunitandpushitinwards
asfarasitwillgo.
8Thisdiagramshowsthepaththemediawilltakethroughthe
printer.
9Turntheprintheadliftlevertothe“closed”position.
EasyCoder PX4i Bar Code Label Printer User’s Guide (IPL Version)
Chapter 4 — Loading Media
10Adjustthepositionofthegreenedgeguidessothatthemedia
isguidedwithaminimumofplay.
11Closethefrontandsidedoors.
12PressFeed/Pausetoadvancethemediaandadjustthemedia
feed.Tearoffthemediabygrabbingtheouteredgeand
pullingdownwards.
Feed/
Pause
22
Chapter 4 — Loading Media
Cut-Off
TheEasyCoderPX4iprintercanprintonlabels,tickets,tags,and
continuousstockinvariousforms.Thissectiondescribesthecase
whenthemediaistobecutoffbyanautomaticpapercutter
(option).
Cut-offcanbeusedfor:
·Non-adhesivecontinuousstock
·Self-adhesivelabelswithliner(cutonlylinerbetweenlabels)
Thecutterisdesignedtocutthroughpaper-basedmediawitha
thicknessbetween60and175μm,whichroughlycorrespondsto
apaperweightof60to175grams/m2(basisweight40to120
lb.).Thecuttershouldnotbeusedtocutthroughlabelsbecause
theadhesivewillsticktotheshears,whichcandamagethecutter.
Theoptionallabeltakensensorcannotbeusedwiththecutter.
Therotatingcuttingbladecanbeaccidentlyactivatedwhilethe
cutterisopen.Toavoidanyriskofinjurytofingers,alwaysswitch
offthepowerbeforeloadingmediaand/orribbonina
cutter-equippedprinter.
EasyCoder PX4i Bar Code Label Printer User’s Guide (IPL Version)
Chapter 4 — Loading Media
To load media for cut-off operation
1Switchoffthepower.Openthecutterandthesidedoor.
E
asy
2Turntheprintheadliftlevercounterclockwisetoraisethe
printhead.
3Removeanyemptycorefromthemediasupplyhub.
24
Chapter 4 — Loading Media
4Inthecaseofamediarollwitha76mm(3in)core,fitan
adapteronthemediasupplyhub.
5Fitanewrollofmediaontothemediasupplyhubandpush
therollinwardsasfarasitwillgo.
6Routethemediaunderneaththeslackabsorberandforward
towardstheprintmechanism.Theslackabsorbercanbe
rotatedforbetteraccessandthensnap-lockedinopen
position.
EasyCoder PX4i Bar Code Label Printer User’s Guide (IPL Version)
Chapter 4 — Loading Media
7Routethemediathroughtheprintunitandpushitinwards
asfarasitwillgo.
8Thisdiagramshowsthepaththemediawilltakethroughthe
printer.
9Turntheprintheadliftlevertothe“closed”position.
26
Chapter 4 — Loading Media
10Adjustthepositionofthegreenedgeguidessothatthemedia
isguidedwithaminimumofplay.
11Routethemediathroughthecutterbetweenthetwoguide
plates.
E
asyC
o
12Closethecutterunitwhilepullingontheendofthemedia.
Closethesidedoorandthenswitchthepoweron.
E
asyC
o
EasyCoder PX4i Bar Code Label Printer User’s Guide (IPL Version)
Chapter 4 — Loading Media
13PressFeed/Pausetoadvancethemediaandadjustthemedia
feed.
Feed/
Pause
Peel-Off (Self-Strip)
TheEasyCoderPX4iprintercanprintonlabels,tickets,tags,and
continuousstockinvariousforms.
Thissectiondescribesthecasewhenself-adhesivelabelsare
separatedfromthelinerimmediatelyafterprinting,which
requiresanoptionalinternalliner/batchtakeupunit.Formore
information,see“Liner/BatchTakeupKit”onpage75.Thisis
alsoknownas“Self-strip”operation.
Peel-offcanonlybeusedforself-adhesivelabelswithliner.
Anoptionallabel-takensensorcanholdtheprintingofthenext
labelinabatchuntilthepresentlabelhasbeenremoved.See
“LabelTakenSensor”onpage77.
Note:Peel-offoperationsetshighdemandsonthemediafor
properlabelstiffness,releasecharacteristicsoftheadhesiveand
liner,resistanceagainstelectrostaticcharge,andsoon.Ifthese
specificrequirementsarenotmet,thelabelswillnotdispense
properly.Consultyourmediasupplierortestthemediatomake
sureitissuitableforyourapplication.
28
Chapter 4 — Loading Media
To load media for peel-off operation
1Openthefrontandsidedoors.
2Turntheprintheadliftlevercounter-clockwisetoraisethe
printhead.
3Pulloutthegreenclip(1)onthelinertakeuphubanddispose
ofanywound-upliner(2).
2.
1.
EasyCoder PX4i Bar Code Label Printer User’s Guide (IPL Version)
Chapter 4 — Loading Media
4Removeanyemptycorefromthemediasupplyhub.
5Inthecaseofamediarollwitha76mm(3in)core,fitan
adapteronthemediasupplyhub.
6Fitanewrollofmediaontothemediasupplyhubandpush
therollinwardsasfarasitwillgo.
30
Chapter 4 — Loading Media
7Routethemediaunderneaththeslackabsorberandforward
towardstheprintmechanism.Theslackabsorbercanbe
rotatedforbetteraccessandthensnap-lockedinopen
position.
8Routethemediathroughtheprintunitandpushitinwards
asfarasitwillgo.
9Pulloutapproximately40cm(15in)oflabelsandremovethe
labelsfromtheliner.
E
a
s
40 c
31
Chapter 4 — Loading Media
10Routethelineraroundthetearbarandbackundertheprint
unit.
E
a
s
11Securethelinertothetakeuphubwiththegreenclip(1)and
rotatethehub(2)untilthemediaispulledtight.
2.
1.
12Thisdiagramshowsthepaththemediaandlinerwilltake
throughtheprinter.
32
Chapter 4 — Loading Media
13Turntheprintheadliftlevertothe“closed”position.
14Adjustthepositionofthegreenedgeguidessothatthemedia
isguidedwithaminimumofplay.
15Closethefrontandsidedoors.
EasyCoder PX4i Bar Code Label Printer User’s Guide (IPL Version)
Chapter 4 — Loading Media
16PressFeed/Pausetoadvancethemediaandadjustthemedia
feed.
Feed/
Pause
Internal Batch Takeup (Roll-to-Roll)
TheEasyCoderPX4iprintercanprintonlabels,tickets,tags,and
continuousstockinvariousforms.Thissectiondescribesthecase
whenprintedlabelsfittedonliner(backingpaper)or
pre-perforatedticketsandtagsarewoundupinsidetheprinter.
Therollofprintedlabels,tickets,ortagscanthenberemoved
andbehandledmanually.Thisrequiresanoptionalinternal
liner/batchtakeupunit.
Thetakeuphubcanaccommodate30to40%ofafull-sizemedia
roll.
Internalbatchtakeupcanbeusedfor:
·Self-adhesivelabelsfittedonliner
·Pre-perforatedticketswithgaps
·Pre-perforatedticketswithmarks
34
Chapter 4 — Loading Media
To load media for internal batch takeup operation
1Openthefrontandsidedoors.
2Turntheprintheadliftlevercounter-clockwisetoraisethe
printhead.
3Removeanyemptycorefromthemediasupplyhub.
EasyCoder PX4i Bar Code Label Printer User’s Guide (IPL Version)
Chapter 4 — Loading Media
4Loosenthesinglescrewthatholdstheguideplateattherear
ofthemediacompartment.
5Removethetearbarfromtheprintunitandreplaceitwith
theguideplate.
36
Chapter 4 — Loading Media
6Inthecaseofamediarollwitha76mm(3in)core,fitan
adapteronthemediasupplyhub.
7Fitanewrollofmediaontothemediasupplyhubandpush
therollinwardsasfarasitwillgo.
EasyCoder PX4i Bar Code Label Printer User’s Guide (IPL Version)
Chapter 4 — Loading Media
8Routethemediaunderneaththeslackabsorberandforward
towardstheprintmechanism.Theslackabsorbercanbe
rotatedforbetteraccessandthensnap-lockedinopen
position.
9Routethemediathroughtheprintunitandpushitinwards
asfarasitwillgo.
10Pulloutapproximately40cm(15in)oflabels.
E
as
40 c
38
Chapter 4 — Loading Media
11Routethelabelsaroundtheguideplateandbackunderthe
printunittothetakeuphub
E
a
s
12Windupsomeofthemediaonthetakeuphub(1)andsecure
itwiththegreenclip(2).
1.
2.
13Thisdiagramshowsthepaththemediawilltakethroughthe
printer.
EasyCoder PX4i Bar Code Label Printer User’s Guide (IPL Version)
Chapter 4 — Loading Media
14Turntheprintheadliftlevertothe“closed”position.
15Adjustthepositionofthegreenedgeguidessothatthemedia
isguidedwithaminimumofplay.
16Closethesidedoor,butkeepthefrontdooropen.
E
a
s
40
Chapter 4 — Loading Media
17PressFeed/Pausetoadvancethemediaandadjustthemedia
feed.
E
a
s
y
C
o
Feed/
Pause
External Supply (Fanfold)
Thissectiondescribesthecasewhenanexternalmediasupplyis
usedsuchasastackoffanfoldticketsoranexternalmediaroll.
Itispossibletosimplyletthemediaentertheprinterthrough
eitherofthetwoslotsintherearplate.However,werecommend
theoptionalIntermecFanfoldKit,whichprovidesadjustable
guidestomoreaccuratelyguidethemediaintotheprinter.The
FanfoldKitcanbefittedtoeithertheupperorthelowerslotin
therearplate.
Whenusinganexternalmediasupply,takecaretoprotectthe
mediafromdust,dirt,andotherforeignparticlesthatcanimpair
theprintoutqualityorcauseunnecessaryweartotheprinthead.
Dependingonbrandandquality,alldirectthermalmediaare
moreorlesssensitivetoheat,directsunlight,moisture,oil,
plasticizers,fat,andothersubstances.Protectthemedia
accordingly.
Externalsupplycanbeusedfor:
·Tear-offoperation
·Cut-offoperation
·Peel-offoperation(upperslotonly)
·Internalbatchtakeupoperation
EasyCoder PX4i Bar Code Label Printer User’s Guide (IPL Version)
Chapter 4 — Loading Media
To load media for external supply operation
1Usetheupperslotintherearplatewhenthesupplyisatthe
samelevelastheprinterorwhenusingpeel-offoperation.
2Usethelowerslotintherearplatewhenthesupplyisplaced
lowerthantheprinter.
3Theprintercanbefittedwithanoptionalsetoffanfold
guidesineitherslot.
42
Chapter 4 — Loading Media
4Theouterguideisadjustableforvariousmediawidths.The
minimumis40mm(1.58in).
5Fitthefanfoldguideintotheupperslotintherearplatewhen
thesupplyisatthesamelevelastheprinterorwhenusing
peel-offoperation.
6Fitthefanfoldguideintothelowerslotintherearplatewhen
thesupplyisplacedlowerthantheprinter.
EasyCoder PX4i Bar Code Label Printer User’s Guide (IPL Version)
Chapter 4 — Loading Media
44
5
Loading Ribbon for Thermal
Transfer Printing
Thischapterexplainshowtoloadtheprinterwithribbonfor
thermaltransferprinting.
EasyCoder PX4i Bar Code45
Label Printer User ’ s Guide
(IPL Version)
Chapter 5 — Loading Ribbon for Thermal Transfer Printing
Loading Ribbon
TheEasyCoderPX4iprintercanprintonlabels,tickets,tags,and
continuousstockusingeitherdirectthermalprintingonspecial
heat-sensitivemediaorthermaltransferprintingusingaspecial
ink-coatedribbon.
Thermaltransferprintingmakesitpossibletouseawiderangeof
receivingfacematerialsandgivesadurableprintoutless
vulnerabletofat,chemicals,heat,sunlightetc.thandirect
thermalprinting.Makesuretoselectatypeofribbonthat
matchesthetypeofreceivingfacematerialandtosetupthe
printeraccordingly.
TheEasyCoderPX4iprintercanusetransferribbonrollswound
withtheink-coatedsidefacingeitheroutwardorinward.
Illustrationsinthismanualshowtheink-coatedsidefacing
inward.
Ribbonisusuallyloadedinconnectionwithmedia
replenishment,butloadedmediaisnotshownintheillustrations
inthischapterinordertogiveaclearerviewoftheribbonpath.
Formedialoadinstructions,see“LoadingMedia”onpage17.
Mosttransferribbonsdonotsmearatroomtemperature.
46
Chapter 5 — Loading Ribbon for Thermal Transfer Printing
To load ribbon for thermal transfer operation
1Openthefrontandsidedoors.
2Turntheprintheadliftlevercounterclockwisetoraisethe
printhead.
3Removeanyusedribbonandtheemptyribboncore.
E
a
s
EasyCoder PX4i Bar Code Label Printer User’s Guide (IPL Version)
Chapter 5 — Loading Ribbon for Thermal Transfer Printing
4UnpackarolloforiginalIntermecthermaltransferribbon.
5Adjusttheribbonsupplybobbinforyourribbon:
aIfyourribbonis55to60mm(2.16to2.3in)wide,compress
theribbonsupplybobbinandmoveitsoitsnapsintothefirst
(innermost)groove.
bIfyourribbonis88to90mm(3.5in)wide,compressthe
ribbonsupplybobbinandmoveitsoitsnapsintothesecond
groove.
48
Chapter 5 — Loading Ribbon for Thermal Transfer Printing
cIfyourribbonis110mm(4.3in)wide,compresstheribbon
supplybobbinandmoveitsoitsnapsintothethird
(outermost)groove.
4Presstheribbonrollontotheribbonsupplybobbin(1)and
routetheribbonthroughtheprintunit.Pullout20cm(8in)
ofribbon.
E
asyC
o
1.
2.
EasyCoder PX4i Bar Code Label Printer User’s Guide (IPL Version)
Chapter 5 — Loading Ribbon for Thermal Transfer Printing
5Withoutreleasingtheribbon,turntheprintheadliftleverto
“closed”positiontolocktheribbon.
6Pressthecardboardcoreatthefrontendoftheribbononto
therewindhub.Duringprinting,therewindhubwillrotate
counterclockwise.
50
Chapter 5 — Loading Ribbon for Thermal Transfer Printing
7Turntheprintheadliftlevertothe“open”position.
8Winduptheribbonuntilallofthetransparentleaderhas
passedtheprintheadandtheribbonbecomestight.
EasyCoder PX4i Bar Code Label Printer User’s Guide (IPL Version)
Chapter 5 — Loading Ribbon for Thermal Transfer Printing
9Turntheprintheadliftleverto“closed”position.
10Closethefrontandsidedoor.
52
6
Setting Up the Printer
Thischapterdescribesthevariousparametersthatareused
duringSetupmodeorinthevariousapplicationprogramsto
configuretheprinterfortheuser’sspecificrequirements.Itcovers
thefollowingtopics:
·Description
·DefaultSetup
·Setupparametersforcommunication,test/service,media,and
configuration.
Whenmeasurementsarespecifiedas“dots”,theactuallengthin
millimetersorinchesdependsontheprintheaddensity.Convert
asfollows:
8dots/mm(203dots/inch)printhead:
1dot=0.125mm=0.0049in(4.9mils)
16dots/mm(406dots/inch)printhead:
1dot=0.0625mm=0.00246in(2.46mils)
EasyCoder PX4i Bar Code53
Label Printer User ’ s Guide
(IPL Version)
Chapter 6 — Setting Up the Printer
Description
Thesetupcontrolstheprinterinregardofserialcommunication,
testandserviceoperations,andspecifieswhichtypesofmedia
andribbonareloadedintheprinter.
Checkthelistbelowtoseeiftheprinter’sdefaultsetupmatches
yourrequirements.Ifnot,youwillhavetochangethesetup.To
entertheSetupMode,pressSetupontheprinter’s
built-inkeyboardandfollowtheinstructionsin“SetupMode”
onpage67.
54
Chapter 6 — Setting Up the Printer
Default Setup
Theprinter’sdefaultsetupislistedbelow,withnooptions
included.
Ser-Com
Baudrate
Databits
Parity
Stopbits
Test/Service
Testprint
Datadump
Memoryreset
LSSTest
Media
Labellength
Mediatype
Papertype
Sensitivity
Darkness
Labelrestpoint
FormadjdotsX
FormadjdotsY
Ribbonlow
Paperlow
Configuration
Emulation
Cutter
EasyCoder PX4i Bar Code Label Printer User’s Guide (IPL Version)
Chapter 6 — Setting Up the Printer
Configuration
Labeltakensensor
Printspeed
Setup Parameters
Serial Communication
Theserialcommunicationparameterscontrolthe
communicationbetweentheprinterandtheconnectedcomputer
orotherdevicesontheserialport.
Note:Theserialcommunicationparametershavenoeffecton
parallelorEasyLANcommunications.
Makesuretheprinter’scommunicationparametersmatchthe
setupoftheconnecteddeviceorviceversa.Ifthesetupofthe
printerandthesetupofthehostdonotmatch,theresponsefrom
theprintertohostwillbegarbled.
Baud Rate
Thebaudrateisthetransmissionspeedinbitspersecond.There
are8options:
·1200
·2400
·4800
·9600(default)
·19200
·38400
·57600
·115200
56
Chapter 6 — Setting Up the Printer
Data Bits
Databitsspecifiesthenumberofbitsthatwilldefineacharacter.
·7CharactersASCII000to127decimal
·8CharactersASCII000to255decimal(default)
Parity
Theparitydecideshowthefirmwarewillcheckfortransmission
errors.Therearefouroptions:
·None(default)
·Even
·Odd
·Space
Stop Bits
Thenumberofstopbitsspecifieshowmanybitswilldefinethe
endofacharacter.Therearetwooptions:
·1(default)
·2
Protocol
XON/XOFF (default)
IntheXON/XOFFprotocol,dataflowcontrolisachievedby
usingXON(DC1)andXOFF(DC3)characters.Messageblocks
arenotrequiredtobebracketedbytheStartofText(STX)and
EndofText(ETX)characters.However,atpoweruporaftera
resetallcharactersexceptENQorVTwillbeignoreduntilan
STXisdetected.Themessagelengthinthisprotocolis
unrestricted.Thatis,theprinterprocessesinformationasitis
beingdownloadedandstopswhenthereisnomoreinformation.
XON/XOFFprotocolconformstogenerallyacceptedindustry
standards.Noend-of-messageresponseissenttothehostother
thanXOFF.AnXONwillbesentonpowerup.
SinceDC1andDC3areusedfordataflowcontrol,theprinter
statuscharactersaredifferentthanthoseoftheStandard
Protocol.Ifthehostignorestheprinter’sXOFF,theprinterwill
resendanXOFFafterreceivingevery15charactersfromthehost.
EasyCoder PX4i Bar Code Label Printer User’s Guide (IPL Version)
Chapter 6 — Setting Up the Printer
Condition
Bufferalreadyfull
Printheadraised
Ribbonfault
Nolabelstock
Buffernowfull
Printheadhot
Labelatstrippin
Labelskipping
Printing
Intermec Standard Protocol
TheIntermecPrinterStandardProtocolisahalf-duplexprotocol.
Alldatatransmissionstotheprinterconsistofstatusinquiry
(ENQ),statusdump(VT),ormessageblocks.Eachmessage
blockstartswiththeStartofText(STX)characterandendswith
theEndofText(ETX)character.Eachmessageblockmustbe
255charactersorless,includingtheSTXandETXcharacters.
Theprinterrespondstoeachstatusinquiryormessageblock
withtheprinterstatus.Thehostshouldchecktheprinterstatus
beforedownloadingamessageblocktotheprinter.ENQcauses
theprintertotransmititshighestprioritystatus,whileVT
instructstheprintertotransmitallstatusthatappliesintheorder
oftheirpriority.Thepossibleprinterstatus,indescending
priority,is:
Condition
Bufferalreadyfull
Printheadraised
Ribbonfault
Nolabelstock
Buffernowfull
Printheadhot
Labelatstrippin
Labelskipping
Ready
Printing
58
Chapter 6 — Setting Up the Printer
Test/Service
Testprint
ThispartoftheSetupModeallowsyoutoprintvarioustypesof
testlabels.GotothedesiredoptionandpressEnter.Theprinter
willstartprintingthetestlabelorlabels.PressFeed/Pauseto
holdtheprintingtemporarily.Toresumeprinting,pressFeed/
Pauseagain.Thefollowingoptionsareavailable:
Configuration
Choosesoftware(SW),hardware(HW),ornetwork.
TheSoftwareConfigurationLabelcontains:
·Currentconfigurationparametersstoredintheprinter’s
memory
·Definedpages
·Definedformats
·Definedgraphics
·Definedfonts
·Anyinstalledprinteroptions
TheHardwareConfigurationLabelcontains:
·Printermemoryinformation
·Printermileage
·Printheadsettings
·Firmwarechecksum,program,andversionnumber
TheNetworkConfigurationLabelcontains:
·WINSName
·MACAddress
·IPSelection
·IPAddress
·Netmask
·DefaultRouter
·NameServer
EasyCoder PX4i Bar Code Label Printer User’s Guide (IPL Version)
Chapter 6 — Setting Up the Printer
·MailServer
·PrimaryWINSServer
·SecondaryWINSServer
·NetworkStatistics
Test Labels
Thisoptionhastwochoices,PitchandPrintQuality.
·ThePitchlabelcontainsanevenpatternofsmalldotsthat
revealsfailingprintheaddotsandvariationsofprintout
darknessbecauseofunevenprintheadpressureorbadenergy
regulationtotheprinthead.
·ThePrintQualitylabelcontainsnumberofbarcodeswith
differentcharacteristicsandusefulinformationonprinter
model,programversion,printspeed,andmediasensitivity
setup.
Format
TheFormatLabelcontainsasingleformatthatyoucanuseto
evaluatetheprintqualityofaparticularformat.Thisoption
printslabelsforalltheformatsstoredintheprinter’smemory.
Page
ThePageLabelteststheabilityoftheprintertoreceiveandprint
singleormultiplepagesoflabeldatathatissentfromthehost.
Thisoptionprintslabelsforallthepagesstoredintheprinter’s
memory.
UDC
TheUDCLabelteststheabilityoftheprintertoreceiveand
printsingleormultipleuser-definedcharacters(bitmapgraphics)
thataresentfromthehost.Thisoptionprintslabelsforallthe
UDCsstoredintheprinter’smemory.
Font
TheFontLabelcontainsallthecharactersinasinglefont.This
optionprintslabelsforalltheuser-definedfonts(UDF)storedin
theprinter’smemory.
60
Chapter 6 — Setting Up the Printer
Data Dump
Ifdatadumpisenabledbyselectingthe“Yes”option,theprinter
printsalldataandprotocolcharactersreceivedontheserialport.
AnASCIIandhexadecimalrepresentationofeachcharacteris
printed.
Memory Reset
Therearetwooptions.Thememorywillberesettofactory
defaultassoonasanoptionhasbeenselectedandEnteris
pressed.Selectbetween“All”,whichresetstheentirememory,
and“Configuration”,whichjustresetstheconfigurationpartof
thememory.
LSS Test
Fordescription,see“LabelStopSensor”onpage104.
Media
Themediaparameterstellthefirmwarethecharacteristicsofthe
mediathatwillbeused,sotheprintoutwillbepositioned
correctlyandgetthebestqualitypossible.
Media Type
TheMediaTypeparameterscontrolhowthelabelstopsensor
(LSS)andthemediafeedwork.Therearethreemediatype
options:
·Gapisusedforadhesivelabelsmountedonliner(backing
paper)orcontinuouspaperstockwithdetectionslots.
Default.
·Markisusedforlabels,tickets,orstripprovidedwithblack
marksattheback.
·Continuousisusedforcontinuousstockwithoutany
detectionslotsorblackmarks.
Paper Type
ThePaperTypeparameterscontrolhowthetransferribbon
mechanismandtheribbonsensorwork.Therearetwopaper
typeoptions:
·DT(DirectThermal)isusedforheat-sensitivemediawithout
anyneedforathermaltransferribbon.Default.
·TTR(ThermalTransfer)isusedfornonheat-sensitive
receivingfacematerialsincombinationwithathermal
transferribbon.
EasyCoder PX4i Bar Code Label Printer User’s Guide (IPL Version)
Chapter 6 — Setting Up the Printer
Label Length Dots
TheLabelLengthsetupspecifiesthelengthindotsofeachcopy
alongthemediafeeddirection(X-coordinate).Thisisusedfor
“label-out”detection.
Sensitivity (Media Sensitivity Number)
Thissetupparameterspecifiesthecharacteristicsofthedirect
thermalmediaorcombinationofreceivingfacematerialand
thermaltransferribbon,sotheprinter’sfirmwarecanoptimize
theheatingoftheprintheadandtheprintspeed.Themedia
sensitivitynumbercanbechangedusingPrintSet,third-party
software,oranIPLcommand(<SI>gn[,m]).See“Media
SensitivityNumber”onpage129formoreinformation
regardingthemediasensitivitynumber.
Darkness
Usethisparametertomakeminoradjustmentsoftheblackness
intheprintout,forexampletoadapttheprintertovariationsin
qualitybetweendifferentbatchesofthesamemediaquality.The
valuecanbesetwithintherange-10%to+10%where-10isthe
lightestand10isthedarkest.Defaultvalueis0%.
Label Rest Point
Specifieswherelabelsstopforremoval.Usethisforpeel-off(selfstrip)applications.Allowedrangeis-30(furthestback)to30
(furthestforward).Defaultis0.AlsoavailableasanIPL
command(<SI>fn).
Form Adj Dots X
SpecifieswheretheX-positionoftheoriginshouldbeplacedon
thelabel.Allowedrangeis-30(closesttotheleadingedge)to30
(furthestfromtheleadingedge).Defaultis0.
Form Adj Dots Y
SpecifieswheretheY-positionoftheoriginshouldbeplacedon
thelabel.Allowedrangeis-30(closesttothecentersection)to30
(furthestfromthecentersection).Defaultis0.
Ribbon Low
Specifiesthevalueinmillimetersoftheribbonsupplyrollforthe
ribbonsensor.Whenthediameterofremainingribbonsupply
rollreachesthesetvalue,anSNMPtrapissenttotheprinter’s
homepage,providedtheprinterhasanoptionalEasyLAN
connection.Range:0-80withpresetvaluesatanintervalof5.A
valuelargerthan80setstheribbonsensorto0.Defaultvalue:0.
62
Chapter 6 — Setting Up the Printer
TheribbonlowsensorcanalsobesetusinganIPLcommand:
<STX><SI>kn<ETX>
Paper Low
Specifiesthediameterinmillimetersofthemediasupplyrollfor
thepapersensor.Whenthediameterofremainingmediasupply
reachesthesetvalue,anSNMPtrapissenttotheprinter’shome
page,providedtheprinterhasanoptionalEasyLANconnection.
Range:0-150withpresetvaluesatanintervalof10.Avalue
largerthan150setsthepapersensorto0.Defaultvalue:0.
TheribbonlowsensorcanalsobesetusinganIPLcommand:
<STX><SI>jn<ETX>
Configuration
Power Up Emulation
Theemulationmodeletsyouprintbarcodelabelsthatwere
originallydesignedonan86XXprinterinmultiplesof10or15
mil.Whentheprinterisworkinginemulationmode,notallIPL
commandsaresupported.Foracompletelistofcommands
availableduringemulationmode,seethelatestversionoftheIPL
ProgrammingReferenceManual(P/N066396-xxx).
Toreturnfromemulationmode,selectemulation“none”
(default).
Print Speed
Youcanselecttheprintspeedfrom4in/sec(100mm/sec)to12
in/sec(300mm/sec)withanintervalof1in/sec.Thehigherthe
printspeed,themorewearontheprinthead,sodonotusea
higherprintspeedthannecessary.Somedirectthermalmediaor
ribbon/mediacombinationsmaynotallowthehighest
alternativeswithouttheprintoutqualitybeingadverselyaffected.
Cutter (option)
Bydefault,“NotInstalled”isdisplayed.Ifacutterisinstalled,
youmustmanuallyindicatethatconditiontothefirmwareby
selectingeither“Enable”or“Disable.”Onceyouhavedonethat,
youcanalsouseIPLcommandstoenableordisablethecutter:
<STX>R<ETX>enterprint/configurationmode
<STX>c0<ETX>Disablecutter
<STX>c1<ETX>Enablecutter
EasyCoder PX4i Bar Code Label Printer User’s Guide (IPL Version)
Chapter 6 — Setting Up the Printer
Label Taken Sensor (option)
Tomaketheprinterworkinself-stripmode,thatis,waitingfora
labeltoberemovedbeforethenextlabelisprinted,theself-strip
modemustbeenabled.Thiscanalsobedonebyexecutingthe
followingcommands:
<STX>R<ETX>enterprint/configurationmode
<STX><SI>t0<ETX>Disableself-strip
<STX><SI>t1<ETX>Enableself-strip
Ifthelabeltakensensordoesnotworkproperly,thesensitivity
canbecalibratedintheSetupMode.Select“LTSCalibration”
andfollowtheinstructionsinthedisplay.Makesurethatno
directsunlightorinteriorlightinginterfereswiththelabeltaken
sensor.
Returning to Factory Default Setup
Therearethreewaystoreturntothefactorydefaultsetupofthe
printer:
·InsertaspecialCompactFlashmemorycardandrestartthe
printer.
·UsetheMemoryResetoptionintheTest/Servicepartofthe
SetupMode.
·Usetheprinter’sbuilt-inkeyboard.
To return to factory default setup using the keyboard
1Lifttheprinthead.
2Switchonthepowertotheprinterandpressiandwaituntil
theprinterbeeps.
Quicklypressthefollowingkeys:
,
3Thefollowingmessagewillbedisplayed:
Factory Default?
Enter=Yes ESC=No
64
Chapter 6 — Setting Up the Printer
4Within10seconds,pressEntertoresettheprintertofactory
default.Theparameterswillberesetandtheprinterwill
continuethenormalstartup.
Ifyoupress
passed,thenormalstartupprocesswillcontinuewithoutany
resetbeingperformed.
Note:Resettingtothefactorydefaultwillresetallfilesusedto
storesettings,butitdoesnotaffectsettingsthatwerealready
loadedbeforethefileswereremoved.Thismeansthat,for
example,EasyLANWirelesssettings(SSID,keys,etc.)retain
theirvaluesuntilthenextreboot.Toreloadallsettings,simply
rebootafterperformingareset.
EasyCoder PX4i Bar Code Label Printer User’s Guide (IPL Version)
Chapter 6 — Setting Up the Printer
66
7
Setup Mode
Thischapterdescribeshowtonavigateinthesetupmode,and
providesoverviewsoftheSetupMode.
EasyCoder PX4i Bar Code67
Label Printer User ’ s Guide
(IPL Version)
Chapter 7 — Setup Mode
Navigating in Setup Mode
EntertheSetupModebypressingSetupontheprinter’sfront
panel.Textinthedisplayguideyouthroughthesetupprocedure.
Usetheprinter’skeyboardtonavigatemenus,acknowledge
displayedvalues,orselectorenternewvalues.
Note:AnexternalkeyboardcannotbeusedinsidetheSetup
Mode.
Keyboard Buttons for Setup Mode
Button
Moveonestepbackonthesamelevel.
Moveuponelevelandescapewithoutchanging
thesetting.
Moveforwardonthesamelevel.
Movedownonelevel.
Acknowledgeandmovetonextmenu.
ExittheSetupMode.Canbeusedanywherein
SetupMode.
TheSetupModeisorganizedasanendlessloopwithanumber
ofsub-categories.Atstartup,thefirmwaredeterminesifan
EasyLANinterfaceboardisinstalledintheprinter.Ifso,the
NetworksetupmenusareshownintheSetupMode.
Thediagramonthenextpageshowstheoptionsinthemain
loop.Detailedoverviewsareshownonthefollowingpages.
68
Chapter 7 — Setup Mode
Setup Modes
Serial Communication
Continued on
the next page
Scroll forward
Scroll back
Scroll forward
Scroll back
Scroll forward
Scroll back
Legend:
Dottedboxesandlinesindicateoptions.
Thickboxesindicatesdefaultoptions.
Values inside brackets indicate default settings.
EasyCoder PX4i Bar Code Label Printer User’s Guide (IPL Version)
Chapter 7 — Setup Mode
Network (Option)
These menus will only be displayed when an optional EasyLAN interface board is installed.
Read-only
Test/Service
Continued from
the previous page
Scroll forward
Scroll back
70
Chapter 7 — Setup Mode
Media
Continued from
the previous page
Scroll forward
Scroll back
Scroll forward
Scroll back
Configuration
Continued from
the previous page
Labels are fed out
Scroll forward
Scroll back
Scroll back
Read only,
press<Enter>
EasyCoder PX4i Bar Code Label Printer User’s Guide (IPL Version)
Chapter 7 — Setup Mode
72
8
Options
ThischapterdescribestheoptionsavailablefortheEasyCoder
PX4iprinter.Theoptionscanbefactoryinstalled,field-installed
byanauthorizedservicetechnician,orinsomecasesinstalledby
theoperator.
EasyCoder PX4i Bar Code73
Label Printer User ’ s Guide
(IPL Version)
Chapter 8 — Options
Introduction
TheEasyCoderPX4iprinterprovidesahighdegreeofflexibility
becauseithasamodulardesign.Byaddingoptionstothebasic
printer,theEasyCoderPX4iprintercanbeadaptedforavariety
ofapplications.Someoptionsshouldbeinstalledbyan
authorizedservicetechnicianorareonlyavailableas
factory-installedoptions.
EasyLAN Wireless Antenna
Fanfold
3-inch Adapter (included)
E
a
s
y
Label Taken Sensor
Media Roll
Retainer
Paper Cutter
Liner/Batch Takeup
PX4i options
74
Chapter 8 — Options
Liner/Batch Takeup Kit
Thisisafactory-installedoptiononlyandisusedtoseparate
labelsfromthelinerandwindupthespentlinerinsidethe
printer’smediacompartment.Labels,tickets,tags,etc.canbe
woundupinsidethemediacompartmentafterprintingbyfitting
aspecialguidetothefrontoftheprintunit.
Thekitconsistsofasteppermotorthatdrivesthelinerdrive
rollerintheprintunit(fittedasstandard)andatakeuphubin
themediacompartment.Aguideshaftisfittedtothecenter
sectionimmediatelybehindtheslackabsorber.Aguideplateis
fittedattherearofthemediacompartmentandcanbeusedto
replacethestandardtearbarontheprintunitforbatchtakeup
operation.
Operationandmedialoadaredescribedin“Peel-Off(SelfStrip)”onpage28and“InternalBatchTakeup(Roll-to-Roll)”
onpage34.
Paper Cutter
TheEasyCoderPX4iprintercaneasilybefittedwithanoptional
papercutter.Thecutterunitreplacesthefrontdoororthelabel
takensensor(LTS),ifoneisequipped.Itisconnectedbyasingle
cabletotheDIN-connectorontheprinter’sfront.Thepaper
cutterisavailablebothasafactory-installedoptionandasa
operator-installablekit.
Thepapercutterincreasestheprinter’stotalweightby
approximately1.0kg(2.2lb)anditslengthby28mm(1.1in).
Thepapercutterisintendedtocutthroughcontinuousnonadhesivepaper-basedmediaorthroughthelinerbetweenlabels.
Itmustnotcutthroughanyadhesive,whichwouldsticktothe
cuttingpartsandrapidlyrenderthecutterinoperable–possibly
alsocausingdamagetotheelectricmotor.Maximumthickness
fornormalpaper-basedmaterialsis175μm(≈175grams/m2).
Thepapercuttercanbetiltedforwardinordertofacilitate
cleaningandmediaload.Formedialoadinstructions,see
“Cut-Off”onpage23.”
EasyCoder PX4i Bar Code Label Printer User’s Guide (IPL Version)
Chapter 8 — Options
Shouldyouinadvertentlycutthroughself-adhesivelabels,you
willhavetocleanthecuttingparts.Tiltthecutterunitdownand
wipeitusingapieceoftissuemoistenedwithisopropylalcohol.
Thecuttingedgewillrotatewhenthepowerisswitchedon
andwhentheprinterisre-booted.Alwayskeepthecutterin
closedpositionduringoperation.Switchoffthepoweror
disconnectthecutterbeforecleaning.Keepyourfingersaway
fromcuttingedges!
Note:ThecuttermustbeenabledduringConfigurationinSetup
Mode.Formoreinformation,see“Cutter(option)”onpage63
and“Configuration”onpage71.
Fanfold Guides
Thefanfoldguidesprovidemoreexactroutingofthemedia
whenthesupplyisplacedoutsidethemediacompartment,such
asastackoffanfoldedtickets.Theguidescomeasanoperatorinstallablekitwithinstallationinstructions.Theguidescanbe
fittedintheupperorlowerslotintherearplate.
Instructionsforloadingthemediaareincludedinthesection
“ExternalSupply(Fanfold)”onpage41.
Media Roll Retainer
Themediarollretainerisintendedforapplicationswherethe
mediamaybecomemisalignedonthemediasupplyhub.The
plasticwing-shapedretainerissimplyslippedontothemedia
supplyhuboutsidethemediarollbytheoperator.Notoolsare
required.
76
Chapter 8 — Options
3-inch Adapter
The3in/76mmadapterisincludedinthepackageandmakesit
possibletousemediarollswith3in/76mminnerdiameter
cardboardcores.
Theadapterispressedontothemediasupplyhubandheldin
placebyascrew.Whenfittingtheadapters,makesurethatthe
screwhitsaroundedplasticsurface,notametalleafspring.
Illustrationsofhowtoloadthemediausingtheadaptercanbe
foundin“LoadingMedia”onpage17.
Label Taken Sensor
TheLabelTakenSensor(LTS)isaphotoelectricsensorfittedto
thecentersectioninsidethefrontdoor.Itallowstheprinter’s
firmwaretodetectifthelatestprintedlabel,ticket,tagetc.has
beenremovedbeforeprintinganothercopy.
Thelabeltakensensorisusuallyfactory-fitted,butisalso
availableasakitforinstallationbyanauthorizedservice
technician.Itcannotbefittedincombinationwithapaper
cutter.
Interface Boards
Anumberofinterfaceboardsareavailableforusewiththe
EasyCoderPX4iprinter.Theinterfaceboardsareeitherfactoryfittedorcaneasilybefittedbyanauthorizedservicetechnician.
TheEasyCoderPX4iprintercanaccommodateoneEasyLAN
interfaceboardplusoneotherinterfaceboard.
EasyLANboards:
·EasyLANEthernetinterface
·EasyLANWirelessinterface
Othercommunicationboards:
·ParallelInterfaceBoard(IEEE1284)
EasyCoder PX4i Bar Code Label Printer User’s Guide (IPL Version)
Chapter 8 — Options
78
9
Troubleshooting
ThischapterdescribeshowtheIntermecReady-to-Work
indicatorandotherindicatorswork.Italsolistsvariouspossible
casesofinferiorprintoutquality,describespossiblecauses,and
suggestsremedies.
EasyCoder PX4i Bar Code79
Label Printer User ’ s Guide
(IPL Version)
Chapter 9 — Troubleshooting
Intermec Ready-to-Work Indicator
Thereadinessoftheprinter,individuallyorasapartofa
solution,isindicatedbytheblueIntermecReady-to-Work
indicator.
Iftheindicatorblinksorisswitchedoff,theprinterisnotready.
Furtherinformationcanbeobtainedinthedisplaywindowby
pressingi.Incaseofseveralerrorsorsimilarconditionsoccurring
simultaneously,onlythemostsignificanterrorisdisplayed.Once
thiserrorhasbeencleared,nextremainingerrorisdisplayed.
Providedtheprinterisconnectedtoanetwork,allconditions
thatpreventsprintingarereportedtotheEasyADCConsole.
TheEasyADCConsoleisaPC-basedsoftwarewhichallowsa
supervisortomonitorallconnecteddevicesthathavean
IntermecReady-to-Workindicator,includinghandheld
computers,accesspoints,andprinters.
80
Chapter 9 — Troubleshooting
.
Display Messages and LED Indications
Error/Event
Operational
Outofpaper
Outoftransferribbon
Transferribbonis
installed
Headlifted
Cuttererror1
Cuttererror2
Cuttererror3
Lsstoohigh
Lsstoolow
Testfeednotdone
Pressfeednotdone
Pausemodeentered
Setupmodeentered
IPlinkerror
IPconfigurationerrorBlink
Printheadnotfound
Rebooted
Initializing
Printercrash
Printerturnedoff
Maintenance
EasyCoder PX4i Bar Code Label Printer User’s Guide (IPL Version)
Chapter 9 — Troubleshooting
Display Messages and LED Indications
Error/Event
Powersupplyover
temperature
Printheadhot
HOT
Note1:ThisisonlyapplicableforprintersequippedwithanEasyLANinterface.
Note2:AprinterthatisequippedwithanEasyLANinterface,butisnotconnectedtoa
network,willhaveablinkingRTW.Toavoidthis,theusercanset“IPSELECTION”to
“MANUAL”and“IPADDRESS”to“0.0.0.0”.Thiswillindicatethattheuserdoesnotregard
thelackofnetworkconnectionasanerror.
Note3:Notrapcanbesentwhenthiserror/eventoccurs.
Note4:ThiserrorindicatesthattheprinterhasnotreceivedanIPaddress.Itisonlyapplicable
forprinterswithIPSELECTIONsettoDHCPand/orBOOTP.
Note5:Atmost,butnotall,printercrashes,theconsoleisreset.ThiswillmaketheRTWgo
off.
Note6:Iftheprintheadtemperatureraisesabove100°C(212°F),anerroroccursand
theprintingwillbepauseduntiltheprintheadhascooledoff.Meanwhile,theprinteris
abletoreceivecommandsanddatauntilthebufferisfilled.Theprintingis
automaticallyresumedwhentheprintheadtemperaturehasreached85°C(185°F).
82
Chapter 9 — Troubleshooting
Troubleshooting
Overall Weak Printout
Possible Cause
Wrongmediagrade
Contrastvaluetoo
low
Printheadpressure
toolow
Wornprinthead
Wrongprinthead
voltage
Printout Weaker On One Side
Possible Cause
Unevenprinthead
pressure
Weak Spots
Possible Cause
ForeignparticlesonCleanorreplace
media
Media/ribbondon’tChangetomatching
match
Poormediaor
ribbonquality
Wornprinthead
Wornplatenroller
EasyCoder PX4i Bar Code Label Printer User’s Guide (IPL Version)
Chapter 9 — Troubleshooting
Overall Dark Printout
Possible Cause
Wrongmediagrade
Contrastvaluetoo
high
Printheadpressure
toohigh
Wrongprinthead
voltage
Excessive Bleeding
Possible Cause
Wrongmediagrade
Contrastvaluetoo
high
PrintheadpressuretooAdjustpressure
high
FaultyenergycontrolReplace CPU board
Dark Lines Along Media Path
Possible Cause
Foreignobjectson
printhead
page88
White Vertical Lines
Possible Cause
Printheaddirty
Replaceprinthead
84
Chapter 9 — Troubleshooting
Large Part Of Dot Line Missing
Possible Cause
Failingprinthead
Failingstrobesignal
Printout Missing Along Inner Edge
Possible Cause
Badmediaalignment
Usingsmallcorewith
supplypostinupper
position.
X-startparametervalue
toolow
Transfer Ribbon Breaks
Possible Cause
Ribbonnotfitted
correctly
WrongmediagradeChangeparameter,then
cleanprinthead
Badenergycontrol
Transfer Ribbon Wrinkles
Possible Cause
FaultyribbonbreakshaftAdjust
adjustment
Incorrectedgeguide
adjustment
Printheadpressuretoo
strong
EasyCoder PX4i Bar Code Label Printer User’s Guide (IPL Version)
Chapter 9 — Troubleshooting
No Thermal Transfer Printout
Possible Cause
Ink-coatedsideofribbonReloadribbon
isnotfacingmedia
Media Feed Not Working Properly
Possible Cause
Changedmedia
characteristics
Wronglabelrest
parameter
WrongMediaType
parameter
WrongLSSposition
Dirtysensors
LabelStopSensor”
onpage93
LooseormissingadapterReplaceandtightenset“Tear-Off
screw
Faultysensors
Compressed Text Or Bar Code
Possible Cause
ToohighprintspeedforReduceprintspeed
largemediaroll
86
10
Maintaining the Printer
Thischapterdescribeshowtheoperatorcanmaintaintheprinter.
Regularmaintenanceisimportantfortheprintoutqualityand
forthelifeoftheprinthead.Thechaptercoversthefollowing
topics:
·PrintheadCleaning
·ExternalCleaning
·CleaningtheLabelStopSensor
·ReplacingthePrinthead
·MediaJams
Whencleaningorreplacingtheprinthead,takeprecautionsto
avoidelectrostaticdischarges.
EasyCoder PX4i Bar Code87
Label Printer User ’ s Guide
(IPL Version)
Chapter 10 — Maintaining the Printer
Printhead Cleaning
Cleaningtheprintheadonaregularbasisisimportantforthelife
oftheprintheadandfortheprintoutquality.Youshouldclean
theprintheadeachtimeyoureplacethemedia.Thissection
describeshowtocleantheprintheadusingcleaningcards.If
additionalcleaningisrequired,forexampleremovingadhesive
residuefromtheplatenrollerortearbar,useacottonswab
moistenedwithisopropylalcohol.
Isopropylalcohol[(CH-3)2CHOH;CAS67-63-0]isahighly
flammable,moderatelytoxic,andmildlyirritatingsubstance.
To clean the printhead
1Openthefrontandsidedoors.
2Turntheprintheadliftlevercounterclockwisetoraisethe
printhead.
88
Chapter 10 — Maintaining the Printer
3Removeanymediaandtransferribbon.
E
a
s
y
C
o
d
4Openthecleaningcardenvelopeandpulloutthecleaning
card.Readthewarningtext.
5Insertmostofthecleaningcardundertheprinthead(1).
Engagetheprinthead(2).
E
a
s
y
C
o
d
e
r
2
1
EasyCoder PX4i Bar Code Label Printer User’s Guide (IPL Version)
Chapter 10 — Maintaining the Printer
6Pulloutthecleaningcard(1)andraisetheprinthead(2).
E
a
s
y
C
o
d
1
7Waitforapproximately30secondstoallowthecleaningfluid
todissolvetheresidue.
8Insertmostofthecleaningcardundertheprintheadagain
(1).Engagetheprinthead(2).
1
90
Chapter 10 — Maintaining the Printer
9Pulloutthecleaningcard.Ifnecessary,repeattheprocesswith
afreshcleaningcard.
E
a
s
y
C
o
d
2
1
10Allowthecleanedpartstodrycompletelybeforeloadingany
mediaandribbon.
E
a
s
EasyCoder PX4i Bar Code Label Printer User’s Guide (IPL Version)
Chapter 10 — Maintaining the Printer
External Cleaning
To clean the exterior of the printer
1Alwaysremovethepowercordbeforecleaning!
2Wipeexternalsurfaceswithasoftclothslightlymoistened
withwateroramilddetergent.
Neverspraytheprinter.Protectitfromwaterwhencleaningthe
premises.
92
Chapter 10 — Maintaining the Printer
Neveruseanysharptoolsforremovingstucklabels.The
printheadandrollersaredelicate.
E
a
s
y
C
o
d
e
r
Cleaning the Label Stop Sensor
Thelabelstopsensor,whichcontrolsthemediafeed,ispartially
enclosedbytwoplasticguides.Lightpassesthroughslots
betweentheupperandlowerpartofthesensor.Iftheguidesare
notclean,stucklabelsorotherobjectsmayblockthelightbeam.
Iftheprinterstartstofeedoutlabelsinanunexpectedway,
removetheguidesasdescribedbelowandcheckforanything
blockingthebeamoflight.Ifnecessary,cleantheguidesusinga
cleaningcardorasoftclothsoakedwithisopropylalcohol.Do
notuseanyothertypeofchemicals.
Isopropylalcohol[(CH-3)2CHOH;CAS67-63-0]isahighly
flammable,moderatelytoxic,andmildlyirritatingsubstance.
EasyCoder PX4i Bar Code Label Printer User’s Guide (IPL Version)
Chapter 10 — Maintaining the Printer
To clean the Label Stop Sensor
1Pulltheupperguidestraightout.(Upperpartofprintunit
omittedforbetterview.)
2Pressthesnap-lock,lifttheouterendofthelowerguideand
pullitout.Aftercleaning,reassembleinreverseorder.
94
Chapter 10 — Maintaining the Printer
Replacing the Printhead
Theprintheadissubjecttowearbothfromthedirectthermal
mediaortransferribbonandfromtherapidheatingandcooling
processduringprinting.Thus,theprintheadwillrequireperiodic
replacement.
Timebetweenprintheadreplacementsdependsontheprint
images,thetypeofdirectthermalmediaorribboninuse,the
amountofenergytotheprinthead,theprintspeed,theambient
temperature,andseveralotherfactors.
Whilereplacingtheprinthead,thepowermustbeoff.The
firmwarewillnotdetectthenewprintheadresistanceand
densityuntiltheprinterhasbeenrestarted.
Note:Checkthatthedensityofthenewprintheadmatchesthe
printheadyouarereplacing.Whileyoucanswitchbetween
densitiesatwill,theprintoutwillbeaffectedaccordingly.
Note:Priortoinstallingthe406dpiprintheadonthePX4i
printerthefirmwaremustbeupdatedtoIPLFirmwareversion
2.74.0orhigher.
To replace the printhead
1Openthefrontandsidedoors.
EasyCoder PX4i Bar Code Label Printer User’s Guide (IPL Version)
Chapter 10 — Maintaining the Printer
2Turntheprintheadliftlevercounterclockwisetoraisethe
printhead.
3Removeanymediaandtransferribbon.
E
a
s
96
Chapter 10 — Maintaining the Printer
4Pulltheprintheadbracketawayfromthemagnetinthe
pressurearm.
5Disconnectthehookedprintheadbracketfingersfromthe
shaftandpullouttheprintheadasfarasthecablesallow.
EasyCoder PX4i Bar Code Label Printer User’s Guide (IPL Version)
Chapter 10 — Maintaining the Printer
6Disconnectthecablesfromtheprinthead.Notethesnap-lock
ontheinnerconnector.Pullattheconnectors—notatthe
cables!
7Connectthetwocablestothereplacementprinthead.
8Fitthehooksoftheprintheadbracketfingersontothe
headliftshaft.Makesurethatthecablesdonotpreventthe
bracketfingersfrombeingproperlyseatedontheheadlift
shaft.
98
Chapter 10 — Maintaining the Printer
9Closetheprintheadsothemagnetengagestheprinthead
bracket.
10Loadanewsupplyofmediaandribbon,asdescribedin
“LoadingMedia”onpage17.
E
a
s
y
C
o
d
EasyCoder PX4i Bar Code Label Printer User’s Guide (IPL Version)
Chapter 10 — Maintaining the Printer
Media Jams
Shouldamediajamoccurintheprintmechanism,proceedthis
waytoclearit.
To clear a media jam
1Alwaysswitchoffthepowerbeforestartingtoclearthe
jammedmedia.
2Raisetheprintheadandpulloutthemedia.
3Ifthemediahasbeenwounduponorhasstucktotheplaten
roller,carefullyremoveitbyhandwithoutusinganysharp
toolsthatcandamagethedelicateplatenrollerorprinthead.
Avoidrotatingtheplatenroller.
Ifyoumustpullawaythemediabyforcecausingtheplaten
rollertorotate,itisveryimportantthatthepowerhasbeen
offforaminuteormore.Ifnot,theelectronicscanbe
damagedbeyondrepair.
4Cutoffanydamagedorwrinkledpart.
5Ifthereisanyadhesivesomewhereintheprintmechanism,
removeitusingacleaningcardoracottonswabsoakedin
isopropylalcohol.
Isopropylalcohol[(CH-3)2CHOH;CAS67-63-0]isa
highlyflammable,moderatelytoxic,andmildlyirritating
substance.
6Reloadthemediaasdescribedin“LoadingMedia”on
page17.
7Switchonthepower.
8Readjustthemediafeedbyraisingandclosingtheprinthead
andthenpressingFeed/Pause.
100
11
Adjustments
Thischapterdescribeshowtheoperatorcanadjusttheprinter.
Thechaptercoversthefollowingtopics:
·NarrowMediaAdjustment
·PrintheadPressureAdjustment
·LabelStopSensorAdjustment
EasyCoder PX4i Bar Code101
Label Printer User ’ s Guide
(IPL Version)
Chapter 11 — Adjustments
Narrow Media
Theprinterisfactory-adjustedforfullsizemediawidth.When
usingnarrowermedia,adjustthepressurearmsoitremains
centeredonthemediaandappliespressureevenly.
Apoorlyadjustedpressurearmmaybedetectedbyaweaker
printoutoneithersideofthemediapath.
To adjust the pressure arm
1Removetheribbon,ifany.
2Loosentheknobthatholdsthepressurearm.Movethearm
inwardsoroutwardsuntilthearrowonthetipofthearm
becomescenteredonthemediastock.
Whilemovingthearm,pushatthepartwheretheknobis
situated,notatthetip.Ifthearmishardtomove,liftthe
printheadandpulltheprintheadbracketfreefromthe
magnetinthearm.
3Lockthearminthenewpositionbytighteningtheknob.
4Re-adjusttheedgeguides.
5Reloadtheribbon,ifany.
Knob
Center of
media
Pressure arm
Edge guides
Pressure Arm adjustment
102
Chapter 11 — Adjustments
Printhead Pressure
Thepressureofthethermalprintheadagainsttheribbonor
directthermalmediaisfactoryadjusted.However,theuseof
thickerorthinnermediathannormalcouldrequiretheprinthead
pressuretobereadjusted.
Turntheadjustmentknobclockwiseforincreasedpressure,or
counterclockwiseforlesspressure.Printafewlabels,preferably
testlabels,andchecktheprintout.Forhelpprintingtestlabels,
see“SettingUpthePrinter”onpage53.Increasedpressure
generallygivesadarkerprintoutandviceversa.Repeatuntilthe
desiredresultisobtained.
Tofindthebasicsetting,turntheknobcounterclockwiseuntil
thereisnopressureleft.Testwithapieceofmediaunderthe
printhead.Youshouldbeabletopullitoutwithoutmorethan
justalittleresistance.Thenturntheknobfourfullturns
clockwise.Fine-adjustusingthetrial-and-errormethod.
Donotuseahigherprintheadpressurethannecessary.
Unnecessarypressuremayincreasethewearoftheprinthead
andshortenitslife.
Knob
Printhead pressure adjustment
EasyCoder PX4i Bar Code Label Printer User’s Guide (IPL Version)
Chapter 11 — Adjustments
Label Stop Sensor
Thelabelstopsensor(LSS)isaphotoelectricsensorthatcontrols
theprinter’smediafeedbydetectinggapsbetweenlabelsorslots
orblackmarksincontinuousstock,dependingontheprinter’s
setupinregardofmediatype.TheLSSshouldbealignedwith
thegaps,slots,orblackmarks.Ifusingirregularlyshapedlabels,
aligntheLSSwiththefronttipsofthelabels.
Thelabelstop/blackmarksensor(LSS)canbemovedlaterally
withinarangeof0to50mm(0to1.96in)fromtheinneredge
ofthemediapath.Thereisascrewrunningthroughtheouter
lowergable.TurningthescrewclockwisewillmovetheLSS
inwardsandviceversa.ThepositionoftheLSSinrelationtothe
mediaisbestcheckedbylookingheadonintotheprintunit
whentheprintheadisraised.AlignthecenterpointoftheVshapeduppersensorwiththecenteroftheslotsormarkstobe
detected.
Thelinearmarkingsonthelowerguideplatecanalsobeusedfor
positioningoftheLSSbecausetheyarespacedwithanintervalof
exactly1cm(0.39in).Thismethodisespeciallyusefulforblack
marks(measurethelateralpositionoftheblackmarkswitha
rulerbeforeloadingthemedia).
Detection slots
Upper part of LSS
Adjustment screw
Label Stop Sensor adjustment
104
Chapter 11 — Adjustments
IntheTest/ServicepartoftheSetupMode,youcantestthelabel
stopsensorifyouhaveadetectionproblem.
Themenuprovidesonlyindicationsfromthelabelstopsensor
unit.Thetestingmenucandetermineifthesensorunitisnot
physicallyinposition,isblockedbydustorstucklabels,oris
defectiveinsomeway.Furthermore,thisisanaidifmediahas
detectioncomplications.
Note:ThereisnowaytoadjusttheLSS-function.Themenus
onlyindicatevaluesfromtheLSS.
·Checkthattheprinterissetupforthetypeofmedialoaded
inyourprinter.NavigatetoSetupMode>Media>Media
type>Gap,Mark,orContinuous.
·Liftandlowertheprinthead,thenpresstheFeed/Pausekey.
·Makesurethatthereisalabel—notagapormark—atthe
LSS.
·Checkthatthemediaisroutedasclosetothecentersectionas
theguidesallow.
·EntertheSetupModeandnavigatetoSetupMode>
Test/Service>LSSTest>LSSAuto.
Themenushouldlooklike
this,withthecursorplacedin
thecenter.
Gapdetection:Liftthe
printheadandpulloutthe
mediaslowly.WhentheLSS
detectsagaporadetection
slot,thecursormovestothe
right.
Markdetection:Liftthe
printheadandpulloutthe
mediaslowly.WhentheLSS
detectsablackmark,the
cursormovestotheleft.
EasyCoder PX4i Bar Code Label Printer User’s Guide (IPL Version)
Chapter 11 — Adjustments
ReturntothecenteredcursorpositionbypressingDown.
Ifthecursorbehavesasdescribedabove,theLSSisworkingand
isproperlyalignedwiththegaps,slots,orblackmarks.
Ifthecursordoesnotreacttoagap,slot,orblackmark,check
thefollowing:
·IstheLSSlaterallyalignedwiththeslotsorblackmarks?
·AreboththeupperandlowerpartoftheLSSalignedwith
eachother?
·Isthetransferribbonproperlyloadedsoitdoesnot
interferewiththeLSS(See“LoadingRibbon”on
page46)?
·Arethelabelstopsensorsfreefromdustandaretheguides
freefromstucklabelsorotherobjectsthatmayinterfere
withthelightthatgoesfromonepartoftheLSStothe
other?Ifnecessary,cleanthesensors.
·Doesthemediahavesomekindofpreprintthatcan
disturbthedetection?
·Istheretoolittledifferencebetweentheblackmarksand
thesurroundingareas?
·Doesthelinerhavetoolittletransparency?
·DoestheLSSworkwithanothertypeofmedia?
TochangetheMediaTypesetup,liftandlowerthe
printheadandthenpressFeed/Pause.
106
A
Technical Data
Thisappendixliststhetechnicaldatafortheprinter.Pleasenote
thatIntermecreservestherighttochangethisinformation
withoutpriornoticeandthatthisinformationdoesnotrepresent
acommitmentonthepartofIntermec.
EasyCoder PX4i Bar Code107
Label Printer User ’ s Guide
(IPL Version)
Appendix A — Technical Data
Printing
PrintTechnique
PrintheadResolution
PrintSpeed(variable)
PrintWidth(max)
PrintLength(max)
MediaWidth
(min/max)
MediaRollDiameter
(max)
MediaRollCore
Diameter
RibbonWidth
(min/max)
RibbonRollDiameter
(outer),max.
RibbonRollCore
Diameter(inner)
PrintDirections
Note1:Themaximumprintlengthisalsorestrictedbytheamountof
freeSDRAMmemory.
Modes of Operation
Tear-Off(Straight-through)
Cut-Off
Peel-Off(Self-strip)
InternalBatchTakeup
Firmware
Firmware
OperatingSystem
SmoothFonts
108
Appendix A — Technical Data
Physical Measurements
Dimensions(W×L×H)
Weight(excludingmedia)
AmbientOperating
Temperature
StorageTemperature
Humidity
Electronics
Microprocessor
On-boardFlashSIMMs
On-boardSDRAMSIMM
16MB
Power Supply
ACVoltage
PFCRegulation
PowerConsumption
average125W;Peak400W
Sensors
LabelGap/BlackMark/OutofMedia
PrintheadLifted
RibbonEnd/RibbonLow
PaperSensor
Controls
LEDs
3
Display
Keyboard
Feed/Pausebutton
Beeper
EasyCoder PX4i Bar Code Label Printer User’s Guide (IPL Version)
Appendix A — Technical Data
Data Interfaces
Serial
ConnectionforOptional
InterfaceBoards
CutterInterface
MemoryCardAdapter
Accessories and Options
IntegralSelf-stripUnitwith
LinerTakeup
MediaRollRetainer
FanfoldGuide
Cutter
LabelTakenSensor
ParallelInterfaceBoard
EasyLANEthernetInterface
EasyLANWirelessInterface
CompactFlashCardsforvariousOption3
purposes
Option1:Factoryinstalledoption.
Option2:Field-installablekit.Installationshouldbeperformedbya
servicetechnician.
Option3:Operator-installableoption.
110
Appendix A — Technical Data
EasyCoder PX4i Bar Code Label Printer User’s Guide (IPL Version)
Appendix A — Technical Data
112
B
Media Specifications
Thisappendixspecifiesthephysicalmeasurementsforvarious
typesofmedia.
EasyCoder PX4i Bar Code113
Label Printer User ’ s Guide
(IPL Version)
Appendix B — Media Specifications
Media Roll Size
Corediameter(A),standard:38to40mm(1.5in),withadapter:
76.2mm(3in)
CoreWidth:Mustnotprotrudeoutsidethemedia.
Themediamustbewounduponthecoreinsuchawaythatthe
printercanpulltheendfree.
Max.diameter(B),tear-offandcut-off
Max.diameter(B),peel-offandbatchtakeup
Max.width(C)
Min.width(C)
Therecommendedmediathicknessis60to170μm(2.4to6.7
mils).Ifthickermediaisused,printqualitymaybereduced.
Mediastiffnessmustbebalancedagainstthicknesstomaintain
printquality.Mediarollstobeloadedinsidetheprintershould
bewoundwiththeprintablesidefacingoutwards.
Themediasupplymustnotbeexposedtodust,sand,orgrit.Any
hardparticles,howeversmall,candamagetheprinthead.
114
Appendix B — Media Specifications
Media
Non-Adhesive Strip (Continuous Stock)
(a)MediaWidth
Minimum:25mm(1.00in)
Maximum:120mm(4.72in)
MediaTypeSetup:ContinuousStock
EasyCoder PX4i Bar Code Label Printer User’s Guide (IPL Version)
Appendix B — Media Specifications
Self-Adhesive Strip (Continuous Stock)
(a)ExternalMediaWidth(includingliner)
Minimum:25mm(1.00in)
Maximum:120mm(4.72in)
(b)LinerWidth
Thelinermustnotextendmorethanatotalof1.6mm(0.06in)
pasttheedgeofthefacematerialandshouldprotrudeequallyon
bothsides.
(c)InternalMediaWidth(excludingliner)
Minimum:23.8mm(0.94in)
Maximum:118.4mm(4.66in)
MediaTypeSetup:ContinuousStock
116
Appendix B — Media Specifications
Self-Adhesive Labels (Gap Stock)
(a)ExternalMediaWidth(includingliner)
Minimum:25mm(1.00in)
Maximum:120mm(4.72in)
(b)LinerWidth
Thelinermustnotextendmorethanatotalof1.6mm(0.06in)
pasttheedgeofthefacematerialandshouldprotrudeequallyon
bothsides.
(c)InternalMediaWidth(excludingliner)
Minimum:23.8mm(0.94in
Maximum:118.4mm(4.66in)
(d)LabelLength
Minimum(withoutLTS):8mm(0.32in)
Minimum(withLTS):12mm(0.47in)Formoreinformation,
see“LabelTakenSensor”onpage77.
Maximum:6,143mm(241in),providedthatthereisasufficient
amountoffreeSDRAMmemory
(e)LabelGap
Recommended:3.0mm(0.12in)
Minimum:1.27mm(0.05in)
Maximum:25.0mm(0.98in)
TheLabelStopSensormustbeabletodetecttheextremefront
edgesofthelabels.Formoreinformation,see“LabelStop
Sensor”onpage104.
MediaTypeSetup:GapStock
EasyCoder PX4i Bar Code Label Printer User’s Guide (IPL Version)
Appendix B — Media Specifications
a
c
d
e
b
Tickets With Gaps (Gap Stock)
(a)MediaWidth
Minimum:25mm(1.00in)
Maximum:120mm(4.72in)
(b)LinerWidth
Minimum(withoutLTS):8mm(0.32in)
Minimum(withLTS):12mm(0.47in)Formoreinformation,
see“LabelTakenSensor”onpage77.
Maximum:6,143mm(241in),providedthereisasufficient
amountoffreeSDRAMmemory
(c)LSSDetectionPosition:Variable,see“LabelStopSensor”on
page104.
118
Appendix B — Media Specifications
(d)DetectionLength
Thelengthofthedetectionslit(excludingcornerradii)mustbea
minimumof2.5mm(0.10in)toeitherside(rightorleft)ofthe
labelstopsensordetectionposition.
(e)DetectionHeight
Recommended:1.6mm(0.06in)
Minimum:1.27mm(0.05in)
Maximum:25.0mm(0.98in)
MediaTypeSetup:GapStock
Note:Handleperforatedmediacarefullytoavoidripsorbreaks
alongtheperforations.Brokenorrippedperforations,particularly
attheedges,maycausethemediatobreakormisfeedduring
printing.
a
c
EasyCoder PX4i Bar Code Label Printer User’s Guide (IPL Version)
Appendix B — Media Specifications
Tickets With Black Mark (Mark Stock)
(a)MediaWidth
Minimum:25mm(1.00in)
Maximum:120mm(4.72in)
(b)CopyLength
Minimum:20.0mm(0.8in)
Maximum:6,143mm(241in),providedthereisasufficient
amountoffreeSDRAMmemory
(c)LSSDetectionPosition:Variable,see“LabelStopSensor”on
page104.
(d)BlackMarkWidth
Recommended:10.0mm(0.39in)
Minimum:5.0mm(0.20in)
Maximum:Fullmediawidth
(e)BlackMarkLength
Recommended:3.2mm(0.13in)
Minimum:1.27mm(0.05in)
Maximum:25.0mm(0.98in)
(f)BlackMarkY-Position
Itisrecommendedthatyouplacetheblackmarkasclosetothe
frontedgeoftheticketaspossible.Theblackmarkcanbeplaced
eitheronthetoporatthebackofthemedia.
BlackMarkCharacteristics
Maximumreflectance:15%,940nm
Differencebetweenmarkandmedia:55%
MediaTypeSetup:MarkStock
Note:Handleperforatedmediacarefullytoavoidripsorbreaks
alongtheperforations.Brokenorrippedperforations,particularly
attheedges,maycausethemediatobreakormisfeedduring
printing.
120
Appendix B — Media Specifications
a
c
EasyCoder PX4i Bar Code Label Printer User’s Guide (IPL Version)
Appendix B — Media Specifications
122
C
Interfaces
Thisappendixdescribestheinterfaceconnectorsfoundonthe
printer’srearplate.Itcoversthefollowingtopics:
·RS-232Interface
·USBInterface
·OptionalInterfaces
EasyCoder PX4i Bar Code123
Label Printer User ’ s Guide
(IPL Version)
Appendix C — Interfaces
RS-232 Interface
Protocol For The Default Setup
Baudrate:9600
Characterlength:8bits
Parity:None
Stopbits:1
RTS/CTS:Disabled
ENQ/ACK:Disabled
XON/XOFF:Disabled(bothways)
NewLine:CR/LF
Tochangetheinterfacesettings,see“SettingUpthePrinter”on
page53.
SIgnals On Printer’s Serial Port
DB-9
1
2
3
4
5
6
7
8
9
*Theexternal+5Vislimitedto500mAandisautomaticallyswitched
offatoverload.
124
Guide (IPL Version)
Appendix C — Interfaces
RS-232
RS-232 Interface
Interface Cable
Computerend:Dependsoncomputermodel
Printerend:DB-9plug
USB Interface
ThisprintersupportsUSBv1.1(alsocalledUSB2.0fullspeed).
TousetheUSBinterfaceforprintingfromaPC,youneeda
specialIntermecUSBprinterdriverinstalledinyourPC.
Theprinterisaso-called“self-powereddevice.”Werecommend
thatyouonlyconnectoneprintertoeachUSBportonthehost,
eitherdirectlyorviaahub.Otherdevices,likeakeyboardanda
mouse,canbeconnectedtothesamehub.Ifyouneedtoconnect
morethanoneIntermecUSBprintertoahost,youshoulduse
differentUSBports.
UsingaUSBClassA/Bcable,connecttheClassAplugtoyour
PCorhubandtheClassBplugtoyourprinter.
TheUSBinterfaceisessentiallyaone-waycommunication
interface.ThereisnocommunicationsetupfortheUSBport.
USB Class A connector
EasyCoder PX4i Bar Code Label Printer User’s Guide (IPL Version)
Appendix C — Interfaces
USB Class B connector
USB
USB Interface
Optional Interfaces
TheprintercanoptionallybefittedwithanIEEE1284Parallel
InterfaceBoardattheright-handsideoftheprinter’srearplate.
TheprintercanalsobefittedwithoneofthefollowingEasyLAN
interfaceboardsforconnectiontoaLocalAreaNetwork(LAN).
·EasyLANEthernetInterface
·EasyLANWirelessInterface
IEEE 1284 Parallel Interface Board
Parallel Interface Connector
126
Appendix C — Interfaces
EasyLAN Ethernet Interface
RJ-45 Connector
EasyLAN Wireless Interface
EasyLAN Antenna
Forinformationonhowtosetup,operate,configure,and
troubleshootanEasyLANinterface,pleaserefertothefollowing
manualsincludedonthePrinterCompanionCD.
·EasyLANInterfaceKitInstallationInstructions
·EasyLANWirelessInterfaceKitInstallationInstructions
·EasyLANUser’sGuide
·EasyLANNetworkSetupUser’sGuide
EasyCoder PX4i Bar Code Label Printer User’s Guide (IPL Version)
Appendix C — Interfaces
128
D
Media Sensitivity Number
ThisappendixdescribeshowtodeterminethecorrectMedia
SensitivityNumber(MSN)forvarioustypesofdirectthermal
mediaorthermaltransferribbon.Italsoincludesinstructionson
howtodeterminetheprinter’scurrentmediasensitivitysetting
andhowtoadjustit.
EasyCoder PX4i Bar Code129
Label Printer User ’ s Guide
(IPL Version)
Appendix D — Media Sensitivity Number
The Media Sensitivity Number (MSN)
Themediasensitivitynumberspecifiestheamountofheatthe
printheadneedstoimagealabel.Theamountofheatrequiredis
uniqueduetodifferentchemistriesandmanufacturingprocesses.
Settingthemediasensitivitycorrectlyoptimizesbothprint
qualityandprintspeed
IntermechasdeterminedMSNsthatproducethehighestpossible
printqualityforIntermecmediaandribboncombinationson
Intermecprinters.
Determining the Printer’s Current Media Sensitivity Setting
YoucanuseSetupmodetoprintoutaconfigurationlabelthat
includestheprinter’scurrentmediasensitivitysetting.For
instructions,see“Test/Service”onpage70.
Bydefault,theprinterusesthesesensitivitysettings.
Default Media Sensitivity Settings
Media
Direct thermal media
Thermal transfer media
Changing the Printer’s Current Media Sensitivity Setting
UsetheSetupMode,PrintSet,third-partysoftware,orthe
Intermecprinterlanguage(IPL)commandsettochangethe
printer’smediasensitivitynumber.Thefollowingexamplesets
theMSNto567usingtheIPLcommandset.
To set the sensitivity rating
1Findthethree-digitsensitivityrating.
2AttheDOSprompt,typethefollowingcommandandpress
Enter:
MODE COM1 96,E,7,1,N
3TypethefollowingcommandlinesandpressEnter:
COPY CON COM1
<STX><SI>g1,567<ETX>^Z
130
Appendix D — Media Sensitivity Number
Determining the MSN for Intermec-Approved Media and Ribbons
Todetermineanexactmediasensitivitynumber,obtainthepart
numberofyourmediaand/orribbonandcall1-800-755-5505,
press1andthen1.Thepartnumbermaybeprintedonthe
outsideoftheboxcarton.
Boththethermaltransfermediaandribbonhaveasensitivity
number.TodeterminetheMSN,combinethedigits.Notethat
“combine”doesnotmean“add”.
Sensitivity
Media or Ribbon
Thermaltransfer
media
Thermaltransfer
ribbon
number.
Determining the MSN for Other Media and Ribbons
IfyouarenotusingIntermec-approvedmediaandribbon,you
canstillachievegoodprintqualitybysettinganapproximate
mediasensitivitynumber.
Ifyourmediaisnotlistedinthetablebelow,butasimilarmedia
is,usetheapproximatesensitivitylevellistedinthefirstcolumn
toachieveacceptableprintquality.Forexample:800,700,100.
Ifyoucannotdetermineanapproximatesensitivitylevel,start
withthehighestsetting(800forthermaltransferand700for
directthermal)andworkyourwaydownuntilyouachieve
acceptableprintquality.YoucanalsousePrintSet’sPrintQuality
Wizardtohelpachieveacceptableprintquality.
EasyCoder PX4i Bar Code Label Printer User’s Guide (IPL Version)
Appendix D — Media Sensitivity Number
Media Sensitivity Numbers for Intermec-Approved Media and
Ribbons
Thefollowingtableslistexactmediasensitivitynumbersfor
popularIntermec-approvedmediaandribbons.
Direct Thermal Media Sensitivity Settings
Sensitivity Level
700SeriesHighSensitivity710
400SeriesMediumSensitivity450
440
430
100SeriesLowSensitivity180
170
140
120
Thermal Transfer Media and Ribbon Sensitivity Settings
Sensitivity Level
800SeriesHighSensitivity
(Paper)
600SeriesMediumSensitivity687
(Synthetic)
683
677
673
657
653
637
633
627
8-milSyntheticTag(TMX2200),
DuratranIIMattePolyester(TMX2200),
ValeronTag(TMX2200)
8-milSyntheticTag(TMX1500),
DuratranIIMattePolyester(TMX1500),
ValeronTag(TMX1500)
Syntran(TMX2200)
132
Appendix D — Media Sensitivity Number
Thermal Transfer Media and Ribbon Sensitivity Settings (continued)
Sensitivity Level
500SeriesMediumSensitivity568
(Paper)
567
565
563
562
537
533
527
523
518
517
513
300SeriesLowSensitivity
(Synthetic)
133
Appendix D — Media Sensitivity Number
134
Worldwide Headquarters
6001 36th Avenue West
Everett, Washington 98203
U.S.A.
tel 425.348.2600
fax 425.355.9551
www.intermec.com
EasyCoder PX4i Bar Code Label Printer User’s Guide (IPL Version)
*934-039-001*
P/N 934-039-001