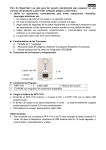
1
Intel® Industrial Solutions System Consolidation Series User’s Guide for v. 1.0b For SCS 111K Development Kit Based on v. 1.0b August 2014 Document #550658-1.0 Introduction By using this document, in addition to any agreements you have with Intel, you accept the terms set forth below. You may not use or facilitate the use of this document in connection with any infringement or other legal analysis concerning Intel products described herein. You agree to grant Intel a non-exclusive, royalty-free license to any patent claim thereafter drafted which includes subject matter disclosed herein. INFORMATION IN THIS DOCUMENT IS PROVIDED IN CONNECTION WITH INTEL PRODUCTS. NO LICENSE, EXPRESS OR IMPLIED, BY ESTOPPEL OR OTHERWISE, TO ANY INTELLECTUAL PROPERTY RIGHTS IS GRANTED BY THIS DOCUMENT. EXCEPT AS PROVIDED IN INTEL'S TERMS AND CONDITIONS OF SALE FOR SUCH PRODUCTS, INTEL ASSUMES NO LIABILITY WHATSOEVER AND INTEL DISCLAIMS ANY EXPRESS OR IMPLIED WARRANTY, RELATING TO SALE AND/OR USE OF INTEL PRODUCTS INCLUDING LIABILITY OR WARRANTIES RELATING TO FITNESS FOR A PARTICULAR PURPOSE, MERCHANTABILITY, OR INFRINGEMENT OF ANY PATENT, COPYRIGHT OR OTHER INTELLECTUAL PROPERTY RIGHT. A "Mission Critical Application" is any application in which failure of the Intel Product could result, directly or indirectly, in personal injury or death. SHOULD YOU PURCHASE OR USE INTEL'S PRODUCTS FOR ANY SUCH MISSION CRITICAL APPLICATION, YOU SHALL INDEMNIFY AND HOLD INTEL AND ITS SUBSIDIARIES, SUBCONTRACTORS AND AFFILIATES, AND THE DIRECTORS, OFFICERS, AND EMPLOYEES OF EACH, HARMLESS AGAINST ALL CLAIMS COSTS, DAMAGES, AND EXPENSES AND REASONABLE ATTORNEYS' FEES ARISING OUT OF, DIRECTLY OR INDIRECTLY, ANY CLAIM OF PRODUCT LIABILITY, PERSONAL INJURY, OR DEATH ARISING IN ANY WAY OUT OF SUCH MISSION CRITICAL APPLICATION, WHETHER OR NOT INTEL OR ITS SUBCONTRACTOR WAS NEGLIGENT IN THE DESIGN, MANUFACTURE, OR WARNING OF THE INTEL PRODUCT OR ANY OF ITS PARTS. Intel may make changes to specifications and product descriptions at any time, without notice. Designers must not rely on the absence or characteristics of any features or instructions marked "reserved" or "undefined". Intel reserves these for future definition and shall have no responsibility whatsoever for conflicts or incompatibilities arising from future changes to them. The information here is subject to change without notice. Do not finalize a design with this information. The products described in this document may contain design defects or errors known as errata which may cause the product to deviate from published specifications. Current characterized errata are available on request. Contact your local Intel sales office or your distributor to obtain the latest specifications and before placing your product order. Copies of documents which have an order number and are referenced in this document, or other Intel literature, may be obtained by calling 1-800-548-4725, or go to: http://www.intel.com/design/literature.htm Intel® Industrial Solutions System Consolidation Series, Core, and the Intel logo are trademarks or registered trademarks of Intel Corporation or its subsidiaries in the United States and other countries. *Other names and brands (denoted by an asterisk upon first instance in this document) may be claimed as the property of others. Copyright © 2014, Intel Corporation. All rights reserved. Intel® Industrial Solutions System Consolidation Series User’s Guide for v. 1.0b SCS 111K Document #550658-1.0 2 Introduction Contents 1 Introduction .....................................................................................................9 1.1 1.2 1.3 2 Terminology ..........................................................................................9 Product Literature ................................................................................ 10 Reference Content ................................................................................ 10 Safety Notice ................................................................................................. 12 2.1 2.2 2.3 Alerts for Warning, Caution, Important, and Note ...................................... 12 2.1.1 WARNING .............................................................................. 12 2.1.2 CAUTION ............................................................................... 12 2.1.3 IMPORTANT ............................................................................ 12 2.1.4 NOTE..................................................................................... 12 Safety during Installation and/or Maintenance .......................................... 13 Safety Related to Data Preservation ........................................................ 13 3 Intel® Industrial Solutions System Consolidation Series Documentation .................. 14 4 User-Provided Items ........................................................................................ 16 4.1 4.2 5 Development Workflows................................................................................... 18 5.1 6 Required User-Provided Items ................................................................ 16 4.1.1 Development Host ................................................................... 16 4.1.2 Development Host Specifications ............................................... 16 4.1.3 User-Provided Software for Target Platform ................................. 17 Optional User-Provided Items ................................................................. 17 Summary of Workflows ......................................................................... 18 Workflow 1: Set Up & Explore the System Features ............................................. 19 6.1 6.2 6.3 6.4 6.5 6.6 About This Chapter ............................................................................... 19 System Introduction ............................................................................. 20 User-Provided System Components ......................................................... 21 Target Platform Subsystem Overview ...................................................... 21 6.4.1 Virtual NIC (VNIC) ................................................................... 24 6.4.2 Default Target OS IP Address Assignment ................................... 24 6.4.3 Customizable Target OS IP Address Assignment .......................... 25 6.4.4 Subsystem Connectivity ........................................................... 25 6.4.5 Accessing Microsoft Windows Operating System ........................... 25 6.4.6 Accessing Linux and VxWorks Operating Systems ........................ 25 Development Host Subsystem Overview .................................................. 25 6.5.1 Development Host Linux Shell ................................................... 28 6.5.2 Wind River Workbench ............................................................. 29 6.5.3 Special Version of Workbench ................................................... 29 6.5.4 Workbench Projects ................................................................. 30 6.5.5 The Target Image.................................................................... 31 6.5.6 Development Host Hardware ..................................................... 32 6.5.7 Development Host Installation Software ..................................... 32 License the System............................................................................... 33 6.6.1 Target Platform Software Licensing ............................................ 33 6.6.2 Development Host Software Licensing ........................................ 33 Intel® Industrial Solutions System Consolidation Series User’s Guide for v. 1.0b SCS 111K Document #550658-1.0 3 Introduction 6.7 6.8 6.9 6.10 6.11 6.12 6.13 6.14 6.15 7 Workflow 2: Develop With Preloaded Workbench Projects ..................................... 75 7.1 7.2 7.3 7.4 7.5 7.6 Appendix A Default Physical Device Allocations .......................................................... 91 - Target Platform Hard Drive Recovery Instructions .............................................. 93 B.1 B.2 B.3 Appendix C About This Chapter ............................................................................... 75 About Build/Rebuild .............................................................................. 75 Start Up .............................................................................................. 75 Workbench Projects .............................................................................. 77 Modify Code in a Preconfigured OS Project ............................................... 79 7.5.1 Modify Simple Code Line in VxWorks 1 Project ............................. 79 7.5.2 Build the Hypervisor Integration Project...................................... 82 7.5.3 Copy the System.Elf File to Boot Media ....................................... 85 Configure Target Platform BIOS to Boot from USB Media ............................ 87 – Default I/O Device Assignment ....................................................................... 91 A.1 Appendix B 6.6.2.1 Determine the Host-ID/Host Name .............................. 33 6.6.2.2 Locate the Serial Number ........................................... 36 6.6.2.3 Go To License Website ............................................... 36 6.6.2.4 Install the License ..................................................... 37 Install the Development Host Software .................................................... 38 Set Up the Target Host .......................................................................... 47 6.8.1 Set Up the Target Platform ....................................................... 47 Intel SCS Windows* 7 (64-bit) Installation Instructions ............................. 48 Windows* 7 (64-bit) Post-installation Instructions ..................................... 51 6.10.1 Install the Wind River Shared Memory Driver .............................. 55 6.10.2 Install the Wind River Virtual Network Interface Card (VNIC) Driver 56 6.10.3 ADlink Windows 7 Driver Installation .......................................... 57 Intel SCS Boot Loader Installation Instructions ......................................... 57 6.11.1 Booting the Target Platform Using the User Support USB Drive ...... 57 6.11.2 User Support OS Login ............................................................. 58 6.11.3 Boot Loader Installation ........................................................... 58 Windows VNIC Configuration Installation Instructions ................................ 58 Configure Windows* 7 as a Time Server .................................................. 59 Connect the Target Platform and Development Hosts ................................. 60 Explore the System .............................................................................. 65 6.15.1 Default OS IP Address Assignment ............................................. 70 6.15.2 Inter-OS Communication over the Target VNIC ............................ 70 6.15.2.1 VxWorks-to-Linux Communication ............................... 71 6.15.2.2 Linux-to-VxWorks Communication ............................... 71 6.15.2.3 VxWorks-to-VxWorks Communication .......................... 73 Configure BIOS to boot from USB ........................................................... 93 User Support OS Login .......................................................................... 93 Recover Hard Drive .............................................................................. 94 - How to Utilize Shared Memory from an Application ............................................ 95 C.1 Linux .................................................................................................. 95 C.1.1 Includes ................................................................................. 95 C.1.2 Open ..................................................................................... 95 C.1.3 Index into Shared Memory area by setting offset ......................... 96 C.1.4 Read ..................................................................................... 96 C.1.5 Write ..................................................................................... 96 C.1.6 Close ..................................................................................... 96 Intel® Industrial Solutions System Consolidation Series User’s Guide for v. 1.0b SCS 111K Document #550658-1.0 4 Introduction C.2 C.3 Appendix D – Technical Support....................................................................................... 101 D.1 D.2 D.3 D.4 Appendix E In-Product Technical Support ............................................................... 101 Online and Live Technical Support ........................................................ 101 Wind River Product Support and Training ............................................... 101 Microsoft* Windows* Product Support ................................................... 101 – Troubleshooting ......................................................................................... 102 E.1 E.2 Appendix F Windows Examples ............................................................................... 97 C.2.1 Additional Dependency Library (setupapi.lib) ............................... 97 C.2.2 Open ..................................................................................... 97 C.2.3 Read ..................................................................................... 97 C.2.4 Write ..................................................................................... 97 C.2.5 Includes ................................................................................. 98 C.2.6 Define GUID ........................................................................... 98 C.2.7 Read ..................................................................................... 99 C.2.8 Write ..................................................................................... 99 Install Additional Components ................................................................ 99 C.3.1 Component 1 .......................................................................... 99 C.3.2 Component 2 .......................................................................... 99 C.3.3 Component 3 .......................................................................... 99 Installation Troubleshooting ................................................................. 103 Configuration Troubleshooting .............................................................. 105 – Legal Notices ............................................................................................. 107 F.1 F.2 F.3 All Notices ......................................................................................... 107 License Notices .................................................................................. 107 GNU General Public License ................................................................. 108 Intel® Industrial Solutions System Consolidation Series User’s Guide for v. 1.0b SCS 111K Document #550658-1.0 5 Introduction Figures Figure Figure Figure Figure Figure Figure Figure Figure Figure Figure Figure Figure Figure Figure Figure Figure Figure Figure Figure Figure Figure Figure Figure Figure Figure Figure Figure Figure Figure Figure Figure Figure Figure Figure Figure Figure Figure Figure Figure Figure Figure Figure Figure Figure Figure Figure Figure Figure Figure Figure Figure Figure 1 – SCS Target Platform Box Shipment ........................................................................ 20 2 – Development Host and Target Platform System ........................................................ 21 3 – The SCS Target Platform Hardware ........................................................................ 22 4 – Target Platform OS Configuration ........................................................................... 23 5 – Target Platform I/O Configuration .......................................................................... 24 6 - Target Boot Image Project Compilation.................................................................... 27 7 - Development Host Desktop .................................................................................... 28 8 - Workbench Workspace .......................................................................................... 29 9 - Project Explorer ................................................................................................... 30 10 – Modifiable Projects ............................................................................................. 31 11 – Unmodifiable Projects ......................................................................................... 32 12 – Rename the Licensing File ................................................................................... 38 13 – Linux Desktop ................................................................................................... 39 14 – Install Icon ....................................................................................................... 40 15 – Warning Window ................................................................................................ 40 16 – Examining Devices ............................................................................................. 41 17 – Location Window ................................................................................................ 41 18 – Installation Type ................................................................................................ 42 19 – Storage Space ................................................................................................... 43 20 – Install Target Devices ......................................................................................... 44 21 – Examining Devices ............................................................................................. 44 22 – System Installs .................................................................................................. 45 23 – Installation Complete.......................................................................................... 46 24 – Linux Desktop ................................................................................................... 47 25 - Power Inverter Plug ............................................................................................ 48 26 - BIOS ................................................................................................................ 49 27 – Device Installation Settings ................................................................................. 52 28 – Open File – Security Warning ............................................................................... 53 29 – Registry Editor................................................................................................... 53 30 – Registry Editor................................................................................................... 54 31 – System Configuration ......................................................................................... 54 32- BOOT Advanced Options ....................................................................................... 55 33 – Internet Protocol Version 4 (TCP/IPv4) Properties ................................................... 59 34 - Target Platform Serial Connector .......................................................................... 61 35 - Development Host Serial Connector ...................................................................... 63 36 – Null Modem / Gender Changer ............................................................................. 64 37 - Development Host Desktop .................................................................................. 65 38 - Workbench Workspace ........................................................................................ 66 39 - AMIO Console .................................................................................................... 66 40 - Multiplexed I/O Button ........................................................................................ 67 41 – Open AMIO Console............................................................................................ 68 42 - Disconnect Icon ................................................................................................. 69 43 – Terminated Connection ....................................................................................... 69 44 - AMIO Consoles ................................................................................................... 70 45 - VxWorks to Linux Communication ......................................................................... 71 46 – Linux Prompt ..................................................................................................... 72 47 - Linux-to-VxWorks Communication ........................................................................ 72 48 - Ifconfig Output................................................................................................... 73 49 - VxWorks-to-VxWorks Communication .................................................................... 74 50- Linux Desktop ..................................................................................................... 76 51 - Workbench Icon ................................................................................................. 76 52 - Workbench Workspace ........................................................................................ 77 Intel® Industrial Solutions System Consolidation Series User’s Guide for v. 1.0b SCS 111K Document #550658-1.0 6 Introduction Figure Figure Figure Figure Figure Figure Figure Figure Figure Figure Figure Figure Figure Figure Figure Figure Figure Figure Figure 53 54 55 56 57 58 59 60 61 62 63 64 65 66 67 68 69 70 71 - Project Explorer ................................................................................................. 78 - VxWorks Project Icon .......................................................................................... 79 - usrAppInit.c ....................................................................................................... 80 – Print File Code ................................................................................................... 81 – File > Save ....................................................................................................... 81 – Rebuild Project .................................................................................................. 82 – Rebuild Project .................................................................................................. 83 – Build Console .................................................................................................... 83 – Select Rebuild Project ......................................................................................... 84 - Build Console ..................................................................................................... 85 – System.elf Copy ................................................................................................ 86 – System.elf Directory ........................................................................................... 87 - USB 3.0 Ports .................................................................................................... 88 – BIOS 1 ............................................................................................................. 88 – BIOS 2 ............................................................................................................. 89 – BIOS 3 ............................................................................................................. 89 – AMIO Consoles .................................................................................................. 90 – Target Platform Devices 1 ................................................................................... 91 - Target Platform Devices 2 .................................................................................... 92 Tables Table Table Table Table Table 1 2 3 4 5 – Terminology ...........................................................................................................9 – Product Literature ................................................................................................. 10 – Reference Documents ............................................................................................ 11 - Installation Troubleshooting .................................................................................. 103 - Installation Troubleshooting .................................................................................. 105 Intel® Industrial Solutions System Consolidation Series User’s Guide for v. 1.0b SCS 111K Document #550658-1.0 7 Introduction Revision History Date Document Version August 2014 1.0 Description Official first release for Intel® Industrial Solutions System Consolidation Series (SCS) 111K product version 1.0b. § Intel® Industrial Solutions System Consolidation Series User’s Guide for v. 1.0b SCS 111K Document #550658-1.0 8 Introduction 1 Introduction This document is written for use by system developers including embedded system developers. This content assumes advanced knowledge of installing and configuring hardware and software for personal computer systems. Engineers using this document should be familiar with the use of and programming of: • Wind River* Hypervisor • Wind River Linux* • Wind River VxWorks* • Wind River Workbench • Microsoft* Windows* 7 IMPORTANT: Read and understand this document in its entirety before setting up the system, installing software, and starting the system. IMPORTANT: This content may be updated without notice. To ensure that you are reading the most recent document, check the product support website: www.intel.com/industrialconsolidation Upon downloading a copy of the User’s Guide from the website, compare the cover page date of the downloaded document to the User’s Guide you currently have. 1.1 Terminology Table 1 – Terminology Term Description Development host The portion of the SCS system used for development. Configurations created on the development host are loaded from the development host onto the target platform to realize productivity. Intel® Industrial Solutions System Consolidation Series Intel® Industrial Solutions System Consolidation Series is also sometimes known by its shorter name, SCS. PC Personal computer SCS Intel® Industrial Solutions System Consolidation Series Intel® Industrial Solutions System Consolidation Series User’s Guide for v. 1.0b SCS 111K Document #550658-1.0 9 Introduction Term Description The Intel® Industrial Solutions System Consolidation Series system comprises two subsystems: System • Target platform • Development host with Software Features For detailed descriptions of these items, see Section 6 - Workflow 1: Set Up & Explore the System Features. 1.2 Target platform The portion of the SCS system used for productivity. Configurations created on the development host are loaded to the target platform for productivity. User-provided This term refers to certain items that the user must provide at the user’s expense. For more information, see Section 4 - User-Provided Items. Product Literature You can order product literature from the following Intel literature centers. Table 2 – Product Literature Location 1.3 Contact Information U.S. and Canada 1-800-548-4275 U.S. (from overseas) 708-296-9333 Europe (U.K.) 44(0)1793-431155 Germany 44(0)1793-421333 France 44(0)1793-421777 Japan (fax only) 81(0)120-47-88-32 Reference Content Contact your Intel Field Representative for assistance in acquiring the latest version of these documents. Intel® Industrial Solutions System Consolidation Series User’s Guide for v. 1.0b SCS 111K Document #550658-1.0 10 Introduction Table 3 – Reference Documents Document Document No./Location Intel® Industrial Solutions System Consolidation Series User Guide This is the document you are reading now, available in PDF format on the User Support media USB that comes with the product packaging. (Doc #: 550658) User Support Documents See the full listing of user support documents in Section 3 – Intel® Industrial Solutions System Consolidation Series Documentation. Other product documentation Get other product documentation by consulting with www.intel.com and/or your Intel Corporation sales representative. Make certain to check the product support website for supplemental information and updates to this document. www.intel.com/industrialconsolidation § Intel® Industrial Solutions System Consolidation Series User’s Guide for v. 1.0b SCS 111K Document #550658-1.0 11 Safety Notice 2 Safety Notice This safety notice summarizes information basic to the safe operation of the equipment described in this manual. The international symbol displayed below is a reminder that all safety instructions should be read and understood before installation, operation, maintenance, or repair of this product. When you see the symbol on other pages, pay special attention to the safety information presented. Observance of safety precautions will also help to avoid actions that could damage or adversely affect the performance of the product. Do not attempt to perform any procedure before carefully reading all instructions. Always follow product labeling and manufacturer’s recommendations. If in doubt as to how to proceed in any situation, contact your Intel Corporation representative. 2.1 Alerts for Warning, Caution, Important, and Note 2.1.1 WARNING WARNING indicates a potentially hazardous situation which, if not avoided, could result in death or serious injury. It may be used to indicate the possibility of erroneous data, loss or destruction of data, or device malfunction. 2.1.2 CAUTION CAUTION indicates a potentially hazardous situation, which, if not avoided, may result in minor or moderate injury. It may also be used to alert against unsafe practices. It may be used to indicate the possibility of erroneous data, loss or destruction of data, or device malfunction. 2.1.3 IMPORTANT IMPORTANT is used for comments that add value to the step or procedure being performed. Following the advice in the Important section adds benefit to the performance of a piece of equipment or to a process. 2.1.4 NOTE NOTE is used to call attention to notable information that should be followed during installation, use, or servicing of this equipment. Intel® Industrial Solutions System Consolidation Series User’s Guide for v. 1.0b SCS 111K Document #550658-1.0 12 Safety Notice 2.2 Safety during Installation and/or Maintenance The target platform is designed to be repaired and serviced by a designated service representative. Any repair, servicing, or modification of this equipment that requires removal of any covers can expose parts and involves the risk of electric shock or personal injury. Make sure that the power switch is off and the product is disconnected from the main power source. Refer servicing to qualified personnel. See further safety information in the documentation that comes with the target platform. 2.3 Safety Related to Data Preservation CAUTION: Intel® Industrial Solutions System Consolidation Series (SCS) provides development software that you will install onto a user-provided computer called a development host. Installation of the SCS software onto the development host will delete all existing hard drive contents. Make certain to back up any contents before installing the development host software. Failure to do so will result in loss of the data on the hard drive. § Intel® Industrial Solutions System Consolidation Series User’s Guide for v. 1.0b SCS 111K Document #550658-1.0 13 Intel® Industrial Solutions System Consolidation Series Documentation 3 Intel® Industrial Solutions System Consolidation Series Documentation For information about installing and operating Intel® Industrial Solutions System Consolidation Series (SCS), see: • Intel® Industrial Solutions System Consolidation Series (SCS) Startup Guide (Doc # 538055) – This is a printed document that comes with the Intel® Industrial Solutions System Consolidation Series (SCS) package. This document also comes as an Adobe-formatted PDF document on the User Support USB media found within the Intel® Industrial Solutions System Consolidation Series (SCS) package. This document has a serial number on the top left of the page that you will use to license the software. See Section 6.6 - License the System. • Intel® Industrial Solutions System Consolidation Series (SCS) User’s Guide for v. 1.0b (Doc # 550658) – This is the guide you are reading now. This is an Adobe-formatted PDF document that comes with the User Support USB media found within the Intel® Industrial Solutions System Consolidation Series (SCS) package. • MXE-5300 Series Fanless Embedded Computer User’s Manual – See this resource for information regarding the target platform hardware. • Wind River Development Host Help – Access various help resources after booting the development host platform on the Development Host media USB. After booting and agreeing to the license information, the development host loads to a Linux OS environment. From there, go to Applications > Wind River Documentation and choose from the help resources available there. • Wind River Workbench Help – Access various help resources after opening the development host software, Wind River Workbench. After clicking the Wind River Workbench icon, the development host system loads Workbench. Go to Help and choose from the information resources listed there. Further resources are available at www.windriver.com. NOTE: The development host includes a specially modified version of Wind River Workbench development software with features designed only for use with Intel® Industrial Solutions System Consolidation Series (SCS). The resources available from the Workbench help mentioned above may cover features not available on Workbench for SCS. For access to a full-featured version of Wind River Workbench, please contact Wind River Systems at www.windriver.com. • Intel Corporation Resources – Make certain to contact with your sales and support representatives regularly. Also check for product updates, new products, and other resources on Intel’s website at www.Intel.com. • Target Platform Documentation – See MXE-5300 Series 5301/5302/5303 Fanless Embedded Computer User’s Manual that comes as a printed document with the target platform packaging. Intel® Industrial Solutions System Consolidation Series User’s Guide for v. 1.0b SCS 111K Document #550658-1.0 14 Intel® Industrial Solutions System Consolidation Series Documentation • Licenses: Access an important Wind River Linux 5.0 Third Party License Notices document by going to the following relative path on the development host media: …/home/wruser/WindRiver/legal-notices/wr-Linux-5.0.1/ WindRiver_Linux5.0_ThirdPartyNotices_v2.1.pdf Access other license documents by going to the following relative path on the development host media: …/home/wruser/WindRiver/licenses IMPORTANT: Make certain to read important information regarding GNU General Public License version 3 (GPLv3) and GNU General Public License version 2 (GPLv2) in the Wind River Linux User’s Guide, page 112. Access this document as an Adobe PDF file by going to the following relative path on the Development Host: …/home/wruser/WindRiver/docs/extensions/eclipse/plugins/com.windriver .ide.doc.wr_linux_5/wr_linux_users_guide/ wr_linux_users_guide_5.0.1.pdf § Intel® Industrial Solutions System Consolidation Series User’s Guide for v. 1.0b SCS 111K Document #550658-1.0 15 User-Provided Items 4 User-Provided Items 4.1 Required User-Provided Items The following sections define the required user-provided items for use with Intel® Industrial Solutions System Consolidation Series (SCS). 4.1.1 Development Host While a fully configured target platform is able to operate as a standalone system, Intel Corporation recommends a direct and permanent connection between the target platform and the development host PC. A direct serial connection enables immediate monitoring of all guest operating systems on the target platform via the development host console. Alternatively, after some configuration, users can log in to guest OSes via Ethernet, SSH, and telnet. 4.1.2 Development Host Specifications CAUTION: Intel® Industrial Solutions System Consolidation Series (SCS) development software installs onto a development host computer that you provide. Installation of the SCS software onto a disk mounted on the development host will delete all existing storage disk (hard drive) contents. Make certain to back up any hard drive contents before installing the development host software. Failure to do so will result in loss of the data on the storage disk. The Intel® Industrial Solutions System Consolidation Series (SCS) is comprised partly of a development host, which is hardware you must provide. The development host platform may be a desktop or laptop PC. When selecting a development host PC, make certain that it meets or exceeds the specifications defined below: • IBM PC-based PC, Intel® Coretm i3 processor • 200 GB storage disk space • 4 GB RAM • One unused USB 2.0 port, USB 3.0 preferred • Keyboard and mouse (for development host, if using a desktop PC) • Keyboard (for target platform) • Monitor capable of displaying 1024 x 768 @ 16 bpp or better (for development host) • Monitor with DVI-I connector (for target platform) Intel® Industrial Solutions System Consolidation Series User’s Guide for v. 1.0b SCS 111K Document #550658-1.0 16 User-Provided Items • DB9 (RS-232) serial connector port • One gender changer serial cable adapter • One null modem serial cable adapter • A network interface card (NIC), for debugging the target platform over Ethernet • Internet connection 4.1.3 User-Provided Software for Target Platform It is the sole responsibility of the customer to purchase Microsoft* Windows* 7 Pro (64-bit) and the appropriate licensing for the product for use on the target platform. 4.2 Optional User-Provided Items The following are optional items you may provide while using SCS. This list is not allinclusive. • Ethernet Connectivity – Connect to the Internet to receive critical updates and other information about SCS at www.Intel.com. • Uninterruptable power source (UPS) – Depending on electrical supply reliability and quality, optionally connect the SCS chassis and development host to a power source protected by a UPS. § Intel® Industrial Solutions System Consolidation Series User’s Guide for v. 1.0b SCS 111K Document #550658-1.0 17 Development Workflows 5 Development Workflows The Intel® Industrial Solutions System Consolidation Series (SCS) development host uses Wind River Workbench as its primary development tool. Some typical workbench activities or workflows are described in the following section. 5.1 Summary of Workflows The Workbench platform can be used for innumerable development activities. This User Guide identifies two common development workflows to demonstrate the Workbench environment in action. IMPORTANT: First read and then perform workflows in their chronological order within this User Guide. The workflows are: • • Workflow 1: Set Up & Explore the System Features Workflow 2: Develop With Preloaded Workbench Projects § Intel® Industrial Solutions System Consolidation Series User’s Guide for v. 1.0b SCS 111K Document #550658-1.0 18 Workflow 1: Set Up & Explore the System Features 6 Workflow 1: Set Up & Explore the System Features 6.1 About This Chapter Before you begin using Intel® Industrial Solutions System Consolidation Series (SCS) for development and production, use this chapter to familiarize yourself with the system. IMPORTANT: This chapter is Workflow 1, the first of two workflows in this document. Make certain you complete this workflow first before proceeding with the other workflow chapter that follows. Perform the workflows in their order in this User Guide. This chapter includes both system background information and instructions. • FIRST… Read and understand this chapter entirely. • THEN… Re-read the chapter and perform the instructions in the workflow. Intel® Industrial Solutions System Consolidation Series User’s Guide for v. 1.0b SCS 111K Document #550658-1.0 19 Workflow 1: Set Up & Explore the System Features 6.2 System Introduction The Intel® Industrial Solutions System Consolidation Series (SCS) encompasses two subsystems: the development host (a PC provided by the end user) and the target platform (see Figure 1 – SCS Target Platform Box Shipment). Figure 1 – SCS Target Platform Box Shipment These two subsystems work together to provide you with development and productivity that you can customize for your needs. Intel® Industrial Solutions System Consolidation Series User’s Guide for v. 1.0b SCS 111K Document #550658-1.0 20 Workflow 1: Set Up & Explore the System Features As an example of the system in its simplest form, Figure 2 – Development Host and Target Platform System shows a laptop as a development host connected by a serial cable to the target platform. Optionally connect the subsystems remotely by Ethernet. Figure 2 – Development Host and Target Platform System NOTE: To render clarity in the figure, power supplies and external peripherals are removed. You may connect external peripherals such as a monitor and keyboard to enable interaction directly with the target platform via Microsoft* Windows*. Before you begin, make certain to read and understand this chapter prior to assembling and exploring your Intel® Industrial Solutions System Consolidation Series (SCS) system. 6.3 User-Provided System Components You must provide certain components to complete assembly of the SCS system: • Development host computer perhaps a desktop, laptop, or tablet PC. When selecting a development host PC, make certain that it meets or exceeds the specifications defined in Section 4.1.2- Development Host Specifications. NOTE: The SCS packaging provides a serial cable dongle to connect the development host to the target platform. Depending on your development host’s hardware, you may also need to supply a male-female serial adapter to establish connection. 6.4 Target Platform Subsystem Overview The SCS target hardware is a rugged software-controlled platform optimized for industrial productivity. See Figure 3 – The SCS Target Platform Hardware. For more Intel® Industrial Solutions System Consolidation Series User’s Guide for v. 1.0b SCS 111K Document #550658-1.0 21 Workflow 1: Set Up & Explore the System Features information about the hardware, see the documentation within the target platform packaging. Figure 3 – The SCS Target Platform Hardware The SCS target platform solid-state drive (SSD) comes preconfigured with a set of software which you either can modify live via a remote connection from the development host, or by overwriting the system OSes with a bootable image (loaded to a USB) that you create using the development host. SCS uses Wind River* Hypervisor 2 to control, monitor, and develop for the target platform’s virtual machines. While the target platform hypervisor defines hardware access to specific virtual machines, the development host has a limited ability to modify access to virtual machine resources. For example, a network interface may be configured as visible only to the Linux* platform while invisible to the other operating systems. You may learn to modify some of these hardware configurations. The SCS target hard drive comes loaded with three virtual machine (VM) platforms as independent operating systems. • One instance of Wind River Linux 5 OS • Two instances of Wind River VxWorks* 6.9 Real-Time OS This edition of the SCS product also runs an instance of Microsoft* Windows* 7 Pro (64-bit) as a virtual machine that boots from the target platform (hardware) hard drive. • It is the sole responsibility of the customer to purchase the Windows OS software and the appropriate licensing for the product. • Windows shall be installed by the customer before using the system. See Section 6.9 - Intel SCS Windows* 7 (64-bit) Installation Instructions. Intel® Industrial Solutions System Consolidation Series User’s Guide for v. 1.0b SCS 111K Document #550658-1.0 22 Workflow 1: Set Up & Explore the System Features When you develop customized OS configurations to be run on the target platform, you may optionally boot the target platform from a USB that contains a bootable image carrying your customizations. Optionally, copy this same image to the target platform’s hard drive via network or a serial connection to boot directly from the target platform hard drive. Figure 4 – Target Platform OS Configuration and Figure 5 – Target Platform I/O Configuration depict high-level views of the system. Figure 4 – Target Platform OS Configuration Intel® Industrial Solutions System Consolidation Series User’s Guide for v. 1.0b SCS 111K Document #550658-1.0 23 Workflow 1: Set Up & Explore the System Features 6.4.1 Virtual NIC (VNIC) The Intel® Industrial Solutions System Consolidation Series’ (SCS) four virtual machines are networked together via a virtual layer 2 switch. Each individual virtual platform has a virtual network interface card (VNIC). This provides a virtual network infrastructure for the guest OSes to communicate with each other without using a physical network interface. See Figure 5 – Target Platform I/O Configuration. Figure 5 – Target Platform I/O Configuration NOTE: Dashed lines indicate virtual connections/devices. The system cannot connect to the VNIC via an external interface directly. This means that when data is sent to the VNIC, it will always be transmitted to another guest OS. A VNIC appears to the guest OS as a standard Ethernet interface. However, unlike a real NIC, the data never leaves the target platform. The act of transmitting data from one VNIC to another is simply a memory copy of the Ethernet frame from one guest OS to another. 6.4.2 Default Target OS IP Address Assignment Intel® Industrial Solutions System Consolidation Series (SCS) assigns target platform IP addresses to the four guest operating systems by default as follows: • Windows* 7 – 10.0.0.2 • Linux 5 – 10.0.0.3 • VxWorks 1 – 10.0.0.4 • VxWorks 2 – 10.0.0.5 Intel® Industrial Solutions System Consolidation Series User’s Guide for v. 1.0b SCS 111K Document #550658-1.0 24 Workflow 1: Set Up & Explore the System Features 6.4.3 Customizable Target OS IP Address Assignment While you can modify a guest OS address manually from a guest OS’s command shell, this change is not persistent. A target platform reboot restores the default IP addresses (10.0.0.2 through 10.0.0.5.) 6.4.4 Subsystem Connectivity The single Linux VM and the two VxWorks VMs are configured to use the serial port to interface with the development host. Because there is a single physical serial port used for debugging, access is shared among the OSes. The asynchronous multiplexed I/O (AMIO) component takes care of multiplexing the serial streams. Wind River Workbench’s AMIO terminals are designed to demultiplex the serial stream so that every platform’s serial stream appears individually in its own Workbench console. The system assigns the target platform devices (such as serial port, NIC, disk controllers, USB controllers, and PCI cards) dynamically during the boot-up procedure. 6.4.5 Accessing Microsoft Windows Operating System The Windows VM directly supports keyboard, mouse, and monitor and can be used right on the target platform. 6.4.6 Accessing Linux and VxWorks Operating Systems The VxWorks VMs do not directly support human interface devices such as a monitor, keyboard, and mouse. These targets are accessed via a remote connection from the development host through the AMIO console. The Linux VM on the target platform can be accessed from the development host by using a serial command line connection in the AMIO console as described in Section 6.4.4 above. 6.5 Development Host Subsystem Overview The SCS development host operates as a system separate from the target platform. The development host uses Wind River Systems Workbench software as its development tool. Within Workbench, you use special development units called projects to develop, organize, and compile customized productivity applications and other software. After you finish development on the development host, you either: • (Option A) load your developed software directly onto the target platform through a live connection (usually via serial cable or Ethernet), or • (Option B) use development host projects to compile your software into Linux and VxWorks, which are then combined with other Workbench project information to create a bootable image file called system.elf. You then copy this image to USB media to boot the target. Intel® Industrial Solutions System Consolidation Series User’s Guide for v. 1.0b SCS 111K Document #550658-1.0 25 Workflow 1: Set Up & Explore the System Features Figure 6 - Target Boot Image Project Compilation shows how the various development projects combine to create the bootable USB media image as described in Option B. Intel® Industrial Solutions System Consolidation Series User’s Guide for v. 1.0b SCS 111K Document #550658-1.0 26 Workflow 1: Set Up & Explore the System Features Figure 6 - Target Boot Image Project Compilation Intel® Industrial Solutions System Consolidation Series User’s Guide for v. 1.0b SCS 111K Document #550658-1.0 27 Workflow 1: Set Up & Explore the System Features 6.5.1 Development Host Linux Shell The development host Workbench software uses Linux as the resident platform for its development software. See Figure 7 - Development Host Desktop. When you start up the Workbench development host software, it loads on top of the development host Linux shell. Figure 7 - Development Host Desktop Intel® Industrial Solutions System Consolidation Series User’s Guide for v. 1.0b SCS 111K Document #550658-1.0 28 Workflow 1: Set Up & Explore the System Features 6.5.2 Wind River Workbench The Intel® Industrial Solutions System Consolidation Series (SCS) development host uses Wind River Workbench as its primary development software. See Figure 8 Workbench Workspace. Figure 8 - Workbench Workspace Workbench is an Eclipse-based development suite that provides an efficient way to develop real-time and embedded applications with minimal intrusion on the target system. It is an integrated development environment for creating software that runs on embedded Wind River Linux or VxWorks systems. Workbench includes a full project management facility in addition to a suite of tools for source code development, debug, and analysis. It provides the capability to manage multiple processes and threads on Linux and VxWorks systems. For more information about Workbench, refer to the Wind River documentation. Find other Wind River documents in Workbench under Help > Help Contents > Wind River Documentation. 6.5.3 Special Version of Workbench Intel® Industrial Solutions System Consolidation Series (SCS) comes with a special implementation of Wind River Workbench that runs on development host hardware that you provide. This version of Workbench is optimized for development of applications that you load onto and run on the target hardware. Intel® Industrial Solutions System Consolidation Series User’s Guide for v. 1.0b SCS 111K Document #550658-1.0 29 Workflow 1: Set Up & Explore the System Features After installing the SCS development software and licenses (see Section 6.6 – License the System and Section 6.7 - Install the Development Host Software) to your development host hard drive, you are ready to begin development using Wind River Workbench. NOTE: For help using the special version of Workbench on SCS, read this User Guide in its entirety and access other help files on the User Support media. 6.5.4 Workbench Projects The Workbench development environment uses projects as the building blocks for activities such as the development of applications for the target OSes. Figure 9 - Project Explorer shows several preconfigured projects as they appear in Workbench’s top workspace console, the Project Explorer. Figure 9 - Project Explorer The SCS version of Workbench has preconfigured projects. These projects are prebuilt packages that help reduce time you spend in development effort. The development host system comes pre-loaded with five preconfigured projects: • vip_wrVbX86_1 – This is the VxWorks image project (VIP) that provides the build information for the first VxWorks virtual machine that appears on the target platform. This project is configurable, for example, to include source code for applications you have created to run on VxWorks. • vip_wrVbX86_2 – This is the VxWorks image project (VIP) that provides the build information for the second VxWorks virtual machine that appears on the target platform. This project is configurable, for example, to include source code for applications you have created to run on VxWorks. • vsb_wrVbX86 – This is a VxWorks source build library that provides the building blocks for the VIPs mentioned above. NOTE: The vsb_wrVbX86 project is not configurable, and thus requires no user modification or interaction. • wr_hypervisor_integration – This is a hypervisor integration project that combines the Linux and the two VxWorks images and creates the single hypervisor target image. This image is used to boot the target. This type of Intel® Industrial Solutions System Consolidation Series User’s Guide for v. 1.0b SCS 111K Document #550658-1.0 30 Workflow 1: Set Up & Explore the System Features project has limited configurability. If you create your own Linux or VxWorks project, you can edit the makefile to use your project instead of the default one. You can also update the script files used to allocate hardware elements to the various VMs. NOTE: The wr_hypervisor_integration project is not configurable, and thus requires no user modification or interaction. • 6.5.5 wrlinux_ugos – This is a Wind River Linux platform project that provides the build information for the Linux virtual machine that appears on the target platform. The Target Image If you have your own application code, you can create a Linux application project, a VxWorks downloadable kernel module (DKM) project, or a VxWorks real-time process (RTP) project to compile your code. Those projects can then be integrated in the Linux or VxWorks images. NOTE: For more information about using DKMs in Workbench, see Wind River Workbench User Guide Section 3.5. Using Workbench, you can also create your own Linux or VxWorks images instead of using the modifiable default projects shown by the arrows in Figure 10 – Modifiable Projects. Figure 10 – Modifiable Projects Intel® Industrial Solutions System Consolidation Series User’s Guide for v. 1.0b SCS 111K Document #550658-1.0 31 Workflow 1: Set Up & Explore the System Features However, when creating a new target system, the SCS system will use two unmodifiable projects (vsb_wrVbX86 and wr_hypervisor_integration) shown by the arrows in Figure 11 – Unmodifiable Projects. Figure 11 – Unmodifiable Projects Collectively, all Workbench projects created on the development host contribute to creating a bootable target image file specifically optimized to run on the SCS target. After creating the target image file on the development host, you place this image file onto a bootable USB flash drive, insert the flash drive into the target platform, and then use the flash drive to boot the hypervisor and launch the guest OSes on the target platform. Figure 6 - Target Boot Image Project Compilation shows that the VxWorks Source Build project combines with the two VxWorks Image Projects along with the Linux Platform Project. All of these projects funnel into the Hypervisor integration project (HIP). The HIP uses all project information to create the system.elf file, which you use to boot the VMs on the target hardware. The hypervisor is preconfigured to boot four virtual machines: one instance of Windows, one instance of Linux, and two instances of VxWorks. While you cannot modify this configuration, you can control which hardware devices (Ethernet ports, serial ports, disk controllers, USB, and so on) are assigned to specific virtual machines that you configure using scripts you modify in Workbench. 6.5.6 Development Host Hardware The development host platform is hardware that you provide. For development host specifications, see Section 4.1.2 - Development Host Specifications. 6.5.7 Development Host Installation Software Intel® Industrial Solutions System Consolidation Series development host installation software resides on the Development Host media USB. Because the software has comes to you in an unlicensed state, follow the licensing procedure to activate the Development Host installation media. After activation, you may install the development host software onto your development host. See Section 6.6 – License the System. Intel® Industrial Solutions System Consolidation Series User’s Guide for v. 1.0b SCS 111K Document #550658-1.0 32 Workflow 1: Set Up & Explore the System Features 6.6 License the System Intel® Industrial Solutions System Consolidation Series is comprised of two subsystems: • Target platform • Development host Read further for important licensing information pertaining to both subsystems. 6.6.1 Target Platform Software Licensing The target platform is hardware shipped in the product packaging. While this requires no license acquisition on your part, please read, understand, and comply with the licensing materials that come with the product packaging. In addition, this edition of SCS runs an instance of Microsoft* Windows* 7 Pro (64-bit) as a virtual machine that boots from the target platform (hardware) hard drive. It is the sole responsibility of the customer to purchase the Windows* OS software and the appropriate licensing for the product. Windows* shall be installed by the customer before using the system. For installation instructions, see Section 6.9 Intel SCS Windows* 7 (64-bit) Installation Instructions. 6.6.2 Development Host Software Licensing The development host is hardware that you provide. Later you will install the software from the Development Host USB media onto the development host. Before you are able to install this software onto your development host PC, you must first request a license key file to activate your Development Host media. IMPORTANT: Make certain your development host PC meets or exceeds the specifications shown in Section 4.1.2 - Development Host Specifications. Follow this procedure to request a license key file. 6.6.2.1 Determine the Host-ID/Host Name In this section, you determine your development host PC’s Host-ID and Host Name. CAUTION: After you determine your development host Host-ID and Host Name, you later install the development host software onto the development host PC you provide. When installing the development host software, the system destroys all data (including any applications and OSes) already installed on your development host PC hard drive. Make certain to back up all data to external storage media before installing the development host software. Failure to do so may result in loss of data on the development host. Before you can license and activate your development host software, you must first provide some information specific to your development host PC. Part of the information you provide is your development host PC’s: • Host Name – A system name assigned to the development host PC. Intel® Industrial Solutions System Consolidation Series User’s Guide for v. 1.0b SCS 111K Document #550658-1.0 33 Workflow 1: Set Up & Explore the System Features • Host-ID – An 8- or 12-character hexadecimal number. If your development host PC does not have a pre-existing OS… If your development host PC does not have a pre-existing OS: Insert the Development Host USB media into your development host and boot PC from that media. After the system boots, a Linux development desktop appears. Follow the instructions in Section 6.6.2.1.3 - For Linux OS: to determine the development host Host-ID and Host Name. If your development host PC does have a pre-existing OS… Many times a development host is already running one of the operating systems mentioned in the following sections. Skim the sections that follow for instructions specific to your OS. 6.6.2.1.1 For Windows OS: Use this instruction if your development host PC has a Windows OS. If your development host machine has a single Ethernet port, use the 12-character MAC address. Go to Start > Run. A Run window appears. Type cmd and press Enter. A command console appears. Type ipconfig –all and press Enter. The result should be similar to the following: Ethernet adapter Local Area Connection: Connection-specific DNS Suffix . : Description . . . . . . . . . . . : 3Com 3C920 Fast Ethernet Physical Address. . . . . . . . . : 00-06-5A-21-95-44 In this example, the Host-ID is 00065A219544 (after removing the dashes from the physical address) Record the Host-ID. At the command prompt, type hostname and press Enter. A Host Name value appears. Record the Host Name and proceed to Section 6.6.2.2 - Locate the Serial Number 6.6.2.1.2 For Windows OS (Alternate Procedure): Use this instruction if your development host PC has a Windows OS and if the previous Windows instructions did not work. If your development host machine has multiple Ethernet cards, is a laptop that is connected with a docking station with its own Ethernet card, or does not have a NIC card, use the hard drive serial number pre-pended with “DISK_SERIAL_NUM=”. Go to Start > Run. A Run window appears. Type cmd and press Enter. A command console appears. Type vol and press Enter. Intel® Industrial Solutions System Consolidation Series User’s Guide for v. 1.0b SCS 111K Document #550658-1.0 34 Workflow 1: Set Up & Explore the System Features The result should be similar to the following: Volume in drive C has no label. Volume Serial Number is C0FC-0C4E In this example, the Host-ID is DISK_SERIAL_NUM=C0FC0C4E. Make certain to pre-pend the value with DISK_SERIAL_NUM= with any dashes and colons removed. Record the Host-ID. At the command prompt, type hostname and press Enter. A Host Name value appears. Record the Host Name and proceed to Section 6.6.2.2 - Locate the Serial Number 6.6.2.1.3 For Linux OS: Use this instruction if your development host PC has a Linux OS. Determine the 12-character Ethernet address in Linux. Run the first line shown below and see the result similar to that shown in the second line. % /sbin/ifconfig -a | grep -i hwaddr eth0... Hwaddr 00:06:5B:82:F4:5A In this example, the Host-ID is 00065B82F45A (after removing the colons from the value following Hwaddr). Record the Host-ID and proceed to Section 6.6.2.2 - Locate the Serial Number. NOTES: 6.6.2.1.4 • Do not use hostid. The Linux hostid command produces a 6- or 8-character result that is not valid as a Host-ID. • Make certain your Ethernet (eth) device lists as eth0. If your PC lists its first Ethernet device as eth1 or eth2 (and so on), the Hwaddr value will not work in conjunction with a development host license key, and your development host license will fail to function. If the first Ethernet (eth) does not list as eth0, then rename it as eth0, and redo the ifconfig command shown above. For Solaris OS: Use this instruction if your development host PC has a Solaris OS. At the command prompt, run: % hostid % 83299eed The 8-character value shown above is the PC’s Host-Id. Record the Host-ID that appears on your display. At the command prompt, type hostname and press Enter. A Host Name value appears. Record the Host Name and proceed to Section 6.6.2.2 - Locate the Serial Number Intel® Industrial Solutions System Consolidation Series User’s Guide for v. 1.0b SCS 111K Document #550658-1.0 35 Workflow 1: Set Up & Explore the System Features 6.6.2.2 Locate the Serial Number The 12-digit serial number is located on the top left corner of the Startup Guide shipped with this product. Find and record this number for use in the next step. 6.6.2.3 Go To License Website Go to the following website: registrationcenter.intel.com Enter your email address and the serial number that was included on the Startup Guide. If you have not registered with your email address at the Intel Registration Center, you will be asked to create a new login ID and password. After entering the email address and serial number (and registering as a new user if needed), a new web page will appear. Intel® Industrial Solutions System Consolidation Series User’s Guide for v. 1.0b SCS 111K Document #550658-1.0 36 Workflow 1: Set Up & Explore the System Features Enter the following information into the matching fields on the web page: 1. 2. 3. 4. 5. 6. 7. 8. 9. 10. 11. First Name: Family Name: Company Name: Your Job Title: Address: Country: Phone: Email Address: Your Company’s Industry: Host-ID: Host Name: Click the Submit button. NOTE: Repeat the procedure for each additional license that you need to request for additional separate development host PCs. IMPORTANT: The license issued will only activate the development host software for the PC hardware HOST ID you submitted. This license will not allow installation of the development host software onto a different PC. Within approximately 24 business hours, you should receive a response email with a license file attachment from IOT SW Licensing ([email protected]). If you do not receive a response for your license request, please: 6.6.2.4 • check your email spam folder for a response message, OR • contact your Intel Corporation sales representative for assistance. Install the License After receiving the response email, follow the instructions below to install the license. Insert the Development Host USB media into an available computer and copy the licensing attachment provided (wrhost.txt) in your licensing email to the root directory of the USB stick. Rename the licensing file to zwrsLicense.lic. See Figure 12 – Rename the Licensing File. The example shown here is for a Microsoft* Windows* computer. Intel® Industrial Solutions System Consolidation Series User’s Guide for v. 1.0b SCS 111K Document #550658-1.0 37 Workflow 1: Set Up & Explore the System Features Figure 12 – Rename the Licensing File Remove the USB stick. Proceed to Section 6.7– Install the Development Host Software. 6.7 Install the Development Host Software CAUTION: In this section you install the development host software onto the development host PC you provide. When installing the development host software, the system destroys all data (including any applications and OSes) already installed on your development host PC hard drive. Make certain to back up all important data to external storage media before installing the development host software. Failure to do so may result in loss of data on the development host. After you license the development host flash media according the instructions above, follow this procedure to install the development software to your development host PC. Power down the development host PC. Insert the Development Host USB media into the user-provided development host PC. TIP: Intel Corporation recommends that you insert the media into a USB 3.0 port. Power up the PC. Several system screens appear and disappear as the system loads. The license window disappears and the system loads to the Wind River Linux desktop. See Figure 13 – Linux Desktop. Intel® Industrial Solutions System Consolidation Series User’s Guide for v. 1.0b SCS 111K Document #550658-1.0 38 Workflow 1: Set Up & Explore the System Features Figure 13 – Linux Desktop Intel® Industrial Solutions System Consolidation Series User’s Guide for v. 1.0b SCS 111K Document #550658-1.0 39 Workflow 1: Set Up & Explore the System Features Double-click the Install to Hard Drive icon. See Figure 14 – Install Icon. NOTE: After licensing the software and starting up the development host, the Install to Hard Drive icon may not appear immediately on the Wind River Linux desktop. If the Install to Hard Drive icon does not appear, wait several minutes to see whether the icon appears. If the icon still does not appear within five minutes, restart the system and restart this procedure. Figure 14 – Install Icon A warning window appears. See Figure 15 – Warning Window. Figure 15 – Warning Window Click Proceed. The cursor changes to a spinning disk for a few moments to indicate system progress. The cursor then returns to its default arrow appearance and remains this way for a few minutes. Intel® Industrial Solutions System Consolidation Series User’s Guide for v. 1.0b SCS 111K Document #550658-1.0 40 Workflow 1: Set Up & Explore the System Features An Examining Devices window appears for a few moments. See Figure 16 – Examining Devices. Figure 16 – Examining Devices A Fedora* installer window appears prompting you to select an interactive language. (Window not shown here.) Select US English and click Next. The location window appears. See Figure 17 – Location Window. Figure 17 – Location Window Intel® Industrial Solutions System Consolidation Series User’s Guide for v. 1.0b SCS 111K Document #550658-1.0 41 Workflow 1: Set Up & Explore the System Features Select your location and click Next. The following window appears. See Figure 18 – Installation Type. Figure 18 – Installation Type Select Use All Space. Intel® Industrial Solutions System Consolidation Series User’s Guide for v. 1.0b SCS 111K Document #550658-1.0 42 Workflow 1: Set Up & Explore the System Features Make certain to uncheck Use LVM and click Next. The storage space window appears. See Figure 19 – Storage Space. Figure 19 – Storage Space In the Data Storage Devices pane (left) locate the local hard drive storage device onto which you wish to install the development host software. This adjacent figures use the ATA Intel… hard drive storage object as an example storage media. Intel® Industrial Solutions System Consolidation Series User’s Guide for v. 1.0b SCS 111K Document #550658-1.0 43 Workflow 1: Set Up & Explore the System Features Click the storage media object and then click the right () arrow to move the object into the Install Target Devices pane. See Figure 20 – Install Target Devices. Figure 20 – Install Target Devices Click Next. A small Examining Devices window appears and the software begins to install. See Figure 21 – Examining Devices. Figure 21 – Examining Devices Intel® Industrial Solutions System Consolidation Series User’s Guide for v. 1.0b SCS 111K Document #550658-1.0 44 Workflow 1: Set Up & Explore the System Features Numerous other process windows appear and disappear as the system installs. See Figure 22 – System Installs. Figure 22 – System Installs After a few minutes, the system prompts you, Would you like to keep any changes you made to the LiveUSB environment? Select No. NOTE: The system may take upwards of 45 minutes to install. Intel® Industrial Solutions System Consolidation Series User’s Guide for v. 1.0b SCS 111K Document #550658-1.0 45 Workflow 1: Set Up & Explore the System Features The system completes installing and a window appears prompting you to restart the system. See Figure 23 – Installation Complete. Figure 23 – Installation Complete Click Reboot. After the system shuts down, remove the Development Host USB media before the system restarts. Intel® Industrial Solutions System Consolidation Series User’s Guide for v. 1.0b SCS 111K Document #550658-1.0 46 Workflow 1: Set Up & Explore the System Features Allow the system to restart. The Wind River Linux development host desktop environment appears. See Figure 24 – Linux Desktop. Figure 24 – Linux Desktop 6.8 Set Up the Target Host Follow the procedure to set up the target platform and development hosts. 6.8.1 Set Up the Target Platform Required tools: • 1/8 inch (3 mm) flathead screwdriver Intel® Industrial Solutions System Consolidation Series User’s Guide for v. 1.0b SCS 111K Document #550658-1.0 47 Workflow 1: Set Up & Explore the System Features Use a 1/8 inch (3 mm) flathead screwdriver to attach the power inverter plug to the target power receptacle. See Figure 25 - Power Inverter Plug. Figure 25 - Power Inverter Plug Plug the power inverter power cord to a grounded power source receptacle. IMPORTANT: Do not power up the target platform. Connect the monitor to the target platform DVI-I video connector. 6.9 Intel SCS Windows* 7 (64-bit) Installation Instructions Insert the Windows* 7 (64-bit) installation media into a USB 2.0 (black-colored) port. Attach the keyboard and mouse to USB 2.0 (black-colored) ports. Configure the SCS target platform BIOS to boot from the Windows installation media. See Figure 26 - BIOS. Intel® Industrial Solutions System Consolidation Series User’s Guide for v. 1.0b SCS 111K Document #550658-1.0 48 Workflow 1: Set Up & Explore the System Features Figure 26 - BIOS NOTE: The hardware configuration may vary from that shown on the figure above. Save the BIOS configuration and boot the target platform. NOTE: While the target platform boots, you may be prompted by the message Press any key to boot from CD or DVD. If this message appears, press a key. During start-up, a Windows Installation window appears, prompting you to choose the language settings. Choose your settings and click Next. Another window appears. Click Install Now. A screen appears stating Setup is starting. A Please read the license terms window appears. Check the I accept the license terms box. Click Next. A new window appears labeled Which type of installation do you want? Click Custom (advanced) A new window appears labeled Where do you want to install Windows? Select Disk 0 Partition 2. Intel® Industrial Solutions System Consolidation Series User’s Guide for v. 1.0b SCS 111K Document #550658-1.0 49 Workflow 1: Set Up & Explore the System Features Click Drive options (advanced). Click Format. A new window appears warning that “the partition might contain recovery files”. Click OK. Click Next. A new window appears labeled Installing Windows... that shows the progress of the Windows installation. This portion of the Windows installation proceeds automatically. Eventually the system states Setup will continue after systems restarts. The system restarts and a Set Up Windows window appears. Enter the following values into the fields: Type a user name User Type a computer name INDU-PC Click Next. A Set a password for your account window appears. Enter the following values into the fields: Type a password indu Retype your password indu Type a password hint industrial Click Next. A Type your Windows product key window appears. Uncheck the Automatically activate Windows when I'm online box. Click Next. A Help protect your computer... window appears. Click Ask me later. A Review your time and date settings window appears. Select a time zone and click Next. Select your computer’s current location and click Next. A new window appears stating Windows is finalizing your settings. The Windows desktop appears. Basic Windows setup is complete. Proceed with the instructions that follow. Disconnect the Windows installation media device. Intel® Industrial Solutions System Consolidation Series User’s Guide for v. 1.0b SCS 111K Document #550658-1.0 50 Workflow 1: Set Up & Explore the System Features 6.10 Windows* 7 (64-bit) Post-installation Instructions IMPORTANT: While operating Windows, do not update the system using Windows Update. Insert the User Support USB media into a black USB 2.0 port. Close the AutoPlay window. Click the Start button. In the command box, type cmd. A cmd icon appears in the Programs list. Right-click the cmd icon and go to Run as administrator and select Yes. A command prompt box appears. Type E: and press Enter. NOTE: Drive letters may vary. Use the drive letter representing the User Support media. At the prompt, type cd Configuration and press Enter. At the prompt, type win7_post_installation.bat and press Enter. In the Device Installation Settings window that appears, confirm that your settings match those in the dialog below. See Figure 27 – Device Installation Settings. Intel® Industrial Solutions System Consolidation Series User’s Guide for v. 1.0b SCS 111K Document #550658-1.0 51 Workflow 1: Set Up & Explore the System Features Figure 27 – Device Installation Settings If your settings match those shown in the window above, press Cancel. Otherwise, configure them to match and press Save Changes. NOTE: If the Open File – Security Warning dialog appears, press Run. Otherwise, proceed to the next step. Intel® Industrial Solutions System Consolidation Series User’s Guide for v. 1.0b SCS 111K Document #550658-1.0 52 Workflow 1: Set Up & Explore the System Features Figure 28 – Open File – Security Warning In the Registry Editor window, press Yes. Figure 29 – Registry Editor In the Registry Editor window, click OK. Intel® Industrial Solutions System Consolidation Series User’s Guide for v. 1.0b SCS 111K Document #550658-1.0 53 Workflow 1: Set Up & Explore the System Features Figure 30 – Registry Editor In the System Configuration window General tab, confirm that the settings match those shown in Figure 31 – System Configuration. Figure 31 – System Configuration In the Boot tab, click Advanced options... a new window appears. Check PCI lock and click OK. See Figure 32- BOOT Advanced Options. Intel® Industrial Solutions System Consolidation Series User’s Guide for v. 1.0b SCS 111K Document #550658-1.0 54 Workflow 1: Set Up & Explore the System Features Figure 32- BOOT Advanced Options Click OK again to close the System Configuration window. Click Exit without restart. Close the command window. 6.10.1 Install the Wind River Shared Memory Driver Go to Start and right-click Computer. Select Properties. Select Device Manager. A Device Manager window appears. Select the Computer icon. From the Action menu drop down, select Add legacy hardware. A window appears. Click Next. A window appears. Select Install the hardware that I manually... option. Click Next. A window appears. From the Common hardware types: scroll the list and select Show All Devices. Intel® Industrial Solutions System Consolidation Series User’s Guide for v. 1.0b SCS 111K Document #550658-1.0 55 Workflow 1: Set Up & Explore the System Features Click Next. A window appears. Click Have Disk... A window appears. Click Browse... A window appears. Browse to User Support USB media. Go to Configuration > WindRiver_Win7_64bit_Drivers > Shared_Memory. Select the wrshmem file icon. Click Open. An Install From Disk window appears. Click OK. In the Add Hardware window, click Next. Click Next. A Windows Security window appears. Click Install. An installation progress window appears for a moment. A Completing the Add Hardware Wizard window appears. Click Finish. A shared memory driver icon appears in the Hypervisor. 6.10.2 Install the Wind River Virtual Network Interface Card (VNIC) Driver Go to Start > Computer, right-click Properties. Select Device Manager. A Device Manager window appears. Select the Computer icon. From the Action menu drop down, select Add legacy hardware. A window appears. Click Next. A window appears. Select Install the hardware that I manually... option. Click Next. A window appears. From the Common hardware types: scroll the list and select Network adapters. Click Next. A window appears. Click Have Disk... A window appears. Click Browse... A window appears. Browse to User Support USB media. Go to Configuration > WindRiver_Win7_64bit_Drivers > VNIC. Select the wrvnic file icon. Intel® Industrial Solutions System Consolidation Series User’s Guide for v. 1.0b SCS 111K Document #550658-1.0 56 Workflow 1: Set Up & Explore the System Features Click Open. An Install From Disk window appears. Click OK. In the Add Hardware window, click Next. Click Next. A Windows Security window appears. Click Install. An installation progress window appears for a moment. A Completing the Add Hardware Wizard window appears. Click Finish. A Wind River Virtual Ethernet Adapter icon appears in the Network adapters list. NOTE: The icon appears with an exclamation (!) symbol. This condition is normal and requires no correction. Close Device Manager. 6.10.3 ADlink Windows 7 Driver Installation Download and install each of the following 64-bit drivers from the ADlink website for the SCS factory-default configuration. ADlink Technology, Inc. (http://www.adlinktech.com/) • • • • MXE-5300 MXE-5300 MXE-5300 MXE-5300 Win7 Win7 Win7 Win7 64bit 64bit 64bit 64bit Audio Driver Chipset Driver Intel-LAN Driver USB3.0 Driver 6.11 Intel SCS Boot Loader Installation Instructions 6.11.1 Booting the Target Platform Using the User Support USB Drive Shut down the target platform. Insert the User Support USB media. Boot the target platform into BIOS by pressing the Delete key repeatedly during startup. Once in the BIOS, go to Boot > Hard Drive BBS Priorities > Boot Option #1 > the USB Flash Drive. Press Enter. Press the Esc key. Go to Save & Exit > Save Changes and Exit. Press Enter. The system reboots. Intel® Industrial Solutions System Consolidation Series User’s Guide for v. 1.0b SCS 111K Document #550658-1.0 57 Workflow 1: Set Up & Explore the System Features 6.11.2 User Support OS Login At the Debian GNU Linux login screen, use the following logon credentials: Login: root Password: scsadmin 6.11.3 Boot Loader Installation Type cd scsadmin and press Enter. Type ./post_installation and press Enter. Type init 0 and press Enter. The system shuts down. Remove the User Support USB media before you restart the target platform. SCS system configuration is complete. 6.12 Windows VNIC Configuration Installation Instructions Go to Start > Control Panel > Network and Sharing Center. A window appears. Click Change adapter settings. An adapter list appears. Right-click the Wind River Virtual Ethernet Adapter and select Properties. A window appears. Select Internet Protocol Version 4 (TCP/IPv4). Click Properties. An IP properties window appears. Enter the properties as shown in Figure 33 – Internet Protocol Version 4 (TCP/IPv4) Properties. Intel® Industrial Solutions System Consolidation Series User’s Guide for v. 1.0b SCS 111K Document #550658-1.0 58 Workflow 1: Set Up & Explore the System Features Figure 33 – Internet Protocol Version 4 (TCP/IPv4) Properties Click OK. The window closes. Click Close. VNIC configuration is complete. 6.13 Configure Windows* 7 as a Time Server Boot Windows 7 on the target platform. Insert the User Support USB media into the target platform. Create a scheduled task to run time sync at startup: • Go to Start > Computer. • Right-click the Computer icon and click Manage. A User Account Control window appears. • Click Yes. Intel® Industrial Solutions System Consolidation Series User’s Guide for v. 1.0b SCS 111K Document #550658-1.0 59 Workflow 1: Set Up & Explore the System Features • Go to System Tools > Task Scheduler. • On the right-hand pane, click Import Task... A window opens. • Browse to and select file C:\Intel\TimeSync\TimeSync.xml • Click Open. • Click OK. • Enter the password for User (the default is “indu”). Click OK. • Close the Computer Management window. Restart the platform to affect changes. If at any point you believe the hard drive has been irretrievably corrupted or otherwise damaged, refer to Appendix B- - Target Platform Hard Drive Recovery Instructions for instructions on how to return the target platform hard drive to its original condition before Windows installation. CAUTION: Appendix B- - Target Platform Hard Drive Recovery Instructions contains instructions to restore the target platform hard drive to its original configuration before Windows installation. DO NOT perform this procedure as a part of preparation for first use of the system. Use the procedure if you believe the contents of the hard drive have been irretrievably corrupted or otherwise damaged. Performing the procedure will erase all data on the hard drive, including partitions and the Windows operating system. 6.14 Connect the Target Platform and Development Hosts While there are several methods for the target platform and development host to communicate, the most common method is through a serial connection. Follow the steps below to establish a serial connection. Attach human interface devices to the development host. For a desktop PC, this includes the keyboard, mouse, and video/monitor cable. Connect the external video/monitor display to a grounded power source receptacle. Intel® Industrial Solutions System Consolidation Series User’s Guide for v. 1.0b SCS 111K Document #550658-1.0 60 Workflow 1: Set Up & Explore the System Features Connect the null modem serial cable between COM1 (labeled “1” on the target platform dongle) and the DB9 (RS-232) serial port on the development host. See Figure 34 - Target Platform Serial Connector and Figure 35 - Development Host Serial Connector. Figure 34 - Target Platform Serial Connector IMPORTANT: Large “X” marks in Figure 34 - Target Platform Serial Connector indicate serial ports you cannot use to connect the development host to the target platform. Make certain to use only the serial port connector labeled “1”. NOTE: Optionally attach the target platform to an Ethernet network cable, and connect to the development host over Ethernet. Ethernet requires configuration to become functional, with either a static IP address or a DHCP configuration with a DHCP server on the network. Intel® Industrial Solutions System Consolidation Series User’s Guide for v. 1.0b SCS 111K Document #550658-1.0 61 Workflow 1: Set Up & Explore the System Features NOTE: The system requires that you provide development host hardware. Depending on the development host hardware you provide, the receptacle at the development host serial connection may vary from that shown in Figure 35 - Development Host Serial Connector. For information about the development host specifications, see Section 4.1.2 - Development Host Specifications. Intel® Industrial Solutions System Consolidation Series User’s Guide for v. 1.0b SCS 111K Document #550658-1.0 62 Workflow 1: Set Up & Explore the System Features Figure 35 - Development Host Serial Connector Intel® Industrial Solutions System Consolidation Series User’s Guide for v. 1.0b SCS 111K Document #550658-1.0 63 Workflow 1: Set Up & Explore the System Features NOTE: If you cannot establish a connection between the development host and target platform in the following steps, the serial cable connection between the development host and target platform may require the use of a null modem adapter and/or cable gender changer. See Figure 36 – Null Modem / Gender Changer. Figure 36 – Null Modem / Gender Changer Item Description 1 Null modem serial connector adapter 2 Gender changer serial connector adapter 3 Target platform DB9 (RS-232) serial port dongle labeled “1” at the location indicated by the arrow Connect the development host power cord to a wall receptacle power source. Intel® Industrial Solutions System Consolidation Series User’s Guide for v. 1.0b SCS 111K Document #550658-1.0 64 Workflow 1: Set Up & Explore the System Features 6.15 Explore the System Start up the development host. The system loads to the Wind River Linux development host desktop. See Figure 37 - Development Host Desktop. Figure 37 - Development Host Desktop On the desktop, double-click the Wind River Workbench icon desktop icon. Intel® Industrial Solutions System Consolidation Series User’s Guide for v. 1.0b SCS 111K Document #550658-1.0 65 Workflow 1: Set Up & Explore the System Features Wind River Workbench loads. See Figure 38 - Workbench Workspace. Figure 38 - Workbench Workspace From the top menu, select Window > Show View > AMIO Console. The AMIO console appears. See Figure 39 - AMIO Console. Figure 39 - AMIO Console Intel® Industrial Solutions System Consolidation Series User’s Guide for v. 1.0b SCS 111K Document #550658-1.0 66 Workflow 1: Set Up & Explore the System Features At the development host Workbench workspace, click the "Creates a connection for Application Multiplexed I/O" button. See Figure 40 - Multiplexed I/O Button. Figure 40 - Multiplexed I/O Button Intel® Industrial Solutions System Consolidation Series User’s Guide for v. 1.0b SCS 111K Document #550658-1.0 67 Workflow 1: Set Up & Explore the System Features An Open AMIO Console window appears. See Figure 41 – Open AMIO Console. Figure 41 – Open AMIO Console Select the parameters shown in Figure 41 – Open AMIO Console. NOTE: If you are connecting through a USB-to-serial connector, you may not be able to connect using the Port parameter /dev/ttyS0 above. If you are unable to connect using the /dev/ttyS0, try connecting with /dev/ttyUSB0. Later references to this connection in this document assume you use the /dev/ttyS0 connection. Click OK. This opens up an AMIO connection at the development host serial port. Intel® Industrial Solutions System Consolidation Series User’s Guide for v. 1.0b SCS 111K Document #550658-1.0 68 Workflow 1: Set Up & Explore the System Features Near the bottom right section of the Workbench workspace, there is a grayed out “connected” icon adjacent to a red “disconnect” icon. See Figure 42 - Disconnect Icon. The red icon indicates the development host is listening for a connection to the target platform. Figure 42 - Disconnect Icon Optionally, click the red disconnect icon to close the development host listening connection. After doing this step, note that the green “connect” icon is enabled and the /dev/ttyS0 console workspace shows the connection as <terminated>. See Figure 43 – Terminated Connection. Before continuing, make certain to re-click the green “connect” icon, and that the green icon has turned gray. Figure 43 – Terminated Connection Double-click the AMIO Console tab. The AMIO console expands within the Workbench workspace. Retrieve the Target Host USB media from the product packaging and insert it into a blue USB 3.0 port on the target platform. Press and release the power switch on the target platform. The power indicator light on the target platform illuminates and the system starts. Intel® Industrial Solutions System Consolidation Series User’s Guide for v. 1.0b SCS 111K Document #550658-1.0 69 Workflow 1: Set Up & Explore the System Features As the system starts, screen output appears on the development host Workbench AMIO console. Separate AMIO consoles appear. Figure 44 - AMIO Consoles shows the console for the first instance of VxWorks. The figure also shows the tabs that correspond with each AMIO instance that appears. Figure 44 - AMIO Consoles NOTE: If not all AMIO consoles appear, then in Workbench go to Window > Show View and select the console you wish to view. 6.15.1 • AMIO Console – This console has no output. Optionally close this console. • AMIO - Core OS – This displays hypervisor output. • AMIO - Channel 1 – This displays Linux OS output. • AMIO - Channel 2 – This displays output from the VxWorks OS 1. • AMIO - Channel 3 – This displays output from the VxWorks OS 2. Default OS IP Address Assignment Intel® Industrial Solutions System Consolidation Series virtual NIC (VNIC) assigns IP addresses to the guest operating systems by default as follows: 6.15.2 • Windows* 7 – 10.0.0.2 • Linux – 10.0.0.3 • VxWorks 1 – 10.0.0.4 • VxWorks 2 – 10.0.0.5 Inter-OS Communication over the Target VNIC Using the physical (serial cable) connection between the development and the target platforms, you can use the Workbench AMIO console to display the logical connection among the Linux and VxWorks shells. NOTE: To physically connect the development host to the target platform, see Section 6.8 – Set Up the Target Host. Intel® Industrial Solutions System Consolidation Series User’s Guide for v. 1.0b SCS 111K Document #550658-1.0 70 Workflow 1: Set Up & Explore the System Features The OSes on the target reside on a supervisory layer called a hypervisor, which also provides a platform for the target system’s VNIC. The VNIC provides a network infrastructure that allows the OSes to communicate. Follow this procedure to demonstrate communication among OSes over the target platform VNIC. Because you monitor this communication on the development host, this likewise demonstrates communication between the development and target platforms. 6.15.2.1 VxWorks-to-Linux Communication To demonstrate that a communication path exists from VxWorks to Linux, visible from the VxWorks side, use the ping command. Double-click any console tab. The console workspace expands within Workbench. Click the VxWorks 1 (AMIO – Channel 2) console tab. The VxWorks (AMIO – Channel 2) console tab appears. At the VxWorks command line, type ping "10.0.0.3" and press Enter. A response indicates that Linux received the ping communication from VxWorks. See Figure 45 - VxWorks to Linux Communication. Figure 45 - VxWorks to Linux Communication 6.15.2.2 Linux-to-VxWorks Communication To demonstrate that a communication path exists between Linux and VxWorks instances, use the ping command. Go to the Linux (AMIO – Channel 1) console. Intel® Industrial Solutions System Consolidation Series User’s Guide for v. 1.0b SCS 111K Document #550658-1.0 71 Workflow 1: Set Up & Explore the System Features Login as root with the password root. The Linux command prompt appears. See Figure 46 – Linux Prompt. Figure 46 – Linux Prompt At the command line, type ping 10.0.0.4 and press Enter. A response indicates that VxWorks 1 received communication from Linux. See Figure 47 - Linux-to-VxWorks Communication. Figure 47 - Linux-to-VxWorks Communication Press CRTL+C to stop the ping activity. Intel® Industrial Solutions System Consolidation Series User’s Guide for v. 1.0b SCS 111K Document #550658-1.0 72 Workflow 1: Set Up & Explore the System Features 6.15.2.3 VxWorks-to-VxWorks Communication Click the VxWorks 2 (AMIO - Channel 3) console tab. The VxWorks 2 (AMIO Channel 3) console appears. At the VxWorks prompt, type ifconfig and press Enter. Network information appears as output. See Figure 48 - Ifconfig Output. Figure 48 - Ifconfig Output The 10.0.0.5 content within the output indicates that you are at the VxWorks 2 prompt. At the prompt, type ping "10.0.0.4" and press Enter. Intel® Industrial Solutions System Consolidation Series User’s Guide for v. 1.0b SCS 111K Document #550658-1.0 73 Workflow 1: Set Up & Explore the System Features A response indicates that VxWorks 1 received communication from VxWorks 2. See Figure 49 - VxWorks-to-VxWorks Communication. Figure 49 - VxWorks-to-VxWorks Communication Optionally perform this procedure from the VxWorks 1 Workbench AMIO console, while pinging the other VxWorks OS. This concludes the overview and demonstration of the system’s basic features and capabilities. To learn how to use the system in greater detail, proceed with the workflow in the chapter that follows. § Intel® Industrial Solutions System Consolidation Series User’s Guide for v. 1.0b SCS 111K Document #550658-1.0 74 Workflow 2: Develop With Preloaded Workbench Projects 7 Workflow 2: Develop With Preloaded Workbench Projects 7.1 About This Chapter The Intel® Industrial Solutions System Consolidation Series (SCS) development host uses Wind River Workbench as its primary development tool. Use the Workbench development platform for innumerable development activities called workflows. IMPORTANT: Before you perform this workflow, you must perform Workflow 1. Intel Corporation recommends performing all other workflows previous to this workflow. This chapter includes both system background information and instructions for connecting and exploring basic system functionality. • FIRST… Read and understand this chapter entirely. • THEN… Re-read the chapter and perform the instructions in the workflow. In this workflow, you use preloaded Linux and VxWorks (template) projects in Wind River Workbench to quickly develop a target platform image and boot it on the target hardware. This workflow helps provide you with basic skills using Workbench in order to reduce source build and compilation time. Once built, you then load the complete target image onto the target platform and boot it up. In this workflow you will have the opportunity to learn how to port your own source code to the VxWorks projects, which boot up from independent VM partitions on the target platform. 7.2 About Build/Rebuild Within this procedure you are prompted to either Build or Rebuild a project. Build compiles only files and changes that have been modified since the last full build, while Rebuild forces the recompilation of the entire project. The system cannot automatically detect modifications to certain types of files (like scripts). In such cases, a Build would not detect the changed file, but a Rebuild would. As a general rule, if you are modifying a source code file (such as .c or .h), a Build is appropriate. However, when changing another type of file, a Rebuild is the safer choice. Use Rebuild to ensure all changes are detected and recorded. 7.3 Start Up Use the following steps after installing the development environment onto the development host’s local hard drive. Intel® Industrial Solutions System Consolidation Series User’s Guide for v. 1.0b SCS 111K Document #550658-1.0 75 Workflow 2: Develop With Preloaded Workbench Projects Start the development host. The Wind River Linux desktop loads. See Figure 50- Linux Desktop. Figure 50- Linux Desktop Open Workbench: Go to the desktop and double-click the Wind River Workbench icon. See Figure 51 - Workbench Icon. Figure 51 - Workbench Icon Wind River Workbench loads. See Figure 52 - Workbench Workspace. Intel® Industrial Solutions System Consolidation Series User’s Guide for v. 1.0b SCS 111K Document #550658-1.0 76 Workflow 2: Develop With Preloaded Workbench Projects Figure 52 - Workbench Workspace The Project Explorer is your main graphical interface for working with projects. You use it to create, open, close, modify, and build projects. You can also use it to add or import application code, to import or customize build specifications, and to access your version control system. Using the Project Explorer, you can visually organize projects into structures that reflect their inner dependencies, and therefore the order in which they are to be compiled and linked. 7.4 Workbench Projects The Workbench development environment uses projects as the building blocks for activities such as the loading of applications onto the target platform OSes. Figure 53 - Project Explorer shows several projects as they appear in Workbench’s top workspace console, the Project Explorer. Intel® Industrial Solutions System Consolidation Series User’s Guide for v. 1.0b SCS 111K Document #550658-1.0 77 Workflow 2: Develop With Preloaded Workbench Projects Figure 53 - Project Explorer Workbench uses preconfigured projects. These projects are prebuilt packages that help reduce time you spend in development effort. The development host system comes pre-loaded with five preconfigured projects: • vip_wrVbX86_1 – This is the VxWorks image project (VIP) that provides the build information for the first VxWorks (VxWorks 1) OS that appears on the target platform. This project is configurable, for example, to include source code for applications you have created to run on VxWorks. • vip_wrVbX86_2 – This is a VIP just like the VxWorks 1 project (vip_wrVbX86_1) immediately above. It corresponds to the VxWorks (VxWorks 2) OS that appears on the target platform. This project is also configurable. • vsb_wrVbX86 – This is a VxWorks source build library that provides the building blocks for the VIPs mentioned above. This project is not configurable, and thus requires no user modification or interaction. • wr_hypervisor_integration – This is a hypervisor integration project that combines the Linux and the two VxWorks images and creates the single hypervisor target image. This image is used to boot the target. This type of project has limited configurability. If you create your own Linux or VxWorks project, you can edit the makefile to use your project instead of the default one. You can also update the script files used to allocate hardware elements to the various VMs. • wrlinux_ugos_glibc_std – This is a Wind River Linux platform project that provides the build information for the Linux virtual machine environment that appears on the target platform. Intel® Industrial Solutions System Consolidation Series User’s Guide for v. 1.0b SCS 111K Document #550658-1.0 78 Workflow 2: Develop With Preloaded Workbench Projects 7.5 Modify Code in a Preconfigured OS Project In this section you have the opportunity to write some simple source code into the preconfigured Workbench project image for VxWorks. NOTE: You will have the opportunity to import code into the Workbench Linux project in a later workflow. When you finish importing the code, you compile the projects, use Workbench to build the target platform boot image, copy it to USB, and boot the target platform from that image. 7.5.1 Modify Simple Code Line in VxWorks 1 Project This procedure provides instruction for inserting a single line of code into the VxWorks 1 project. In Project Explorer, expand the VxWorks project by clicking the triangular icon adjacent to vip_wrVbX86_1. See the darkened project icon in Figure 54 - VxWorks Project Icon. Figure 54 - VxWorks Project Icon The VxWorks project expands. In the listing that appears below the VxWorks line item, scroll down to the usrAppInit.c object. Double-click the usrAppInit.c object. To the right of Project Explorer a usrAppInit.c work pane and Outline pane appear. See Figure 55 - usrAppInit.c. Intel® Industrial Solutions System Consolidation Series User’s Guide for v. 1.0b SCS 111K Document #550658-1.0 79 Workflow 2: Develop With Preloaded Workbench Projects Figure 55 - usrAppInit.c Double-click the usrAppInit.c tab. The usrAppInit.c work pane expands. NOTE: usrAppInit() is an application entry-point routine that can be modified to start your kernel application automatically at boot time. This is explained in further detail in the VxWorks Kernel Programmer's Guide which you can access through Workbench Help. Alternatively, for starting RTP applications refer to the VxWorks Application Programmer's Guide for details on using the usrRtpAppInit.c routine stub. Within the usrAppInit.c work pane just below the banner at the top of the file locate the following line of code: #include <vxWorks.h> Insert the following just above the <vxWorks.h> include statement. #include <stdio.h> Place the cursor at the end of the code line below: /* add application specific code here*/ Press Enter twice. The cursor advances downward. Type the following code: printf(“Hello World!\n”); See the boxed content in Figure 56 – Print File Code. Intel® Industrial Solutions System Consolidation Series User’s Guide for v. 1.0b SCS 111K Document #550658-1.0 80 Workflow 2: Develop With Preloaded Workbench Projects Figure 56 – Print File Code You may optionally insert your own code in the space above into the VxWorks project. Go to File > Save. See Figure 57 – File > Save. Figure 57 – File > Save The file saves to the system. Repeat this procedure to embed source code for VxWorks #2 (vip_wrVbX86_2). Intel® Industrial Solutions System Consolidation Series User’s Guide for v. 1.0b SCS 111K Document #550658-1.0 81 Workflow 2: Develop With Preloaded Workbench Projects 7.5.2 Build the Hypervisor Integration Project In Project Explorer, go to and right-click the vip_wrVbX86_1 object. Select Rebuild Project. See Figure 58 – Rebuild Project. Figure 58 – Rebuild Project A Rebuild Project – vip_wrVbX86_1 window appears (see Figure 59 – Rebuild Project) and a Build Console at the bottom of Workbench (see Figure 60 – Build Console) displays lines of scrolling code. Intel® Industrial Solutions System Consolidation Series User’s Guide for v. 1.0b SCS 111K Document #550658-1.0 82 Workflow 2: Develop With Preloaded Workbench Projects Figure 59 – Rebuild Project Figure 60 – Build Console When the system finishes rebuilding the project, the Rebuild Project – vip_wrVbX86_1 window disappears and returns to Wind River Workbench. Repeat this procedure for the VxWorks 2 project (vip_wrVbX86_2). In the procedure that follows, you instruct Hypervisor to collect the changes you just made in the VxWorks 1 project. As it collects these changes, Hypervisor also gathers any other changes you may have made in the VxWorks 2 (vip_wrVbX86_2) and Linux (wrlinux_ugos_glib_std) projects. All of the changes contribute to creating an image you can later use to boot the target. Go to and right-click the wr_hypervisor_integration object. Select Rebuild Project. See Figure 61 – Select Rebuild Project. Intel® Industrial Solutions System Consolidation Series User’s Guide for v. 1.0b SCS 111K Document #550658-1.0 83 Workflow 2: Develop With Preloaded Workbench Projects Figure 61 – Select Rebuild Project A Rebuild Project – wr_hypervisor_integration window appears and a Build Console pane at the bottom of Workbench displays lines of scrolling code. See Figure 62 - Build Console. Intel® Industrial Solutions System Consolidation Series User’s Guide for v. 1.0b SCS 111K Document #550658-1.0 84 Workflow 2: Develop With Preloaded Workbench Projects Figure 62 - Build Console While the system rebuilds the wr_hypervisor_integration project, the system copies information from the other projects in Project Explorer. This process consolidates this information into a file called system.elf. The system.elf file comprises the image containing the modifications and configurations (including any code you create) that the target platform uses to boot. Depending on the size of project you rebuild, after a few moments the Rebuild Project window disappears. 7.5.3 Copy the System.Elf File to Boot Media While there are several methods to move the system.elf file from the development host to the target platform, the easiest method is to copy the system.elf file to USB media and boot the target platform from that media. Follow these steps to perform this copy procedure. CAUTION: Intel Corporation provides you with the target platform media USB for copying the system.elf file from the development host to the target platform. However, copying data onto the target platform USB media may cause the data on the media to be overwritten. Make certain to back up data before using the media. Failure to do so may result in the loss of the data on the media. IMPORTANT: Intel Corporation provides you with the target platform media USB for copying the system.elf file from the development host to the target platform. While you may use any Linux-formatted USB media, this procedure assumes you use the Target Host USB media. At the development host, insert the Target Host USB media into an open USB port. The USB media mounts to the Linux file system. NOTE: You may optionally insert any Linux-formatted USB media (with 16 GB or more free space) into an open USB port. Intel® Industrial Solutions System Consolidation Series User’s Guide for v. 1.0b SCS 111K Document #550658-1.0 85 Workflow 2: Develop With Preloaded Workbench Projects Open the Target Host USB media using the development host Linux File Explorer. Open the /images directory and find the system.elf file. Rename the system.elf file to system.elf.factory. The file you rename in this step is a default factory-configured system.elf file which you may later wish to use to boot the target platform. By renaming it, you are protecting it from being overwritten in the following steps. In Workbench Project Explorer, click the wr_hypervisor_integration project and expand it. Expand the Objects folder. Right-click the system.elf object and select Copy. See Figure 63 – System.elf Copy. Figure 63 – System.elf Copy You may optionally use a command line or the Linux file explorer to copy the system.elf file from the location indicated in the Build Console. For a path to the system.elf file, see the darkened content in Figure 64 – System.elf Directory. Intel® Industrial Solutions System Consolidation Series User’s Guide for v. 1.0b SCS 111K Document #550658-1.0 86 Workflow 2: Develop With Preloaded Workbench Projects Figure 64 – System.elf Directory In Workbench, close the AMIO channel consoles. Minimize Workbench. Use Linux File Explorer to navigate to the following directory of the USB media: /target_usb/images Paste the system.elf file into the directory. After the file finishes copying, unmount the USB media and remove it from the development host. 7.6 Configure Target Platform BIOS to Boot from USB Media Before booting the target platform from USB media, you first configure the target platform BIOS to boot from USB media. NOTE: To ensure that you start the target platform from USB media, follow this procedure each time you need to boot from USB media. Shut down the target platform and wait 5 seconds. Ensure that no other bootable media are inserted into the target platform. Place the bootable USB media into an open USB port (preferably a blue USB 3.0 port). NOTE: For a faster boot, Intel Corporation recommends you connect the boot media to a USB 3.0 port on the target platform. Arrows in Figure 65 - USB 3.0 Ports provide the locations of two target platform USB 3.0 ports. Intel® Industrial Solutions System Consolidation Series User’s Guide for v. 1.0b SCS 111K Document #550658-1.0 87 Workflow 2: Develop With Preloaded Workbench Projects Figure 65 - USB 3.0 Ports Press and release the target platform power button. The target platform begins to start. As the target platform begins to start, repeatedly press the DELETE button. The target platform enters the BIOS Main tab. See Figure 66 – BIOS 1. Figure 66 – BIOS 1 Use the right-arrow key to go to the Save & Exit tab. See Figure 67 – BIOS 2. Intel® Industrial Solutions System Consolidation Series User’s Guide for v. 1.0b SCS 111K Document #550658-1.0 88 Workflow 2: Develop With Preloaded Workbench Projects Figure 67 – BIOS 2 Use the down-arrow key to move the highlighted selection to the USB media. See Figure 68 – BIOS 3. NOTE: In this example, the USB media is named ADATA USB Flash Drive 1100. Your USB media may have a different name. Figure 68 – BIOS 3 Intel® Industrial Solutions System Consolidation Series User’s Guide for v. 1.0b SCS 111K Document #550658-1.0 89 Workflow 2: Develop With Preloaded Workbench Projects Press Enter. The target platform boots from USB media. As the system starts, communication activity appears on the development host AMIO console. Several console tabs appear within the AMIO pane: • Core OS – This shows the Hypervisor I/O • Channel 1 –This shows the Linux I/O • Channel 2 – This shows the I/O for VxWorks #1 • Channel 3 – This shows the I/O for VxWorks #2 The code you inserted into the usrAppInit.c object in the development host VxWorks project runs and displays. See the boxed content in Figure 69 – AMIO Consoles. Figure 69 – AMIO Consoles This concludes a basic demonstration of working with preconfigured Workbench projects. § Intel® Industrial Solutions System Consolidation Series User’s Guide for v. 1.0b SCS 111K Document #550658-1.0 90 Workflow 2: Develop With Preloaded Workbench Projects Appendix A – Default I/O Device Assignment A.1 Default Physical Device Allocations Intel® Industrial Solutions System Consolidation Series SCS comes with preconfigured physical device allocations as shown in Figure 70 – Target Platform Devices 1 and Figure 71 - Target Platform Devices 2. Figure 70 – Target Platform Devices 1 Item # Device Type Assigned to VM Comment 1 USB 3.0 Linux Denoted by blue connector color. 2 USB 2.0 Windows Denoted by black connector color 3 Video Windows Windows graphics 4 Ethernet Windows This device is driven by an Intel driver. 5 Ethernet Windows This device is driven by an Intel driver. 6 PS2 (NA) Not supported by this implementation of SCS. Intel® Industrial Solutions System Consolidation Series User’s Guide for v. 1.0b SCS 111K Document #550658-1.0 91 Workflow 2: Develop With Preloaded Workbench Projects Figure 71 - Target Platform Devices 2 Item # Device Type Assigned to VM Comment 1 Ethernet Linux This device is driven by a Realtek driver. 2 Ethernet Linux This device is driven by a Realtek driver. 3 eSATA (NA) Not supported by this implementation of SCS. 4 Audio (NA) Not supported by this implementation of SCS. 5 Serial (NA) Non-modifiable device preconfigured to support serial connection between development host and target platform via AMIO console. § Intel® Industrial Solutions System Consolidation Series User’s Guide for v. 1.0b SCS 111K Document #550658-1.0 92 Workflow 2: Develop With Preloaded Workbench Projects Appendix B - Target Platform Hard Drive Recovery Instructions CAUTION: This procedure provides instructions to restore the target platform hard drive to its original configuration before Windows installation. DO NOT perform this procedure as a part of preparation for first use of the system. Use the procedure if you believe the contents of the hard drive have been irretrievably corrupted or otherwise damaged. Performing this procedure will erase all data on the hard drive, including partitions and the Windows operating system. Use this procedure to restore the target platform hard drive to its original condition before Windows installation. B.1 Configure BIOS to boot from USB Shut down the target platform. Insert the User Support USB media. Boot the target platform into BIOS by pressing the Delete key repeatedly during startup. The system loads the BIOS settings system. Go to Boot > Hard Drive BBS Priorities > Boot Option #1 > [USB Flash Drive]. Press Enter. Press Esc. Go to Save & Exit > Save Changes and Exit. Press Enter. Press Enter. The system reboots. B.2 User Support OS Login At the Debian GNU Linux login screen, use the following logon credentials: SCS login: root Password: scsadmin Intel® Industrial Solutions System Consolidation Series User’s Guide for v. 1.0b SCS 111K Document #550658-1.0 93 Workflow 2: Develop With Preloaded Workbench Projects B.3 Recover Hard Drive Type cd scsadmin and press Enter. Type ./restore_factory_hd and press Enter. Type init 0 and press Enter. The system shuts down. Remove the User Support USB media before the system restarts. SCS Target HD restoration is complete. Intel® Industrial Solutions System Consolidation Series User’s Guide for v. 1.0b SCS 111K Document #550658-1.0 94 Workflow 2: Develop With Preloaded Workbench Projects Appendix C - How to Utilize Shared Memory from an Application Note: The shared memory region is fixed to 8 MB. C.1 Linux C.1.1 Includes #include <sys/types.h> #include <sys/stat.h> #include <fcntl.h> #include <stdio.h> #include <stdlib.h> #include <unistd.h> #include <ctype.h> #include <errno.h> #include <string.h> C.1.2 Open fd = open( device_name, oflags) Parameters: device_name - “/dev/win_lx_shared_memory” oflags – O_RDWR Return Value: fd – filedescriptor pointing to shared memory region Intel® Industrial Solutions System Consolidation Series User’s Guide for v. 1.0b SCS 111K Document #550658-1.0 95 Workflow 2: Develop With Preloaded Workbench Projects C.1.3 Index into Shared Memory area by setting offset llseek(fd, offset, SEEK_CUR); C.1.4 Read bytes_read = read(fd, (void *) buf, count) Parameters: fd – File descriptor returned by open buf – empty buffer in which data will be copied count – number of bytes that should be read as input parameter Return Value: bytes_read – number of bytes actually read C.1.5 Write bytes_written = write(fd, (void*) buf, count) Parameters: fd – File descriptor returned by open buf – buffer containing data to write to shared memory count – number of bytes that should be written. User supplies the count. Return Value: bytes_written – number of bytes actually written C.1.6 Close Close Shared Memory area with: Intel® Industrial Solutions System Consolidation Series User’s Guide for v. 1.0b SCS 111K Document #550658-1.0 96 Workflow 2: Develop With Preloaded Workbench Projects close(fd); C.2 Windows Examples Below are examples of how to use the APIs for Windows. C.2.1 Additional Dependency Library (setupapi.lib) Setupapi.lib C.2.2 Open DevicePath = GetDevicePath((LPGUID)&GUID_DEVINTERFACE_WRSHMEM); hDevice = CreateFile(DevicePath, GENERIC_READ|GENERIC_WRITE, FILE_SHARE_READ | FILE_SHARE_WRITE, NULL, OPEN_EXISTING, 0, NULL ); DevicePath = GetDevicePath((LPGUID)&GUID_DEVINTERFACE_WRSHMEM); C.2.3 Read SetFilePointer(hDevice, dataOffset, NULL, FILE_BEGIN); Result = ReadFile(hDevice, readBuffer, dataLength, &bytesRead, NULL); C.2.4 Write SetFilePointer(hDevice, dataOffset, NULL, FILE_BEGIN); Result = WriteFile (hDevice, writeBuffer, dataLength, &bytesWritten, NULL); Intel® Industrial Solutions System Consolidation Series User’s Guide for v. 1.0b SCS 111K Document #550658-1.0 97 Workflow 2: Develop With Preloaded Workbench Projects C.2.5 Includes #include <DriverSpecs.h> OR optionally use the parameters in the following section, Define GUID. C.2.6 Define GUID If you choose not to define the device path by GetDevicePath, then you must define GUID as follows: #define WHILE(a) \ __pragma(warning(suppress:4127)) while(a) // // Define an Interface Guid so that app can find the device and talk to it. // DEFINE_GUID (GUID_DEVINTERFACE_WRSHMEM, /* 4968ac3d-b46a-4bf0-afb3-95f659518ba8 */ 0x4968ac3d, 0xb46a, 0x4bf0, 0xaf, 0xb3, 0x95, 0xf6, 0x59, 0x51, 0x8b, 0xa8); // // Device type -- in the "User Defined" range." // #define FILEIO_TYPE 40001 // // The IOCTL function codes from 0x800 to 0xFFF are for customer use. // #define IOCTL_WRSHMEM_SHMEMSIZE \ CTL_CODE( FILEIO_TYPE, 0xdef, METHOD_BUFFERED, FILE_ANY_ACCESS ) After defining the GUID, you must also define a device path. DevicePath = "\\\\?\\\\root#unknown#0000#{4968ac3d-b46a-4bf0-afb395f659518ba8}"; hDevice = CreateFile(CA2W(DevicePath), GENERIC_READ|GENERIC_WRITE, FILE_SHARE_READ | FILE_SHARE_WRITE, Intel® Industrial Solutions System Consolidation Series User’s Guide for v. 1.0b SCS 111K Document #550658-1.0 98 Workflow 2: Develop With Preloaded Workbench Projects NULL, OPEN_EXISTING, 0, NULL ); C.2.7 Read SetFilePointer(hDevice, dataOffset, NULL, FILE_BEGIN); Result = ReadFile(hDevice, readBuffer, dataLength, &bytesRead, NULL); C.2.8 Write SetFilePointer(hDevice, dataOffset, NULL, FILE_BEGIN); Result = WriteFile (hDevice, writeBuffer, dataLength, &bytesWritten, NULL); C.3 Install Additional Components C.3.1 Component 1 Install Visual Studio 2012 Update Pack 4 onto the development host. C.3.2 Component 2 Install Redistributable Packages 2012 the target platform. C.3.3 Component 3 Ensure .NET Framework 4.0.30319 is installed on the target platform project: 1. 2. 3. 4. Go to File > New > Project. Expand Installed > Templates > Visual C++. Select Win32. Choose Win32 Console Application. Intel® Industrial Solutions System Consolidation Series User’s Guide for v. 1.0b SCS 111K Document #550658-1.0 99 Workflow 2: Develop With Preloaded Workbench Projects 5. 6. 7. Click OK. Click Finish. Add the source code and header file a. For the driver test app, add wrshmem_test.cpp and public.h to the project directory b. Import file: i. Right click the source files: Select Add > Existing, and Browse to wrshemem_test.cpp ii. Right click the header files: Select Add > Existing; and browse to public.h 8. Add x64 platform type a. Click Build > Configuration Manager. b. Click the drop-down menu below Configuration. c. Select Release. c. 9. Build the project. § Intel® Industrial Solutions System Consolidation Series User’s Guide for v. 1.0b SCS 111K Document #550658-1.0 100 Workflow 2: Develop With Preloaded Workbench Projects Appendix D – Technical Support D.1 In-Product Technical Support In the event you require support while using Intel® Industrial Solutions System Consolidation Series (SCS), we strongly recommend you first consult with the many resources provided to you as documentation in printed and electronic file format in the product packaging. • For a document listing, go to Section 3 – Intel® Industrial Solutions System Consolidation Series Documentation. • For self-help activities, see Appendix C – Troubleshooting. D.2 Online and Live Technical Support As an authorized Intel® Industrial Solutions System Consolidation Series (SCS) product owner, you are entitled to technical support as defined on the SCS product website. See the technical support statement at: www.intel.com/industrialconsolidation D.3 Wind River Product Support and Training Portions of your Intel® Industrial Solutions System Consolidation Series (SCS) product are provided courtesy of Wind River. For support and training beyond that defined here, see Wind River’s website: www.windriver.com/company/contact D.4 Microsoft* Windows* Product Support For assistance with Windows*, refer to Windows resident help and www.microsoft.com. § Intel® Industrial Solutions System Consolidation Series User’s Guide for v. 1.0b SCS 111K Document #550658-1.0 101 Appendix E – Troubleshooting CAUTION: Content within this section may include activities that entail risk to the preservation of data you may have accumulated in the course of your business activities. For example, in order to resolve a performance issue in your system, you may decide to follow the recommendation to reinstall all or part of the system software. In so doing, you may cause data that you may have accumulated in your system hard drive storage to be irretrievably destroyed. To avoid data loss, make certain to create full backups of your business data onto remote resources in accordance with your company’s policies. Make certain to review other Safety content outlined in Section 2 – Safety Notice. This section provides activities you may perform to resolve some issues while using the Intel® Industrial Solutions System Consolidation Series (SCS). This chapter is arranged into subsections when issues commonly occur: • Installation – Issues that may arise when setting up, connecting, and starting the system • Configuration – Issues that may arise when developing target platform configurations for production Review the items listed in the sections below for a description of your issue and perform the suggested troubleshooting activity to help resolve the issue. Also make certain to consult the references mentioned in Appendix D – Technical Support. IMPORTANT: This content may be updated without notice. To ensure that you are reading the most recent document, check the product support website: www.intel.com/industrialconsolidation In the event that all immediately available troubleshooting and help does not resolve your issue, interactive support is available. For more information, go to www.intel.com/industrialconsolidation IMPORTANT: Some Recommend Resolutions shown below instruct you to perform activities on the development host, and some on the target platform. Make certain that you distinguish between these two subsystems, and that you perform activities on the subsystem indicated. Document #550658-1.0 Document #538056 Workflow 2: Develop With Preloaded Workbench Projects E.1 Installation Troubleshooting The following troubleshooting items are commonly related to system installation. Table 4 - Installation Troubleshooting Item # Issue Recommended Resolution T0001 Development host does not boot from the USB media labeled Development Host. Turn off the development host. Make certain the Development Host USB media is plugged into a functional USB port on the development host. Start the development host. As the development host starts up, invoke the development host BIOS menu. Configure the BIOS so that the development host boots from USB media upon next startup. Boot the development host from the Development Host USB media. If the development host still does not boot from the Development Host USB media, try using a different USB port, or try using different development host hardware. T0002 When attempting to install development host software to the development host, the “Install to Hard Drive” icon does not appear. Before you can install the development host software onto the development host, you must first license the Development Host USB media. The licensing process includes placement of a license file into a specific file directory. Make certain you place the file into the correct location and follow the instructions provided in Section 6.6- License the System. After placing the license file into the proper Development Host USB media directory and booting the development host from the USB media, it may take several minutes for the “Install to Hard Drive” icon to appear. Intel® Industrial Solutions System Consolidation Series User’s Guide for v. 1.0b SCS 111K Document #550658-1.0 103 103 Workflow 2: Develop With Preloaded Workbench Projects Item # Issue Recommended Resolution T0003 When attempting to install development host software to the development host, the installation takes too long. Installation time depends greatly upon the performance factors of the user-provided development host. These factors include processor speed, hard drive speed, and overall throughput among other factors. During testing on various development host hardware, Intel Corporation observed installation times ranging from 10 minutes to 2 hours. Generally, newer hardware systems require less installation time than older systems. Because software ideally only needs to be installed once, Intel Corporation recommends waiting until the system installs completely. T0004 When attempting to install development host software onto the development host, the installation hangs or fails. Make certain your development host hardware meets the minimum performance specifications defined in Section 4.1.2 – Development Host Specifications. If you determine you must install your development host software onto different hardware, you should first contact your Intel representative to nullify the old license and provide Host ID information for the new development host. See the licensing instructions in Section 6.6 - License the System. T0005 When establishing an AMIO connection between the development host and target platform over serial connection, the development host and target platform do not connect. Make certain you correctly set up the physical and logical connections between the development host and target platform. When starting up the development host and target platform and establishing a connection, make certain to start up the development host software first and establish an open connection on the development host AMIO console before starting the target platform. See Section 6.14- Connect the Target Platform and Development Hosts. Intel® Industrial Solutions System Consolidation Series User’s Guide for v. 1.0b SCS 111K Document #550658-1.0 104 Document #538056 Workflow 2: Develop With Preloaded Workbench Projects E.2 Configuration Troubleshooting The following troubleshooting items are commonly related to system configuration. Table 5 - Installation Troubleshooting Item # Issue Recommended Resolution T0006 When attempting to boot the target platform using the Target Platform USB media, the target platform boots from the target platform hard drive instead. Every time you boot the target platform from USB media, you must configure the target platform BIOS settings to boot from USB media. After configuring the BIOS to boot from USB Media, this change is not persistent, and the system boots only one time from USB Media. On subsequent startups, the target platform boots from hard drive. T0007 When attempting to boot the target platform using the Target Platform USB media, the target platform hangs. Make certain the boot image file name is named system.elf. If the boot image has another name, rename it to system.elf and retry booting. The boot image on the Target Platform USB media may be corrupt. Recreate the image and try rebooting the target platform from it. T0008 I load customized code into my VxWorks/Linux project and create a new system.elf that I copy to USB. After booting the target platform using the USB media with the image containing my customized code, the code does not appear in the VxWorks/Linux OSes after the target platform boots. If the customized code does not appear upon booting up the target platform, the target platform likely did not boot from the USB media. Every time you boot the target platform from USB media, you must configure the target platform BIOS settings to boot from USB media. After configuring the BIOS to boot from USB Media, this change is not persistent, and the system boots only one time from USB Media. On subsequent startups, the target platform boots from hard drive. Intel® Industrial Solutions System Consolidation Series User’s Guide for v. 1.0b SCS 111K Document #550658-1.0 105 105 Workflow 2: Develop With Preloaded Workbench Projects Item # Issue Recommended Resolution T0009 While using the development host software to build a new Linux project from scratch, the build process takes too long. When frequently adding small portions of customized code or small components that require frequent recompiling of the Linux project, try using the Rebuild command instead the Build command. Rebuild recompiles the Linux project, adding only the differences you added since the last full project build. Using Rebuild can significantly reduce overall wait time as the project compiles. To further reduce build time, select fewer components and / or work with a development host with powerful processing capabilities. During testing on various development host hardware, Intel Corporation observed Linux project build times ranging from 15 minutes to 8 hours. T0010 When booting the target platform from USB media containing a system.elf file I created using the development host software, not all OSes boot up on the target platform. First confirm that you are actually booting the target platform from the USB media. See Troubleshooting item #T0006. Allow the target platform to restart form the USB boot media containing the system.elf file you wish to boot. In the development host AMIO pane, consoles for each OS should open. If all of the OS consoles do not appear within a few minutes after booting the target OS, then not all of the OS projects you created in the development host were integrated properly into the bootable system.elf file. Make certain you have followed the instructions in the User Guide chapters entitled Develop With Preloaded Workbench Projects or Build Linux & VxWorks OS Images from Scratch. These chapters provide instructions to ensure that all OS projects are properly compiled and integrated into a bootable system.elf file. § Intel® Industrial Solutions System Consolidation Series User’s Guide for v. 1.0b SCS 111K Document #550658-1.0 106 Document #538056 Appendix F – Legal Notices F.1 All Notices Make certain to read all information including legal notices before using the system. Information is available in printed and electronic formats from: • this document, the Intel® Industrial Solutions System Consolidation Series (SCS) User Guide • the User Support media USB • the development host software system. See Section 3 – Intel® Industrial Solutions System Consolidation Series Documentation. • Reference materials included those listed in Section 1.3 – Reference Content. • www.Intel.com • www.WindRiver.com • your sales and support representatives F.2 License Notices Access an important Wind River Linux 5.0 Third Party License Notices document by going to the following relative path on the development host media: …/home/wruser/WindRiver/legal-notices/wr-Linux-5.0.1/ WindRiver_Linux5.0_ThirdPartyNotices_v2.1.pdf Access other license documents by going to the following relative path on the development host media: …/home/wruser/WindRiver/licenses IMPORTANT: Make certain to read important information regarding GNU General Public License version 3 (GPLv3) and GNU General Public License version 2 (GPLv2) in the Wind River Linux User’s Guide, page 112. Access this document as an Adobe PDF file by going to the following relative path on the Development Host: …/home/wruser/WindRiver/docs/extensions/eclipse/plugins/com.windriver .ide.doc.wr_linux_5/wr_linux_users_guide/ wr_linux_users_guide_5.0.1.pdf Document #550658-1.0 Workflow 2: Develop With Preloaded Workbench Projects F.3 GNU General Public License GNU GENERAL PUBLIC LICENSE Version 3, 29 June 2007 Copyright (C) 2007 Free Software Foundation, Inc. <http://fsf.org/> Everyone is permitted to copy and distribute verbatim copies of this license document, but changing it is not allowed. Preamble The GNU General Public License is a free, copyleft license for software and other kinds of works. The licenses for most software and other practical works are designed to take away your freedom to share and change the works. By contrast, the GNU General Public License is intended to guarantee your freedom to share and change all versions of a program--to make sure it remains free software for all its users. We, the Free Software Foundation, use the GNU General Public License for most of our software; it applies also to any other work released this way by its authors. You can apply it to your programs, too. When we speak of free software, we are referring to freedom, not price. Our General Public Licenses are designed to make sure that you have the freedom to distribute copies of free software (and charge for them if you wish), that you receive source code or can get it if you want it, that you can change the software or use pieces of it in new free programs, and that you know you can do these things. To protect your rights, we need to prevent others from denying you these rights or asking you to surrender the rights. Therefore, you have certain responsibilities if you distribute copies of the software, or if you modify it: responsibilities to respect the freedom of others. For example, if you distribute copies of such a program, whether gratis or for a fee, you must pass on to the recipients the same freedoms that you received. You must make sure that they, too, receive or can get the source code. And you must show them these terms so they know their rights. Developers that use the GNU GPL protect your rights with two steps: (1) assert copyright on the software, and (2) offer you this License giving you legal permission to copy, distribute and/or modify it. For the developers' and authors' protection, the GPL clearly explains that there is no warranty for this free software. For both users' and authors' sake, the GPL requires that modified versions be marked as changed, so that their problems will not be attributed erroneously to authors of previous versions. Some devices are designed to deny users access to install or run modified versions of the software inside them, although the manufacturer can do so. This is fundamentally incompatible with the aim of protecting users' freedom to change the software. The systematic pattern of such abuse occurs in the area of products for individuals to use, which is precisely where it is most unacceptable. Therefore, we have designed this Intel® Industrial Solutions System Consolidation Series User’s Guide for v. 1.0b SCS 111K Document #550658-1.0 108 Workflow 2: Develop With Preloaded Workbench Projects version of the GPL to prohibit the practice for those products. If such problems arise substantially in other domains, we stand ready to extend this provision to those domains in future versions of the GPL, as needed to protect the freedom of users. Finally, every program is threatened constantly by software patents. States should not allow patents to restrict development and use of software on general-purpose computers, but in those that do, we wish to avoid the special danger that patents applied to a free program could make it effectively proprietary. To prevent this, the GPL assures that patents cannot be used to render the program non-free. The precise terms and conditions for copying, distribution and modification follow. TERMS AND CONDITIONS 0. Definitions. "This License" refers to version 3 of the GNU General Public License. "Copyright" also means copyright-like laws that apply to other kinds of works, such as semiconductor masks. "The Program" refers to any copyrightable work licensed under this License. Each licensee is addressed as "you". "Licensees" and "recipients" may be individuals or organizations. To "modify" a work means to copy from or adapt all or part of the work in a fashion requiring copyright permission, other than the making of an exact copy. The resulting work is called a "modified version" of the earlier work or a work "based on" the earlier work. A "covered work" means either the unmodified Program or a work based on the Program. To "propagate" a work means to do anything with it that, without permission, would make you directly or secondarily liable for infringement under applicable copyright law, except executing it on a computer or modifying a private copy. Propagation includes copying, distribution (with or without modification), making available to the public, and in some countries other activities as well. To "convey" a work means any kind of propagation that enables other parties to make or receive copies. Mere interaction with a user through a computer network, with no transfer of a copy, is not conveying. An interactive user interface displays "Appropriate Legal Notices" to the extent that it includes a convenient and prominently visible feature that (1) displays an appropriate copyright notice, and (2) tells the user that there is no warranty for the work (except to the extent that warranties are provided), that licensees may convey the work under this License, and how to view a copy of this License. If the interface presents a list of user commands or options, such as a menu, a prominent item in the list meets this criterion. 1. Source Code. The "source code" for a work means the preferred form of the work for making modifications to it. "Object code" means any non-source form of a work. Intel® Industrial Solutions System Consolidation Series User’s Guide for v. 1.0b SCS 111K Document #550658-1.0 109 Workflow 2: Develop With Preloaded Workbench Projects A "Standard Interface" means an interface that either is an official standard defined by a recognized standards body, or, in the case of interfaces specified for a particular programming language, one that is widely used among developers working in that language. The "System Libraries" of an executable work include anything, other than the work as a whole, that (a) is included in the normal form of packaging a Major Component, but which is not part of that Major Component, and (b) serves only to enable use of the work with that Major Component, or to implement a Standard Interface for which an implementation is available to the public in source code form. A "Major Component", in this context, means a major essential component (kernel, window system, and so on) of the specific operating system (if any) on which the executable work runs, or a compiler used to produce the work, or an object code interpreter used to run it. The "Corresponding Source" for a work in object code form means all the source code needed to generate, install, and (for an executable work) run the object code and to modify the work, including scripts to control those activities. However, it does not include the work's System Libraries, or general-purpose tools or generally available free programs which are used unmodified in performing those activities but which are not part of the work. For example, Corresponding Source includes interface definition files associated with source files for the work, and the source code for shared libraries and dynamically linked subprograms that the work is specifically designed to require, such as by intimate data communication or control flow between those subprograms and other parts of the work. The Corresponding Source need not include anything that users can regenerate automatically from other parts of the Corresponding Source. The Corresponding Source for a work in source code form is that same work. 2. Basic Permissions. All rights granted under this License are granted for the term of copyright on the Program, and are irrevocable provided the stated conditions are met. This License explicitly affirms your unlimited permission to run the unmodified Program. The output from running a covered work is covered by this License only if the output, given its content, constitutes a covered work. This License acknowledges your rights of fair use or other equivalent, as provided by copyright law. You may make, run and propagate covered works that you do not convey, without conditions so long as your license otherwise remains in force. You may convey covered works to others for the sole purpose of having them make modifications exclusively for you, or provide you with facilities for running those works, provided that you comply with the terms of this License in conveying all material for which you do not control copyright. Those thus making or running the covered works for you must do so exclusively on your behalf, under your direction and control, on terms that prohibit them from making any copies of your copyrighted material outside their relationship with you. Conveying under any other circumstances is permitted solely under the conditions stated below. Sublicensing is not allowed; section 10 makes it unnecessary. 3. Protecting Users' Legal Rights From Anti-Circumvention Law. No covered work shall be deemed part of an effective technological measure under any applicable law fulfilling obligations under article 11 of the WIPO copyright treaty Intel® Industrial Solutions System Consolidation Series User’s Guide for v. 1.0b SCS 111K Document #550658-1.0 110 Workflow 2: Develop With Preloaded Workbench Projects adopted on 20 December 1996, or similar laws prohibiting or restricting circumvention of such measures. When you convey a covered work, you waive any legal power to forbid circumvention of technological measures to the extent such circumvention is effected by exercising rights under this License with respect to the covered work, and you disclaim any intention to limit operation or modification of the work as a means of enforcing, against the work's users, your or third parties' legal rights to forbid circumvention of technological measures. 4. Conveying Verbatim Copies. You may convey verbatim copies of the Program's source code as you receive it, in any medium, provided that you conspicuously and appropriately publish on each copy an appropriate copyright notice; keep intact all notices stating that this License and any non-permissive terms added in accord with section 7 apply to the code; keep intact all notices of the absence of any warranty; and give all recipients a copy of this License along with the Program. You may charge any price or no price for each copy that you convey, and you may offer support or warranty protection for a fee. 5. Conveying Modified Source Versions. You may convey a work based on the Program, or the modifications to produce it from the Program, in the form of source code under the terms of section 4, provided that you also meet all of these conditions: a) The work must carry prominent notices stating that you modified it, and giving a relevant date. b) The work must carry prominent notices stating that it is released under this License and any conditions added under section 7. This requirement modifies the requirement in section 4 to "keep intact all notices". c) You must license the entire work, as a whole, under this License to anyone who comes into possession of a copy. This License will therefore apply, along with any applicable section 7 additional terms, to the whole of the work, and all its parts, regardless of how they are packaged. This License gives no permission to license the work in any other way, but it does not invalidate such permission if you have separately received it. d) If the work has interactive user interfaces, each must display Appropriate Legal Notices; however, if the Program has interactive interfaces that do not display Appropriate Legal Notices, your work need not make them do so. A compilation of a covered work with other separate and independent works, which are not by their nature extensions of the covered work, and which are not combined with it such as to form a larger program, in or on a volume of a storage or distribution medium, is called an "aggregate" if the compilation and its resulting copyright are not used to limit the access or legal rights of the compilation's users beyond what the individual works permit. Inclusion of a covered work in an aggregate does not cause this License to apply to the other parts of the aggregate. 6. Conveying Non-Source Forms. Intel® Industrial Solutions System Consolidation Series User’s Guide for v. 1.0b SCS 111K Document #550658-1.0 111 Workflow 2: Develop With Preloaded Workbench Projects You may convey a covered work in object code form under the terms of sections 4 and 5, provided that you also convey the machine-readable Corresponding Source under the terms of this License, in one of these ways: a) Convey the object code in, or embodied in, a physical product (including a physical distribution medium), accompanied by the Corresponding Source fixed on a durable physical medium customarily used for software interchange. b) Convey the object code in, or embodied in, a physical product (including a physical distribution medium), accompanied by a written offer, valid for at least three years and valid for as long as you offer spare parts or customer support for that product model, to give anyone who possesses the object code either (1) a copy of the Corresponding Source for all the software in the product that is covered by this License, on a durable physical medium customarily used for software interchange, for a price no more than your reasonable cost of physically performing this conveying of source, or (2) access to copy the Corresponding Source from a network server at no charge. c) Convey individual copies of the object code with a copy of the written offer to provide the Corresponding Source. This alternative is allowed only occasionally and noncommercially, and only if you received the object code with such an offer, in accord with subsection 6b. d) Convey the object code by offering access from a designated place (gratis or for a charge), and offer equivalent access to the Corresponding Source in the same way through the same place at no further charge. You need not require recipients to copy the Corresponding Source along with the object code. If the place to copy the object code is a network server, the Corresponding Source may be on a different server (operated by you or a third party) that supports equivalent copying facilities, provided you maintain clear directions next to the object code saying where to find the Corresponding Source. Regardless of what server hosts the Corresponding Source, you remain obligated to ensure that it is available for as long as needed to satisfy these requirements. e) Convey the object code using peer-to-peer transmission, provided you inform other peers where the object code and Corresponding Source of the work are being offered to the general public at no charge under subsection 6d. A separable portion of the object code, whose source code is excluded from the Corresponding Source as a System Library, need not be included in conveying the object code work. A "User Product" is either (1) a "consumer product", which means any tangible personal property which is normally used for personal, family, or household purposes, or (2) anything designed or sold for incorporation into a dwelling. In determining whether a product is a consumer product, doubtful cases shall be resolved in favor of coverage. For a particular product received by a particular user, "normally used" refers to a typical or common use of that class of product, regardless of the status of the particular user or of the way in which the particular user actually uses, or expects or is expected to use, the product. A product is a consumer product regardless of whether the product has substantial commercial, industrial or non-consumer uses, unless such uses represent the only significant mode of use of the product. "Installation Information" for a User Product means any methods, procedures, authorization keys, or other information required to install and execute modified Intel® Industrial Solutions System Consolidation Series User’s Guide for v. 1.0b SCS 111K Document #550658-1.0 112 Workflow 2: Develop With Preloaded Workbench Projects versions of a covered work in that User Product from a modified version of its Corresponding Source. The information must suffice to ensure that the continued functioning of the modified object code is in no case prevented or interfered with solely because modification has been made. If you convey an object code work under this section in, or with, or specifically for use in, a User Product, and the conveying occurs as part of a transaction in which the right of possession and use of the User Product is transferred to the recipient in perpetuity or for a fixed term (regardless of how the transaction is characterized), the Corresponding Source conveyed under this section must be accompanied by the Installation Information. But this requirement does not apply if neither you nor any third party retains the ability to install modified object code on the User Product (for example, the work has been installed in ROM). The requirement to provide Installation Information does not include a requirement to continue to provide support service, warranty, or updates for a work that has been modified or installed by the recipient, or for the User Product in which it has been modified or installed. Access to a network may be denied when the modification itself materially and adversely affects the operation of the network or violates the rules and protocols for communication across the network. Corresponding Source conveyed, and Installation Information provided, in accord with this section must be in a format that is publicly documented (and with an implementation available to the public in source code form), and must require no special password or key for unpacking, reading or copying. 7. Additional Terms. "Additional permissions" are terms that supplement the terms of this License by making exceptions from one or more of its conditions. Additional permissions that are applicable to the entire Program shall be treated as though they were included in this License, to the extent that they are valid under applicable law. If additional permissions apply only to part of the Program, that part may be used separately under those permissions, but the entire Program remains governed by this License without regard to the additional permissions. When you convey a copy of a covered work, you may at your option remove any additional permissions from that copy, or from any part of it. (Additional permissions may be written to require their own removal in certain cases when you modify the work.) You may place additional permissions on material, added by you to a covered work, for which you have or can give appropriate copyright permission. Notwithstanding any other provision of this License, for material you add to a covered work, you may (if authorized by the copyright holders of that material) supplement the terms of this License with terms: a) Disclaiming warranty or limiting liability differently from the terms of sections 15 and 16 of this License; or b) Requiring preservation of specified reasonable legal notices or author attributions in that material or in the Appropriate Legal Notices displayed by works containing it; or c) Prohibiting misrepresentation of the origin of that material, or requiring that modified versions of such material be marked in reasonable ways as different from the original version; or Intel® Industrial Solutions System Consolidation Series User’s Guide for v. 1.0b SCS 111K Document #550658-1.0 113 Workflow 2: Develop With Preloaded Workbench Projects d) Limiting the use for publicity purposes of names of licensors or authors of the material; or e) Declining to grant rights under trademark law for use of some trade names, trademarks, or service marks; or f) Requiring indemnification of licensors and authors of that material by anyone who conveys the material (or modified versions of it) with contractual assumptions of liability to the recipient, for any liability that these contractual assumptions directly impose on those licensors and authors. All other non-permissive additional terms are considered "further restrictions" within the meaning of section 10. If the Program as you received it, or any part of it, contains a notice stating that it is governed by this License along with a term that is a further restriction, you may remove that term. If a license document contains a further restriction but permits relicensing or conveying under this License, you may add to a covered work material governed by the terms of that license document, provided that the further restriction does not survive such relicensing or conveying. If you add terms to a covered work in accord with this section, you must place, in the relevant source files, a statement of the additional terms that apply to those files, or a notice indicating where to find the applicable terms. Additional terms, permissive or non-permissive, may be stated in the form of a separately written license, or stated as exceptions; the above requirements apply either way. 8. Termination. You may not propagate or modify a covered work except as expressly provided under this License. Any attempt otherwise to propagate or modify it is void, and will automatically terminate your rights under this License (including any patent licenses granted under the third paragraph of section 11). However, if you cease all violation of this License, then your license from a particular copyright holder is reinstated (a) provisionally, unless and until the copyright holder explicitly and finally terminates your license, and (b) permanently, if the copyright holder fails to notify you of the violation by some reasonable means prior to 60 days after the cessation. Moreover, your license from a particular copyright holder is reinstated permanently if the copyright holder notifies you of the violation by some reasonable means, this is the first time you have received notice of violation of this License (for any work) from that copyright holder, and you cure the violation prior to 30 days after your receipt of the notice. Termination of your rights under this section does not terminate the licenses of parties who have received copies or rights from you under this License. If your rights have been terminated and not permanently reinstated, you do not qualify to receive new licenses for the same material under section 10. 9. Acceptance Not Required for Having Copies. You are not required to accept this License in order to receive or run a copy of the Program. Ancillary propagation of a covered work occurring solely as a consequence of using peer-to-peer transmission to receive a copy likewise does not require Intel® Industrial Solutions System Consolidation Series User’s Guide for v. 1.0b SCS 111K Document #550658-1.0 114 Workflow 2: Develop With Preloaded Workbench Projects acceptance. However, nothing other than this License grants you permission to propagate or modify any covered work. These actions infringe copyright if you do not accept this License. Therefore, by modifying or propagating a covered work, you indicate your acceptance of this License to do so. 10. Automatic Licensing of Downstream Recipients. Each time you convey a covered work, the recipient automatically receives a license from the original licensors, to run, modify and propagate that work, subject to this License. You are not responsible for enforcing compliance by third parties with this License. An "entity transaction" is a transaction transferring control of an organization, or substantially all assets of one, or subdividing an organization, or merging organizations. If propagation of a covered work results from an entity transaction, each party to that transaction who receives a copy of the work also receives whatever licenses to the work the party's predecessor in interest had or could give under the previous paragraph, plus a right to possession of the Corresponding Source of the work from the predecessor in interest, if the predecessor has it or can get it with reasonable efforts. You may not impose any further restrictions on the exercise of the rights granted or affirmed under this License. For example, you may not impose a license fee, royalty, or other charge for exercise of rights granted under this License, and you may not initiate litigation (including a cross-claim or counterclaim in a lawsuit) alleging that any patent claim is infringed by making, using, selling, offering for sale, or importing the Program or any portion of it. 11. Patents. A "contributor" is a copyright holder who authorizes use under this License of the Program or a work on which the Program is based. The work thus licensed is called the contributor's "contributor version". A contributor's "essential patent claims" are all patent claims owned or controlled by the contributor, whether already acquired or hereafter acquired, that would be infringed by some manner, permitted by this License, of making, using, or selling its contributor version, but do not include claims that would be infringed only as a consequence of further modification of the contributor version. For purposes of this definition, "control" includes the right to grant patent sublicenses in a manner consistent with the requirements of this License. Each contributor grants you a non-exclusive, worldwide, royalty-free patent license under the contributor's essential patent claims, to make, use, sell, offer for sale, import and otherwise run, modify and propagate the contents of its contributor version. In the following three paragraphs, a "patent license" is any express agreement or commitment, however denominated, not to enforce a patent (such as an express permission to practice a patent or covenant not to sue for patent infringement). To "grant" such a patent license to a party means to make such an agreement or commitment not to enforce a patent against the party. If you convey a covered work, knowingly relying on a patent license, and the Corresponding Source of the work is not available for anyone to copy, free of charge and under the terms of this License, through a publicly available network server or Intel® Industrial Solutions System Consolidation Series User’s Guide for v. 1.0b SCS 111K Document #550658-1.0 115 Workflow 2: Develop With Preloaded Workbench Projects other readily accessible means, then you must either (1) cause the Corresponding Source to be so available, or (2) arrange to deprive yourself of the benefit of the patent license for this particular work, or (3) arrange, in a manner consistent with the requirements of this License, to extend the patent license to downstream recipients. "Knowingly relying" means you have actual knowledge that, but for the patent license, your conveying the covered work in a country, or your recipient's use of the covered work in a country, would infringe one or more identifiable patents in that country that you have reason to believe are valid. If, pursuant to or in connection with a single transaction or arrangement, you convey, or propagate by procuring conveyance of, a covered work, and grant a patent license to some of the parties receiving the covered work authorizing them to use, propagate, modify or convey a specific copy of the covered work, then the patent license you grant is automatically extended to all recipients of the covered work and works based on it. A patent license is "discriminatory" if it does not include within the scope of its coverage, prohibits the exercise of, or is conditioned on the non-exercise of one or more of the rights that are specifically granted under this License. You may not convey a covered work if you are a party to an arrangement with a third party that is in the business of distributing software, under which you make payment to the third party based on the extent of your activity of conveying the work, and under which the third party grants, to any of the parties who would receive the covered work from you, a discriminatory patent license (a) in connection with copies of the covered work conveyed by you (or copies made from those copies), or (b) primarily for and in connection with specific products or compilations that contain the covered work, unless you entered into that arrangement, or that patent license was granted, prior to 28 March 2007. Nothing in this License shall be construed as excluding or limiting any implied license or other defenses to infringement that may otherwise be available to you under applicable patent law. 12. No Surrender of Others' Freedom. If conditions are imposed on you (whether by court order, agreement or otherwise) that contradict the conditions of this License, they do not excuse you from the conditions of this License. If you cannot convey a covered work so as to satisfy simultaneously your obligations under this License and any other pertinent obligations, then as a consequence you may not convey it at all. For example, if you agree to terms that obligate you to collect a royalty for further conveying from those to whom you convey the Program, the only way you could satisfy both those terms and this License would be to refrain entirely from conveying the Program. 13. Use with the GNU Affero General Public License. Notwithstanding any other provision of this License, you have permission to link or combine any covered work with a work licensed under version 3 of the GNU Affero General Public License into a single combined work, and to convey the resulting work. The terms of this License will continue to apply to the part which is the covered work, but the special requirements of the GNU Affero General Public License, section 13, concerning interaction through a network will apply to the combination as such. 14. Revised Versions of this License. Intel® Industrial Solutions System Consolidation Series User’s Guide for v. 1.0b SCS 111K Document #550658-1.0 116 Workflow 2: Develop With Preloaded Workbench Projects The Free Software Foundation may publish revised and/or new versions of the GNU General Public License from time to time. Such new versions will be similar in spirit to the present version, but may differ in detail to address new problems or concerns. Each version is given a distinguishing version number. If the Program specifies that a certain numbered version of the GNU General Public License "or any later version" applies to it, you have the option of following the terms and conditions either of that numbered version or of any later version published by the Free Software Foundation. If the Program does not specify a version number of the GNU General Public License, you may choose any version ever published by the Free Software Foundation. If the Program specifies that a proxy can decide which future versions of the GNU General Public License can be used, that proxy's public statement of acceptance of a version permanently authorizes you to choose that version for the Program. Later license versions may give you additional or different permissions. However, no additional obligations are imposed on any author or copyright holder as a result of your choosing to follow a later version. 15. Disclaimer of Warranty. THERE IS NO WARRANTY FOR THE PROGRAM, TO THE EXTENT PERMITTED BY APPLICABLE LAW. EXCEPT WHEN OTHERWISE STATED IN WRITING THE COPYRIGHT HOLDERS AND/OR OTHER PARTIES PROVIDE THE PROGRAM "AS IS" WITHOUT WARRANTY OF ANY KIND, EITHER EXPRESSED OR IMPLIED, INCLUDING, BUT NOT LIMITED TO, THE IMPLIED WARRANTIES OF MERCHANTABILITY AND FITNESS FOR A PARTICULAR PURPOSE. THE ENTIRE RISK AS TO THE QUALITY AND PERFORMANCE OF THE PROGRAM IS WITH YOU. SHOULD THE PROGRAM PROVE DEFECTIVE, YOU ASSUME THE COST OF ALL NECESSARY SERVICING, REPAIR OR CORRECTION. 16. Limitation of Liability. IN NO EVENT UNLESS REQUIRED BY APPLICABLE LAW OR AGREED TO IN WRITING WILL ANY COPYRIGHT HOLDER, OR ANY OTHER PARTY WHO MODIFIES AND/OR CONVEYS THE PROGRAM AS PERMITTED ABOVE, BE LIABLE TO YOU FOR DAMAGES, INCLUDING ANY GENERAL, SPECIAL, INCIDENTAL OR CONSEQUENTIAL DAMAGES ARISING OUT OF THE USE OR INABILITY TO USE THE PROGRAM (INCLUDING BUT NOT LIMITED TO LOSS OF DATA OR DATA BEING RENDERED INACCURATE OR LOSSES SUSTAINED BY YOU OR THIRD PARTIES OR A FAILURE OF THE PROGRAM TO OPERATE WITH ANY OTHER PROGRAMS), EVEN IF SUCH HOLDER OR OTHER PARTY HAS BEEN ADVISED OF THE POSSIBILITY OF SUCH DAMAGES. 17. Interpretation of Sections 15 and 16. If the disclaimer of warranty and limitation of liability provided above cannot be given local legal effect according to their terms, reviewing courts shall apply local law that most closely approximates an absolute waiver of all civil liability in connection with the Program, unless a warranty or assumption of liability accompanies a copy of the Program in return for a fee. END OF TERMS AND CONDITIONS How to Apply These Terms to Your New Programs Intel® Industrial Solutions System Consolidation Series User’s Guide for v. 1.0b SCS 111K Document #550658-1.0 117 Workflow 2: Develop With Preloaded Workbench Projects If you develop a new program, and you want it to be of the greatest possible use to the public, the best way to achieve this is to make it free software which everyone can redistribute and change under these terms. To do so, attach the following notices to the program. It is safest to attach them to the start of each source file to most effectively state the exclusion of warranty; and each file should have at least the "copyright" line and a pointer to where the full notice is found. <one line to give the program's name and a brief idea of what it does.> Copyright (C) <year> <name of author> This program is free software: you can redistribute it and/or modify it under the terms of the GNU General Public License as published by the Free Software Foundation, either version 3 of the License, or (at your option) any later version. This program is distributed in the hope that it will be useful, but WITHOUT ANY WARRANTY; without even the implied warranty of MERCHANTABILITY or FITNESS FOR A PARTICULAR PURPOSE. See the GNU General Public License for more details. You should have received a copy of the GNU General Public License along with this program. If not, see <http://www.gnu.org/licenses/>. Also add information on how to contact you by electronic and paper mail. If the program does terminal interaction, make it output a short notice like this when it starts in an interactive mode: <program> Copyright (C) <year> <name of author> This program comes with ABSOLUTELY NO WARRANTY; for details type `show w'. This is free software, and you are welcome to redistribute it under certain conditions; type `show c' for details. The hypothetical commands `show w' and `show c' should show the appropriate parts of the General Public License. Of course, your program's commands might be different; for a GUI interface, you would use an "about box". You should also get your employer (if you work as a programmer) or school, if any, to sign a "copyright disclaimer" for the program, if necessary. For more information on this, and how to apply and follow the GNU GPL, see <http://www.gnu.org/licenses/>. The GNU General Public License does not permit incorporating your program into proprietary programs. If your program is a subroutine library, you may consider it more useful to permit linking proprietary applications with the library. If this is what you want to do, use the GNU Lesser General Public License instead of this License. But first, please read <http://www.gnu.org/philosophy/why-not-lgpl.html> § Intel® Industrial Solutions System Consolidation Series User’s Guide for v. 1.0b SCS 111K Document #550658-1.0 118