1
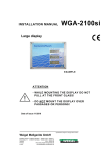
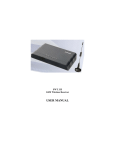
INSTALLATION MANUAL
WGA-330
Large display
EXAMPLE
Date of issue 11/2010
- specifications subject to change without notice -
Weigel Meßgeräte GmbH
Postfach 720154 D-90241 Nürnberg Telefon: 0911 / 42347-0
Erlenstraße 14
D-90441 Nürnberg Telefax: 0911 / 42347-39
Vertrieb:
0911 / 42347-94
Internet:
http//:www.weigel-messgeraete.de
e-mail:
[email protected]
WGA-330 V1.04_e
Please read before use!
This unit exists out of sensitive electronic parts and is therefore to protect from shock influence and
sudden climate variations.
Be careful with the large display and don‘t push at the housing.
We have tried to make this manual complete and correct. If you find any mistakes please inform
us.
We don't take any responsibility, guarantee or warranty if you don’t use the large display in the
recommended way.
All trademarks, into this document cover is taken, is property of the corresponding owner.
Use only original-parts, especially for the power supply unit. Separate the power supply unit from
the net if you have finished work with the large display. Power supply only for indoor use!
Protect from high humidity (condensation) and high temperature. Only for indoor use!
Introduction
Congratulation for your decision in purchased this large display.
Please read this manual before use. We wish you good success with your new display.
Please contact us if you have any questions or you don’t know exactly how to use the display.
2
WGA-330 V1.04_e
Content
Page
1
Mounting the large display
4
2
General connection description
5
2.1
Connecting the display to an energy meter with impulse output
6
2.2
Connecting the display to a Sunny Boy Control via RS-232
7
2.3
Connecting the display to a Sunny Boy Control via RS-485
8
2.4
Connecting the display to a Fronius Display Card/Box
9
2.5
Connecting the display to a MaxComm Basic
2.6
Connecting the display to Power One Aurora inverters via RS-485 11
3
Configure the display with the key
12
4
Technical data
14
3
10
WGA-330 V1.04_e
1 Mounting the large display
Warning:
Improper use and mounting of the large display can cause serious injuries to
personnel and damage to the display.
The large display is designed to mounting on a wall or similar. The connection of the display is
described at chapter 2 of this manual.
The large display is only for indoor use!
Important: The large display must be mounted with screws and dowels that fit to the underground
of the wall.
Screws for upper housing profile
Upper housing
profile
Hole for
wires
Hole for
mounting
Hole for mounting
1
Connectors
2
3
Key for
configuration
To open the housing of the large display unscrews the upper two screws in the upper housing
profile. Remove the upper housing profile and carefully remove the front cover by pulling out to the
upper side.
Now the mounting holes and the electrical connectors are accessible.
After mounting the large display on the wall the electrical connection is done like described below.
4
WGA-330 V1.04_e
2 General connection description
Warning:
Incorrect connection of the large display can cause serious injuries to
personnel and damage to the display.
Especially never connect the display directly to the 230 VAC grid!
After mounting the display must be connected to the power supply unit and the device who gives
the data to the display (data source).
The large display provides different inputs:
- Impulse input for potential free close contacts of energy meters.
- RS-232 interface
- RS-485 interface
Below the connections are described but please only use the description for the data source
you want to use!
Connectors and pin definition
Connector
Function
Definition
1
2
3
1
Power supply
Pin 1: 0 V (–)
Pin 2: not used
Pin 3: + 7.5 VDC; 0.3 A
1
2
3
4
2
RS-232 interface
Pin 1:
Pin 2:
Pin 3:
Pin 4:
RxD
GND
TxD
DTR
1
2
3
4
3
RS-485 interface
Pin 1:
Pin 2:
Pin 3:
Pin 4:
Data+
Data–
Impulse +
Impulse –
Impulse input
(potential free close contact)
Connecting the power supply unit
At connector 1 the DC output (free wires) of the delivered power supply unit is connected. If you
have to lengthen the cable please use cable with about 0.75 mm2 cross-section.
Please take care of the polarity.
After connecting the power supply unit and the data source (see below) to the large display the
power supply unit must plugged into a 230 VAC plug.
Please note that the power supply unit is only for indoor use.
5
WGA-330 V1.04_e
2.1 Connecting the display to an energy meter with impulse output
At connector 3 the impulse output (potential free close contact) of the energy meter is connected
by using a shielded cable.
Pin 3 (Impulse +) of the display is connected to Impulse + of the energy meter.
Pin 4 (Impulse –) of the display is connected to Impulse – of the energy meter.
The shield of the cable must be connected to 0 V (connector 1 pin 1) of the large display only.
On the side of the energy meter the shield must be unconnected.
The maximum possible cable length is about 100 meters.
Connection scheme
Display connector
Energy meter
(Example)
Power
supply
unit
Shield
(–) (+)
6
–
+
1
2
3
Connector 1
1
2
3
4
Connector 2
1
2
3
4
Connector 3
WGA-330 V1.04_e
2.2 Connecting the display to a Sunny Boy Control via RS-232
At connector 2 the Sunny Boy Control is connected via a shielded data cable.
Pin 1 (RxD) of the display is connected to Pin 3 (TxD) of COM 2/3 of the Sunny Boy Control.
Pin 2 (GND) of the display is connected to Pin 5 (GND) of COM 2/3 of the Sunny Boy Control.
The shield of the cable must be connected to 0 V (socket 1 pin 1) of the display only.
The maximum possible cable length is 15 meters.
Important note:
The Sunny Boy Control must be configured for using with the large display.
Necessary settings:
Protocol:
HvG
(Baud rate:
2400)
(further details see user manual Sunny Boy Control part ‚connections’ headword ‚large display’ and
headword ‚communication’)
Connection scheme
Display connector
Power
supply
unit
Sunny Boy
Control
Shield
COM2/3
(RS-232)
–
+
1
2
3
Connector 1
1
2
3
4
Connector 2
1
2
3
4
Connector 3
max. 15 meters
7
WGA-330 V1.04_e
2.3 Connecting the display to a Sunny Boy Control via RS-485
At connector 2 the Sunny Boy Control is connected via a shielded data cable.
Pin 1 (Data+) of the display is connected to Pin 3 (Data+) of COM 2/3 of the Sunny Boy Control.
Pin 2 (Data–) of the display is connected to Pin 8 (Data–) of COM 2/3 of the Sunny Boy Control.
The shield of the cable must be connected to 0 V (socket 1 pin 1) of the display only.
Important note:
The Sunny Boy Control must have a RS-485 interface (Piggy-Back) at COM2/3.
The Sunny Boy Control must be configured for using with the large display.
Necessary settings:
Protocol:
HvG
(Baud rate:
2400)
(further details see user manual Sunny Boy Control part ‚connections’ headword ‚large display’ and
headword ‚communication’)
Connection scheme
Display connector
Power
supply
unit
Shield
Sunny Boy
Control
COM2/3
(RS-485)
8
–
+
1
2
3
Connector 1
1
2
3
4
Connector 2
1
2
3
4
Connector 3
WGA-330 V1.04_e
2.4 Connecting the display to a Fronius Display Card/Box
At connector 2 the Fronius Display Card/Box is connected by using a shielded cable.
Pin 1 (RxD) of the display is connected to Pin 3 (TxD) of the Fronius Display Card/Box.
Pin 2 (GND) of the display is connected to Pin 5 (GND) of the Fronius Display Card/Box.
Pin 3 (TxD) of the display is connected to Pin 2 (RxD) of the Fronius Display Card/Box.
The shield of the cable must be connected to 0 V (connector 1 pin 1) of the large display only.
At the side of the Display Card/Box the shield must be unconnected.
The maximum possible cable length is 15 meters.
Connection scheme
Display connector
Power
supply
unit
Display Card/Box
Shield
Display
(RS-232)
max. 15 meters
9
–
+
1
2
3
Connector 1
1
2
3
4
Connector 2
1
2
3
4
Connector 3
WGA-330 V1.04_e
2.5 Connecting the display to a Sputnik MaxComm Basic via RS-485
At connector 3 the display is connected to the RS-485 network with MaxComm Basic and
inverter(s) via a shielded cable.
Pin 1 (Data+) of the display must be connected to Bus A of the RS-485 network.
Pin 2 (Data–) of the display must be connected to Bus B of the RS-485 network.
The shield of the cable must be connected to 0 V (connector 1 pin 1) of the display only.
At the side of the network the shield must be unconnected.
Hint: MaxComm Basic must have MaxDisplay 1.0 option!
Connection scheme
Display connector
Power
supply
unit
Shield
10
–
+
1
2
3
Connector 1
1
2
3
4
Connector 2
1
2
3
4
Connector 3
WGA-330 V1.04_e
2.6 Connecting the display to Power One Aurora inverter(s) via RS-485
At connector 3 the display is connected to the RS-485 network of the Power One Aurora
inverter(s) via a shielded cable.
Pin 1 (Data+) of the display must be connected to +T/R (RS485 clamp 2) of the inverter(s).
Pin 2 (Data–) of the display must be connected to –T/R (RS485 clamp 3) of the inverter(s).
The shield of the cable must be connected to 0 V (connector 1 pin 1) of the display only.
At the side of the network the shield must be unconnected.
Important hint: In difference to the manual of the Power One Aurora inverters
ALL Termin-switches S1 must be in position 'OFF'!
Please also note the manual of the Power One Aurora inverters.
Connection scheme
Display connector
Power
supply
unit
Aurora WR #1
Shield
Aurora WR #2
Aurora WR #3
11
–
+
1
2
3
Connector 1
1
2
3
4
Connector 2
1
2
3
4
Connector 3
WGA-330 V1.04_e
3 Configure the display with the key
After mounting and connecting, the display had to be configured.
The display is preconfigured but it may be necessary to do some adjustments to fit to the local
situation.
The following settings can be done:
- data source (from where the display get the data to show)
If the data source is an energy meter with impulse output there are two additional settings:
- Starting value of the total energy (kWh)
- Impulse rate of the energy meter (Impulse per kWh)
The configuration is done with the key on the connection circuit board shown at the picture on
page 4.
The duration of pressing the key decide the reaction of the display:
Short
key press
Long
key press
Duration
< 1 second
Reaction
Value of the changeable
position is incremented by 1
Remark
The increment appears after
releasing the key
> 1,5 second
The changeable position
jumps to the next left
position or
save settings
Press key until the decimal point
jumps to the next left position
or
display jumps to the next value
Configuration
a) While powering up the display press the configuration key:
’CFG’ appears in the upper display line.
b) After releasing the key ’SrC’ appears in the upper display line.
c) In the second display line appears the number of the current configured data source.
Now the needed data source can be configured:
(Assignment of number to data source see table below)
- Short key press
Important:
Î the displayed number increases by 1
The value of the number changes after releasing the key!
Hint: The value jumps after 9 back to 0.
- Long key press
Important:
Î the selected data source will be saved
press key until the display makes a display test in all display lines or
’Strt’ appears in the upper display line!
12
WGA-330 V1.04_e
The numbers in the second display line correspond to the following data sources:
0: Energy meter with impulse output
1: Sunny Boy Control RS-232
2: Sunny Boy Control RS-485
3: MaxComm Basic RS-485
4: Fronius DisplayCard/Box RS-232
5: RiCo RS-232
6: RiCo RS-485
7: CV 485
8: Power One Aurora inverter RS-485
9: Solutronic inverter RS-232
d) If energy meter with impulse output is selected as data source the starting value of the total
energy (kWh) can be configured.
At all other data sources the configuration is now finished.
e) At energy meter with impulse output as data source now ’Strt’ appears in the upper
display line. Now the starting value of the total energy can be adjusted:
- Short key press
Important:
Î the value of the changeable position increases by 1
(starting in the right position)
The value of the number changes after releasing the key!
Hint: The value jumps after 9 back to 0.
- Long key press
Important:
Î the decimal point jumps to the next left position and the
next position can be adjusted.
Exception: At the first right position no decimal point
appears.
Press key until decimal point jumps to the next left position!
There must all 6 positions be adjusted otherwise the value will not be saved.
f)
After adjusting all positions of the starting value press the key long again until ’PULS’
appears in the upper display line. Now the adjustment of the impulses per kWh can be
done.
The adjustment of the impulses per kWh is similar to the starting value of the total energy.
There must all 5 positions be adjusted otherwise the value will not be saved.
g) After another long key press the adjustments will be saved and the display starts the
normal measuring mode recognizable by a segment test in all display lines.
13
WGA-330 V1.04_e
4 Technical data
number of values
display units
dimension
3
7-segment LED display with 20 mm digits
red hyper bright
Depends on your order
Standard:
Watt 4 digits
kWh 6 digits
kg 6 digits
ca. 397 x 295 x 42 mm3
material
alloy
business temp
+ 5 ... + 40 °C
storage and transport. temp.
- 20 ... + 60 °C
data source
- Impulse meters (potential free contact)
- SMA-Control, Control Light and Control Plus
- Sputnik MaxComm Basic
- Fronius Display Card/Box
- CV485
- Power One Aurora inverter
- Solutronic inverter
- others on request
external power supply unit
Input: 230 VAC
Output to large display 7.5 VDC
Never connect more than 12 VDC direct to the large display!
resolution
power supply
warranty
2 years
Norm
CE, EN 61326-1
Changes in every kind possible, printed mistakes possible.
14