Transcript
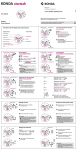
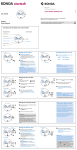
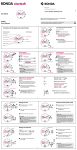
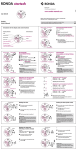
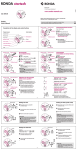
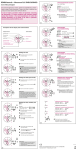
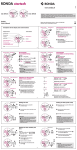
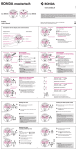
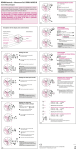
65,5% = 40mm Druchmesser www.ronda-startech.com 60 30 Cal. 5030.D 20 45 10 10 8 12 6 15 30 2 21 4 Battery type: 395 (diameter 9.5mm x 2.6mm / SR 927 SW) Accuracy: +20 / -10 seconds per month English User’s Manual In case your watch needs to be repaired or to raise claims under a guarantee, please contact the point of sales Minute counter Description of the display and control buttons (Start / Stop / Reset) Control buttons 20 45 10 Second hand 10 8 Minute hand Push button A Hour hand 20 Centre stop-second 10 Minute counter 45 10 8 12 6 15 21 2 Push button B 4 6 button A once more and read the three chronograph hands: 1h / 20min / 10 sec. 45 10 10 Date 8 15 30 12 21 2 4 6 � Chronograph: Accumulated timing 60 30 20 45 10 10 8 15 21 2 4 6 10 8 = 28 min 10 sec Hour counter � � 45 10 Chronograph: Intermediate or interval timing Push-button A 60 30 20 � Stop: (e.g. 15 min 5 sec following �) � Restart: (timing is resumed) �* Stop: (e.g. 13 min 5 sec following �) 30 12 Push-button B Minute counter Example: � Start: (start timing) Press push-button B. (The three chronograph hands will be reset to their zero positions). 60 30 20 � � � � � Stop: to stop the timing, press push- 4 � Zero positioning: 21 Hour counter Minute counter Push-button A � Start: Press push-button A. 30 12 Crown 30 2 Example: 15 Hour counter 60 30 � � 60 30 Display elements Chronograph: Basic function Push-button A Example: � Start: (start timing) � Display interval: e.g. 10 minutes 10 seconds (timing continues in the background) *� Making up the measured time: (the 3 chronograph hands are quickly advanced to the ongoing measured time). � Stop: (Final time is displayed) � Reset: The 3 chronograph hands are returned to their zero position 15 30 12 21 2 � � 4 6 Hour counter Push-button B (The accumulated measured time is shown) � Reset: The three chronograph hands are returned to their zero positions. 60 30 20 45 10 10 12 8 15 Please note: * Following �, the accumulation of the timing can be continued by pressing pushbutton A (Restart / Stop, Restart / Stop, …) 30 21 2 4 6 � Push-button B Minute counter 45 10 10 8 15 30 12 I 21 2 II III 4 6 10 8 4 6 � 15 30 12 � I � � 60 30 45 10 20 I 21 II 45 10 III 10 � Turn the crown until you reach the correct 4 6 Termination of the chronograph hands adjustment (can be carried out at any time). � 60 30 (the watch stops). 15 2 III Setting the date (quick mode) �* Pull out the crown to position III 30 12 II Setting the time � 8 � Adjusting the minute counter hand (position 9h) 1 x short Single step A Continuous A long � Returning the crown to position I Second hand 10 � A 4 6 Adjusting the hour counter hand (position 6h) Single step 1 x short A long Continuous A Adjusting the next hand B B � III 21 2 Push-button B 20 � A simultaneously for at least 2 seconds (the centre stop-second rotates by 360° � corrective mode is activated). � 60 45 Adjusting the centre stop second Single step 1 x short A Continuous A long Adjusting the next hand B B chronograph hands are in their correct or incorrect zero position). 30 10 � A � Keep push-buttons A and B depressed 8 � Push-button B Push-button A 10 Please note: * Following �, further intervals or intermediates can be displayed by pressing push-button B (display interval / make up measured time, ...) 21 2 � Pull out the crown to position III (all 3 Hour counter 20 15 30 12 Example: One or several chronograph hands are not in their correct zero positions and have to be adjusted (e.g. following a battery change). 60 30 45 10 Adjusting the chronograph hands to zero position Center stop-second � 20 60 30 20 8 time 8:45. � Pull out the crown to position II (the watch � continues to run). 15 30 12 31 2 I II � Turn the crown until the correct 4 6 date 1 appears. �* Push the crown back into position I. 20 � 60 30 45 10 10 8 15 30 12 I 21 2 II III 4 6 20 � 60 45 10 10 8 12 6 17 I 45 10 10 8 II Date 1 2 I Please note: During the date changing phase between 9 PM and 12 PM; the date must be set to the date of the following day. II 4 6 Second hand � 60 30 20 45 10 10 � Pull out the crown to position II 4 � 15 30 12 Example: – Date / time on the watch: 17 / 1:25 AM 4 / 8:30 PM – Present date / time: 15 30 2 20 Setting the date/time following a battery change Crown 30 Please note: * In order to set the time to the exact second, � must be pulled out when the second hand is in position «60» (I). Once the hour and minute hands have been set, � must be pushed back into position I at the exact second. � Push the crown back into position I. 60 30 8 (the watch continues to run). 12 6 �**Pull out the crown to position III � (the watch stops). 15 30 3 2 I II �**Turn the crown until the correct date III 4 4 appears. �**Continue to turn the crown until the correct time 8:30 PM appears. �**Push the crown back into position I. � Turn the crown until yesterday’s date 60 30 20 45 10 10 8 12 6 � 15 � appears 3 . 20 30 2 3 I II 8 45 10 10 4 � � 60 30 12 6 15 30 2 4 4 I II III � Please note: **To set your watch to the exact second, please refer to the chapter entitled «setting the time». **Please observe the AM/PM clock rhythm. 11 / 2008 Ronda AG CH-4415 Lausen/Switzerland