1
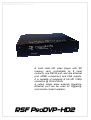
ProDVP-HD User Manual
RSF Eur ope
P
r o
DA P
ProDVP- H D II
USER MANUAL
ProDVP-HD User Manual
A solid state HD video player with SD
memory card, controllable by 8 input
contacts, one RS232 port, and one ethernet
port. HDMI, component, and VGA outputs.
It is capable of playback at full HD 1080p
resolution @ 50 and 60Hz.
4 output relays allow external triggering.
Ethernet port can be used for triggering,
and remote content updates.
RSF ProDVP-HD2
ProDVP-HD User Manual
Ta b l e o f c o n t e n t s
1.
Configuration
Page 3
2. Basic functionality
Page 4
3. Input contacts
Page 5
4. Output relays
Page 6
5. Control via RS232 and Ethernet
6. Remote content updates
7. RS232 and Ethernet protocol
Page 6
Page 7
Page 8
8. Update procedures
Page 10
9. Encoding parameters
Page 10
10. Additional notes
Page 10
Chapter 1
Configuration
At startup the ProDVP-HD analyses the file ProDVP-HD2ini.dvp and configures the internal electronics
according to the output combinations required.
This internal configuration can take multiple resets to take effect - please be patient! Once the configuration has been set, it is retained until next changed by the ProDVP-HD2ini.dvp file.
The ProDVP-HD2ini.dvp file can be changed in notepad or any basic text editor.
The key fields in the ProDVP-HD2ini.dvp file are essential for the operation of the ProDVP-HDII. They
should not be modified.
The modification number (ModifNum) can be changed to differentiate between different configurations.
To add a remark, insert a semicolon (;) before the remark.
The different variables adjustable in the ProDVP-HD2ini.dvp file are:
ProDVP-HD User Manual
Basic functionality:
[LoopFile]
[TimerLoopFile]
[TimerLoopReadingMode]
[ReadingMode]
Video configuration :
[VideoOut]
[ViewMode]
[ResolutionMode]
[Resolution]
Images :
[ImagesTransitionMode]
[ImagesMode]
Audio configuration:
[AudioOutput]
[AudioMode]
[Volumes]
[VolumesSave]
Content update and media server configuration:
[TestUpdateContain]
[TestUpdateFrequency]
[ServerURL]
Touchscreen :
[TouchScreen]
Relay configuration :
[IN_OUT]
[Relay]
[RelayDuration]
[LastInputMemorised]
Ethernet and UDP configuration:
[Ethernet]
[EthernetAddr]
[UDP]
Chapter 2
Basic Functionality
At startup, if a file is specified in [LoopFile], the file indicated will play in a continuous loop. It can be interrupted by any clip, and will be reverted to at the end of the selected clip.
Clips can either be started by contact closures, UDP Ethernet codes, or RS232 serial codes. More details
are provided later in this manual.
If [ReadingMode] = Continuous, the clip can only be stopped by a STOP command
If [ReadingMode] = Breakable, the clip can be stopped by starting another clip (the clip itself can also be
restarted)
Clips 1 thru 4 can control the relay outputs (see subsequent chapters for details)
The ProDVP-HDII can access a remote server for content updates. More details are provided later.
Suported Files:
MPEG2-PS in mpg container at 19Mb/s
MPEG2-TS in ts container at 25 to 35Mb/S
H.264/AVC in ts container at 15 to 30Mb/s or in mp4 and mov container at 10 to 15Mb/s
Wav PCM 16bit and mp3 audio
BMP and JPG picture files
ProDVP-HD User Manual
Clip Naming:
The name of the clips can contain up to 16 characters without special characters.
Chapter 3
Input contacts
Input 1 = START CLIP001xxx.mpg
Start the clip with name beginning CLIP001.
E.g: CLIP001_TestSw.mpg
Playback mode of the clip depends on [ReadingMode].
Input 2 = START CLIP002xxx.mpg
Start the clip with name beginning CLIP001.
E.g: CLIP002_NewTest.mpg
Playback mode of the clip depends on [ReadingMode].
The same protocol is used for :
Input 3 = START CLIP003xxx
Input 4 = START CLIP004xxx
Input 5 = START CLIP005xxx
If 8In option is selected as [IN_OUT] parameter, the same protocol is applied to Clip006 to Clip008
If 4In-4Out is selected, the Clip001 to Clip004 can be started by the inputs 1 to 4, the connections 5 to 8
are configured as outputs.
If 5InV-V+1Out is selected, the Clip001 to Clip005 can be started by the inputs 1 to 5, input 6 decreases
the volume, input 7 reduces the volume and input 8 is configured as an ouput
Playback mode of the clip depends on [ReadingMode].
ProDVP-HD User Manual
Chapter 4
Output relays
The relay outputs correspond to the clips 1 thru’ 4
E.g. CLIP001xxxxxx.mpg will control relay 1
If [Relay] = DuringClip, the relay will remain closed for the duration of the clip.
If [Relay] = OnStart, the relay will close at the start of playback, and will remain closed for the time indicated in [RelayDuration].
If [Relay] = OnEnd, the relay will be closed at the end of playback, and will remain closed for the length of
time indicated by [RelayDuration].
If the clip is interrupted the relay will be closed as well.
[RelayDuration] is indicated in tenths of a second.
E.g: the value 42 = 4.2 seconds.
The LEDs situated just above the relay outputs display the status of each relay.
Chapter 5
Control via RS232 and Ethernet
It is possible to control the ProDVP-HD via a serial RS232 115200 baud connection or UDP codes sent
via the Ethernet connection.
More details on the RS232 and Ethernet protocol can be seen on page 8.
To use Ethernet triggering, it is preferable to use a fixed IP addresses:
[Ethernet]= ManualAddress
Entering IP addresses for the ProDVP-HD.
[EthernetAddr]
E.g.
192.168.0.222
; IP Address
255.255.255.0
; IP Subnet
192.168.0.1
; IP Gateway
192.168.0.255
; IP Broadcast
192.168.0.1
; IP DNS
UDP port:
[UDP]
Ex :5051
ProDVP-HD User Manual
The address and the port for responses are optional. They can always be reset by the command
« CGADa,p »
E.g: CGAD198.168.0.45,5024<CR><LF>
Chapter 6
Remote content updates
The ProDVP-HD can be updated (both content and drivers) from a remote server.
The server address is designated by [ServerURL]
To update multiple ProDVP-HDs from one server different folders should be used:
E.g: http://192.168.0.6:7070/ServerDVP01/
E.g: http://192.168.0.6:7070/ServerDVP02/
[TestUpdateContain] allows the user to define the update frequency:
Never
OnPowerOn
Periodicly
OnPowerOnAndPeriodicly
Never
At startup
At fixed intervals
At startup, and then at fixed intervals.
If [TestUpdateContain] = Periodicly or OnPowerOnAndPeriodicly then [TestUpdateFrequency] determines the time interval between checks for updates.
It is entered in the form "d-hh:mm"
d = number of day of week: 9=every day,
0=Sunday, 1=Monday, 2=Tuesday, 3=Wednesday, 4=Thursday, 5=Friday, 6=Saturday
hh:mm = hours and minutes if "hh"=99 it will check for updates every "mm" minutes.
Example 1 : 6-22:30 = check for updates every Saturday at 22:30
Exemple 2 : 9-02:00 = check for updates every day at 02:00 (2:00AM)
Exemple 3 : 9-99:05 = check for updates every 5 minutes
At each check for updates the ProDVP-HD reads the Update.txt file on the server and compares the different update versions.
If one or more versions on the server are newer, it will download the new files and replace them.
Place a copy of the "Update.txt" file in the ProDVP-HD-xx folder on the server and on the CF card in the
ProDVP-HD.
NB: In the Update.txt file on the ProDVP-HD (which is a copy of the file on the server), the information
about which files to add, replace, or delete is not consulted.
In the Update.txt file on the Server:
The update sequence nr is defined by [UpdateContainNum]
The files to be added or replaced are defined in [FileListToAddReplace]
The files to delete are defined in [FileListToDelete].
The update sequence number of the ProDVP-HDini.dvp is defined by [UpdateProDVPHDiniNum]
The ProDVP-HD will restart after loading the new file(s) to reflect any new configurations.
The update sequence number for the driver is defined by [UpdateAutorunNum]
The update sequence number for the firmware is defined by [UpdateFirmwareNum]
The ProDVP-HD will restart after transferring the file(s).
ProDVP-HD User Manual
Chapter 7
RS232 and Ethernet protocol
RS232 serial port:
Speed
Bits
Parity
Stop Bits
19200 Bauds
8
none
1
Pin connections are shown in the diagram on the
right.
------------ RS232 and UDP protocol ----------The commands are essentially ASCII text. They are terminated by <CR> (= Carriage Return) and <LF>
(= Line Feed).
The HEXA equivalent of these characters are:
<CR> = 0D and <LF> = 0A
Clip playback
Structure :
PFxyz001<CR><LF>
PF=PlayFile
x=
Mode
A = Blocked (non-interruptable)
I = Non-blocked (interruptible)
L = Non-blocked loop
y=
z=
(ALL)
(Interup)
(Loop)
Return
M = Info string sent via RS232 (End, Timecode event..)
D = No info to be sent via RS232
Option
V = Clip number in following bits. LEDs used.
C = Clip number in following bits. LEDs not used.
N = Clip name in following bits. LEDs not used.
(Mess)
(Direct)
(View)
(Clip)
(Name)
001 = Clip Number
<CR> <LF> =
End characters
Example: Play clip001, looped, no return message, use output LEDs --> PFLDV001<CR><LF>
ProDVP-HD User Manual
Command or configuration
Structure :
CGtp<CR><LF>
CG=Internal command/configuration
t=Type of command
VL = Volume left and right
VA = all volumes
AD = Target IP address and port
CD = Internal command
p=Paramètres depending on command type
Each parameter is separated by a comma
VL Parameters =
Left,Right
VA Parameters = Left,Right,Center,Subwoofer,LeftSurround,RightSurround
AD Parameters =
TargetAdresseIP,TargetPortUDP
CD Parameters =
_PLAY
_STOP
_PAUSE
_RESUME
_RESET
Reset ProDVP-HD
_UPDATE
check for updates on server
_DEBUG_ON
send debug info on serial port
_DEBUG_OFF
<CR><LF> = End characters
Example 1 : Set volume left to 100 and volume right to 50 --> CGVL100,50<CR><LF>
Example 2 : Address for UDP response = 198.168.0.45 and port = 5024 -->
CGAD198.168.0.45,5024<CR><LF>
Example 3 : Perform a reset --> CGCD_RESET<CR><LF>
Example 4 : Stop playback of current clip --> CGCD_STOP<CR><LF>
ProDVP-HD User Manual
Chapter 8
Update Procedures
Download the latest versions of files from : http://dvp.go-rsf.info
Copy the update files to the CF card, or replace the existing files with the new version. Insert the CF card in the ProDVPHD and power on.
The ProDVP-HD will perform the updates, then delete the unnecessary files, and if necessary perform a restart.
Driver: autorun.bas (replace current version)
Firmware: update.rok (this is deleted after update)
Configuration file: ProDVP-Hdini.dvp
These files can also be updated via the remote server as outlined in chapter 6.
Chapter 9
Encoding Parameters
All videos in a project should be encoded in the same way and at the same bitrate. Failure to do this can cause the
player to freeze.
The MPEG-2 codec should be used.
Videos can be encoded as one file containing audio and video, or as one video file, and three stereo audio files. This
has to be selected in the ini configuration file.
Chapter 10
Additional notes
Until the HDMI protocol has been finalised there will always exist certain discrepancies in the data exchange at the
beginning of a connection. At present this can cause certain devices to not work over HDMI. For this reason we
recommend preparing and testing videos on the same model screen or projector that will be used in the installation.