1
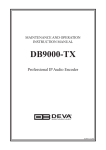
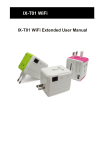
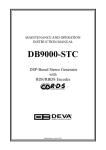
65 Aleksandar Stamboliyski Str., 8000 Burgas, Bulgaria
Tel.: +359 56 820027, Fax: +359 56 836700
Email: [email protected], Web: www.devabroadcast.com
Quick User Guide
DB9000-RX
Professional IP Audio Decoder
BEFORE YOU USE THIS PRODUCT
In order to be able to enjoy all the benefits of owning your new
DEVA product, please verify first that the latest software and
firmware release were installed.
Visit www.devabroadcast.com/downloads for the most
recent software and firmware downloads, prior the installation.
DEVA Broadcast Limited is an ISO 9001:2008 certified company.
This Quick user guide will make the installation of DB9000-RX quick and easy. Applying these
principles, you can simplify the process and save yourself extra time and effort. For more information
about the Safety precautions and the Operating environment recommendations please refer to the
User Manual.
Connection
STEP 1
Connect the device to a local network or to the Internet by a cable with an RJ-45 connector.
To operate the device you need to know its IP Address. In case you are not aware of it, you can hear it
through the headphones when you turn on the the device. Alternatively, use the Network discovery feature
at Local networks (for reference see Step 13).
WEB Interface
STEP 2
Open a WEB Browser and enter the device IP address in the browser's address field, then press Enter.
The web interface will be displayed to you with the respective main pages: Status; Configuration; MPX;
Factory Defaults; Reboot; Firmware Update.
Status Section
STEP 3
Current status information will be displayed
comprising Audio Status; Network Status; Connection
Status.
For further reference see the detailed explanation on
the right part of the screen.
NOTE: Clicking on the LIVE DATA icon will toggle live
data ON and OFF
General Settings
STEP 4
Click on the Configuration button. A dialog will appear. Fill in the
username and password requested, default values being: user and pass.
Device Alias
By choice, you can change the name of the device. Later on it will be used
as a title name on all WEB pages. Customizing the name will make the device
more recognizable.
Date and Time
?
Internet Time – Enable or disable automatic time synchronization from
Internet.
?
Time Zone – Select local time zone of the device.
?
Local Date and Local Time – Enter the local date and time if the
Internet Time is disabled.
NOTE: After selecting new settings, press the SAVE button to put them into
effect. Some of the new settings can reset DB9000-RX.
STEP 5
Network Configuration
General Network Settings
If you prefer to use static settings please disable the DHCP and fill in the
information requested - IP Address, Netmask, Gateway, Primary and
Secondary DNS. Otherwise, enable the DHCP.
IP Voice Announcement
In order to avoid IP voice announcement during broadcasting we
recommend you to disable this function.
Web Server Settings
In order to enhance the security of DB9000-RX you can set new
username and password. A dialog box requesting your NEW username and
password may appear.
NOTE: If username and password fields are left blank, NO security is used.
FTP Server Settings
Specify the Command Port of the FTP server. Enter username and
password for the FTP server.
The FTP Server must be in Passive mode-maximum one connection at a
time.
SNMP Settings
Press the Download button to download the latest available DB9000RX SNMP MIB file. Then specify Agent ID, Agent Port, Community, Manager
IP and Manager Port.
Agent ID is used to identify the device among others when a SNMP
notification is send. Agent - enables/disables SNMP Agent.
STEP 6
IP Audio Configuration
Source Priority
DB9000-RX has one main and two backup audio sources. If the audio
signal of the main source disappear the device will switch to the first available
backup source.
When the main audio signal is recovered DB9000-RX will automatically
switch back to it. Depending on your needs the priority of the connections
should be specified.
RTP Audio Player
Choose a port and decoder.
Icecast Audio Player
Choose a port and decoder. The username and password are used to
secure the connection. Make sure to enter the same on both sides.
IP Audio Player
DB9000-RX has one main URL and two alternative Stream Audio
Sources URL2, URL3. Switching between streams is immediate on audio
loss. When current Stream is URL2 or URL3 and connection to URL1 is
restored there will be an instantaneous switch back to URL1.
If the server does NOT use Port 80 you should enter URL and Port of the
Encoder. For example 192.165.1.21:2100.
NOTE: The selected players' decoders must match the settings of the
encoder devices on the other side of the connection.
Analog Audio Output
Adjust the analog output level of the device.
STEP 7
Backup Audio Configuration
Audio Loss and Audio Recover
Select the appropriate levels of loss and recovery of the audio signal. Do not forget to set the timeout.
Set wether the loss of audio should be registered by the one channel only or for both of them.
DB9000-RX has a built-in backup audio player. It plays tracks from SD Card storage uploaded over
the FTP in case of main audio signal loss.
The MPS Audio Player permits you to Select the order in which the tracks are played by the backup
player from the possible options.
All backup audio files must be located in a single folder named Audio. It must be in the root of the SD
Card. No subfolders are allowed. The playlist file must be named playlist.m3u.
STEP 8
Stereo Encoder
The Stereo and RDS Encoder Module is an optional board.
?
Stereo Mode - Select Stereo or
Mono Mode for MPX signal.
?
Emphasis - Select 50ìS for Europe
or 75ìS for USA.
?
Injection Levels - Select injection
level from 0 to 12 % for the 19kHz
pilot tone and for the RDS
subcarrier.
?
Phase Adjustment - Select a phase
of the Pilot Tone, those of the L-R
sub-carrier and RDS sub-carrier are
factory adjusted.
?
MPX Limiter - Enable or Disable the
MPX Limiter and set the desired
Threshold and Processing.
NOTE: For further reference see the
detailed explanation on the right
part of the screen.
STEP 9
Audio Enhancement
Automatic Gain Control Settings
Enable or Disable the Automatic Gain Control (AGC).
There are factory and user configurable presets available. Set your own
AGC presets changing the following parameters: Attack time, Release time,
Gain, Max gain up.
Audio Equalizer Settings
Applied equalizer gain has to be set according to the level of specified
frequency and overall level of this frequency must not exceed 0dB.
Stereo Encoder
STEP 10
DB9000-RX has a built-in RDS Encoder, it allows you to brand your
station.
Program Station (PS) Name Settings
Comprise of PS Static, PS Dynamic, DPS Scroll Step, DPS Scroll Speed.
Radio Text Settings
After pressing the INFO button on the receiver, up to 64-character block
for visual display will appear on the faceplate of the radio.
RT Speed –Select RT transmission speed from RT off to Fast.
General Settings
Comprise of PI – Program Identification: “digital signature” of the station,
PTY – Program Type, M/S – Music / Speech Switch.
Trafic Information
TP – Traffic Program Identification. Turn TP on or Off.
TA – Traffic Announcement: Turn TA on or Off.
Decoder Information
DI – Decoder Information: This is one of several 'flags' that convey yes/no
or other very basic data.
Console Settings
Enter the TCP port of the RDS console used to edit RDS settings in real
time. Enter a Password for the RDS console: the first symbols that must be
sent to authenticate to the RDS console, otherwise the connection will drop.
If left blank, NO security is used.
STEP 11
DB9000-RX allows you to set your own
alternative frequencies.
?
Disabled - disable corresponding
Alternative frequencies;
?
LF/MF Follows - This tool indicates
that next Alternative frequency is in
the Low or Medium frequency range;
?
Filler is used to fill the Alternative
frequency list to even length.
?
1 to 204 - Alternative frequency. For
more information see "AF reference
table" placed on the right part of the
WEB Interface.
Alternative Frequencies
Factory Defaults, Reboot, Firmware update
STEP 12
The Factory Defaults page
To restore DB9000-RX to its Factory
Defaults you should first press the Restore
button. A new window will appear: confirm
that you want to restore factory defaults and
wait for the process to complete. All settings
will be restored to their factory defaults
except for Network and WEB server Settings which remain unchanged. On completion of the process the
settings should have the proper default values.
Hardware Reset
This process will fully restore DB9000-RX to its Factory Defaults, including the Network settings. To
start a Hardware Reset, disconnect the power supply cable from the unit. Then locate the RESET button
on Rear panel, press and hold it. Afterwards, connect the power supply cable to the unit and keep the
RESET button hold until the POWER led starts blinking. Release the RESET button and wait for DB9000RX to reboot with the factory default settings.
Rebooting
To start Rebooting of DB9000-RX press the
Reboot button. A dialog warning window
will appear. Confirm that you want to reboot
the device and wait for the process to
complete.
Firmware Update
To update the device firmware, please
select the new firmware file. Press the
Upload button. A dialog window will appear.
Confirm firmware update and wait for the
process to complete.
STEP 13
Network discovery for Windows 7
1. Open Advanced sharing settings by clicking the Start button, and then on "Control Panel". In the
search box, type "network", click "Network and Sharing Center", and then, in the left panel click
"Change advanced sharing settings".
2. Select your current network profile.
3. Click Turn on network discovery, and then click Save changes. If you're prompted for an
administrator password or confirmation, type the password or provide confirmation.
4. To access the device open a new Explorer bar and click on Network . If you have successfully enabled
the network discovery option, the device will be displayed. Double click on DB9000-RX will open a
new WEB browser window.
NOTE: If you have already enabled this function on your computer just open a new Explorer bar and click
on Network. The device must be displayed. If not follow the instructions from Step 13.
Please refer to the User manual for detailed information on
how to configure and explore your device.