1
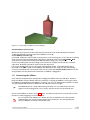
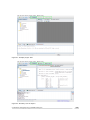
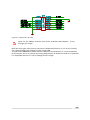
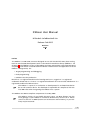
Figure 1.1: Connecting the ICEbear to the JTAG port
Any distribution (from tar file)
Make sure you have one of the newer kernels (2.4.XX or later) with USB device filesystem
enabled and libusb installed. Unpack the ICEbear tar file by
tar xfz ICEbear-<version>.tgz
In the lib/ folder you will find the necessary DLLs (.so’s) to link against. If you are not installing
them into one of the standard library directories, add their path into the LD_LIBRARY_PATH
environment variable and modify your Makefile library flags (’-L’), if necessary.
If you are installing the source package, you will have to compile and install each software
separately. Read the installation notes inside the directories.
For recent distributions that are using the udev hotplug system, a udev permission file is
provided in the udev/ folder of the ICEbear distribution tar file. Copy this file (while being
root) into /etc/udev/rules.d and restart udev via the command /etc/init.d/udev restart. This file
then properly sets the permissions whenever an ICEbear is plugged in.
1.5
Connecting the ICEbear
First, remove the power from the board or unplug the ICEbear from the USB port. Avoid to
plug the ICEbear into the board while any software accessing the ICEbear is running or when
the ICEbear is plugged into the USB port. In worst case, this can damage the hardware if there
are ground potential differences between the USB port and your target.
The ICEbearPlus has a status LED showing whether it is in a JTAG session with the
target. Do not unplug while it is lit, rather, quit the session on the host PC first.
Connect the ICEbear as shown in Fig. 1.1 below. The JTAG connector has a key on pin 3 which
prevents it from plugging it in the wrong way.
Do not connect the ICEbear to a board that was modified to run with another
JTAG adapter that needs voltage supply from the board. This will possibly destroy the ICEbear and make all warranty void.
1.5 Connecting the ICEbear
v1.53
7