1
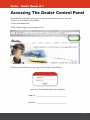
Sitesfor... Dealers Manual v2.5
1
Sitesfor... Dealers Manual v2.5
Table of Contents
Accessing The Dealer Control Panel!
5
The Dealer Control Panel
Initial Site Setup!
7
Initial Setup Complete
Managing Your Inventory!
9
Adding Inventory
Editing Inventory
Deleting inventory
Managing Items!
12
Accessing the Item Management System
Adding Items
Editing Items
Deleting Items
Craigslist!
13
About Craigslist
Creating a Craigslist Account
Using the Craigslist Generator
Your Account Page
Removing Ads
Keeping Ads on Top
Photo Tips!
18
2
Sitesfor... Dealers Manual v2.5
Photo Resolution
Lighting
Cropping
Text Tips!
20
Advanced Control Panel Functions!
21
Site Statistics
Dealer-to-Dealer (D2D)
Changing Your Password and/or User ID
Autotrader and Yahoo! Autos Auto-Submission
Add a Custom Message to your eNotifiers
Email!
23
Logging In
Checking Your Email
Printing Email
Replying to Email
Forwarding Email
Sending a New Email
Attachments
Secure Finance Forms
Installing Adobe Reader
Deleting Email
Managing SPAM
Changing Your Email Password
3
Sitesfor... Dealers Manual v2.5
Forward Email Alerts!
30
Send Alerts to an Alternate Email Address
Send Alerts as a Mobile Phone Text Message
Making Your Website Work For You!
31
First Things First
People Your Website Will Serve
Getting Exposure for your Website
!
!
4
Sitesfor... Dealers Manual v2.5
Accessing The Dealer Control Panel
The Dealer Control Panel is where you can edit the content that shows on your site.
To log on to your Dealer Control Panel:
1.Go to www.sitesfor.com
2. Click “Dealer Login: on the top right corner
3. Enter your ID and Password and Login to Your Dealer Control Panel
(write your ID and Password here for reference)
dealer id: _______________________________
password: _______________________________
5
Sitesfor... Dealers Manual v2.5
The Dealer Control Panel
Navigating the Dealer Control Panel.
The first page of the Dealer Control Panel is the “Admin Page”. This is the main page where you can
see all of your settings at a glance.
The Top Bar, has quick links to different control pages. This bar is visible from any page in the Dealer
Control Panel.
6
Sitesfor... Dealers Manual v2.5
Initial Site Setup
When your website is first created, it must be set up with some initial information.
Once these fields are set, they do not need any further attention, unless you want to edit them later.
When these initial steps have been completed, check this box
Initial Setup Complete
1. “Edit Homepage Information”
This information is the first thing your customers will see when they go to your site.
-Find this option in the Admin Page.
-If there is no existing picture, click “Choose File” or “Browse” (depending on your computer), and
Select a Picture of your Dealership.
Tip: Make sure this photo shows off your business from a street side view so customers can better
identify it.
-Edit your Homepage Text. What does your business offer?
-Click Submit Changes
Note: You can return to the Admin Page by clicking “Admin MAIN” in the top bar
2. “Edit Meta Tag”
This is the data that Search Engines like Google will see when they scan your site
-Find this option in the Admin Page
-Edit your Title Text
This is the name of your business. (in example: Yahoo!)
-Edit your Meta Text Description.
This is a short description that will appear below your name in a search engine result. Keep it
brief (<30 words) or your description will be cut off. (in example: Welcome to Yahoo!, the..
-Edit your Meta Text Keywords.
7
Sitesfor... Dealers Manual v2.5
These are the keywords people enter into a search bar (in example: Cars). Separate keywords
with commas (,) but without spaces ( ).
-Click “Submit Changes”
3. “Edit About Us Information”
This is the information people will see on your “About Us” page.
-Find this option in the Admin Page
-If no photo already exists, click “Choose File” or “Browse” and select an image
Tip: Early photos of your dealership, photos of your dealership’s interior, or a group photo with
you and your employees work well here.
-Edit your About Us Text.
Much like the front page, include details of what your business offers for customers.
-Click “Submit Changes”
4. “Edit Dealer/Contact Info”
This is the information that people will see on your “Contact” page.
-Find this option in the Admin Page
-Type in your Dealer Name, Address, City, State and Zip
-Type in your Hours of Operation
-Include any other information in the text box below “Contact Us”
-Type in a Contact Name and Phone Number
-Type in a Fax Number (optional)
-Main Email
For security reasons, this setting cannot be modified.
-Type in a Forward Email Address (optional)
To insure data security, you must use your dealer webmail to check your dealership’s email. For
convenience, you can have “Check Your Email” Alerts sent to another email address. This
-Add/Edit/Delete Links
If your business has more than one website, or if you would like to link to another website, you
set that up here.
-Click “Submit Changes”
Your Initial Setup is Complete!
Remember to Check the Box at the beginning of this section
8
Sitesfor... Dealers Manual v2.5
Managing Your Inventory
Adding Inventory
1. Go to your Dealer Control Panel
2. Click “Add Inventory”
Note: Alternatively, you can click “Add New” on the right corner of the Inventory Management System.
!
3. Click “Choose File” or “Browse” (depending on your computer) and select a photo of the car.
Tip: If you’re using Windows XP, put your “Browse” window in Thumbnail mode to easily find your photo.
3. Fill out the rest of the form and click “Submit”
Note: Uploading Photos - When you select a new photo on a form and click submit, your computer will
be sending (uploading) that photo to the server. This may take some time depending on the size of the
photo, and the speed of your connection. See Photo Tips for more information.
9
Sitesfor... Dealers Manual v2.5
Editing Inventory
1. Go to your Dealer Control Panel
2. Click “Edit Inventory”
!
Clicking this link brings you to the Inventory Management System
3. Select the vehicle you wish to edit
4. Edit the data in the form
!
Note: To replace the car’s existing photo, click “Choose” and select your new photo
5. Click “Submit”
Note: Uploading Photos - When you select a new photo on a form and click submit, your computer will
be sending (uploading) that photo to the server. This may take some time depending on the size of the
photo, and the speed of your connection. See Photo Tips for more information.
Note: You can also access the Inventory Management System from the Top Bar
10
Sitesfor... Dealers Manual v2.5
Deleting inventory
1. Go to your Dealer Control Panel
2. Click “Delete Inventory”
!
3. Check the box next to the vehicle you wish to remove
4. Click “Delete Selected” at either the top or bottom of the list.
5. Confirm that you want to delete the selected car by clicking “OK”
11
Sitesfor... Dealers Manual v2.5
Managing Items
Accessing the Item Management System
1. Go to your Dealer Control Panel
2. Click “Edit Items”
!
Note: Items for Dealers is an optional package that can be added on to your account for an additional
fee. If your account does not show “Edit Items”, Items for Dealers has not been activated on your
account.
4. This Link takes you to the Item Management System
Adding Items
This process is similar to Adding Inventory
1. Click “Add New” on the top right corner of the Item Management System.
2. Fill out the form and click “Submit”.
Editing Items
This Process is similar to Editing Inventory
1. Click on the name of the item you wish to modify
2. Make your changes and click “Submit”
Deleting Items
This Process is similar to Deleting Inventory
1. Click on the check box(s) on the item(s) you wish to delete
2. Click “Delete Selected” in the top left corner of the Item Management System
3. Confirm your choice to delete the items by clicking “OK”
12
Sitesfor... Dealers Manual v2.5
Craigslist
About Craigslist
Craigslist is a centralized network of online urban communities, featuring free classified advertisements.
It serves over 5 Billion page views per month, making it the 9th most visited site in the United States.
The website is primitive but straightforward, and gives you one click access to millions of potential
customers.
Creating a Craigslist Account
Before you can use the Craigslist Generator feature in your dealer control panel, you’ll need to setup a
free Cragslist account.
1. Go to www.Craigslist.org and click “my account” in the top left corner.
2. Under the Login Window, there is a link to create a new account
4. Enter your Email Address ([email protected])
3. Next you’ll see a verification box. This is to verify that you are a human and not a spam bot. Simply
type in the text from the distorted text box.
4. A link will be sent to your email address. Check your email, find the message, click the link it
provides you with and follow the directions it gives you.
13
Sitesfor... Dealers Manual v2.5
(Write down your Craigslist login information here for future reference)
!
!
email address: !__________________________________________
!
!
password:!
__________________________________________
Using the Craigslist Generator
The Craigslist Generator allows you to quickly and easily post ads to the Craigslist Free Classifieds.
1. Go to the Admin Page of your Dealer Control Panel
2. Click “Inventory Edit” in the top bar to get to the Inventory Management System
3. Click “Generate” next to the car you wish to make a Craigslist Ad For.
4. In the Generator Popup Window, Click the button labeled “Popup link to Craigslist.org”
5. In the Craigslist popup window, click “my account”
3.. In the Posting List click “For Sale”
4. In the Category List click “Cars & Trucks”
5. Click on the Generator Window, and arrange it next to Craigslist Window
7. Highlight, the Title Text in the Generator window, Right-Click it and select “Copy”. Then in the
Craigslist Window, Right-Click in the “Posting Title” box and select “Paste”
8. Copy the Price from the Generator Window and Paste it into “Price” in the Craigslist Window
9. Copy the block of HTML code in the Generator Window, and Paste it into “Posting Description” in
the Craigslist Window.
8. Fill in the “Specific Location” of your dealership. (e.g. South Austin, North Austin, Cedar Park,
Leander, etc)
9. Under “For Sale By” click “Commercial Dealer”
14
Sitesfor... Dealers Manual v2.5
10 At the bottom of the page, click “Continue”
!
Note: If your browser gives you a popup message mentioning “Secure and Insecure Items” while
!
on Craigslist, click “Yes” to continue.
11. Now you will see a preview of your Craigslist Ad. Fill out the Verification Box and Click “Continue”
to post your ad.
Note: Because of the anti-spam verification checks Craigslist builds into their system, it is virtually
impossible for any system to automatically submit Craigslist ads for you. If a system to circumvent
these checks did exist, it would break Craigslist’s Terms of Services agreement, and Craigslist would ban
your account.
15
Sitesfor... Dealers Manual v2.5
Your Account Page
You can manage all of your Craigslist Ads in your Account Page. To access this page go to Craigslist.org
and click on “My Account. The color of the ads will indicate their status.
To see the detail page on one of your ads, simply click the ad’s title. This detail page will also give you
options to edit or delete you ad.
To return to your account page while in craigslist, there are three options
1. Type “craigslist.org” in your web browser’s address bar, and click “my account”
2. In the Top Left Corner there is a page path (eg: Austin Craiglist > Cars+Trucks) Click “Craigslist” to
return to the Craigslist homepage, and from the homepage click “my account”.
3. If the link exists, click “Return to Account Page”
Removing Ads
To Remove an ad,
1. Click on the title of the ad
2. Click “Delete this Posting”
You ad has now been removed
16
Sitesfor... Dealers Manual v2.5
Keeping Ads on Top
All advertisements last for 30 days before becoming expired. When a person runs a search, the results
are ordered by date posted (the most recently posted showing first).
You can push your ads to the top by resubmitting them, but you can only resubmit an ad after 48 hours.
Otherwise, your ad will be marked as spam and deleted.
To resubmit your ad,
1.On your Craigslist account page, click the title of the car you wish to resubmit
2. Click “Delete this Posting”
3. Now that your posting is deleted, click “Return to my account page” to do so.
4. Click the title of your newly deleted car
5. Click “Repost this Listing”
6. Click “Cars & Trucks”
7. Click “Continue”
8. Type the text in the verification box and click “Continue” to repost your listing
17
Sitesfor... Dealers Manual v2.5
Photo Tips
Photo Resolution
The resolution of a digital photograph is measured in Megapixels. Modern digital cameras can have 6 or
more megapixel resolutions. A high resolution is good for personal photos; it makes it easy to crop and
zoom, and print in high quality.
While a high resolution may be good for personal photos, it comes with the cost of a bigger file size.
The higher the Megapixels, the bigger the size of the photo file. Large files take a long time to transfer
over the internet. For this reason, high megapixel photos are not ideal for the web.
Check your digital camera’s user manual, and reduce your camera’s resolution to around 1 Megapixel
when you take photos for the web. (but make sure to switch it back to its highest setting when you
take personal photos) This will make uploading your photos for your website much quicker while
maintaining a good quality photo.
Lighting
Take photos in the morning or afternoon when sunlight is softer. Photos taken around noon will have
too much glare.
Cropping
Far away photos may look fine at full size, but look poor in thumbnail size. Take close photos, or crop
them with photo editing software.
18
Sitesfor... Dealers Manual v2.5
Photo Angles
Take outside photos at an angle. if you have Multi-Photo, this allows just two photos to cover the
entire car.
Photographing the dashboard
Angle the back of the passenger seat all the way back, and take the photo from the back seat behind
the passenger’s headrest.
19
Sitesfor... Dealers Manual v2.5
Text Tips
On the Internet DO NOT type everything in ALLCAPS.
THIS IS CONSIDERED SCREAMING. IT IS OFFENSIVE WHEN USED IN MOST SITUATIONS ONLINE
Instead, spend the extra effort to type with proper capitalizations and punctuation.
It makes your site look reputable, and stands out in a positive way.
Which would potential customers trust?
THIS IS A GREAT RUNNING CAR
WITH LOW MILES A CLEAN
INTERIOR AND A CUSTOM SOUND
SYSTEM THIS CAR WONT LAST
LONG CALL TODAY!!!!!!! 555-5555
This is a great running car with low
miles, a clean interior, and a custom
sound system. This car won!t last
long, so call today! 555-5555
In general, people will interpret the ad on the left as appearing desperate and suspicious,
and see the ad on the right as being honest and trustworthy.
20
Sitesfor... Dealers Manual v2.5
Advanced Control Panel Functions
Site Statistics
This allows you to see how many “hits” your site has received. Your site receives a hit whenever a
computer opens your website. Keep in mind that one person can generate multiple hits by visiting the
site more than once. For this reason, one hit doesn’t necessarily represent one new person viewing
your site.
To view your site’s Statistics, click “Check Stats” in your dealer control panel. This page will show your
sites statistics, and the statistics for all of the Sitesfor...Dealers Sites.
Please Note: The Acura 2.3 is the first option alphabetically on the “Find My Car” form. Some people
like to click “submit” to see if a form works. Keep this in mind, as it may skew statistics.
21
Sitesfor... Dealers Manual v2.5
Dealer-to-Dealer (D2D)
The Dealer to Dealer Network allows you to network your inventory with other dealers. When a
user submits a “Find My Car” request, the system will search your inventory, and the inventory of the
Dealers in your D2D network. If the car is found in the inventory of a Dealer that has chosen to share
their inventory with you, you will be notified via email.
To share your inventory with another Dealer, click “D2D - Dealer-to-Dealer Edit”, and on the Left
Column, check the box next to the desired Dealer.
On the Right column, you’ll see all of the dealers who have chosen to share their inventories with You.
Changing Your Password and/or User ID
To change the name and password you use to login to your Dealer Control Panel, click “Password/User
ID Edit” on the Admin Page. Fill out the form for the desired changes and click “Submit Changes”
Note: For security, changes made on this page will NOT affect your email name and password.
Autotrader and Yahoo! Autos Auto-Submission
As a convenience, the Sitesfor...Dealers system can automatically submit the VIN Numbers of your
inventory to your Autotrader or Yahoo! Autos account. To do this, simply enter in your Autotrader or
Yahoo! Autos Account Number into the appropriate space and click submit. If you do not know your
Account Number, contact Autotrader or Yahoo! Autos Support.
Add a Custom Message to your eNotifiers
If you would like to add your own custom text to the eNotifier messages that are automatically sent
from your website, click “eNotifier Edit” in the Admin Page, click the eNotifier you’d like to edit, enter
your custom text, and click “Submit”.
22
Sitesfor... Dealers Manual v2.5
Email
The Sitesfor...Dealers webmail system is SSL Encrypted, to maintain the confidentiality of financial
applications, which are securely sent from dealer websites. Traditional email protocols, used by
programs such as Microsoft Outlook and Outlook Express, are not secure. For this reason, you must
only access your email using the secure webmail system.
Logging In
1.Go to www.sitesfor.com and click on Webmail
Note: This page may take longer to load due to the SSL Encryption which insures data security.
2.Enter your full email address ([email protected]) and password and login.
(Write down your email address and password here for future reference)
email address: _______________________________________________
password:
!
_______________________________________________
Note: for security purposes, your email and dealer logins are separate.
23
Sitesfor... Dealers Manual v2.5
Checking Your Email
Once logged in, click “Inbox” to see your email inbox. Either link works.
To view a message, select it from the list and it will appear on the bottom half of the window.
Alternatively, you can double click the message to have it appear in the whole window.
24
Sitesfor... Dealers Manual v2.5
Printing Email
While viewing your email message, click the “Print” icon
Replying to Email
1. While viewing your email message, click the “Reply” icon
!
2. Type your message
3. Click “Send”
Forwarding Email
1. While viewing your email message, click the “Forward” icon
!
2. Type in the email address you wish to forward the message to in the “To:” field
3. Type your message
4. Click “Send
25
Sitesfor... Dealers Manual v2.5
Sending a New Email
1. Click “New Message” on the right menu
!
2. Type the recipient’s email address in the “To:” field
3. Type a subject in the “Subject:” field
4. Type your message in the large text box
5. Click “Send Message” at the top to send the message
Attachments
Attachments are files that are sent with an email. Attachments can be almost everything: photos,
documents, programs and even viruses. While the email server does have a built in antivirus scanner,
the best protection is to not open any attachments from an untrusted source.
Secure Finance Forms
A finance form sent from your website will be in an email titled “Finance Form Application” and will be
sent from “[email protected]”. For added security, the finance form itself is a .PDF attachment.
To download and open the finance form, click the .PDF file next to “Attachments” on the message
window.
26
Sitesfor... Dealers Manual v2.5
After clicking on the attachment, your computer will do one of two things (depending on your
browser).
!
1. Your Web Browser will automatically open the .PDF file
!
!
From here you can view the application, and you can print it by clicking File > Print.
!
2. Your Web Browser will download the file to your desktop
!
!
Now you must simply double click the .PDF file on your desktop to open it. Once
opened, you
!
!
can view and print the application. If your computer cannot open the file, you need to
!
!
download and install the Free Adobe Reader and try again.
Installing Adobe Reader
1. Go to www.Adobe.com and click
2. Uncheck “Adobe Photoshop Album” and click “Continue”
3. Uncheck “Google Toolbar” and click “Download”
4. The download manager window will popup and start downloading Adobe Reader. When it is finished
downloading, the installer will open automatically. Click through the installer, and your finished.
Deleting Email
To delete an email, first check the box next to it on the list. (Delete multiple emails by checking
multiple boxes)
!
Next, click action, and then delete.
!
Alternatively, you can click “Delete” on the right of the email on the list.
27
Sitesfor... Dealers Manual v2.5
Managing SPAM
Your webmail has a smart SPAM filter. Messages are identified by the filter in three ways: Low, Medium
and High. Messages detected as Medium or High are automatically placed in your Junk Email Folder.
Low messages are shown in your inbox with a subject prefix of [SPAM: LOW].
This is a Smart SPAM filter, it becomes more effective as you train it.
To mark a message as SPAM, check the box next to the message, click “Action” and “Mark as Spam”.
If a message is wrongly identified as SPAM, check its box, click “Action” and “Unmark as Spam.
!
28
Sitesfor... Dealers Manual v2.5
Changing Your Email Password
1. On the top bar, click “Settings”
!
!
2. Enter your current password in “Current Password”
3. Enter your desired password in “New Password”, and enter it again in “Confirm Password”
4. Click “Save”
!
Note: For security purposes, you dealer and email passwords are separate.
Note: Changing your Display Name will NOT change your email address.
29
Sitesfor... Dealers Manual v2.5
Email Alerts
As a convenience, you can have alerts sent to you via a mobile phone text message, or via an alternative
email address. These alerts will remind you to check your email whenever a customer sends you a
Finance Application, submits a Find-My-Car request, or sends you a message from your site’s webmailer
form.
Note: Due to security protocols, alerts will NOT be sent for any new email that you receive, but only
for emails that are sent from forms on your website.
Send Alerts to an Alternate Email Address
If you have another email address that you check on a regular basis, and you want email alerts sent to
this address, follow these steps.
1. Go to your Dealer Control Panel
2. Click Edit Dealer/Contact Information
3. Under “Alert Email” fill in the email address you want your alerts sent to
4. Click Submit Changes
Send Alerts as a Mobile Phone Text Message
You can have your alerts sent to you as a mobile phone text message. Sitesfor...Dealers charges
nothing to send the text messages, but you mobile phone provider’s standard text message rates do
apply. If you have unlimited text messages on your mobile phone plan and want to receive instant
alerts, this option is for you.
To set this up you first need to figure out your mobile phone’s gateway email address. Below is list for
common mobile phone providers. Emails sent to your mobile phone’s gateway email address are
received by your phone as a text message.
Provider!
!
!
AT&T Wireless (Cingular)!
AT&T Prepaid (GoPhone) !
Cricket Wireless!
!
Sprint (PCS)! !
!
Sprint (Nextel)!
!
T-Mobile!
!
!
Tracfone (Prepaid)! !
Verizon Wireless!
!
Format!!
!
!
!
[email protected]! !
!
[email protected]! !
[email protected]!!
[email protected]!
[email protected]! !
[email protected]!!
!
[email protected]! !
[email protected]! !
!
Example
[email protected]
[email protected]
[email protected]
[email protected]
[email protected]
[email protected]
[email protected]
[email protected]
Note: If your mobile phone provider is not listed here, go to http://en.wikipedia.org/wiki/SMS_gateways
for an extended list.
1. Go to your Dealer Control Panel
2. Click Edit Dealer/Contact Information
3. Under “Alert Email” fill in your mobile phone’s gateway address
4. Click Submit Changes
30
Sitesfor... Dealers Manual v2.5
Making Your Website Work For You
First Things First
There are no Magical People on the Internet that will find your website and purchase cars from you.
Think of your website as an up to date Catalogue or Brochure that people can access 24/7 to get
information.
People Your Website Will Serve
The Car-Shopping Commuter
These people are stuck in traffic in the mornings and afternoons. They are interested in buying a car,
but don’t have the time to drive from dealership to dealership to find one. While commuting, they will
notice your website on a sign and write it down. While procrastinating at work, they will go to your
website and notice a car they like. They can then print out the car, as well as driving directions, and visit
your dealership on their way home from work.
The ‘Interested in an Upgrade’ Commuter
These people are in a similar situation as the above. They are interested in an upgrade, but not quite
sure if they can afford one. They notice a car in your lot while driving to work. They also notice your
web address posted on a sign, and write it down. While at work, they go to your website and find the
car they are interested in. They like the car but know they will need financing. They click on
“Financing” and fill out the form “just to see what happens”. Later that day, they receive a phone call or
email telling them they’re approved, so they visit the dealership on their way home from work.
The After-Hours Shopper
Whether they work long hours, odd hours, or the night shift, these people simply can’t visit a dealership
whenever it’s open. They walk on your lot and notice a car they like. They also notice your website on
a sign and on the car itself. They go to your website and pull more information about the car they’re
interested in. Then they set up an appointment with an email.
The Craigslist Shopper
These people avoid glossy corporate sites like Autotrader, and instead goes to Craigslist because they’re
looking for a deal. They notice your car on Craigslist.org. They click the picture for a larger view, and
are taken to that car’s page on your website. They see detailed information about the car and also look
at other cars in your inventory. They like the car, so they print out a map to your dealership so they
see it in person.
The Anti-Salesperson Shopper
This person wants straight facts, figures and hard information, without all of the BS. They don’t want to
be sold, and they don’t want to play salesperson mind games. These are the responsible customers that
want to buy on their own time and their own terms. Your website allows them to get the information
they need, allowing them to be anonymous, but not a nobody. They see a car they like on your lot, and
visit the site they see on your sign for the information they need. These people don’t come in right
away, but instead save up the money necessary for a downpayment, or the money to buy the car in
cash. When this person comes to your dealership, they are buying the car and will be out the door in
fifteen minutes.
31
Sitesfor... Dealers Manual v2.5
Getting Exposure for your Website
Signs - A large, highway viewable sign with your website will capture the attention of commuters
Ice Chalk - Write the name of your website on the windshields of some of your cars
Business Cards - If you already have printed business cards, stamp on your web address
License Plate Holder - Attach a clearly printed tag on both the front and back of your cars
Craigslist Free Classifieds - See the “Craigslist” chapter for more information.
32