1
Software version 3.7.0
ENGLISH
Rev. 1.2
Kiosk version 3.7.0
Operator's manual
Kiosk version 3.7.0
Operator's manual
Kiosk version 3.7.0
Operator's manual
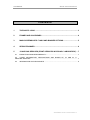
CONTENTS
1
INTRODUCTION ............................................................................................ 8
1.1
DESCRIPTION .............................................................................................................. 8
1.2
KIOSK MODELS ........................................................................................................... 9
1.3
KIOSK IN “STANDALONE” OR “ORDER TERMINAL” MODE ..................................... 9
1.4
USERS OF THE SYSTEM ............................................................................................ 9
2
SYSTEM FUNCTIONALITY ......................................................................... 11
2.1
INPUT OF IMAGES .................................................................................................... 11
2.2
PHOTOGRAPHY SERVICES ..................................................................................... 15
2.2.1
Instant prints .................................................................................................... 15
2.2.2
Laboratory development (1h/24h) .................................................................... 16
2.2.3
Decoration (Frames and calendars) ................................................................ 16
2.2.4
DVD/CD Burning .............................................................................................. 17
2.2.5
Photo WebAlbum creation on the Internet ....................................................... 17
2.2.6
ID Photo ........................................................................................................... 17
2.2.7
Collage ............................................................................................................. 17
2.2.8
Remote Orders ................................................................................................ 18
2.3
IMAGE EDITING ......................................................................................................... 19
3
PAYMENT METHODS ................................................................................. 20
3.1
COUNTER PAYMENT ................................................................................................ 20
3.2
PREPAYMENT CARD ................................................................................................ 21
3.3
CREDIT / DEBIT CARDS (BANK CARD) ................................................................... 21
3.4
CASH .......................................................................................................................... 22
3.5
FREE MODE ............................................................................................................... 23
4
SCREEN FLOW: USER INTERFACE .......................................................... 23
4.1
CHOOSE LANGUAGE AND SERVICE ...................................................................... 23
4.2
INFORMATION ON SERVICES AND CONDITIONS OF USE .................................. 24
4.3
INPUT OF IMAGES: WHERE DO YOU HAVE YOUR PICTURES? .......................... 25
4.4
FILTERING THE DATA SOURCE .............................................................................. 25
4.5
SERVICES: WHAT DO YOU WANT TO DO WITH YOUR PICTURES? ................... 27
4.6
VIEWER: SELECT PICTURES ................................................................................... 29
4.7
DECORATION: CALENDARS AND FRAMES ........................................................... 33
4.8
DO YOU WANT AN INDEX FROM YOUR PICTURES? ............................................ 34
4
Kiosk version 3.7.0
Operator's manual
4.9
ORDER SUMMARY .................................................................................................... 35
4.10
EXTRACT SOURCES ................................................................................................. 36
4.11
METHOD OF PAYMENT SELECTION: HOW WILL YOU PAY? ............................... 37
4.12
CHECKING DEVICES ................................................................................................ 37
4.13
EXECUTION OF SERVICES ...................................................................................... 38
5
SYSTEM CONFIGURATION ........................................................................ 40
5.1
KIOSK OPERATOR .................................................................................................... 41
5.1.1
Operator menu panels ..................................................................................... 42
5.1.2
Customer Cards ............................................................................................... 43
5.1.3
Dispatcher Administrator.................................................................................. 45
5.1.4
Payment registry .............................................................................................. 45
5.1.5
Coin counter ..................................................................................................... 50
5.1.6
DPS Monitor ..................................................................................................... 52
5.1.7
Statistics ........................................................................................................... 52
5.1.8
Shutdown ......................................................................................................... 52
5.2
KIOSK SUPERVISOR ................................................................................................. 53
5.2.1
Settings ............................................................................................................ 54
5.2.2
Operator and Sam card management ............................................................. 67
5.2.3
Logs ................................................................................................................. 69
5.3
PHOTO SUPERVISOR ............................................................................................... 72
5.3.1
Settings ............................................................................................................ 73
5.3.2
Prices ............................................................................................................... 79
5
Kiosk version 3.7.0
Operator's manual
APPENDIX DPS Monitor
APPENDIX Activation Wizard
APPENDIX Dispatcher
APPENDIX Statistics
APPENDIX PrintServer
APPENDIX DPSLab
APPENDIX CD Burning
APPENDIX WebAlbum
APPENDIX Customizations
APPENDIX Connection between DPS Systems
APPENDIX SWGifts
6
Kiosk version 3.7.0
Operator's manual
1 Introduction
1.1 Description
Kiosk is an easy to use system, providing instant digital prints and other services. It is used
directly by the client user, who can input, manage photographs and pay for every service
requested.
The Kiosk system enables client users to insert their digital media card in the device, see its
contents, select the desired pictures and print them. It is therefore a confidential and simple
self-service system, which the user can use for ordering printings, pay for them and obtain
them immediately.
The main advantage of this system is the possibility of seeing all the pictures and only printing
those desired.
Kiosk does not only enable digital photographs to be printed, but also provides a range of
services and functions, related to the world of digital photography, which are described below:
SERVICES
Immediate digital printing: instant print on paper of the pictures brought by the client to the
shop in digital format.
Laboratory printing: Development of the client's digital photographs in the laboratory
within 1 to 24 hours (1 hour / 24 hours)
Frames and calendars: Adds a decorative frame or creates a calendar using a client's
image.
DVD/CD Burning: Storage of the client's photographs on a CD-ROM or DVD-ROM.
Index print: Provides the client with future copies thanks to an index print with all the
photographs in miniature.
PhotoWebAlbum: Creation of a private album on the Mitsubishi web portal so that clients
can share their photographs. Provides the opportunity to order copies online from
anywhere.
FUNCTIONS
Cropping: Enables photograph to be cropped in order to remove unwanted parts.
Framing: Enables selection of the area of the image desired for printing.
Zoom: When used with trimming or framing, allows a specific part of the photograph to be
enlarged.
Rotation: Allows the photograph to be rotated by preset degrees to improve viewing on
the screen.
Red eyes effect: Enables the red eyes effect in affected photographs to be removed.
Colour adjustments: Allows photographs to be transferred to black and white, sepia or an
increase or decrease in colour components.
Black and white and sepia effects.
8
Kiosk version 3.7.0
Operator's manual
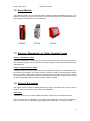
1.2 Kiosk Models
This software version can be used with various hardware models with different features. The
differences among all of them can be read in each product brochure. The specifications may
also vary without notification of the manufacturer.
PT9000
PT7000
PT6000
1.3 Kiosk in “Standalone” or “Order Terminal” mode
Kiosk in “Standalone” mode
A Kiosk in “Standalone” mode works as an autonomous machine that can produce prints and
other services by itself. The end customer can order and get services with the minimum shop
staff assistance
Kiosk in “Order Terminal” mode
A Kiosk in “Order Terminal” mode cannot produce services by himself. It‟s not attached to any
photo printer, per instance. An “Order Terminal” machine is used by the end customer during
less time, because many times consuming operations like printing, burning DVDs or paying
are transferred to a Dispatcher machine. These operations take place at the counter, leaving
the Kiosk immediately free to provide service to another customer.
1.4 Users of the system
The various users of Kiosk are distinguished by the type of operations they carry out on the
machine. There are 3 types of users, which are listed below:
Client User
This is the end user, who uses the Kiosk self-service system for purchasing its services.
The client user can be identified by the system (providing that he/she uses a prepayment
card) or interact with it anonymously (by payment with a credit card, in cash or at the till).
9
Kiosk version 3.7.0
Operator's manual
Operator User
The operator user is responsible for the maintenance and correct operation of the machine.
He/she can also validate orders when required.
5 operator users (OP1, OP2, etc.) are generated in the Kiosk registration process. Each one
has access to the system with a personalised card. This card can also be assigned a
password, enabling the user to be validated as an operator with no need for the card.
Supervisor User
One of the five operator users is the supervisor user. This is an advanced operator, able to
change configurations like services activation, prices, passwords, etc.
10
Kiosk version 3.7.0
Operator's manual
2 System functionality
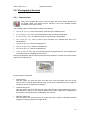
2.1 Input of images
It is necessary to input images in the Kiosk to perform any service. To do so, there are many
options enabling the client to transfer his/her images easily, on whatever medium they are
stored.
The various ways of transferring images to the Kiosk are listed below.
From a DIGITAL CAMERA or USB Device
For photos on flash cards or USB storage devices. When the card or USB
device is inserted, the system detects it automatically. The USB devices
detected by the system are those known as “Removable storage devices”, it
does not detect hard drives.
Kiosk accepts all normal memory cards (Smart Media, Compact Flash, SD, Memory Stick,
Multimedia Card, XD, Mini SD, etc.)
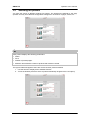
Initially, an animation appears on the screen helping the client to use the card reader. When
the user does not know where to insert the card, he/she is informed that by selecting the type
of card from among those shown on the screen, he/she will be shown where to insert it.
NOTE
The digital media card reader hardware protects the cards against any writing of data,
including USB devices. This helps to protect end customer data stored in their device. Only
USB devices connected to the reader allow writing operations for servicing purposes. Please
check the Monitor Manager appendix for enabling/disabling this feature.
11
Kiosk version 3.7.0
Operator's manual
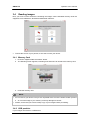
CD / DVD
For images stored in a CD / DVD. The reader tray opens automatically.
To ensure that the CD/DVD is inserted correctly, the user is shown the following
animation.
BLUETOOTH
When the photographs are saved on devices with Bluetooth transfer capacity,
this option allows clients to use the many services offered by the Kiosk when the
images are on a mobile telephone or PDA.
The image(s) saved on the Bluetooth device must be selected and sent to the
Kiosk identified as “DPSxxxxx” on the list of Bluetooth devices detected, which are shown on
the client's mobile telephone or PDA.
Kiosk informs the client of the total number of images received and previews the last image
received.
INFRA-RED
For photographs saved on devices able to transfer data using Infra-red. This
option allows clients to use the many services offered by the Kiosk when the
images are in a mobile or PDA.
The image(s) saved on the device must be selected and sent to the Kiosk by
aligning the infra-red ports.
12
Kiosk version 3.7.0
Operator's manual
Kiosk shows the total number of images received and previews the last image received.
NOTE
The infra-red source is not available in every hardware model. Please check system model
specifications or brochure for its availability.
PHOTOWEBALBUM
This option gives access from any Kiosk to the images in private albums on
www.mitsubishialbum.com.
When this option is selected, the identification of the album and its password is
required, using a touch-sensitive keyboard shown on the screen.
REMOTE ORDERS
The main purpose of www.mitsubishialbum.com is not only to be able to share
photographs, but also to order copies from any standard PC with internet
connection and go to the nearest establishment to collect them.
When a client requests a job from www.mitsubishialbum.com he/she is assigned
an order identification code for this job.
Afterwards, when the client comes to the establishment where the order has been sent to
collect it, he/she must enter the order identification code using a touch-sensitive keyboard
shown on the screen.
13
Kiosk version 3.7.0
Operator's manual
After the order identification code has been entered, a summary appears on the screen,
showing the price for verification, and the service is performed after payment.
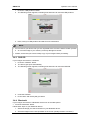
FLATBED SCANNER
With the scanner option you can work on previously printed images. Guided
screens show the customer how to introduce the pictures in the system for
subsequent processing.
First he/ she is told how to place the picture into the scanner for processing.
Once the preview of the image appears the customer can adjust the scanning area by means
of the position and zoom controls.
When the previewed image is optimal it can be saved and the customer can go on working.
14
Kiosk version 3.7.0
Operator's manual
2.2 Photography Services
2.2.1 Instant prints
This service enables the client to print on paper the photos he/she wishes from
any digital media. The images can be printed in one of the available formats
according to the client's choice.
The possible paper formats offered by Kiosk are as follows:
10 x 15 cm (4” x 6”). The most frequently used format for standard prints.
7.5 x 10 cm (3” x 4”). The recommended size for low resolution photographs.
9 x 12 cm (3.5” x 4.7”). An alternative size for low resolution photographs.
13 x 18 cm (5” x 7”). This is used in some countries as a standard print size or for
enlargements.
15 x 20 cm (6” x 8”). Used for enlargements.
15 x 21 cm (6” x 8.5”). Used for enlargements.
15 x 23 cm (6” x 9”). Used for enlargements.
11.5 x 15 cm (4.5” x 6”). The recommended format for digital cameras. This maintains the
4:3 image format of the digital camera screen.
After the photographs and the output format have been selected, an index print of the images
entered can be printed too.
Several options are offered:
Of all pictures
With this option, the client will have an index print of all the images from the current
source. One or several sheets will be used to print them, depending on the number of
images per sheet configured in the machine.
Of selected pictures
With this option, the client will have an index print with the images he/she has chosen
beforehand for printing. One or several sheets will be used to print them, depending on
the number of images per sheet configured in the machine.
Summary index print
With this option, the client will have an index print with a series of randomly selected
images as a sample printed on a single sheet.
15
Kiosk version 3.7.0
Operator's manual
2.2.2 Laboratory development (1h/24h)
This option is used for printing images at other high production machines
connected to the Kiosk, whatever they are local minilabs connected to a LAN or
even remote photographic laboratories that can be accessed through an internet
connection. To send orders to these external systems, the MITSUBISHI Kiosk
provides a powerful communication protocol that every laboratory can easily integrate.
The various printing formats depend on the high production development equipment or
laboratories in each case.
There are several options for connecting a high production machine to the Kiosk:
FTP (File Transfer Protocol): The data are sent to the laboratory over the Internet.
LAN (Local Area Network): The data are sent to the laboratory using the company's
internal network.
By burning a CD: The data are transported to the laboratory on a CD.
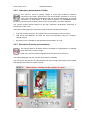
2.2.3 Decoration (Frames and calendars)
This service allows a decorative frame to be added to a photograph or a calendar
to be made using a client's image.
Kiosk has a series of frame templates which the client can choose from.
The desired language and year can also be chosen for calendars.
The next screen shown is the one presented to the client for fitting the image to the template
and selecting the number of copies required.
16
Kiosk version 3.7.0
Operator's manual
2.2.4 DVD/CD Burning
This enables the client's images to be burned onto a CD-ROM or DVD-ROM. The
images are always copied in their original format so that their resolution is not
changed.
When a DVD/CD is burned, it includes an easy to use software application for viewing the
pictures, which enables the client to view the photographs on his/her personal computer.
2.2.5 Photo WebAlbum creation on the Internet
The user can temporarily save and/or share images over the Internet by creating
a private album on the Mitsubishi web album server (www.mitsubishialbum.com).
After the photos have been uploaded, the server generates a code that is sent to
the Kiosk and delivered to the customer. This code is used to regain access to the images
from any Kiosk or other device connected to the Internet.
Each album has a maximum storage size of 50 MB. The images loaded remain in the
Mitsubishi Album for 21 days, unless the user has a private account and imports the album.
If the picture files are larger than 500 KB they are resized in order to optimise their transfer on
the network.
Resizing criteria:
If the size in pixels is more than 1500 x 1200 it is resized to this size (keeping the original
aspect ratio) and saved in JPG format.
If the size in pixels is less than 1500 x 1200 the image is only saved in JPG format.
NOTE
These criteria have been considered for traffic on the network to be optimum and the quality
of the image to be sufficiently high for printing up to a 15 x 20 format.
2.2.6 ID Photo
This service enables to print a composition of photos for identity cards, passports
or portraits. The images can be printed in any format accepted for instant digital
print service. For each format Kiosk offers different compositions among witch
the client may choose one. This service can only be used by operator users.
2.2.7 Collage
This service enables to print different compositions according to the user
selected format. The compositions shown can be configured in the settings
configuration.
17
Kiosk version 3.7.0
Operator's manual
There are two types of compositions:
With the same image: The compositions is done only with one selected
image (only one image is allowed). The number of copies can be
increased or decreased with the + o - buttons.
With different images: In this case several images can be selected as
images for the composition. No single image can be repeated and the
number of copies cannot be increased or decremented.
2.2.8 Remote Orders
Remote services are for printing or burning CDs which have been ordered beforehand using
the website by a Mitsubishi Web Album user.
Payment for these services takes place when the user comes to the Kiosk to collect them. At
this point, he/she is asked to enter the collection identification code, a check is made as to
whether the job has been downloaded and if so, the order summary is shown.
After the payment for the service has been processed, it is executed immediately.
The configuration of the services provided by any given Kiosk and their prices is currently
carried out by a website administration interface available for each Kiosk on the DPS Website
Server.
It is possible to configure the following services:
Printing : 9 x 13, 10 x 15, 13 x 18, 15 x 20, 15 x 21, 15 x 23, 20 x 25, 20 x 30
CD : with the selected photos
18
Kiosk version 3.7.0
Operator's manual
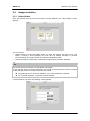
2.3 Image editing
This is a range of tools offered to the client in order to be able to make adjustments to images
in the development services.
The various options are:
Black and white: Transforms colour images to black and white.
Sepia: Transforms colour or black and white images to sepia.
Auto Brightness: Automatic brightness adjustment to improve the quality of the
image (Disabled if the histogram is ON in the configuration).
Auto colour: Automatic colour adjustment to improve the quality of the image (Applies
automatic histogram correction to each colour channel).
Trim: Uses the "+" and "-" icons to trim or increase the image displayed. Use the arrows to
move the image.
Rotate: Allows the image to be rotated in 90 degree angles.
Automatic red eye correction: Can be applied several times, depending on the complexity
of the image.
Restore: Restores the original photograph as it was before the changes.
In case of ID Photo service the „trim‟ option is permanently activated. It is possible to trim,
increase or move the image displayed, while making other image adjustments.
19
Kiosk version 3.7.0
Operator's manual
3 Payment methods
There are 5 different ways that the Kiosk services can be paid for. Those desired can be
activated in the configuration menu, depending on the needs of each Kiosk owner.
When paying for services, the client sees a screen displaying all the authorised payment
options in the Kiosk, so that he/she chooses the preferred option.
This screen does not appear in machines in “Order Terminal” mode, as payment and the
collection of services always takes place at the counter.
3.1 Counter payment
Payment for the services is made at the counter of the establishment.
In Kiosks in “Standalone” mode, if the end user wants to pay at the counter, an
operator must validate the operation afterwards in order for the Kiosk to process
the services. This does not happen when the Kiosks are in “Order Terminal” mode, as the
services are not processed in the terminal itself, so they can be validated later in the
Dispatcher machine.
There are two different ways of validation by the operator:
Validation with operator's card
Kiosk prints a ticket with the list of services requested and their prices. Kiosk is
temporarily blocked so that the client can go to the counter and make the payment. Once
the payment has been made, the Kiosk operator inserts his/her operator's card to enable
the client's services to be processed.
This method of payment is designed for establishments in which the Kiosk and the
counter are relatively close to each other.
This method has the advantage of not requiring any additional hardware for processing
the payment, and because payment is made directly in the shop's counter, it is
automatically linked to the shop's accounts.
20
Kiosk version 3.7.0
Operator's manual
However, there is the disadvantage that the Kiosk is blocked and cannot be used while
the client is at the counter making the payment.
Validation with an operator's password
This method is identical to the one above, with the sole difference that after the operator
has received payment for the service from the client, he/she authorises the processing of
the services using his/her operator's password.
3.2 Prepayment Card
This method enables users with a prepayment card to pay for any of the services
offered directly in the Kiosk. The establishment sells these cards which are preloaded with the balance at the time of purchase.
The prepayment cards contain a high security chip, with Mitsubishi encryption algorithms that
totally guarantee the protection of the data.
Each card has an associated limit which enables its use to be limited to a specific Kiosk, to all
the Kiosks in a shop or the Kiosks in an entire chain of shops.
The use of prepayment cards enables client loyalty to be maintained thanks to the
personalisation and improvement of the services.
3.3 Credit / debit cards (bank card)
This method enables payment to be made for the Kiosk services using a bank
credit or debit card.
In order to process a payment, the Kiosk reads the information on the card (strip
or chip) including the PIN if necessary. Whether it reads a strip or chip, and if it needs to ask
for the PIN, depends on the platform processing the payment and the regulations in each
country.
Special Kiosk parameters must be configured beforehand for this mode to be active. These
configuration parameters are provided by the same platform which processes payments. The
screen shown to the user for him/her to insert his/her card in the reader when making a
payment is shown below.
NOTE
Please check with your dealer the availability of the Kiosk credit card payment solution in your
country and hardware system.
21
Kiosk version 3.7.0
Operator's manual
3.4 Cash
This method enables payment for services to be made in cash, in the currency of
the appropriate country.
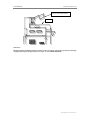
To do so, the Kiosk requires these 6 hardware parts:
Coin box
Coin acceptor
Note box
Note acceptor
2 hoppers
The hoppers are devices storing coins for change, and each one can contain only 1 type of
coin. When Kiosk gives change, it always does so with coins from these devices. They are
filled at the side by an operator (see sub-section “Coin counter” in the “Kiosk Operator”
section for more information) and coins of the same value as the contents of the hoppers
inserted in the Kiosk by the end user go directly to these devices.
There are 2 different working methods in the cash payment method – where change is given,
and with no change given. The Kiosk owner is the person who decides which one he/she
wishes to work with.
Some clients prefer to work without change being given, to avoid having to worry about
having change available in the machine.
If the machine is configured to give change, the notes and coins it accepts depends on the
availability of change in the Kiosk. There must be enough to ensure that the money can be
returned if the client cancels the operation. Payment is deemed to have taken place when the
sum inserted equals or exceeds the value of the services. If the value of the services is
exceeded, the appropriate change is given.
If it is configured to not give change, Kiosk accepts notes and coins until the amount for the
services is equalled or exceeded. If the sum inserted exceeds the value of the services, the
difference between the amounts is not returned in this working mode. Two sums appear on
the proof of payment slip.
The machine's hoppers are not used in the "cash payment without change given" mode, as
no amount is returned to the client. If the operation is cancelled during payment, a slip is
printed showing the cancellation of the service and the sum inserted by the client up to that
point.
Using this slip, the owner of the Kiosk can return the sum to the client if he/she considers this
appropriate.
The screen seen by the client when making cash payment is shown below. It shows the
amount for the services, the sum pending payment and the coins and notes accepted by the
Kiosk at any time.
22
Kiosk version 3.7.0
Operator's manual
3.5 Free mode
In this mode, Kiosk performs services at no cost to the user. This mode is used basically in
demonstration machines and at trade fairs.
4 Screen flow: User interface
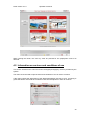
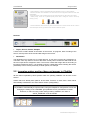
When nobody is using the Kiosk, the screensaver appears on the monitor. When it is
touched, the main screen appears and the client can start using Kiosk.
The client can select the language and service on this screen. The services offered depend
on the applications installed in the Kiosk (Digital Photography Services, EasyAlbum,
EasyCalendar, Greetings, etc.)
4.1 Choose language and service
The user can choose the language and service desired.
If the client has a prepayment card, it must be inserted now. In this case, the choice of
language takes place automatically as the card is preconfigured with the language the client
has chosen beforehand.
Every time he/she inserts the card, Kiosk welcomes the client and shows the name and
balance available at the bottom of the screen.
23
Kiosk version 3.7.0
Operator's manual
When leaving the Kiosk, the "exit" key must be pressed for the prepayment card to be
returned.
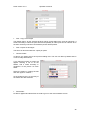
4.2 Information on services and conditions of use
This screen welcomes the client and shows the digital photography services provided by the
system.
The client must read and accept the terms and conditions of use in order to continue.
If the client pushes the descriptions of the digital photography services in error, a warning is
given that he/she must read the conditions of use and accept them in order to continue.
24
Kiosk version 3.7.0
Operator's manual
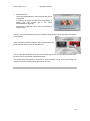
4.3 Input of images: Where do you have your pictures?
On this screen, client is asked to show the data source from where the images are to be read.
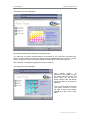
4.4 Filtering the data source
Data source filtering will save us time in processing and selection when working with a digital
camera cards or DVD/CDs already classified by the customer.
Similarly, it simplifies the development of a whole memory card or a DVD/CD and permits the
direct printing of all the photos without the need to enter the flow of editing screens.
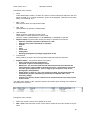
During filtering the source data device will be read, and a summary of the number of folders
and files found will be displayed
NOTE
This filtering screen will appear provided that is has been activated in the Photo configuration
and the file source is a digital camera card or a CD.
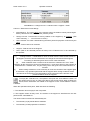
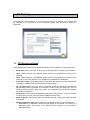
The following figure presents the 4 available options
25
Kiosk version 3.7.0
Operator's manual
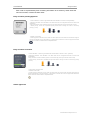
Print 1 copy of all images
The fastest option. All the selected pictures will be printed without the need to load them. It
will be necessary to select the print format and optionally an index print can be ordered. Once
the order summary has been confirmed the photos will be printed.
Print 2 copies of all images
The same as above but with two copies per photo.
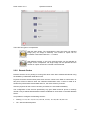
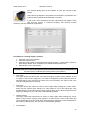
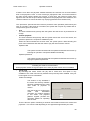
Choose folders
It‟s also a nice option also to save picture loading time. The user can filter by folders that he
or she is really interested in.
If you select this option a screen will
appear showing a list of all the
folders, and a small summary in
miniatures of the picture sin each
folder.
Select the folder by clicking the title
and click again to unselect.
At the bottom there is a summary of
the folders and files selected.
See all files:
No filter is applied and all the files are read to go on to the manual edition screen.
26
Kiosk version 3.7.0
Operator's manual
4.5 Services: What do you want to do with your pictures?
After selecting the data source, the next step is to choose the service. When the client's
images are loaded from a CD or PhotoWebAlbum, the CD-ROM burning services or the
creation of a PhotoWebAlbum are disabled, in each case.
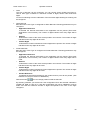
Information
There is an information button with a
description of each service, which the client
must push in order to consult prices and obtain more details
about the service.
In the prices section, the prices are shown according to the
format and the number of copies ordered (if the price ranges
are active).
For 1h/24h printing services, the information section can be
personalised.
The description can be modified by editing the text files D:\DPSPhoto\ServicesInstructions.
More information can be found in the “Kiosk Customisation” appendix.
Instant prints
This option enables images to be printed using
the Kiosk printers.
The user must then choose the print size.
27
Kiosk version 3.7.0
Operator's manual
The formats available depend on the formats selected in the general configuration of
DPSPhoto and the printers connected.
The number of copies pending also appears next to each size.
The print size appears in grey if the format is temporarily unavailable (for example, due to a
lack of paper, a problem in the printer, etc.)
DVD/CD Burning
This option enables a CD or DVD to be burned using the files or images selected.
When this service is chosen, the client is asked to insert an empty disk before
continuing. The maximum capacity of the disk is calculated after it has been inserted. The real
available space will be less than that on the disk as the picture browsing & viewer application
and the thumbnails of the selected images are included on the CD (approximately 175 MB on
a complete CD). The amount of space used on the disk is shown while the images are being
selected.
1 h / 24h prints
This option enables photographs to be sent to an alternative digital photograph
processor. The images are sent to any higher production machine in DPSLab
format.
The option of development in one hour is possible when the establishment has a high
production machine. If not, the development will take longer (up to 24 hours). The order can
be collected at the counter at the time stated by the establishment or sent to the client's
home.
The options available depend on the configuration of the DPSLab module (see DPSLab
Appendix).
Decoration
This option allows calendars to be created with
photographs or decorative frames to be added.
The print size must be chosen, as when producing instant
prints.
The client can also choose between various frames and
calendars designs. For the latter, the year and language
must be chosen.
The formats available depend on the formats selected in the general configuration of
DPSPhoto and the printers connected. The years and languages that can be chosen depend
on the calendars package installed.
Create a Photo WebAlbum
This option allows images be loaded onto a Photo WebAlbum which is created on
the website www.mitsubishialbum.com. After having paid for the service, and if it
has been possible to send the images, the user receives an information ticket with
the user name and password of his/her new Photo Website Album.
NOTE
This service is only available in ONLINE Kiosks
28
Kiosk version 3.7.0
Operator's manual
ID Photo
This option allows creating compositions with identity card, passport or portrait
photos and printing them on paper. End customer can not choose this service from
the list of available services, because is not shown in the services screen. The assistance of
the shop staff is needed when this service is required by the end customer.
Available formats depend on the formats chosen in DPSPhoto general settings and on the
connected printers.
Depending on the selected format, different compositions may be possible.
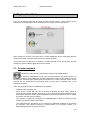
4.6 Viewer: Select pictures
The “viewer” screen shows the files that have been read from any of the available digital
media.
The files that are not images (marked on this screen as Multimedia files) can only be read if
the CD burning service has been selected. This service enables the user to record a CD with
all the films and sounds that his/her digital camera can create on the medium.
There are two working modes that can be configured using the DPSPhoto configuration.
These modes only affect instant prints, 1h/24h prints and decoration.
Mode 1 Automatic copy: Default configuration. When an image is selected, a copy of it
is automatically added to the order.
Multi-selection mode: When an image is selected, the number of copies requested does
not change automatically. To do this, button 6 must be pressed (see below). This mode
enables several images to be selected at the same time and the number of copies of
all of them to be increased or reduced at the same time (using button 6; see below).
29
Kiosk version 3.7.0
Operator's manual
1
6
2
3
7
4
8
5
9
10
11
12
13
14
1. Image selected
When an image is chosen, it is highlighted with a red edge. Depending on the working
mode, more than one image or only one can be selected.
2. Select all pictures / One copy of each
Wait until all the photographs have loaded before pushing this button. Check the total
number of photographs (9). (This option is only activated if all the files have been loaded.)
Depending on the working mode, only one copy of each will be selected, or one copy of
each will be selected and a copy ordered.
3. Deselect all pictures / Zero copies each
Depending on the working mode, they are simply deselected, or the number of copies
becomes zero.
4. Copies
This panel shows the number of copies that are to be printed.
The icon changes depending on the service requested (Printing, CD or PhotoWebAlbum).
5. Selected images
Number of images selected.
If the PhotoWebAlbum service is chosen, the megabytes they occupy also appear (Max:
50MB).
6. Add copies (only instant prints, 1h/24h prints and decoration)
This increases/decreases the number of copies of the image(s) selected.
At least one copy must be requested to continue onto the next screen.
7. Information panel
This shows information on the price per copy, the size and number of copies selected.
30
Kiosk version 3.7.0
Operator's manual
8. Services total
This shows the total price of this service plus that of other previously requested services,
if any.
The total sum appears in red when the balance of a prepayment card is exceeded.
9. Total pictures
This shows the total number of loaded images and files in the inserted medium. Check
that all the files are loaded before pushing the “select all photos” button.
10. Back
Ask the client whether he/she wants to cancel the current
service and not to add it to the list of projects ordered. If
accepted, the service selection screen reappears.
11. Previewing
Enables the selected image to be previewed. Depending
on the print size, a dotted line appears where the image
will be cut.
This screen also has buttons which allow the image to be
rotated or returned to its original resolution.
12. Edit
Enables the client to modify his/her images. The various options are listed in the “Editing
of images” section.
31
Kiosk version 3.7.0
Operator's manual
13. Low resolution signal
This icon appears next to images with a lower resolution than the one recommended for
the selected print size.
14. Next Button
This appears when at least one copy has been ordered. It leads to the next screen.
NOTA
The photo viewer is limited to 2500 files to guarantee good system performance and to make
it easier for the client to select pictures. If there are more files on the same device, the
contents should be structured in folders to simplify usability and selection.
32
Kiosk version 3.7.0
Operator's manual
4.7 Decoration: Calendars and frames
If the calendars and frames service has been selected by marking the desired photograph on
the “viewer” screen, the composition screen appears.
1
4
2
3
5
6
7
1. Selection panel
This allows a choice between the calendar and frame screens. It adapts automatically to
the photograph.
2. Template view
This enables the various templates to be viewed.
3. Back Button
This enables the user to return to the viewer and to choose another image.
4. Add copies
This enables the number of copies of the selected composition to be increased or
decreased.
5. Arrow buttons
This is used to centre the photograph in the frame or calendar.
6. Zoom buttons
This enables the size of the photograph to be increased or reduced.
7. Turn button
This enables the photograph to be rotated by 90 degrees every time it is pressed.
33
Kiosk version 3.7.0
Operator's manual
4.8 Do you want an index from your pictures?
This option only appears when instant copies or CD burning is selected in the first service
requested by the client. If the client answers yes, a menu showing the various types of index
print appears.
Of all pictures
Printing of an index print of all the images from the current source. "Copies" shows the
number of pages necessary for printing them.
This option may appear in grey if not all the images on the medium have been completely
loaded. In this case, the “Back” button must be pressed and all the images must be
completely loaded.
Of selected pictures
Printing of an index print of the selected images.
"Copies" shows the number of pages necessary for printing them.
Summary index print
Printing of an index print with a series of images selected at random from the source.
Only one page is printed in this option.
34
Kiosk version 3.7.0
Operator's manual
4.9 Order summary
This screen lists all the services requested up to this point and their cost.
Back
Go back to the "Search" screen.
Confirm service
By pushing this button, the client confirms the services requested, which are shown on
the summary, and this leads to the next screen.
From here, more operations can be added, the summary
consulted or the services accepted.
NOTE
This is the last screen to appear before payment is made and the services are completed
35
Kiosk version 3.7.0
Operator's manual
4.10 Extract sources
If a digital camera card or a CD has been inserted, Kiosk will ask the client to remove it now.
The client must extract the source medium and push the "Next "button".
NOTE
The Kiosk software assumes that the client has removed the data medium before pushing the
"Next" button.
Mitsubishi Electric cannot be held responsible for any medium that is left in the machine.
36
Kiosk version 3.7.0
Operator's manual
4.11 Method of payment selection: How will you pay?
This screen appears in “Standalone” mode, providing that a prepayment card has not been
inserted at the beginning of the transaction.
Counter payment
Cash
Credit card
This screen does not appear in machines in “Order Terminal” mode, as payment for the
services is always made at the counter.
4.12 Checking devices
At this point, Kiosk checks whether the correct media have been loaded in the printers and/or
whether a blank and valid CD has been inserted in the CD recorder (with a capacity for the
size of the selected files).Depending on the number of images or services selected, this
process may take a few minutes.
This screen does not appear in machines in “Order Terminal” mode, as the services are
processed using another machine.
37
Kiosk version 3.7.0
Operator's manual
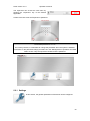
4.13 Execution of services
This screen shows the progress of the services requested by the client by means of a main
progress bar, and the progress of each service separately, below the appropriate icon.
38
Kiosk version 3.7.0
Operator's manual
Services banner
The area located below the main progress bar can be
customised.
It works as an image carousel. More instructions on
adding your own images are in the “Kiosk
Personalisation” appendix.
Alternatively a flash file can be used, for example to
make surveys.
After the services requested have been completed, a slip with the list of operations carried out
will be printed.
If the transaction has been paid for with a prepayment card,
Kiosk asks the client to remove the card now.
In any of the devices breaks down and cannot finish the service, an error slip is printed which
the client can use to make the appropriate claim.
This screen does not appear in machines in “Order Terminal” mode, as the processing and
collection of services always takes place at the counter.
39
Kiosk version 3.7.0
Operator's manual
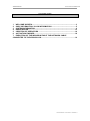
5 System configuration
NOTE
The first time using the machine it‟s necessary to use the Activation Wizard (see Activation
Wizard annex) in order to configure some Kiosk settings, such as the name, the IP address,
etc.
Some of the chapters may be only applied depending on the hardware.
Kiosk Kernel manages the core components of the system and their interaction with other
applications (DPSPhoto, additional services, etc.)
The system's core components are the hardware devices, methods of payment, operators,
screensaver, main screen, statistics and other general options such as languages,
information on the establishment, etc.
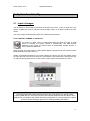
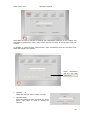
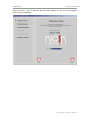
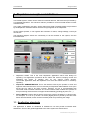
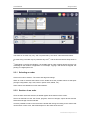
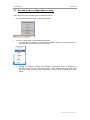
In order to configure and manage the Kiosk's behaviour, the operator must first access the
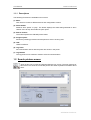
global configuration screen. This can be done in two ways:
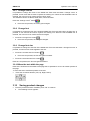
Automatically, by inserting the operator's card from the main screen
Manually, pressing the logo appearing in the top corners of the main screen and then
keying the operator's password in sequence.
1
Then type the Operator's password
2
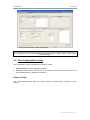
The global settings menu appears after the operator's password or card has been accepted.
All operators, including the supervisor, can access the various configurations of the
applications from this screen.
40
Kiosk version 3.7.0
Operator's manual
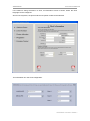
5.1 Kiosk Operator
Access to the operator interface is limited to users defined as operators, who need to access
the Kiosk system in order to carry out maintenance work.
On this interface, the operator can create client cards, restart failed requests, check payment
records, print a duplicate slip, view the state of the hardware, turn off the system, etc.
The operator can access the following menu by
pressing the “operator” key of the desired
application.
NOTE
This menu should be used whenever a problem arises and the information necessary to find
its cause collected
41
Kiosk version 3.7.0
Operator's manual
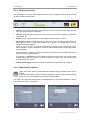
5.1.1 Operator menu panels
The general state of the system is at the bottom of the operator's menu.
Kiosk Information
o Current user: Shows the number of the operator who is accessing this menu.
o Version: Shows the actual Kiosk Kernel version.
o KioskID: Shows the identification for the machine. Its function is to identify the
machine as unique.
Status
Shows the general state of the machines. The operator can manually update the
information on the state of the hardware by pushing the update devices button.
Update button: Checks the current state of all the devices.
If there is any problem, consult the information listed on faulty operation of the
device in the "Device manager" panel. The three states are:
o
OK. The system is working correctly.
o
Warning. There is an error but the system can provide other services.
o
Critical error. The system cannot operate.
If Kiosk shows a state of warning or critical error in any device, this icon also
appears on the machine's main screen.
Kiosk out of order
If the Kiosk is out of order, the reason is shown on this panel.
The main reasons for this happening may be:
o
o
o
No application is activated: Restart the applications from the DPS Monitor or
restart the system.
No payment modes available: Check that all the payment devices (till, credit
card reader) work and are configured correctly
Ticket printer out of order: Check whether the ticket printer is out of paper or if
there is any problem with the device manager.
Failed Orders
If there is an error (e.g. uncompleted printing), this panel shows the number of jobs
pending or blocked. If this is not zero, push the "orders pending" button to obtain more
information.
42
Kiosk version 3.7.0
Operator's manual
Pending Task
o Remote updates: Shows the number of software updates that Kiosk has
downloaded from the DPS Server and which are pending execution. If this is
not zero, push the "DPS Monitors" button to obtain more information.
If the remote updating is ready for execution, this icon also appears on the
machine's main screen.
o
o
WebAlbum downloaded orders: Shows the number of remote orders that Kiosk
has downloaded from the DPS Server and which are pending execution. If this
is not zero, push the "orders pending" button to obtain more information.
Pending orders: Shows how many orders are pending to be executed. In the
case of an Order Terminal it shows the pending orders on the remote machine.
In case of a Standalone Kiosk it shows pending orders on the machine itself.
Device Manager
The operator can find out the cause of the problem using this panel.
The device manager tree is divided into applications.
Each application offers information that is updated periodically on its software or
hardware modules:
o Kiosk Kernel
Displays the state of the Kiosk hardware
o DPSPhoto
Shows the state of the digital photography services:
Applications: DPSPhoto, DPSPrintServer, DPS Lab
Printers
The four states of the hardware or software components are:
o
o
o
o
Ready. The application or device is operating correctly.
Warning. The system is ready but a problem is anticipated (e.g. the paper is
going to run out).
Error. The application or device does not work due to an error.
Start-up. The application or device is still not ready, due to start-up tasks
being carried out.
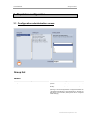
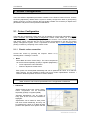
5.1.2 Customer Cards
Client cards can be created, client details changed or the balance available on
a prepayment card changed on this menu.
Registrations
New client cards can be created here.
43
Kiosk version 3.7.0
Operator's manual
o Title, name, gender, job, language, etc.
Enter the client's personal details. These are optional fields. The language specified in
year will be the default language that Kiosk will use when the client inserts his/her card in
the machine.
o Balance
Enter the new client's initial balance.
o Photo WebAlbum information
If the client has an account at www.mitsubishialbum.com, the user name and password
can be included in these fields. This enables the albums generated from the machine to
be automatically saved in the user's private account.
If the prepayment card is not compatible with the kiosk, a of dialogue box informing the
operator of this and he/she can decide whether he/she wants it to be compatible.
All data stored on the card may be used by this DPSKiosk (including money).
The system considers cards created in a DPSKiosk belonging to another business
incompatible (establishment or chain of establishments).
NOTE
The importing of the client's data from an incompatible card is for specific purposes.
The manufacturer cannot be held responsible for inappropriate use of this feature.
Modify
Enables the client's personal details stored on a prepayment card to be modified. At the
end, it is necessary to push the “Modify” button.
Reload
Enables the client's balance to be increased. The amount selected is added to the
balance available on the client's card at that time.
NOTE
The client's data are only read or recorded on the card. They are not saved on the hard disk.
44
Kiosk version 3.7.0
Operator's manual
5.1.3 Dispatcher Administrator
The operator can only use this screen when the machine is configured
in Standalone mode. This screen gives access to Dispatcher admin.
(See appendix Dispatcher Admin.), and from there orders pending
because of any error are accessible.
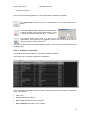
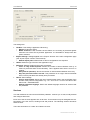
5.1.4 Payment registry
The operator can use this screen to find out the total amount of
transactions carried out in the Kiosk per day, week, month and year.
He/she can also print copies of the receipt for any order carried out in the
Kiosk. The duplicate is useful for tallying the till accounts when the client
pays directly in the kiosk, when the ticket printer is not working, or to
close the balance sheet for the current period and check the statistics
summary.
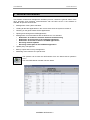
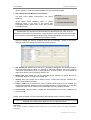
5.1.4.1 Payment Order tab
This screen shows all the details of the transactions carried out in the Kiosk.
45
Kiosk version 3.7.0
Operator's manual
Description of the columns:
Order
Order identification number. An Order is a series of services that kiosk offers the user and
which are paid for in a single transaction. (Prints of photographs, calendars, Photo Web
Album, CD recording, etc.)
Date / Time
Date and time when the request was made.
User Type
Client (USER”) or operator (“OPERATOR”).
User Identifier
Name of client if a prepayment card is used
“END USER” if another payment modes is used.
Operator number (“OPERADOR1” to “OPERADOR5”) if validating an operator.
Payment mode: Payment mode used by the client or operator for the service.
o Operator validation (operator's password or card)
o Operator Free (orders started by an operator)
o Counter
o Free
o Cash
o Credit card
o Prepayment
o Recharge prepayment (recharge prepayment cards)
Total Amount
Money paid by the client. This is the real amount that the Kiosk has collected.
Payment status: The payment status of a request
o Done: request carried out satisfactorily.
o Cancelled: request cancelled by the client.
o Reimburse: The client has paid the total amount but Kiosk has returned the
money because it was unable to perform the service. (This status is only used
for some special applications, such as topping up cell phones, and not for
photographic development)
o Power failure: if there is a cut in the electricity supply, the Kiosk switches off
automatically and the outstanding transactions are marked with "cut in
electricity supply"
o Counter: In a Kiosk in Order Terminal mode, all transactions have to be paid for
at the counter.
The table at the bottom of the “payment request” tab enables quick viewing of the details of
each payment movement.
Description of the columns:
Line: Line number of each row of details of an order
Date / Time: Date and time of each of the actions related to the order carried out by the
client.
46
Kiosk version 3.7.0
Operator's manual
Concept: Shows the action performed by the client or Kiosk:
o “Entry”: The user has inserted money into the Kiosk.
o Entry counter: If one of the configured modes of payment is COUNTER, and it
has been used to validate the work in an Order Terminal configuration.
o “Return”: Kiosk has returned money to the client due to a cancellation,
because of the Back button being pushed, etc.
o “Recharge prepayment": The client has charged money to his/her prepayment
card.
o “Return error ticket”: If there has been a cut in the electricity supply or the
"reimbursement" situation arises (see above).
o “Cash income”: An operator has filled the hoppers with cash.
o “Coin value change”: The coin value configured for the hoppers has been
changed.
Debit: The amount of money returned to the client. This may be the total amount entered,
for cancellations, or a change in the transaction. If the Kiosk's “no change” mode is
activated (see configuration), no amount will be returned (the “debit” column always
shows 0).
Credit: The amount of money the client has entered to pay for the service.
(e.g.: in this case, the client entered 1.5 €, and immediately cancelled the service (see
lines 1 and 2). Afterwards, the client entered 6.5€ and 1.5 € was returned as change for
payment of the real price of 5€)
Payment mode: See definitions in the table above.
As a summary, the following equation could be applied to all orders: (except for “without
change” mode)
Total amount = credit - debit
Select and push this button to print a copy of an order identification slip.
NOTE
Records of the transaction are kept until the supervisor decides to delete them.
This action is taken from the Kiosk Kernel supervisor's interface
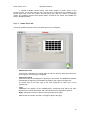
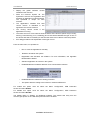
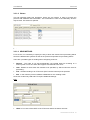
5.1.4.2 Current balance
This tab shows a summary of all the transactions recorded during a given period of time. It is
possible to print the information with the ticket printer (as in the previous tab).
47
Kiosk version 3.7.0
Operator's manual
Sections:
Current period: Shows the period of time included in the “current balance” tab. To start a
new period, push the “close balance” button).
Payments summary: List of payments grouped according to payment modes. This does
not include payments made with a prepayment card or cash refill, for the following
reasons:
o Prepayment mode: The client makes the payment when recharging the
prepayment card.
o Cash refill: The money inserted manually in the hoppers by the operator is not
accounted for as profit.
Cash summary: This is divided into 3 sections: Statements for the hopper levels, the list
of income in cash and the summary of the total in cash.
o Hoppers level: Amount of money currently in the hoppers and which can be
used for giving change to clients. (More information in the Coin counter
section)
o Change income list: List of the record of changes in the hopper: money
inserted (+) and money collected ( - ). This is updated when the operator
pushes the counter button (See the Coin counter section).
o Summary: 2 different ways of calculating the total amount collected during this
period can be seen here (2 columns; the left column shows the statement of
income)
48
Kiosk version 3.7.0
Operator's manual
Initial Balance + change income + collected cash = Hoppers + Cash.
Column 1: Statement of cash takings
Initial Balance: The initial value of the hoppers when the balance sheet period begins.
Money carried over from the end of the previous period.
Change income: Total amount of money loaded in the hoppers by an operator. (See
“Cash summary” “List of Income in Cash”)
Cash collected: The cash collected during the entire period for payment of services by the
client.
Column 2: Total in cash to be collected.
Hoppers: Total amount in the Hoppers.
Cash: (Cash to be collected) Amount of money in the "Collection box" to be collected by
the operator.
(1)
NOTES:
“Change income” + “initial balance” does not have to be the same as the amount in
the hoppers, as all the client's transactions can change the end result of the hoppers,
increasing or decreasing their value in each cash transaction.
(2)
“Cash collected” does not have to be the same as "collection box" as in "Cash
collected," all the money from services (Collection box + coins which will go to the hoppers) is
collected and in "collection box", only the money which has gone to the "Collection box" is
counted.
(3)
When closing a balance it is not necessary to count the contents of the hoppers again
or to fill them. Any operation performed with the hoppers after closing a balance will be
recorded in the next period. The initial balance of the new period is the amount of the
previous balance left in the hoppers.
To empty the “collection box,” the operator must push the “close balance" button. All
the values return to zero in order to be able to start a new period. When a balance is
closed, all the information not related to the hoppers in the “current balance” section
is deleted.
When this operation takes place, Kiosk assumes the following:
1. The collection box is empty for the next period.
2. The hoppers remain as they were. The amount in the hoppers is transferred to the next
period as the “initial balance”.
The various actions carried out automatically are:
The summary of payments table is restarted.
The summary of total payments is restarted.
49
Kiosk version 3.7.0
Operator's manual
The list of income in cash is restarted.
Initial Balance = Hoppers.
The hopper values are unchanged.
Change income is restarted
Cash collected is restarted.
After pushing the “close balance” icon, the “balance list” tab is updated with all the balance
values (date end, balance end, money entrance (income), collected amount, and finalized =
true).
The current balance is represented with Completed = False on the new line that appears.
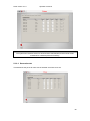
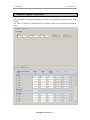
5.1.4.3 Balance list
This is where the record of all the previous collection is stored when the “close balance”
button is pushed.
Collected Id: Unique identification number for the registry.
Initial date: Start date of the balance sheet. The same as the final date of the previous
period.
Date end: Date when the balance sheet was closed.
Initial balance: Amount of money in the hoppers at the start of the balance. This comes
from the amount from the hoppers in the previous balance.
Balance end: Calculated when the “close balance” button is pushed.
Money entrance: Total amount loaded in the hoppers by an operator.
Collected amount: Total amount in the hoppers when the “close balance” button is
pushed.
Finalized: “True" when the balance period is closed, and “false”, when the balance period
is the one in progress.
The section at the bottom of the tab shows detailed information on the total amount collected
by each payment method in the selected balance period.
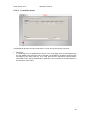
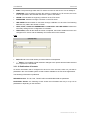
5.1.5 Coin counter
50
Kiosk version 3.7.0
Operator's manual
The changes taking place in the hoppers of coins are checked in this
section.
This button only appears if the optional coin machine is connected to the
system and the optional hardware panel is checked.
If you have a coin mechanism and this symbol does not appear, make
sure that the counter is connected properly and receives enough
electricity; and then restart the programme.
Procedure for counting hopper contents:
1. Insert the coins in the hoppers.
2. Close the machine door.
3. Push the “count” button in the appropriate hopper (Hopper 1: upper button; Hopper 2:
lower button) NOTE: As it counts them, the machine will eject the coins.
4. Reinsert the coins in the hoppers.
NOTE
The final result of the count is equivalent to the real contents of the hoppers. (Regardless of
the amount they contained before being filled by the operator)
Coin value
This figure shows the value of the coins that the hopper contains (in the example, 0.10 €
in hopper 1 and 0.50 € in hopper 2). This must be configured by the supervisor and it is
important that it is the same as the value of the coins inserted. The value of the coins
must be configured before counting.
Coin level
This figure shows the number of coins in each hopper after pushing the "count" button.
Every time the system gives change or a client inserts a coin of this value (the coins
inserted directly by the client which have the same value as the value configured for the
hopper go directly to it), the coin level is automatically updated.
Hopper amount
This figure shows the total amount of money in each hopper after pushing the "count"
button. Every time the system gives change or a client inserts a coin of this value (the
coins inserted directly by the client which have the same value as the value configured for
the hopper go directly to it), the coin level is automatically updated.
Total hoppers
51
Kiosk version 3.7.0
Operator's manual
This figure shows the total amount of money in both hoppers after pushing the "count"
button. Every time the system gives change or a client inserts a coin of this value (the
coins inserted directly by the client which have the same value as the value configured for
the hopper go directly to it), the coin level is automatically updated.
“Release Critical Stop” button
This button allows the coin counter to be unblocked if it has been blocked for security
reasons, due to attempts at theft or fraud in the insertion of notes.
5.1.6 DPS Monitor
This button is used to access the DPS Monitor module.
More information can be found in the DPS Monitor section of this
manual.
5.1.7 Statistics
This button provides access to the statistics screen. See APPENDIX
STATISTICS.
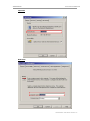
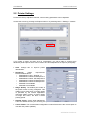
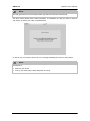
5.1.8 Shutdown
The system must be shut down in an organised manner to avoid
damage to the operating system and the databases. After pushing the
“Shutdown” button, a confirmation screen appears. Push YES to shut
down the Kiosk correctly.
52
Kiosk version 3.7.0
Operator's manual
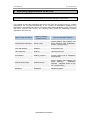
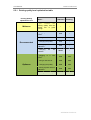
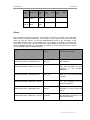
Most systems include an UPS (Uninterruptible Power Supply). In this case, the table below
shows 4 different ways to turn off the system and the procedure followed by the system in
each case is listed.
CASE 1
CASE 2
CASE 3
CASE 4
TURN OFF FROM THE
OPERATOR'S MENU
TURN OFFFROM THE
OPERATING SYSTEM
DISCONNECTION
DISCONNECTION
FROM MAIN ELECTRICITY
SUPPLY
FROM THE MAIN UPS/KIOSK
SWITCH
PROCEDURE 1
PROCEDURE 2
PROCEDURE 3
PROCEDURE 4
System (automatically)
System (automatically)
System (automatically)
System (automatically)
1.- Closes the applications
1.- Damages the
applications
1.- Wait 2 minutes
1.- Turns off
2.- Saves the databases
3.- Closes the windows
4. - The UPS waits for the
configured period of time.
2.- Close the applications
2.- Does not save the
databases
3.- Saves the databases
3.- Closes the windows
4.- Close the windows
5. - The UPS waits for the
configured period of time.
Operator (manually)
This procedure may cause a fault
in the system!
Operator (manually)
1. - Disconnects the
electricity supply before the
configured time has passed.
6.- The UPS turns off
1.- Disconnects the
electricity supply
2.- The UPS beeps
3.- The UPS turns off
Recommended
Not recommended
Recommended
Not recommended
Case 3: this situation is equivalent to a cut in the electricity supply.
The system carries out all the steps automatically.
The incident is notified to the incident database and the Kiosk owner is also notified by email (for ONLINE kiosks).
If an order is being executed (e.g. printing) an error it is printed and the remaining copies
are saved in system as pending jobs.
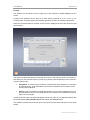
5.2 Kiosk supervisor
Access to the supervisor's interface is restricted to the supervisor of the establishment, and it
allows the Kiosk system to be configured and its advanced functionality to be checked.
With this interface, the supervisor can set up the general configuration of the Kiosk, review
the statistics and manage the operators' cards.
53
Kiosk version 3.7.0
Operator's manual
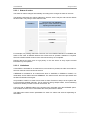
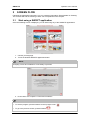
The supervisor can access the next menu by
pushing the “supervisor” key of the desired
application.
He/she must then enter the Supervisor's password
NOTE
The default password is "1 2 3""
For security reasons, it is advisable to change this password when the system is installed.
Information on the password change procedure is in the “Management of operators and SAM
cards” section. Only the supervisor should know the password.
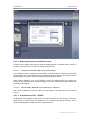
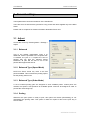
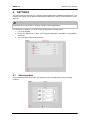
5.2.1 Settings
In this section, the general parameters of the Kiosk can be configured.
54
Kiosk version 3.7.0
Operator's manual
5.2.1.1 General
Regional Configuration
o
Language
The default language used for the operator and user interface, the screensaver, the
main screen, etc.
o
Measure
The metric unit used to show dimensions on any screen: centimetres or inches.
o
Currency
Allows the country's currency to be selected. This coin currency applied to both
payments in cash and those with credit cards.
o
Coin position
This allows a choice of where the symbol of the currency will appear (before or after
the numbers).
Date format
For selecting the format of the date printed on receipts and the index copy
Online Options (Kiosk ONLINE control panel )
This option will only be enabled if the Kiosk has been registered beforehand. You should
check this panel if the Kiosk is connected to the internet and provides online services.
If it is not checked, the Kiosk will be unable to request jobs or remote updates from the
web server and the web services will be disabled.
55
Kiosk version 3.7.0
Operator's manual
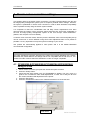
Taxes and discounts
If you wish, you can check the taxes panel so
that the value and description of the tax appears
on the receipt.
Add its name and percentage.
By checking the “prepayment discount” you can
offer special prices to clients using the
prepayment card.
NOTE
Taxes are not shown in the final price. The price given to the client must include taxes.
Screensaver
o Inactivity notification time.
After the time selected has passed, a
waiting time screen appears. If no
button is pressed, the screensaver is
activated after this period.
o
Inactivity message duration.
If the user is using a service, a message informing him/her of the inactivity appears
on the screen. This message is displayed for this period and the screensaver appears
afterwards.
o
Customised screensaver pictures interval.
The screensaver which is used while the service is being performed can be
personalised using a carousel of several images.
The time interval between each change of image can be set here.
(See “Kiosk Customisation” appendix).
Kiosk out of order
On this tab you can determine what will put the
Kiosk in the out of order mode.
o
Application Status
Indicates that if no application is working
correctly, this will cause out of order (For
example DPSPhoto). This option cannot be
changed.
o
Ticket Printer not available
If a ticket printer is out of paper or has stopped working the Kiosk will get out of.
o
Any payment method available
If no payment mode is working correctly (as established in settings) Kiosk will be out
of order.
56
Kiosk version 3.7.0
Operator's manual
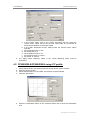
5.2.1.2 Kiosk Information
Owner Info
o Shop name, address, telephone number
Information on the establishment where the Kiosk is installed. This information
appears at the top of the slip that the client receives.
o
Website
URL address which appears on the printed slip and on the screen of the Kiosk when
a Photo Web Album service is requested.
o
Fiscal identification
Fiscal identification number of the establishment. In some countries, this number
must be included on the client's slip by law.
o
The shop's logo
Logo which appears on the SublimeCD, on the index print and in top left corner of the
screens. More information in the “Kiosk Customisation” appendix.
Order Numbering Options
o Next Order Id
Every order is associated to a unique identification number. It would be possible to
change the value of the following orders. Only use this option following advice of the
technical support.
Terminal Type
o Machine Alias
Name to be shown on the slip. This name is free and can be modified to easy identify
the machine (for example "Kiosk on the corridor”).
o
Work Mode
This option makes it possible to configure the Kiosk as an Order Terminal or
Standalone. In case of setting as Order Terminal it is necessary to insert the IP
address of the Flexilab system.
57
Kiosk version 3.7.0
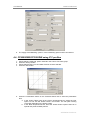
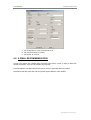
5.2.1.3
Operator's manual
Kiosk Applications
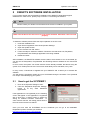
All the applications installed in the Kiosk appear on this screen. Those that are marked are
available to clients.
Do not mark the options if you do not want the applications to activate the next time you turn
on system.
In the „Reference‟ section a code to be used when configuring the barcode can be introduced
(see ticket tab on this section).
5.2.1.4 Languages
This section allows you to choose the languages available on the main screen. The first
language configured on the list is the default language used.
58
Kiosk version 3.7.0
Operator's manual
5.2.1.5 Payment mode
Payment mode
The payment modes available in the Kiosk and offered in the various DPS applications
are defined in this section.
59
Kiosk version 3.7.0
Operator's manual
If there‟s more than one payment method activated, the customer can choose between
them in the payment screen. In case of having a prepayment card, it must be inserted in
the main screen before starting any service. In that case, the payment screen won‟t
appear at the end and the price will be charged from the prepayment card. Otherwise, the
customer will have to choose another way of paying (between the activated ones).
The "print ticket" panel shows that a ticket is printed for each operation performed by the
user as a receipt. If this panel is not marked, the system will not print any tickets and no
receipt will be given to the client.
o
Free
The client interacts anonymously with the system and the service is provided free of
charge.
o
Counter payment
The client interacts anonymously with the system and at the end of the service; the
operator's presence is required to validate the jobs.
When the client indicates the services used, the system prints a ticket showing the
price of the transaction and asks the client to pay this amount at the counter.
Operator card
The system remains blocked until the operator authorises the service by
inserting an operator's card (Not available in KioskLite).
Operator password
The system remains blocked until the operator authorises the service by
keying an operator's password.
NOTE
Activating this mode is recommended.
These payment modes are a good option when other payment modes are not available.
o
Credit card
By activating this mode, clients can pay with a credit card. This option is only
available if the credit card security software has previously been installed. Ask your
local supplier for more information.
Credit card settings
This section is only activated if
the credit card security software
has been installed and the credit
card mode of payment is
chosen.
Use this section to configure the
credit
card
information
necessary for making payment
in this mode. The payment
platform supplier provides the
necessary details for operating
with the card.
There is also the option of defining a minimum and maximum amount for credit card
payments. This can be used depending on the agreement signed with your bank.
60
Kiosk version 3.7.0
o
Operator's manual
Prepayment
This mode should be selected if clients use prepayment cards. These cards enable
the client to pay for services beforehand, maintaining the balance on the card. The
system greets the client personally.
This type of card is personal and may be used in a specific Kiosk or in a group of
Kiosks in the same domain. These domains are defined on the administration website
server's interface.
The client must insert the card at the beginning of the transaction, on the main
screen. It will not be possible to use the prepayment card afterwards.
o
Cash
This option enables clients to pay for Kiosk services in cash.
The notes or coins accepted can be configured, as well as some parameters related
with to the machine.
This option is enabled by selecting the "optional hardware" box, in the "general" tab. If
the Kiosk does not detect the hardware when the programme starts, it will be unable
to detect it later and the option will remain disabled until the application is restarted.
Cash parameters:
- Coin
If the payment in cash mode is
chosen, the currency in the
"general" tab is automatically
disabled. As a result, the Kiosk
currency is the one configured in the
coins and notes acceptors.
- Supported notes/coins
This enables the coins and notes that Kiosk accepts for cash payments
to be configured.
- Reset Button
Always push this when contradictory information appears in the
compatible coins /notes panel.
- Cash modes
´No change´ mode
Does not give the change to the user, even when he/she wants to cancel
payment. With this option, hoppers are not used, so it is not necessary to
have them connected. All compatible coins and notes that have been
configured are accepted.
Change mode
If working with this mode, the cash payment system can:
Return all the money that the client has inserted if payment is cancelled at any time
during the payment process.
Return change for the coins and notes accepted.
61
Kiosk version 3.7.0
Operator's manual
NOTE
In change mode, it is very important to check that the value of the coin set for each hopper is
the same as the coins it really contains. If not, the Kiosk could return an incorrect amount of
change to the client.
When the coins to be contained in the hopper are changed, it is important that the value of
the coin set for each hopper is the same as the coins it really contains, as Kiosk records this
difference as a payment record later in the balance sheet.
The coins and notes accepted during the payment process may vary depending on the
amount of coins contained in the Hoppers and how the “Maximum change allowed”
setting is configured.
NOTE
Combining this mode of payment with counter payment is recommended.
5.2.1.6 Ticket tab
In this section, the information on the ticket can be personalised.
Ticket Header
In this section, the ticket heading can be personalised.
If this option is checked, the text can be edited in the next panel.
62
Kiosk version 3.7.0
Operator's manual
Push the "update" button to obtain a preview and the “print” button” to print a sample
ticket.
Ticket Settings
In this section everything related to barcode and tickets is configured.
o
Print Ticket
If selected a ticket will be printed for each done order. If not no ticket will be printed
(not recommended).
o
Additional Copies
Allows to print as much copies of each printed ticket as the shown value indicates.
o
Barcode Type
The standard configuration of barcode allows to chose between different types of
coding:
- No Barcode: no barcode shown on the ticket.
- Order Barcode: one single barcode with information about the total amount of the
order will be printed.
- Product Barcode: one barcode for each product with its price will be printed (see
reference tab on DPSPhoto settings). Order Barcode is also printed at the bottom.
- Product Reference: a number code (no barcode is shown) will be printed for each
product with its price (see reference tab on DPSPhoto settings). Order Barcode is
also printed at the bottom.
o
Barcode Format
You can chose among different types of barcodes. A click on this button
access to the following settings screen.
provides
63
Kiosk version 3.7.0
Operator's manual
Code
The type of barcode can be configured. You can choose among CODE-128, EAN-13,
UPC-A. Each type is related to a maximum number of digits, shown under Code Max
Digits.
On the two following screens codification of the barcodes digits following its meaning will
be configured.
Order Barcode
Barcode when Ticket Type is configured as Order Barcode. Following parameters may be
configured.
o
Application Reference
If selected the barcode associated to the application will be printed. (See Kiosk
Applications in this section). The number of digits indicates how many digits will be
used.
o
Amount
If selected the value of the order will be printed in the barcode. The number of digits
indicates how many digits will be used.
o
Custom Digits
If selected the number indicated at Custom Digits will be printed. The number of digits
indicates how many digits will be used.
Product Barcode
Barcode when Ticket Type is configured as Product Barcode. Following parameters may
be configured.
o
Application Reference
If selected the barcode associated to the application will be printed. (See Kiosk
Applications in this section). The number of digits indicates how many digits will be
used.
o
Amount
If selected the value of the order will be printed in the barcode. The number of digits
indicates how many digits will be used.
o
Custom Digits
If selected the number indicated at Custom Digits will be printed. The number of digits
indicates how many digits will be used.
o
Product Reference
If selected the barcode associated to the product and its price will be printed. (See
Reference in the price section of DPSPhoto).
With the arrows
you can change position inside the barcode.
By selecting „Validate‟ you will find out if the configuration fits to the selected codification
(CODE-128, EAN-13, UPC-A). In case the configuration may not be validated it must be
made sure that the maximum number of digits corresponds to the sum of the digits
configured.
64
Kiosk version 3.7.0
Operator's manual
5.2.1.7 Devices
Optional Hardware
o UPS
If UPS is available this option must be checked. This will allow the system to control
its state and errors in the energy supply.
o
Cash Machine
If a cash machine is available this option must be checked. This will allow the system
to control its state and to configure it on the PAYMENT MODE tab.
o
Chip Card Reader
If prepayment card is available this option must be checked. This will allow the
system to control its state and to configure discounts on the PAYMENT MODE tab.
o
Ticket Printer
If ticket printer is available this option must be checked. This will allow the system to
control its state and to configure its options on the PAYMENT MODE tab.
UPS Configuration
o Warning Time
Time (in minutes) during which the UPS remains on after the electricity supply has
been cut off.
Ticket Printer Configuration
o Ticket Printer
Allows selecting the ticket printer model.
65
Kiosk version 3.7.0
Operator's manual
5.2.1.8 Incidences tab
Incidences in the system can be notified to pre-defined groups by e-mail. Use this section to
select whether they should be notified and which groups should be notified.
Error group
Each error by an application or device is classified in a group which enables decisions to
be taken on who to notify of the incidence by e-mail.
E-mail
Mark this option for incidences to be notified by e-mail.
E-mail group
If you mark the e-mail option, you must indicate which group of e-mails is used to receive
notification of the incidence.
There are four notification groups:
5. Service
6. Maintenance
7. Administration
8. All
The e-mail addresses of each group are configured on the administration site of the DPS
Server.
All the notifications are regularly passed on to the DPS server if the Kiosk is ONLINE.
66
Kiosk version 3.7.0
Operator's manual
5.2.1.9 Sources tab
This table shows the various media and devices used as inputs for images. In the source and
route columns, the unit and route of the system are shown, respectively.
The sources are predefined by default for the Kiosk system units and must not be changed.
5.2.2 Operator and Sam card management
This menu enables operator cards to be managed and Sam cards to
be created.
The operator's name can also be configured on this menu, and a
password assigned to each card.
It is also possible to create or delete operator's cards, up to a maximum
of 5 operators.
67
Kiosk version 3.7.0
Operator's manual
Sam cards are used to activate an optional and independent hardware, for the creation and
recharging of prepayment cards. They will be valid for the Kiosk where the Sam card was
created.
To activate or create the Sam cards function, push “Ctrl+Shift+S” and the “new Sam card”
button will appear in the window
Press Ctrl+Shift+S
and the new Sam
card
button
will
appear
Operator 1…5
Select the card you want to create or modify.
Operator Name
Enter the operator's name and push the green
button. This name is used to identify the
operator.
68
Kiosk version 3.7.0
Operator's manual
Password
Enter the password of the selected operator. This will be
necessary later, when the validation of the operator's
password is selected as a payment mode and to enable
access to the operator's menu.
A key will appear next to the operator's card icon to show that
this operator has been assigned a password.
NOTE
Assignment of at least one password to one operator's card is recommended.
It can be used as an alternative for access to the General Settings Menu if the card is lost
Create card
Push this button to create an operator's card and insert an operator's card to continue.
NOTE
With this operation, any data stored on the card will be overwritten.
Delete operator
Push this button to delete the information about this operator.
It is not necessary to insert any card.
After this operation, the operator's card and its password will be disabled.
Supervisor password
This option enables the supervisor's password to be changed.
NOTE
Carrying out this process the first time the supervisor accesses this menu after installation of
the Kiosk is recommended.
5.2.3 Logs
In this section, the supervisor can check on the statistics of the
Incidences and the system, requesting information from local
databases.
All the records are sent to the DPS server and may be distance
consulted by the DPS server administrator if the Kiosk is ONLINE.
5.2.3.1 Log options
The two statistics tables share these buttons, which are used to configure the mode in which
the data panel shows the records.
The supervisor can define the data filtering criteria by clicking on the Filter button.
Date
69
Kiosk version 3.7.0
Operator's manual
Operator (only user)
Every time a new filter is applied it is to the original table of statistics (complete).
The “Reset filter” button removes the selected filter. All the information is then
shown.
This button deletes data. A dialogue window appears,
in which the date and time must be entered, in order
to delete "transactions data older than ..." that date.
This button allows all the data in a text file to be exported. This file can
subsequently be imported to any database system and can be opened using a
TM,
simple text editor or Microsoft Excel
The format of these files is CSV (fields separated with a comma and recorded separately with
the Return key)
5.2.3.2 Incidences record tab
This table shows all the Incidences in the Kiosk related to hardware.
The DPS server is regularly notified of the Incidences.
The Incidences are ordered by date and time or using a defined field in the filter configuration
panel. The fields are:
Date / time
Device: Identifies the device
Error code: Identifies the type of incident.
Error message: Description of the problem
70
Kiosk version 3.7.0
Operator's manual
Reported: This column shows whether the DPS server has been notified of the incident.
The various values are:
o Reported. The data have been sent.
o Pending. The service has been completed but the data is yet to be sent.
o n/c. The order has not been sent. (for kiosks that are not online)
5.2.3.3 Users tab
This table records some actions carried out by the operators or supervisor in the system
(Turn off, Operators' tasks, create prepayment cards, etc.).
The system records are regularly sent to the DPS server.
This panel shows the actions separately, classified by the field defined in the filter
configuration panel. The fields are:
Date and time
User type
User identifier: Number of the operator performing the action.
Action: Description of the action
Additional information: Additional information which may be relevant.
71
Kiosk version 3.7.0
Operator's manual
The DPSPhoto application provides the client with photographic services and a means to
manage the way they are offered. The operator and supervisor interfaces can be entered
from the global configuration screen.
Choose the “New task" option to carry out any transaction the way the
client does, but omitting payment. This operation is carried out at no
charge and is recorded as an operator's transaction.
5.3 Photo supervisor
Access to the supervisor's interface is restricted to the supervisor of the shop, and enables
advanced configuration tasks to be carried out on the kiosk application in order to personalise
photographic services.
With this interface, the supervisor can administer the general configuration of DPS PHOTO
(formats, index print, decoration, etc.) and the prices of these services.
The supervisor can access the next menu
by pushing the “supervisor” key of the
DPSPhoto application
Enter supervisor's password
NOTE
The default password is "1 2 3""
For security reasons, we recommend changing this password when the system is installed.
See the “Management of operators and Sam cards” section on how to change the password.
Only the supervisor should know the password.
72
Kiosk version 3.7.0
Operator's manual
5.3.1 Settings
In this section, the supervisor can configure the general parameters of
the DPSPhoto application.
5.3.1.1 "General” tab
Formats
73
Kiosk version 3.7.0
o
Operator's manual
Composition
If this option is checked, the client's low resolution
images can be printed with the paper size selected
in the “paper size” section.
The image is printed in the size established in the
"layout" section. Depending on the size of paper
selected, the image on the paper is located
according to the parameters set for “compositions”.
Not all paper sizes allow low resolution formats.
Base size
This is the first option offered to the client on the
list of available print sizes and is also used by
default as the paper size for the index print.
Additional sizes
Six additional formats are also possible for the
client to choose different enlargements or
alternative formats.
The following table shows the sizes allowed depending
on the media (paper) loaded in the printer.
Media
format (cm)
Media
format
(inches)
Base size
available
(cm)
Base size
available
(inches)
Low resolution
Low resolution
Compositions(cm)
Compositions(inch)
9 x 13
3.5 x 5
9 x 13
3.5 x 5
No
No
7.5 x 10 (2)
3 x 4 (2)
9 x 12 (1)
3.5 x 4.7 (1)
7.5 x 10 (1)
3 x 4 (1)
10 x 15, 7.5 x 10(2)
4 x 6, 3 x 4 (2)
If 10 x 15 is chosen
(2); 7.5 x 10 (2); 9 x
12 (1); 7.5 x 10 (1)
If 4 x 6 is chosen (2);
3 x 4 (2); 3.5 x 4.7
(1); 3 x 4 (1)
10 x 15
13 x 18
15 x 23
4x6
5x7
10 x 15
4x6
13 x 18
5x7
15 x 23
6x9
15 x 21
6 x 8.5
15 x 20
6x8
13 x 18W
5 x 7W
10 x 15 (2)
4 x 6 (2)
11.5x 15 (2)
4.5 x 6 (2)
6x9
The number appearing in brackets, (1) or (2) shows the amount of images printed. For
example, 10 x 15 (2) means that two 10 x 15 cm photographs are printed on a 15 x 23 cm
sheet of paper.
74
Kiosk version 3.7.0
Operator's manual
If the medium loaded in the printer does not allow some formats to be printed, these formats
will appear in grey (disabled) in the client's interface.
NOTE
The same print size cannot be chosen for two printing formats (e.g. 10 x 15 and 10 x 15 (2)).
The 10 x 15 W format is only related to the Mitsubishi CP8000DW printer and should not be
chosen.
Banner time interval while jobs are being carried out
The number which appears in this text panel shows the time (in seconds) passing
between each customisable dynamic banner which appears while the DPSPhoto services
are being carried out. See the “Kiosk Customisation” appendix for more information.
Collage formats. Define the formats for made the compositions. This format is available or
disable in the service screen according if the format exist or not..
5.3.1.2 Customisation Tab
This section is used to customize the range of photographic services.
Services
The following services can be enabled or disabled:
o
o
o
o
o
CD/DVD burning Enables the CD/ DVD recording service
Photo WebAlbum Enables the Photo Web Album service. This
option is only available if the Kiosk is ONLINE.
1H Prints Enables the 1H printing service
24H Prints Enables the 24H printing service
Decoration Enables the decoration service with calendars and
frames.
75
Kiosk version 3.7.0
Operator's manual
NOTE
The 1H and 24H services are disabled if the DPS Lab application has not been configured.
o
Browser tab
This enables configuration of the parameters for the image viewer.
Selection mode
This enables the selection mode for the image viewer to be established.
(Information on the modes available in the “Viewer” section)
Edition
This enables or disables the image editing service and the
various options in this section.
Image enhancement
Enabling the “Auto Adjustment” option the Print Server is
instructed to realize a general image adjustment on all
printings. If this option is disabled no corrections will be made.
Sepia
Configures the ink levels for sepia edition.
NOTE
The modifications are only applied to printed images and do not affect the original
photographs saved on the client's medium.
Filtering the source device
We can enable or disable the source device filtering
option to improve file loading (It is selected by
default, and this is the recommended option)
We can print 1 copy of all the source images without
even viewing them, and even filter by folders, thus
gaining in speed and performance.
Copies control. We can control available copies
when we select the images in the Browser screen.
For this, we use the following configuration:
1.- Check after finish selection. This specification is used when the next button is
selected. Appears a message if haven‟t available copies in the printer for finish the order. This
is the default option.
2.- Check after selecting images. This check is realized every time that the user select
one image in the browser screen. Appears error message if no exist available copies in the
printer.
76
Kiosk version 3.7.0
Operator's manual
3.- Disable available copies control. This option disable el copies control in the
browser screen, this means that the user can print more copies that the available in the
printer. When this occurs, the system will print ticket error with the number of remaining
copies. The operator will have that replace paper & sheet ink the printer and validate the
order in DispatcherAdmin.
5.3.1.3 “Index Print” tab
This menu enables the print mode of the index prints to be configured.
o
Enable Index Print
If this option is activated, the system asks the client to print the index print before the
service (prints, CD burning) is completed.
o
Pictures per sheet
Input the number of photographs for printing on each sheet. The DPSPhoto software
automatically changes the presentation according to the number of images set.
The paper size of the index copy is the size configured as “base size” on the
“general” tab.
o
Logo
Establishes the position of the establishment's customised logo which has been
selected in the “Kiosk Information” tab in the Kiosk Kernel configuration window.
Right: Shows the number of pixels on the right edge of the page.
Top: Shows the number of pixels on the upper edge of the page.
77
Kiosk version 3.7.0
o
Operator's manual
DPSKiosk Logo
Sets the position of the DPSKiosk logo.
Left: Shows the number of pixels on the left edge of the page.
Top: Shows the number of pixels on the upper edge of the page.
"Refresh" button
Allows the presentation of the index print to be previewed.
“Print” button
Allows a sample of the index copy to be printed.
5.3.1.4 Decoration tab
The calendar and frame templates are installed in the system beforehand.
From this section, the calendar and frame templates used in the “decoration” service can be
deleted and previewed. Push the “-“ button to delete a frame or calendar and the "uninstall
year” button to delete all calendars for the selected year.
78
Kiosk version 3.7.0
Operator's manual
5.3.2 Prices
From this section, the supervisor can set the prices for each
photographic service offered.
NOTE
It sets the prices taking into account that the system does not return coins of a lower value
than those contained in the hoppers to the client.
Example:
Price of the
order
2.58€
Coin
Coin
Hopper 1
Hopper 2
0.10€
0.50€
Money inserted
Return
Real price (paid
by the client)
3.00€
0.40€(in 4 coins
of 0.10 €, from
the hopper1)
2.60€
5.3.2.1 General tab
The supervisor can establish different prices for a group of copies, according to the number of
prints requested by the client. This group of copies in a given price range is called a "range”.
In this section, the number of price ranges and the amount of images for it to cover can be
defined.
The ranges established are applied automatically to the other tabs related to setting prices.
5.3.2.2 Copies tab
This tab allows the prices for each paper size to be set in the “general” tab of the
“configuration” window of DPSPhoto. (See section 5.4.1.1. of the manual)
79
Kiosk version 3.7.0
Operator's manual
NOTE
The system will not admit orders for amounts above 999,999,999, and amounts will be
rounded off to 3 decimal points if necessary.
5.3.2.3 Decoration tab
This tab allows the prices for each size of calendar and frame to be set.
80
Kiosk version 3.7.0
Operator's manual
5.3.2.4 References Tab
This tab allows the introduction of codes to be used for barcode printing. Each barcode will be
related to the product and its associated value. See „ticket‟ on the DPSKiosk settings section..
5.3.2.5 Other services tab
This tab allows prices to be set for services to which no price ranges are applied.
81
Kiosk version 3.7.0
Operator's manual
5.3.2.6 1 h and 24 h prints
This tab allows prices to be set for jobs sent to 1-hour and 24-hour printing services.
Surcharge
If a surcharge is to be applied to the service, such as postage costs, the description and
the sum added to the final price can be entered. It is advisable to include a warning of this
surcharge for the client (see the 1H or 24H print services instructions section) (More
information in the “Kiosk Customisation” appendix). This surcharge is included directly in
the total price of the order.
82
APPENDIX
DPS Monitor
CONTENTS
1
GENERAL INFORMATION.......................................................................... 3
2
UPDATING SOFTWARE ............................................................................. 6
3
BACK-UP AND RECOVERY ....................................................................... 8
4
EXPORT/ IMPORT OF PRICES................................................................... 9
5
SELECTING APPLICATIONS TO BE RUN ............................................... 11
APPENDIX
DPS Monitor
1 General information
This module controls and manages the activation process, checks the general status of the
other programs and manages communications with the DPS server if the software is
ONLINE. Its specific functions are:
Management of the system activation.
Loading all the DPS applications in the correct order when the system is turned on
Checking on the general state of DPS applications
Opening and closing all the DPS applications
Management of communications with the DPS server. This includes:
o Notification of incidences related to hardware malfunctioning
o Notification of the activities of all completed operations
o Notification of the state of devices and DPS applications
o Receiving software updates
o Receiving remote jobs for the DPSPhoto application
Update policy management
Backup copies and recovery management
Restarting of the machine at a specific time.
The operator can access the DPS Monitor from the Kiosk Kernel operator's
menu
The main DPS Monitor window is shown below.
APPENDIX DPS Monitor 3
APPENDIX
DPS Monitor
Display the global software
installed in this machine.
Show the machine System ID. The
SystemID is used for the registration and
activation of applications in DPS Systems.
The SystemID is unique for each
machine.
The applications installed and their
current version is identified in the
application and version columns.
The running column
application is running.
The status and error code columns show the status of the devices (which may be ready,
warning, critical warning, error, initializing) and a code which identifies the type of error in
the device and what is necessary for the technical service to be able to solve the problem.
Error Msg provides a brief explanation of the type of error.
shows
version
if
the
From the main menu, it is possible to:
o
Run or close the applications manually.
o
Restart or shutdown the system.
o
Registration and activation the software. For more information, see Appendix
DPSActivation Wizard.
o
Selection application to execute in the system.
o
Enable/Disable the hardware detection to be connected the machine.
o
Enable/Disable the USB device writing protection.
o
This option allow the writing to the internal or external USB device.
For enable this option must be select the Menu Configuration, USB Protection
section and select Enable.
For disable this option must be select the Menu Configuration, USB Protection
section and select Disable.
The default option is “Enable” for DPSKiosk software. This means that every time the
machine gets power on the USB write protection will be enabled.
APPENDIX DPS Monitor 4
APPENDIX
DPS Monitor
For DPSClick and ClickLite software, the default option is “Disable”.
IMPORTANT
When a USB is inserted in the machine, the parameter of the USB protection assigned for
this device will be selected in that configured in the DPSMonitor en in the insertion moment.
If the USB protection parameter is changed, must will be extract and insert again the device
for apply the new parameter.
Reference:
Mitsubishi Electric DPS Software is based in technology Copyright © 1995-2006, Oracle. (All
rights reserved) for the internal management information.
APPENDIX DPS Monitor 5
APPENDIX
DPS Monitor
2 Updating software
Push the UPDATES button on the actions panel on the DPS Monitor main screen to access
the Updates List
The DPS Monitor allows CD or remote updates to be executed. Before installing the update,
the DPS Monitor closes all the applications. After installing the update, the DPS Monitor
allows the system to be restarted or all the applications to be reactivated (without restarting
the machine).
NOTE
Restarting the system is recommended after installing an update.
APPENDIX DPS Monitor 6
APPENDIX
DPS Monitor
Updates from a CD
This is used to install frames, calendars, software updates, etc. from a CD.
To carry out an update from a CD, the operator/ supervisor must:
1.
2.
3.
4.
Insert the update CD.
Close all the applications from the main menu of the DPS Monitor (optional)
Push the “Updates” button in the main Monitor window.
Push the Run update button.
Remote updates
These are for remote downloading, installing or deleting of updates.
Downloading: There is a store for publishing and storage of software updates on the
DPS server. There are three types:
o
Version
This is a new version of software for a DPS application, which has new specifications
and functions. Published by Mitsubishi Electric.
o
Patch
This is a modification to the current version allowing improvements to be applied or
problems to be solved. Published by Mitsubishi Electric.
o
Pack
This is an optional update that is not related to any DPS Application, which adds
functions to the system. For example: Calendars, frames, screensaver, firebreak
configuration, etc. Published by Mitsubishi Electric or the Installer or the chain
administrator
When a software update is published and sent to a Kiosk, the DPS Monitor starts to
download the data automatically. The information related to the update is shown in the list
of updates:
o
o
o
o
o
o
ID: Internal identifier.
Type: Version / Patch / Package
Application: The DPS application which will be modified.
Description: Information on the software update.
Status: This may be notified / downloading / downloaded
Run update: A panel for selecting the update executing it by pushing the
Execute update button
o
Install: when “downloaded” appears in the status column, the updating is ready to be
installed. The operator/supervisor is informed by an icon which appears on the main
screen of the client's interface and on the Kiosk Kernel operator's menu.
To execute a remote update, the operator/ supervisor must:
5. Close all the applications from the main menu of the DPS Monitor (optional).
6. Push the “Updates” button.
7. Choose the update to be installed.
8. Push the Run update button.
If the “update patch automatically” box is checked and the type of update downloaded is
“patch”, it will be executed automatically the next time the Kiosk is turned on.
Delete: This enables an update to be deleted. If the update is "notified" or is being
"downloaded” and the “remove update” button is pressed, the server resends the update
automatically. If the update is downloaded or installed, and the “remove update” button is
pressed, the updates file R:\Updates\id is deleted
APPENDIX DPS Monitor 7
APPENDIX
DPS Monitor
3 Back-up and recovery
DPS monitor automatically creates backup copies of critical files of all DPS applications.
These are saved in the folder R:\Backups. These files are the databases related to the
system configuration (Prices, general configuration, etc.) There are two types of backup
copies:
Partial back-up
All the information on databases and images in remote requests are saved providing that
the system is shut down (see section „Shut down‟).
A maximum of 10 partial backup copies are made at the same time. The previous copies
are deleted from the system and only the last back-up copy is saved if two copies are
executed on the same day.
Total back-up
All the information on the database and all the DPS Application files (except for the
Calendars and Frames) are saved whenever a remote update is executed. A maximum of
3 total backup copies can be executed at the same time and only the last back-up copy is
saved if two copies are executed on the same day.
The operator/ supervisor can execute a back-up copy manually from the main screen of the
DPS Monitor:
9. Push the “Manual backups" button
10. Select the DPS application for which you want to make a back-up copy
11. Choose the type of back-up copy
The operator can restore the information saved manually from the DPS Monitor main screen:
12. Push the “Restores” button
13. Choose the DPS Application to be recovered
14. Choose the back-up copy for which you wish to recover data
APPENDIX DPS Monitor 8
APPENDIX
DPS Monitor
4 Export/ Import of prices
This tool enables the prices configured in a Kiosk to be exported and passed on to other
Kiosks.
The prices for Kiosk are configured from the prices screen on the DPSPhoto supervisor
menu.
APPENDIX DPS Monitor 9
APPENDIX
DPS Monitor
DPS Monitor shows a new button called Export/Import which can be used to export the prices
configured in the Kiosk which is being worked with or to manually import prices from another
Kiosk.
The exportation of prices and price ranges takes place by generating two files:
An executable file with the extension .bat
A compressed file with the extension .tgz, which contains information on prices. In this one,
the information is encrypted so that the prices cannot be changed by third parties.
Passing on prices over the Internet
It is possible to pass on prices over the Internet, as if it was a remote package.
The two files created by the exportation must be uploaded to the website, and assigned to the
Kiosks where the prices are to be imported.
The prices are updated automatically, meaning that no actions other than assigning the
package to the right Kiosk is necessary.
APPENDIX DPS Monitor 10
APPENDIX
DPS Monitor
5 Selecting applications to be run
NOTE
Only personnel authorised by the manufacturer can make changes on this screen
It is possible to select the applications that will be run when the machine boots up. System
performance will increase proportionally to the number of applications disabled. Each
application is associated with a series of services and therefore disabling a given service will
stop these services from running. The following table shows the relationship between
applications and services:
Option in Click and Kiosk
Option on Monitor
(interna name)
Services affected if disabled
Activate Monitor Manager
Monitor_Alive
Remote updates, web statistics and
device warnings, VPN initialisation,
Backups, remote printing
DVD / CD Burning
DPSBurn
Burning DVD / CD
Labs Laboratory
DPSLab
Laboratory Services
DPS Listener
DPSLab_Listener
Incoming orders from a standalone
machine(Labs)
External orders (web)
DPSConnection
Remote updates, web statistics and
device warnings,
Webalbum
download , Registrer Kiosk on the
web, remote printing
WebAlbum
WebAlbum
Webalbum upload
APPENDIX DPS Monitor 11
APPENDIX
DPS Monitor
To access this screen, click the option Running applications in the Configuration menu.
Regardless of what is selected on this screen, the system has a series of restrictions that will
modify this selection subsequently. These restrictions depend on the product and whether it is
Online or Offline, as the following table shows:
Product
Offline
Online
Kiosk Standalone
WebAlbum or DPSConnection
are not run
WebAlbum, DPSConnection and
Monitor are run
Kiosk OT
WebAlbum or DPSConnection
are not run
WebAlbum, DPSConnection and
Monitor are run
Kiosk Lite
WebAlbum or DPSConnection
are not run
A Kiosk Lite will not be Online
WebAlbum, DPSConnection or
Monitor are not run
DPSConnection and Monitor are run
WebAlbum, DPSConnection.
A Click Lite will not be Online
Click
Click Lite
IMPORTANT
From Click v2.6.0 and Kiosk v3.6.0 software, the Monitor Manager aplication will be avaiable
by default in all software, even in ClickLite application.
APPENDIX DPS Monitor 12
APPENDIX
Activation Wizard
ENGLISH
Rev. 2.0
APPENDIX
Activation Wizard
CONTENTS
1 WELCOME SCREEN ............................................................................................. 3
2 SHOP INFORMATION / CLICK INFORMATION ................................................... 5
3 SYSTEM INFORMATION ...................................................................................... 9
4 REGISTRATION .................................................................................................. 13
5 CREATION OF OPERATORS ............................................................................. 16
6 ACTIVATION FINISHED ...................................................................................... 18
7 EXECUTION OF THE WIZARD WITHOUT THE NETWORK CABLE
CONNECTED TO THE KIOSK/CLICK. ...................................................................... 19
APPENDIX Activation Wizard 2
APPENDIX
Activation Wizard
Aim
The following tool enables the basic settings of a Kiosk or Click to be configured quickly in order
to be able to start work.
The various screens which appear in a Kiosk or Click are then described, which may be
different depending on the type of machine.
1 Welcome screen
This is the welcome screen, which shows the type of machine (Kiosk or Click) and allows the
wizard language to be changed.
The part on the left is the same on all the screens, and shows which step the user has reached
at any time.
If the Kiosk or Click is not activated, the exit button does not appear on this first screen, as the
machine cannot be used until it has been activated correctly. To do this, registration and
operator creation options appear.
APPENDIX Activation Wizard 3
APPENDIX
Activation Wizard
When the Kiosk or Click is activated, the exit button appears and the record and operator
creation steps are disabled.
APPENDIX Activation Wizard 4
APPENDIX
Activation Wizard
2 Shop information / Click information
If the wizard is being executed in a Kiosk, this shop information screen is shown, where the
basic information for the establishment can be configured, and the regional properties which will
be used by the Kiosk.
It can also be selected the default print media that the sytem will use. This can help to reduce
the list of available options in many settings procedures of the system. Also the A4 printer model
can be filtered. All these options can be changed later in the Printserver application
configuration.
Some of this information can be changed from the Kiosk configuration screen, using the
supervisor's menu, some other information is only needed for communicate with the webserver
whether automatic register is used.
The country list is retrieved from webserver then connectivity with webserver is needed.
APPENDIX Activation Wizard 5
APPENDIX
Activation Wizard
APPENDIX Activation Wizard 6
APPENDIX
Activation Wizard
If the wizard is being executed in a Click, its information screen is shown, where the Click
language can be configured.
Also for Click systems, the print media and A4 printer model can be selected.
This information is in the Click configuration.
APPENDIX Activation Wizard 7
APPENDIX
Activation Wizard
The print media and A4 printer installed in the Shop/Click information section, can also be
configured in the main menu of DPSPrintServer application.
APPENDIX Activation Wizard 8
APPENDIX
Activation Wizard
3 System information
The physical name of the Kiosk/Click can be configured on this screen, which is used as an
alias by default if the machine has not yet been activated. This name is also used to configure
the two possible types of bluetooth: Impulsesoft and Widdcomm.
The physical name of the machine can be changed using the properties of My PC.
APPENDIX Activation Wizard 9
APPENDIX
Activation Wizard
The Kiosk/Click alias can be changed on the Kiosk configuration screen, using the supervisor
menu.
It is possible to change the name of the machine in the bluetooth using the bluetooth properties
menu.
APPENDIX Activation Wizard 10
APPENDIX
Activation Wizard
Impulsoft
Widcomm
APPENDIX Activation Wizard 11
APPENDIX
Activation Wizard
The date and time section shows the current system date and time and it can be changed if
necessary.
This information can be modified from the Windows clock configuration.
Finally, it is possible to assign an IP address to the Kiosk/Click following the steps shown in the
example:
This information can be changed manually from the card properties of the Kiosk/Click network.
APPENDIX Activation Wizard 12
APPENDIX
Activation Wizard
4 Registration
This screen enables us to show the Kiosk/Click whether or not it is online, and to register it on
the Mitsubishi website in order to keep informed of updates.
The Online information can subsequently be changed on the Kiosk configuration screen, in the
supervisor’s menu.
APPENDIX Activation Wizard 13
APPENDIX
Activation Wizard
The connection port information is configured in the Kiosk/Click network card properties, as
shown in the previous section.
An Internet connection and a registration identifier is needed in order to be able to register.
The part below the registration button provides information on the state of registration, whether
it has taken place correctly, whether there is an Internet connection, etc.
If you want you could register the machine automatically. You need to choose the automatic
registration option, but Standard registration is recommended.
APPENDIX Activation Wizard 14
APPENDIX
Activation Wizard
APPENDIX Activation Wizard 15
APPENDIX
Activation Wizard
5 Creation of operators
On this screen, up to five operator cards can be created or the password's first operator can be
defined.
Only one of the two options can be chosen.
Note: When one of the two options is selected, any cards already created are invalidated.
Depending on the option chosen, access to the Kiosk properties will be different.
Under the buttons, information will be given on the state of operator card creation, whether they
have been created correctly, if there has been an error, etc.
This screen is not available for a Click, and the card creation option is also not available if the
Kiosk is a PT6000, as it has no card creation/reading machinery.
The operator cards and password can be created on the Kiosk operators screen, in the
supervisor’s menu.
APPENDIX Activation Wizard 16
APPENDIX
Activation Wizard
APPENDIX Activation Wizard 17
APPENDIX
Activation Wizard
6 Activation finished
This screen congratulates the user for having activated the Kiosk/Click and gives information on
the next steps to be followed for it to be completely configured.
The printing formats are adjusted by default and must be manually configured to users'
needs.
All the prices are set by default with the value “1”.
Backup copies. Steps to follow for making a back-up copy.
From this screen, all the configured data are saved by pushing the save button, which restarts
the Kiosk/Click, or returning to previous screens is possible, in order to review and change the
configuration if necessary.
APPENDIX Activation Wizard 18
APPENDIX
Activation Wizard
7 Execution of the wizard without the network cable
connected to the Kiosk/Click.
If the wizard is executed for a Kiosk/Click without a network cable connected, it will tell us.
It will not allow the Kiosk/Click to be registered.
APPENDIX Activation Wizard 19
APPENDIX
Dispatcher
ENGLISH
Rev. 2.0
APPENDIX
Dispatcher
CONTENTS
1
DISPATCHER CONCEPTS AND DEFINITIONS................................................ 3
1.1
2
APPLICATION STANDARDS ........................................................................................... 3
1.1.1
Status colour coding .............................................................................................. 4
1.1.2
Multiple selection ................................................................................................... 4
1.1.3
Editing, optional fields and of information. ............................................................. 4
DISPATCHER ADMINISTRATION INTERFACE ............................................... 5
2.1
PREVIEW OF THE MAIN SCREEN ................................................................................. 5
2.2
INCOMING ORDERS SECTION (DOES NOT APPEAR IN CLICKLITE) ........................ 7
2.2.1
Approval of orders .................................................................................................. 8
2.2.2
Browsing incoming orders ...................................................................................... 8
2.3
ACTIVE ORDERS SECTION ............................................................................................ 8
2.3.1
Selecting an order .................................................................................................. 9
2.3.2
Services in an order ............................................................................................... 9
2.3.3
Toolbar and status bar ......................................................................................... 10
2.3.4
Details of services ................................................................................................ 13
2.3.5
Order/service options ........................................................................................... 13
2.3.6
Order options ....................................................................................................... 14
2.3.7
Service options (optional) .................................................................................... 14
2.3.8
Exporting orders and services to Click ................................................................ 15
2.3.9
Saving orders permanently .................................................................................. 16
2.3.10 Apply changes ..................................................................................................... 16
2.3.11 Preview and touching up of images in orders/services ....................................... 16
2.4
DEFAULT FILTERS FOR ORDERS ............................................................................... 17
2.4.1
Active orders ........................................................................................................ 17
2.4.2
Completed orders ................................................................................................ 18
2.4.3
All orders .............................................................................................................. 18
2.4.4
Orders to save ..................................................................................................... 18
2.5
SERVICE MODULES ...................................................................................................... 19
2.5.1
Devices ................................................................................................................ 19
2.5.2
Formats ................................................................................................................ 21
3
DISPATCHER CONFIGURATION ................................................................... 22
3.1
4
CONFIGURATION ADMINISTRATION SCREEN .......................................................... 22
SPECIAL FEATURES OF SERVICE MODULES ............................................. 24
4.1
PRINT SERVER .............................................................................................................. 24
APPENDIX Dispatcher 2
APPENDIX
Dispatcher
1 Dispatcher concepts and definitions
In a Flexilab system, orders can be made from external devices, which are then processed by
a centralised Dispatcher. This structure makes it possible to connect several Kiosks in Order
Terminal mode.
In a system configured in this way, all the orders from Order Terminal Kiosks are processed
by the Dispatcher. ClickPRO orders are also brought together in the Dispatcher.
As the system operator, it can organise the execution of orders, change settings, review job
records, etc.
The following diagram shows the connectivity of all the modules in the system, and the
information flow.
Dispatcher CORE: This is the main Dispatcher application which must always be
operating. This application processes all the orders and services, keeping control and
managing the queue of pending jobs for the various output devices.
The monitor application starts the dispatcher core motor and makes sure it is constantly
operating.
Dispatcher ADMINISTRATION: This is the interface used by the operator to view and
organise orders and services. It is not necessary for Dispatcher Administration to be open
all the time for jobs to be done correctly. However, its use is recommended with
connected Order Terminal machines as it is the interface which enables the operator to
accept incoming orders that are not approved automatically (pending payment, etc…)
Service Module: Output devices which process the services included in a client's order.
For example, 10 x 15 cm (4 inches x 6 inches) digital photo is printed by the DPS Print
Server Service Module, which chooses the best printer for processing the image.
1.1 Application standards
The application is based on standards to facilitate its use and provide increased client
satisfaction. Some of the guides applicable to the entire system are shown below.
APPENDIX Dispatcher 3
APPENDIX
Dispatcher
1.1.1 Status colour coding
Dispatcher Administration shows the status of orders and services using coloured circles.
- Pending
- Executing
- Paused
- Error
- Done
- Batch executing (can be executed later)
1.1.2 Multiple selection
In the list of incoming orders, several orders can be selected at the same time by checking
each one separately. To deselect an order, check it again.
After several orders have been selected, the same action can be applied to the entire set
(approve, validity with pause or delete).
1.1.3 Editing, optional fields and of information.
The following standard is applied to all fields containing information:
White Background: compulsory fields. The information must be completed or selected.
Light cyan blue background: Optional fields. These can be left blank.
Grey or transparent background: Information fields. These cannot be changed.
APPENDIX Dispatcher 4
APPENDIX
Dispatcher
2 Dispatcher administration interface
Dispatcher Administration is an application which can be started manually from the
Kiosk/Click application. It can be opened and closed without this affecting the work being
done.
2.1 Preview of the main screen
The main screen consists of various sections and tool bars, depending on the objective of
each section.
Incoming orders
pending approval
Tool
bars
Active or
completed orders
Details of orders
(services)
Configuration
and
Click access
All the lists are ordered by priority and time. The left hand side of the list contains higher
priority orders, while those with a lower priority or older ones are on the right. The list of
completed orders is ordered by date of ending (more recent ones are shown first)
High priority
Most recent
Low priority
Oldest
Order and service files
APPENDIX Dispatcher 5
APPENDIX
Dispatcher
Each order is represented by files containing information as a summary, either about the
services involved, or about the order itself.
Entry of orders pending approval
+ Order identifier. A ticket is generated with this identifier in Kiosk or Click (999998)
+ Machine identifier. This identifier is an alias that can be configured at Kiosk or Click level
(K70XAVI)
+ Day and time of order creation (those on the same day will only be shown with a time)
+ Order priority. There are 3 possible priority levels and a change of colour to show top
priority ( "now").
Now!
High
Medium
Low
+ PRICE of the order
+ Order payment indicator. If the order has been paid for at the Order Terminal this image in
the file will appear in the file before it is approved. It shows that it can be approved before
the client comes to collect his/her completed order.
Entry of orders in transfer
+ Order identifier. A ticket is generated with this identifier in Kiosk or Click (500031)
+ Machine identifier. This identifier is an alias that can be configured at Kiosk or Click level
(C5000006)
+ Day and time of order creation (those on the same day will only be shown with a time)
+ Order priority. There are 3 possible priority levels and a change of colour to show top priority
( "now").
Now!
High
Medium
Low
+ File transfer progress bar.
+ PRICE of the order
+ Order payment indicator. If the order has been paid for at the Order Terminal this image in
the file will appear in the file before it is approved. It shows that it can be approved before the
client comes to collect his/her completed order.
Orders approved
APPENDIX Dispatcher 6
APPENDIX
Dispatcher
+ Order identifier. A ticket is generated with this identifier in Kiosk or Click(100035)
+ Machine identifier. This identifier is an alias that can be configured at Kiosk or Click level
(K7000086)
+ Day and time of order creation (those on the same day will only be shown with a time)
+ Order priority. There are 3 possible priority levels and a change of colour to show top
priority ("now").
Now!
High
Medium
Low
+ Service identifiers. Each order may have several services. This file shows the first 4 with a
short description of the type and format, and the number of copies.
Services
Copies, Service, Status, Samples
A service file contains details of the status of the service, its progress, date of ending of the
service, and a preview of the first and last image in the service.
Destination
The destination may contain one or several devices, or may even not have any assigned to it.
This latter case only arises in services that have recently been created and which still do not
have an output device assigned to them. The service module will assign devices according to
its internal assignment policy. It is possible to specify a destination before sending the service
(ClickPRO) to force it to be printed by a certain printer, for example.
2.2 Incoming orders section (does not appear in Clicklite)
All the orders requested by DPS Systems which are pending validation can be seen in this
section.
Orders that have already been paid for at the Order Terminal, or those from a Click will be
automatically transferred to the active orders section (configurable).
NOTE
It is possible to automatically accept all orders, using the Dispatcher configuration screen and
changing the setting of the “ORDERS” group labelled “AUTO_APPROVE” to TRUE.
However, to make incoming orders always pending validation, the value of
“AUTO_APPROVE” must be FALSE.
APPENDIX Dispatcher 7
APPENDIX
Dispatcher
2.2.1 Approval of orders
In order to approve an order, select it in the main browsing panel and press the “approve” or
“approve with pause” button.
This panel enables multiple selections to be made: Several orders can be selected at the
same time and all of them approved in a single operation.
Approve: After the order has been approved, it disappears from the panel and
reappears in "Active Orders" as "Pending”. This means that the order is
processed automatically as soon as the appropriate Service Module is
available.
Approve with pause: When an order is approved with a pause, it also appears
in the “Active orders” panel, but is not processed while it is “paused”.
This order waits indefinitely, until started manually by an operator.
This option is useful if an operator needs to make adjustments to the image or to
change the order options before executing it in the Service Module.
2.2.2 Browsing incoming orders
All incoming orders are stored in this section until they are approved. Hundreds of orders can
be stored this way. The arrows on the left and right must be used to view them.
The arrows are disabled if all the orders fit in the visible space on the screen. When the
arrows are enabled, they are shown in a different colour and a number appears inside them,
showing the amount of hidden elements in each direction.
The example below shows the contents of the arrows.
Visual Area
2
3
2.3 Active orders section
The orders included in this section are those that have been approved and which may be
processed at any time. This depends on the availability of the Service Modules and the status
of the order.
APPENDIX Dispatcher 8
APPENDIX
Dispatcher
The status of an order may vary, and is represented by the colour codes described above.
(*)
An order being executed may be paused at any time , and the Service Module stops work on
it.
(*)
Depending on the Service Module, it is possible that an order remains paused, due the risk
of damage to the medium or application. For example, copying a CD cannot be stopped, but
printing of a digital photo can.
2.3.1 Selecting an order
Click on an order to select it. The colour and edge will change.
When an order is selected the buttons on the toolbar show the possible actions at that point
(change configuration, stop, start, leave in pause mode, delete, etc.).
Some actions are disabled in some order statuses.
2.3.2 Services in an order
Once the order has been selected, its details appear at the bottom of the screen.
Service is deemed to mean: the format, progress, amount of images, output devices and the
first and last image of those selected.
It is also possible to select a service and the toolbar will change according to the actions that
can be taken in each case, which also depend on the status of the service.
APPENDIX Dispatcher 9
APPENDIX
Dispatcher
2.3.3 Toolbar and status bar
The toolbar consists of various buttons. Each allows different actions to be taken on the
execution of the order or the service.
There are some limitations on the way some actions can be executed. Depending on the
status of an order or service, some actions may not be available.
Some status have certain associated actions. The following list gives details of these actions.
RESUME
If an order has been selected, this action will start all its services with a
status
of
PENDING,
DONE,
in
ERROR,
or
PAUSE
DELETE
This button only affects an order which is stopped (PAUSED, ERROR or
DONE) and deletes it from the system, although some data are kept
internally for inclusion in statistics.
PAUSE
PAUSE is only applicable to orders or services with a status of IN
EXECUTION, or PENDING. This action stops the execution, or holds up
the queue for the order/ service in question, moving on to the next services
in the queue according to the order of priority.
OPTIONS
(not
available
in
Kiosks
in
Standalone
mode)
Enables the options of any element (order/service) to be seen and some of
their settings to be modified, depending on their status. The statuses that
allow modification of the data are those which are “inactive” (DONE,
ERROR, PAUSED).
When this button is pressed, the options window appears, and remains
visible until the button is pressed again.
When editing options, it is possible to change between orders and
services with no need to hide this window.
PICTURE ADJUST (not available in Kiosks in Standalone mode)
It is possible to access the adjustments screen from an order or from a
service. If access is from an order, all the images belonging to it will be
edited.
RESTRICTIONS
All the orders from a Kiosk in Standalone mode contain which the client's files must be
deleted for legal reasons, as explained in the terms and conditions. For this reason,
Dispatcher deletes all the images of orders from the system once they have been completed.
APPENDIX Dispatcher 10
APPENDIX
Dispatcher
2.3.3.1 Status of orders
The status of orders changes automatically according to the changes in status of services.
The following list shows the various statuses in which a service may be and how this affects
the final order. The priority is from HIGH to LOW.
PRIORITY
STATUS OF THE ORDERS
ordered by the most restrictive statuses
requiring manual operation
HIGH
ERROR
PAUSED
EXECUTING
.
PENDING
.
.
DONE
LOW
For example, in a pending order with 3 services; if 2 are in EXECUTING and 1 in ERROR, the
status of the order is ERROR because this shows that an operator's attention is required.
Services in EXECUTING continue to be executed until they are completed.
Paused devices are also given a high priority on the list above as they require manual
intervention by the operator.
2.3.3.2 Limitations
If "PAUSED" is activated for an order/service, its execution is paused, but other new orders or
services continue to be executed as normal.
If RESUME is activated for an order/service which is PAUSED, in ERROR or DONE, it is
reactivated, and its status becomes PENDING. The order/ service will not be processed until
the Service Module is free again.
It is possible to “KKEP” an order from a Kiosk or Order Terminal to keep it in the system until
it is permanently deleted manually. This is useful for saving sample orders, some interesting
orders from clients you wish to save for some time, etc.
A service with an ERROR status may continue being executed using the RESUME option.
This enables the service to be resumed at the exact point where it left off.
The table below shows all the possibilities for action for orders and services depending on
their status.
APPENDIX Dispatcher 11
APPENDIX
Dispatcher
Actions Toolbar & options
START
PAUSE
OPTIONS
PENDING
Yes (4)
Yes
Yes
PAUSED
Yes
Yes (5)
ERROR
Yes
Yes (5)
Type
STATE
EXECUTING
(Orders)(2)
Yes
Yes
Yes
Yes
OPTIONS
(Service
Modules)(6)
ADJUSTMENT
KEEP
EXPORT
(2)
(2)
to Click(2)
Yes (7)
Yes
Yes
Yes
Yes
Yes
Yes
Yes
Yes
Yes
Yes (7)
Yes
Yes (7)
Yes
Yes
Yes
DELETE
BATCH_
ORDERS
EXECUTING
DONE
KEEP
TO_APPROVE
Yes
Yes (5)
Yes
Depends on the status of the orders
Yes (validate)
Yes (validate)
Yes
Depends on the status of the orders
Yes
TO_RESUME
Yes
Yes
Yes
PENDING
Yes
Yes
Yes (7)
Yes
PAUSED
Yes
Yes (3) (5)
Yes
Yes
ERROR
Yes
Yes (3) (5)
Yes
Yes
Yes
Yes
Yes (7)
Yes
Yes
EXECUTING
SERVICES
BATCH_
Yes (7)
EXECUTING
DONE
TO_RESUME
Yes
Yes (3) (5)
Yes
Yes
Yes
Yes
Yes
TABLE 1
If the system has eliminated the service files, only the delete-option will be possible on it.
Only activated in a Click. A subfolder is created in the professional workfolder with the order
identifier, so that it can be easily identified.
The priority of a service cannot be modified.
It is possible to restart an order in pending status if an order with “Now” priority has stopped
another incoming order.
The options can be seen and edited.
The button is not active if the Service Module has not published its handle (actually all Service
Modules except for WebAlbum publish it).
Shows adjustments in reading mode.
APPENDIX Dispatcher 12
APPENDIX
Dispatcher
2.3.4 Details of services
The information on a service which appears when an order is selected is useful for monitoring
the steps to take and the status.
Copies: The number of images for processing is shown in the first section. When burning
CDs, the number of CDs is normally 1.
Service: Shows the print format (10 x 15) or the type of service for IndexPrint, calendars,
card photos, etc.
Status: Shows a progress bar and the completed / total number of copies.
Destination: Shows the output device/s for the service if it is already being processed. If
these services have not yet been assigned to a device, an “Output device not yet
assigned” message appears.
There is only one case in which the destination is known before assignment of the
Service Module - when a destination device isn determined from the source application.
(E.g. ClickPRO)
This information is useful for collecting jobs after they have been processed, when there
are more than one output device.
For example, a PRINTING service in balanced mode can be printed on all the connected
printers which offer this format. This section shows the “alias” of all the printers which
process this type of service.
First and last images: Shows a thumbnail of the first and last image in the service.
2.3.5 Order/service options
Order and service options can be edited and viewed using the options button on the
toolbar.
This window activates a pop-up window showing the options for the selected element
(order or service) and enables some settings to be modified.
The options for orders and services are not translated as they are internal Dispatcher values.
The meaning of each is listed below.
APPENDIX Dispatcher 13
APPENDIX
Dispatcher
2.3.5.1 Restrictions
It is not possible to edit options in orders or services if their status is Executing or Pending.
Changes cannot be made in these cases.
It is also not possible to EXPORT TO CLICK for an order which is being processed.
It must first be left "IN PAUSE" in order to be able to make changes.
2.3.6 Order options
Some settings or options in the order can be modified. All the internal options in the order can
be seen as complementary information.
The order settings which can be changed are:
PRIORITY: An indicator of priority within the following values: High, Medium, Low, Now!
(Immediate).
The Now priority is the highest, and leads to any job with a lower priority that is being
executed being stopped. When the order is completed the order is reestablished
according to what the other orders were being executed.
Some of the common read only settings in an order are:
INITIAL_TIME (start time): The date and time when the order was created.
END_TIME (end time): The date and time when execution of the order was completed.
SOURCE APPLICATION:The name of the application which generates the WebAlbum,
Photo, Mobile Contents, etc. order.
USER_TYPE: Thetype of user executing the order. This is useful for orders from an
Order Terminal/Kiosk (operator, end client, etc.)
2.3.7 Service options (optional)
The service settings shown depend on the destination Service Module and the type of
service.
COMMON SETTINGS:
o FORMAT: The output format which is used in this service (Example for printing: 10 x
15cm or 4 x 6 inches, etc., CD burning: DVD_8Gb, etc., DPSLab: 1 hour, 24 hour
service, etc.)
o DESTINATION_DEVICE (destination printer): Enables the printer printing the service
to be changed. Only the printers using the format in question are offered.
o COPIES: Number of images / CDs etc. processed for the selected service.
o PAUSE_AFTER: The devices (printers, CD burners, etc.) go into pause mode when
the service is completed. This requires manual unblocking from Dispatcher admin in
order to for the new services to be processed. In the case of CD burning, the user is
asked to collect the CD.
o PAUSE_BEFORE: The devices are placed in pause mode before processing the job.
This enables action to be taken or the device to be handled before starting, such as
CD burning, which requires manual insertion of the medium, etc. (a purely informative
setting).
PRINT SERVER:
o QUALITY: 1,2,3 (Normal, Fine, Superfine)
APPENDIX Dispatcher 14
APPENDIX
o
o
o
o
o
o
o
Dispatcher
BALANCED (balanced mode): TRUE/FALSE depending on whether the printing
mode is balanced or blocked
WHITE BORDER: True/False:
FIT_TO_PAPER: False
COLOR_OPTIMIZED: Colour optimisation (Colour / Black and white)
FIT_TO_PAPER: TRUE/FALSE To fit the image to the paper, trimming the image to
maintain the proportions.
ERROR CODE: (Not visible if there is no error): An error code, only when there has
been a problem in the service.
ERROR DESC: (Not visible if there is no error): Description of the error code.
CD BURNING:
o ACTION (Result of creating a CD): SUBLIME (creation of a CD with the client's
images and the SUBLIMECD application), BACKUP (back-up copy CD), ERASE
(deletion of CD), QERASE (Quick delete)
o SESSION_NAME: Internal name of the CD compilation (only available for SUBLIME
and the CD BACK-UP COPY)
o LANGUAGE: Default language for the SUBLIMECD.
DPSLAB:
o TAX: Amount of money for tax applied to the Service Module.
o CUSTOMER_ASK: Questions that the Kiosk or ClickPRO will ask clients to obtain
information about them (address, telephone number, etc…)
o SERVICE_ASK: Questions defining the type of service to be carried out
(Colour/B+W, White border, etc.)
o PRODUCT_ASK: Questions related to the product.
WEBALBUM:
o USER:
User
created
to
upload
the
album
onto
the
website:
www.mitsubishialbum.com
o PASSWORD: Key used to publish the photos in the album. This is necessary for the
client to gain access to the photos.
2.3.8 Exporting orders and services to Click
Selected orders and services can be sent to Click from the options screen
The selected orders/services are transferred to a Click work folder as a
subfile with the same name as the order number.
Working Folder
DISPATCHER_123456
DISPATCHER_222333
To access these exported orders, access the Click application and the work folder opens to
view the order for editing.
Because an order can be exported as many times as desired, if the order exists in Click, a
folder is created with a number (1), e.g. “DISPATCHER_222333 (1)”
APPENDIX Dispatcher 15
APPENDIX
Dispatcher
2.3.9 Saving orders permanently
Orders of interest can be saved permanently in the system. To delete them
afterwards, the “Cancel” button is used.
The orders saved are visible from the STORE tab.
Orders can be saved regardless of their status. A saved order can reexecuted at any time and
as many times as necessary.
2.3.10 Apply changes
This button is used to apply changes to the values in the options panel, so that
they are effective and the screens are updated with the new values.
2.3.11 Preview and touching up of images in orders/services
Orders normally consist of photographic services or include images. The first and last images
they contain are shown in the details of services (in the active orders section).
Dispatcher allows previewing of the entire contents of the services, and
adjustments to be made quickly. An order can be completely modified, moving
automatically from service to service.
All the images involved are shown on the preview/adjustments screen, where
all the changes made can be saved.
RESTRICTIONS
It is not possible to adjust images of orders/services which are being executed or pending. In
this case, it is only possible to preview the contents.
APPENDIX Dispatcher 16
APPENDIX
Dispatcher
Operation of this screen is explained in the Click manual.
2.4 Default filters for orders
From here, orders can viewed and filtered to work quickly with those needing most attention,
already processed orders can be recovered.
2.4.1 Active orders
Shows the orders currently active. This refers to orders with the following statuses:
PENDING, IN PAUSE, ERROR, EXECUTING and all their services.
APPENDIX Dispatcher 17
APPENDIX
Dispatcher
This list is ordered from high to low PRIORITY and by date. The orders on the left of the list
have the highest priority, and the ones on the right the lowest priority.
2.4.2 Completed orders
These are those with a DONE status and whose services are also DONE.
This list is ordered backwards by date and time of completion. The first order on the left will
be the last to have been processed, and the one on the right the oldest. The date shown on
the file is the creation date, but when the order is selected, the completion date of each of the
services can be seen on the progress bar.
2.4.3 All orders
This shows all orders, both active and completed, and those marked with SAVE.
Completed orders in SAVE status are shown in the panel of completed orders until the day
specified for the Garbage Collector. From this date onwards, orders are only visible from the
SAVE tab.
2.4.4 Orders to save
Orders which can be in any status but which are marked as SAVE. The operator chooses to
save them from the options panel.
APPENDIX Dispatcher 18
APPENDIX
Dispatcher
2.5 Service Modules
2.5.1 Devices
This view enables viewing of the physical devices of all the service modules and the services
of the associated orders. The visible services are those which have been assigned by the
service module, or whose destination device is already known. (e.g. specified from Click).
Unassigned services cannot be seen in this section.
This screen is useful for finding out the amount of services that will be performed by specific
devices. It is possible to PAUSE and RESTART/CONTINUE services according to needs,
using this interface.
2.5.1.1 Open specific Service Module adjustment application
To open a Service Module, press the button which identifies the Service Module to select it,
and then the OPTIONS button on the toolbar.
This action opens the Service Module screen with its options and extensive information. The
example shows the options screen of the CD Burn Service Module:
APPENDIX Dispatcher 19
APPENDIX
Dispatcher
2.5.1.2 Working with services and their actions
Changes can be made to the services using the toolbar buttons. The status of each service is
shown in the same way as on other screens (a coloured icon).
2.5.1.2.1
PLACING A SERVICE MODULE IN PAUSE MODE
It is possible to place a complete Service Module in pause mode by selecting and pressing
the “PAUSE” button. This makes the Service Module stop all the jobs it is processing until it is
released again. It will then continue working at the point where it left off.
Some Service Modules, such as CD burning, cannot be stopped when the process has
started, as the output device could be damaged. In this case, a message appears stating that
the action is impossible.
2.5.1.2.2
PAUSE MODE, RESUME, STOP AND EDIT A SERVICE
This screen enables the common actions on the toolbar to be executed on the selected
service.
2.5.1.3 Completed services - "DONE”
Completed services appear on this screen, until the execution of a new service in the same
device starts, or until the device is released, if it is in pause mode after processing. This is
useful for identifying the output device for a specific service.
APPENDIX Dispatcher 20
APPENDIX
Dispatcher
2.5.2 Formats
This screen enables viewing of all the Service Modules classified by output format, regardless
of the amount of devices they support.
The services appearing are those that the Service Module has assigned or those for which
the destination format is already known. For printing services, the formats could be 10 x 15,
13 x 18, etc.
APPENDIX Dispatcher 21
APPENDIX
Dispatcher
3 Dispatcher configuration
3.1 Configuration administration screen
Group list
ORDERS
Setting list
AUTO_APPROVE
Setting detail
TRUE: All orders reaching Dispatcher are automatically
approved
FALSE: All orders reaching Dispatcher must be approved
manually.
CHOOSE: Incoming orders are approved or pending approval
depending on the source application. Pre-approved orders can
be generated automatically in Kiosk depending on whether the
client paid for it in that Kiosk. (Although this can be configured
in Kiosk settings)
APPENDIX Dispatcher 22
APPENDIX
Dispatcher
GARBAGE COLLECTOR
Old orders are checked for every 24 hours. The configuration of the following settings determines the action to be taken on
orders:
Setting list
Setting detail
MAX TIME DONE ORDERS: (default value 1 day)
Frequency of cleaning up of completed orders. Numerical value
specified in days.
1-9999: shows how many days orders are saved for.
MAX TIME CANCELLED ORDERS: (default value 1 day)
Frequency of cleaning up of cancelled orders. Numerical value
specified in days.
MAX TIME ERROR ORDERS: (default value 0 days - disabled)
Frequency of cleaning up of error orders. Numerical value
specified in days.
MAX TIME PENDING ORDERS: (default value 0 days disabled)
Frequency of cleaning up of pending orders. Numerical value
specified in days.
MAX TIME TO_APPROVE ORDERS: (default value 0 days disabled)
Frequency of cleaning of orders to be approved. Numerical
value specified in days.
FULL GARBAGE COLLECTOR FRECUENCY: (default value
365 days) Frequency of complete cleaning.
STATISTICS_CLEANUP_TIME: (default value 365 days)
Configuring the system to clean orders over one year old is
recommended. If the value is 0, the statistics data are never
deleted.
Frequency of cleaning of order information from the system.
The statistics data disappears.
TRANSFER
Setting list
Setting detail
LOCAL PATH: Local folder, where incoming orders are stored.
This folder must be writable.
SHARED PATH: This is the shared name for the LOCAL PATH
folder.
In any of the above cases, part of the order data is saved in the system for counting in
statistics.
The following parameter is used to delete these data automatically
APPENDIX Dispatcher 23
APPENDIX
Dispatcher
4 Special Features of Service Modules
4.1 Print Server
The printing service is more complex in a Flexilab system, and the effect of some status
changes on the Dispatcher administration interface warrants special attention.
Print Server can be configured in various ways. The configuration of the application and the
connected printers and their formats may affect the status shown in Dispatcher.
The following table shows all the possible cases changing the status of Dispatcher and as a
consequence is helpful in interpreting the information on the screen and quickly finding areas
which require manual intervention for the recovery of errors in the printers (no paper, etc…)
DISPATCHER
1 Printer ("ANY" balancing
option) or DESTINATION
DEVICE selected
Dispatcher DEVICES status
Automatic balancing
between printers
Printer OK
EXECUTING
OK
n/a
The printer is in ERROR
ERROR - If relaunched, it is
assigned to the same
original printer
DeviceERROR
NO
Printers OK
EXECUTING
OK
n/a
Some printers in ERROR
EXECUTING and the part of
the job assigned to the
printers which have ERROR
have to wait.
Device ERROR
NO
ORDER mode
N Printers ("ANY" balancing
option) or DESTINATION
DEVICE selected
EXECUTING. The job waits
for the change of paper or
solution to the problem.
All the printers in ERROR or it is impossible to
continue
1 initial printer (then other
printers with the same
format can be assigned)
SPEED "MULTIPRINTER"
mode (DESTINATION
DEVICE = ANY)
Several printers assigned
(balanced automatically)
1 Printer (1 with only 1
format) and optionally,
DESTINATION DEVICE
"SINGLE PRINTER" mode
(with or without
DESTINATION DEVICE)
SPEED and ORDER do not
matter
N Printers (balanced option
"ANY")
Print Server
Dispatcher
ORDERS/SERVICES status
NOT automatic (can be
changed from Dispatcher
options)
Device ERROR
No other service can take
priority until the one being
executed is completed.
If all the printers left to finish
printing fail, there is
EXECUTING until the
problem is solved
Yes - If another printer
providing the same format
is free
Printer OK
EXECUTING
OK
The printer is in ERROR
ERROR
Device ERROR
NO
Yes - If another printer
providing the same format
is free
Printers OK
EXECUTING
OK
Some printers in ERROR
EXECUTING
Device ERROR
YES
Device ERROR
n/a - YES, if the job is
relaunched manually.
All the printers in ERROR or it is impossible to
continue
ERROR
Printer OK
EXECUTING
OK
n/a
The printer is in ERROR
ERROR
Device ERROR
NO
Printers OK
EXECUTING
OK
YES - A printer is initially
assigned, and another
cannot be reassigned until
the end of the service
Some printers in ERROR,
but this does not affect the
printer assigned initially.
EXECUTING
Device ERROR
NO
ERROR in my printer
ERROR
Device ERROR
NO
APPENDIX Dispatcher 24
APPENDIX
Statistics
CONTENTS
1
STATISTICS SUMMARY ................................................................................... 5
2
ORDERS (DETAILS) ......................................................................................... 6
3
INFORME DE PRODUCCIÓN ............................................................................ 7
4
INFORME POR VOLUMEN.............................................................................. 11
5
CONTENTS AND FILTERS ............................................................................. 13
5.1
VIEWING ORDERS/ SERVICES STATUS..................................................................... 13
APPENDIX
Statistics
This application is accessible from the general ClickPRO or Kiosk application.
ClickPRO: Access to statistics is from the lower toolbar on the main screen.
Kiosk: Operator access: Access to the statistics application is from the Kernel configuration.
This enables viewing and provides detailed information about the activities of any DPS
system using a common interface.
In the production report tab sheet is possible view monthly which is the number of copies
printed according to printing size, format size and service.
In the volumen report tab sheet is possible view monthly which is the number of copies
printed and by range which is the production make Turing the selected month.
For a Dispatcher which is centralising several Order Terminals, it enables selection between
showing the statistics of a specific machine or the whole Flexilab unit.
In the top right hand corner is a drop-down list with the names of all the connected machines
and the option to view them all simultaneously.
Filters
Filters can be applied by dates, to obtain statistics for a week, a day, a month, the current
year, or any range of dates.
o
o
o
o
o
“Today”: Current statistics from 00:00h to 24:00h
“This week”: Statistics for the week in progress, from Monday to Sunday inclusive.
“This month”: Statistics for the month in progress, from the 1st until the most recent
day of the month.
“This year”: The year in progress, starting on 1st January.
“Choose period”: You can determine a period between two dates, selecting elements
from the list in the “from” and “to” sections.
The total summary of consumption between the dates shown is displayed, or the details of all
the orders and services for that period.
Exporting statistics
The statistics can be exported to a flat file which is easily importable to a standard
spreadsheet (e.g. Microsoft Excel) or any other application that reads this format.
The contents of the file is plain text separated by commas (CSV) and shows the totals, and
details of all the orders, services and settings of the services.
Is exporting differents file from the production and volume report:
1.- Files with .png extension. This file is only information for the user and can print the
statistics in the local printer.
2.- Files with .mf extension. Encrypted file for the statistics validation by Mitsubishi Electric
Europe BV.
APPENDIX Statistics 3
APPENDIX
Statistics
Printing
The statistics can be printed to have a hard copy of the summary or details displayed on the
screen.
Printing of the statistics can be done on a ticket printer (optional) or a 10 x 15 cm (4 x 6
inches) printer. This latter option automatically generates an order for printing in Dispatcher.
When the print ticket option is pressed, a new screen is displayed to select the printer that will
print the ticket.
The options enabled will depend on whether the machine has a ticket printer connected to it
and whether it can send the ticket for printing by a pphoto printer depending on the machine’s
current working mode.
Standalone: The ticket can be printed by a photo printer when statistics is connected
to DispatcherCore, to the Data Base and moreover PrintServer has at least a 10x15
format printer published.
Others: Printng is possible provided that statistics is connected to DispatcherCore, to
the Data Base, since even if a printer with a 10x15 format is not available the prinmter
paper can be changed.
In both cases the order generated will appear just like any other one in DispatcherAdmin with
the nomenclature Order_Number (S) and will appear with Paused status.
The statistics production and volume report can’t print by printer ticket and format 10x15 (4x6)
neither.
APPENDIX Statistics 4
APPENDIX
Statistics
1 Statistics summary
The statistics summary tab shows all the data of the Kiosks and Clicks which generate orders
in Dispatcher, classified according to the type of service and source application.
For each service, a total (number of copies, number of contents, etc) and a price is shown.
APPENDIX Statistics 5
APPENDIX
Statistics
2 Orders (details)
This tab shows the list of all the orders between the dates and on the machines selected, and
the services they consisted of.
For each service, it shows the list of settings configuring the service in question.
The grouping levels of the services are reflected according to their chracteristics or formats.
The following table shows all the types of service that the DPS products can generate, which
would be shown in statistics.
PRINTS
COPY
Standard prints of photos
INDEXPRINT
Index copy
CALENDAR
Decoration - Calendars
FRAMES
APPENDIX Statistics 6
APPENDIX
Statistics
3 Production report
The production tab sheet show a copies statistics monthly of the machine based in different
types:
1. Copies by size report. In this report is showed the information reference to the paper
quantity or printing formats. This paper or format is similar to the paper reference that
is possible view in the paper box. As formats prints exist these, 10x15 (4x6) –
13x18(5x7) – 15x23(6x9) – 20x25(8x10) – 20x30(8x12), ...
2. Copies by print format. Can be show the quantity of printing formats and which
months was printed. As print format, means to the format selected in the configuration
print screen in the DPSClick software or in the prints formats of DPSKiosk settings.
The difference between size or print format is that in the size is possible do different
prints formats, as example multicut format, of de 15x23 can be possible do two
10x15(2).
3. Copies by service report. In this report is show the quantity of printed copies between
in what different services has been doing and how many copies has printed each
service.
In these reports are show a comparative between the closed month and the same month of
previous year, besides are added the current month. This means that in this statistics are
show 14 months total by report (Current month + the 13 previously).
APPENDIX Statistics 7
APPENDIX
Statistics
4 Volume report
The volume report tab sheet show a statistics with the number of copies printed in two
different report types:
1. Copies by size report. In this report is showed the information reference to the paper
quantity or printing formats. This paper or format is similar to the paper reference that
is possible view in the paper box. As formats prints exist these, 10x15 (4x6) –
13x18(5x7) – 15x23(6x9) – 20x25(8x10) – 20x30(8x12), ...
2. Copies by service report. In this report is show the quantity of printed copies between
in what different services has been doing and how many copies has printed each
service.
These reports type is show the current month previous selection. In these report is viewing by
range, this means the Lumber of copies make will be added in the correspond range By
example, if is doing a request with 15 copies of 10x15, these 15 copies will be added to the
number of copies exist in the range 10-19.
APPENDIX Statistics 8
APPENDIX
Statistics
5 Contents and filters
As standard criteria, all orders leading to financial changes in the system and causing costs in
consumable materials or services (Photos, CD/DVD, etc.) are shown in the statistics.
All the services administered from Dispatcher can be relaunched as many times as desired.
These repetitions are also counted in the statistics as they involve expenses in consumable
materials, although they do not affect the price.
NOTE
Statistics shows the initial price of a service. The price does not change if the service is
cancelled, has errors or is repeated several times. These logistics must be managed by the
operator.
5.1 Viewing orders/ services status
The following table shows the internal status of an order or service in the Dispatcher
database.
STATUS OF ORDERS IN
DISPATCHER
Type
Incoming
orders
State
ORDERS
SERVICES
DISPATCHER Administration
PENDING
PAUSED
ERROR
EXECUTING
DONE
TO_APPROVE
CANCELLED
OT_CANCELLED
OT_REIMBURSED
PENDING
PAUSED
ERROR
EXECUTING
DONE
Active
orders
Completed
orders
VISIBLE
VISIBLE
VISIBLE
VISIBLE
VISIBLE
ALL
SAVE
Summary
VISIBLE
VISIBLE
VISIBLE
VISIBLE
VISIBLE
VISIBLE
Depends
on the
selection
SAVE in
the
ACTIONS
toolbar in
Admin.
VISIBLE (*)
VISIBLE (*)
VISIBLE (*)
VISIBLE (*)
YES
VISIBLE
VISIBLE
VISIBLE
VISIBLE
VISIBLE
VISIBLE
VISIBLE
VISIBLE
Statistics
VISIBLE (*)
VISIBLE
VISIBLE
VISIBLE
VISIBLE
VISIBLE
VISIBLE (*)
VISIBLE (*)
VISIBLE (*)
VISIBLE (*)
VISIBLE
WebServer
Details of
orders
Transfer of
activities
VISIBLE
VISIBLE
VISIBLE
VISIBLE
VISIBLE
VISIBLE
VISIBLE
VISIBLE
VISIBLE
VISIBLE
VISIBLE
VISIBLE
VISIBLE
VISIBLE
YES
YES
YES
YES
(*) The total is calculated using the formula:
TOTAL = Repetitions* Total photos (or the applicable number) + Progress
The following list shows the internal status of payments in Kernel, which can be viewed in the
statistics details associated with orders. The various payment statuses may be visible in
Dispatcher or statistics according to the configuration of this table:
TERMINAL
CONFIGURATION
ORDER PAYMENT MODE
State of PAYMENT
CANCELLED
CANCELLED (with payment)
ORDER TERMINAL
CREDIT CARD
CASH
PREPAYMENT CARD
FREE
OPERATOR FREE
Order Terminal (COUNTER)
DISPATCHER Status of entry
PAYMENT RECORD
screen in KIOSK
N/A
Yes
OT_CANCELLED
Yes
PAYING
N/A
NONE
N/A
PAID
N/A
FAILED (validation)
OT_REIMBURSED
PAY_APPROVED
N/A
Yes
DONE
PENDING
Yes
DONE (*) & Fraud
PENDING
Yes
Block to SAI
OT_CANCELLED
Yes
COUNTER
TO_APPROVE
Yes
APPENDIX Statistics 9
APPENDIX
Statistics
OPERATOR CARD
OPERATOR PASSWORD
N/A
N/A
CANCELLED
CANCELLED (with payment)
STANDALONE
OPERATOR PASSWORD
Operator card
Credit card
Cash
prepayment
Yes
N/A
NONE
N/A
PAID
FAILED (validation mode)
N/A
OT_REIMBURSED
Yes
N/A
DONE
PENDING
Yes
DONE ( with Fraud)
PENDING
Yes
OT_CANCELLED
N/A
Yes
Block to SAI
Order Terminal
Yes
OT_CANCELLED
PAYING
PAY APPROVED
Operator free
N/A
N/A
N/A
N/A
APPENDIX Statistics 10
APPENDIX
DPS PrintServer
ENGLISH
Rev. 2.0
APPENDIX
DPS PrintServer
CONTENTS
1
GENERAL .......................................................................................................... 4
1.1
MAIN SCREEN ................................................................................................................. 4
1.1.1
Descriptors ............................................................................................................. 5
1.2
SEARCH PRINTERS SCREEN ........................................................................................ 5
1.2.1
Status messages ................................................................................................... 6
1.2.2
Supported printers ................................................................................................. 6
1.2.3
Supported formats ................................................................................................. 7
1.2.4
Published print sizes .............................................................................................. 8
2
PRINTER CONFIGURATION ............................................................................. 9
2.1
COLOUR CONFIGURATION............................................................................................ 9
2.1.1
Classic colour correction ........................................................................................ 9
2.1.2
Image Quality Management (iQ) .......................................................................... 11
2.2
PRINTER SETTINGS ..................................................................................................... 12
2.3
PICTURE AUTOMATIC ADJUSTMENTS ...................................................................... 14
2.4
PRINT AREAS ................................................................................................................ 15
3
GENERAL SETTINGS ..................................................................................... 17
3.1
4
ADJUST .......................................................................................................................... 17
3.1.1
Balanced .............................................................................................................. 17
3.1.2
Balanced Type (Speed Mode) ............................................................................. 17
3.1.3
Balanced Type (Order Mode) .............................................................................. 17
3.1.4
Sorting ................................................................................................................ 17
3.1.5
Beep on finished request ..................................................................................... 18
3.1.6
Logging / No resize .............................................................................................. 18
3.1.7
Full belt mode....................................................................................................... 18
3.1.8
Beep on full belt ................................................................................................... 18
3.1.9
Number of stacks ................................................................................................. 18
3.1.10 Custom backprint information .............................................................................. 18
CLASSIC COLOUR CORRECTION SETTINGS .............................................. 19
4.1
CP9550DW-S/CP9600DW-S/CP9800DW-S/DP9820DW-S USING CPD FILE ............. 19
4.2
CP9550DW-S/CP9600DW-S USING ICC PROFILE ...................................................... 20
4.3
CP9500DWS/CP3020DW USING CPD FILES............................................................... 22
4.4
CP9500DWS/CP3020DW USING ICC PROFILES ........................................................ 23
4.5
A FINAL RECOMMENDATION....................................................................................... 24
APPENDIX PrintServer
APPENDIX
5
DPS PrintServer
IMAGE QUALITY MANAGEMENT IQ .............................................................. 25
5.1
EYE-ONE CALIBRATION KIT ........................................................................................ 25
5.2
WORKING WITH EYE-ONE DEVICE ............................................................................. 26
5.2.1
Eye-One device parts .......................................................................................... 26
5.2.2
Eye-One operation ............................................................................................... 26
5.3
HOW
5.3.1
5.3.1.1
5.3.1.2
5.3.2
5.3.3
5.3.4
TO ADJUST THE PRINTER: IQ MANAGEMENT WIZARD ................................. 28
Calibrating the printer ........................................................................................... 30
Visual Calibration ................................................................................................. 30
Calibration with Eye-One device .......................................................................... 31
Printer Profiling .................................................................................................... 36
Calibration and profiling the MPU unit ................................................................. 39
Profiling Windows driver based Printers (CP3800 series and Plotter Series) ..... 39
5.4
COMPATIBILITY ............................................................................................................. 42
5.5
SUMMARY ...................................................................................................................... 43
5.5.1
Printing quality level optimisation table ................................................................ 44
6
MPU SORTER ................................................................................................. 45
6.1
INTRODUCTION ............................................................................................................. 45
6.1.1
Requirements and compatibility ........................................................................... 45
6.2
INSTALLATION ............................................................................................................... 45
6.3
WORKING MODES ........................................................................................................ 46
6.3.1
Working as a single printer .................................................................................. 46
6.3.2
Working as a central high production unit ............................................................ 46
6.3.3
Compatible formats .............................................................................................. 47
6.4
CONFIGURATION .......................................................................................................... 47
6.4.1
Balanced .............................................................................................................. 47
6.4.2
Sorting ................................................................................................................ 47
6.4.3
Full belt mode....................................................................................................... 47
6.4.4
Beep on full belt ................................................................................................... 48
6.4.5
Number of stacks ................................................................................................. 48
6.4.6
Custom Backprinting information ......................................................................... 48
6.4.7
Recommended configuration ............................................................................... 48
6.5
CONSIDERATIONS ........................................................................................................ 48
APPENDIX PrintServer
APPENDIX
DPS PrintServer
1 General
The DPS PrintServer module performs the instant print function for the DPS system, and
releases the system from managing and sending information through the USB bus.
Some relevant DPS PrintServer issues:
It can find and manage any Mitsubishi printer attached to the system. You can obtain
information about its status (out of paper, number of copies remaining, printer door open,
printing, etc…) at any time.
It can manage any instant print format accepted by the printers (10x15/6x4, etc…)
It applies very good ICC profiles to obtain the best printing results for each kind of printer.
It manages the queue of images to be printed, to obtain maximum performance.
It can be configured for speed printing (any available printer will accept any job) or be
configured for order printing (images are assigned to specific printers for those images to
be ordered by input time).
1.1 Main screen
The DPS PrintServer main screen will appear, showing the list of orders and jobs being sent
to the printer and the status of each one.
1
5
2
3
6
8
7
4
APPENDIX PrintServer
APPENDIX
DPS PrintServer
1.1.1 Descriptors
The following functions are available on this screen.
(1) Menu
Click here for access to different actions and configuration screens.
(2) Pause button
Switches from “pause” to “play”. The button displays the status being switched to when
clicked. Use it to stop and restart the print queue.
(3) Search Printers
This button explores the ONLINE printer status.
(4) Progress panel
Shows the job being processed and the printer to which it is being sent.
(5) Hide
Hides PrintServer.
(6) Log Panel
All communication issues with the printer are shown in this panel.
(7) Log Buttons
The log panel can be cleared or saved to a file from these buttons.
1.2 Search printers screen
Click on this icon to reach the „Detected Printers List‟ screen. The main purpose of
this screen is to show the connected printers and other important information about
them.
APPENDIX PrintServer
APPENDIX
DPS PrintServer
From this list, the operator can check the Model of the printer, the Alias assigned to the
printer (Name for recognising the printer), the Format (Paper size), the remaining Copies of
the printer (if available), and the Status and the internal identification code of the printer
(nSerial code).
This information cannot be changed manually. The system automatically detects these
parameters (except for Alias).
The “Printers Control Panel” button gives access to the windows printer printing settings for
the printer model CP3800.
The “Special Printer Installer” starts the installation process of CP3800 printers.
For setting up CP3800 printers refer to the installations documentation.
NOTE
Some printers cannot give information about the remaining paper, so “999” will be displayed.
1.2.1 Status messages
The operator will take action according to the status information:
If there is no printer detected (no information can be checked)
Press the „Scan Printers‟ button to make the DPS PrintServer search for printers. Wait for
10/15 seconds.
If no printer is detected, follow these steps:
1.
2.
3.
4.
Check that LEDs on the front panel of the printer are On and Ready.
Check that the printer is properly connected (USB and power supply cables).
Restart the printer.
Restart the DPS system.
Ink.../Paper.../Cassette.../Jam…/etc..
They are caused by problems with the consumables kit. Remove the paper and/or ink
and make sure it is properly inserted into the printer.
Overheating
The printer is in safe self-pause mode due to head overheating. Wait for 30 seconds and
the printer will start to work again once it has cooled down.
Open door.
The printer door is open.
Wrong Print Size.
The paper media is different to the format chosen. Check that the type of paper media
inserted and the print format are the same.
1.2.2 Supported printers
CP9600 Series
CP9550 Series
CP3020 Series
CP9500 Series
CP9800 Series
CP3800 Series
CP9820 Series
MPU
Canon Plotter Series
APPENDIX PrintServer
APPENDIX
DPS PrintServer
1.2.3 Supported formats
CP95XX
Series
CP9600
Series
CP98XX
Series
CP3020
Series
CP3800
Series
Plotter
Series
A4 - 20X25 - 8X10
X
X
X
X
X
A4H - 20X25 - 8X10
X
X
X
X
X
LA4 - 20X30 - 8X12
X
X
X
X
X
LA4H - 20X30H - 8X12H
X
X
X
X
X
L - 10X15 - 4X6
X
X
X
LH - 10X15H - 4X6H
X
X
X
X
X
LHG - 10X15HG - 4X6HG
X
X
X
X
X
M - 9X13 - 3.5X5
X
X
X
MH - 9X13H - 3.5X5H
X
X
X
X
X
MHG - 9X13HG - 3.5X5HG
X
X
X
X
X
W - 15X23 - 6X9
X
X
X
WH - 15X23H - 6X9H
X
X
X
X
X
WHG - 15X23HG - 6X9HG
X
X
X
X
X
W10 - 10X15(x2) - 4X6(x2)
X
X
X
W10H - 10X15(x2)H - 4X6(x2)H
X
X
Format name - cm - inches
W10HG - 10X15(x2)HG - 4X6(x2)HG
X
X
X
X
X
X
X
X
X
X
X
X
X
X
X
X
X
W11 - 11.5X15(x2) - 4.4x6(x2)
W11H - 11.5X15X(x2)H - 4.4x6(x2)H
X
X
W11HG - 11.5X15X(x2)HG - 4.4x6(x2)HG
X
X
W13 - 13X18W - 5X7W
X
X
X
X
W13HG - 13X18WHG - 5X7WHG
X
X
X
X
X
W20 - 15X20 - 6X8
X
X
X
W20H - 15X20H - 6X8H
X
X
X
X
X
W20HG - 15X20HG - 6X8H
X
X
X
X
X
W21 - 15X21 - 6X8.5
X
X
X
W21H - 15X21H - 6X8.5H
X
X
X
X
X
W21HG - 15X21HG - 6X8.5HG
X
X
X
X
X
X - 13X18 - 5X7
X
X
X
XH - 13X18H - 5X7H
X
X
X
X
X
XHG - 13X18HG - 5X7HG
X
X
X
X
X
PLT - PLOTTER
X
X
X
X
X
LLT - 40X60 - 15x24"
X
X
X
X
X
NLT - 30X60 - 12x24
X
X
X
X
X
RLT - 40X30 - 15x12
X
X
X
X
X
W15H - 20X15(x2)H - 8X6(x2)H
X
X
X
X
X
WL3H - 20X10(x3)H - 8X4(x3)H
X
X
X
X
X
WLH - 20X10(x2)H - 8X4(x2)H
X
X
X
X
X
WXLH - 20X13(x2)LH - 8X5(x2)LH
X
X
X
X
X
WXH - 20X13(x2)H - 8X5(x2)H
X
X
X
X
X
X
X
X
X
X
X
X
W76 - 15X7.6(x3) - 6X3(x3)
W76HG - 15X7.6(x3)HG - 6X3(x3)HG
X
X
APPENDIX PrintServer
APPENDIX
DPS PrintServer
L51 - 15X5.1(x2) - 6X2(x2)
X
X
X
X
L51HG - 15X5.1(x2)HG - 6X2(x2)HG
X
X
X
X
X
W55 - 15X5.5(x4) - 6X2.2(x4)
X
X
X
X
W55HG - 15X5.5(x4)HG - 6X2.2(x4)HG
X
X
X
X
X
1
When the printer is an MPU multi-cut formats are not supported.
1.2.4 Published print sizes
It‟s possible to enable or disable the print sizes supported by the software. This means that the software only will print
using the resulting list. This chart is available at Menu/Settings/Published Printsizes
The operator can always come back to change any of these parameters.
This helps to minimize the lists that are shown in different places of our applications and also the different related
products, saving time and efforts to configure all of them.
By default, all the formats are enabled. It‟s highly recommended to disable entirely some groups if the system is not
going to use them, like HG media, Standard media, CP3020, Plotter, and so on.
IMPORTANT
For enabling the CP9600 exclusive formats, the option “exclusive formats” in the CP9600
printer parameters section of DPSPrintserver must be checked.
NOTE
By default, the Plotter and CP9600 exclusive formats are disabled.
APPENDIX PrintServer
APPENDIX
DPS PrintServer
2 Printer Configuration
There are different adjustable parameters available on the Search Printers Screen. Printers
are factory-adjusted by default and the system is already configured to obtain a good printing
quality. However, in order to achieve the best quality possible it is necessary to adjust some
parameters and perform some periodical calibrations.
2.1 Colour Configuration
There are two configuration modes which can be applied on each printer individually: Classic
colour correction and Image quality management. Classic mode allows you to configure
standard printer parameters through legacy adjustment screens. The available adjustments
with classic colour correction are fine, but it is highly recommended to use the new Image
quality management system, since it represents a forward step in colour managing and
printing consistency comparing to the classic mode.
2.1.1 Classic colour correction
Access this screen by pressing the „Explore‟ button or by
selecting Menu > Settings > Printers
Basic
Select Basic and click „Colour Setup‟. The colour components
can be fine-tuned separately (R,G,B) or together (Brightness)
o
o
„Level‟ adjusts the colour saturation
„Gamma‟ adjusts the middle tones
Each printer can be adjusted individually and can be optimised for colour or for black &
white pictures. It‟s also possible to define two more custom optimizations: Custom1 /
Custom2. Different profiles can also be saved / loaded.
NOTE
B&W, Custom1 and Custom2 optimisations are not applicable to DPSKiosk
Advanced
Select Advanced and click „Colour Setup‟.
Colour components can be fine-tuned
separately (R,G,B) or together (RGB)
Separate adjustments can be made at
every point on the curve from shadows to
highlights.
Adjustments can be made for each printer
and each format individually, and they can
be optimised for colour or for black & white
pictures and optimize more options with the
APPENDIX PrintServer
APPENDIX
DPS PrintServer
values Custom1 / Custom2. Different profiles can also be saved / loaded.
ICC Settings (Colour Matching, ICC Profiles)
For best colour quality improvement, use Colour
Matching.
Check „Apply Colour Matching‟ option in „Colour
Matching‟ panel. If you want to use picture files
embedded profiles, please also check „Use pictures
embedded profile‟.
NOTE
Old Mitsubishi ICC profiles from DPS PrintServer versions prior to 5.6 are no longer
supported. Use the new ones provided or contact Support if you had old specific ICC profiles.
From version 5.6. DPS PrintServer allows using standard ICC profiles as well as the new
Mitsubishi ICC Profiles provided.
Select the printer you want to configure. Press the „ICC Settings…‟ button in the „Printer
Settings‟ panel. This setting only affects the printer selected.
ICC Profiles list. With the list on the left, it‟s possible to manage the ICC profiles placed in
the DPSPrintServer\ICCs folder. It‟s possible to add new profiles to the list by pressing
„Load ICCs‟ and selecting an ICC profile placed in another location. It‟s also possible to
delete them from the list by pressing „Delete ICCs‟.
Media Type. Each media type can be configured with a different ICC profile. Be sure to
configure at least the currently used media type.
Quality. Each print quality has a different colour contrast and intensity. Different ICC
profiles must therefore be used.
Colour – B/W. Colour correction for colour or black & white images can be enabled and
configured separately. Enabling Colour and disabling B/W is recommended. An ICC profile
is assigned to the Colour mode of every media type and every quality by default.
Arrow button. Use this button to assign the selected profile from the ICC profiles list to
Colour or B/W.
Please, refer to chapter 4 for more information about classic colour correction settings.
NOTE
All default ICC profiles will be applied in any new detected printer.
References:
Part of DPS PrintServer (Mitsubishi Electric Europe, B.V.) uses “Colour Science i2e Image Enhancement
Technology”.
APPENDIX PrintServer
APPENDIX
DPS PrintServer
2.1.2 Image Quality Management (iQ)
Image Quality Management is a new concept of printer calibration and
adjustment which makes possible to obtain the maximum quality in your
prints.
Access this screen by pressing the „Explore‟ button or by selecting Menu
> Settings > Printers.
Then select „Image quality management‟ and click „Setup…‟ button to
access iQ configuration screen.
On the left side are placed all the controls which allow configuring the different adjustments
assigned to the printer. On the right side is placed the button to start a new iQ adjustment
process. It is highly recommended not to change the configuration of the left side panel. The
values are configured automatically when you perform a calibration or profiling process with
your printer, and they are only intended for administration or advanced testing purposes.
To start the iQ adjustment process, please, follow the steps on the right side: Firstly, select
the quality you want to adjust, and then press the „Start wizard‟ button.
A new screen will appear and will guide you trough the process. To obtain fully detailed
information about the iQ management system, please, refer to chapter 5.
APPENDIX PrintServer
APPENDIX
DPS PrintServer
2.2 Printer Settings
Printers are factory-adjusted. However, some working parameters can be adjusted.
Access this screen by pressing the Explore button or by selecting Menu > Settings > Printers.
If you select a printer and then click on “Parameters” you will be able to change some
advanced printer options which can be used to fine tune adjustments or improve print quality.
Alias. Change this to improve printer
identification.
Sharpness.
Detail
improvement.
Recommended values:
o CP9500DW-S: User – Manual - 6
o CP9550DW-S: Noise:Off Sharpness:4
o CP9600DW-S: Noise: Off Sharpness:4
o CP9800DW-S: Noise:Off Sharpness:8
o CP9820DW-S: Noise:Off Sharpness:8
o CP3800D: Not available
o CP3020D: Not available
Image Quality. The default print mode of
the printer which is being configured. This
quality level is used when no image quality
is specified by the sender application.
Improved quality involves a higher quality
of image and colour, but also a slower
printing speed.
Gamma Colour. Colour depth adjustment.
Leave the default values if you are using ICC profiles.
Colour Tables. The recommended configuration is None-Flat and it is the correct option to
use with ICC profiles (default).
APPENDIX PrintServer
APPENDIX
DPS PrintServer
Number of copies near end will generate an incident when reaching the configured
number.
Save and Exit to apply changes.
Exclusive Formats. Activating this option CP9600DW-S will work with its own formats.
This helps to avoid CP9600DW-S printing standard 10x15 cm (6x4 inc) or 15x23 cm (6x9
inch) sizes when the printer is attached to a system together with other printers like
CP9500DW-S also using that media size. Due to HIGH QUALITY and SLOW SPEED of
CP9600DW-S printer, it is preferable to reserve this printer for special jobs like Studio
pictures, where high quality is a must. When this option is checked and the user wants to
send a request to that printer, special paper size must be chosen from the list of available
paper size 10x15 cm (6x4 inc) or 15x23 cm (6x9 inch).
Mirror Mode. Activating this option the image will be inverted (from left to right), producing
a mirror effect. This option is deactivated by default.
Overcoat. This option enables the printing of an overcoat layer on the picture. It is
activated by default.
White border. This option is used to adjust the position of the picture over the white
border when this option is selected to print pictures. This is useful when the print out of the
printer is slighty shifted respect the upper/lower or right/left edges.
The target is to have the same thickness of white border for all sides. This value is
settable in fractions of 0.1 millimetres and can also be positive or negative.
The default values are usually the best, but the operator can vary these parameters to
improve the performance of the printer on a printer-by-printer basis.
NOTE
Do not change the Colour Table unless ICC profiling applies.
In this case, „Flat‟ or „No tables‟ will be automatically selected
NOTE
For CP9550DW (A) choosing FineDeep image quality, will make the printer print in SuperFine
mode
Restrictions:
With the format 10x15x2 based on paper-cut, white edge cannot be implemented.
When a plotter printer is selected, the “Parameters” screen shows special configuration
options that only apply to the plotter.
Advanced interpolation. This option allows resizing the plotter images for the format
PLOTTER. This option is disabled by default.
Max MegaPixels. This option allows specifying how many megapixels will be used when
resizing to format PLOTTER. It is only applied when advanced interpolation is activated.
APPENDIX PrintServer
APPENDIX
DPS PrintServer
2.3 Picture automatic adjustments
Picture automatic adjustments applies
changes to specific parts of the image. It is
useful to enhance highlights and shadows,
colours, etc.
To apply automatic adjustments, a
configuration screen accessible from the
main screen has been created. Go to
Menu - Settings - Picture Automatic
Adjustments to open the configuration
menu.
Each one of the automatic adjustments
options can be individually activated or
deactivated. Moreover the impact of each
one of the parameters on the image can
be modified. The application is configured
to improve the pictures aspect, although it
is possible to adjust the configuration in
order to get best results.
Enable picture automatic adjustments
Adaptative brightness enhancement: This option enables the use of shadow and Highlight
enhancement.
Shadow and highlight enhancement: this option enables highlights correction strength and
Shadows Correction Strength options.
Adaptative colour enhancement
Local sharpness enhancement
Memory colour enhancement
Local noise reduction
Highlight contrast
Shadow Contrast
Shadow desaturation
”DEFAULT” button restores default factory values.
Note: Certain parts of Mitsubishi Electric DPS PrintServer have been created using “Colour-Science i2e Image
Enhancement Technology."
APPENDIX PrintServer
APPENDIX
DPS PrintServer
2.4 Print Areas
White
border
Limits of printable area
Non printable area
Choose printer, format and
quality
Refresh screen
Adjustment of printing
area
Save
changes
Exit
Keep proportions
White border
adjustment
In this section is possible to set the default parameters of real print area and white border
dimensions depending on printer model (and printing quality in some cases).
The final picture data being sent to the printer is always slightly bigger than the real print area
size, in order to compensate possible deviations of the thermal head position respect the
paper position. This helps to ensure that, even when the paper is slightly shifted to one side,
there‟s not any edge of the paper without picture information being printed.
By default, the print area is equal to the picture data dimension in terms of pixel size. (width
and height). This data („Printable width‟, „Printable Height‟) can be adjusted in this screen.
Also the dimensions of the white frame for white border prints can be adjusted here.
NOTE
It‟s possible to adjust different offset per each printer of the same model being installed in the
same system, but not in this screen. It‟s required to access to the individual printer parameter
menu and change horizontal and vertical offset. This is useful when printers of the same
model are showing differences between their respective printing position offsets.
APPENDIX PrintServer
APPENDIX
DPS PrintServer
IMPORTANT NOTE
Cutting formats (10x15x2, 11‟5x15x2) do not support white border
When printers or format are chosen, changes must be saved or cancelled.
NOTE
If cutting formats are modified (10x15x2 ; 11‟5x15x2) the composition file must be modified for
optimal results.
APPENDIX PrintServer
APPENDIX
DPS PrintServer
3 General settings
These parameters control the behaviour of the PrintServer.
There are some of them that are general for every printer and others applied only to the MPU
Sorter.
Please refer to chapter 6 for further information about MPU Sorter unit.
3.1 Adjust
Access this screen by selecting Menu > Settings >
Adjust
3.1.1 Balanced
This is the default configuration used if no
„Balanced‟ mode is specified in the requests sent.
If checked, the jobs in a request are sent to
printers that can print the selected format.
Otherwise, all jobs will be sent to one of the
printers that supports the format.
3.1.2 Balanced Type (Speed Mode)
DPS Print Server sends any order to the first
printer available. This increases the printing speed,
but the printing order is lost.
3.1.3 Balanced Type (Order Mode)
A set of ordered printing jobs are assigned to each available printer. Instant prints are
ordered, but speed is lost (because an available printer could not be assigned in order to
prevent the order being lost).
3.1.4 Sorting
Whenever the print queue is ready to print, this option will reverse (Descending) or not
(Ascending) the printing order. This option is useful for copies to land on the print tray in
reverse order.
APPENDIX PrintServer
APPENDIX
DPS PrintServer
3.1.5 Beep on finished request
If checked, a sound will be played when a request finishes printing.
3.1.6 Logging / No resize
These parameters are for technical purposes. Please leave them unchecked.
3.1.7 Full belt mode
This setting only applies to MPU unit, it indicates what is the action that the application must
do when a stack has reached the end of the belt. The values can be:
STOP: PrintServer will stop printing with MPU till the stack is removed from the belt
by the operator (only the stack over the sensor it‟s needed to be removed).
MOVE: PrintServer will move the belt so the first stack will fall at belt tray.
3.1.8 Beep on full belt
This setting only applies to MPU unit, when checked PrintServer will emit a sound when a
stack has reached the belt end.
3.1.9 Number of stacks
This setting only applies to MPU unit. It allows configuring the number of the MPU output
stacks on the belt.
3.1.10 Custom backprint information
See MPU related information in this manual further on.
APPENDIX PrintServer
APPENDIX
DPS PrintServer
4 Classic colour correction settings
This chapter refers to the classic colour corrections. It is highly recommended to use the new
iQ Image quality management system (refer to chapter 5) instead classic settings. However,
the system is predefined in classic colour correction in order to allow backward compatibility
and it is possible to keep using the classic system instead.
It is important to take into consideration that old Easy Colour Adjustments have been
removed from the Classic colour correction options because they have been embedded on
the new iQ Image quality management system as the new concept “Visual Calibration”.
(Please, refer chapter 5 for more details).
In Classic colour correction mode, after the printer is detected, some colour and quality set-up
can be carried out. A choice between using CPD colour adjustment files or ICC profiles is
possible. It is very important to set up the system according to your choice.
ICC profiles are automatically applied to each printer and it is the default Mitsubishi
recommended configuration.
IMPORTANT NOTE – ICC COMPATIBILITY
Now DPS PrintServer supports standard ICC profiles and special Mitsubishi ICC profiles.
Mitsubishi ICC profiles follow a new design and are not compatible with the old ones, so, ICC
profiles from older versions than DPS PrintSever 5.6 are not longer compatible.
4.1 CP9550DW-S/CP9600DW-S/CP9800DW-S/DP9820DW-S
using CPD file
1. Check Colour Correction group has the „Advanced‟ option checked.
2. Press the „Setup‟ button.
3. Check that the CPD default curve for CP9550DWS is loaded. The grey curve is a
guide if one is needed to make small adjustments, in order not to stray too far from
the current standard CPD adjustment for the printer.
4. Press the „Exit‟ button.
5. Press the „Parameters‟ button on the „Detected Printer list‟ to show this form.
Load default
APPENDIX PrintServer
APPENDIX
DPS PrintServer
a. In the „Colour Table‟ group in the „Colour‟ drop-down list box, select the
„Printer Colour‟ option. Do not use the „Flat‟ colour table. The convention of
these names depends on the printer model.
b. In the „B/W‟ drop-down list box, always leave the „Printer Colour‟ option
selected.
c. Set „Noise Reduction‟ to „off‟.
d. Set „Sharpness‟ to 4.
e. Set „Superfine mode‟ to „off‟.
f. Set „Gamma Colour‟ to „Photo‟.
g. Set „Mode‟ to „normal‟.
6. The „Apply Colour Matching‟ option in the „Colour Matching‟ panel must be
unchecked.
4.2 CP9550DW-S/CP9600DW-S using ICC profile
1.
2.
3.
4.
Check that the Colour Correction group has the „Advanced‟ option checked.
Press the „Set-up‟ button.
Check that NO CPD curve is loaded. The Flat line must be selected.
Press the „Exit‟ button.
5. Press the „Parameters‟ button on the „Detected Printer list‟ to show the Parameters
form.
APPENDIX PrintServer
APPENDIX
DPS PrintServer
a. Select the „Flat‟ option in the „Colour Table‟ group in the „Colour‟ drop-down
list box. Do not use the „Printer Colour‟ colour table. The full option naming
convention depends on the printer model.
b. In the „B/W‟ drop-down list box, leave the „Printer Colour‟ option, if there is no
special colour profile for that option.
c.
d.
e.
f.
g.
Set „Noise Reduction‟ to „off‟.
Set „Sharpness‟ to 4.
Set „Superfine mode‟ to „off‟.
Set „Gamma Colour‟ to „Photo‟.
Set „Mode‟ to „normal‟.
6. Check the „Apply Colour Matching‟ option in the „Colour Matching‟ panel. If you want
to use picture files embedded profiles, also check „Use pictures embedded profile‟.
7. Press „ICC Settings…‟ button on the „Printer Settings‟ panel. On list on the left, you
have the previously loaded profiles.
a. Select „Media Type‟ and the desired Quality.
b. Check the „Colour‟ option.
c. The ICC profile on the left must be assigned using the arrow button.
d. The B/W option must be left unchecked if there is no special colour profile for
that option.
APPENDIX PrintServer
APPENDIX
DPS PrintServer
4.3 CP9500DWS/CP3020DW using CPD files
1.
2.
3.
4.
Check that the Colour Correction group has „Advanced‟ option checked.
Press the „Set-up‟ button.
Load or „draw‟ the CPD curve that you need.
Save the new curve if needed and press the „Exit‟ button.
5. Press the „Parameters‟ button on the „Detected Printer list‟ to show the Parameters
form.
a. In the „Colour Table‟ group, in the „Colour‟ drop-down list box, select the
„Printer Colour‟ option. Do not use the „Flat‟ colour table. These convention of
these names depends on the printer model.
b. In the „B/W‟ drop-down list box, always leave the „Printer Colour‟ option
selected.
c. Set „Sharpness‟ to „User‟ and „Manual‟ to 6.
d. Set „Gamma Colour‟ to „Photo‟.
e. Set „Mode‟ to „normal‟.
APPENDIX PrintServer
APPENDIX
DPS PrintServer
6. The „Apply ColourMatching‟ option in „Colour Matching‟ panel must be unchecked.
4.4 CP9500DWS/CP3020DW using ICC profiles
1.
2.
3.
4.
Check that the „Advanced‟ option checked in the Colour Correction group.
Press the „Set-up‟ button.
Check that NO CPD curve is loaded. Flat line must be selected.
Press the „Exit‟ button.
5. Press the „Parameters‟ button on the „Detected Printer list‟ to show the parameters
form
a. In the „Colour Table‟ group in the „Colour‟ drop-down list box, select the „Flat‟
option. Do not use the „Printer Colour‟ colour table. The full option naming
convention depends on the printer model.
b. In the „B/W‟ drop-down list box, leave the „Printer Colour‟ option if there is no
special ICC profile for B/W pictures.
APPENDIX PrintServer
APPENDIX
DPS PrintServer
c. Set „Sharpness‟ to „User‟ and „Manual‟ to 6.
d. Set „Gamma Colour‟ to „Photo‟.
e. Set „Mode‟ to „normal‟.
4.5 A FINAL RECOMMENDATION
Current ICC profiles are created using the printer's flat colour curves, in order to start with
neutral corrections. They are not based in any CPD file.
Recommendation: DO NOT MIX Printer Colour curves or CPD files with ICC profiles.
Remember that each print size and print speed require different colour profiles.
APPENDIX PrintServer
APPENDIX
DPS PrintServer
5 Image quality management iQ
Image Quality Management or, iQ management, is a new way to adjust
and calibrate printers to obtain the best colour reproduction and
consistency.
The system is based on a wizard that guides the user to calibrate each
printer-paper-quality combination. Calibration requires printing some
patterns in order to use them during the adjusting process.
In order to use the maximum capabilities of the printers, the user should obtain an Eye-One
calibrator device. However, the Eye-One device is not essential to get a good colour
reproduction. Please, contact your dealer for further information.
There are two main steps on the iQ process:
1) Calibration.
Calibration helps to keep a regular response of the printer thermal head through the whole
range of light intensity. Also helps to get the most of the thermal head dynamic range. A good
calibration will result in perfect grayscale tones, without colour casts.
Calibration can be performed with an Eye-One device or through a visual system. Eye-One
calibration is the best way to calibrate objectively the printer and obtain the best results. The
visual calibration system uses the same method as the former Easy Colour Adjustment
technology, which has been improved and included in the iQ management process.
2) Profiling
Profiling process, applied over a calibrated printer, helps to improve colour reproduction
accuracy, whatever the darker or brighter the colour is. The ICC profiles transform original
picture colour to a common colour space (sRGB).
5.1 Eye-One Calibration kit
The Eye-One calibration kit includes an i1Pro
spectrophotometer. It is a fast, handheld, colour
measurement device which measures the full
visible spectrum of the light reflected from colour
samples and it is used for monitor and printer
profiling/calibration.
It also includes a special support for measurement
and a special accessory for monitor profiling.
For monitor profiling, please install the software
provided on the CD. And follow the documentation
provided with the kit. For printer calibration it is not
necessary to install any additional software.
APPENDIX PrintServer
APPENDIX
DPS PrintServer
5.2 Working with Eye-One device
Eye-One calibration device connects with the system through USB cable. You will find the
drivers on „C:\Drivers\Eye-One\‟. For further information about installation, please refer the
Eye-One installation document.
EYE-ONE USB CONNECTION ADVICE
Please, do not use front USB connection to connect Eye-One Device. Use any of free
system rear USB connections instead.
Eye-One device is used by DPS PrintServer for printer calibration and profiling. To do so,
several prints with colour patches have to be made. Then they have to be read with the
device in order to obtain the required measurements for the printer adjustment.
5.2.1 Eye-One device parts
These are the most important parts of the Eye-One device:
USB plugg
White calibration tile
Operation button
The device has an operation button on the left side. This button has to be pressed for reading
samples or for device calibration.
The white calibration tile is used only for the Eye-One calibration. The device must be placed
over it and the button has to be pressed when prompted in the software. Then, Eye-One
device will be calibrated and ready to use.
5.2.2 Eye-One operation
In this point it is explained how to read the printed patches with the Eye-One calibrator
device, either you are calibrating or profiling your system. It is very important understanding it
because this process will be assumed in the following chapter 5.3, where iQ management
wizard will be explained.
APPENDIX PrintServer
APPENDIX
DPS PrintServer
After printing one or more patterns you will have to read them with the device. Please, repeat
the following steps for each printed pattern:
1. Put the printed target on the reading support as
shown, attaching it with the upper black plastic
support.
2. Put the Eye-One device on the black plastic slider
support as shown. Eye-One device must slide freely
in horizontal direction and the transparent plastic
guide must slide in vertical direction. Make sure the
printed target is not too close to the left because the
reading process must start on a white surface.
3. Slide Eye-One and transparent support to the top
left, as shown. Eye one device must be placed
aligned with the first row of patches and pointing to a
white background on the left of the first patch. When
prompted by the software, click on the Eye-One
operation button and leave it pressed. Then, you will
hear a “beep” signal (If you don‟t hear a beep signal,
because maybe your system does not include
internal speaker, just wait a couple of seconds). In
this moment slide the Eye-One device horizontally to
the right until reaching the end of the patches row.
Try to move the reading device in a constant speed.
With some practice you can read a 4x6 print in less
than a minute (45-50 seconds).
4. Move down the transparent plastic sliding support,
aligning the plastic support hole to the next row, and
return the Eye-One device to the left as shown. Then
repeat the process until finished.
APPENDIX PrintServer
APPENDIX
DPS PrintServer
5.3 How to adjust the printer: iQ management wizard
iQ management wizard is the application that will guide you in the printer adjustment process.
If you are not satisfied with your printing quality / consistence, please follow the iQ
management steps in order to adjust your printers. If you are satisfied with your printing
quality and you have an Eye-One device you will be able to get even better quality. If you
don‟t have an Eye-One device, use the wizard only if printing quality is not good, because the
visual adjustment process is not so accurate.
Access the initial screen by pressing the „Explore‟ button or by selecting Menu > Settings >
Printers.
Then select „Image quality management‟ and click „Setup…‟ button.
Printer calibration will be performed with the installed media. To start the adjustment process,
follow the steps on the right side of the screen.
Firstly, choose the printing quality, and secondly, press “Start wizard” button. It is very
important to check that any of the printers installed is printing before continue. A message box
will appear warning about it. Click “Ok” to continue.
APPENDIX PrintServer
APPENDIX
DPS PrintServer
Then, iQ wizard will be launched. It will guide you until the end of the process. The picture
below shows the main elements you can find along the wizard steps.
Shortcut buttons.
(Only for advanced
users)
Information area
Action area
Exit button
In the welcome screen you will find information about selected printer, paper and quality.
Click „Continue‟ to go to the next step.
You will be asked whether you have or not, an Eye-One device. Choose the convenient
option and click „Continue‟.
If you don‟t have an Eye-One calibration device, follow the next point 5.3.1. If you have an
Eye-One device, please go to point 5.3.2.
APPENDIX PrintServer
APPENDIX
DPS PrintServer
5.3.1 Calibrating the printer
There are two ways to calibrate the printers. In case of having the Eye-One calibration kit
please proceed with the calibration mode using Eye-One. Otherwise, proceed with visual
calibration.
5.3.1.1 Visual Calibration
NOTE
If you have an Eye-One calibration kit please go to the next chapter 5.3.1.2, which refers to
the calibration using an Eye-One.
Start the calibration wizard and when you are asked whether you have or not and Eye-one
device choose the option “No, I don‟t”.
At the beginning of the wizard an image with a set of greyish patches will be printed, as
shown in the figure, divided into four groups.
Once printed, select the most neutral grey box (with no colour cast) of each group (area) and
enter the associated number in the corresponding boxes. In the first step is quite normal to
leave the values to 0, since none of the patches are closer enough to the desired gray, but it
will depend on the printer. Sometimes, leaving the values to 0 and pressing „Continue‟ makes
the decision easier by reducing the distance between patches.
APPENDIX PrintServer
APPENDIX
DPS PrintServer
For further information follow on-screen instructions.
You can repeat the process up to four times to fine-tune the result by clicking “Continue” or, if
you are satisfied with the result, you can press “Finish” at any time you want.
Then the final screen will appear. Click „Finish‟ again to leave the iQ wizard. You will return to
the previous configuration screen.
The generated calibration will be applied automatically to the selected printer, paper and
quality. You only have to press „Close‟ to leave the iQ configuration screen or select another
printing quality and start the process again.
5.3.1.2 Calibration with Eye-One device
With the Eye-One calibration device you will be able to obtain the best printing quality
possible, even if you think that the default quality is good enough.
Start the calibration wizard and when you are asked whether you have or not and Eye-one
device choose the option “Yes, I have an Eye-one device. After that, you will have to choose if
you want to perform a full or a quick calibration.
APPENDIX PrintServer
APPENDIX
DPS PrintServer
Quick calibration has to be chosen only if you have performed a full calibration before. Full
calibration will provide the best calibration for your printer, but it will require 5 prints in
10x15cm – 4x6 inch. Quick calibration can be done with only 1 print, and it is intended for
everyday adjustment, but it is based on a previous full calibration. Quick calibration is only
able to correct small deviations, but will work fine on most of the cases. When quick
calibration does not perform well, it‟s time to proceed with a full calibration again.
In this chapter, only full calibration will be explained, because it has more steps. If you
understand full calibration you will be able to perform a quick calibration as well.
Click „Continue‟ to start the calibration process. You will be prompted to connect Eye-One
device. Connect it and click „Ok‟ to continue. Calibrator application will be launched.
CALIBRATOR & PRINT PROFILER ACTIVATION CODE
When Calibrator is launched for the first time you will be prompted to insert an activation
code. This code can be found inside the Eye-One case in a paper labelled “Calibrator Unlock
Code”. Please, note that the unlock code is case sensitive.
Next you will be prompted for device calibration. Follow the shown instructions and finally
click „Ok‟.
APPENDIX PrintServer
APPENDIX
DPS PrintServer
You will be able then to see the following screen:
NOTE
The White Point Calibration is only available with the 9800 series printers.
1
2
Press „Print‟ button (1) to print the white point calibration card. Please, wait for the print to
finish. Then press „Next‟ button to continue (2).
Now you have to put the printed card on the reading support and read, row by row, as
described in the point 5.2.2 Eye-One operation.
APPENDIX PrintServer
APPENDIX
DPS PrintServer
When finished, click „Next‟ button to continue.
The following step will be greyscale calibration. You have to click „Print‟ again. Some prints
will be made, and then again you will have to push „Next‟ button to continue.
You will have to read the printed patches as described in 5.2.2 Eye-One operation point.
When you finish reading one print, the page will change automatically. You only have to
change the card in the reading support and start again with the following print.
APPENDIX PrintServer
APPENDIX
DPS PrintServer
NOTE
Sometimes, depending on the printer model, it can appear the message below. Don‟t care as
it is just an informative message.
The error may be caused by the fact that the printer is not warmed enough. But this doesn‟t
prevent performing a good calibration.
Once you have finished reading all the rows of the different pages click „Next‟ button to
continue. This is the last screen, where you have to press the button „Generate Tables‟ (1) in
order to generate the calibration information. You will be able to see a graphics chart where
the read information will be shown.
1
2
Finally press „Complete‟ button (2) to exit the Calibrator application.
Now you have generated a calibration for your selected printer, paper and quality. Most users
will find this calibration good enough, because can be used with the provided generic ICC
profiles. The next screen will ask if you want to use the generic ICC profiles or if you want to
improve even more the quality by generating a new profile for the selected printer, paper and
quality settings.
APPENDIX PrintServer
APPENDIX
DPS PrintServer
5.3.2 Printer Profiling
You can access this screen from the „ICC Profiling‟ shortcut button on the iQ screen or after
calibrating a printer. It is highly recommended to perform a full printer calibration prior to
profiling. Printer profiling should only be used for fine tuning and it is not intended for daily
adjustment.
If you don‟t want to generate a new ICC profile, simply click „Skip‟ button and the wizard will
finish. Now we will explain how to generate a new ICC profile.
Firstly, click on „Print Patches‟ button. Several patches for your selected printer and paper
size will be printed. Wait until finished and then, click „Printer Profiling‟ button to start the
process. Print Profiler software will appear.
CALIBRATOR & PRINT PROFILER ACTIVATION CODE
When Print Profiler is launched for the first time, if Calibrator has not been started before,
you will be prompted to insert an activation code. This code can be found inside the Eye-One
case in a paper labelled “Calibrator Unlock Code”. Please, note that the unlock code is case
sensitive.
First of all, click „Connect‟ button to
establish the communication between
the Eye-One device and the software.
Secondly click „Calibrate‟ to calibrate
the device. Follow the on-screen
instructions and click „Ok‟.
1
2
After calibration, click the
green right arrow on the
bottom right of the screen
to continue.
APPENDIX PrintServer
APPENDIX
DPS PrintServer
The following screen will appear.
Press „Start‟ button before starting the reading process.
You will have to read the printed patches as described in 5.2.2 Eye-One operation point.
When you finish reading one print, the page will change automatically on the screen. You only
have to change the card in the reading support and start again with the following print.
When finished, click again the right green arrow to continue.
The following screen will appear:
Click „Create Profile…‟ to
generate the ICC profile. You will
be asked about the name and
folder where the file will be
saved. Please, leave the default
name and folder for a correct file
detection.
Then you have finished profiling
your printer. Click the „X‟ on the
top right to leave Print Profiler
application or Go to „File-> Quit‟
menu.
APPENDIX PrintServer
APPENDIX
DPS PrintServer
After generating an ICC profile or skipping the ICC generation step you will find the Final
screen. Click „Finish‟ to leave the iQ management wizard and return to configuration screen.
The generated calibration and profile will be applied automatically to the selected printer,
paper and quality.
You only have to press „Close‟ to leave the iQ configuration screen or select another printing
quality and start the wizard again.
APPENDIX PrintServer
APPENDIX
DPS PrintServer
5.3.3 Calibration and profiling the MPU unit
The MPU Sorter unity is composed by two printers. To perform a calibration and profiling it is
necessary to do it individually to each printer composing the unit.
Please, follow the steps described in the chapter 5.3 which refers to the calibration and
profiling of printers.
Remember that the colour patches are placed on the upper tray.
5.3.4 Profiling Windows driver based Printers (CP3800 series and
Plotter Series)
Windows driver based printers have a special treatment when profiling. There are 2 main
issues to take into account:
1) Windows driver ICC management has to be disabled.
2) Printing the adjustment patches has to be made through Print Profiler software instead of
IQ Wizard „Print Patches‟ button.
Profiling example for the printer CP3800:
First of all, we have to disable windows driver colour managing. Go to „Search Printers‟
screen and click „Printers Control Panel‟ button. „Printers and Faxes‟ window will appear.
Select CP3800 printer and go to „File-Printing Preferences…‟
Then select the tab „Option‟ and change the „Color Adjustment‟ setting to „None (N)‟ as
shown.
Then click Ok to save changes and leave the printing preferences menu. „Printers and Faxes‟
window has to be closed too. This step has to be made only once. The setting keeps
configured in Windows driver. Now we are ready to profile the printer through the IQ Wizard
APPENDIX PrintServer
APPENDIX
DPS PrintServer
Follow the instructions of the
chapter 5.3 to start IQ Wizard
selecting CP3800 printer in the
printer list.
Click „Next‟ button on the IQ Wizard
and the Printer Profiling screen will
appear.
„Print Patches‟ button will be
disabled, since interaction way for
this printer is through the Windows
printing interface. Click „Printer
Profiling‟ to continue.
APPENDIX PrintServer
APPENDIX
DPS PrintServer
Print Profiler application will
appear, with all options freely
configurable. First of all, select
the printer type.
In case of CP3800 select RGB
Dye sub (for Plotter series you
should select RGB Printer). Click
the blue links on the application
in order to obtain more
information.
Then click the green right arrow
to continue to next step „Select
Device‟.
Click „Connect‟ button to establish the communication between the Eye-One device and the
software and then click „Calibrate‟ to calibrate the device. Follow the on-screen instructions
and click „Ok‟. (See chapter 5.3.3 for detailed information).
Click the green right arrow again. „Define Target‟ step will appear.
Here we will be able to configure and print the patches for printer profiling.
1
2
3
Click „Page Setup…‟ to configure the printing output (1)
Then click on „Printer…‟ (2) and select MITSUBISHI CP3800DW printer from the list (3). Click
„Ok‟ button. „Page Setup‟ menu will now have information about the available printing sizes of
the printer.
APPENDIX PrintServer
APPENDIX
DPS PrintServer
Now select the correct printing size according to
installed media (8x10 or 8x12) and click „Ok‟.
The following step is selecting the number of patches
that we want to print. For optimum results in dye
sublimation printers, we recommend 1400 patches,
but you can try a lower patch count.
Finally, press „Print‟ button in order to obtain the printed patches before the next step.
Once printed, click right green arrow to
continue with „Read Target‟ step.
Click „Start‟ before starting the reading
process.
Then follow the last steps described in
chapter 5.3.3 to complete the ICC
profile creation process.
5.4 Compatibility
Not all the printers are compatible with the complete iQ management flow. There are some
printers that are only compatible with ICC profiling.
IMPORTANT REMINDER: ICC PROFILING WITH CP3800 & PLOTTER SERIES
CP3800 Series and Plotter Series printers are configured by default with a windows driver
ICC profile. Please, disable ICC profiles in windows driver settings before creating a new ICC
profile with iQ management wizard.
Please, refer to Chapter 5.3.4 for detailed information
APPENDIX PrintServer
APPENDIX
PRINTER MODEL
DPS PrintServer
CALIBRATION
PROFILING
CP95XX Series
CP9600 Series
CP98XX Series
CP3020 Series
X
CP3800 Series
X
(*)
MPU
Plotter Series
X
(*)
(*) For these printers, profiling process requires proper windows driver configuration.
For printers not compatible with calibration, only ICC profiling will be enabled on the iQ wizard
application.
5.5 Summary
There are 3 different scenarios you can apply:
1) Using provided generic calibration files and generic ICC profiles.
The system is configured by default with this scenario when iQ mode is activated. If you
do not perform any additional adjustment you will obtain a very good printing quality.
2) Calibrating the printer (visual procedure or hardware attended procedure) and
using the provided generic ICC profiles.
This option will provide you better than default results. Calibrating the printers will result in
better colour consistency. It is a quick process, so you will not spend a lot of time, and
you will improve a lot your printing quality.
3) Calibrating the printer and creating new ICC profiles.
This is the option that will give you the best results, but requires more time for adjusting a
printer.
MITSUBISHI RECOMMENDS:
Acquiring an Eye-One device and performing a full calibration the first time (printer profiling
optionally) and, periodically, re-adjust the printers with a quick calibration.
Please, read carefully chapter 5.3 to obtain detailed information and read the table below as
well.
APPENDIX PrintServer
APPENDIX
DPS PrintServer
5.5.1 Printing quality level optimisation table
Printing Quality
optimisation level
Minimum
When…
Calibration
Profiling
-
-
Full
-
…using a new format.
Full
-
…changing the quality.
Full
-
…having a printer with no
calibration.
Full
-
Quick
-
Full
Yes
…using a new format.
Full
Yes
…changing the quality.
Full
Yes
…having a printer with no
calibration.
Full
Yes
Quick
-
…you
consider
the
printing quality with the
default ICC is good
enough.
…plugging
printer.
Recommended
in
…changing
cassette.
…plugging
printer.
Optimum
in
a
new
the
ink
a
new
…starting the workday.
APPENDIX PrintServer
APPENDIX
DPS PrintServer
6 MPU Sorter
6.1 Introduction
The mass production unit MPU Sorter has been designed to achieve a high performance
level and a higher easiness working due to its backprinting and sorting functions.
6.1.1 Requirements and compatibility
To be able to use the MPU Sorter it‟s mandatory to have an IT5000 with a Flexilab ClickPro
software version 2.5.0 or higher.
In order to achieve the best results, use an IT5000 HW4 version, or higher, and plug in the
MPU Sorter directly with the supplied USB connector. It‟s advised not to use and USB
extender.
The MPU Sorter unit is compatible with Flexilab systems using PT6000, PT7000 or MT1E
machines connected in Order Terminal mode to an IT5000 working with ClickPro software
version 2.5.0 or higher.
6.2 Installation
Before connecting the unity to the IT5000, please check that you have a Flexilab Click Pro
2.5.0 version or higher and shut down all applications using the Monitor Manager.
Once the MPU Sorter is plugged in, please read thoroughly the on-screen instructions in
order to install correctly the MPU Sorter unit.
Once the installation is accomplished, reboot the system in order to let the changes be
applied.
To check the installation has been performed correctly, please verify that the MPU Sorter is
shown now in the DispatcherAdmin screen. It must be shown as a red frame framing the
contained printers.
Both printers are differentiated as the UPPER printer and the LOWER printer.
These 2 printers belong to the same
MPU Sorter.
APPENDIX PrintServer
APPENDIX
DPS PrintServer
MITSUBISHI RECOMMENDS:
It‟s necessary to calibrate the printers contained in the MPU Sorter in order to achieve an
optimum result regarding to printing quality. Please refer to the previous chapter to get more
information about printer calibration.
6.3 Working modes
A MPU Sorter unit must be always attached to an IT5000. The MPU Sorter is able to print
local Click5000 orders (working as a single printer) and other ones coming from order
terminals (working then as a central high production machine).
6.3.1 Working as a single printer
This working mode is only referred to the orders that are generated locally and printed with
the MPU Sorter.
To generate and order for the MPU Sorter, choose the option labelled as “Sorter” in the field
“Destination” of the Print page in CLICK.
Choose the available paper size and quality in MPU Sorter. Then choose the destination
MPU. In case of having more the one, both will be listed. Otherwise, the MPU Sorter unit will
be the default destination.
The MPU will only print orders sent with the option “Sorter” or, in case of having a printer
inside the MPU Sorter with a specific format, it will also print orders with the options “Multi
printers” or “Single printer”.
6.3.2 Working as a central high production unit
To be able to print with the MPU Sorter using an Order Terminal it is necessary to fulfil the
requirement that at least one printer contained in the MPU Sorter has to be the only printer in
the system with the desired format.
In the case where the MPU doesn‟t own exclusively a format, it‟s necessary to export the
order to CLICK so as to resend it to the MPU Sorter.
APPENDIX PrintServer
APPENDIX
DPS PrintServer
Please refer to the chapter 4.3.5 form the Click application manual to know how to export an
order.
6.3.3 Compatible formats
The MPU unit is compatible with most of the formats supported by the 98xx series printers
except those ones called composition, or multi-cut, formats. Please refer to the formats table
from chapter 1.2.3 for further information about available formats.
NOTE
Composition or multi-cut formats are no available printing with a MPU Sorter.
6.4 Configuration
The configuration of the MPU Sorter is placed in
general settings of PrintServer (see chapter 3). The
configuration is applied to every MPU Sorter attached
to the system.
The fields configurable regarding of the MPU Sorter
are the following.
6.4.1 Balanced
This setting is ignored by PrintServer when printing
with an MPU Sorter.
6.4.2 Sorting
This option determines if the MPU Sorter starts
printing the first picture or the last one.
Ascending: The MPU Sorter will start
printing the first picture.
Descending: The MPU Sorter will start printing the last picture.
6.4.3 Full belt mode
The possible values:
STOP: MPU Sorter will stop printing until the stack is removed from the belt by the
operator (only the stack on the sensor it‟s needed to be removed).
MOVE: MPU Sorter will move the belt when it gets full. The first stack will fall in the
belt tray and the MPU Sorter will keep printing.
APPENDIX PrintServer
APPENDIX
DPS PrintServer
6.4.4 Beep on full belt
When this option is checked, the IT5000 will beep when the belt gets full.
6.4.5 Number of stacks
This option is used to choose how many stacks are placed on the belt. It‟s possible to choose
between 2 or 3 stacks. Depending on this number the capacity of the belt will vary between
110 (2 stacks) or 165 (3 stacks) photos.
6.4.6 Custom Backprinting information
It allows to set a custom short information to be shown in the backprint information, like the
shopname, per instance.
6.4.7 Recommended configuration
To achieve an optimum performance, Mitsubishi recommends using the following
configuration of PrintServer:
Full belt mode: MOVE if the MPU Sorter is unattended, otherwise STOP.
Beep on full belt: Activated
Number of stacks: 2
MITSUBISHI RECOMMENDS:
Do not use used paper or ink from another printer. The MPU Sorter unit performs better if
both printers have the same amount of remaining copies. Please change also paper roll
when ink cassette is exhausted.
6.5 Considerations
Printed orders are sent to the belt or to the upper tray depending on the paper size and the
priority of the order. The orders with the format L – 10x15 are placed on the belt. The orders
with X – 13x18 and W – 15x23 are placed on the upper tray. Moreover, the orders with “Now!”
priority appear on the upper tray regardless of the format, as well as the colour patches while
calibrating printers.
The number of stacks specified it‟s only considered in the orders placed on the belt. The
capacity of the belt is about 110 photos (2 stacks) or 165 photos (3 stacks).
When changing from one paper size to another one, check the position of the paper selector
switch is the correct one for the new paper size.
APPENDIX PrintServer
APPENDIX
DPS PrintServer
15x23 / 13x18 / Now! Orders
10x15
References:
Mitsubishi Electric Kiosk&Click software contains portions of imaging code based on proprietary technology
copyrighted by Pegasus Imaging Corporation, Tampa, FL. ALL RIGHTS RESERVED.
NUEVO
NUEVO
APPENDIX PrintServer
APPENDIX
DPSLab
APPENDIX
DPSLab
CONTENTS
1
INTRODUCTION ................................................................................................ 3
1.1
2
SYSTEM OVERVIEW ....................................................................................................... 4
1.1.1
Image processing ................................................................................................... 5
1.1.2
Sending jobs .......................................................................................................... 5
INSTALLATION ................................................................................................. 6
2.1
SOFTWARE INSTALLATION ........................................................................................... 6
2.2
UNINSTALLATION PROCESS ......................................................................................... 7
3
CONFIGURATION ............................................................................................. 8
3.1
ACCESS TO THE CONFIGURATION SCREEN. ............................................................. 9
3.2
THE CONFIGURATION SCREEN .................................................................................. 10
General Config .................................................................................................................... 10
Services 11
Internationalization .............................................................................................................. 21
Import / Export ..................................................................................................................... 23
4
INSTALLATION AND CONFIGURATION OF THE MIT_GEN_200
PROTOCOL .................................................................................................................. 26
5
4.1
INTRODUCTION TO THE PROTOCOL ......................................................................... 26
4.2
SPECIFIC CHARACTERISTICS OF THE PROTOCOL ................................................. 26
4.3
SOFTWARE INSTALLATION ......................................................................................... 26
4.4
CONFIGURATION .......................................................................................................... 26
General ............................................................................................................................. 27
Specifics ............................................................................................................................. 28
Formats ............................................................................................................................. 29
Others ............................................................................................................................. 30
PRACTICAL CASES ....................................................................................... 31
Examples of configuration and use of the DPSLab module. ............................................... 31
APPENDIX DPSLab 2
APPENDIX
DPSLab
1 Introduction
DPSLab is one of the applications in the Flexilab Service Module interface (the new
comprehensive system for processing orders). It is responsible for processing and redirecting
print orders which are not for direct printing (INSTANT PRINT) in the MITSUBISHI
sublimation printers.
Examples of application: printing on plotters or minilabs installed in the actual establishment
(sending by LAN) or even printing in remote laboratories using the internet-based FTP
protocol.
Moreover, the application makes it possible to identify these extra services in a
"commercially" different way to other instant print services. Thus, the current version of
DPSLAB makes it possible to offer 2 additional print services at the same time, whose code
name are 1H (1-hour print service) and 24H (24-hour print service).
These code names are suggested for the default configuration of the module, i.e. 1H for local
sending to a minilab or plotter (since in this case the client can have the copies in an hour),
and 24H for Internet-based sending (to indicate a type of service in which the client comes
back to the establishment the following morning to pick up the photographs), although each
one can be configured for any service required.
For example, the first one for sending to plotter and the second for sending to a minilab, both
locally. In other words, the default code name is not linked to the type of service to be offered,
and nor the time that will be taken to process the job.
Moreover, they can also be renamed so that the establishment can identify the services
according to the configuration. For example, for 1H "counter printing" and for 24H "24-hour
Laboratory printing services", or also for 1H "Plotter Printing" and for 24H "Ready-in-1 hour
minilab printing", etc.
APPENDIX DPSLab 3
APPENDIX
DPSLab
1.1 System overview
The DPSLAB service module is comprised of the following elements:
Components
Orders, Order 0001,
Order 0002, Order N
DPSLab
Protocols, Protocol A,
Protocol B…
Laboratory System
Description
Each of the orders sent to laboratories. They are based on the traditional
file system, structuring orders into folders .
The application discussed in this document.
The protocols can adapt to the specific way of work of each laboratory.
Destination laboratory, receiving the orders sent from a system with
DPSLab. This may also be a DPSClick machine.
When a 1H or 24H type service reach the DPSLAB module, the latter processes the images
first, prepares the necessary data structure and sends them, images and data, to their
destination. Depending on the configuration of the service, THE WHOLE process will begin
instantly or when the scheduled time slot is reached. The system can even be configured to
accumulate orders and thus at the end of the day they can all be burnt manually to CD, and
then be sent manually (by ordinary transport) to a remote laboratory.
APPENDIX DPSLab 4
APPENDIX
DPSLab
1.1.1 Image processing
Depending on the configuration and the characteristics of the service protocol, the DPSLAB
module will process the job images before sending them.
This is of the utmost importance, for example, when sending images via the Internet, so the
size must be reduced to make for easier sending.
In this case we should work in "MaxSizeFactor" mode (see the 'Image Processing' section the
"General" tab of the DPSLAB Services Configuration).
More specifically, The OPTSIZEDISK parameter will determine what the maximum size for an
image file on the hard drive is. If this size is surpassed the image file will be opened, its size
changed to the one that corresponds to the print size requested by the client, and it will be
compressed in ".JPG" format.
If you do not wish to changes the image size (in local area network connections, where file
size may be very high, without reducing the efficiency of sending), and you wish the target
machine to do this, OPTSIZEDISK will be increased to a sufficiently high value to prevent
processing. For example, 100000 (in bytes, 100Mbyte).
Another way of working is to adapt the image to the exact dimensions of the print size of the
target machine. It may be a requirement of this machine, and it saves processing time on it,
but it obliges the machine running the DPSLab module to perform more calculations and will
therefore reduce its performance. It is recommended only in local area network (not Internetbased) connections where large file sizes are permitted, although it is also possible for jobs
sent to remote laboratories with reasonable print sizes and forcing a JPG format
compression.
In this case there are two options available, "Cut" and "Fit Sides", explained in greater detail
at a later point in this annex.
1.1.2 Sending jobs
Jobs are sent chronologically as they arrive, regardless of the service they are associated
with (1H or 24H).
The orders accepted by the DPSLab module go from the "PENDING" to "BATCH
EXECUTING" status as long as the image processing and sending lasts. Only when the
DPSLab module reports that these jobs have been completed successfully will these orders
pass to the "DONE" status.
If during the sending of a job there is any communication error with the remote mechanism or
laboratory, or any abnormal situation arises interrupting the process, the order will be left in
the internal status "FAILED_TO_SEND" (in DPSLab environments) and the pre-established
APPENDIX DPSLab 5
APPENDIX
DPSLab
time will be allowed to elapse before a retry. During this waiting time DPSLab will process the
following order, if there is one.
Once the waiting time is up, since work orders are processed cyclically, in the next round the
job will be attempted again beginning with the first file that was left pending from the previous
attempt.
Throughout this process, the order is reflected in DISPATCHER in the "BATCH EXECUTING"
status.
If this error persists, a series of attempts will be made (according to configuration) until the job
is abandoned as "FAILED", and the following pending job will be processed. DPSLab jobs in
the "FAILED" status become services with the "error" status in DISPATCHER.
The services in "error" status in DISPATCHER must be relaunched manually by the operator,
and the DPSLab module will treat them as if it were processing them for the first time,
beginning from zero with each one of them.
If during the sending of a job the machine is powered off, the job will remain in the "BATCH
EXECUTING" status in DISPATCHER, and when the machine is powered up again, the
DPSLab module will check the files sent until that moment and will continue with the one after
the one last one sent before the power-off, following the same procedure as for retries
through communication failures, explained above.
The PAUSE button in Dispatcher is not effective on 1H or 24H Services.To eliminate an order
from the print queue of the DPSLab module, the module must be switched off and the order
removed from DISPATCHER when it appears in error status after a few seconds.
2 Installation
2.1 Software installation
DPSLAB-3.0.16-setup.exe is the DPSLab installer. Double clicking on it starts the installation.
The following screens are typical of an automatic installation system and are very intuitive:
Welcome and introduction screen
Selection screen for the modules to be installed. In this case there is only the DPSLab
application.
Request for the installation directory. The installer proposes the preconfigured directories,
if these have already been created. (More information on this in the Flexilab manuals)
After the directory has been selected, the installation process begins after clicking on
"install" and a screen shows the progress of the installation.
In the last step in the software installation process, the HASP devices which control
access to the application are configured, as are the settings of the DPSLab configuration.
APPENDIX DPSLab 6
APPENDIX
DPSLab
Follow the instructions that appear on the screen. After the entire installation process has
ended, a concluding screen will appear. Click on “close” to complete the installation.
NOTE
At least one protocol must be installed for DPSLAB to be configured correctly.
At least one DPSLAB service must be configured.
2.2 Uninstallation process
During installation, the file „Uninstall_DPSLAB-3.0.16.exe‟ is generated in the installation
directory. Clicking twice on it begins the DPSLab uninstallation process. This is followed by a
series of very intuitive screens which act as a guide during the process:
1. The initial screen proposes uninstalling the programme from the folder where it was
installed. Click on „Uninstall‟ to begin the process.
2. Details of the process are shown while it is taking place.
3. Click on "close" on the last screen to complete the uninstallation process.
APPENDIX DPSLab 7
APPENDIX
DPSLab
3 Configuration
This section explains the application's configuration settings.
DPSLAB enables orders for printing photos and/or other services to be sent to third party
laboratories. The operational mode of DPSLab is organised by services. These consist of a
combination of the protocol configuration for sending orders, the method for sending orders to
electronic systems in the laboratory, the description of the Service itself and how it operates.
Service
Protocol
Sending method
1H
MIT_GEN_200
LAN
24H
MIT_GEN_200
FTP
The steps to be followed for configuring DPSLab services are
1. Install the protocols to use (see INSTALLATION AND CONFIGURATION OF THE
MIT_GEN_200 PROTOCOL).
.
2. Create the service to be configured and select the protocol to use in this service. At
this point, the entire selected protocol configuration has been copied to the
configuration of the service, including translations. There will be no more links
between the protocol configuration and the service configuration for the associated
protocol. The part of the service configuration relating to the associated protocol will
be called the „Service Protocol Configuration‟ from now on.
a. The "PROTOCOLS" tab has been hidden to avoid wrong configurations.
Each protocol will be configured with the most general possibilities and each
configuration will be personalised in each service created.
b. It is now possible to duplicate a service or department already configured
when creating a new one. See further below for more details.
3. Configure the other parts of the service – the sending method and its characteristics.
4. Save the configuration.
The next section only applies to Click type machines:
There is an additional point with regard to the DPSLAB configuration and the HASP device
which protects part of the DPSLab HASP configuration.
This device enables certain actions to be taken in terms of the settings as a whole and for
some of them in particular, so that the following actions may only be taken if the HASP in
question is connected:
Add and/or delete services
Import service configurations.
Change the protocol associated with a service.
Change the sending mode associated with a service.
APPENDIX DPSLab 8
APPENDIX
DPSLab
3.1 Access to the configuration screen.
There are two ways of accessing the configuration screen:
From the DPSLAB main screen: the Settings button.
From the context menu of the DPSLAB application:
o The DPSLab icon appears on the operations taskbar. Place the mouse pointer on it
and right click to read the context menu below:
o
Clicking on "settings" accesses the DPSLAB configuration screen. A password is
required for access to the configuration screen. This is initially empty and is set using
the "new" button. Access to the configuration screen is then by pushing the "OK"
button.
APPENDIX DPSLab 9
APPENDIX
DPSLab
This screen shows the current configuration.
IMPORTANT
The configuration can only be modified when DPSLAB stops. To stop it, click on "Stop" in the
contextual menu.
3.2 The configuration screen
The configuration screen is divided into 2 sections or tabs:
General Config: General application settings.
Services: In this section the services to be published and which allow access by third
party laboratories are created and configured.
General Config
The overall settings which affect the various aspects of DPSLAB are configured in this
section.
APPENDIX DPSLab 10
APPENDIX
DPSLab
The settings are:
CD Burn: This setting is applied to CD burning.
o Speed: CD burning speed.
o Buffer underrun: If the recorder has this feature, the recording is protected against
instensive use of the CPU by another application. It is advisable to always leave this
option activated.
Export Settings: Settings applied to the "Export" function of the main configuration page
(see “import/ export” section of this manual)
o Default export path: Default folder to where configurations are exported.
LOGS: Shows the type of level of the application Logs.
Requests: Settings relating to the orders processed.
o Times to retry failed requests: Shows the number of times DPSLab must try to
resend a processed order to the laboratory. This is applied when there is an error in
sending.
o Retry interval (minutes): Shows the number of minutes waited between each retry.
o Days the processed orders are left: This parameter is no longer used as DPSLAB
does not save jobs that have already been processed.
Others: Other settings.
o Unit for alias formats: Shows the unit of measurement used in the ALIAS field of the
formats of the protocol configuration. E.g.: 10 x 15 is 10 cm x 15 cm if the value of this
field is CM – CENTIMETERS.
o Default published language: Shows the default language used for all services that
are published.
Services
This tab maintains the services that DPSLab publishes. It allows you to add, modify all data
and configure behaviour.
Each one of the services appears here in tab form. Three sections may be distinguished here:
Description of the the service, sending mode and protocol. The following sections describes
these sections.
There are two buttons to "create" and "delete" services:
APPENDIX DPSLab 11
APPENDIX
DPSLab
"Add Service" Button – Adds a new service tab with a new service at the end of the
existing ones. The tabs of newly-added services are marked with the (*) suffix.
a. It is also possible to create a new service or department by copying an
existing one. See below.
"Delete Service" Button – Eliminates the service currently displayed.
3.2.1.1.1
Add a service
The add service button behaves differently depending on whether there are services already
configured or not.
If there is no service configured it creates an empty service, without a protocol or sending
mode.
If a service has there already been created, DPSLab presents a list of the services already
configured and allows you to select the one to be copied or else create an empty one, as
shown in the following screen:
The "Copy Selected" button will create a new service by COPYING THE WHOLE
configuration of the the service selected, including internationalisation (Translations),
taking us back to the settings screen to personalise the new service.
The "Create Empty" button creates a new empty service, without protocol or sending
mode.
The "Cancel' button returns you to settings without doing anything.
In both cases, of creation, the service is created with the "NEW SERVICE" identifier and the
newly created suffix (*). If there is already a service with the name in question it adds the
suffix "_" to "NEW SERVICE".
The ID field identifies the service.
Each one of the sections of a service configuration are described below.
APPENDIX DPSLab 12
APPENDIX
DPSLab
3.2.1.2 SERVICE
The "SERVICE" section a service tab specifies a series of properties of the service.
The following fields are to be filled in:
ID: Unique service identifier.
Default language: Specifies the language of the descriptions.
Title: Summarised description of the service.
Description: Detailed description of the service.
Delete finished jobs on startup: This field is no longer used since DPSLab does not
save completed jobs.
Execution & Transfer time window: It is used to specify in which in time interval
an order for this service will be processed. If an order arrives outside the established
time interval it goes to "pending" status until the time interval arrives. DPSLab
periodically checks if the scheduled orders have reached their time interval. By
default the interval will be 24h (00:00:00 to 23:59:59).
3.2.1.3 PROTOCOL
This section is used to configure how the information to be sent to a destination (local or
remote) will be generated, how images are processed, how part of the protocol behaves, the
media supported by the protocol and even what information may be prompted of the user.
APPENDIX DPSLab 13
APPENDIX
DPSLab
The following screen shows the complete design of the configuration of protocol data.
This configuration is divided into the following parts:
General: the main configuration settings for image processing and some general aspects
of the protocol.
Specific: the configuration settings of specific aspects of the protocol. This includes a
description of each parameter.
Customer Asks: Questions related to the customer: Name, telephone number, etc. The
customer answer will be sent to the lab through the summary output file.
Formats: Configuration of the various printing formats offered by the laboratory. Each
protocol installs a configured group of formats, but this section is completely configurable.
ATTENTION: Alter changing the formats for an existing service the price adjustments
of all the Kiosks that are connected to this machine must be checked, as they will be
affected by the changes.
APPENDIX DPSLab 14
APPENDIX
DPSLab
Others: The properties which are totally subject to the protocol are configured in this tab.
Each setting is described in detail in the following sections.
NOTE
There is a series of parameters, which are specifications of the actual protocol, which have
been deactivated to avoid wrong configurations and therefore a protocol malfunction. They
have been left visible to the user to so that they can be easily read if they need to be known.
3.2.1.4 General
Image processing
o Compression: Shows the compression factor applied to the images when converting
them from their original format (TIF, GIF, etc.) to JPG format. 0 – Maximum quality
(minimum compression), 100 – Minimum quality (maximum compression).
o Position: Shows the position of the images which the protocol accepts.
Multiposition - The protocol accepts all photo positions.
Horizontal – The protocol requires all the photos to be in a horizontal position. If any
are not, they will be rotated.
Vertical – The protocol requires all the photos to be in a vertical position. If any are
not, they will be rotated.
o
o
o
Only JPG: If this box is checked the protocol only accepts image files in JPG format.
If not, it accepts all the formats specified in the "others" field.
Others: This specifies the image extensions that are not automatically coverted to
JPG, for sending to the laboratory, if the "only JPG" box is not checked.
One extension per line must be written with no dot before it, as shown in the image.
Type of adjust to format dimensions: There are three options for adjusting the
image to the laboratory format when the image size is larger than the formats:
Cut - the image is reduced until one of the sides coincides with one of the
dimensions of the format. The other dimension, which will always be
bigger than that of the format, will be cut proportionally on both sides.
Fit Sides - The image is made smaller so that both dimensions are within
the format. One of them is the same as one of the format, and the other
will therefore be smaller than the format. In this case, there will always be
a white edge on the paper when printing.
Max. Size Factor - This reduction is only applied when the image size is
larger than the value in the field Opt. Size Disk (in KBytes) and if the
image dimensions are larger than those of the format after applying the
Max. Size Factor. This means that the image is changed providing that
the dimensions of image x Max. Size Factor > format dimensions.
APPENDIX DPSLab 15
APPENDIX
DPSLab
This type of adjustment is used to reduce the weight of images without
reducing their quality, in order to be able to apply it when sending by
FTP, for example.
General
o Multiformat: This shows whether the protocol can handle transfers of orders with
more than one format type (10 x 15 and 13 x 18, for example).
TRUE - The protocol accepts orders with more than one type of print format.
o
FALSE - The protocol only accepts one format per order.
Unicode: This shows whether the protocol accepts Unicode (texts in a non-Latin
alphabet) both in the various texts it handles and the in image and directory names
which it works with. The default UNICODE coding system UTF-8.
TRUE - The protocol accepts Unicode
FALSE - The protocol does not accept Unicode
3.2.1.5 Specific
This enables the values of a series of variables for the protocol to be defined, which change
its behaviour as a specific protocol. It consists of a table with the property name in the lefthand field (not changeable), and the assigned value in the right (changeable). A descriptive
panel is on the right of the table, which contains information on the variable on which the
cursor is placed at any given time.
See the protocol manual for more information on the configuration of each setting.
3.2.1.6 Customer Asks
The following tabs contain questions on user data which can be configured. It presents a
table of 3 columns:
Key: Identifying name of the question being configured (not changeable)
APPENDIX DPSLab 16
APPENDIX
DPSLab
Asks: Editable field recording the question for the end user
Default Value: Editable field. Default value applied in response to the question if the user
does not select any value (this is also the default value which appears on the screen)
The currently selected value is explained in more detail in the description field on the right of
the table.
3.2.1.7 Formats
The formats tab contains a control in the form of a table which enables all the formats data to
be edited, the existing ones to be deleted and other new ones to be added.
The "delete" button enables the selected row to be deleted.
The "add" button enables more formats to be added to the end of the list. It is not possible to
add a new format if one if half specified.
The fields are as follows:
KIOSK ALIAS – The internal identifier of DPSLab for the format.
KIOSK DESCRIPTION – Description of the format seen by the end user.
LAB. PRODUCT ID – Identifier of the laboratory for the format.
LAB. PRODUCT DESCRIPTION– Description of the format by tyhe laboratory.
WIDTH – Width of the format in pixels.
APPENDIX DPSLab 17
APPENDIX
DPSLab
HEIGHT - Height of the format in pixels.
All the above fields are compulsory. The following are optional:
PRINT WIDTH – Width of the paper to be used to print the image in millimetres. This is
only used in some protocols. If not specified in the protocol, 0 can be used.
PRINT HEIGHT – Height of the paper to be used to print the image, in millimetres. This is
only used in some protocols. If not specified in the protocol, 0 can be used.
MEGAPIXELS – This value is for information purposes and specifies the size in pixels the
image should have in order to be printed in this format and to obtain an acceptable
quality.
APPENDIX DPSLab 18
APPENDIX
DPSLab
3.2.1.8 Others
This tab specifies totally free properties, which are only textual, in order to provide the
protocol with additional free information. This information is sent to the laboratory where it
may be read. This section is optional.
.
3.2.1.9 SEND METHOD
For a service, it is necessary to specify the way in which the results of this processing will be
sent to the laboratories' systems as well as the protocol responsible for processing orders.
There are 4 possible types of sending when configuring a service:
Delivery - The order is not sent automatically, but instead waits for recording on a
memory card or on a CD. When this happens it is deemed to be "sent".
LAN - Enables a route within the network to be specified, by which orders are sent for
processing .
FTP – Enables sending to an FTP server (File Transfer Protocol) to be specified
Self - In this case the protocol software establishes its own sending mode.
Of the four modes only LAN and FTP require additional settings:
FTP
HOST: IP or name of the HOST of the FTP server where the orders are sent.
APPENDIX DPSLab 19
APPENDIX
DPSLab
PORT: The port through which the FTP service is active on the server. This is usually 21.
HOME DIR: If it is necessary to leave the orders in a subfile in an FTP account, the route
must be specified in this field with the format „\<path to the folder>‟.
LOGIN: User identifier for beginning a session on the FTP server.
PASSWORD: Password to begin a session on the FTP server.
USE PROXI: Shows whether a connection through a PROXY is to be used. The following
fields are only valid is the answer is TRUE.
HOST, PORT, LOGIN and PASSWORD in combination with USE PROXI: Defines the
necessary settings for the configuration of a PROXY.
TEST Button: After all the fields have been completed, this button enables access to the
configured FTP server and the feasibility of normal actions to be checked.
LAN
PATH: Route to the folder where processed orders are deposited.
‘…’ button: This enables a folder selection dialogue to be opened and the folder selected
to be copied in the PATH field.
3.2.1.10 Publication of formats
Of all the information that is configured for each one of the services, there is a part that is
published in the core Flexilab system so that it will be available to the rest of the applications.
The following information is published:
SERVICE Section: The ID, Title, TICKET INFO and DESCRIPTION are published.
PROTOCOL Section: the following screen shows the information that may or may not be
published no depending on the selection
APPENDIX DPSLab 20
APPENDIX
DPSLab
Formats: it is used to configure, using the check on the left, which formats, of those
configured in the formats tab, are available for selection in orders.
Customer Asks: for selecting if the use will be asked the questions configured in the
"Customer Asks" tab when an order is made for this service.
The available printing formats must be enabled to be able to process orders.
NOTE
The maximum of formats enabled in the DPSLab should be 8.
When the information to be published ++ the DPSLab must be rebooted for the changes to be
applied.
.
Internationalization
DPSLab has resources to translate texts which may appear on end user screens when there
is a change of language in the final applications.
the services configuration tab has a button called „Internationalization‟ enabling the texts in
the configuration which end users, e.g. asks, description of services, descriptions of formats,
etc. to be edited.
APPENDIX DPSLab 21
APPENDIX
DPSLab
DPSLab has a specialist screen presenting the user with all the texts liable for translation in
table data form.
The top left box shows what is being edited (SERVICE) and the identifier of the element (ID of
the service).
The first tab to appear is the one texts in the default language which is the basis for the other
translations.
To add new translations, select a language in the drop-down menu in the centre of the screen
and then push the "Add Language" button. A new tab appears with the name of the language
and a copy of all the keys and original texts in the default language. The "VALUE" column is
open for each editing, with the texts in the default language for overwriting in the target
language.
The text of the selected key always appears in the default language in the text panel („VALUE
DEF. LANGUAGE”) on the right of the screen. This makes the task of translation easier.
APPENDIX DPSLab 22
APPENDIX
DPSLab
The keys identifying the texts are organised hierarchically.
The GROUP column shows to which large group the texts included in it belong: ASKS,
FORMATS, SERVICE, etc.
The VAR / ID / ALIAS column shows to which subgroup among the elements of GROUP
the texts belong, i.e.: CUSTOMERTYPE, NAME, TELEPHONE, etc .
The FIELD column shows which elements of the previous subgroup are translated. For
example, in the case of ASKS for each question in settings the ASK itself and its default
value is configured, meaning that what is translated on this screen is the subelement ASK
and its DEFAULT_VALUE. Furthermore, for option selection elements the description of
the options can be translated.
This system of keys means that identifying which settings belong to an entry is very intuitive.
Import / Export
Because of the large amount of information generated when the services are configured,
DPSLab has been equipped with a mechanism for exporting the configuration of the desired
services in order to be able to be import them into other DPSLABs, conveniently, comfortably
and as many times as desired.
The configurations are exported in a single file with the extension .sed (Service Exported
Data) and are imported into another DPSLAB.
3.2.1.11 Export
The "Export" button of the “settings” screen provides access to the exportation screen.
APPENDIX DPSLab 23
APPENDIX
DPSLab
Select the services to be exported and then push the „Export Checked Services‟ button. A
"Save as" dialogue will open and saving the file as ServicesExported.sed will be suggested.
The name can be changed but doing so is not recommended. When "save" is pressed, the
services will be exported and the screen closes automatically.
3.2.1.12 Import
The "import" button on the "settings" screen accesses the import screen. There is a button for
selecting the .sed file to be imported. After the file has been selected, the services detected
inside it are loaded and a short description of its configuration and the loading status is given.
This shows if the services included can be imported directly or if there is any problem, such
as the protocol they use not being installed, the version of the protocol not being the same as
and not compatible with the one installed, etc.
On this screen, select the services to be imported and press „Import Checked Services‟.
APPENDIX DPSLab 24
APPENDIX
DPSLab
NOTE
Final importation replaces all the current "settings" services for imported ones. If "settings” is
cancelled without saving, the original configuration is maintained.
If there is any service with a non-OK status, the reason will appear in the "Status" text panel
on the right of the screen.
Some of the reasons which may cause a service to be in a non-OK status e.g. the protocol it
uses is not installed, can be solved at the time. Install the new protocol and then press the
"Check Status" button. This will cause the new protocol to be loaded and the validation of the
service to be correct and importing to be possible.
APPENDIX DPSLab 25
APPENDIX
DPSLab
4 Installation and configuration of the MIT_GEN_200
protocol
4.1 Introduction to the protocol
The MIT_GEN_200 Protocol enables the DPSLAB system to send printing requests for
photos to the Mitsubishi Labs using the MITSUBISHI PROTOCOL V2.0. protocol.
4.2 Specific characteristics of the protocol
As a protocol of the DPS system, its main characteristics are:
It accepts UNICODE.
It accepts images in any position.
The type of image files it accepts is configured in each installation.
It accepts requests with various formats at the same time.
ALIAS
WIDTH / HEIGHT (Pixels)
WIDTH / HEIGHT (mm)
10 x 15
2152 / 1416
-
13 x 18
2452 / 1812
-
4.3 Software installation
The programme for starting the installation is the self-installing „MIT_GEN_200 -2.2.0setup.exe‟ located in the software folder.
This installer is the typical type used in DPSLAB installations, which is very intuitive and easy
to use. Remember that the protocol is installed in the MODULES folder in the DPSLab
installation directory.
4.4 Configuration
This section describes the default settings specified for the protocol configuration.
APPENDIX DPSLab 26
APPENDIX
DPSLab
General
Field
Value
Unicode
TRUE
Compression
0
Type of format adjust
Max. Size Factor
Max. Size Factor
1.2
Opt. Size Disk
10000
Orientation
Multiorientation
Multiformat
TRUE
Only JPG
Checked
Others
Default language
English USA (ENU)
APPENDIX DPSLab 27
APPENDIX
DPSLab
Specifics
Key
Value
Description and values
COPIESMODE
0
This setting shows how the number of copies per
image is identified.
0 – by the name of the format folders
1 – by the name of the images.
RENDERORDER
FALSE
Specifies whether the image „RenderOrder.jpg‟ is
generated. This is a summary of the contents of
the order in image format.
Possible values:
TRUE – RenderOrder.jpg. is generated.
FALSE – The image RenderOrder.jpg is not
generated.
FOLDER_NAME_LABEL
NAME
The folder of the order generated will include the
CUSTOMER ASK value shown here.
APPENDIX DPSLab 28
APPENDIX
DPSLab
SIMPLIFIED_FILENAMES
TRUE
Defines whether the convention of 8 characters for
the file names used in older systems is to be used.
TRUE – The convention of 8 characters is used.
FALSE - All the files HAVE their complete name.
The value TRUE will disable communication with
any Mitsubishi CLICK PRO 1.0 or SUPERIOR
terminal. The name of images provided by the
client does not change.
Formats
Kiosk
Alias
Kiosk
Description
Lab. Product Lab.
Id
description
Product Megapixels
10x15
Standard
photography
size 10x15
0000
Size 10 x 15
6
13x18
Big
13x18
Size 1111
Size 13 x 18
6
APPENDIX DPSLab 29
APPENDIX
DPSLab
Kiosk
Alias
Width (Px)
Height
(Px)
Print
(mm)
10 x15 1600
1200
-
-
13x18
1400
-
-
1800
width Print
(mm)
height
Others
Free information can be configured to be sent with the results of an order. This information
has no effect on DPSLabs behaviour. If you whish to send a specific information with each
order, you can use „Others‟. On this tab DESCRIPTION refers to the description of the
information and KEY to the corresponding value. For example, if you whish to add the name
of the shop to each order, you can create a Key called ‟NAME OF THE SHOP‟ and with the
value „MITSUBISHI SHOP. This information is defined by the protocol itself and the values
can be modified using the settings interface
Key
Value
Description and values
OPERATOR_INFO_0.DESCRIPTION
Shop_ID
Shop identifier
OPERATOR_INFO_0.DEFAULT_VALUE
OPERATOR_INFO_1.DESCRIPTION
Value which identifies the shop
(response
to
the
previous
description)
Shop_City
OPERATOR_INFO_1.DEFAULT_VALUE
Name of the city where the shop
is located.
The city (response
previous description)
to
the
OPERATOR_INFO_2.DESCRIPTION
SendTo
Information on who to send the
order to
OPERATOR_INFO_2.DEFAULT_VALUE
Customer
The addressee (response to the
previous description)
APPENDIX DPSLab 30
APPENDIX
DPSLab
5 Practical Cases
Examples of configuration and use of the DPSLab module.
Some examples and the most important parameters to be configured for each case are
described below. The details on special connections to minilab or remote laboratory are not
explained in detail, in which the characteristics of printing sizes and specific communication
protocol parameters other than the "MITSUBISHI LAB protocol" must also be edited. When a
Click5000 machine is shipped, the default print size parameters are correct. The full details on
the configuration of DPSLab can be found in this manual.
a) Sending jobs from a standalone MITSUBISHI Kiosk (PT7000 with own printers) to offer a
2-hour print ing service in a Click5000. The actual Kiosk also sends to a remote laboratory for
print jobs.
In this case the 1H service is configured for sending the jobs to the Click5000 by local area
network (LAN). The most significant parameters for the 1H service would be the following:
TITLE1H: "2-hour printing" (for example).
1H DESCRIPTION: "Come back in 2H to collect your photos."
OPTSIZEDISK=100000. (100Mbyte. The image size does not matter as they are sent
by
local area network).
"Type" in "Image Processing" should be left as "MaxSizeFactor".
COMPATIBLE EXTENSIONS. The default list should not be changed, since
they
are all the image formats understood by the Click5000. Uncheck
"Only JPG".
SENDING METHOD = LAN
For the 24H service it will be regarded as being sent by the Internet.
TITLE24H: "Laboratory service" (for example).
DESCRIPTION 24H: "Come back in 2 days to pick up your photos."
OPTSIZEDISK=2500. (Limits the size of each file to a maximum of 2.5Mbyte
The "Type" in "Image Processing" should be left as "MaxSizeFactor".
"COMPATIBLE EXTENSIONS". Check "Only JPG". Small size files should be sent
, and JPG compression is indispensable.
SENDING Method = FTP.
).
b) Sending jobs from standalone MITSUBISHI Kiosk (PT7000 with own printers) to a
Click5000 for printing large formats and also to a minilab. The minilab of the example needs
the images in the correct size, and can only interpret JPG- and bmp-type files.
For the 1H service.
TITLE1H: "Enlargements in 1 hour" (for example).
DESCRIPTION 1H: "Come back in 1 hour to collect your 20x30 or 20x25
enlargements."
APPENDIX DPSLab 31
APPENDIX
DPSLab
OPTSIZEDISK=100000
The "Type" in "Image Processing" should be left as "MaxSizeFactor".
"COMPATIBLE EXTENSIONS". Uncheck "Only JPG".
SENDING METHOD = LAN.
For the 24H service.
TITLE24H: "Chemical developing in 1 hour" (for example).
DESCRIPTION 24H: "Come back in 1 hour to collect your photos on chemical
paper."
OPTSIZEDISK=100000
The "Type" in "Image Processing" should be left at "Cut", since the minilab in
question requires an exact print size.
"COMPATIBLE EXTENSIONS". Uncheck "Only JPG", and make sure that only
"JPG" and "BMP" appear in the "Compatible Extensions" list, deleting any other
extensions.
SENDING METHOD = LAN.
c) Sending jobs from a Click5000 to a remote laboratory with FTP connection and another
laboratory a connection but with a job collection service.
For the 1H service.
TITLE1H: "Chemical developing in 2 days" (for example).
DESCRIPTION 1H: "Get your paper copies in 48 hours."
OPTSIZEDISK=2500
The "Type" in "Image Processing" should be left as "MaxSizeFactor".
"COMPATIBLE EXTENSIONS". Check "Only JPG".
SENDING Method = FTP.
For the 24H service.
TITLE24H: "Chemical developing in 3 days" (for example).
DESCRIPTION 24H: "Get your paper copies in 3 days at the best price."
OPTSIZEDISK=20000. (20 megas per file. It does not matter if the files are very big
as they are burnt to a CD.
The "Type" in "Image Processing" should be left as "MaxSizeFactor".
"COMPATIBLE EXTENSIONS". Uncheck "Only JPG", and make sure that the
extensions compatible with the laboratory appear in the "Compatible Extensions"
list.If the laboratory prefers only JPG, check "Only JPG".
SENDING METHOD = DELIVERY.
APPENDIX DPSLab 32
APPENDIX
CD Burning
CONTENTS
1
CD BURNING .................................................................................................... 3
1.1
2
CD BURNING SETTINGS ................................................................................................ 3
ACTIVITY ........................................................................................................... 4
1 CD Burning
CD Burning is a Service Module. It is for burning images onto a CD/DVD. This CD/DVD can
be executed on a computer to show the burned images, with no need to install any
application.
1.1 CD Burning settings
All the configurable parameters of this Service Module can be viewed by pushing this button.
Shop name: This shop name will be shown on the application recorded on the CD/DVD.
URL1: Internet address. This address will be shown on the application recorded on the
CD/DVD.
URL2: Internet address. This address will be shown on the application recorded on the
CD/DVD. This second address is only available for SUBLIME (see SUBLIME).
Proprietary images: proprietary image format. When this option is activated the images
recorded on a CD/DVD can only be viewed on DPS systems.
Do not replace files: when this option is activated, all the files saved in the destination
file beforehand will be protected. If an attempt is made to save an existing file, the one
already saved has priority, while if this option is not activated the new file will overwrite
the previously saved file.
Verify mode: saves onto the CD/DVD with verification. While saving, it checks to see that
it is being done correctly. This increases the CD/DVD saving time.
Buffer underrun: Saving takes place with mistake proofing. Leaving this option activated
is advisable.
Default compilation type: defines what type of application will burn onto the CD/DVD.
o SUBLIMECD: an application allowing saved images to be viewed and printed on a
Mitsubishi printer, the images to be edited and the images to be uploaded to
Mitsubishi Album.
o
BACKUP: burning of images onto a CD with no application to view them.
CD/DVD Writer Speed: the speed at which burning takes place can be selected. MAX
defines the maximum speed regardless of the burner model. If errors have taken place
during several burning sessions, we advise selecting 8x as the burning speed.
2 Activity
Shows the current state of the service module.
APPENDIX
Mitsubishi WebAlbum
CONTENTS
1
THE WEB PORTAL ........................................................................................... 3
2
ONLINE DEVELOPMENT SERVICE ................................................................. 4
3
ADMINISTRATION INTERFACE ....................................................................... 4
APPENDIX
Mitsubishi WebAlbum
Mitsubishi Album is a powerful tool connecting DPS machines with an interface which
provides many advantages. For example, it enables remote development jobs and updates
with improvements for the machines to be received.
1 The web portal
Mitsubishi Album (http://www.mitsubishialbum.com) is a portal where users can ask for
copies of their photographs and locate shops providing development services.
It also offers other advantages such as being able to store photographs, share them with
other users, send electronic postcards and preview images. For more information, visit
http://www.mitsubishialbum.com.
APPENDIX Mitsubishi WebAlbum 3
APPENDIX
Mitsubishi WebAlbum
2 Online development service
The user can send photographs for development from Mitsubishi Album to a specific
establishment.
With a DPS machine:
A specific establishment can be located using our Mitsubishi Album search system.
Any user can very easily find their nearest establishment or find one in a specific area
(search by town, street, postcode).
Mitsubishi Album users can remote develop their photographs in a specific
establishment. Mitsubishi Album sends the user's photographs over the Internet for
development on the DPS machine.
3 Administration interface
For an establishment to use remote development services with Mitsubishi Album, it is
necessary to do the following:
Access the remote web interface at http://www.mitsubishialbum.com/meeadmin . If you
do not have an authorised user, contact your installer / distributor.
Publish the available services on the administration website
Considerations
o
o
o
Shop configuration: shop that is going to offer an on-line developing service mush
choose which equipment the services are to be received on. Not all the formats for
each one of them need to be published.
Job assignment: When identical formats are offered in webalbum corresponding to
different equipment from the same shop, the sending of the service will be assigned
preferably to the clicks and then to the kiosk, and in alphabetical order. The services
will only be assigned to the equipment that have this format published.
Equipment failure, order retrieval: When a machine malfunctions or is switched off, no
online services will be received. To reassign the services pending to another machine
it is necessary to connect to a web administration interface and assign the format to
another machine which is on-line, and unassign the format of the machine that is not
operational.
Other services provided by the administration website
o
o
o
Consult the state of your DPS machines: i.e. whether the machine is working correctly
or if there is any problem. Any incident is recorded on the administration website and
notified by e-mail if desired.
Consult incidents record: It is possible to ascertain when any problem took place and
when it was solved.
Consult the production data of your DPS machines: This enables enquiries to be
made about periods of time, services, etc. and data such as the sums of money paid,
the mode in which orders were paid for, the number of jobs done and for what type of
user they were carried out (client, client with pre-payment card, operator, etc…)
APPENDIX Mitsubishi WebAlbum 4
APPENDIX
o
o
Mitsubishi WebAlbum
Management of the services offered to Mitsubishi Album users: Enables development
sizes to be configured, and whether the CD burning service is offered and the price of
each service to be determined.
Creation of users authorised for management of the web interface.
Other services provided by Mitsubishi Album
Mitsubishi Album offers a free version or package updating service for machines. For
example, this allows new images to be received for the development service with calendars
and frames or future improvements for DPS machines to be available.
To find out how to publish the services available for your establishment, consult the help
section on the administration website.
APPENDIX Mitsubishi WebAlbum 5
APPENDIX
Kiosk Customization
APPENDIX
Kiosk Customization
CONTENTS
1
THE SHOP'S LOGO .......................................................................................... 3
2
FRAMES AND CALENDARS ............................................................................ 4
3
MAIN SCREENSAVER: FLASH AND BANNER OPTIONS............................... 5
4
SERVICE BANNER ........................................................................................... 6
5
1H AND 24H SERVICES (PRINT SERVICES IN DPSLAB / LABORATORY) ... 7
5.1
EXEMPTION FROM RESPONSIBILITY ........................................................................... 7
5.2
TICKET INFORMATION, DESCRIPTIONS AND NAMES OF 1H AND 24 H
PRINTING SERVICES. ................................................................................................................ 7
5.3
INFORMATION ON SURCHARGES. ............................................................................... 8
APPENDIX Kiosk Customization 2
APPENDIX
Kiosk Customization
1 The shop's logo
This is the logo which can appear in the top left corner upper of Kiosk software screens, on
the client's software screen of SublimeCD and on the index print.
It is possible to configure the logo from the Kiosk Kernel supervisor
menu, using the “change logo” button.
When the “delete logo” button is pushed, the DPS logo will be used
by default.
Resolution: a ".bmp" file of 166 x 52 pixels.
APPENDIX Kiosk Customization 3
APPENDIX
Kiosk Customization
2 Frames and calendars
You must copy your new calendar files to the folder Decoration\Calendars\Year\Language
and your frame files to Decoration\Frames.
The name of the folder YEAR must have a 4-digit format. E.g. 2005
The name of the folder LANGUAGE must be the same as the abbreviation of the language of
the calendar.
If you would like more information about how to create your own frames and calendars,
please contact your distributor.
APPENDIX Kiosk Customization 4
APPENDIX
Kiosk Customization
3 Main screensaver: Flash and Banner options
The main screensaver appears after a certain time of inactivity.
There are two ways of creating the customized main screen saver for DPSKiosk.
1. Creating a Macromedia Flash ® project with following conditions:
Contact an advanced software engineer for Macromedia Flash ® (software engineer
and graphic designer)
The name for the flash must be „screensaver.swf‟
The screen size is 800x600 pixel.
In the flash project, a FSCommand(„EVENTO‟, „ONCLICK‟) must be applied for the
mouse click event. This allows the Kiosk application to get control, when somebody
touches the screen.
The flash file has to be saved in „D:\Kiosk Kernel\GUI\Custom\ScreenSaver‟.
1. Creating an image carrousel with following characteristics:
Name. The name of each file must be DPS_SS#.bmp; the symbol “#” represents the
number of appearance order “0, 1, 2, …” . There is no limit for the total number of
bitmaps.
Resolution. 800 x 600 pixels
Colour. Indexed colour
Location. The files have to
Kernel\GUI\Custom\ScreenSaver‟.
be
copied
into
the
folder
„D:\Kiosk
APPENDIX Kiosk Customization 5
APPENDIX
Kiosk Customization
4 Service Banner
The image banners shown during work processing can be customized. The image files must
accomplish following conditions:
Name. The name of each file must be DPS_SV#.bmp.;
the symbol “#” represents the number of appearance
order “0, 1, 2, …” . There is no limit for the total number of
bitmaps.
Resolution. 740 x 425 pixels
Colour. Indexed colour
Location.
The
files
have
to
„D:\DPSPhoto\GUI\custom\servicebanner‟.
be
copied
into
the
folder
Opcionalmente también es posible mostrar un flash durante el procesamiento de los trabajos.
Éste debe cumplir las siguientes condiciones:
Contact an advanced software engineer for Macromedia
Flash ® (software engineer and graphic designer)
Name. The name of the flash must be servicebanner.swf.
Parameter. Following parameters are ascribed to the
flash:
o
Language: language of the application.
o
MachineId: Kiosk identifier.
o
OrderId: Identifier of the order being executed.
Resolution. 740 x 425 pixels
Location.
The
flash
file
has
„D:\DPSPhoto\GUI\custom\servicebanner‟
to
be
copied
into
the
folder
APPENDIX Kiosk Customization 6
5 1h and 24h Services (Print services in DPSLab /
Laboratory)
5.1 Exemption from responsibility
Exemptions from responsibility with regard to 1H and 24H printing services can be
customized. This information appears below the price list and enables the client to be shown
the conditions and instructions for this service.
Edit and copy the files in D:\DPSPhoto\ServicesInstructions
MINILAB_1h_XXX.txt.; XXX is the letters of the desired language.
with
the
name
If the customized language is not there, the program will show the information found in
MINILAB_1h.txt or MINILAB_24h.txt, depending on the service. selected.
5.2 Ticket information, descriptions and names of 1h and 24
h printing services.
To configure the name and description of these services, push the “configure protocol” button
on the configuration screen of the DPSLab application, where you can find the 1h or 24h
services tab.
Name of service
Description
The following parameters must be changed in the “general configuration” tab of the open
document:
TITLE1H= [Name of 1h service]
DESCRIPTION1H= [Description of 1h Service]
TITLE24H = 24h Service (example)
DESCRIPTION24H= 24h printing (example)
TICKETINFO=Call telephone 555555 to obtain more information [Information to be
printed on the ticket]
5.3 Information on surcharges.
In the configuration section of the DPSPhoto application prices, a postage surcharge (or
another type of surcharge) and its description can be configured for the client's information. It
is also advisable to inform the client of this surcharge in the exemption from responsibility
information section for this type of services.
APPENDIX
Connection between DPS
Systems
APPENDIX
Connections between DPS Systems
CONTENTS
1
CONNECTION BETWEEN DPS SYSTEMS ...................................................... 4
1.1
SCENARIO 1: KIOSK ORDER TERMINAL CONNECTED TO A CLICK .......................... 4
1.1.1
Configuration of Kiosk and Click .............................................................................4
1.2
SCENARIO 2: STANDALONE KIOSK CONNECTED TO A CLICK.................................. 5
1.2.1
Kiosk configuration .................................................................................................5
1.2.2
Click configuration ..................................................................................................5
APPENDIX Connection between DPS Systems 3
1 CONNECTION BETWEEN DPS SYSTEMS
There are several ways to connect a Kiosk to a DPSClick, depending on the functionality
desired, and they are shown in the following scenarios.
1.1 Scenario 1: Kiosk Order Terminal connected to a Click
This scenario is for stores where it is desired to have to have several points to collect clients'
orders (Kiosk Terminal Order), for subsequent execution by a centralized machine (Click) after
validation by a worker in the store.
1.1.1 Configuration of Kiosk and Click
1) Make sure that the IP addresses of the Kiosk and Click machines belong to the same
network.
2) Set the option “Work Mode” to “Terminal Order” in the “Kiosk Information” tab.
3) Enter the IP of the Click in the “Dispatcher IP” field.
4) Reboot the machine.
1.2 Scenario 2: Standalone Kiosk connected to a Click
This scenario is for Kiosk self-service machines, but when the aim is to execute 1H and 24H
services in a DPSClick machine.
When there are one or more Kiosks working as Standalone, all the orders of a user are
executed in the same machine (self-service), but the DPSLab services are sent to a remote
machine (Click). These jobs are received by DPSLab Listener, which subsequently enters them
in the database, in order to be validated and to be executed by the worker.
1.2.1 Kiosk configuration
1) Change the IP address of the Kiosk machine. It must belong to the same network as
Click.
2) Configure the Work Mode to Standalone in the Kiosk Information tab.
3) Configure DPSLab to send jobs to the remote Click machine. See the DPSLab
appendix.
4) Restart the machine.
1.2.2 Click configuration
1) Change the IP address of the Click machine. It must belong to the same network as the
Kiosk.
2) Stop the DPSLab Listener service. In order to do this, right click on
the
icon of the toolbar and click on the contextual menu.
3) Open the contextual menu again and click on the Settings option.
4) In this screen, click on the Add option folder to add the folder
formed in DPSLab on reception of the works. (Leaving the folder
created by default is recommended).
5) Close to save the changes.
6) Open the contextual menu again and click on the Start option.
OPERATOR GUIDE
DPS KIOSK SWGIFTS
Software version 1.4
ENGLISH
Rev. 1.6
Operator user‟s manual
SWGIFTS
TABLE OF CONTENTS
1
INTRODUCTION ......................................................................................... 4
1.1
1.2
1.3
1.4
2
SWGIFTS Description ................................................................................... 4
EasyAlbum .................................................................................................... 4
EasyCalendar ................................................................................................ 5
Greetings....................................................................................................... 5
SWGIFTS SOFTWARE INSTALLATION ................................................... 6
2.1 How to get the SYSTEMID? .......................................................................... 6
2.2 Registering and activating the software ......................................................... 7
2.3 Demo licenses ............................................................................................... 7
3
SCREEN FLOW .......................................................................................... 9
3.1
3.2
3.3
3.4
Start using a SWGIFT application.................................................................. 9
Selecting the product ................................................................................... 10
Select theme ............................................................................................... 11
Reading images .......................................................................................... 12
3.4.1 Memory Card ............................................................................................ 12
3.4.2 USB pendrive ........................................................................................... 12
3.4.3 DVD/CD .................................................................................................... 13
3.4.4 Bluetooth .................................................................................................. 13
3.5 Images selection ......................................................................................... 15
3.5.1 Select folders ............................................................................................ 15
3.5.2 Select pictures .......................................................................................... 16
3.6 Write a title for your album (Optional and only for EasyAlbum. Depends on
each product definition) ....................................................................................... 17
3.7 Select front page (Optional. Depends on each product definition) ............... 18
3.8 Composition ................................................................................................ 19
3.8.1 Rendering the album automatically. Sorting of pictures. ......................... 19
3.9 Preview & Edition ........................................................................................ 19
3.9.1 Change crop area of each pictures .......................................................... 20
3.9.2 Change background ................................................................................. 20
3.9.3 Swap pictures ........................................................................................... 21
3.9.4 Rotate images .......................................................................................... 21
3.9.5 Change frames ......................................................................................... 21
3.9.6 Add or Delete text line .............................................................................. 21
3.9.7 Change colours ........................................................................................ 22
3.9.8 Change font .............................................................................................. 22
3.9.9 Change font size ...................................................................................... 22
3.9.10 Move the text within the page .................................................................. 22
3.10 Saving product changes .............................................................................. 22
3.11 Order Summary ........................................................................................... 23
3.12 Validating the order ..................................................................................... 25
4
SETTINGS ................................................................................................ 27
4.1 Select product ............................................................................................. 27
4.2 Creating or editing a product ....................................................................... 28
4.2.1 Reference ................................................................................................. 29
4.2.2 Enabled .................................................................................................... 29
4.2.3 Product name ........................................................................................... 29
2/32
Operator user‟s manual
SWGIFTS
4.2.4
4.2.5
4.2.6
4.2.7
4.2.8
Sort ........................................................................................................... 29
Image to show .......................................................................................... 29
Layouts path ............................................................................................. 29
Theme path .............................................................................................. 30
Number of pages ...................................................................................... 30
4.2.8.1
4.2.8.2
4.2.8.3
EasyAlbum ..................................................................................... 30
EasyCalendar ................................................................................ 30
Greetings ....................................................................................... 30
4.2.9 Price.......................................................................................................... 31
4.2.10 Product format .......................................................................................... 31
4.2.11 Text shadow ............................................................................................. 31
4.2.12 Frame type & colour ................................................................................. 31
4.2.13 Binding position ........................................................................................ 31
4.2.14 Binding size .............................................................................................. 31
4.2.15 Cover (Front Page)................................................................................... 31
4.3 Administration of themes designs ................................................................ 32
3/32
Operator user‟s manual
SWGIFTS
1
1.1
INTRODUCTION
SWGIFTS Description
SWGIFTS is a pack of 3 new photo services that are offered from Kiosk software version 3.6,
besides the default Digital Photo service. These new services are automatically installed with it,
but the way to activate them may vary depending on the acquired product license.
The new services are EasyAlbum, EasyCalendar and Greetings. All of them are based in the
same software application, so the workflow and graphic user interface are almost the same.
The prints are performed instantly (standalone kiosk) or at the Click5000 system (order terminal)
SWGIFTS applications are very easy to use as they have been designed for the touchscreen
user experience. They are simple, fast, powerful and flexible.
1.2
EasyAlbum
EasyAlbum is a software tool which allows generating „MITSUBISHI EasyAlbum‟ instantly in an
easy way. The EasyAlbum application output will be a set of digitally printed pages suitable to
make a MITSUBISHI EasyAlbum.
The MITSUBISHI EasyAlbum is an instant & personalized photo album. It‟s available in different
sizes. Please contact your dealer to get more information about the MITSUBISHI EasyAlbum
solution and product references.
10X15cm / 4x6”, 20 pages
20x25cm / 8x10”, 20 pages
15x23cm / 6x9”, 20 pages
4/32
SWGIFTS
Operator user‟s manual
EasyAlbum software application contains a big amount of different picture layout per each page
(up to eight pictures per page) and backgrounds, so you can design and personalize your photo
album.
1.3
EasyCalendar
EasyCalendar is a software tool which allows generating MITSUBISHI EasyCalendars in an
easy way. The MITSUBISHI EasyCalendar is an instant & personalized 12-month calendar (12
different sheets), and it‟s available in different sizes.
Please contact your dealer to get more information about the MITSUBISHI EasyCalendar
solution and product references.
1.4
Greetings
Greetings is a software tool which allows generating personalized greeting cards in an easy
way. The greeting card is composed by a background texture, a place to locate the picture and
another place to insert some text using the software functionalities.
There are different sizes of greeting cards, from the classical 10x15cm / 4x6” and 13x18cm /
5x8”, to the newest 7,5x15cm / 3x6” or 10x20cm / 4x8”. These two last are offered in the
software application as a pack product that consists in 3 equal prints of the same greeting card.
5/32
SWGIFTS
2
Operator user‟s manual
SWGIFTS SOFTWARE INSTALLATION
If your system already has the SWGIFTS installed but the SWGIFTS applications appear
disabled in the main screen, please jump to section 2.2 ‘Activating the software’.
NOTE
Please contact your dealer to know what kind of license is installed in your system.
NOTE
Make sure the Kiosk has the version 3.4.0 or higher installed. Otherwise it will not work
properly.
To install the software please follow the steps explained on the CD cover:
1. Insert the installation CD.
2. Open Screen Application from Kiosk Operator Settings.
3. Open the Update section.
4. Press “Execute from CD” button.
5. Follow the steps to install the software. Please be sure that Kiosk 3.6, EasyAlbum,
EasyCalendars and Greetings applications are being installed.
6. Restart the Kiosk.
After installation, the SWGIFTS software license needs to be activated. If it is not activated yet,
you will see the EasyAlbum, EasyCalendar and Greetings buttons disabled in the main Kiosk
screen.
In some cases, the system can include a demo license already installed, that allows using the
system for a certain period of time. The license needs always to be activated, in any case.
In many cases, a CardCode is supplied with your SWGIFTS CD. It allows you to activate the
software.
You will need the CardCode number and your SYSTEMID during the activation. The SystemID
is a unique code indentifying your system.
2.1
How to get the SYSTEMID?
1. Enter to the Operator Settings screen.
2. Click the “EasyAlbum Supervisor Settings”
button or at any other SWGIFTS
applications.
If the application is not registered yet, the following
screen will appear. If the application is registered
with a demo key, a similar screen is shown but
asking for software activation confirmation. In
case of demo licenses, the testing period starts in
the moment the license is activated.
Once you have both the SYSTEMID and the CardCode you can go to the Mitsubishi
Registration portal to activate your software.
http://www.mitsubishiphoto.com/cardcode
6/32
SWGIFTS
Operator user‟s manual
Follow the instructions in the website to get the activation KEY. Once you have the activation
key, follow to the next step.
2.2
Registering and activating the software
To activate the SWGIFTS applications it is needed to access to the Operator screen.
3. Access the Kiosk Operator Settings screen.
4. Open any of the SWGIFTS applications Supervisor Settings (EasyAlbum, EasyCalendar
or Greetings).
NOTE
If some text or codes have to be typed you need a USB keyboard plugged to continue.
At this point EasyAlbum will ask you for Registration. You have to type here the activation key
supplied at the Mitsubishi Registration website (http://www.mitsubishialbum.com/registered ).
Type the new activation KEY in the following screen and press the “Register Key” button.
If you have inserted a correct activation key the next screen will appear.
At this point you can start using SWGIFTS applications!
2.3
Demo licenses
If the system has a demo license, it has to be activated before starting using EasyAlbum,
EasyCalendar and Greetings applications. To activate it follow the next steps:
1. Access the Kiosk Operator Settings screen.
2. Open any of the SWGIFTS applications Supervisor Settings (EasyAlbum, EasyCalendar
or Greetings).
7/32
SWGIFTS
Operator user‟s manual
If the license has not been activated yet, the next screen will appear:
Once the demo license has been activated, a message like this will appear every time you enter
in the supervisor settings of any of the three applications.
When the demo period expires, or at any time you want to activate the applications with a
purchased key, push the button “Insert purchased or trial key” and follow the steps in the
previous “Registering and activating the software” section.
8/32
SWGIFTS
3
Operator user‟s manual
SCREEN FLOW
Following the application instructions you can create an EasyAlbum, EasyCalendar or Greeting.
The screens flow and the meaning of each one are explained on this chapter.
3.1
Start using a SWGIFT application
Once the following screen is displayed, you can start using any of the SWGIFTS applications.
1. Choose your language.
2. Touch the desired SWGIFTS application button.
NOTE
Accepting “Terms and conditions” is necessary to proceed
3. Press “Next” if to accept the “Terms and conditions”.
NOTE
To exit the program, press this button on the top-right corner:
To go to the previous screen, press this button:
9/32
SWGIFTS
3.2
Operator user‟s manual
Selecting the product
You have the choice of different products for printing. The products are defined by the shop
operator and may have different configuration settings such as number of pages, format, etc …
NOTE
Each product displays the following parameters:
Name.
Price.
Number of printed pages.
Minimum and maximum number of pictures that must be included.
The right scrollbar will appear if there are more than three products defined.
1. Use the arrows to display all the available formats.
2. Touch the desired product to select it (it will automatically navigate to the next option).
10/32
SWGIFTS
3.3
Operator user‟s manual
Select theme
Every theme consists of several backgrounds that will be applied randomly to each page of the
selected product.
1. To select the theme, please use the arrows to navigate through all the themes.
2. Select the theme you want to use.
When the theme is selected, there is a sample theme preview of the first three
backgrounds. A theme may contain a lot of backgrounds. In „Greetings‟ service, each
theme includes one unique background.
For 12 month calendars, there are 12 backgrounds inside each theme, each one
belonging to a different month. Only 3 of them are shown per each theme here, anyway.
It‟s also required to select the starting month of your calendar. Depending on the
different year and designs availability, the range of available options may vary.
3. Press “Next”.
11/32
SWGIFTS
3.4
Operator user‟s manual
Reading images
Now, you have to insert the device containing the images. All the standard memory cards are
supported. Also USB drives, DVD/CD and Bluetooth transfers.
Choose the source of your photos, to see how to insert your device.
3.4.1 Memory Card
1. Press the “Digital media card reader” button.
The following screen appears, indicating how and where to introduce the memory card.
2. Insert the memory card.
NOTE
Do not remove your device until you are requested at the end of the whole creation process.
An incorrect usage of your memory card may damage its content.
Please, ensure that you have a backup copy of your images before proceeding.
3.4.2 USB pendrive
If your images are stored in a USB device:
12/32
SWGIFTS
Operator user‟s manual
1. Press the “USB pendrive” button.
The following screen appears, indicating how and where to insert the USB pendrive.
2. Now, insert your USB pendrive and wait for more instructions.
NOTE
Do not remove your device until you are requested at the end of the whole creation process.
An incorrect usage of your memory card may damage its content.
Please, ensure that you have a backup copy of your images before proceeding.
3.4.3 DVD/CD
If your images are stored in a CD/DVD:
1. Press the “CD/DVD” button.
The device gets open automatically.
The following screen appears, indicating how and where to insert the CD/DVD.
2. Insert the CD/DVD.
3. Press “Next” and the tray will get closed.
3.4.4 Bluetooth
If your images are stored in a Bluetooth device such as a mobile phone:
Press the “Bluetooth” button.
Follow these steps on your Bluetooth device:
1. Select the image you want to transfer on your Bluetooth device.
2. Send the images to the name specified on the screen (usually similar to “K70xxxx”).
13/32
SWGIFTS
Operator user‟s manual
3. If required, type the Bluetooth password specified on the screen (usually “0000”).
After finishing the image-transfer you will see it on the screen.
Repeat the same process until you reach the desired number of images to be included
in the product.
4. When you have finished sending all the images, touch the “Next” button on the Kiosk
screen to proceed.
NOTE
The default Bluetooth password is “0000”.
14/32
SWGIFTS
3.5
Operator user‟s manual
Images selection
3.5.1 Select folders
Once the pictures from the source have been correctly detected, the “select folders” screen
appears:
You can choose:
“Select folders” to select the folders where you have the pictures you want to use. This
option is useful to avoid spending too much time on loading hundreds of pictures
(recommended). The folders shown are ordered in alphabetical order.
“Include all folders” to select all the folders and images which have been detected.
NOTE
This screen shows the number of found folders and images.
In case that the amount of images detected is not enough to fill the minimum number of images
for the selected product, it will not be possible to proceed.
For greetings service or annual calendars, only 1 picture selection is allowed.
For 12 month calendars, 12 pictures must be selected.
If “Select folders” is chosen, the following screen appears:
15/32
Operator user‟s manual
SWGIFTS
For selecting folders:
1. Use the arrows to navigate through all the folders. Every folder shows a sample of
pictures contained in it.
2. Press the desired folders.
When the folder is selected, the screen indicates the number of selected images and the
images which have to be at least included.
For deselecting folders:
1. Press the selected folders again for deselecting.
Press “Next” to proceed.
3.5.2 Select pictures
Once the desired folders have been selected, the following screen appears:
You can:
Select all the images.
o
Press the “Select all” button:
Select one by one the images you want to use.
1. Use the scroll arrows to navigate through all the images.
2. Touch the images you want to use to select them.
A check mark will appear on the corner of the selected images.
Deselect all the images.
o
Press the “Unselect all” button:
Rotate the selected image.
o
To the left, press this button:
o
To the right, press this button:
Preview the last selected image.
o
Press the “Preview” button:
16/32
SWGIFTS
Operator user‟s manual
NOTE
The screen indicates the number of images selected.
If the minimum number of images required by the EasyAlbum, EasyCalendar or Greetings is not
selected yet, a message will appear specifying you how many images are missing. Exactly the
same will happen if you selected too much images.
Unless you are between the correct limits you will not be able to continue. The “Next” button is
disabled.
For greetings service or annual calendars, only 1 picture selection is allowed.
For 12 month calendars, 12 pictures must be selected.
3.6
Write a title for your album (Optional and only for
EasyAlbum. Depends on each product definition)
Once the images have been selected and if the option “Cover” is enabled (only available in
EasyAlbum), the following screen appears:
On this screen you have to write the title of your product (for an EasyAlbum) that will be
included on the main page of your creation.
Press the “Next” button when you have finished.
There are several options to write text on this screen:
Uppercase/Lowercase
Press the “aA” button on the bottom left corner to change between lowercase and
uppercase.
When pressing a key, an options panel will be displayed at the top left side of the keyboard. The
options will look like “AaáÁÀàâäÂÄ”. By pressing the same key twice it will change to the next
character, and each time you press it will change again.
After a few seconds, the options panel will disappear and you will be able to type the same
character again.
17/32
SWGIFTS
3.7
Operator user‟s manual
Select front page (Optional. Depends on each product definition)
NOTE
The front page configuration (cover) is optional and only available in EasyAlbum. It depends on
the product configuration that is available through the operator/supervisor settings.
To enable this option see chapter 4.2.13.
Once the title has been written, the following screen appears:
For selecting the image for the cover:
1. Use the arrows to navigate through all the available images.
2. Press the image that you want to include on the album front page.
You can rotate it before continuing or also preview it in full screen.
3. Press “Next” to continue.
18/32
SWGIFTS
3.8
Operator user‟s manual
Composition
This will perform the composition of the chosen product with all the information you have
provided during the whole workflow.
A progress bar indicates that the product is being generated automatically.
3.8.1 Rendering the album automatically. Sorting of pictures.
When the EasyAlbum, EasyCalendar or Greetings applications are reading pictures from the
digital media, they sort the folders and pictures in alphabetical order. Once the pictures have
been selected to automatically create the product, they are also used following the same
sorting. The application decides more or less randomly the amount of pictures per each
individual page, and it tries later to find an appropriate layout per each page, always trying to
keep the original sorting.
Once the composition is completed, it is recommended entering in the Preview&Edition section
where it‟s possible to adjust the pictures position and some other parameters.
Press the “Preview & Edition” button to preview & edit the resulting product.
NOTE
It is highly recommended to preview the product. You will be able to modify it before printing.
Press “Next”. (See chapter 3.11).
3.9
Preview & Edition
Once you enter the “Preview” option you will see a screen like this (may vary depending on the
selected service):
19/32
SWGIFTS
Operator user‟s manual
This screen shows all the generated pages at the bottom side, a toolbar panel on the right side
and a working area in the middle.
To select a different page, just click on the page thumbnail or use the page navigation
arrows:
and
.
The toolbar allows you to modify each page in an easy way. The different available actions are
the following:
Change the background.
Change the cropped area of the images in the selected layout.
Swap two images within the same page or between different pages. Each image will be
changed by the other one.
Add or remove the frame of all the images in the current page, or change the colour to white
or black.
Add or Delete a text line.
Change the colour of each text line.
Change the font of each text line.
Change the font size of each text line.
Move each text line within the page.
3.9.1 Change crop area of each pictures
Each image is inserted into an area, and in some cases, and depending on the image size
(aspect ratio), some parts of the image may be lost (cropped).
You can choose what part of the image will be lost:
If cropped horizontally (landscape image in a vertical layout): Left, right or centre.
If cropped vertically (portrait image in a horizontal): Top, bottom or middle.
You will notice that an image has been cropped when a arrow-shaped yellow icon appears on
the right corner of an image.
To adjust to a different crop position:
Press the movement buttons:
3.9.2 Change background
It‟s possible to change the background of each page on every service but in EasyCalendars.
20/32
Operator user‟s manual
SWGIFTS
Each time the button is pressed, a new background is used. When the last available
background is reached, the next one to appear is the first background again.
Press the “change background” button:
Each time you press it, the background will be changed according to the selected
theme.
3.9.3 Swap pictures
It‟s possible to swap two pictures between their positions. They can be placed in the same page
or in different pages.
This swap action will keep the original layout of the page, and the images will be adjusted to the
new position.
It‟s possible to swap between portrait and landscape images. They will get cropped according to
the new area requirements. The swapping operation can be done as many times as desired.
Press the “Swap” button and follow the instructions placed on the screen:
3.9.4 Rotate images
It‟s possible to rotate 90º in case of an image or 15º in case of a text:
Press the “Rotate” button:
Press the following button to rotate clockwise:
Press the “Rotate” button:
3.9.5 Change frames
The frames that are applied to each page are managed by the buttons of this option.
You can add or remove the frame and shadow of all the images on each page or choose the
frame colour (white or black).
The frame-colour button that is being used will look like in a “pressed” status.
In case that you wish to unselect the frame, just press again the “pressed” button.
Press or release this buttons for:
White frame.
Black frame.
3.9.6 Add or Delete text line
You can add or delete text in every page. The delete option will be active when a text is
selected. When the button “Add Text Line” is pressed an on-screen keyboard is shown.
An unlimited amount of text lines are possible to be added in a page.
Press these buttons for:
Add Text Line.
Delete Text Line.
21/32
SWGIFTS
Operator user‟s manual
3.9.7 Change colours
It‟s possible to change the colour of the added text. Each time the button “Change colour” is
pressed, a new colour will be used to replace the existing one. When the last available colour is
reached, the next one to be used is the first colour again.
The available colours are Black, White, Blue, Green and Red.
Press the “Change colour” button:
Each time it‟s pressed, the colour gets changed.
3.9.8 Change font
It‟s possible to change the font of the inserted added text. Each time the button “Change font” is
pressed, a new font will be used to replace the existing one. When the last available font is
reached, the next one to be used is the first font again.
Press the “Change font” button:
Each time it‟s pressed, the font gets changed.
3.9.9 Change font size
It‟s possible to change the size font of the added text. Each time the button “Change font size” is
pressed, a new font size will be applied to the text.
Press the “increase size font” button:
Each time it‟s pressed, the font size gets increased.
Press the “decrease size font” button:
Each time it‟s pressed, the font size gets decreased.
3.9.10 Move the text within the page
Each text is inserted into the middle of the page but it‟s possible to move it to another position of
the page.
To move the text to a different position of the text:
Press the movement buttons (Left, Up, Right, Down):
3.10
Saving product changes
Once the product has been modified, press “Ok” to continue.
The following screen appears:
22/32
SWGIFTS
Operator user‟s manual
This dialog box will allow you to choose between three options:
To discard changes and exit the Preview screen:
Press this button:
To save changes and exit the Preview screen:
Press this button:
To cancel the operation and return to the Preview screen:
Press this button:
3.11 Order Summary
Once the product changes have been accepted, the following screen appears:
This screen lists all the products requested up to this moment and their cost.
On this screen, you can:
23/32
SWGIFTS
Add more copies of the recently created product.
Cancel the order.
Operator user‟s manual
Confirm the order.
For increasing the number of copies:
Press the“+” button if you want to print more than one copy of the product.
Press the“-” button if you want to decrease the number of copies of the product.
NOTE
For the Greetings products being composed by 3 prints:
„Amount‟ means the number of packs being printed. „x1‟ means 3 prints, „x2‟ means 6 prints,
etc.
For cancelling the order:
Press “Cancel”.
For confirming the order:
Press “Next”.
In this moment if the ticket printer is installed, and the Kiosk is configured as standalone,
a ticket with the order details will be printed.
24/32
SWGIFTS
3.12
Operator user‟s manual
Validating the order
Once the order has been accepted, the payment screens will appear. Each payment method
works exactly in the same way as Kiosk Photo application works. See the Kiosk documentation
for more information on the different payment methods.
In this example you can see the operator password validation screen.
NOTE
Check the payment methods and functionalities of the Kiosk payments user guide section.
After validating the payment operation, a progress screen will appear. Please wait until the
order is finished. In a Standalone Kiosk you will have to wait until the order is printed. In an
Order Terminal Kiosk you have to wait until the order is sent to the central dispatcher DPS
system.
25/32
SWGIFTS
Operator user‟s manual
NOTE
The final generation process and print tasks may take some minutes. Please wait.
The final screen shows some useful information. It remembers you that you have to remove
your device or pickup your order-completed ticket.
In case of any error it will be shown an error message indicating the source of the problem.
NOTE
Remember to:
Remove your device.
Pick up your ticket (only if the ticket printer is active).
26/32
SWGIFTS
4
Operator user‟s manual
SETTINGS
This section allows supervisors to configure general parameters of SWGIFTS applications. This
includes the creation of new products with specific parameters, change current products, prices,
sizes, etc…
NOTE
Only Supervisors can access to “Settings” section of these applications.
For accessing to “Settings” you have to login as Supervisor of Kiosk Kernel:
1. Log in as operator.
2. Press the “Supervisor” button of the desired application (easyalbum, easycalendar,
greetings)
3. Type your Kiosk supervisor password.
4.1
Select product
Once the password has been input, the following screen is displayed showing all existing
products.
27/32
Operator user‟s manual
SWGIFTS
The software is configured with some sample products by default. They contain approximated
prices and the recommended amount of pictures to fit in the MITSUBISHI EasyAlbum and
EasyCalendar solution. A Supervisor can freely modify the product size, price and format.
In this screen, it possible to:
Create a new product.
Edit an existing product.
Delete an existing product.
Administrate the different collections of themes designs: enable or disable themes, and also
delete the obsolete ones.
To create a new product:
Press this button:
To delete an existing product:
Press this button:
To edit an existing product:
1. Select it
2. Press this button:
To administrate themes designs:
Press this button:
4.2
Creating or editing a product
Once the buttons
and
have been selected, the following screen appears:
NOTE
On this screen:
The mouse pointer is visible in order to work more easily with an USB mouse.
When all modifications are done, press
If you don‟t have an USB keyboard connected, on the text fields you can press the
to save the changes.
button to display an on-screen keyboard.
Please verify the product price is the correct one.
28/32
SWGIFTS
Operator user‟s manual
The following parameters can be updated or changed while editing the content of a product:
Reference.
Enabled
Product name.
Sort.
Image to show.
Layouts path
Theme path.
Number of pages.
Price
Product format.
Frame
Cover.
Binding.
4.2.1 Reference
This reference is a text string that can be freely changed as it‟s used to create an internal
reference to each product. It will be displayed on the customer order ticket and will be also
visible on the Dispatcher application.
When setting the Kiosk to print barcodes in the receipt, this reference is also used to identify the
product into each barcode in some of the possible barcode settings. In that case, please pay
attention to the text string length (only when printing barcodes), in order to avoid wrong barcode
calculation and prints.
Please avoid repeating references among different products.
4.2.2 Enabled
Change this value in order to enable or disable any product that has been already created.
4.2.3 Product name
This is the name of the product that customers will see.
We recommend trying to be descriptive with the product name to encourage customers to order
this product.
4.2.4 Sort
This number indicates the order of products on the product selection screen. If two products
have the same order, the earliest to be created is displayed first.
4.2.5 Image to show
This image will be displayed close to the product information. You can take a picture of your end
product and replace the default picture.
If this field is kept empty the default picture is displayed.
4.2.6 Layouts path
This path sets the location of the default layouts description file.
The layouts description file is an XML file that contains the description of every different layout
of all the possible ones to be used in a product. Every layout is a combination of pictures
(amount and distribution) over one sheet of the album.
Depending on the products or service, a unique layout file is being used whatever the print size
or aspect ratio is being used by every product or different layout files can be used.
29/32
SWGIFTS
Operator user‟s manual
Thus, easyalbum products are using the same layout file, but easycalendar and greetings
products are using more than one different layout file depending on the aspect ratio of the print
size (layoutA.xml for 2/3 aspect ratio, layoutB.xml for 4/3 a.r., layouts1Pict.xml for ½ A.R.)
Do not touch it if you are not authorized by Mitsubishi.
NOTE
This option can be modified by Mitsubishi exclusively.
Please contact to Mitsubishi to modify the layouts of the products. A wrong choice when
creating a new product can cause unexpected layout or cropping of pictures at every page
of the generated product.
4.2.7 Theme path
This is an internal parameter intended to change the default backgrounds and themes. It is
empty by default.
Depending on the product, the background design aspect ratio is important. Thus, for ½ aspect
ratio printing sizes, special designs were created: they can be found at „themes1.2‟ and
„themes1.2softedge‟.
Do not touch it if you are not authorized by Mitsubishi.
4.2.8 Number of pages
With this option you can introduce the number of pages you want the selected product to have.
Each sheet of the MITSUBISHI EasyAlbum solution contains two sides so the value “Number of
pages” must be the double than the number of sheets of the MITSUBISHI EasyAlbum solution.
E.g. if the MITSUBISHI EasyAlbum solutions has 10 sheets, the number of pages must be set
to “20”.
After choosing the number of pages you have to choose the minimum and maximum number of
pictures per product. This setting is different among EasyAlbum, EasyCalendar and Greetings.
4.2.8.1 EasyAlbum
Minimum number of images:
The same as the number of pages minus one if the product has the cover
enabled (one picture per page).
Maximum number of images:
The recommended value is the number of pages less the number of pages
with one image multiplied by 3, 4 or 5.
Number of pages with one image:
This option lets you select the number of pages with a single image.
The maximum recommended value is the 20% of the total number of pages. „0‟
(none) is also a possible value.
4.2.8.2 EasyCalendar
Minimum, maximum and number of pages with one image:
Set it to 12 if it‟s a 12-month calendar or set it to 1 if it‟s a 1-year calendar.
4.2.8.3 Greetings
Minimum, maximum and number of pages with one image:
It has to be always set to 1.
Num. Copies Greeting:
30/32
Operator user‟s manual
SWGIFTS
It specifies the amount of repeated greetings printed in one sheet. (See chapter
1.4)
If you are out of bounds an error screen like this will inform you about the problem.
4.2.9 Price
This field is the final price for the product (including VAT and other concepts).
You can also use decimal numbers as the product price using the “.” symbol.
This price will be displayed using the same currency configured in Kiosk Kernel.
4.2.10 Product format
With this option you can choose the printing output format you want for the selected product.
4.2.11 Text shadow
With this option you can choose whether the text added in the product (in the cover or any other
page) has a decorating shadow or not. It‟s activated by default.
4.2.12 Frame type & colour
With this option you can choose the thickness of the picture frame (simple, normal or double) as
well as the default frame colour (black or white). A picture frame always includes a picture
shadow effect over the background.
4.2.13 Binding position
You have to use this parameter if the binding requires keeping some non-printed space on the
left or the top side of the paper.
This value is set to “No binding” by default.
4.2.14 Binding size
This parameter indicates the percentage (%) of the paper that will be reserved without a printed
area.
It only makes sense if the previous parameter is set to “Top” or “Left”.
4.2.15 Cover (Front Page)
This option allows you to choose whether the product is going to include a front page or not.
A front page is composed by a picture and a title.
NOTE
Please do not enable the cover in EasyCalendar or Greetings.
31/32
SWGIFTS
4.3
Operator user‟s manual
Administration of themes designs
After pressing the „settings‟ button, the operator enters this screen.
It allows to:
- Enable and disable theme by theme. The theme is enabled/disabled from all the
different products that are using it. The theme must be double-clicked in order to
change its status.
- Delete a theme. The theme is erased form all the different products that are using it.
This means that the application is searching in the hard disk all the theme folders with
the same name and deleting all of them.
- Delete a full year themes package (only for easycalendar application). This means that
the application is searching in the hard disk all the single files belonging to the same
year and deleting all of them.
32/32
Kiosk version 3.6.3
Operator's manual
6 CONTACT
French Branch
Mitsubishi Electric Europe B.V.
25 Boulevard des Bouvets, 92741
Nanterre Cedex,
France
Tel (+33) 1 55 68 55 00
Fax (+33) 1 55 68 57 31
Spanish Branch (Barcelona)
Mitsubishi Electric Europe B.V.
Carretera de Rubí 76-80,
Apartado de correos 420
08190 Sant Cugat del Vallès
(Barcelona) Spain
Tel (+34) 902 304 422
Fax (+34) 93 589 43 88
German Branch
Mitsubishi Electric Europe B.V.
Gothaer Str. 8, Ratingen / P.O. Box 1548
40835 Ratingen
Germany
Tel (+49) 2120 486 9250
Fax (+49) 2102 486 7320
Scandinavian Branch
Mitsubishi Electric Scandinavia
Hammarbacken 14, P.O. Box 750
SE-191 27 Sollentuna
Sweden
Tel (+46) 8 625 10 00
Fax (+46) 8 625 10 36
Irish Branch
Mitsubishi Electric Ireland
Westgate Business Park, Ballymount
Dublin 24
Ireland
Tel (+353) 14198844
Fax (+353) 14564422
UK Branch
Mitsubishi Electric Europe B.V.
Travellers Lane, Hatfield
Herts AL10 8XB
U.K.
Tel (+44) 1707 278684
Fax (+44) 1707 278541
Italian Branch
Mitsubishi Electric Europe B.V.
Centro Dir. Colleoni, Pal. Perseo – Ingr.2
Via Paracelso 12,
20041 Agrate B. (Milano)
Italy
Tel (+39) 039 60531
Fax (+39) 039 6053214
Russian Branch
Mitsubishi Electric Europe B.V.
Moscow Representative Office
52, bldg. 5, Kosmodamianskaya Nab.
113054, Moscow
Russia
Tel (+7) 095 721-2070
Fax (+7) 095 721-2071
Benelux Branch
Mitsubishi Electric Benelux
Nijverheidsweg 23A, 3641 RP Mijdrecht /
Postbus 222
3640 AE Mijdrecht
Netherlands
Tel (+31) 297 282461
Fax (+31) 297 283936
American Branch
Mitsubishi Digital Electronics America, Inc.
9351 Jeronimo Road
Irvine, CA 92618, U.S.A.
Phone (+1) 949-465-6000
Fax (+1) 949-465-6338