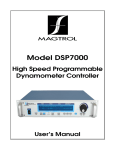
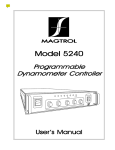
Download Manual - Magtrol
Transcript
HD and ED Series Hysteresis Dynamometers User’s Manual Purchase Record Please record all model numbers and serial numbers of your Magtrol equipment, along with the general purchase information. The model number and serial number can be found on either a silver identification plate or white label affixed to each unit. Refer to these numbers whenever you communicate with a Magtrol representative about this equipment. Model Number: _____________________________ Serial Number: _____________________________ Purchase Date: _____________________________ Purchased From: _____________________________ While every precaution has been exercised in the compilation of this document to ensure the accuracy of its contents, Magtrol, Inc./Magtrol SA assumes no responsibility for errors or omissions. Additionally, no liability is assumed for any damages that may result from the use of the information contained within this publication. Copyright Copyright ©2002-2015 Magtrol, Inc. All rights reserved. Copying or reproduction of all or any part of the contents of this manual without the express permission of Magtrol is strictly prohibited. Trademarks LabVIEW™ is a trademark of National Instruments Corporation. Microsoft® is a registered trademark of Microsoft Corporation. National Instruments™ is a trademark of National Instruments Corporation. Windows® is a registered trademark of Microsoft Corporation. 4th Edition, revision M – June 2015 Safety Precautions Several warning labels are affixed directly to the dynamometer. These warnings are discussed in further detail below. Please take the time to read this page thoroughly before connecting and using your dynamometer. 1. Make sure that all Magtrol dynamometers and electronic products are earth-grounded, to ensure personal safety and proper operation. 2. Check line voltage before operation on any dynamometer that uses AC input power. 3. Make sure that dynamometers are equipped with a protective cover to prevent contact with the rotating shaft and coupling. The protective cover must be equipped with a safety interlock to disable the test motor if the cover is removed. 4. Make sure that all motors under test are equipped with appropriate safety guards. 5. Use caution with exposed brake surfaces. They have a tendency to become very hot during long periods of operation. CAUTION BRAKE SURFACES MAY BECOME HOT 6. Do not lift the unit by the brake assembly, as it may cause damage to the torque sensor. CAUTION LIFTING BY BRAKE ASSEMBLY MAY CAUSE DAMAGE TO TORQUE SENSOR 7. When operating dynamometers with blowers, hearing protection must be worn. i Revisions To This Manual The contents of this manual are subject to change without prior notice. Should revisions be necessary, updates to all Magtrol User’s Manuals can be found at Magtrol’s web site at www.magtrol.com/support/manuals.htm. Please compare the date of this manual with the revision date on the web site, then refer to the manual’s Table of Revisions for any changes/updates that have been made since this edition. Revision Date 4th Edition, revision M – June 2015 Table of Revisions Date Edition 06/11/15 4th Edition - rev. M 05/11/15 09/04/14 4th Edition - rev. L 4th Edition - rev. K 06/09/14 4th Edition - rev. J 02/26/14 4th Edition - rev. I 06/01/12 4th Edition - rev. H 05/21/12 4th Edition - rev. G 10/07/08 08/31/07 08/31/07 08/31/07 06/11/07 03/12/07 03/12/07 02/02/07 02/02/07 06/28/06 01/23/06 4th Edition - rev. F 4th Edition - rev. E 4th Edition - rev. E 4th Edition - rev. E 4th Edition - rev. D 4th Edition - rev. C 4th Edition - rev. C 4th Edition - rev. B 4th Edition - rev. B 4th Edition - rev. A 4th Edition Change Speed sensor board schematic added for 2015 and later dynamometers. Compressed air regulator setting changed for HD-800 dynamometer. Updated description of booster power amplifier. Note added concerning operation at continuous power rating for long intervals and high temperatures. All referneces to DSP6001 changed to DSP7000 Dimensions were updated on the data sheet for the HD-800 and HD810 model dynamometers Part number for the 88M007 and 88M070 cables was changed to 88M007-0150 and 88M070-0150 Temperature conditions for maximum power absorption Updated electrical power and fuse ratings New resistance and current values for HD-106 Added note about circuitry between connector and brake coil Deleted: Analog Outputs Updated calibration drawings and procedure Added new section: "Calibration Beams and Weights" New "A", "P" and "Q" dimensions for HD-700 series dynamometers Change in torque, speed and power ratings. Change in power and speed ratings for HD-805. All HD and ED data sheets condensed to one single data sheet. 01/23/06 4th Edition HD-515 (compressed air cooled) dynamometer added to product line. 01/23/06 10/12/05 10/12/05 4th Edition 3rd Edition - rev. D 3rd Edition - rev. D New resistance and current values for HD-500 and HD-505 Note to "call factory" for HD-805 power and speed ratings Change in power rating (5 minutes) for HD-800 02/24/05 3rd Edition - rev.C Hearing safety warnings added 12/09/04 3rd Edition - rev.B 03/11/04 3rd Edition - rev. A 12/08/03 10/27/03 10/27/03 10/27/03 10/02/03 09/25/03 3rd Edition 2nd Edition - rev. E 2nd Edition - rev. E 2nd Edition - rev. E 2nd Edition - rev. D 2nd Edition - rev. C Electrical power and fuse ratings added to data sheets 5410 Torque/Speed Readout and 5200/5210 Power Supply removed from manual/open-loop test system configurations HSD Series High Speed Dynamometers discontinued Change in maximum torque rating for HSD-710-8N Added short base plate option Change in speed encoder options New dimensions for HD-700 series dynamometers New "B" dimension for HD-400 ii Section(s) B.2 1.3, 4.1.3.2.1 5.6.1 4.3.1 throughout manual 1.3 1.3, 3.3.1, 3.3.2 4.1.3.1 1.3 8.1.3.1, 8.1.3.2 8.1.3.1 7.2, 1.3 6.4 6.2 1.3 1.3, 4.1.3.1 1.3, 4.1.3.1 1.3 1.3, 2.2, 3.3.3, 3.3.3.2, 4.1.3.1, 4.1.3.2.1, 8.1.3.1, 8.1.3.2 8.1.3.1, 8.1.3.2 1.3.3, 4.1.3.1 1.3.3, 4.1.3.1 2.2, 3.3.3.1, 4.1.1, 4.1.3.2.2 1.3.1–1.3.4 1.3.1–1.3.4, 3.3.1 throughout manual 1.3.5, 4.1.3.1 1.3.1–1.3.3 1.3.1–1.3.4 1.3.2 1.3.1 09/25/03 08/19/03 03/17/03 03/17/03 2nd Edition - rev. C 2nd Edition - rev. B 2nd Edition - rev. A 2nd Edition - rev. A 01/03/03 2nd Edition 01/03/03 01/03/03 2nd Edition 2nd Edition New "B" and "E" dimensions for HD-106 New schematic drawing for HD-800–815 Brake Control Supply New "F" dimension for HSD-610M New Dynamometer Table added to System Options and Accessories Added more information about air cooling – air flow sensor now standard Inserted new chapter about optional features HSD High Speed Dynamometer information added iii 1.3.1 B.4 1.3.5 1.3.1–1.3.5 3.3.3 chapter 7 throughout manual Table of Contents Safety Precautions..........................................................................................................................i Revisions To This Manual................................................................................................................ii Table of Contents.......................................................................................................................... iv Table of Figures......................................................................................................................................................... vi Preface................................................................................................................................................ vi Purpose of This Manual......................................................................................................................................... vi Who Should Use This Manual.............................................................................................................................. vi Manual Organization............................................................................................................................................. vi Conventions Used in This Manual...................................................................................................................vii 1. Introduction.................................................................................................................................1 1.1 Unpacking Your Hysteresis Dynamometer............................................................................................ 1 1.2 Features of the Hysteresis Dynamometer............................................................................................. 2 1.2.1HD Series...................................................................................................................................................... 2 1.2.2 ED Series...................................................................................................................................................... 2 1.3 Data Sheet................................................................................................................................................................. 3 2. Inputs/Outputs............................................................................................................................16 2.1 Rear Panel.............................................................................................................................................................. 16 2.2 Rear Panel Inputs and Outputs.................................................................................................................. 16 3. Installation/Configuration...................................................................................................18 3.1 Removal of the Load cell Shipping/Restraining Bolt................................................................... 18 3.1.1HD-100, -400 and -500 Series................................................................................................................. 18 3.1.2HD-700 Series............................................................................................................................................ 19 3.1.3HD-800 Series............................................................................................................................................ 19 3.1.4ED-715........................................................................................................................................................... 19 3.1.5ED-815........................................................................................................................................................... 19 3.2 Earth Ground....................................................................................................................................................... 20 3.3 System Configurations................................................................................................................................... 21 3.3.1 Manual Test Systems......................................................................................................................... 21 3.3.2 PC-Based Test Systems....................................................................................................................... 22 3.3.3 Air Cooling.............................................................................................................................................. 23 4. Testing............................................................................................................................................25 4.1 Testing Considerations.................................................................................................................................. 25 4.1.1Safety......................................................................................................................................................... 25 4.1.2Accuracy.................................................................................................................................................. 25 4.1.3 Power Dissipation................................................................................................................................. 26 4.1.4 Fixtures and Couplings.................................................................................................................... 38 4.1.5Windage..................................................................................................................................................... 38 4.1.6Friction..................................................................................................................................................... 39 4.1.7Vibration.................................................................................................................................................. 39 4.1.8Cogging..................................................................................................................................................... 40 4.1.9 Eddy Currents....................................................................................................................................... 40 iv Table of Contents Magtrol Hysteresis Dynamometers 4.1.10 Temperature Rise................................................................................................................................. 41 5. Operating Principles................................................................................................................42 5.1Speed.......................................................................................................................................................................... 42 5.2Torque...................................................................................................................................................................... 42 5.3 Torque Signal Amplification....................................................................................................................... 43 5.4 Decimal Point Control................................................................................................................................... 43 5.5 Damper Cylinder................................................................................................................................................ 44 5.6Brake Control Power...................................................................................................................................... 44 5.6.1HD-800/815 and ED-815............................................................................................................................ 44 5.6.2HD-825........................................................................................................................................................... 44 6. Calibration...................................................................................................................................45 6.1 6.2 6.3 6.4 6.5 Initial Calibration............................................................................................................................................ 45 Calibration Beams and Weights................................................................................................................ 45 Calibration Preparation................................................................................................................................ 46 Calibration Procedure................................................................................................................................... 46 Calibration Frequency.................................................................................................................................. 48 7. Optional Features.....................................................................................................................49 7.1 Speed Encoder...................................................................................................................................................... 49 8. Troubleshooting........................................................................................................................50 8.1 Torque Readout Problems............................................................................................................................ 50 8.1.1 New Dynamometer.............................................................................................................................. 50 8.1.2Zero Balance.......................................................................................................................................... 50 8.1.3 Full Scale Torque............................................................................................................................... 51 8.1.4 Mechanical (Rotational) Alignment........................................................................................ 53 8.2 Speed Readout Problems................................................................................................................................ 54 Appendix A: Calibration Record..............................................................................................55 Appendix B: Schematics................................................................................................................56 B.1 Torque Amplification Board........................................................................................................................ 56 B.2 Speed Sensor Board .......................................................................................................................................... 57 B.3 Load Cell Schematic........................................................................................................................................ 58 B.4HD-800–815 Brake Control Supply............................................................................................................... 59 B.5HD-825 Brake Control Supply....................................................................................................................... 60 Index......................................................................................................................................................61 Service Information.......................................................................................................................63 Returning Magtrol equipment for Repair and/or Calibration...................................................... 63 Returning Equipment to Magtrol, Inc. (United States)................................................................. 63 Returning Equipment to Magtrol SA (Switzerland)...................................................................... 63 v Table of Contents Magtrol Hysteresis Dynamometers Table of Figures 2. Inputs/Outputs Figure 2–1 Figure 2–2 Figure 2–3 Figure 2–4 Figure 2–5 Figure 2–6 Figure 2–7 Rear Panel...............................................................................................................................................16 Dynamometer Brake Input......................................................................................................................16 Dynamometer Connector........................................................................................................................16 Calibration Potentiometers.....................................................................................................................17 Speed Encoder Switch.............................................................................................................................17 Blower Input............................................................................................................................................17 Compressed Air Input..............................................................................................................................17 3. Installation/Configuration Figure 3–1 HD 100–500 Series Shipping/Restraining Bolt Location........................................................................18 Figure 3–2 HD-700 Series Shipping/Restraining Bolt Location...............................................................................19 Figure 3–3 ED-715 Shipping/Restraining Bolt Location..........................................................................................19 Figure 3–4 HD 100–500 Series Top View .................................................................................................................20 Figure 3–5 HD-800 Series Top View..........................................................................................................................20 Figure 3–6 Dynamometer with 6200 Controller........................................................................................................21 Figure 3–7 Dynamometer with DSP7001 Controller and M-TEST Software............................................................22 Figure 3–8 Dynamometer with 6510e Power Analyzer, DSP7001 Controller and M-TEST Software......................22 Figure 3–9 Air Flow Sensor Schematic.....................................................................................................................23 Figure 3–10 Dynamometer with Blower Connection................................................................................................24 Figure 3–11 Dynamometer with Compressed Air Connection..................................................................................24 4. Testing Figure 4–1 Power Absorption Curve Parameters......................................................................................................27 Figure 4–2 HD 106 Power Absorption Curve............................................................................................................28 Figure 4–3 HD 100 Power Absorption Curve............................................................................................................28 Figure 4–4 HD 400 Power Absorption Curve............................................................................................................29 Figure 4–5 HD 500 Power Absorption Curve ...........................................................................................................29 Figure 4–6 HD 510 Power Absorption Curve............................................................................................................30 Figure 4–7 HD 505 Power Absorption Curve............................................................................................................30 Figure 4–8 HD 515 Power Absorption Curve............................................................................................................31 Figure 4–9 HD 700 Power Absorption Curve............................................................................................................31 Figure 4–10 HD 710 Power Absorption Curve..........................................................................................................32 Figure 4–11 HD 705 Power Absorption Curve..........................................................................................................32 Figure 4–12 HD 715 Power Absorption Curve..........................................................................................................33 Figure 4–13 HD 800 Power Absorption Curve..........................................................................................................33 Figure 4–14 HD 810 Power Absorption Curve..........................................................................................................34 Figure 4–15 HD 805 Power Absorption Curve..........................................................................................................34 Figure 4–16 HD 815 Power Absorption Curve..........................................................................................................35 Figure 4–17 HD 825 Power Absorption Curve..........................................................................................................35 Figure 4–18 ED 715 Power Absorption Curve..........................................................................................................36 Figure 4–19 ED 815 Power Absorption Curve..........................................................................................................36 Figure 4–20 Dynamometer with Compressed Air Connection..................................................................................37 Figure 4–21 Dynamometer with Blower Connection................................................................................................37 Figure 4–22 Examples of Possible Shaft Misalignment.............................................................................................38 Figure 4–23 Hysteresis Brake Cross-Section.............................................................................................................40 5. Operating Principles Figure 5–1 Mechanical Layout of a Load Cell..........................................................................................................42 6. Calibration Figure 6–1 Figure 6–2 Figure 6–3 Figure 6–4 Calibration Label....................................................................................................................................45 Calibration Setup....................................................................................................................................46 Calibration Potentiometers.....................................................................................................................47 Calibration Calculation..........................................................................................................................47 7. Optional Features Figure 7–1 Speed Encoder Schematic.......................................................................................................................49 8. Troubleshooting Figure 8–1 Damper Connection................................................................................................................................53 vi Preface Purpose of This Manual This manual contains all the information required for the setup and general use of Magtrol’s Hysteresis Dynamometers. To achieve maximum capability and ensure proper use of the dynamometer, please read this manual in its entirety before operating. Keep the manual in a safe place for quick reference whenever a question should arise. Who Should Use This Manual This manual is intended for those operators who are planning to use any of Magtrol’s Hysteresis Dynamometers. Manual Organization This section gives an overview of the structure of the manual and the information contained within it. Some information has been deliberately repeated in different sections of the document to minimize cross-referencing and to facilitate understanding through reiteration. The structure of the manual is as follows: Chapter 1: Introduction – Contains the technical data sheets for Magtrol’s Hysteresis Dynamometers, which describe the units and provide detailed technical characteristics. Chapter 2: INPUTS/OUTPUTS – Description of the elements located on the rear panel of the dynamometer. Chapter 3: INSTALLATION/CONFIGURATION – Provides information needed for setup of the dynamometer. This includes load cell shipping/restraining bolt removal, earth ground instruction and configurations for manual, computer-controlled and aircooled test setups. Chapter 4: TESTING – Provides information on how to run a test along with considerations that should be taken when operating the dynamometer. Chapter 5:OPERATING PRINCIPLES – Information pertaining to theory of operation including speed, torque, torque signal amplification, decimal point control, damper cylinder and brake control power. Chapter 6: CALIBRATION – Provides recommended calibration schedules along with stepby-step instructions for the calibration procedure. Chapter 7:OPTIONAL FEATURES – Provides information regarding various optional features available to enhance the capability of Magtrol’s Hysteresis Dynamometers including speed encoders and analog outputs. Chapter 8: TROUBLESHOOTING – Solutions to common problems encountered during setup and testing. Appendix A: CALIBRATION RECORD – Data sheet for tracking calibration results. Appendix B: SCHEMATICS – For the torque amplification board, speed sensor board, load cell and brake control power supplies. vi Preface Magtrol Hysteresis Dynamometers Conventions Used in This Manual The following symbols and type styles may be used in this manual to highlight certain parts of the text: Note: This is intended to draw the operator’s attention to complementary information or advice relating to the subject being treated. It introduces information enabling the correct and optimal function of the product. Caution:This is used to draw the operator’s attention to information, directives, procedures, etc. which, if ignored, may result in damage to the material being used. The associated text describes the necessary precautions to take and the consequences that may arise if these precautions are ignored. WARNING! This introduces directives, procedures, precautionary measures, etc. which must be executed or followed with the utmost care and attention, otherwise the personal safety of the operator or third party may be at risk. The reader must absolutely take note of the accompanying text, and act upon it, before proceeding further. When hearing protection is required, the stop sign is replaced with the ear muff symbol. vii 1.1 Introduction Unpacking Your Hysteresis Dynamometer Your Hysteresis Dynamometer was packaged in reusable, shock resistant packing material that will protect the instrument during normal handling. 1. Make sure the carton contains the following: Magtrol User Manual CD-Rom Line Cord (not included with 700 series or HD-825) Hysteresis Dynamometer 14-Pin Instrument Cable Brake Cable Calibration Certificate 2. Inspect the contents for any evidence of damage in shipping. In the event of shipping damage, immediately notify the carrier and Magtrol’s Customer Service Department. Note: Save all shipping cartons and packaging material for reuse when returning the instrument for calibration or servicing. 3. Remove the Shipping Bolt PLEASE TAKE NOTICE! Before proceeding any further, you will need to remove the load cell shipping/restraining bolt if you have just unpacked a new: HD-100HD-500HD-515HD-710 HD-106HD-505HD-700HD-715 HD-400HD-510HD-705ED-715 This does not apply to HD-800, HD-805, HD-810, HD-815, HD-825 or ED-815 Dynamometers. For further instruction see Section 3.1 Removal of the Load Cell Shipping/Restraining Bolt. Note: Retain the shipping/restraining bolt for future use when moving or shipping your Magtrol Dynamometer. 1 GENERAL INFORMATION 1. Chapter 1 – Introduction Features of the Hysteresis Dynamometer All Magtrol Hysteresis Dynamometers (HD and ED Series) feature the following: • Hysteresis Braking System: The dynamometers do not require speed to create torque, and therefore can provide a full motor ramp from free-run to locked rotor along with precise torque loading. • Air Flow Sensor: Any Magtrol Hysteresis Dynamometer that is internally ported for compressed air and/or blower cooling contains an air flow sensor that provides protection against overheating and operator error • Standard Torque Units: English, metric and SI are available. • Easy Calibration Unique features of each series are listed below. 1.2.1 HD Series Magtrol’s HD Series Dynamometers are versatile and ideal for testing in low to medium power ranges. Features include: • Accuracy: ±0.25% to ±0.5% full scale, depending on size and system configuration. • Custom Dynamometers: For special torque and speed requirements. • Encoder Switch: Optional feature that allows the user to switch between a 60 and 600-bit encoder or a 60 and 6000-bit encoder. 1.2.2 ED Series Magtrol’s ED Series Dynamometers are high performance dynamometers specifically designed to address the severe, high vibration conditions inherent in internal combustion engine testing. Features include: • Accuracy: ±0.25% full scale. • High Speed Capabilities: 12,000 to 25,000 rpm, depending on model. • Rugged Stainless Steel Shaft: Larger shaft for additional strength. • Specially Reinforced Load Cell: Stainless steel pin used at contact point to prevent premature wear from excess vibration. • Gusseted Pillow Blocks: Adds additional front and rear support. • Brake Cooling: Blower cooled to maximize heat dissipation. 2 GENERAL INFORMATION 1.2 Magtrol Hysteresis Dynamometers Chapter 1 – Introduction Magtrol Hysteresis Dynamometers HD / ED Data Sheet HD Hysteresis Dynamometers ED Engine Dynamometers HD Features eD Features • • • • • • • • • • 16StandardModelswithMaximumTorquefrom 2.5oz·into500lb·in(18mN·mto56.5N·m) HysteresisBrakingSystem:providesprecisetorque loadingindependentofshaftspeed MotorTesting:fromnoloadtolockedrotor StandardTorqueUnits:English,MetricandSI Accuracy:±0.25%to±0.5%(fullscale) AirFlowSensor:Forprotectionagainstoverheating andoperatorerror BasePlates:availableinlongorshortversions CustomDynamometers:forspecialtorqueandspeed requirements EasyCalibration • • • • • • • • • • MaximumTorque:from55lb·into250lb·in (6.5N·mto28N·m) HysteresisBrakingSystem MotorTesting:fromnoloadtolockedrotor StandardTorqueUnits:English,Metric&SIavailable Accuracy:±0.25%(fullscale) BlowerCooled:tomaximizeheatdissipation AirFlowSensor:forprotectionagainstoverheating andoperatorerror SpeciallyReinforcedLoadCell:stainlesssteelpinat contactpointpreventsprematurewearfromexcessvibration LargerShaft:foradditionalstrength GussetedPillowBlocks:foradditionalfrontandrear support EasyCalibration HD Description eD Description HysteresisBrakeDynamometers(HDSeries)areversatileand idealfortestinginthelowtomediumpowerrange(maximum 14kWintermittentduty).WithaHysteresisBrakingsystem, the Dynamometers do not require speed to create torque, andthereforecanprovideafullmotorrampfromfree-run tolockedrotor.Brakecoolingisprovidedbyconvection (noexternalsource),bycompressedairorbydedicated blower,dependingonthemodel.AllMagtrolHysteresis Dynamometershaveaccuracyratingsof±0.25%to±0.5% fullscale—dependingonsizeandsystemconfiguration. With Magtrol’s Engine Dynamometers, high performance motor testing is available to manufacturers and users of small engines. Magtrol’s Engine Dynamometers have been designedtoaddressthesevere,high vibration conditions inherent in internalcombustionenginetesting. Magtrol’s Engine Dynamometers are highly accurate (± 0.25% of full scale) and can be controlled eithermanuallyorviaaPCbased Controller.Forasmallenginetest stand, Magtrol offers a full line of controllers,readoutsandsoftware. Tobetterintegratedynamometersintosystems,Magtrol offers both long and short base plates. The shorter base plate facilitates easier motor Model HD-710 mountingwhenusedwithT-slottables Hysteresis Dynamometer and MagtrolAdjustable Motor AswithallMagtrolHysteresisDynamometers, with long base plate Fixtures,whereasthelongbase engineloadingisprovidedbyMagtrol’sHysteresis plates are better suited for table Brake,whichprovides:torqueindependentofspeed, toptesting. including full load at 0 rpm; excellent repeatability; frictionlesstorquewithnowearingparts(otherthanbearings); and long operating life with low maintenance. Magtrol HD applications provides a NIST traceable certificate of calibration, and calibrationbeamwitheachEngineDynamometer. Magtrol motor test systems can be found in test labs, at inspectionstations,andonthemanufacturingfloorsofmostof theworld’sleadingmanufacturers,usersandcertifiersofsmall eD applications tomediumsizedelectric,pneumaticandhydraulicmotors, TheEngineDynamometersareideallysuitedforemissions as well as internal combustion engines. Magtrol supplies testingassetforthinCARBandEPACleanAirRegulations. motortestsystemsforawidearrayofindustriesincluding: TheDynamometerswilloffersuperiorperformanceonthe Appliance,Automotive,Aviation, Computer, HVAC, Lawn productionline,atincominginspectionorintheR&Dlab. and Garden, Medical and Dental, Electric Motor, Office EquipmentandPowerTools. www.magtrol.com 1 3 GENERAL INFORMATION 1.3 M DataAGTROL Sheet Chapter 1 – Introduction Magtrol Hysteresis Dynamometers operating principles HD / ED Dynamometer selection POLE STRUCTURE SHAFT Magtrol’sHysteresisDynamometerscoverawiderangeof Torque,SpeedandMechanicalPowerratings.Toselectthe appropriatesizeDynamometerforyourmotortestingneeds, you will need to determine the Maximum Torque, Speed and PowerappliedtotheDynamometer. BALL BEARINGS Maximum Torque ROTOR (Drag Cup) FIELD COIL HUB AIR GAP Magtrol Hysteresis Dynamometers absorb power with a uniqueHysteresisBrakingSystemwhichprovidesfrictionless torqueloadingindependentofshaftspeed.TheHysteresis Brakeprovidestorquebytheuseoftwobasiccomponents—a reticulated pole structure and a specialty steel rotor/shaft assembly—fittedtogetherbutnotinphysicalcontact.Until thepolestructureisenergized,thedragcupcanspinfreely on its shaft bearings. When a magnetizing force from the fieldcoilisappliedtothepolestructure,theairgapbecomes afluxfieldandtherotorismagneticallyrestrained,providing abrakingactionbetweenthepolestructureandrotor. complete pc control Magtrol’sM-TEST7Softwareisastate-of-the-artmotortesting program forWindows®-based data acquisition. Used with a Magtrol Programmable Dynamometer Controller, Magtrol M-TEST 7 Software provides the control of any Magtrol Dynamometerandrunstestsequencesinamannerbestsuited totheoverallaccuracyandefficiencyoftheMagtrolMotorTest System.ThedatathatisgeneratedbyMagtrol’sMotorTesting Softwarecanbestored,displayedandprintedintabularorgraphic formats,andcanbeeasilyimportedintoaspreadsheet. WritteninLabVIEW™,M-TEST7hastheflexibilitytotest amajorityofmotortypesinavarietyofways.Becauseof LabVIEW’sversatility,obtainingdatafromothersources(e.g. thermocouples),controllingmotorpowerandprovidingaudio/ visualindicatorsisrelativelyeasy. Magtrol’sM-TEST7Softwareisidealforsimulatingloads, cyclingtheunitundertestandmotorramping.Becauseitis easytogatherdataandduplicatetests,thesoftwareisidealfor useinengineeringlabs.Testscanbeprogrammedtorunon theirownandsavedforfutureuseallowingforvaluabletime savingsinproductiontestingandincoming/outgoinginspection. The Magtrol Hysteresis Absorption Dynamometer will developbrakingtorqueatanyspeedpoint,includinglowspeed and stall conditions (“0” rpm). It is important to consider alltorquepointsthataretobetested,notonlyratedtorque, butalsolockedrotorandbreakdowntorque.Dynamometer selectionshouldinitiallybebasedonthemaximumtorque requirement, subject to determining the maximum power requirements. Maximum Speed This rating is to be considered independent of torque and power requirements, and is the maximum speed at which theDynamometercanbesafelyrununderfree-runorlightly loadedconditions.Itisnottobeconsideredasthemaximum speedatwhichfullbrakingtorquecanbeapplied. Maximum Power Ratings These ratings represent the maximum capability of the DynamometerBrakingSystemtoabsorbanddissipateheat generatedwhenapplyingabrakingloadtothemotorunder test. The power absorbed and the heat generated by the DynamometerisafunctionoftheTorque(T)appliedtothe motorundertest,andtheresultingSpeed(n)ofthemotor. Thisisexpressedinthesepower(P)formulas: SI: P(watts)=T(N·m)×n(rpm)×(1.047×10⁻¹) English:P(watts)=T(lb·in)×n(rpm)×(1.183×10⁻²) Metric: P(watts)=T(kg·cm)×n(rpm)×(1.027×10⁻²) All of Magtrol’s controllers, readouts and software calculate horsepower as defined by 1 hp = 550 lb·ft / s. Using this definition: hp=P(watts)/745.7 TheDynamometer’sabilitytodissipateheatisafunctionof howlongaloadwillbeapplied.Forthisreason,themaximum powerratingsgivenarebasedoncontinuousoperationunder load,aswellasamaximumof5minutesunderload. To safely dissipate heat and avoid Dynamometer failure, the maximum power rating is the most important consideration in selecting a Dynamometer. Magtrol offers three types of dynamometer brakes to absorb load: Hysteresis, Eddy Current and Magnetic Powder. Each type of Dynamometer has advantages and limitations and choosing the correct one will depend largely on the type of testing to be performed. With over 50 models to choose from, Magtrol Sales professionals are readily available to assist in selecting the proper Dynamometer to meet your testing needs. 2 4 M AGTROL GENERAL INFORMATION Principles and Selection Chapter 1 – Introduction Magtrol Hysteresis Dynamometers Model HD-106 HD-100 HD-400 HD-500 HD-510 HD-505 HD-515 HD-700 HD-710 HD-705 HD-715 HD / ED Torque Measure Unit Code Maximum Torque Range 5N** 6N 7N 8N 5N** 6N 7N 8N 5N** 6N 7N 8N 5N** 6N 7N 8N 5N** 6N 7N 8N 5N** 6N 7N 8N 5N** 6N 7N 8N 5N** 6N 7N 8N 5N** 6N 7N 8N 5N** 6N 7N 8N 5N** 6N 7N 8N 0.018 N·m 2.50 oz·in 180.0 g·cm 18.00 mN·m 0.08 N·m 11.00 oz·in 800 g·cm 80.0 mN·m 0.28 N·m 40.0 oz·in 2.80 kg·cm 280 mN·m 0.85 N·m 120.0 oz·in 8.50 kg·cm 850 mN·m 0.85 N·m 120.0 oz·in 8.50 kg·cm 850 mN·m 1.7 N·m 240 oz·in 17.00 kg·cm 1700 mN·m 1.7 N·m 240 oz·in 17.00 kg·cm 1700 mN·m 3.10 N·m 440 oz·in 31.0 kg·cm 3.10 N·m 3.10 N·m 440 oz·in 31.0 kg·cm 3.10 N·m 6.20 N·m 55.0 lb·in 62.0 kg·cm 6.20 N·m 6.20 N·m 55.0 lb·in 62.0 kg·cm 6.20 N·m Drag Torque De-Energized at 1000 rpm Nominal Input Inertia lb·ft·s² 0.056 mN·m 0.008 oz·in 7.04 × 10⁻⁷ 0.57 g·cm 0.056 mN·m 0.64 mN·m 0.09 oz·in 3.40 × 10⁻⁶ 6.5 g·cm 0.64 mN·m 2 mN·m 0.25 oz·in 1.55 × 10⁻⁵ 0.02 kg·cm 2 mN·m 5 mN·m 0.5 oz·in 8.05 × 10⁻⁵ 0.05 kg·cm 5 mN·m 5 mN·m 0.5 oz·in 8.05 × 10⁻⁵ 0.05 kg·cm 5 mN·m 10 mN·m 1.0 oz·in 1.61 × 10⁻⁴ 0.1 kg·cm 10 mN·m 10 mN·m 1.0 oz·in 1.61 × 10⁻⁴ 0.1 kg·cm 10 mN·m 0.013 N·m 2.0 oz·in 5.51 × 10⁻⁴ 0.14 kg·cm 0.013 N·m 0.013 N·m 2.0 oz·in 5.51 × 10⁻⁴ 0.14 kg·cm 0.013 N·m 0.023 N·m 0.2 lb·in 1.10 × 10⁻³ 0.24 kg·cm 0.023 N·m 0.023 N·m 0.2 lb·in 1.10 × 10⁻³ 0.24 kg·cm 0.023 N·m kg·m² Max. Power Ratings Maximum Speed 5 minute continuous*** W W rpm Brake Cooling Method 9.54 × 10⁻⁷ 35 7 30,000 Convection 4.61 × 10⁻⁶ 75 20 25,000 Convection 2.10 × 10⁻⁵ 200 55 25,000 Convection 1.09 × 10⁻⁴ 400 80 25,000 Convection 1.09 × 10⁻⁴ 750 375 25,000 Compressed Air * 2.18 × 10⁻⁴ 800 160 25,000 Convection 2.18 × 10⁻⁴ 1,500 900 25,000 Compressed Air * 7.47 × 10⁻⁴ 700 150 25,000 Convection 7.47 × 10⁻⁴ 1,500 935 25,000 1.49 × 10⁻³ 1,400 300 25,000 1.49 × 10⁻³ 3,400 3,000 25,000 (7 CFM @ 1.75 PSI) (10 CFM @ 4 PSI) Blower (included) Convection Blower (included) * Requires air cooling provided by user. Regulator and filter package is provided as standard equipment on these units. ** 5 Volt output *** NOTE: Operating at the continuous power rating for periods of up to 4 hours is acceptable. However, operating for extended periods at high temperatures will result in premature component and bearing failure. Limiting the length of the cycle and the component temperatures will guard against premature failure. Where continuous duty is desired for longer time intervals, component temperatures should be maintained less than 100°C; monitoring the outside brake surface temperature is a sufficient reference. 3 5 M AGTROL GENERAL INFORMATION Ratings Chapter 1 – Introduction Magtrol Hysteresis Dynamometers HD-800 HD-810 HD-805 HD-815 HD-825 5N** 6N 7N 8N 5N** 6N 7N 8N 5N** 6N 7N 8N 5N** 6N 7N 8N 5N** 6N 7N 8N HD / ED 14.00 N·m 125.0 lb·in 140.0 kg·cm 14.00 N·m 14.00 N·m 125.0 lb·in 140.0 kg·cm 14.00 N·m 28.0 N·m 250 lb·in 280 kg·cm 28.0 N·m 28.0 N·m 250 lb·in 280 kg·cm 28.0 N·m 56.5 N·m 500 lb·in 565 kg·cm 56.5 N·m 0.10 N·m 0.8 lb·in 1.0 kg·cm 0.10 N·m 0.10 N·m 0.8 lb·in 1.0 kg·cm 0.10 N·m 0.14 N·m 1.2 lb·in 1.5 kg·cm 0.14 N·m 0.14 N·m 1.2 lb·in 1.5 kg·cm 0.14 N·m 0.22 N·m 3.5 lb·in 4.0 kg·cm 0.40 N·m 4.43 × 10⁻³ 6.01 × 10⁻³ 2,800 1,800 Compressed Air * 12,000 4.43 × 10⁻³ 6.01 × 10⁻³ 3,500 3,000 12,000 8.81 × 10⁻³ 1.19 × 10⁻² 5,300 3,000 12,000 8.81 × 10⁻³ 1.19 × 10⁻² 7,000 6,000 12,000 1.85 × 10⁻² 2.51 × 10⁻² 14,000 12,000 8,000 (13 CFM @ 10 PSI) Blower (included) Compressed Air * (15 CFM @ 14 PSI) Blower (included) Blower (included) * Requires air cooling provided by user. Regulator and filter package is provided as standard equipment on these units. ** 5 Volt output *** NOTE: Operating at the continuous power rating for periods of up to 4 hours is acceptable. However, operating for extended periods at high temperatures will result in premature component and bearing failure. Limiting the length of the cycle and the component temperatures will guard against premature failure. Where continuous duty is desired for longer time intervals, component temperatures should be maintained less than 100°C; monitoring the outside brake surface temperature is a sufficient reference. Model ED-715 ED-815 Torque Measure Unit Code Maximum Torque Range 5N** 6N 7N 8N 5N** 6N 7N 8N 6.20 N·m 55.0 lb·in 62.0 kg·cm 6.20 N·m 28.0 N·m 250 lb·in 280 kg·cm 28.0 N·m Drag Torque De-Energized at 1000 rpm Nominal Input Inertia lb·ft·s² kg·m² 0.035 N·m 0.3 lb·in 1.27 × 10⁻³ 1.72 × 10⁻³ 0.36 kg·cm 0.035 N·m 0.14 N·m 1.2 lb·in 9.61 × 10⁻³ 1.30 × 10⁻² 1.4 kg·cm 0.14 N·m Max. Power Ratings Maximum 5 minute continuous*** Speed * hp W hp W rpm 5 3400 4 3000 25,000 10 7000 8 6000 12,000 Brake Cooling Method Blower (included) Blower (included) * The maximum speed will depend on what type of keyway (if any) is used on the shaft. Unless specified, the dynamometer shaft will be made without a keyway. ** 5 Volt Output *** NOTE: Operating at the continuous power rating for periods of up to 4 hours is acceptable. However, operating for extended periods at high temperatures will result in premature component and bearing failure. Limiting the length of the cycle and the component temperatures will guard against premature failure. Where continuous duty is desired for longer time intervals, component temperatures should be maintained less than 100°C; monitoring the outside brake surface temperature is a sufficient reference. 4 6 M AGTROL GENERAL INFORMATION Ratings Chapter 1 – Introduction Magtrol Hysteresis Dynamometers HD / ED electrical power anD Fuses Model HD-1XX-XN HD-1XX-XNA HD-4XX-XN HD-4XX-XNA HD-5XX-XN HD-5XX-XNA HD-800-XN HD-800-XNA HD-810-XN HD-810-XNA HD-805-XN HD-805-XNA HD/ED-815-XN HD/ED-815-XNA HD-825-XN HD-825-XNA Voltage 120 V 240 V 120 V 240 V 120 V 240 V 120 V 240 V 120 V 240 V 120 V 240 V 120 V 240 V 120 V 240 V VA 30 30 30 30 30 30 65 65 65 65 130 130 130 130 N/A N/A Style UL/CSA IEC UL/CSA IEC UL/CSA IEC UL/CSA IEC UL/CSA IEC UL/CSA IEC UL/CSA IEC N/A N/A 300 mA 125 mA 300 mA 125 mA 300 mA 125 mA 800 mA 315 mA 800 mA 315 mA 1.25 A 630 mA 1.25 A 630 mA N/A N/A Rating 250 V 250 V 250 V 250 V 250 V 250 V 250 V 250 V 250 V 250 V 250 V 250 V 250 V 250 V SB T SB T SB T SB T SB T SB T SB T Blower power anD Fuses • ModelsHD-710,HD-715,HD-810andED-715 includetheBL-001blower. • ModelsHD-815andED-815includetheBL-002 blower. • ModelHD-825usestwoBL-002blowersfor coolingitstwobrakesets. Model BL-001 BL-001A BL-002 BL-002A Voltage 120 V 240 V 120 V 240 V VA 600 500 1000 1000 Style UL/CSA IEC UL/CSA IEC 6.3 A 3.15 A 15 A 6.3 A Rating 250 V 250 V 250 V 250 V SB T SB T Blower Dimensions Allow approximately 6in to 8 in (152mm to 203mm) between rear of dynamometer base plate and blower for connection hardware. Requiredhardwareissuppliedwiththe dynamometer. BL-002 Blower has two filter elements. ØA Air Filter Model E Dyno. Brake Air Outlet B C On/Off Switch 120 VAC 60 Hz G F ØA B C D E F G Weight BL-001 in mm 6 152 11 279 6 152 8 203 4 102 8 203 1 25 8.5 lb 3.9 kg BL-002 in mm 6 152 11 279 6 152 15 381 4 102 12 305 1 25 18 lb 8.1 kg D 5 7 M AGTROL GENERAL INFORMATION Ratings Chapter 1 – Introduction Magtrol Hysteresis Dynamometers HD / ED NOTE: Original dimensions are in English units. Dimensions converted to Metric units have been rounded and are for reference only. HD-100/400/500 series witH long Base plate E J A P Q H ØB C ØN SHAFT END DETAIL (2:1) (FLAT) G L M F D Model HD-106 HD-100 HD-400 HD-500 HD-510 HD-505 HD-515 units in mm in mm in mm in mm in mm in mm in mm A 0.50 12.7 0.75 19.1 0.67 17.0 0.88 22.2 0.88 22.2 0.88 22.2 0.88 22.2 ØB 0.1245/0.1247 3.162/3.167 0.1870/0.1875 4.750/4.763 0.2495/0.2497 6.337/6.342 0.3745/0.3750 9.512/9.525 0.3745/0.3750 9.512/9.525 0.3745/0.3750 9.512/9.525 0.3745/0.3750 9.512/9.525 C 3.5 88.9 3.5 88.9 3.5 88.9 4.0 101.6 4.0 101.6 4.0 101.6 4.0 101.6 D 17 432 17 432 17 432 17 432 17 432 20 508 20 508 E 9.38 238.3 9.13 231.9 9.13 231.9 9.13 231.9 9.13 231.9 9.64 244.9 9.64 244.9 F 10 254 10 254 10 254 10 254 10 254 10 254 10 254 G 0.5 12.7 0.5 12.7 0.5 12.7 0.5 12.7 0.5 12.7 0.5 12.7 0.5 12.7 H 6.3 159 6.3 159 6.3 159 6.3 159 6.3 159 6.3 159 6.3 159 J 8.5 216 8.5 216 8.5 216 8.5 216 8.5 216 8.5 216 8.5 216 L* 15.5 394 15.5 394 15.5 394 15.5 394 15.5 394 18.5 470 18.5 470 M* 8.5 216 8.5 216 8.5 216 8.5 216 8.5 216 8.5 216 8.5 216 ØN P Q Weight 0.37 0.015 0.375 12.0 lb 9.4 0.38 9.53 5.4 kg 0.37 0.025 0.375 12.5 lb 9.4 0.64 9.53 5.7 kg 0.37 0.03 0.438 15.0 lb 9.4 0.76 11.13 6.8 kg 0.37 0.047 0.375 16.0 lb 9.4 1.19 9.53 7.3 kg 0.37 16.0 lb N/A 9.4 7.3 kg 0.37 0.05 0.375 18.0 lb 9.4 1.27 9.53 8.1 kg 0.37 18.0 lb N/A 9.4 8.1 kg HD-100/400/500 series witH sHort Base plate J Q P ØB A SHAFT END DETAIL (2:1) (FLAT) H ØN C G L Model units in HD-106 mm in HD-100 mm in HD-400 mm in HD-500 mm in HD-510 mm in HD-505 mm in HD-515 mm A 0.50 12.7 0.75 19.1 0.67 17.0 0.88 22.2 0.88 22.2 0.88 22.2 0.88 22.2 ØB 0.1245/0.1247 3.162/3.167 0.1870/0.1875 4.750/4.763 0.2495/0.2497 6.337/6.342 0.3745/0.3750 9.512/9.525 0.3745/0.3750 9.512/9.525 0.3745/0.3750 9.512/9.525 0.3745/0.3750 9.512/9.525 M F E D C 3.5 88.9 3.5 88.9 3.5 88.9 4.0 101.6 4.0 101.6 4.0 101.6 4.0 101.6 D 7.0 177.8 7.0 177.8 7.0 177.8 7.0 177.8 8.0 203.2 9.5 241.3 10.25 260.4 E 0.33 8.4 0.08 2.1 0.08 2.1 0.08 2.1 0.13 3.2 0.10 2.6 0.10 2.6 F 11 279.4 11 279.4 11 279.4 11 279.4 11 279.4 11 279.4 11 279.4 G 0.5 12.7 0.5 12.7 0.5 12.7 0.5 12.7 0.5 12.7 0.5 12.7 0.5 12.7 H 6.3 159 6.3 159 6.3 159 6.3 159 6.3 159 6.3 159 6.3 159 J 8.5 216 8.5 216 8.5 216 8.5 216 8.5 216 8.5 216 8.5 216 L* 6.0 152.4 6.0 152.4 6.0 152.4 6.0 152.4 7.0 177.8 8.5 215.9 9.25 234.9 M* 9.84 250 9.84 250 9.84 250 9.84 250 9.84 250 9.84 250 9.84 250 ØN P Q Weight 0.35 0.015 0.375 7.5 lb 9 0.38 9.53 3.4 kg 0.35 0.025 0.375 8.0 lb 9 0.64 9.53 3.6 kg 0.35 0.03 0.438 11.0 lb 9 0.76 11.13 5.0 kg 0.35 0.047 0.375 12.0 lb 9 1.19 9.53 5.4 kg 0.35 12.5 lb N/A 9 5.7 kg 0.35 0.05 0.375 13.0 lb 9 1.27 9.53 5.9 kg 0.35 13.0 lb N/A 9 5.9 kg * These dimensions represent the distance between mounting holes. There are four (4) mounting holes on each base plate. 6 8 M AGTROL GENERAL INFORMATION Dimensions Chapter 1 – Introduction Magtrol Hysteresis Dynamometers HD / ED HD-700 series witH long Base plate J E A P Q H ØB C SHAFT END DETAIL (2:1) (FLAT) G ØN L D Model units in mm in HD-710 mm in HD-705 mm in HD-715 mm HD-700 A 1.25 31.8 1.25 31.8 1.25 31.8 1.25 31.8 ØB 0.4995/0.4999 12.687/12.692 0.4995/0.4999 12.687/12.697 0.4995/0.4999 12.687/12.692 0.4995/0.4999 12.687/12.697 M F C 5.875 149.2 5.875 149.2 5.875 149.2 5.875 149.2 D 24 609.6 26 660.4 28 711.2 30 762.0 E 12.75 323.9 13.59 345.2 13.62 346.0 14.29 363.0 F 11 279.4 11 279.4 11 279.4 11 279.4 G 0.625 15.9 0.625 15.9 0.625 15.9 0.625 15.9 H 9.5 241.3 9.5 241.3 9.5 241.3 9.5 241.3 J 10 254 10 254 10 254 10 254 L* 22.5 571.5 24.5 622.3 26.5 673.1 28.5 723.9 M* 9.5 241.3 9.5 241.3 9.5 241.3 9.5 241.3 ØN 0.375 9.5 0.375 9.5 0.375 9.5 0.375 9.5 P 0.06 1.6 Q Weight 0.63 39 lb 15.9 17.63 kg 45 lb N/A 20.30 kg 0.06 0.63 52 lb 1.6 15.9 23.50 kg 59 lb N/A 26.60 kg HD-700 series witH sHort Base plate J P Q A ØB SHAFT END DETAIL (2:1) (FLAT) H C ØN G L D Model HD-700 HD-710 HD-705 HD-715 units in mm in mm in mm in mm A 1.25 31.8 1.25 31.8 1.25 31.8 1.25 31.8 ØB 0.4995/0.4999 12.687/12.692 0.4995/0.4999 12.687/12.697 0.4995/0.4999 12.687/12.692 0.4995/0.4999 12.687/12.697 M F E C 5.875 149.2 5.875 149.2 5.875 149.2 5.875 149.2 D 11.34 288.0 12.50 317.5 14.45 367.0 15.75 400.0 E 0.09 2.2 0.09 2.3 0.07 1.8 0.04 1.1 F 11 279.4 11 279.4 11 279.4 11 279.4 G 0.625 15.9 0.625 15.9 0.625 15.9 0.625 15.9 H 9.5 241.3 9.5 241.3 9.5 241.3 9.5 241.3 J 10 254 10 254 10 254 10 254 L* 9.84 250.0 11.00 279.5 12.95 329.0 14.25 362.0 M* 9.84 250 9.84 250 9.84 250 9.84 250 ØN 0.35 9 0.35 9 0.35 9 0.35 9 P 0.06 1.6 Q Weight 0.63 30 lb 15.9 13.6 kg 36 lb N/A 16.3 kg 0.06 0.63 43 lb 1.6 15.9 19.5 kg 50 lb N/A 22.7 kg eD-series engine Dynamometers Q A P R ØB H SHAFT END DETAIL (2:1) (SQUARE KEY) B C ØN G M F L D E Model units in ED-715 mm in ED-815 mm A 1.72 43.7 3.02 76.7 ØB C D E 0.7490/0.7495 6.87 16.00 18.13 19.025/19.037 174.5 406.4 460.5 1.4995/1.5000 11.00 23.00 23.27 38.087/38.100 279.4 584.2 591.1 F 11.00 279.4 17.00 431.8 G 1.00 25.4 2.00 50.8 H 10.50 266.7 16.63 422.4 L* M* ØN P Q R 14.50 9.50 0.37 0.64 1.00 0.187 368.3 241.3 9.4 16.35 25.4 4.83 20.80 15.00 5/8-11 1.287 2.00 0.375 528.3 381.0 THD 32.7 50.8 9.53 Weight 75 lb 34 kg 285 lb 129.3 kg * These dimensions represent the distance between mounting holes. There are four (4) mounting holes on each base plate. 7 9 M AGTROL GENERAL INFORMATION Dimensions Chapter 1 – Introduction Magtrol Hysteresis Dynamometers HD / ED HD-800 series witH long Base plate E J A ØB H K C ØN NOTE: For detailed dimension drawings of dynamometers with the T-slot base plate option, visit Magtrol’s Web site. G M F L D Model units in mm in HD-810 mm in HD-805 mm in HD-815 mm HD-800 A 2.13 54 2.05 52 2.13 54 2.25 57 ØB 0.9995/1.0000 25.387/25.400 0.9995/1.0000 25.387/25.400 0.9995/1.0000 25.387/25.400 0.9995/1.0000 25.387/25.400 C D 38.5 978 38.5 978 38.5 978 38.5 978 9 228.6 9 228.6 9 228.6 9 228.6 E 23.81 605 23.09 587 20.57 522 18.19 462 F 17 432 17 432 17 432 17 432 G H 14.6 371 14.6 371 14.6 371 14.6 371 2 50.8 2 50.8 2 50.8 2 50.8 J 14 356 14 356 14 356 14 356 K 21.4 544 20.7 526 18.2 462 15.7 399 L* 36.5 927 36.5 927 36.5 927 36.5 927 M* 15 381 15 381 15 381 15 381 ØN 0.53 13.5 0.53 13.5 0.54 13.7 0.54 13.7 Weight 237.0 lb 107.2 kg 233.0 lb 105.3 kg 287.0 lb 129.7 kg 288.0 lb 130.1 kg M* 15.75 400 15.75 400 15.75 400 15.75 400 ØN 0.35 9 0.35 9 0.35 9 0.35 9 Weight 168.0 lb 76.2 kg 164.0 lb 74.4 kg 228.0 lb 103.4 kg 236.0 lb 107.0 kg HD-800 series witH sHort Base plate J E A ØB H K C ØN G M F L D Model units in mm in HD-810 mm in HD-805 mm in HD-815 mm HD-800 A 2.13 54 2.05 52 2.13 54 2.12 54 An HD-825 Dynamometer with long base plate is available if ordered with the accompanying dynamometer table (TAB 0825L). Contact Magtrol for details. ØB 0.9995/1.0000 25.387/25.400 0.9995/1.0000 25.387/25.400 0.9995/1.0000 25.387/25.400 0.9995/1.0000 25.387/25.400 C D 17.25 438 18.00 457 20.50 520 23.00 584 9 228.6 9 228.6 9 228.6 9 228.6 E 2.56 65 2.59 66 2.57 65 2.59 66 F 17 432 17 432 17 432 17 432 G H 14.6 371 14.6 371 14.6 371 14.6 371 2 50.8 2 50.8 2 50.8 2 50.8 E J 14 356 14 356 14 356 14 356 K 0.15 3.8 0.18 4.5 0.1 2.5 0.2 5.1 L* 13.78 350 14.06 357 15.75 400 19.09 485 J A H C T L D S G ØN M F Q P R ØB SHAFT END DETAIL (2:1) (SQUARE KEY) Model units A ØB C D E F G H J L* M* Ø N P Q R S T Weight 11 38.5 38.93 17 2 16.6 14 36.5 15 0.54 1.287 2 0.376 2 1 400.0 lb in 2.83 1.4995/1.5000 72 38.087/38.100 279.4 978 989 432 50.8 422 356 927 381 13.7 32.69 50.8 9.53 50.8 25.4 181.4 kg mm HD-825 * These dimensions represent the distance between mounting holes. There are four (4) mounting holes on each base plate. 8 10 M AGTROL GENERAL INFORMATION Dimensions Chapter 1 – Introduction Magtrol Hysteresis Dynamometers 9 30000 25000 20000 15000 10000 5000 0 30000 25000 20000 15000 10000 5000 0 0 0 0.5 3.6 1 1.5 7.2 10.8 TORQUE 2 14.4 Maximum Torque for Dynamometer 2.5 (oz·in) 18 (mN·m) HD-106 The power absorption curves represent the maximum power (heat) that the dynamometer can dissipate over time. 0 0 0.5 3.6 1 1.5 7.2 10.8 TORQUE 2 14.4 2.5 (oz·in) 18 (mN·m) HD-100 0 0 2.2 16 4.4 6.6 32 48 TORQUE 8.8 64 11 (oz·in) 80 (mN·m) HD-500 SPEED (rpm) 30000 25000 20000 15000 10000 5000 0 Maximum Kinetic Power Rating Curve for Less Than Five Minutes: Area under curve equals the maximum speed and torque combinations for a motor test of less than five minutes. SPEED (rpm) 36000 30000 24000 18000 12000 6000 0 36000 30000 24000 18000 12000 6000 0 0 0 24 170 48 72 340 510 TORQUE 96 680 120 (oz·in) 850 (mN·m) HD-505 SPEED (rpm) SPEED (rpm) SPEED (rpm) SPEED (rpm) SPEED (rpm) Maximum Kinetic Power Rating Curve for Continuous Duty: Area under curve equals the maximum speed and torque combinations for a continuous duty motor test. SPEED (rpm) Maximum Rated Speed for Dynamometer HD / ED 0 0 48 340 96 144 680 1020 TORQUE 192 1360 240 (oz·in) 1700 (mN·m) 11 30000 25000 20000 15000 10000 5000 0 30000 25000 20000 15000 10000 5000 0 30000 25000 20000 15000 10000 5000 0 HD-400 0 0 8 56 16 24 112 168 TORQUE 32 224 40 (oz·in) 280 (mN·m) 96 680 120 (oz·in) 850 (mN·m) 192 1360 240 (oz·in) 1700 (mN·m) HD-510 0 0 24 170 48 72 340 510 TORQUE HD-515 0 0 48 340 96 144 680 1020 TORQUE M AGTROL GENERAL INFORMATION Power Absorption Curves Chapter 1 – Introduction Magtrol Hysteresis Dynamometers HD-700 25000 20000 15000 10000 5000 0 0 0 88 0.62 15000 10000 5000 0 0 0 11 1.24 22 33 2.48 3.72 TORQUE 44 4.96 55 (lb·in) 6.20 (N·m) HD-800 SPEED (rpm) 9000 6000 3000 0 0 25 2.8 50 75 5.6 8.4 TORQUE 100 11.2 SPEED (rpm) 9000 6000 3000 0 0 50 5.6 100 150 11.3 16.8 TORQUE 200 22.4 352 2.48 440 (oz·in) 3.10 (N·m) 15000 10000 5000 0 0 0 11 1.24 22 33 2.48 3.72 TORQUE 44 4.96 55 (lb·in) 6.20 (N·m) 100 11.2 125 (lb·in) 14.0 (N·m) HD-810 12000 9000 6000 3000 0 0 25 2.8 50 75 5.6 8.4 TORQUE HD-815 and ED-815 12000 9000 6000 3000 0 250 (lb·in) 28 (N·m) 176 264 1.24 1.86 TORQUE HD-715 and ED-715 15000 12000 0 88 0.62 25000 20000 0 125 (lb·in) 14.0 (N·m) HD-805 15000 0 0 15000 12000 0 25000 20000 15000 10000 5000 0 30000 SPEED (rpm) SPEED (rpm) SPEED (rpm) 440 (oz·in) 3.10 (N·m) 25000 20000 15000 SPEED (rpm) 352 2.48 HD-705 30000 0 0 50 5.6 100 150 11.3 16.8 TORQUE 200 22.4 250 (lb·in) 28 (N·m) HD-825 10000 SPEED (rpm) 176 264 1.24 1.86 TORQUE HD-710 30000 SPEED (rpm) SPEED (rpm) 30000 8000 6000 The power absorption curves represent the maximum power (heat) that the dynamometer can dissipate over time. 4000 2000 0 10 HD / ED 0 0 100 11.3 200 300 22.6 33.9 TORQUE 400 45.2 500 (lb·in) 56.5 (N·m) 12 M AGTROL GENERAL INFORMATION Power Absorption Curves Chapter 1 – Introduction Magtrol Hysteresis Dynamometers HD / ED open loop systems MagtroloffersbothopenloopmanualtestsystemsandPC-basedclosedlooptestsystems.Atypicalopenloopsystemwill consistofaDynamometerandaMagtrol6200Open-LoopController.AMagtrolSingleorThree-PhasePowerAnalyzer,which allowsforthecapturingofvolts,amps,wattsandpowerfactor,canbeincludedasanoption.Anopenloopsystemisoftenused forquickpass/failtestingontheproductionlineoratincominginspection.Magtrol’s6200Controllerprovidespass/failtesting asastandardfeature. Dynamometer with 6200 Controller HD / ED DYNAMOMETER o---------o---o---------- 6200 CONTROLLER 1 2 Pin Dynamometer Brake Cable PN88M070-0150 (included with dynamometer) 14 Pin/14 Pin Instrument Cable PN88M007-0150 (included with dynamometer) closeD loop systems Inaclosedloopmotortestsystem,dataiscollectedonaPCusingMagtrol’sM-TESTSoftware,DSP7000Programmable DynamometerController,andrequisiteinterfacecardsandcables.Magtrol’sModel6200andDSP7000Controllerscomputeand displaymechanicalpower(inhorsepowerorwatts)inadditiontotorqueandspeed.ASingleorThreePhasePowerAnalyzer, a required component in a test system measuring motor efficiency, can be integrated into this system as well as Magtrol’s TemperatureTestingHardware. Dynamometer with DSP7001 Controller and M-TEST Software HD / ED DYNAMOMETER DSP7001 CONTROLLER o---------o---o---------- PC M-TEST 1 USB 2 Pin Dynamometer Brake Cable PN88M070-0150 (included with dynamometer) 14 Pin/14 Pin Instrument Cable PN88M007-0150 (included with dynamometer) Dynamometer with 6510e Power Analyzer, DSP7001 Controller and M-TEST Software 6510e POWER ANALYZER AC/DC Input Power HD / ED DYNAMOMETER DSP7001 CONTROLLER o---------o---o---------- 1 PC GPIB Card M-TEST USB 2 Pin Dynamometer Brake Cable PN88M070-0150 (included with dynamometer) 14 Pin/14 Pin Instrument Cable PN88M007-0150 (included with dynamometer) 11 13 M AGTROL GENERAL INFORMATION System Configurations Chapter 1 – Introduction Magtrol Hysteresis Dynamometers HD / ED custom motor test system HDSeriesHysteresisDynamometerscanbeincorporatedintoaCustomizedMotorTestSystem.ThesePCbased,turn-key systemsarecustomdesignedandbuilttomeetspecificuserrequirements. heavy-duty equipment rack emergency stop button M-TEST Motor Testing Software side panel connectors allow for easy hook-up LCD monitor 6530 Power Analyzer AMF Adjustable Motor Fixture DSP7000 Dynamometer Controller space for rackmounted third-party power supply and computer HD Hysteresis Dynamometer keyboard drawer Dynamometer Table M AGTROL 12 14 GENERAL INFORMATION System Configurations Chapter 1 – Introduction Magtrol Hysteresis Dynamometers Dynamometer options HD / ED orDering inFormation Encoder Options For Low Speed Testing MODEL NUMBER: Forlowspeedmotors,suchasgearmotorswithmaximumspeeds oflessthan200rpm,Magtroloffersadditionalencoderoptions thatallowforincreasedresolutionofthespeedsignal. DYNAMOMETER TYPE • Hysteresis • Engine T-Slot Base Plate TORQUE UNITS • 5 V Output • English (U.S.) • Metric • SI ToaccommodateMagtrolAMF-3AdjustableMotorFixtures, a grooved base plate with three M12T-slots, one centered and two 250 mm apart, is available on all HD-800 series dynamometers. custom Dynamometers High Speed Testing Forcertainmodels,MagtrolcanprovideDynamometerswhich canoperateathigherthanratedspeeds. Mechanical Modifications Magtrolcanprovidecustomizedbaseplates,riserblocksand shaftmodifications. GENERAL INFORMATION Ordering Information D– – N –0 HD 100 – 825 ED 715 – 815 5N 6N 7N 8N POWER OPERATION • 120 VAC (standard) • 240 VAC (option) (blank) A BASE PLATE • long 0 • short 1 • long with T-slots (available on HD-800 series only)2 • ED dynamometers 0 SPEED ENCODER • 60 bit (standard) 00 • 60 and 600 bit 30 • 60 and 6000 bit 40 *Contact sales regarding speed encoders for HD-100 through HD-500 series dynamometers. system options anD accessories CATEGORY DESCRIPTION High-Speed Programmable Dynamometer Controller CONTROLLERS Open Loop Dynamometer Controller POWER High-Speed Single-Phase Power Analyzer ANALYZERS High-Speed Three-Phase Power Analyzer M-TEST 7 Motor Testing Software SOFTWARE Temperature Testing Hardware POWER SUPPLIES MISC. ELECTRONICS MODEL / PART # DSP7000 6200 6510e 6530 M-TEST 7 HW-TTEST 5241 Power Amplifier – included with all HD-825 dynamometers Manually Controlled Switch Box Direction Indicator Table (with grooved table top) for HD-100/400/500/700 series short base plate dynamometers and ED-715* Table (drilled and tapped) for HD-100/400/500/700 series long base plate DYNAMOMETER dynamometers TABLES Table for HD-800 series long base plate dynamometers and ED-815* (base of dynamometer also serves as the table top) Table for HD-825 long base plate dynamometers MOTOR Adjustable Motor Fixtures FIXTURES Fixed Motor Fixtures CALIBRATION Calibration Beam Assemblies and Calibration Weights 5500 5600 TAB 1457S TAB 1457L TAB 0800L TAB 0825L AMF Series FMF Series CB and WT Series * Mounting of ED Engine Dynamometers to dynamometer tables requires certain modifications. Contact Magtrol for details. Due to the continual development of our products, we reserve the right to modify specifications without forewarning. magtrol inc 70 Gardenville Parkway Buffalo, New York 14224 USA Phone: +1 716 668 5555 Fax: +1 716 668 8705 E-mail: [email protected] magtrol sa Route de Montena 77 1728 Rossens / Fribourg, Switzerland Phone: +41 (0)26 407 3000 Fax: +41 (0)26 407 15 3001 E-mail: [email protected] Subsidiaries in: Germany • France China • India Worldwide Network of Sales Agents HD-US 05/15 www.magtrol.com 2.1 Rear Panel The rear panel provides connectors and receptacles for connecting to appropriate equipment. + speed encoder xxxx bit 60 bit + CW Calibration zero CCW Calibration magtrol + + + + Figure 2–1 Rear Panel 2.2 Rear Panel Inputs and Outputs DYNAMOMETER Connect dynamometer brake cable here. BRAKE INPUT Figure 2–2 Dynamometer Brake Input DYNAMOMETER Connect dynamometer signal cable here. CONNECTOR 7 6 5 4 3 2 1 14 13 12 11 10 9 8 1. FLOW/CLUTCH 2. TACH. B 3. +24 VDC 4. +24 VDC COM 5. -24 VDC COM 6. -24 VDC 7. +5.0 VDC 8. +5.0 VDC COM 9. D.P. A 10. TACH. A 11. INDEX 12. D.P. B 13. TORQUE COMMON 14. TORQUE SIGNAL Figure 2–3 Dynamometer Connector 16 GENERAL INFORMATION 2. Inputs/Outputs Chapter 2 – Controls Magtrol Hysteresis Dynamometers POTENTIOMETER Adjust clockwise (CW), zero and counterclockwise (CCW) calibration here. See Chapter 6 – Calibration. CW Calibration Zero CCW Calibration Figure 2–4 Calibration Potentiometers ENCODER SWITCH Optional feature switches between a 60 and 600-bit encoder or a 60 and 6000-bit encoder. Speed Encoder xxxx Bit 60 Bit Figure 2–5 Speed Encoder Switch BLOWER INPUT Connect blower tube here. For HD-710, HD-715, HD-810, HD-815, HD-825, ED-715 and ED-815 Dynamometers only. Warning! Due to the noise levels of the blowers, hearing protection must be worn during operation. Figure 2–6 Blower Input COMPRESSED AIR INPUT Connect compressed shop air line here. For HD-510, HD-515, HD-800 and HD-805 Dynamometers only. Figure 2–7 Compressed Air Input 17 GENERAL INFORMATION CALIBRATION 3. Installation/Configuration 3.1 Removal of the Load cell Shipping/Restraining Bolt Within the dynamometer enclosure there is a load cell shipping/restraining bolt that must be removed before dynamometer operation. The bolts are identified with red heads. Refer to the diagrams below for the bolt location on your model. Retain the shipping/restraining bolt for future use when moving or shipping your Magtrol Dynamometer. HD-100, -400 and -500 Series The shipping/restraining bolt is located on the bottom of the HD 100-500 Series Hysteresis Dynamometers as shown in Figure 3–1. SHIPPING BOLT Figure 3–1 HD 100–500 Series Shipping/Restraining Bolt Location 18 SETUP 3.1.1 Note: Chapter 3 – Installation/Configuration Magtrol Hysteresis Dynamometers 3.1.2 HD-700 Series The shipping/restraining bolt is located on the front side of the HD-700 Series Hysteresis Dynamometers as shown in Figure 3–2. SETUP SHIPPING BOLT Figure 3–2 HD-700 Series Shipping/Restraining Bolt Location 3.1.3 HD-800 Series There is no shipping/restraining bolt on an HD-800 Series Hysteresis Dynamometer. 3.1.4 ED-715 The shipping/restraining bolt is located on the front side of the ED-715 dynamometer as shown in Figure 3–3. SHIPPING BOLT Figure 3–3 ED-715 Shipping/Restraining Bolt Location 3.1.5 ED-815 There is no shipping/restraining bolt on an ED-815 dynamometer. 19 Chapter 3 – Installation/Configuration Earth Ground Before proceeding any further, the dynamometer must be connected to earth ground. The earth ground is located on the top of the dynamometer as indicated in the following diagrams by the earth ground symbol. EARTH GROUND SETUP Figure 3–4 HD 100–500 Series Top View The following diagram is to be referenced for all HD-700, -800 series and ED dynamometers. Caution Caution lifting by brake assembly may Cause damage to torque sensor EARTH GROUND brake surfaCes may beCome hot 3.2 Magtrol Hysteresis Dynamometers Figure 3–5 HD-800 Series Top View 20 Chapter 3 – Installation/Configuration Magtrol Hysteresis Dynamometers 3.3 System Configurations After the load cell shipping/restraining bolt has been removed and the dynamometer has been earth grounded, the unit is ready for connection to the appropriate readout instrument and power supply. 3.3.1 Manual Test Systems The dynamometer can be set up as a manual test system for quick pass/fail testing on the production line or at incoming inspection. A typical manual test system will consist of a Magtrol Hysteresis Dynamometer used in conjunction with a Magtrol 6200 Open-Loop Controller. Note: Magtrol’s Single or Three-Phase Power Analyzer may be included as an option. The following diagram illustrates the required cable sets and connections for a manual test system setup. HD / ED DYNAMOMETER o---------o---o---------- 6200 CONTROLLER 1 2 Pin Dynamometer Brake Cable PN88M070-0150 (included with dynamometer) 14 Pin/14 Pin Instrument Cable PN88M007-0150 (included with dynamometer) Figure 3–6 Dynamometer with 6200 Controller 21 SETUP Chapter 3 – Installation/Configuration 3.3.2 Magtrol Hysteresis Dynamometers PC-Based Test Systems In a PC-based motor test system, data is collected on a personal computer using Magtrol’s M‑TEST Software, a DSP7000 Programmable Dynamometer Controller and requisite interface cards and cables. Note: Magtrol’s Single or Three-Phase Power Analyzer can be integrated into this system as well as Magtrol’s Temperature Testing Hardware and Software. HD / ED DYNAMOMETER DSP7001 CONTROLLER o---------o---o---------- PC M-TEST 1 USB 2 Pin Dynamometer Brake Cable PN88M070-0150 (included with dynamometer) 14 Pin/14 Pin Instrument Cable PN88M007-0150 (included with dynamometer) Figure 3–7 Dynamometer with DSP7001 Controller and M-TEST Software 6510e POWER ANALYZER AC/DC Input Power HD / ED DYNAMOMETER DSP7001 CONTROLLER o---------o---o---------- 1 PC GPIB Card M-TEST USB 2 Pin Dynamometer Brake Cable PN88M070-0150 (included with dynamometer) 14 Pin/14 Pin Instrument Cable PN88M007-0150 (included with dynamometer) Figure 3–8 Dynamometer with 6510e Power Analyzer, DSP7001 Controller and M-TEST Software 22 SETUP The following diagrams illustrate the required cable sets and connections for a PC-based test system setup. Chapter 3 – Installation/Configuration Magtrol Hysteresis Dynamometers 3.3.3 Air Cooling Magtrol’s HD-510/515/710/715, ED-715 and any 800 Series Dynamometer are all internally ported for compressed air or blower cooling and may be integrated with a manual or PC-based test setup in order to provide air cooling of the dynamometer brake. An air flow sensor has been added to these dynamometers to protect against operator error. With the air flow sensor, the dynamometer comes equipped with a pressure sensor ported into the cooling airway. The sensor, when used in combination with Magtrol’s DSP7000 Dynamometer Controller, prevents the dynamometer brake from being energized until the blower or air supply has been turned on. When used with the DSP7000, pin 1 is internally pulled high with a resistance to 5 volts. If not using a Magtrol controller, it is assumed the user will pull pin 1 to the 5 volts supplied to the amplifier board (pin 7) with a 1 K to 10 K resistor. J4 PRESSURE SWITCH 1 2 +5 VDC COM TORQUE AMPLIFICATION BOARD Figure 3–9 Air Flow Sensor Schematic 23 J1 BACK PANEL 1 2 3 4 5 6 7 8 9 10 11 12 13 14 1 2 3 4 5 6 7 8 9 10 11 12 13 14 SETUP When the air supply to the dynamometer is turned on, the pressure sensor closes an electrical contact. Two wires from the sensor run internally to the dynamometer and attach to the torque amplification board. One of the wires from the sensor is then passed directly to the back panel connector (14-pin connector, pin 1). The other wire is tied on the board to +5 VDC COM (14-pin connector, pin 8). Chapter 3 – Installation/Configuration 3.3.3.1 Magtrol Hysteresis Dynamometers Blower Setup If an HD-710, HD-715, HD-810, HD-815, ED-715 or ED-815 dynamometer is being used, a blower input is integrated into the unit. SETUP Figure 3–10 Dynamometer with Blower Connection For more information, see Section 4.1.3.2.2 – Blower. 3.3.3.2 Warning!Due to the noise levels of the blowers, hearing protection must be worn during operation. Compressed Air Setup If a Model 510, 515, 800 or 805 dynamometer is being used, a compressed air input is integrated into the unit. The connection is illustrated in the following diagram. 1,5 1,0 2,0 0,5 2,5 0o 3,0 psi Figure 3–11 Dynamometer with Compressed Air Connection For more information, see Section 4.1.3.2.1 – Compressed Air. 24 4. Testing 4.1 Testing Considerations A number of factors must be taken into consideration before running a test including safety, accuracy, power dissipation, fixturing, couplings, windage, friction, vibration, cogging, eddy currents and temperature rise. The following sections describe these factors, and their effects, in further detail. 4.1.1 Safety Caution:A power-line fault into the dynamometer frame could pass a transient surge through all interconnected instruments, any computer in use or operating personnel with dangerous and costly consequences! • • • 4.1.2 Always connect the motor frame to a high current capacity (water pipe) earth ground. Be sure the motor control circuit breakers cannot be bypassed by accident. Variable autotransformers are especially hazardous! When operating dynamometers with blowers, hearing protection must be worn. Accuracy Following, is a list of several factors that affect the apparent accuracy of the torque readout. • Full Scale Torque Calibration: This setting will be affected by an internal temperature rise of up to ±0.0015% FS/°C. For more information on full-scale torque setup and troubleshooting, refer to Section 6.4 – Calibration Procedure and Section 8.1.3 – Full Scale Torque. • Zero Offset: This setting is affected by an internal temperature rise of up to ±0.002% Reading/°C. For more information on zero offset setup and troubleshooting, refer to Section 6.4 – Calibration Procedure and Section 8.1.2 – Zero Balance. • Coupling Losses: If the coupling becomes hot to the touch, or if the dynamometer or motor vibrate after a period of running, coupling loss error could occur up to several percent depending on the size of the motor and dynamometer. For more detail, refer to Section 4.1.4 – Fixtures and Couplings. • Windage: Negligible at speeds up to 6000 rpm. This effect is described more extensively in Section 4.1.5 – Windage. • Mechanical Friction: Generally negligible on HD-400 series dynamometers and larger. On HD-106 and HD-100 the user is cautioned to be aware of the effects that friction may cause. For more detail, refer to Section 4.1.6 – Friction. 25 OPERATION For general safety considerations, please follow these few common-sense rules: • Be sure that your coupling is adequately rated for the speed and torque that you intend to run. • Make sure all rotating elements are covered. • Always wear safety glasses when working around dynamometer test equipment. • Do not wear loose clothing or ties when working around dynamometer test equipment. • Never allow anyone to stand close to the side of, or lean over, a rotating shaft coupling. • Insulate electrical (internal and external) motor connections. Chapter 4 – Testing 4.1.3 Magtrol Hysteresis Dynamometers Note: None of the above take into account the long-term drift effects on digital readout instrumentation. This is covered for each instrument by their individual specifications. Also, many of the above factors are dependent upon motor horsepower, fixturing and other circumstances beyond the control of Magtrol. If reasonable care is exercised, and calibration and maintenance are performed on a regular basis,, motor test data accuracy better than 0.25% of torque-speed value can be expected. Power Dissipation All Magtrol Dynamometers are power absorption instruments. As a dynamometer loads a test motor, it is absorbs horsepower from the motor into the hysteresis brake. The brake then converts this mechanical energy into heat. Excessive power over extended periods of time may result in more obscure damage including breakdown of bearing lubricants and degradation of magnetic coil insulation. Also, exposure to temperatures over 690 °C (1275 °F) will alter the rotor’s magnetic properties. 4.1.3.1 Note: Do not instantaneously apply maximum power (torque-speed) to a cold dynamometer. High temperature gradients cause differential expansions resulting in misalignment of the running air gaps between the rotor and stator assembly on the load brake. Allow all dynamometers to warm up before heavy loading. This is accomplished by gradually increasing the load to the motor. If a motor must be tested cold, warm up the dynamometer with a different motor first. Note:Operating at the continuous power rating for periods of up to 4 hours is acceptable. However, operating for extended periods at high temperatures will result in premature component and bearing failure. Limiting the length of the cycle and the component temperatures will guard against premature failure. Where continuous duty is desired for longer time intervals, component temperatures should be maintained less than 100°C; monitoring the outside brake surface temperature is a sufficient reference. Power Absorption Curves The following graphs (Figures 4–1 through 4–15) represent the maximum power (heat) that the dynamometer can dissipate over time. The specifications shown are conditional upon the following: 26 OPERATION There are finite limits to the amount of energy and resulting temperature rise that any absorption brake can withstand. Rapidly rising operating temperatures from excessive power input can cause severe mechanical distortion of the rotor assembly. This, in turn, may cause the rotating assembly to contact the stationary members that surround it. Once this happens, metal transfer and ultimately seizing of the brake assembly may occur. Chapter 4 – Testing Magtrol Hysteresis Dynamometers • • • • Maximum brake temperature = 100 °C (212 °F) Maximum rotor temperature = 460 °C (860 °F) Ambient temperature = 25 °C (77 °F) The dynamometer cooling system is running The following values are sufficiently accurate (within 1%) to establish watts (W) for use in the heat rise curves. where P = power (watts), T = torque, and n = speed (rpm) = T (N·m) × n (rpm) × (1.047 × 10⁻¹) = T (lb·in) × n (rpm) × (1.183 × 10⁻²) = T (kg·cm) × n (rpm) × (1.027 × 10⁻²) P (watts) P (watts) P (watts) Note: Please take a moment to familiarize yourself with any limitations that may apply to your specific dynamometer and motor testing requirements. Maximum Kinetic Power Rating Curve for Continuous Duty: Area under curve equals the maximum speed and torque combinations for a continuous duty motor test. 30000 0.5 3.6 1 1.5 7.2 10.8 TORQUE 2 14.4 Maximum Torque for Dynamometer 2.5 (oz·in) 18 (mN·m) The power absorption curves Shaft Height 0 0 0.5 3.6 1 1.5 2 2.5 (oz·in) 7.2 10.8 14.4 18 (mN·m) Torque Range TORQUE HD-100 Input Inertia Maximum Speed Maximum Input Power 0 0 2.2 16 4.4 6.6 32 48 TORQUE 8.8 64 0.1245 in / 0.1250 in represent the maximum power (3.163 mm / 3.175 (heat)mm) that the dynamometer can dissipate over time. 3.50 in (88.9 mm) 2.50 oz·in 180.0 g·cm 18.00 mN·m HD-400 7.04 × 30000 10-7 lb·ft·s² 30,00025000 rpm 20000duty: 7 W continuous 15000 < 5 minutes: 35 W SPEED (rpm) Shaft Diameter 11 (oz·in) 80 (mN·m) HD-500 30000 25000 20000 15000 10000 5000 0 0 0 SPEED (rpm) SPEED (rpm) SPEED (rpm) 30000 25000 20000 15000 10000 5000 0 Maximum Kinetic Power Rating Curve for Less Than Five Minutes: Area under curve equals the maximum speed and torque combinations for a motor test of less than five minutes. HD-106 Figure 4–1 Power Absorption Curve Parameters SPEED (rpm) 36000 30000 24000 HD-106 18000 12000 6000 0 36000 30000 24000 18000 12000 6000 0 HD / ED 0 0 24 170 48 72 340 510 TORQUE HD-505 96 680 (oz·in) 120 27 850 (mN·m) 10000 5000 0 30000 25000 20000 15000 10000 5000 0 30000 0 0 8 56 16 24 112 168 TORQUE 32 224 40 (oz·in) 280 (mN·m) 96 680 120 (oz·in) 850 (mN·m) HD-510 0 0 24 170 48 72 340 510 TORQUE HD-515 OPERATION Maximum Rated Speed for Dynamometer SPEED (rpm) Power Absorption Curves Magtrol Hysteresis Dynamometers SPEED (rpm) Chapter 4 – Testing 36000 30000 24000 18000 12000 6000 0 0 0 0.5 3.6 1 1.5 7.2 10.8 TORQUE 2 14.4 2.5 (oz·in) 18 (mN·m) Figure 4–2 HD 106 Power Absorption Curve HD-100 Shaft Diameter Shaft Height Input Inertia Maximum Speed SPEED (rpm) Maximum Input Power 30000 25000 20000 15000 10000 5000 0 0 0 2.2 16 4.4 6.6 32 48 TORQUE 8.8 64 11 (oz·in) 80 (mN·m) Figure 4–3 HD 100 Power Absorption Curve HD-400 Shaft Diameter Shaft Height Torque Range Input Inertia Maximum Speed Maximum Input Power 28 0.2495 in / 0.2500 in (6.338 mm / 6.350 mm) 3.50 in (88.9 mm) 40.0 oz·in 2.80 g·cm 280 mN·m 1.55 × 10⁻⁵ lb·ft·s² 25,000 rpm continuous duty: 55 W < 5 minutes: 200 W OPERATION Torque Range 0.1870 in / 0.1875 in (4.750 mm / 4.763 mm) 3.50 in (88.9 mm) 11.00 oz·in 800 g·cm 80.00 mN·m 3.40 × 10⁻⁶ lb·ft·s² 25,000 rpm continuous duty: 20 W < 5 minutes: 75 W Chapter 4 – Testing SPEED (rpm) Magtrol Hysteresis Dynamometers 30000 25000 20000 15000 10000 5000 0 0 0 8 56 16 24 112 168 TORQUE 32 224 40 (oz·in) 280 (mN·m) Figure 4–4 HD 400 Power Absorption Curve HD-500 Shaft Diameter Shaft Height Input Inertia Maximum Speed SPEED (rpm) Maximum Input Power 30000 25000 20000 15000 10000 5000 0 0 0 24 170 48 72 340 510 TORQUE 96 680 120 (oz·in) 850 (mN·m) Figure 4–5 HD 500 Power Absorption Curve HD-510 Shaft Diameter Shaft Height Torque Range Input Inertia Maximum Speed Maximum Input Power 29 0.3745 in / 0.3750 in (9.512 mm / 9.525 mm) 4.00 in (101.6 mm) 120.0 oz·in 8.50 kg·cm 850 mN·m 8.05 × 10⁻⁵ lb·ft·s² 25,000 rpm continuous duty: 375 W < 5 minutes: 750 W OPERATION Torque Range 0.3745 in / 0.3750 in (9.512 mm / 9.525 mm) 4.00 in (101.6 mm) 120.0 oz·in 8.50 kg·cm 850 mN·m 8.05 × 10⁻⁵ lb·ft·s² 25,000 rpm continuous duty: 80 W < 5 minutes: 400 W Magtrol Hysteresis Dynamometers SPEED (rpm) Chapter 4 – Testing 30000 25000 20000 15000 10000 5000 0 0 0 24 170 48 72 340 510 TORQUE 96 680 120 (oz·in) 850 (mN·m) Figure 4–6 HD 510 Power Absorption Curve HD-505 Shaft Diameter Shaft Height Input Inertia Maximum Speed SPEED (rpm) Maximum Input Power 30000 25000 20000 15000 10000 5000 0 0 0 48 340 96 144 680 1020 TORQUE 192 1360 240 (oz·in) 1700 (mN·m) Figure 4–7 HD 505 Power Absorption Curve HD-515 Shaft Diameter Shaft Height Torque Range Input Inertia Maximum Speed Maximum Input Power 30 0.3745 in / 0.3750 in (9.512 mm / 9.525 mm) 4.00 in (101.6 mm) 240 oz·in 17.00 kg·cm 1700 mN·m 1.61 × 10⁻⁴ lb·ft·s² 25,000 rpm continuous duty: 900 W < 5 minutes: 1500 W OPERATION Torque Range 0.3745 in / 0.3750 in (9.512 mm / 9.525 mm) 4.00 in (101.6 mm) 240 oz·in 17.00 kg·cm 1700 mN·m 1.61 × 10⁻⁴ lb·ft·s² 25,000 rpm continuous duty: 160 W < 5 minutes: 800 W Chapter 4 – Testing SPEED (rpm) Magtrol Hysteresis Dynamometers 30000 25000 20000 15000 10000 5000 0 0 0 48 340 96 144 680 1020 TORQUE 192 1360 240 (oz·in) 1700 (mN·m) Figure 4–8 HD 515 Power Absorption Curve HD-700 Shaft Diameter Shaft Height Input Inertia Maximum Speed Maximum Input Power SPEED (rpm) 30000 25000 20000 15000 10000 5000 0 0 0 88 0.62 176 264 1.24 1.86 TORQUE 352 2.48 440 (oz·in) 3.10 (N·m) Figure 4–9 HD 700 Power Absorption Curve HD-710 Shaft Diameter Shaft Height Torque Range Input Inertia Maximum Speed Maximum Input Power 31 0.4995 in / 0.5000 in (12.687 mm / 12.700 mm) 5.875 in (149.2 mm) 440 oz·in 31.0 kg·cm 3.10 N·m 5.51 × 10⁻⁴ lb·ft·s² 25,000 rpm continuous duty: 935 W < 5 minutes: 1400 W OPERATION Torque Range 0.4995 in / 0.5000 in (12.687 mm / 12.700 mm) 5.875 in (149.2 mm) 440 oz·in 31.0 kg·cm 3.10 N·m 5.51 × 10⁻⁴ lb·ft·s² 25,000 rpm continuous duty: 150 W < 5 minutes: 700 W Magtrol Hysteresis Dynamometers SPEED (rpm) Chapter 4 – Testing 30000 25000 20000 15000 10000 5000 0 0 0 88 0.62 176 264 1.24 1.86 TORQUE 352 2.48 440 (oz·in) 3.10 (N·m) Figure 4–10 HD 710 Power Absorption Curve HD-705 Shaft Diameter Shaft Height Input Inertia Maximum Speed Maximum Input Power SPEED (rpm) 30000 25000 20000 15000 10000 5000 0 0 0 11 1.24 22 33 2.48 3.72 TORQUE 44 4.96 55 (lb·in) 6.20 (N·m) Figure 4–11 HD 705 Power Absorption Curve HD-715 Shaft Diameter Shaft Height Torque Range Input Inertia Maximum Speed Maximum Input Power 32 0.4995 in / 0.5000 in (12.687 mm / 12.700 mm) 5.875 in (149.2 mm) 55.0 lb·in 62.0 kg·cm 6.20 N·m 1.101 × 10⁻³ lb·ft·s² 25,000 rpm continuous duty: 3000 W < 5 minutes: 3400 W OPERATION Torque Range 0.4995 in / 0.5000 in (12.687 mm / 12.700 mm) 5.875 in (149.2 mm) 55.0 lb·in 62.0 kg·cm 6.20 N·m 1.101 × 10⁻³ lb·ft·s² 25,000 rpm continuous duty: 300 W < 5 minutes: 1400 W Chapter 4 – Testing Magtrol Hysteresis Dynamometers SPEED (rpm) 30000 25000 20000 15000 10000 5000 0 0 0 11 1.24 22 33 2.48 3.72 TORQUE 44 4.96 55 (lb·in) 6.20 (N·m) Figure 4–12 HD 715 Power Absorption Curve HD-800 Shaft Diameter Shaft Height Input Inertia Maximum Speed Maximum Input Power SPEED (rpm) 15000 12000 9000 6000 3000 0 0 0 25 2.8 50 75 5.6 8.4 TORQUE 100 11.2 125 (lb·in) 14.0 (N·m) Figure 4–13 HD 800 Power Absorption Curve HD-810 Shaft Diameter Shaft Height Torque Range Input Inertia Maximum Speed Maximum Input Power 33 0.9995 in / 1.0000 in (25.387 mm / 25.400 mm) 9.00 in (228.6 mm) 125.0 lb·in 140.0 kg·cm 14.00 N·m 4.43 × 10⁻³ lb·ft·s² 12,000 rpm continuous duty: 3000 W < 5 minutes: 3500 W OPERATION Torque Range 0.9995 in / 1.0000 in (25.387 mm / 25.400 mm) 9.00 in (228.6 mm) 125.0 lb·in 140.0 kg·cm 14.00 N·m 4.43 × 10⁻³ lb·ft·s² 12,000 rpm continuous duty: 1800 W < 5 minutes: 2800 W Chapter 4 – Testing Magtrol Hysteresis Dynamometers SPEED (rpm) 15000 12000 9000 6000 3000 0 0 0 25 2.8 50 75 5.6 8.4 TORQUE 100 11.2 125 (lb·in) 14.0 (N·m) Figure 4–14 HD 810 Power Absorption Curve HD-805 Shaft Diameter Shaft Height Input Inertia Maximum Speed Maximum Input Power SPEED (rpm) 15000 12000 9000 6000 3000 0 0 0 50 5.6 100 150 11.3 16.8 TORQUE 200 22.4 250 (lb·in) 28 (N·m) Figure 4–15 HD 805 Power Absorption Curve HD-815 Shaft Diameter Shaft Height Torque Range Input Inertia Maximum Speed Maximum Input Power 34 0.9995 in / 1.0000 in (25.387 mm / 25.400 mm) 9.00 in (228.6 mm) 250 lb·in 280 kg·cm 28.0 N·m 8.81 × 10⁻³ lb·ft·s² 12,000 rpm continuous duty: 6000 W < 5 minutes: 7000 W OPERATION Torque Range 0.9995 in / 1.0000 in (25.387 mm / 25.400 mm) 9.00 in (228.6 mm) 250 lb·in 280 kg·cm 28.0 N·m 8.81 × 10⁻³ lb·ft·s² 12,000 rpm continuous duty: 3000 W < 5 minutes: 5300 W Chapter 4 – Testing Magtrol Hysteresis Dynamometers SPEED (rpm) 15000 12000 9000 6000 3000 0 0 0 50 5.6 100 150 11.3 16.8 TORQUE 200 22.4 250 (lb·in) 28 (N·m) Figure 4–16 HD 815 Power Absorption Curve HD-825 Shaft Diameter Shaft Height Input Inertia Maximum Speed Maximum Input Power SPEED (rpm) 10000 8000 6000 4000 2000 0 0 0 100 11.3 200 300 22.6 33.9 TORQUE 400 45.2 500 (lb·in) 56.5 (N·m) Figure 4–17 HD 825 Power Absorption Curve ED-715 Shaft Diameter Shaft Height Torque Range Input Inertia Maximum Speed Maximum Input Power 35 0.7490 in / 0.7495 in (19.025 mm / 19.037 mm) 6.87 in (174.5 mm) 55.0 lb·in 62.0 kg·cm 6.20 N·m 1.27 × 10⁻³ lb·ft·s² 25,000 rpm continuous duty: 3000 W < 5 minutes: 3400 W OPERATION Torque Range 1.4995 in / 1.5000 in (38.087 mm / 38.100 mm) 9.00 in (228.6 mm) 500 lb·in 565 kg·cm 56.5 N·m 1.85 × 10⁻² lb·ft·s² 8,000 rpm continuous duty: 12,000 W < 5 minutes: 14,000 W Chapter 4 – Testing Magtrol Hysteresis Dynamometers SPEED (rpm) 30000 25000 20000 15000 10000 5000 0 0 0 11 1.24 22 33 2.48 3.72 TORQUE 44 4.96 55 (lb·in) 6.20 (N·m) Figure 4–18 ED 715 Power Absorption Curve ED-815 Shaft Diameter Shaft Height Input Inertia Maximum Speed Maximum Input Power SPEED (rpm) 15000 12000 9000 6000 3000 0 0 0 50 5.6 100 150 11.3 16.8 TORQUE 200 22.4 250 (lb·in) 28 (N·m) Figure 4–19 ED 815 Power Absorption Curve 4.1.3.2 Cooling Methods 4.1.3.2.1 Note: For additional details on compressed air and blower setup along with extensive information on the Air Flow Sensor feature, refer to Section 3.3.3 – Air Cooling. Compressed Air Magtrol’s HD-510, 515, 800 and 805 dynamometers are internally ported for compressed air cooling. Always use the filter and line regulator supplied with the unit. These elements should be installed 36 OPERATION Torque Range 1.4995 in / 1.5000 in (38.087 mm / 38.100 mm) 11.00 in (279.4 mm) 250 lb·in 280 kg·cm 28.0 N·m 9.61 × 10⁻³ lb·ft·s² 12,000 rpm continuous duty: 6000 W < 5 minutes: 7000 W Chapter 4 – Testing Magtrol Hysteresis Dynamometers as shown in the following diagram. 1,5 1,0 2,0 0,5 2,5 0o 3,0 psi Figure 4–20 Dynamometer with Compressed Air Connection For maximum air flow and cooling, set the regulator to the following: HD-510 HD-515 HD-800 HD-805 WARNING! PSI (Pounds per Square Inch) 1.75 4 10 7 do not exceed the pressures given. The air supply should be enabled whenever the unit is in operation. 4.1.3.2.2 Blower Magtrol’s HD-710/715/810/815/825 and ED-715/815 dynamometers are internally ported for blower cooling. The following diagram illustrates the connection. Figure 4–21 Dynamometer with Blower Connection Warning!Due to the noise levels of the blowers, hearing protection must be worn during operation. 37 OPERATION CFM (Cubic Feet per Minute) 7 10 13 15 HD Model Chapter 4 – Testing 4.1.4 Magtrol Hysteresis Dynamometers Fixtures and Couplings When mounting the test motor, please consider the following: • Construct precise fixtures that provide proper shaft alignment. • Secure the test motor in the fixture to prevent torsional movement and bolt the fixture to the dynamometer base plate. • Give consideration to the interaction of materials between the motor and test fixture. For example, a (magnetic) steel plate placed against the exposed lamination of an open frame motor can significantly influence performance. Some thin shell PM (permanent magnet) motors may be similarly affected. • The dynamometer base plate material is an aluminum tool plate that is easily drilled and tapped. The use of helix thread inserts is a good idea if you are going to interchange fixtures often. Note: For an additional charge, Magtrol can perform base plate modifications. ANGULAR PARALLEL OFFSET Figure 4–22 Examples of Possible Shaft Misalignment The use of high quality double flexure couplings is recommended to help correct any misalignment problems. This type of coupling—two flexing elements separated by a solid link—inherently tolerates greater parallel offset. If you would like more specific coupling recommendations, contact Magtrol Technical Assistance. For precise misalignment tolerances, consult your coupling manufacturer. 4.1.5 Windage Windage is proportional to the square of speed and magnifies rapidly above rated speed. The air friction is tangential to the surface and impinges upon the stationary field assembly. This acts as viscous drag and becomes part of the motor load and torque reading. However, there is a small amount of air dissipated as pumping loss. Since this appears as a load on the motor, not measured by the dynamometer, it becomes a source of error. Windage effects on accuracy tests have been conducted on all Magtrol dynamometers. The percentage of torque loss due to windage ranges between 0.025% and 0.20% of full scale at maximum rated rpm. Windage is proportional to the square of speed and magnifies rapidly above rated speed. Conversely, at one half of the rated speed, the effect becomes immeasurably small. 38 OPERATION The following diagram illustrates examples of possible shaft misalignment. Chapter 4 – Testing Magtrol Hysteresis Dynamometers 4.1.6 Friction Friction of the shaft bearings is a measurable load, but some friction can exist in the carrier bearing. When correctly loaded and lubricated, the friction is insignificant. The value may be quantitatively established by the following procedure. 1. Remove all attachments to the dynamometer shaft. 2. Advance the torque control slightly, to obtain a small torque load. 3. Apply a small amount of torque (by hand) in one direction of rotation. 4. Carefully release the shaft, allow several seconds, and record the torque reading, if any. 5. Then, carefully re-apply torque in the opposite direction. 6. Slowly release the shaft as above, and compare the two readings. The difference should be less than 1% of full scale. During actual motor testing there is usually enough system vibration to “settle” negating frictional effects. If excessive drag is present, mechanical realignment may be required, dependent upon dynamometer size. Certain mechanical factors need to be determined before corrective action proceeds. Please contact Magtrol Technical Assistance. Vibration All rotating dynamometer assemblies are precision balanced, however, the dynamometer shaft is cantilevered. This may cause vulnerability to radial forces. At high speeds, some vibration and noise are inevitable but not necessarily harmful. However, excessive resonant vibrations, caused by bent shafts, poor alignment and out of balance couplings will produce excessive data errors and are a safety hazard. Warning!S h a f t c o u p l ing s o p e rating at s p e e d s above their design limits are extremely hazardous. Many couplings contain somewhat loosely supported flexure elements. When overdriven, excessive centrifugal force may displace them out of axial alignment. As this happens, they immediately begin to absorb energy resulting in severe vibration and destruction of the coupling. 39 OPERATION 4.1.7 Chapter 4 – Testing 4.1.8 Magtrol Hysteresis Dynamometers Cogging Rotor Poles Case Pole Rotor Assembly N N N S S S Figure 4–23 Hysteresis Brake Cross-Section This cross-section shows (by one tooth) the magnetic relationship of the hysteresis brake elements. If the dynamometer shaft is at rest with torque applied, and if the torque control is then reduced to zero, a magnetic salient pole will be temporarily imposed on the rotor of the brake. To avoid magnetic cogging, before the shaft comes to rest, reduce the torque control to zero. To remove cogging, once established, reapply current on the dynamometer. Then, decrease the current to zero while simultaneously rotating the dynamometer shaft. 4.1.9 Eddy Currents There is some Eddy current generation within the brake rotor. These magnetically induced currents cause an increase in brake torque proportional to speed. The larger the hysteresis brake, the higher the rotor surface velocity. Additionally, as brakes become larger the rotor cross-sectional area increases. Each of these factors increase Eddy current generation. The combination results in speed-related torque increase, exhibiting a more pronounced effect on larger dynamometers. With the HD-800 through 815 models, the Eddy-current torque component adds approximately 10%/1000 rpm to a static, fixed current, torque value. On the smaller dynamometer sizes, 2% to 4%/1000 rpm is typical. 40 OPERATION If the shaft is then rotated slowly, the magnetic poles on the rotor will attempt to align with the adjacent case-pole tooth form. This is often referred to as “cogging”. The action is sinusoidal—first it tries to resist rotation and then, as the rotor passes through the tooth form, it subsequently supports rotation. At a few hundred rpm, these forces integrate resulting in an effective torque of nearly zero. Chapter 4 – Testing Magtrol Hysteresis Dynamometers 4.1.10 Temperature Rise Temperature rise has a more complex effect on hysteresis brake load torque and is difficult to quantify. As the temperature of the brake increases, differential expansions cause dimensional changes that tend to increase torque. Conversely, electrical resistance in the rotor increases with temperature, resulting in decreased Eddy current generation and torque, all in a variable frame. Where current and speed remain fixed, there may be a gradual torque increase over a period of a few moments. This will generally stabilize at 0.5% (for small dynamometers, up to HD-500) to 2% of the starting torque value, per 1000 rpm of applied speed. Note: If highly accurate long-term torque stability is required, consider the Magtrol DSP7000 Dynamometer Controller. This is a computercontrolled closed loop system capable of maintaining either constant torque or speed. OPERATION 41 5. Operating Principles 5.1 Speed Inside the dynamometer enclosure is an optical speed transducer. A high-speed optical switch, consisting of an Infrared (IR) LED and IR receiver, senses the passage of light through a slotted disk that is attached to the end of the dynamometer shaft. Light passing through a slot in the disk causes the speed output signal to go to a logic low (near 0 VDC). As a solid section passes in front of the IR receiver, the output signal switches to a logic high (near 5 VDC). Rotation of the disk results in the optical switch generating a pulse frequency of 60 bits per shaft revolution. For schematic, see Section B.2 – Speed Sensor Board in Appendix B. 5.2 Torque Torsional force from the hysteresis brake assembly is measured by a load cell. The load cell consists of a flexing beam with four strain gauges. The strain gauges are in a bridge configuration, producing an analog signal proportional to torque. The load cell schematic in Appendix B shows voltage levels and connection identifications. The mechanical diagram below illustrates how the assembly clamps onto the rear support member of the brake. LOAD CELL PC BD. TEMP COMP FINE BALANCE PIVOT ASSEMBLY LOCKING SCREW THEORY LOAD CELL ASSEMBLY STRAIN GAUGES WIRE COLORS -BLUE GREEN WHITE RED NOTE: A coarse balancing resistor, located on the torque signal amplification board, may be connected between the blue or green and white wire terminals. Figure 5–1 Mechanical Layout of a Load Cell 42 Chapter 5 – Operating Principles Magtrol Hysteresis Dynamometers 5.3 Torque Signal Amplification A printed circuit board mounted on the dynamometer rear panel, identified as part number 234401-101-xxx, contains the torque signal amplifiers IC1, IC2 and IC3, load cell excitation supply consisting of voltage reference DZ1, amplifier IC4 and Transistors Q1-Q4. Voltage reference DZ1 is a precision voltage source, and along with IC4 and Q1–Q4, provides +5.00 and -5.00 volts DC excitation to the load cell bridge. Transistors Q1–Q4 are NPN and PNP transistors, serving as series pass elements to boost the current output drive capability to over 30 mA. Bipolar bridge excitation is used to improve the noise immunity of the low millivolt range bridge output signal. See B.1 – Torque Amplification Signal in Appendix B. Amplifier IC1 is a precision, differential input instrumentation amplifier providing amplification necessary to calibrate the torque signal. IC2 and IC3 provide additional amplification and scaling, along with the counterclockwise calibration (CCW CAL) control. The torque signal is calibrated by adjusting the rear panel trim potentiometers P1 and P2, labeled “CW CAL” and “CCW CAL”. Torque signal zero is adjusted by using the rear panel trim potentiometer P3, labeled “ZERO”, when no torque is applied. The load cell on all dynamometers except the HD-106, produce an output signal of 15 mV at full torque. The HD-106 output is 7.5 mV full scale. Amplifiers IC1-IC3 calibrate this so the output in millivolts equals the dynamometer full scale torque. The torque signal zero may be affected thermally and may need periodic readjustment. Therefore, the “ZERO” adjustment can be readjusted as needed. The clockwise calibration (CW CAL) adjustments should not typically need readjustment. In the event that a “CW CAL” adjustment is needed, a precision calibration beam and weight must be used. The calibration beam may be purchased from Magtrol. Use only an insulated screwdriver or a plastic trim pot adjustment tool when adjusting the “CW CAL,” “CCW CAL” or “ZERO” trim potentiometers. For example, the HD-400-6 Dynamometer lists the full scale torque at 40.0 oz·in. Therefore, the amplifier gain will be set to produce 0.400 VDC output, when the load cell input is ≅0.011 VDC. 5.4 Decimal Point Control Two solder links on the circuit board indicate to the digital readout instrument where the decimal point belongs. The chart below shows how this is accomplished by jumping the appropriate link on the board. Digital output “XXX” represents the result of the analog output (in millivolts) with the decimal point properly located. Digital Output X.XX XX.X XXX. 43 SL13 Closed Open Closed SL12 Open Closed Closed THEORY Note: Chapter 5 – Operating Principles 5.5 Magtrol Hysteresis Dynamometers Damper Cylinder Hysteresis brakes, machined from (solid bar) magnetic material, represent a heavy mass. The load cell behaves somewhat like a spring. A mass, supported by a spring, will resonate at the system’s natural frequency. For this reason, the dynamometer brake assembly must be dampened to filter out torque data and to avoid stress and fatigue. The damper cylinder arm, attached to the brake, connects to a piston within the hydraulic cylinder. When the load cell shipping/ restraining bolt was removed (see Section 3.1 – Removal of the Load Cell Shipping/Restraining Bolt), the brake/load cell assembly was centered and the damper became functional. 5.6 Brake Control Power Any Magtrol Dynamometer Controller is universal in that it must operate all dynamometers. Due to the higher level of current required by Magtrol’s larger dynamometers, a booster power amplifier is used to increase the control current. These supplies, contained within the dynamometer enclosures, are in operation when the cooling fans are on. 5.6.1 HD-800/815 and ED-815 A booster power amplifier is used to increase control current by a factor of 2 with the HD-800 and 810 and a factor of 4 with the HD-805, 815 and ED-815 dynamometers. The schematic in Section B.4 – HD-800-815 Brake Control Supply details the HD-800, 805, 810 and 815 brake power amplifier. 5.6.2 HD-825 An HD-825 uses a 5241 power amplifier to increase the control current. For the schematic, see Section B.5 – HD-825 Brake Control Supply. THEORY 44 6. Calibration 6.1 Initial Calibration All Magtrol instruments are calibrated prior to shipment. There is a calibration label on each unit as shown in the following figure. MAGTROL, INC. CALIBRATION DUE: DATE: S/N: BY: BUFFALO, NY 716-668-5555 Figure 6–1 Calibration Label This label tells the user when the next calibration is required, although Magtrol does recommend that calibration be completed after the dynamometer, readout instrumentation and power supply are set up for the first time. 6.2 Calibration Beams and Weights To perform a successful dynamometer calibration, a precision weight heavy enough to apply a torque at or close to the full scale rating is required. Magtrol offers precision weights (WT Series) and calibration beams (CB Series) rated specifically for each Hysteresis Dynamometer. Note: The Pin Location represents the distance between the pin and the center of the calibration beam. See Figure 6–4 Calibration Calculation. Metric and SI Pin Full Scale Torque Location -7N series* -8N series cm 183.5 g·cm 18.00 mN·m 9.18 815.8 g·cm 80.0 mN·m 8.16 2.86 kg·cm 280 mN·m 14.28 8.67 kg·cm 850 mN·m 17.34 Weights Size Model 20 g WT-106M 100 g WT-100M 200 g WT-400M 500 g WT-500M 17.34 kg·cm 1700 mN·m 17.34 1.0 kg WT-505M 31.61 kg·cm 3.10 N·m 31.61 1.0 kg WT-700M 63.22 kg·cm 6.20 N·m 31.61 2.0 kg WT-705M 142.76 kg·cm 14.00 N·m 47.59 3.0 kg WT-800M 285.52 kg·cm 28.0 N·m 47.59 6.0 kg WT-805M 576.14 kg·cm 56.5 N·m 38.41 15.0 kg WT-825M * The -7N Full Scale Torque values are not exactly equivalant to the dynamometer ratings, but are instead representative of the actual torque produced by the WT Series weights. 45 MAINTENANCE English Calibration For Full Scale Pin Weights Beam Hysteresis Torque Location Assembly Dynamometer -6N series Size Model in CB-106 HD-106 2.50 oz·in 2.500 1 oz WT-106 CB-100 HD-100 11.00 oz·in 5.500 2 oz WT-100 CB-400 HD-400 40.0 oz·in 5.000 8 oz WT-400 HD-500 120.0 oz·in 7.500 1.0 lb WT-500 HD-510 CB-500 HD-505 240 oz·in 7.500 2.0 lb WT-505 HD-515 HD-700 440 oz·in 11.000 2.5 lb WT-700 HD-710 CB-700 HD-705 55.0 lb·in 11.000 5.0 lb WT-705 HD-715 HD-800 125.0 lb·in 15.625 8.0 lb WT-800 HD-810 CB-800 HD-805 250 lb·in 15.625 16.0 lb WT-805 HD-815 CB-825 HD-825 500 lb·in 20.000 25.0 lb WT-825 Chapter 6 – Calibration 6.3 Magtrol Hysteresis Dynamometers Calibration Preparation Before beginning the calibration procedure, the following items must be checked. • Be sure all equipment is set for the correct power-line input voltage as specified on the original order. • Ensure correct earth grounds on equipment. • For instructions and operational details on how to set an open loop current, refer to your power supply manual. • Turn on the controller or readout and power supply and allow 20 minutes for warm-up, longer if the equipment is below room temperature. 6.4 Calibration Procedure The calibration procedure is as follows: Note: Do not hang the weight until instructed to do so in step 4. 1. Place the calibration beam onto the dynamometer shaft, inserting the shaft through the center hole of the beam. Secure by tightening the clamping screws. See Figure 6–2. Note: If the shaft has a flat, make sure that the flat is facing down and tighten the clamping screw(s) against the flat only. Level Pins CB Series Calibration Beam Dynamometer shaft Clamping screws Figure 6–2 Calibration Setup 2. Apply full current to the dynamometer brake. 3. With the beam perfectly horizontal, use a flathead screwdriver to adjust the ZERO trim pot (located on the rear panel) so that the torque reading is zero ± 1 least significant dynamometer torque digit. 46 MAINTENANCE WT Series Calibration Weight Chapter 6 – Calibration Magtrol Hysteresis Dynamometers CW Calibration Zero CCW Calibration Figure 6–3 Calibration Potentiometers 4.Hang the weight from the clockwise (right) pin and level the calibration beam. Note: To hang bottleneck weights, Magtrol recommends using only lightweight (but strong) line. Simply fashion a loop and attach it to the weight. D (English) D (SI) CCW CW W Torque = Weight (W) × Distance (D) Weight (W) = Torque / Distance (D) Figure 6–4 Calibration Calculation Note: If using Magtrol CB Calibration Beams in conjunction with WT Calibration Weights, simply calibrate to the full scale torque listed in the table in Section 6.1 – Calibration Beams and Weights. 6. Transfer the weight to the counterclockwise (left) pin and level the dynamometer. 7. Adjust the CCW Calibration trim pot so that the torque reading equals the weight times the distance. See Note in step #5. 8. Remove the weight from the calibration beam. 47 MAINTENANCE 5. Adjust the CW Calibration trim pot so that the torque reading equals the weight times the distance. Chapter 6 – Calibration Magtrol Hysteresis Dynamometers 9. Reduce the current to zero while pumping the calibration beam CW/CCW (moving it up and down). This will ensure that the rotor does not remain magnetized in one specific location (becoming “cogged”), thus preventing the shaft from rotating freely. For more information, refer to Section 4.1.8 – Cogging. 10. Remove the calibration beam. The dynamometer is calibrated and ready for motor testing. 6.5 Calibration Frequency Magtrol load cells are temperature compensated and designed for stability. It is a good idea to calibrate, frequently at first, maintaining a record (see Appendix A – Calibration Record) until you have established a history. If there appears to be excessive drift, contact Magtrol Technical Assistance. MAINTENANCE 48 7. Optional Features 7.1 Speed Encoder All Magtrol dynamometers come standard with a 60-bit speed encoder, best suited for high-speed systems. For low speed motors, with maximum speeds of less than 200 rpm, Magtrol offers several additional encoder options, which include: • 600-bit single encoder • 6000-bit single encoder • 60/600-bit dual encoder • 60/6000-bit dual encoder With the single higher resolution encoder option, five wires from the 600 or 6000-bit encoder run internally to the torque amplification board. All five of the wires from the encoder are then passed directly to the back panel connector. 14-pin Connector pin 11 pin 10 pin 2 pin 7 pin 8 Speed Encoder index pulse TACH_A TACH_B +5 VDC +5 VDC COM With the dual encoder option, the dynamometer comes equipped with a standard 60-bit encoder and an additional 600 or 6000-bit encoder. The user can select which encoder to use via a back panel switch. (See Figure 2–1 Rear Panel). Five wires from the 600/6000-bit encoder run the torque amplification board. Three of the wires from the encoder are then passed directly to the back panel connector (14-pin connector, pin 11 = index pulse, pin 2 = TACH_B, pin 8 = +5VDC COM.). Two of the wires route to a double pole double throw switch. The switch selects which encoder will be powered up and routes the appropriate Tach_A signal to the 14-pin connector (14-pin connector, pin 10 = TACH_A, pin 7 = +5VDC). J4 600/6000-BIT ENCODER 1 2 3 4 5 TACH_B INDEX 6 SW1 4 3 1 J7 60 BIT ENCODER 5 TACH_A 2 1 2 3 +5 VDC INDEX +5 VDC COM J1 BACK PANEL 1 2 3 4 5 6 7 8 9 10 11 12 13 14 1 2 3 4 5 6 7 8 9 10 11 12 13 14 Figure 7–1 Speed Encoder Schematic The 60 bit encoder may be used for high speed systems and the 600/6000-bit encoder for lower speed applications. Additionally the TACH_A and TACH_B signals can be quadrature decoded to give even higher resolutions and direction of rotation. 49 OPTIONS TORQUE AMPLIFICATION BOARD 8. Troubleshooting 8.1 Torque Readout Problems 8.1.1 New Dynamometer If the dynamometer is new (never operated before) and the torque reading is near full scale and constant, the probable cause is failure to remove the shipping restraining bolt. This applies to all dynamometers with model numbers from 106 to 715. For further instruction refer to Section 3.1 – Removal of the Load Cell/Shipping Restraining Bolt. 8.1.2 Zero Balance Zero balance is usually attained by the ZERO control potentiometer on the rear panel of the dynamometer. Refer to Section 6.2 – Calibration Procedure. If you cannot obtain a zero torque reading with zero applied torque, you will need to first make sure that your load cell is functional. To verify that the strain gauge is stable under stress, complete the following steps. 1. Install the calibration beam. 2. Set the power supply for full current. 3. Install a weight on the beam (either side) sufficient to apply close to 100% of full-scale rated torque. If the reading is stable, switch the weight to the other side of the beam. 4. Steady the weight and the beam to be sure they are motionless. 8.1.2.1 Note: The torque reading may show activity, but hold steady within three or four dynamometer torque digits. Steady Torque Reading Note: It is a good idea to clamp the rear panel to the dynamometer base plate. This will decrease the possibility of pulling on the fragile interconnection lead wires. 5. Remove resistor R20 from the torque amplification circuit board. 6. Turn on the digital readout instrument. 7. While observing (or recording) the torque reading, start with a 100 K to 200 K resistor and temporarily connect it in the R20 position on the circuit board. 8. Temporarily jumper solder link SL14. If the reading becomes larger, remove the jumper and bridge solder link SL 17. If the reading becomes smaller, remove the jumper and bridge solder link SL 14. 50 MAINTENANCE If the torque reading is active and steady, you will need to reestablish the zero load cell balance. 1. Adjust the zero control on the rear panel for an approximate mechanical center. This is a 20 turn control, so rotate it clockwise more than 20 turns and then counterclockwise for 10 turns. 2. Disconnect the dynamometer line cord from the line power source. 3. Turn off the digital readout device or dynamometer controller. 4. Lower the rear panel. Chapter 8 – Troubleshooting Magtrol Hysteresis Dynamometers 9. Select resistors until two adjacent resistance values, within 1% or 2% of each other, cause the reading to swing through zero. Do not use any resistance below 10K. 10.Once the correct resistance value has been established, a high quality 50 ppm/°C, 1% or better, precision resistor (RN60C or RN65C) must be obtained. Permanently solder it onto the board in the R20 position. 11. The ZERO control potentiometer, which was previously set to a mechanical center, should now trim out any remaining imbalance. 8.1.2.2 Note: If something has caused the original balance to shift to such an extent that the rear panel ZERO balancing control is out of range, it is probable that more difficulties lie ahead. Whereas a new load cell might offer the best solution, these instructions may get the dynamometer operational. Erratic Torque Reading If the torque reading is erratic, then the problem could be a defective load cell or electronic component in the dynamometer or readout device. It will be necessary to establish specifically what is defective. At this time contact Magtrol Technical Assistance. 8.1.3 Full Scale Torque If the dynamometer cannot obtain full torque and will not support the beam and weight at full scale, a resistance or current check may be used to help locate the problem. 8.1.3.1 Resistance Check 1. Disconnect the 2-pin connector and the dynamometer line cord. 2. Measure the resistance across the 2-pin male plug at the dynamometer. 3. Check the reading to the table below. 51 Resistance @ 20 °C Ω 171 180 80 75 75 37.5 37.5 80 80 40 40 20 20 10 10 5 40 13 MAINTENANCE Dynamometer Model HD-106 HD-100 HD-400 HD-500 HD-510 HD-505 HD-515 HD-700 HD-710 HD-705 HD-715 HD-800 HD-810 HD-805 HD-815 HD-825 ED-715 ED-815 Chapter 8 – Troubleshooting Magtrol Hysteresis Dynamometers If the reading is within ±10% of the value specified in the table, proceed to Section 8.1.3.2 – Current Check . If the reading is not within the values specified, contact Magtrol Technical Assistance. 8.1.3.2 Note: The resistance check in the table is accurate for Magtrol HD106, -100, -400, -500 and -700 Series, ED-715 and HD-825 Dynamometers. The HD-800, 805, 810 and 815 Dynamometers have circuitry between the connector and the brake coil. The brake coil must be isolated from this circuitry for the resistance in the table to be accurate. Current Check 1. Insert an ammeter between the power supply and dynamometer brake. 2. Adjust the power supply voltage until the ammeter reading is equal to the value in the following table. Dynamometer Model HD-106 HD-100 HD-400 HD-500 HD-510 HD-505 HD-515 HD-700 HD-710 HD-705 HD-715 HD-800 HD-810 HD-805 HD-815 HD-825 ED-715 ED-815 F.S. Current A 0.145 0.135 0.300 0.298 0.298 0.596 0.596 0.339 0.339 0.678 0.678 1.200 1.200 2.400 2.400 4.800 0.678 2.400 Note: The current check is accurate for all Magtrol Dynamometers. 52 MAINTENANCE 3. Attach the appropriate weight for full-scale torque and verify whether the brake holds the load. If it does not hold the load with proper current flowing in the brake, the power supply is not the problem. The dynamometer is probably at fault and you will need to contact Magtrol Technical Assistance for further help. Chapter 8 – Troubleshooting Magtrol Hysteresis Dynamometers 8.1.4 Mechanical (Rotational) Alignment Refer to the drawing and the instructions below if the dynamometer will apply torque but the torque reading will not calibrate full scale, even though the zero balance is within tolerance. See Figure 5–1 Mechanical Layout of a Load Cell. 1. Disconnect all inputs and outputs on the dynamometer rear panel. 2. Disconnect the dynamometer line cord from the line power source if applicable. 3. Carefully remove the rear panel. Note: 4. 5. 6. 7. Remove the socket-head cap screw retaining the pulse disk to the shaft. Remove the pulse disk. Loosen, but do not remove, the load cell clamping screw. Carefully grasp the brake assembly and slowly rotate the assembly in both directions. Please note several degrees of free-swing, restrained by the damper cylinder in both directions. Note: It is a good idea to clamp the rear panel to the dynamometer base plate. Do not force this assembly! The objective is to reposition the load cell in such a manner to re-establish the center of allowable rotation, restricted by the damper assembly. Devise a shim of sufficient thickness, that when inserted between the top of the damper cylinder and the damper arm, the arm will be parallel to the top of the cylinder. MAINTAIN PARALLEL DAMPER ARM DAMPER CYLINDER Figure 8–1 Damper Connection The above diagram shows the location of these elements, however, you will only be able to view them from the top. 8. While pressing down on the damper arm, thus positioning the entire assembly, tighten the load cell clamping screw. Be sure the load cell assembly has not moved axially and is seated against the sleeve resting up against the inner race of the carrier bearing. 9. Remove the shim. 10. Reinstall the pulse disk, reassemble the enclosure and then recalibrate. 53 MAINTENANCE BRAKE Chapter 8 – Troubleshooting 8.2 Magtrol Hysteresis Dynamometers Speed Readout Problems If there is an erratic speed reading, or no speed reading at all, remove the rear panel of the dynamometer and inspect the pulse disk. It must be tight on the rotor shaft and the shaft must rotate freely. Also, make sure that the disk is not bent or distorted. If the disk is damaged, contact Magtrol Technical Assistance for a replacement disk. If the pulse disk appears normal, then connect an oscilloscope with the probes across pins 8 and 10 of the dynamometer 14-pin “D” connector—pin 8 is common or ground. As the disk rotates, the pulse voltage should switch between a low of about 0.4 VDC (or less) and a high of about 5 VDC. If this signal is incorrect, the problem is on the encoder optical pickup board. The encoder optical pickup is replaceable as an assembly from the Magtrol Technical Assistance Department. If this signal is correct, examine your digital readout instrument for the problem. MAINTENANCE 54 Appendix A: Calibration Record DATE DYNAMOMETER MODEL/SERIAL # APPLIED TORQUE INDICATED TORQUE ERROR TESTER APPENDICES 55 Blu TACH_B 0VD 10VD 2 3 MTA-100-3 J7 MTA-100-5 1 2 3 4 5 INDEX SL19 Flow_Clutch J4 1 0VD 2 FLOW_CLUTCH-OK 3 +5VD SL18 MTA100-3 +25V Encoders J3 R20 xxK 0VA -5Vref C9 100 nF -5Vref +5Vref C8 100 nF TP6 SL17 SL14 1 3 4 6 +5VD -25V A_COM A_COM +25V TACH_B FLOW_CLUTCH-OK 0VA 3M3314 14P_Main J1 Torque_O/P 0VA SL12 DPB INDEX TACH_A SL13 DPA 0VD MTA-100-5 Load-Cell J2 5 Shield 4 IN + 3 IN 2 Ex + 1 Ex - DPDT SW1 2 5 1.2 K R6 100 K +5VD TACH_A P3 Zero 5K R5 100 K -5Vref 100 nF R27 0VA C11 C10 100 nF C2 100 nF 100 nF C17 100 nF C16 1.2 K R7 SL8 4 2 3 1.5 K R8 SL7 1 K R4 SL9 820 R3 SL10 680 R2 SL11 1.2 K C1 100 nF 1.8 K R9 SL6 R1 2.4 K R10 SL5 TP5 IN Adj Adj Out R35 2.4 K R34 2.4 K (Case) LM337 IC6 (Case) 10 uF C19 10 uF C18 IC5 IN LM317 Out 2.7 K R11 SL4 MTA-100-5 3.3 K R12 SL3 TP4 ) IN+ ) IN- ) TP7 ) TP8 ) 1.2 K R15 C20 C3 100 nF AD620 1 uF 3 C23 1 uF C22 R18 56 K Gain Adj. +/-15% -15V 0VA +15V 100 nF C12 20 K CW cal TP1 P1 0VA C21 -15V 5 6 IC1 0VA 10 uF R37 220 10 uF R36 220 2 4 8 3 2 1 +15V 7 4 0VA ( TP5 ( TP6 ( +15V( -15V ( R38 10 -15V BT2907A BCV48 Q4 Q3 R30 R31 10 K R39 10 K 100 K Q2 BT2222A R29 10 BCV49 Q1 Bridge_Supply -5Vref +5Vref R22 6 TP2 51 K 5 SL15 1 7 5 V ( WB/PB & HD106 ) 10 V ( HD100-825 ) 0VA +15V TL062I 270 K IC2A 1 R28 51 K 0VA 3 2 C29 C6 C5 C4 R21 27 nF 47 nF 10 nF 100 nF 7 IC4A TL062I 1 nF C24 IC4B TL062I C13 1 nF TL062I 51 K IC2B 48.7 K R24 R23 0VA 3 2 R32 100 K C25 100 nF 100 K R41 R40 100 K 0VA 5 6 100 K D3 1N4148 R33 100 K 0VA 3 2 C7 10 nF DZ1 LM4050-5V 3 +5Vref 2 0VA 1 +15V 100 K R17 R16 CCW cal 1N4148 D1 P2 5K Sym_Adj 7 R19 xx K R25 -15V +15V -15V D4 8 4 C26 100 nF C27 0VA 100 nF 0VA 4 TL062I IC4C 8 R42 10 K S2 C28 100 nF Torque_COM C15 100 nF WB/PB: 5V HD: see Data sheet L1 100 uH Torque_O/P C14 100 nF 0VA Earth_Plan SL20 1K R26 SL16 TL062I IC2C S1 OP177GS 6 D2 100 K IC3 +15V 4 MTA-100-3 J6 1 2 3 4 5 600x-bit 4.3 K R13 SL2 1 Grn APPENDICES 56 60-bit 5.1 K R14 SL1 1 1N4148 1N4148 B.1 Test_connectors J5 1 TP1 ( First stage O/P ) 2 TP2 ( 2nd stage O/P ) 3 Torque_O/P ( TP3 ) Appendix B: Schematics Torque Amplification Board Appenidix B: Schematics Magtrol Hysteresis Dynamometers Speed Sensor Board R2 220 R1 470 U1 0PB963 1 +5V (Pin 7 of 14 Pin, Brown Wire) F0 (Pin 10 of 14 Pin, White Wire) 3 4 2 5 GND (Pin 8 of 14 Pin, Green Wire) 2015 and later dynamometers: +5V R2 470 3 B.2 R1 200 +5V U1 1 2 C1 4.7uF R3 470 4 Fo 5 C2 .01uF OPB963N 51 GND COM GND PA D5 PA D6 PA D7 PA D8 BRAKE CONNECTION PA D9 PA D10 M OUNT HOLES APPENDICES 57 Appenidix B: Schematics B.3 Magtrol Hysteresis Dynamometers Load Cell Schematic VOLTAGE LEVELS: +5 VDC TEMP COMP 50 OHM RED 0-11 MILLIVOLT SIGNAL LEVEL BLUE TO GREEN S.G. = (4)-350 OHM BLUE 0-15 mVDC 4.42K OHM GREEN 1 OHM (2) WHITE -5 VDC FINE BALANCE 100 OHM TRIMPOT APPENDICES 58 TRANS3 APPENDICES 59 TRANS2 TRANS1 D8 1N5625 D7 1N5625 C2 1000UF R1 2.2K D6 D4 D5 5KP13A 5KP13A 5KP13A 1N4004 D1 3 R3 R4 680 D2 1N4004 * Resistor is selected at time of calibration for necessary current level C1 1000UF IN NEG IN POS (+35 Volts) R2* MT3 MT4 MT1 MT2 R5 680 (BUL45 Transistor ) BR2 BR1 BRAKE EMITTER BASE COLLECTOR B.4 D3 1N5625 Magtrol Hysteresis Dynamometers Appenidix B: Schematics HD-800–815 Brake Control Supply Appenidix B: Schematics B.5 Magtrol Hysteresis Dynamometers HD-825 Brake Control Supply P1 1 2 3 4 5 PEM1 03CR4 F1 L I N E ON L O A D F2 T1 MPI-300-28 1 2 120V 240V +35 DB1 3 4 SW1 OFF KBPC2502 + C14 10000uF 75V R29 1K 5W P4 2 FAN +35 5240 78B159 PC BD F3 P5 1 MOV1 VB2ZA4 P5 2 J10 1 P10 1 J10 2 P10 2 U30d-15 N/C N/C J12-2 J12-8 DYNO BRAKE J14 1 2 3 4 5 6 P14 1 2 3 4 5 6 3 FOOT CABLE ASSY P11 88M077 5 4 TO B.P. 3 2 CONNECTOR 1 6 REMOVE R38 & R41 CHANGE R71 TO 5K P11 5 4 3 TO B.P. 2 CONNECTOR 1 6 BNC CABLE ASSY 88M086 DSP6001/6200 C8 INTERNAL CABLE ASSY J11 5 4 B.P. CONNECTOR 3 2 1 6 .0022uF R16 76.8K D3 R22 1N4148 0 to +3V J3 4 J3 3 R13 R14 10.0K R12 10.0K 10.0K D2 1N5225A 5.76K OP400EY 2 R17 1 3 + U1 100K a R15 15.4K C11 .01uF C7 .047uF R25 1.0K +15 C13 R8 0 to -10V J3 2 J3 1 R6 R7 10.0K 90.9K D1 1N5242A R5 10.0K .1uF Q1 2N2222 10M 6 7 5 + U1 b R9 9.09K R10 1.00K R23 R24 100K 10.0K J7 1 2N2907 Q2 D G S 2 6 3 7 PD05 4 8 IF-6-40 -15 9.09K 9 8 10 + U1 c D4 4.99K 1N5225A R19 C12 .001uF R21 1.00K J3 6 J3 5 J4 2 R29 100 + C14 1000uF R1 5.1K + C15 1000uF R2 5.1K + C1 1uF + C4 1uF in out com com in out LM320T15 Q5 C9 .1uF C10 .1uF 60 +15 + C2 1uF C3 .1uF + C5 1uF C6 .1uF -15 APPENDICES 4 R20 4.99K R27 0.1 5W +15 U1 11 J5 2 R18 +15 BR1 J5 1 D5 Q3 IRFP250 MUR120 Q4 LM340T15 5 R26 5 J6 1 R28 50K T1 1 D6 MUR120 J6 2 R11 1M -15 J1 1 2 3 4 5 P3 1 2 3 P.C. BOARD 4 5 6 Index A I Accuracy 24 Air Cooling 22 Inputs 15 Blower 16 Compressed Air 16 Dynamometer Brake 15 B Blower Connection 36 Input 16 Setup 23 Brake Control Power 43 Brake Control Power Supply HD-800 to HD-815 57 HD-825 58 L Load Cell 41 Load Cell Schematic 56 M Manual Test Systems 20 Mechanical Alignment 52 C O Calibration 44 Calibration Beams 44 Calibration Potentiometer 16 Calibration Record 54 Calibration Weights 44 Cogging 39 Compressed Air Connection 35 Input 16 Setup 23 Cooling Methods 35 Coupling Losses 24 Couplings 37 Current Check 51 Outputs 15 P PC-Based Test Systems 21 Power Absorption Curves 25 Power Dissipation 25 R Rear Panel 15 Resistance Check 50 Rotational Alignment 52 S Safety 24 Shaft Misalignment 37 Shipping Bolt 1,17 Speed 41 Speed Encoder 48 Speed Readout Problems 53 Speed Sensor Board 56 System Configurations 20 Manual 20 PC-Based 21 D Damper Cylinder 43 Data Sheet 3 Decimal Point Control 42 Dynamometer Brake Input 15 Dynamometer Connector 15 E Earth Ground 19 Eddy Currents 39 Encoder Switch 16 Erratic Torque Reading 50 T Temperature Rise 40 Torque 41 Torque Amplification Board 55 Torque Readout Problems 49 Torque Signal Amplification 42 Troubleshooting 48,49 F Features 2 Fixtures 37 Friction 38 Full Scale Torque 50 Full Scale Torque Calibration 24 U Unpacking 1 61 Index Magtrol Hysteresis Dynamometers V Vibration 38 W Windage 24,37 Z Zero Balance 49 Zero Offset 24 62 Service Information Returning Magtrol equipment for Repair and/or Calibration Before returning equipment to Magtrol for repair and/or calibration, please visit Magtrol’s Web site at http://www.magtrol.com/support/rma.htm to begin the Return Material Authorization (RMA) process. Depending on where the equipment is located and which unit(s) will be returned, you will be directed to either ship your equipment back to Magtrol, Inc. in the United States or Magtrol SA in Switzerland. Returning Equipment to Magtrol, Inc. (United States) When returning equipment to Magtrol, Inc.’s factory in the United States for repair and/or calibration, a completed Return Material Authorization (RMA) form is required. 1. Visit Magtrol’s Web site at http://www.magtrol.com/support/rma.htm to begin the RMA process. 2. Complete the RMA form online and submit. 3. An RMA number will be issued to you via e-mail. Include this number on all return documentation. 4. Ship your equipment to: Magtrol, Inc. 70 Gardenville Parkway Buffalo, NY 14224 Attn: Repair Department 5. After Magtrol’s Repair Department receives and analyzes your equipment, a quotation listing all the necessary parts and labor costs, if any, will be faxed or e-mailed to you. 6. After receiving your repair estimate, provide Magtrol with a P.O. number as soon as possible. A purchase order confirming the cost quoted is required before your equipment can be returned. Returning Equipment to Magtrol SA (Switzerland) If you are directed to ship your equipment to Switzerland, no RMA form/number is required. Just send your equipment directly to Magtrol SA in Switzerland and follow these shipment instructions: 1. Ship your equipment to: Magtrol SA After Sales Service Route de Montena 77 1728 Rossens / Fribourg Switzerland VAT No: 485 572 2. Please use our forwarder : TNT • 1-800-558-5555 • Account No 154033 Only ship ECONOMIC way (3 days max. within Europe) 3. Include the following documents with your equipment: • Delivery note with Magtrol SA’s address (as listed above) • Three pro forma invoices with: • Your VAT number • Value - for customs purposes only • Description of returned goods • Origin of the goods (in general, Switzerland) • Noticed failures 4. A cost estimate for repair will be sent to you as soon as the goods have been analyzed. If the repair charges do not exceed 25% the price of a new unit, the repair or calibration will be completed without requiring prior customer authorization. 63 Testing, Measurement and Control of Torque-Speed-Power • Load-Force-Weight • Tension • Displacement Magtrol Inc 70 Gardenville Parkway Buffalo, New York 14224 USA Phone: +1 716 668 5555 Fax: +1 716 668 8705 E-mail: [email protected] Magtrol SA Route de Montena 77 1728 Rossens / Fribourg, Switzerland Phone: +41 (0)26 407 3000 Fax: +41 (0)26 407 3001 E-mail: [email protected] www.magtrol.com Subsidiaries in: Germany • France China • India Worldwide Network of Sales Agents


