1
Mounting
Step 1: Choose mounting location
Locate the solar charger controller on a vertical surface. Select an appropriate
mounting location. Use a horizontal line and the length of the line must be 150mm
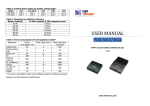
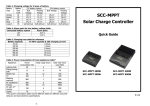
and mark the two ends on the wall. (see Fig. 1 & Fig. 3)
Step 2: Check the clearance
Install the solar charge controller in a protected area that is free of excessive dust
and has adequate air flow. Please place the solar charge controller away from other
units at least 20 cm to avoid interference. Do NOT operate it where the temperature
and humidity is outside the specific limits. (Please check the specs for the
limitations.)
Step 3: Drill the holes
Remove the controller and drill 2 holes in the marked locations with 2 screws.
Step 4: Secure controller
Place the unit on the surface and align the mounting holes with 2 screws in step 3.
(see Fig. 2 & Fig. 4)
Wiring
CAUTION! Be sure to secure all wiring, especially for mobile applications. Use
cable clamps to prevent cables from swaying when the vehicle is in motion.
Unsecured cables create loose and resistive connections which may cause excessive
heating or fire
Step 1: DC Load Wiring
The load output will provide battery voltage to connected loads such as lights,
monitors and other electronic devices.
CAUTION! NEVER conect an inductive load (e.g. electric motors) to charge
controller. It could damage it, as at start up it consumes 5-7 times more than its
power.
Wall
Step 1: connect load positive (+) wire to the positive terminal of the unit and load
negative (-) wire to the negative terminal of the unit.
Step 2: install a DC Breaker or a DC fuse holder in a positive wire. The rating of the
DC Breaker/Fuse must be according to the charging current (40 Amp). Keep the DC
breaker off or do not install the DC fuse.
Fig. 1
Fig. 2
WARNING! Please use the appropriate cable size according to load rating. Please
refer to Important Safety Warnings Section for the details. It will prevent internal
high temperature.
Step 2: Battery Wiring
Fig. 3
Fig. 4
Step 1: connect battery positive (+) wire to the positive terminal of the unit and
load negative (-) wire to the negative terminal of the unit.
Step 2: install a DC Breaker or a DC fuse holder in a positive wire. The rating of the
DC Breaker/Fuse must be according to the charging current (40 Amp). Keep the
DC breaker off or do not install the DC fuse.