1
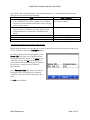
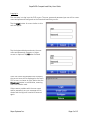
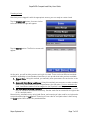
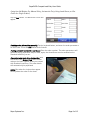
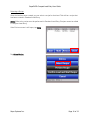
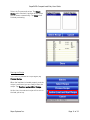
SUPERDATA
COMPACT LOAD ENTRY
FOR SSI TOUCH SCREENS
USER GUIDE
Super Systems Inc.
7205 Edington Drive
Cincinnati, OH 45249
513-772-0060
Fax: 513-772-9466
www.supersystems.com
SuperDATA Compact Load Entry User Guide
Super Systems Inc.
USA Office
Corporate Headquarters
7205 Edington Drive
Cincinnati, OH 45249
Phone: (513) 772-0060
http://www.supersystems.com
Super Systems Europe
Units 3 & 4, 17 Reddicap Trading Estate,
Sutton Coldfield, West Midlands
B75 7BU
UNITED KINGDOM
Phone: +44 (0) 121 329 2627
http://www.supersystemseurope.com
Super Systems México
Sistemas Superiores Integrales S de RL de CV
Calle 3 Int.: 11.
Zona Ind. Benito Juarez
Querétaro, Qro. Méx.
C.P.: 76120
Phone: +52 (442) 210 2459
http://www.supersystems.com.mx
Super Systems China
No. 335 XianXia Road
Room 308
Shanghai, CHINA
200336
Phone: +86 21 5206 5701/2
http://www.supersystems.com
Super Systems Inc.
Page 2 of 12
SuperDATA Compact Load Entry User Guide
Contents
Introduction ..................................................................................................................................... 4
Prerequisites................................................................................................................................... 4
Operation......................................................................................................................................... 4
Configuring a Network Connection and Furnace ........................................................................ 5
Logging In .................................................................................................................................... 6
Creating a Load ........................................................................................................................... 7
Using the Add Button (for Manual Entry, Automatic Entry Using Load Queue, or Bar Codes
for Single Orders) .................................................................................................................... 8
Using the Multi Button (for Bar Codes for Multiple Orders) ................................................... 9
Selecting a Recipe ......................................................................................................................10
Starting the Recipe .....................................................................................................................11
Revision History .............................................................................................................................12
Super Systems Inc.
Page 3 of 12
SuperDATA Compact Load Entry User Guide
Introduction
Compact Load Entry (CLE) runs as an option in conjunction with SSi’s Standard Load Entry
software and 9000 Series controllers. With CLE, users can enter and charge loads, preview
recipes, and scan bar codes created by Standard Load Entry’s Print Traveller feature, all from
the SSi touch screen. In order to do this, CLE communicates with the Standard Load Entry
server via an Ethernet connection.
IMPORTANT!
Many of the functions of CLE, such as logging in with a user name and password, are based on
Standard Load Entry configurations. Refer to the Standard Load Entry Operations Manual for
details on how to configure these options.
Prerequisites
CLE runs on SSi touch screens. For optimal operation, compatible 9000 Series software must
be loaded on the same touch screen as CLE. CLE must be in communication with the Standard
Load Entry server (using the Configure option described in this manual); an Ethernet connection
is required for this.
Operation
CLE facilitates load creation, load charging to a furnace, recipe previewing, and scanning of bar
codes created by Standard Load Entry’s Print Traveller feature. CLE is designed so that
operators can handle these functions directly from the SSi touch screen.
The main CLE screen will look similar to the
screen showed at right. Options include:
• Login (allows the user to log in with a
user name and password set up on the
Standard Load Entry server)
• Create Load (allows the user to create
loads and associate recipes with the
loads; requires operator or higher
access)
• Configure (allows the user to set up the
network connection to the Standard
Load Entry server, as well as the
furnace for which the load will be
programmed) and
• Return (exits CLE and returns to the
9000 Series menu).
NOTE about Keyboard Button: Note that in many screens, a keyboard button (
present. Tap this button to open the on-screen keyboard.
Super Systems Inc.
) will be
Page 4 of 12
SuperDATA Compact Load Entry User Guide
Using CLE is fairly straightforward. For optimal operation, it is recommended that the steps
described in the table below be followed.
Step
Refer to Section
A. (If setting up network connection and furnace for the
Configuring a Network Connection
first time) With CLE running, configure the network
and Furnace, page 5
connection to the Standard Load Entry server, as well
as the furnace setup.
1. Log in with an appropriate user name and password
Logging In, page 6
that provide the needed access level. (User names
and passwords are configured in Standard Load
Entry.)
2. Create a load.
Creating a Load, page 7
3. Select a recipe.
Selecting a Recipe, page 10
4. Confirm the load and start the recipe.
Starting the Recipe, page 11
Configuring a Network Connection and Furnace
Before load information can be entered, a server connection and furnace name must be set up
in CLE. To do this, tap on the Configure button.
A screen similar to this one will appear. In the
Server URL field, enter the IP address of the
Standard Load Entry server. (This must be the
Load Entry server and not a workstation.) If
you need assistance identifying the IP address
of the server, consult with your network
administrator.
In the Furnace Name field, enter the name of
the furnace (as it is configured in Standard
Load Entry) for which you will be setting up a
load.
Tap OK when finished.
Super Systems Inc.
Page 5 of 12
SuperDATA Compact Load Entry User Guide
Logging In
The next step is to log in on the CLE screen. The user name and password you use will be a user
name and password configured on the Standard Load Entry server.
Tap the Login button. A screen similar to this
one will appear.
Tap the keyboard button and enter the user
name and password. Operator or higher
access is required. Tap OK when finished.
If the user name and password are accepted,
the current user will be displayed on the main
CLE screen, as shown at right. Notice that the
Create Load button is colored blue, meaning
that it can now be used.
If there was a problem with the user name
and/or password, an error message will be
shown and the login will need to be entered
again.
Super Systems Inc.
Page 6 of 12
SuperDATA Compact Load Entry User Guide
Creating a Load
Now that you are logged in with the appropriate access, you are ready to create a load.
Tap the Create Load button. A screen similar
to the one shown at right will appear.
Tap the Entries button. The Entries screen will
appear.
At this point, you will be able to enter entries for the load. There are three different methods
available, depending on how Standard Load Entry is set up and what tools you have available.
1. Manual Entry. Using this method, you manually enter parameters for each order in the
load.
2. Automatic Entry Using Load Queue. Using this method, you can enter an order number,
and CLE will automatically enter the parameters for that order. For this method to be
used, Load Queue mode must be enabled on the Standard Load Entry server.
3. Bar Code Scanning (Load Traveller). This method allows you to scan bar codes created
by Print Traveller in Standard Load Entry. One bar code can be created for a single order
or for multiple orders.
Manual entry, automatic entry using Load Queue, and scanning of a bar code for a single order
are performed using the Add option. Scanning of a bar code for multiple orders is done using
the Multi option. More details are provided below.
Super Systems Inc.
Page 7 of 12
SuperDATA Compact Load Entry User Guide
Using the Add Button (for Manual Entry, Automatic Entry Using Load Queue, or Bar
Codes for Single Orders)
Tap the Add button. The Add Order screen will
appear.
If adding order information manually: Tap the keyboard button, and enter the order parameters
on the screen. Press the Add button when finished.
If using automatic entry with Load Queue: Enter the order number. The order parameters will
automatically be populated. Keep in mind, again, that Load Queue must be enabled on the
Standard Load Entry server.
If scanning a bar code for a single order: With
the cursor in the Order # field, scan the bar
code on the Load Traveller sheet you created
with Standard Load Entry. The order details
will automatically be populated.
NOTE: Bar codes for single orders appear
directly above the order on the sheet.
Super Systems Inc.
Page 8 of 12
SuperDATA Compact Load Entry User Guide
The result of any of these methods will be that
the Add Order screen will be populated with
order information.
Tap Add when finished.
Using the Multi Button (for Bar Codes for Multiple Orders)
Standard Load Entry also has the ability to create a Load Traveller sheet for multiple orders.
This sheet will contain a bar code at the top; when that bar code is scanned, parameters for
multiple orders can be entered into a single load.
To enter load information using a bar code for
multiple orders, first tab the Multi button. A
message will appear asking you to scan the
bar code.
Scan the bar code at the top of the Load
Traveller sheet you created with Standard
Load Entry. Multiple orders will automatically
be added to the order list.
Super Systems Inc.
Page 9 of 12
SuperDATA Compact Load Entry User Guide
Selecting a Recipe
Once the load has been created, you can select a recipe for that load. This will be a recipe that
has been created in Standard Load Entry.
NOTE: Edits to the recipe must be performed in Standard Load Entry. Recipes cannot be edited
in Compact Load Entry.
If the Entries screen is still open, tap Done.
Tap Select Recipe.
Super Systems Inc.
Page 10 of 12
SuperDATA Compact Load Entry User Guide
Select the Process and recipe. Tap Select
Recipe when finished. A preview of the recipe
will be shown automatically. Tap Done when
finished previewing.
Starting the Recipe
If you want to preview the recipe again, tap
Preview Recipe.
When the load data is loaded properly, and the
recipe is confirmed, you are ready to start the
recipe. Tap Confirm Load and Start Recipe.
At this time, the selected recipe will be run on
the load you set up.
Super Systems Inc.
Page 11 of 12
SuperDATA Compact Load Entry User Guide
Revision History
Rev.
-
Super Systems Inc.
Description
First Release
Date
9/11/2014
MCO #
2153
Page 12 of 12