1
AW00061107000
Acquiring Images
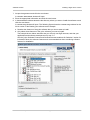
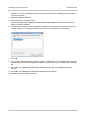
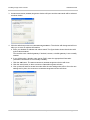
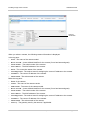
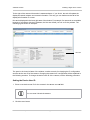
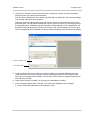
4. Click on your camera’s name in the device tree to select the camera. A camera properties
pane will open in the viewer as shown below.
You can use the selections in the camera properties pane to adjust all of the cameras settings
such as gain, black level, and exposure.
Notice the user level selector drop down list that now appears in the lower left corner of the
properties pane. You can select the beginner, expert, or guru user level. For the beginner level,
the properties pane will display only the most basic camera settings. For the expert level, the
properties pane will display all of the most commonly used camera settings. And for the guru
level, the properties pane will display all camera settings including the most advanced settings.
Camera Properties Pane
User Level Selector
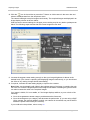
5. To get an initial feel for how to adjust your image quality, you will make adjustments to the
camera lens and you will use the pylon Viewer to make adjustments to the camera’s black
level, gain, and exposure time settings. You will also use the viewer to capture images and to
see what they look like.
6. Open the lens aperture "halfway" by choosing an intermediate f-number.
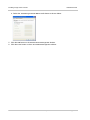
7. In the Camera Properties Pane, click the + icon next to the Transport Layer category.
a. Set the Packet Size parameter to the maximum value.
Installation and Setup Guide for Cameras Used with Basler’s pylon API
99