1
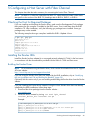
HP 3PAR Red Hat Enterprise Linux and
Oracle Linux Implementation Guide
Abstract
This implementation guide provides the information you need to configure an HP 3PAR StoreServ Storage with Red Hat Enterprise
Linux (RHEL) 4, RHEL 5, RHEL 6, and Oracle Linux (OL). General information is also provided on the basic steps required to
allocate storage on the HP 3PAR StoreServ Storage that can then be accessed by the RHEL host.
HP Part Number: QL226-96973
Published: June 2013
© Copyright 2013 Hewlett-Packard Development Company, L.P.
Confidential computer software. Valid license from HP required for possession, use or copying. Consistent with FAR 12.211 and 12.212, Commercial
Computer Software, Computer Software Documentation, and Technical Data for Commercial Items are licensed to the U.S. Government under
vendor's standard commercial license.
The information contained herein is subject to change without notice. The only warranties for HP products and services are set forth in the express
warranty statements accompanying such products and services. Nothing herein should be construed as constituting an additional warranty. HP shall
not be liable for technical or editorial errors or omissions contained herein.
Acknowledgements
Java and Oracle are registered trademarks of Oracle and/or its affiliates.
Red Hat and Red Hat Enterprise Linux are registered trademarks of Red Hat, Inc.
UNIX® is a registered trademark of The Open Group.
Windows® is a U.S. registered trademark of Microsoft Corporation.
Contents
1 Introduction...............................................................................................6
Supported Configurations..........................................................................................................6
HP 3PAR OS Upgrade Considerations.........................................................................................7
Audience.................................................................................................................................7
2 Configuring the HP 3PAR StoreServ Storage for Fibre Channel..........................8
Configuring the HP 3PAR StoreServ Storage Running HP 3PAR OS 3.1.x or OS 2.3.x.........................8
Configuring Ports on the HP 3PAR StoreServ Storage for a Direct Connection...............................8
Configuring Ports on the HP 3PAR StoreServ Storage for a Fabric Connection..............................9
Creating the Host Definition................................................................................................11
Configuring the HP 3PAR StoreServ Storage Running HP 3PAR OS 2.2.x........................................11
Configuring Ports for a Direct Connection..............................................................................11
Configuring Ports for a Fabric Connection.............................................................................12
Creating the Host Definition................................................................................................12
Connecting the HP 3PAR StoreServ Storage to the Host................................................................12
Setting Up and Zoning the Fabric.............................................................................................13
HP 3PAR Coexistence.........................................................................................................14
Configuration Guidelines for Fabric Vendors..........................................................................14
Target Port Limits and Specifications.....................................................................................15
HP 3PAR Priority Optimization.............................................................................................15
Persistent Ports...................................................................................................................15
Persistent Ports Setup and Connectivity Guidelines.............................................................16
Persistent Ports Limitations...............................................................................................17
Unsupported Configurations...........................................................................................17
FCoE-to-FC Connectivity...........................................................................................................18
3 Configuring the HP 3PAR StoreServ Storage for iSCSI....................................19
Configuring Ports for an iSCSI Connection.................................................................................19
Creating the Software iSCSI Host Definition................................................................................20
RHEL iscsiadm Utility Usage.....................................................................................................23
Target Port Limits and Specifications..........................................................................................24
HP 3PAR Priority Optimization..................................................................................................24
4 Configuring the HP 3PAR StoreServ Storage for FCoE....................................26
Setting Up the FCoE Switch, FCoE Initiator, and FCoE target ports.................................................26
Target Port Limits and Specifications..........................................................................................28
HP 3PAR Priority Optimization..................................................................................................28
5 Configuring a Host Server with Fibre Channel..............................................29
Checking the Host for Required Packages..................................................................................29
Installing the Emulex HBA........................................................................................................29
Building the Emulex Driver..................................................................................................29
Modifying the /etc/modprobe.conf File and Building the Ramdisk...........................................30
Setting up the NVRAM and BIOS with the Emulex HBA...........................................................33
Enabling an Adapter to Boot from SAN...........................................................................33
Configuring Boot Devices...............................................................................................34
Configuring the Emulex HBA using the HBACMD Utility..........................................................34
Installing the QLogic HBA........................................................................................................35
Building the QLogic Driver..................................................................................................35
Modifying the /etc/modprobe.conf file and Building the Ramdisk............................................35
Setting Up the NVRAM and BIOS with the QLogic HBA..........................................................37
Configuring the QLogic HBA Using the SCLI Utility.................................................................38
Installing the Brocade HBA......................................................................................................39
Contents
3
Building the Brocade Driver.................................................................................................39
Setting up the NVRAM and BIOS with the Brocade HBA.........................................................40
Configure the following NVRAM settings using the Brocade BIOS utility...............................40
Enabling an Adapter to Boot from SAN...........................................................................40
Configuring Boot Devices...............................................................................................40
Configuring the Brocade HBA using the BCU Utility...........................................................41
Setting the SCSI Timeout..........................................................................................................41
Using UDEV Rules to Set the SCSI Timeout.............................................................................41
Verifying the SCSI Timeout Settings..................................................................................42
Using QLogic Scripts to Set the SCSI Timeout.........................................................................43
Using Emulex Scripts to Set the SCSI Timeout.........................................................................44
Setting Up Multipathing Software.............................................................................................45
Setting Up Device-mapper...................................................................................................45
Modifying the /etc/multipath.conf File.............................................................................46
Enabling Multipath........................................................................................................48
Setting Up Veritas DMP Multipathing....................................................................................48
Installing the HP 3PAR Host Explorer Package........................................................................50
6 Configuring a Host Server with iSCSI..........................................................51
Setting Up the Switch, iSCSI Initiator, and iSCSI target ports.........................................................51
Configuring RHEL 4 for iSCSI...................................................................................................51
Installing iSCSI on RHEL 4...................................................................................................51
Setting Up a Software iSCSI for RHEL 4................................................................................51
Configuring RHEL 4 iSCSI Settings with Device-mapper Multipathing........................................52
Configuring RHEL 5 or RHEL 6 for Software and Hardware iSCSI..................................................54
Installing iSCSI on RHEL 5 or RHEL 6....................................................................................54
Setting Up Software iSCSI for RHEL 5, 6...............................................................................54
Setting Up Hardware iSCSI for RHEL 5 or RHEL 6..................................................................56
Setting IP Addresses Using BIOS.....................................................................................56
Using the OneCommand Manager GUI...........................................................................58
Using the hbacmd Utility................................................................................................65
Configuring RHEL 5 or RHEL 6 iSCSI Settings with Device-mapper Multipathing.........................67
Starting the iSCSI Daemon for RHEL 5 or RHEL 6...................................................................70
Creating the Software iSCSI Connection in RHEL 5 or RHEL 6 Using the iscsiadm Command.......71
Configuring CHAP for the iSCSI Host........................................................................................72
Setting the Host CHAP Authentication on the HP 3PAR StoreServ Storage..................................72
Setting the Host CHAP for RHEL 5 or RHEL 6 on the Host...................................................73
Setting the Host CHAP for RHEL 4...................................................................................74
Setting Up the Bidirectional CHAP on the HP 3PAR StoreServ Storage.......................................75
Setting the Bidirectional CHAP for RHEL 5 or RHEL 6.........................................................75
Setting the Bidirectional CHAP for RHEL 4........................................................................77
Configuring and Using Internet Storage Name Server..................................................................78
Using a Microsoft iSNS Server to Discover Registrations..........................................................78
Using the iSNS Server to Create a Discovery Domain.............................................................79
Configuring the iSCSI Initiator and Target for iSNS Server Usage.............................................79
Configuring the HP 3PAR StoreServ Storage......................................................................79
Configuring the iSNS Client (RHEL Host)...........................................................................79
7 Configuring a Host Server with FCoE..........................................................81
Linux Host Server Requirements.................................................................................................81
Configuring the FCoE Switch....................................................................................................81
Using system BIOS to configure FCoE........................................................................................81
8 Allocating Storage for Access by the RHEL Host............................................85
Creating Storage on the HP 3PAR StoreServ Storage...................................................................85
Creating Virtual Volumes....................................................................................................85
4
Contents
Creating Thinly-provisioned Virtual Volumes...........................................................................86
Exporting LUNs to the Host......................................................................................................86
Restrictions on Volume Size and Number...................................................................................87
Discovering Devices with an Emulex HBA...................................................................................87
Scan Methods for LUN Discovery.........................................................................................87
Method 1 - sysfs Scan....................................................................................................87
Method 2 - Adding Single Devices..................................................................................88
Verifying Devices Found by the Host Using the Emulex HBA.....................................................89
Discovering Devices with a QLogic HBA....................................................................................89
Scan Methods for LUN Discovery.........................................................................................90
Method 1 - sysfs Scan Using the echo Statement................................................................90
Method 2 - Scan using add single device.........................................................................92
Verifying Devices Found by the Host Using the QLogic HBA.....................................................93
Discovering Devices with a Software iSCSI Connection................................................................94
Discovering Devices with RHEL 5 or RHEL 6...........................................................................94
Discovering Devices with RHEL 4..........................................................................................95
9 Modifying HP 3PAR Devices on the Host Server............................................97
Creating Device-mapper Devices..............................................................................................97
Displaying Detailed Device-mapper Node Information.................................................................99
Partitioning Device-mapper Nodes..........................................................................................100
Creating Veritas Volume Manager Devices...............................................................................104
Removing a Storage Volume from the Host...............................................................................104
UNMAP Storage Hardware Primitive Support for RHEL 6.x.........................................................106
10 Booting the Host from the HP 3PAR StoreServ Storage...............................108
HP 3PAR StoreServ Storage Setup Requirements........................................................................108
RHEL Host HBA BIOS Setup Considerations..............................................................................108
Booting from the HP 3PAR StoreServ Storage Using QLogic HBAs..........................................108
Booting from the HP 3PAR StoreServ Storage Using Emulex HBAs...........................................108
Installation from RHEL Linux CDs or DVD..................................................................................109
Modifying the /etc/multipath.conf File....................................................................................110
Changing the Emulex HBA Inbox Driver Parameters...................................................................114
Installing the New QLogic Driver............................................................................................114
11 Using Veritas Cluster Servers...................................................................116
12 Using RHEL Xen Virtualization.................................................................117
13 Using RHEL Cluster Services...................................................................118
14 Using Red Hat Enterprise Virtualization (KVM/RHEV-H)..............................119
15 Using Oracle Linux................................................................................120
Oracle Linux with RHEL-Compatible Kernel...............................................................................120
Using Oracle Linux with Unbreakable Kernel............................................................................120
Oracle VM Server................................................................................................................120
Oracle Linux Creating Partitions..............................................................................................120
16 Support and Other Resources.................................................................122
Contacting HP......................................................................................................................122
HP 3PAR documentation........................................................................................................122
Typographic conventions.......................................................................................................125
HP 3PAR branding information...............................................................................................125
17 Documentation feedback.......................................................................126
Contents
5
1 Introduction
This implementation guide provides the information you need to configure an HP 3PAR StoreServ
Storage with Red Hat Enterprise Linux (RHEL) 4, RHEL 5, RHEL 6, and Oracle Linux (OL). General
information is also provided on the basic steps required to allocate storage on the HP 3PAR
StoreServ Storage that can then be accessed by the RHEL host.
The information contained in this implementation guide is the outcome of careful testing of the
HP 3PAR StoreServ Storage with as many representative hardware and software configurations
as possible.
NOTE:
All references to RHEL also apply to Oracle Linux unless stated otherwise.
Table 1 RHEL and Oracle Linux Releases
RHEL Release
Oracle Linux Release
4.x
4.x
5.x
5.x
6.x
6.x
Required
For predictable performance and results with your HP 3PAR StoreServ Storage, the information in
this guide must be used in concert with the documentation set provided by HP for the HP 3PAR
StoreServ Storage and the documentation provided by the vendor for their respective products.
Supported Configurations
The following types of host connections are supported between the HP 3PAR StoreServ Storage
and hosts running Linux OS:
•
Fibre Channel (FC)
•
Software iSCSI initiator
•
Hardware iSCSI initiator
•
Fibre Channel over Ethernet (FCoE)
Fibre Channel connections are supported between the HP 3PAR StoreServ Storage and the RHEL
host server in both a fabric-attached and direct-connect topology.
For information about supported hardware and software platforms, see the HP Single Point of
Connectivity Knowledge (HP SPOCK) website:
http://www.hp.com/storage/spock
For more information about HP 3PAR storage products, follow the links in “HP 3PAR Storage
Products” (page 6).
Table 2 HP 3PAR Storage Products
6
Product
See...
HP 3PAR StoreServ 7000 Storage
http://h20000.www2.hp.com/bizsupport/TechSupport/
Home.jsp?lang=en&cc=us&prodTypeId=12169&
prodSeriesId=5335712&lang=en&cc=us
HP 3PAR StoreServ 10000 Storage
http://h20000.www2.hp.com/bizsupport/TechSupport/
Home.jsp?lang=en&cc=us&prodTypeId=12169&
prodSeriesId=5157544&lang=en&cc=us
Introduction
Table 2 HP 3PAR Storage Products (continued)
Product
See...
HP 3PAR Storage Systems
http://h20180.www2.hp.com/apps/Nav?
h_pagetype=s-001&h_lang=en&h_cc=us&
h_product=5044012&h_client=S-A-R163-1&
h_page=hpcom&lang=en&cc=us
HP 3PAR StoreServ Software — Device Management
http://h20180.www2.hp.com/apps/Nav?
h_pagetype=s-001&h_lang=en&h_cc=us&
h_product=5046476&h_client=S-A-R163-1&
h_page=hpcom&lang=en&cc=us
HP 3PAR StoreServ Software—Replication
http://h20180.www2.hp.com/apps/Nav?
h_pagetype=s-001&h_lang=en&h_cc=us&
h_product=5053605&h_client=S-A-R163-1&
h_page=hpcom&lang=en&cc=us
HP 3PAR OS Upgrade Considerations
For information about planning an online HP 3PAR Operating System (HP 3PAR OS) upgrade, see
the HP 3PAR Operating System Upgrade Pre-Planning Guide, which is available on the HP Business
Support Center (BSC) website:
http://www.hp.com/go/bsc
For complete details about supported host configurations and interoperability, consult the HP
SPOCK website:
http://www.hp.com/storage/spock
Audience
This implementation guide is intended for system and storage administrators who monitor and
direct system configurations and resource allocation for the HP 3PAR StoreServ Storage.
The tasks described in this manual assume that the administrator is familiar with RHEL 4, RHEL 5,
RHEL 6, or Oracle Linux and the HP 3PAR OS.
This guide provides basic information that is required to establish communications between the
HP 3PAR StoreServ Storage and the Red Hat Enterprise Linux or Oracle Linux host and to allocate
the required storage for a given configuration. However, the appropriate HP documentation must
be consulted in conjunction with the RHEL host and host bus adapter (HBA) vendor documentation
for specific details and procedures.
NOTE: This implementation guide is not intended to reproduce or replace any third-party product
documentation. For details about devices such as host servers, HBAs, fabric switches, and
non-HP 3PAR software management tools, consult the appropriate third-party documentation.
HP 3PAR OS Upgrade Considerations
7
2 Configuring the HP 3PAR StoreServ Storage for Fibre
Channel
This chapter describes how to establish a connection between an HP 3PAR StoreServ Storage and
an RHEL host using Fibre Channel and how to set up the fabric when running HP 3PAR OS 3.1.x,
OS 2.3.x, or OS 2.2.x. For information on setting up the physical connection for a particular
HP 3PAR StoreServ Storage, see the appropriate HP 3PAR installation manual.
Required
If you are setting up a fabric along with your installation of the HP 3PAR StoreServ Storage, see
“Setting Up and Zoning the Fabric” (page 13) before configuring or connecting your HP 3PAR
StoreServ Storage.
Configuring the HP 3PAR StoreServ Storage Running HP 3PAR OS 3.1.x
or OS 2.3.x
This section describes how to configure the HP 3PAR StoreServ Storage running HP 3PAR OS 3.1.x
or OS 2.3.x.
Required
The following setup must be completed before connecting the HP 3PAR StoreServ Storage port to
a device.
NOTE: When deploying HP Virtual Connect direct-attach FC storage for HP 3PAR storage systems,
where the HP 3PAR StoreServ Storage ports are cabled directly to the uplink ports on the HP Virtual
Connect FlexFabric 10 Gb/24-port Module for c-Class BladeSystem, follow the steps for configuring
the HP 3PAR StoreServ Storage ports for a fabric connection.
For more information about HP Virtual Connect, HP Virtual Connect interconnect modules, and the
HP Virtual Connect direct-attach feature, see HP Virtual Connect documentation and the HP SAN
Design Reference Guide. This documentation is available on the HP BSC website:
http://www.hp.com/go/bsc
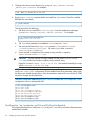
Configuring Ports on the HP 3PAR StoreServ Storage for a Direct Connection
To configure HP 3PAR StoreServ Storage ports for a direct connection to the RHEL host, complete
the following steps:
1. To set up the HP 3PAR StoreServ Storage ports for a direct connection, issue the following set
of commands with the appropriate parameters for each direct connect port:
a. controlport offline <node:slot:port>
b. controlport config host -ct loop <node:slot:port>
where -ct loop specifies a direct connection.
c.
controlport rst <node:slot:port>
Example:
# controlport offline 1:5:1
# controlport config host -ct loop 1:5:1
# controlport rst 1:5:1
8
Configuring the HP 3PAR StoreServ Storage for Fibre Channel
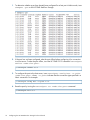
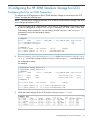
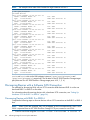
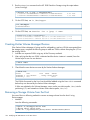
2.
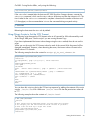
After all ports have been configured, verify that the ports are configured for a host in a direct
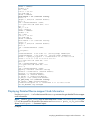
connection by issuing the showport -par command on the HP 3PAR StoreServ Storage.
In the following example, loop denotes a direct connection and point denotes a fabric
connection:
# showport -par
N:S:P
0:0:1
0:0:2
0:0:3
0:0:4
0:4:1
0:4:2
0:5:1
0:5:2
0:5:3
0:5:4
1:0:1
1:0:2
1:0:3
1:0:4
1:2:1
1:2:2
1:4:1
1:4:2
1:5:1
1:5:2
1:5:3
1:5:4
Connmode ConnType CfgRate
disk
loop
auto
disk
loop
auto
disk
loop
auto
disk
loop
auto
host
point
auto
host
point
auto
host
point
auto
host
loop
auto
host
point
auto
host
loop
auto
disk
loop
auto
disk
loop
auto
disk
loop
auto
disk
loop
auto
host
point
auto
host
loop
auto
host
point
auto
host
point
auto
host
loop
auto
host
loop
auto
host
loop
auto
host
loop
auto
MaxRate
2Gbps
2Gbps
2Gbps
2Gbps
4Gbps
4Gbps
2Gbps
2Gbps
2Gbps
2Gbps
2Gbps
2Gbps
2Gbps
2Gbps
2Gbps
2Gbps
2Gbps
2Gbps
4Gbps
4Gbps
4Gbps
4Gbps
Class2
disabled
disabled
disabled
disabled
disabled
disabled
disabled
disabled
disabled
disabled
disabled
disabled
disabled
disabled
disabled
disabled
disabled
disabled
disabled
disabled
disabled
disabled
UniqNodeWwn
disabled
disabled
disabled
disabled
disabled
disabled
disabled
disabled
disabled
disabled
disabled
disabled
disabled
disabled
disabled
disabled
disabled
disabled
disabled
disabled
disabled
disabled
VCN
disabled
disabled
disabled
disabled
disabled
disabled
disabled
disabled
disabled
disabled
disabled
disabled
disabled
disabled
disabled
disabled
disabled
disabled
disabled
disabled
disabled
disabled
IntCoal
enabled
enabled
enabled
enabled
enabled
enabled
enabled
enabled
enabled
enabled
enabled
enabled
enabled
enabled
enabled
enabled
enabled
enabled
enabled
enabled
enabled
enabled
Configuring Ports on the HP 3PAR StoreServ Storage for a Fabric Connection
To configure HP 3PAR StoreServ Storage ports for a fabric connection, complete the following
steps for each port connecting to a fabric.
CAUTION: Before taking a port offline in preparation for a fabric connection, you should verify
that the port has not been previously defined and that it is not already connected to a host, as this
would interrupt the existing host connection. If an HP 3PAR StoreServ Storage port is already
configured for a fabric connection, you can ignore step 2, since you do not have to take the port
offline.
Configuring the HP 3PAR StoreServ Storage Running HP 3PAR OS 3.1.x or OS 2.3.x
9
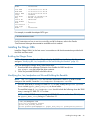
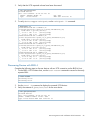
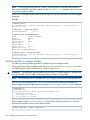
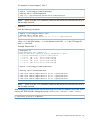
1.
To determine whether a port has already been configured for a host port in fabric mode, issue
showport -par on the HP 3PAR StoreServ Storage.
2.
If the port has not been configured, take the port offline before configuring it for connection
to a host server. To take the port offline, issue the HP 3PAR OS CLI command controlport
offline <node:slot:port>.
# controlport offline 1:5:1
3.
To configure the port to the host server, issue controlport config host -ct point
<node:slot:port>, where -ct point indicates that the connection type specified is a
fabric connection. For example:
# controlport config host -ct point 1:5:1
4.
Reset the port by issuing the controlport rst <node:slot:port> command.
# controlport rst 1:5:1
10
Configuring the HP 3PAR StoreServ Storage for Fibre Channel
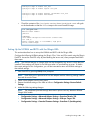
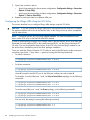
Creating the Host Definition
Before connecting the RHEL host to the HP 3PAR StoreServ Storage, create a host definition that
specifies a valid host persona for each HP 3PAR StoreServ Storage that is to be connected to a
host HBA port through a fabric or a direct connection.
1. To create host definitions, issue the createhost [options] <hostname> [<WWN>...]
command. For example:
# createhost -persona 1
redhathost 1122334455667788 1122334455667799
:
To enable HP 3PAR Host Explorer functionality, HP recommends host persona 1 for hosts running
RHEL 4 update 6 and later, RHEL 5.0 and later, or RHEL 6.0 and later.
Host persona 1 enables two functional features:
•
Host_Explorer, which requires the SESLun element of host persona 1
•
UARepLun, which notifies the host of newly exported VLUNs and triggers a LUN discovery
request on the host, making the VLUN automatically available.
Currently, none of the supported RHEL versions use the UARepLun, so you must manually scan the
newly exported VLUNs.
Host persona 6 is automatically assigned following a rolling upgrade from HP 3PAR OS 2.2.x. If
one or both of these features are to be used, the host persona value can be changed from 6 to 1
after the upgrade.
NOTE: See the HP 3PAR Command Line Interface Reference or the HP 3PAR Management Console
Help for complete details on using the controlport, createhost, and showhost commands.
These documents are available on the HP BSC website:
http://www.hp.com/go/bsc
Configuring the HP 3PAR StoreServ Storage Running HP 3PAR OS 2.2.x
This section describes how to configure an HP 3PAR StoreServ Storage running HP 3PAR OS 2.2.x.
Required
The following setup must be completed before connecting the HP 3PAR StoreServ Storage port to
a device.
Configuring Ports for a Direct Connection
To configure the HP 3PAR StoreServ Storage ports for a direct connection, complete the following
steps.
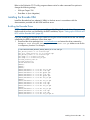
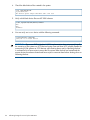
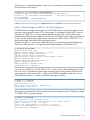
1. Set each HP 3PAR StoreServ Storage port to port persona 1 by issuing controlport
persona 1 <X:X:X>, where <X:X:X> is the port location, expressed as node:slot:port.
2. Issue controlport vcn disable -f <X:X:X>.
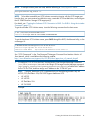
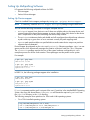
3. Verify that each port has the appropriate persona defined:
# showport -par
N:S:P ConnTypeCfgRateClass2 VCN -----------Persona-----------4:0:2 loop
auto
disable disable *(1) g_ven, g_hba, g_os, 0,
IntCoal
DC enabled
Configuring the HP 3PAR StoreServ Storage Running HP 3PAR OS 2.2.x
11
Configuring Ports for a Fabric Connection
To configure the HP 3PAR StoreServ Storage ports for a fabric connection, complete the following
steps.
Procedure 1
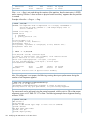
1.
2.
3.
Set each storage server port that will connect to a fabric to port persona 7 by issuing
controlport persona 7 <X:X:X>, where <X:X:X> is the port location, expressed as
node:slot:port.
Issue controlport vcn disable -f <X:X:X> for each port.
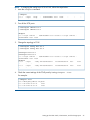
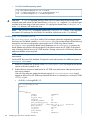
Verify that each port has the appropriate persona defined:
# showport -par
N:S:P ConnType CfgRate Class2 VCN -----------Persona------------ IntCoal
4:0:2 point
auto disable disable *(7) g_ven, g_hba, g_os, 0, FA enabled
Creating the Host Definition
Before connecting the RHEL host to the HP 3PAR StoreServ Storage, create a host definition for
each HP 3PAR StoreServ Storage that is to be connected to a host HBA port through a fabric or
a direct connection.
1. To create host definitions on the HP 3PAR StoreServ Storage, issue the following command:
# createhost [options] <hostname> [<WWN>]...
Example:
# createhost redhathost 1122334455667788 1122334455667799
2.
To verify the host definition, issue the showhost command. For example:
# showhost
2 redhathost 1122334455667788 4:0:1
1122334455667799 5:0:1
Connecting the HP 3PAR StoreServ Storage to the Host
During this stage, connect the HP 3PAR StoreServ Storage to the host server directly or to the fabric.
This set of tasks includes physically cabling the HP 3PAR StoreServ Storage to the host server or
fabric.
12
Configuring the HP 3PAR StoreServ Storage for Fibre Channel
Setting Up and Zoning the Fabric
NOTE: This section does not apply when deploying HP Virtual Connect direct-attach FC storage
for HP 3PAR storage systems, where the HP 3PAR StoreServ Storage ports are cabled directly to
the uplink ports on the HP Virtual Connect FlexFabric 10 Gb/24-port Module for c-Class
BladeSystem. Zoning is automatically configured based on the Virtual Connect SAN Fabric and
server profile definitions.
For more information about HP Virtual Connect, HP Virtual Connect interconnect modules, and the
HP Virtual Connect direct-attach feature, see HP Virtual Connect documentation and the HP SAN
Design Reference Guide. This documentation is available on the HP BSC website:
http://www.hp.com/go/bsc
Fabric zoning controls which Fibre Channel end-devices have access to each other on the fabric.
Zoning also isolates the host server and HP 3PAR StoreServ Storage ports from Registered State
Change Notifications (RSCNs) that are irrelevant to these ports.
You can set up fabric zoning by associating the device World Wide Names (WWNs) or the switch
ports with specified zones in the fabric. Although you can use either the WWN method or the port
zoning method with the HP 3PAR StoreServ Storage, the WWN zoning method is recommended
because the zone survives the changes of switch ports when cables are moved around on a fabric.
Required
Employ fabric zoning, using the methods provided by the switch vendor, to create relationships
between host server HBA ports and storage server ports before connecting the host server HBA
ports or HP 3PAR StoreServ Storage ports to the fabric(s).
Fibre Channel switch vendors support the zoning of the fabric end-devices in different zoning
configurations. There are advantages and disadvantages with each zoning configuration. Choose
a zoning configuration based on your needs.
The HP 3PAR arrays support the following zoning configurations:
•
One initiator to one target per zone
•
One initiator to multiple targets per zone (zoning by HBA). This zoning configuration is
recommended for the HP 3PAR StoreServ Storage. Zoning by HBA is required for coexistence
with other HP Storage arrays.
NOTE: For high availability/clustered environments that require multiple initiators to access
the same set of target ports, HP recommends that separate zones be created for each initiator
with the same set of target ports.
NOTE: The storage targets in the zone can be from the same HP 3PAR StoreServ Storage,
multiple HP 3PAR StoreServ Storages , or a mixture of HP 3PAR and other HP storage systems.
For more information about using one initiator to multiple targets per zone, see Zoning by HBA in
the Best Practices chapter of the HP SAN Design Reference Guide. This document is available on
the HP BSC website:
http://www.hp.com/go/bsc
If you use an unsupported zoning configuration and an issue occurs, HP may require that you
implement one of the supported zoning configurations as part of the troubleshooting or corrective
action.
After configuring zoning and connecting each host server HBA port and HP 3PAR StoreServ Storage
port to the fabric(s), verify the switch and zone configurations using the HP 3PAR OS CLI showhost
command, to ensure that each initiator is zoned with the correct target(s).
Setting Up and Zoning the Fabric
13
HP 3PAR Coexistence
The HP 3PAR StoreServ Storage array can coexist with other HP array families.
For supported HP arrays combinations and rules, see the HP SAN Design Reference Guide, available
on the HP BSC website:
http://www.hp.com/go/bsc
Configuration Guidelines for Fabric Vendors
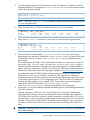
Use the following fabric vendor guidelines before configuring ports on fabric(s) to which the
HP 3PAR StoreServ Storage connects.
•
Brocade switch ports that connect to a host server HBA port or to an HP 3PAR StoreServ
Storage port should be set to their default mode. On Brocade 3xxx switches running Brocade
firmware 3.0.2 or later, verify that each switch port is in the correct mode using the Brocade
telnet interface and the portcfgshow command, as follows:
brocade2_1:admin> portcfgshow
Ports
0 1 2 3
4 5 6 7
-----------------+--+--+--+--+----+--+--+-Speed
AN AN AN AN
AN AN AN AN
Trunk Port
ON ON ON ON
ON ON ON ON
Locked L_Port
.. .. .. ..
.. .. .. ..
Locked G_Port
.. .. .. ..
.. .. .. ..
Disabled E_Port
.. .. .. ..
.. .. .. ..
where AN:AutoNegotiate, ..:OFF, ??:INVALID.
The following fill-word modes are supported on a Brocade 8 G/s switch running FOS firmware
6.3.1a and later:
admin>portcfgfillword
Usage: portCfgFillWord PortNumber Mode [Passive]
Mode: 0/-idle-idle
- IDLE in Link Init, IDLE as fill word (default)
1/-arbff-arbff - ARBFF in Link Init, ARBFF as fill word
2/-idle-arbff - IDLE in Link Init, ARBFF as fill word (SW)
3/-aa-then-ia - If ARBFF/ARBFF failed, then do IDLE/ARBFF
HP recommends that you set the fill word to mode 3 (aa-then-ia), which is the preferred
mode using the portcfgfillword command. If the fill word is not correctly set, er_bad_os
counters (invalid ordered set) will increase when you use the portstatsshow command
while connected to 8 G HBA ports, as they need the ARBFF-ARBFF fill word. Mode 3 will
also work correctly for lower-speed HBAs, such as 4 Gb/2 Gb HBAs. For more information,
see the Fabric OS command Reference Manual supporting FOS 6.3.1a and the FOS release
notes.
In addition, some HP switches, such as the HP SN8000B 8-slot SAN backbone director switch,
the HP SN8000B 4-slot SAN director switch, the HP SN6000B 16 Gb FC switch, or the HP
SN3000B 16 Gb FC switch automatically select the proper fill-word mode 3 as the default
setting.
14
•
McDATA switch or director ports should be in their default modes as G or GX-port (depending
on the switch model), with their speed setting permitting them to autonegotiate.
•
Cisco switch ports that connect to HP 3PAR StoreServ Storage ports or host HBA ports should
be set to AdminMode = FX and AdminSpeed = auto port, with the speed set to auto negotiate.
•
QLogic switch ports should be set to port type GL-port and port speed auto-detect. QLogic
switch ports that connect to the HP 3PAR StoreServ Storage should be set to I/O Stream Guard
disable or auto, but never enable.
Configuring the HP 3PAR StoreServ Storage for Fibre Channel
Target Port Limits and Specifications
To avoid overwhelming a target port and ensure continuous I/O operations, observe the following
limitations on a target port:
•
Maximum of 64 host server ports per HP 3PAR StoreServ Storage port, with a maximum total
of 1,024 host server ports per HP 3PAR StoreServ Storage.
•
I/O queue depth on each HP 3PAR StoreServ Storage HBA model, as follows:
◦
QLogic 2G: 497
◦
LSI 2G: 510
◦
Emulex 4G: 959
◦
HP 3PAR HBA 4G: 1638
◦
HP 3PAR HBA 8G: 3276 (HP 3PAR StoreServ 10000 and HP 3PAR StoreServ 7000
systems only)
•
The I/O queues are shared among the connected host server HBA ports on a first-come,
first-served basis.
•
When all queues are in use and a host HBA port tries to initiate I/O, it receives a target queue
full response from the HP 3PAR StoreServ Storage port. This condition can result in erratic I/O
performance on each host server. If this condition occurs, each host server should be throttled
so that it cannot overrun the HP 3PAR StoreServ Storage port's queues when all host servers
are delivering their maximum number of I/O requests.
NOTE: When host server ports can access multiple targets on fabric zones, the assigned
target number assigned by the host driver for each discovered target can change when the
host server is booted and some targets are not present in the zone. This situation may change
the device node access point for devices during a host server reboot. This issue can occur
with any fabric-connected storage, and is not specific to the HP 3PAR StoreServ Storage.
HP 3PAR Priority Optimization
The HP 3PAR Priority Optimization feature introduced in HP 3PAR OS versions 3.1.2.MU2 is a
more efficient and dynamic solution for managing server workloads and can be utilized as an
alternative to setting host server I/O throttles. Using this feature, a storage administrator is able to
share storage resources more effectively by enforcing quality of service limits on the array. No
special settings are needed on the host side to obtain the benefit of Priority Optimization although
certain per target or per adapter throttle settings may need to be adjusted in rare cases. For
complete details of how to use Priority Optimization (Quality of Service) on HP 3PAR arrays, please
read the HP 3PAR Priority Optimization technical whitepaper available at http://www.hp.com/
go/bsc.
Persistent Ports
NOTE:
The Persistent Ports feature is supported only on HP 3PAR OS 3.1.2.
The Persistent Ports (or virtual ports) feature minimizes I/O disruption during an HP 3PAR Storage
online upgrade or node-down event. Currently, persistent ports are supported only with Fibre
Channel connections. Persistent Ports allows a Fibre Channel HP 3PAR Storage port to assume the
identity (port WWN) of a failed port while retaining its own identity. The solution uses the NPIV
feature for Fibre Channel. This feature does not work in direct-connect mode and is supported only
on Fibre Channel target ports that connect to Fibre Channel fabric and are in point-to-point mode
where both the active and partner ports share the same fabric.
Setting Up and Zoning the Fabric
15
Each Fibre Channel port has a partner port automatically assigned by the system. Where a given
physical port assumes the identity of its partner port, the assumed port is designated as a persistent
port. Array port failover and failback with Persistent Ports is transparent to most host-based
multipathing software which, in most cases, can keep all its I/O paths active.
The Persistent Ports feature is activated by default during node-down events (online upgrade or
node reboot). Port shutdown or reset events do not trigger this feature. Persistent Ports is enabled
by default starting with the HP 3PAR OS 3.1.2 software.
In the event that an HP 3PAR Storage node is downed during an online upgrade or node-down
event, the Fibre Channel target ports fail over to their partner ports. For example, in a two-node
HP 3PAR Storage array configuration, if ports 0:1:1, 0:5:1 and 1:1:1, 1:5:1 are connected to
the fabric, then if node 0 goes down, ports 0:1:1, 0:5:1 fail over to ports 1:1:1, 1:5:1 and become
active while ports 1:1:1, 1:5:1 remain active.
In HP 3PAR Storage arrays with more than two nodes, failover behavior occurs on node pairs;
that is, if node 0 goes down, ports on node 0 fail over to node 1, if node 2 goes down, ports on
node 2 fail over to node 3, and so on. Conversely, when node 1 goes down, ports on node 1 fail
over to node 0, and when node 3 goes down, ports on node 3 fail over to node 2. When the
downed node is up again, the failed-over ports automatically fail back to their original ports.
During the failover and failback process, a short pause in I/O could be experienced by the host.
Persistent Ports Setup and Connectivity Guidelines
For Persistent Ports to function properly, specific cabling setup and connectivity guidelines that
need to be followed can be found in the HP 3PAR Command Line Interface Administrator’s Manual,
“Using Persistent Ports for Nondisruptive Online Software Upgrades.” See this document for other
information about Persistent Ports as well.
The fabric switch ports connecting to the HP 3PAR array ports must support NPIV and have the
feature enabled in order for Persistent Ports to work.
The showport command output includes Partner and FailoverState columns that display
the partner port <node>:<slot>:<port> information and failover state information, respectively.
FailoverState values represent the failover state of the two ports listed in the N:S:P and
Partner columns. The FailoverState value can be one of the following:
•
none: No failover in operation
•
failover_pending: In the process of failing over to partner
•
failed_over: Failed over to partner
•
active: The partner port is failed over to this port
•
active_down: The partner port is failed over to this port, but this port is down
•
failback_pending: In the process of failing back from partner
Use the showport HP 3PAR CLI commands to get the state of the persistent ports. In the output of
the showport command shown below, under the Partner column, port 1:1:1 is the partner port
that 0:1:1 would fail over to and 0:1:1 is the partner port to which 1:1:1 would fail over. When
Persistent Ports is not active, the FailoverState for the ports would indicate none.
When a node is down during an online upgrade or node reboot, from the output of the showport
command, the FailoverState column would show that Persistent Ports is active. In the example
16
Configuring the HP 3PAR StoreServ Storage for Fibre Channel
below, node 1 has gone down, Persistent Ports for 1:1:1 has become active on port 0:1:1, and
all filesystem I/O for port 1:1:1 is physically served by port 0:1:1.
Before Persistent Ports is active, the output of the showhost command displays as follows:
# showhost
Id Name
1 server1
Persona
Generic
---------------WWN/iSCSI_Name--------------5001438009AE770E
5001438009AE770C
5001438009AE770E
5001438009AE770C
Port
0:1:1
0:1:1
1:1:1
1:1:1
When Persistent Ports is active, the output of the showhost command, under the Port column,
shows both the physical port and the physical port where Persistent Ports is active. In the example
below, port 0:1:1, logged in from each of the host HBA ports, appears twice, once for the physical
port and once again for the persistent port that is active on the physical port.
# showhost
Id Name
1 server1
Persona
Generic
---------------WWN/iSCSI_Name--------------5001438009AE770E
5001438009AE770C
5001438009AE770E
5001438009AE770C
Port
0:1:1
0:1:1
0:1:1
0:1:1
After the controller node has been successfully rebooted, the FailoverState for the ports changes
back to none, as shown in the following example:
After the node has been successfully rebooted, the node entry of node 0 reappears in the GUI and
I/O is still in progress.
Manually, you can perform failover and failback using the controlport failover <N:S:P>
and controlport failback <N:S:P> command options.
Persistent Ports Limitations
Persistent Ports Technical White Paper
To learn more about Persistent Ports, refer to the following White Paper:
http://h20195.www2.hp.com/V2/GetPDF.aspx/4AA4-4545ENW.pdf
Unsupported Configurations
The Persistent Ports feature is not supported with iSCSI and FCoE.
Setting Up and Zoning the Fabric
17
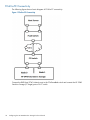
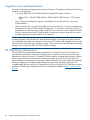
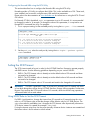
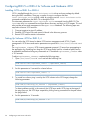
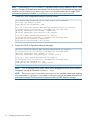
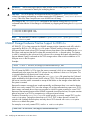
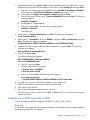
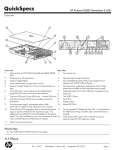
FCoE-to-FC Connectivity
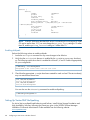
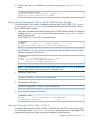
The following figure shows a basic diagram of FCoE-to-FC connectivity.
Figure 1 FCoE-to-FC Connectivity
Connect the RHEL host (FCoE initiator) ports to the FCoE-enabled switch and connect the HP 3PAR
StoreServ Storage (FC target) ports of a FC switch.
18
Configuring the HP 3PAR StoreServ Storage for Fibre Channel
3 Configuring the HP 3PAR StoreServ Storage for iSCSI
Configuring Ports for an iSCSI Connection
To configure an iSCSI target port on the HP 3PAR StoreServ Storage for connection to an iSCSI
Initiator, complete the following steps:
NOTE: The method for configuring software iSCSI on the HP 3PAR StoreServ Storage is the same
as for configuring hardware iSCSI.
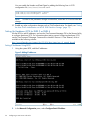
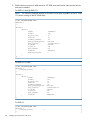
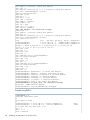
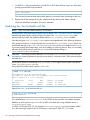
1.
10 Gb iSCSI ports on HP 3PAR StoreServ 10000 and HP 3PAR StoreServ 7000 arrays require
a one-time configuration using the controlport command. (HP 3PAR V-class, T-class, and
F-class arrays do not require this one-time setting.) Use the showport and showport -i
commands to verify the configuration setting.
For example:
# showport
N:S:P
Mode
State ----Node_WWN---- -Port_WWN/HW_Addr- Type Protocol
0:3:1 suspended config_wait
- cna
0:3:2 suspended config_wait
- cna
# showport -i
N:S:P Brand Model
0:3:1 QLOGIC QLE8242
0:3:2 QLOGIC QLE8242
2.
Rev Firmware
58 0.0.0.0
58 0.0.0.0
Serial
HWType
PCGLT0ARC1K3SK CNA
PCGLT0ARC1K3SK CNA
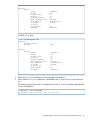
If State=config_wait or Firmware=0.0.0.0, use the controlport config iscsi
<n:s:p> command to configure. Use the showport and showport -i commands to verify
the configuration setting.
For example:
# controlport config iscsi 0:3:1
# controlport config iscsi 0:3:2
# showport
N:S:P
Mode
State ----Node_WWN---- -Port_WWN/HW_Addr- Type Protocol
...
0:3:1
target
ready
2C27D7521F3E iscsi
iSCSI
0:3:2
target
ready
2C27D7521F3A iscsi
iSCSI
# showport -i
...
N:S:P Brand Model
Rev Firmware
Serial
HWType
...
0:3:1 QLOGIC QLE8242 58 4.8.76.48015 PCGLT0ARC1K3U6 CNA
0:3:2 QLOGIC QLE8242 58 4.8.76.48015 PCGLT0ARC1K3U6 CNA
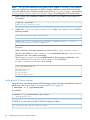
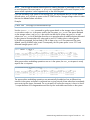
3.
Check the current settings of the iSCSI ports by issuing showport -iscsi.
Configuring Ports for an iSCSI Connection
19
4.
Set up the IP address and netmask address of the iSCSI target ports by issuing
controliscsiport addr <ipaddr> <netmask> [-f] <node:slot:port>.
# controliscsiport addr 10.100.0.101 255.255.0.0 -f 0:3:1
# controliscsiport addr 10.100.0.201 255.255.0.0 -f 1:3:1
5.
Verify the changed settings by issuing showport -iscsi.
NOTE: Make sure that VLAN connectivity is working properly. See “Setting Up the Switch,
iSCSI Initiator, and iSCSI target ports” (page 51)
6.
Issue the controliscsiport ping <ipaddr> <node:slot:port> command to verify
that the switch ports where the HP 3PAR StoreServ Storage iSCSI target ports and iSCSI Initiator
host connect are visible to each other.
# controliscsiport ping 10.100.0.100 0:3:1
Ping succeeded
NOTE: When the host initiator port and the HP 3PAR OS target port are in different IP subnets,
the gateway address for the HP 3PAR OS port should be configured in order to avoid unexpected
behavior by issuing controliscsiport gw <gw_address> [-f] <node:slot:port>.
Creating the Software iSCSI Host Definition
This section describes how to create a software iSCSI host definition.
To set up a hardware iSCSI host definition, see “Setting Up Hardware iSCSI for RHEL 5 or RHEL
6” (page 56).
20
Configuring the HP 3PAR StoreServ Storage for iSCSI
NOTE:
If multiple initiator ports are used, add the following to /etc/sysctl.conf:
net.ipv4.conf.all.arp_filter = 1
NOTE: To be able to establish an iSCSI Initiator connection/session with the iSCSI target port
from the host, you must create a host definition entry, create the iSCSI host definition, and configure
the HP 3PAR StoreServ Storage iSCSI target port(s).
For details, see “Creating the Software iSCSI Connection in RHEL 5 or RHEL 6 Using the iscsiadm
Command” (page 71).
To get the software iSCSI initiator name, issue the following command on the host server:
# cat /etc/iscsi/initiatorname.iscsi
Initiator Name=iqn.1994-05.com.redhat:a3df53b0a32dS
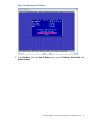
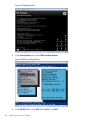
To get the hardware iSCSI inititator name, press Ctrl-S through the BIOS, the hbacmd utility, or the
ocmanager UI:
# hbacmd GetInitiatorProperties 28-92-4a-af-f5-61
Initiator login options for 28-92-4a-af-f5-61:
Initiator iSCSI Name:
iqn.1990-07.com.emulex:28-92-4a-af-f5-61
See “iSCSI Commands” in the OneCommand™Manager Command Line Interface Version 6.1
User Manual, which is available at the following website:
http://www-dl.emulex.com/support/elx/r32/b16/docs/apps/ocm_cli_manual_elx.pdf
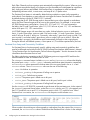
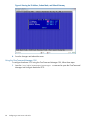
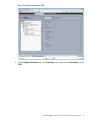
1.
To configure 10 G iSCSI on the host, Use the Emulex OneCommand Manager command
/usr/sbin/ocmanager/hbacmd or the QLogic QConvergeConsole Manager command
/opt/QLogic_Corporation/QConvergeConsoleCLI/qaucli to find the MAC address
for the 10 Gb CNA, and then assign an IP address to the 10 Gb NIC port.
NOTE: Currently, hardware iSCSI is supported only on the following models: only HP
NC551/553/FlexFabric 554/CN1100E support hardware iSCSI
•
HP NC551
•
HP NC553
•
HP FlexFabric 554
•
HP CN1100E
Example:
Creating the Software iSCSI Host Definition
21
Use the qaucli command to find the MAC address for the 10 Gb CNA, followed by assigning
an IP address to the 10 Gb NIC port.
2.
You can verify that the iSCSI Initiator is connected to the iSCSI target port by using the HP 3PAR
OS CLI showhost command.
# showhost
Id Name
--
Persona
----------WWN/iSCSI_Name----------- Port
iqn.1994-05.com.redhat:a3df53b0a32d 0:3:1
iqn.1994-05.com.redhat:a3df53b0a32d 1:3:1
NOTE: To enable HP 3PAR Host Explorer functionality, HP recommends host persona 1 for
hosts running RHEL 4 update 6 and later, RHEL 5.0 and later, or RHEL 6.0 and later.
However, host persona 6 is automatically assigned following a rolling upgrade from HP 3PAR
OS 2.2.x. It is required to change host persona 6 after an upgrade to host persona 1.
Host persona 1 enables two functional features: HP 3PAR Host Explorer, which requires the
SESLun element of host persona 1, and the UARepLun, which notifies the host of newly exported
VLUNs and should trigger a LUN discovery request on the host, making the VLUN automatically
available. Currently, none of the supported RHEL versions use the UARepLun, so you must
manually scan the newly exported VLUNs.
3.
Create an iSCSI host definition entry by using the HP 3PAR OS CLI createhost -iscsi
<host name> <iSCSI Initiator name> command. On an HP 3PAR StoreServ Storage
running HP 3PAR OS 3.1.x or OS 2.3.x, use createhost with the -persona 1 option.
For example:
# createhost -iscsi -persona 1 redhathost iqn.1994-05.com.redhat:a3df53b0a32d
NOTE:
For RHEL 4, to get the software iSCSI initiator name, issue the following command:
# cat /etc/iscsi/initiatorname.iscsi
InitiatorName=iqn.1987-05.com.cisco:01.4766d09183f3
4.
Verify that the host entry has been created.
Example for an HP 3PAR array running HP 3PAR OS 2.3.x or OS 3.1.x:
# showhost
Id Name
0 redhathost
Persona
Generic
----------WWN/iSCSI_Name----------- Port
iqn.1994-05.com.redhat:a3df53b0a32d 0:3:1
iqn.1994-05.com.redhat:a3df53b0a32d 1:3:1
NOTE: For an HP 3PAR StoreServ Storage system running HP 3PAR OS 2.2.x, the output
of showhost appears differently since there are no Persona fields.
Example of showhost output for an HP 3PAR StoreServ Storage system running HP 3PAR
OS 2.2.x:
# showhost
Id Name -----------WWN/iSCSI_Name------------ Port
22
Configuring the HP 3PAR StoreServ Storage for iSCSI
0
linux iqn.1994-05.com.redhat:a3df53b0a32d
iqn.1994-05.com.redhat:a3df53b0a32d
0:3:1
1:3:1
RHEL iscsiadm Utility Usage
This section provides examples of a few commands using the iscsiadm utility to set up the iSCSI
sessions:
•
Discover targets using SendTargets iSCSI Discovery:
# iscsiadm -m discovery -t sendtargets -p 10.0.0.10:3260
•
iSCSI login:
•
iSCSI logout:
•
iSCSI logout all:
# iscsiadm -m node --logoutall=all
•
Change iSCSI parameter:
•
Add custom iSCSI node:
# iscsiadm -m node -o new -p 10.0.0.30:3260
•
Remove iSCSI node:
•
Remove SendTarget iSCSI Discovery:
# iscsiadm -m discovery -o delete -p 10.0.0.10
RHEL iscsiadm Utility Usage
23
•
Display iSCSI node configuration:
# iscsiadm -m node -T iqn.2000-05.com.3pardata:21110002ac0001a6 -p 10.0.0.20:3260
•
Show all records in discovery database:
# iscsiadm -m discovery
•
Show discovery record setting:
# iscsiadm -m discovery -p 10.0.0.10:3260
•
Show all node records
◦
Display session statistics:
# iscsiadm -m session -r 1 --stats
◦
Display session and device information:
# iscsiadm -m session
•
Rescan iSCSI LUNs or sessions:
# iscsiadm -m session -R
Target Port Limits and Specifications
To avoid overwhelming a target port and ensure continuous I/O operations, observe the following
limitations on a target port:
•
I/O queue depth on each HP 3PAR StoreServ Storage HBA model, as follows:
◦
QLogic 1G: 512
◦
QLogic 10G: 2048 (HP 3PAR StoreServ 10000 and HP 3PAR StoreServ 7000 systems
only)
•
The I/O queues are shared among the connected host server HBA ports on a first-come,
first-served basis.
•
When all queues are in use and a host HBA port tries to initiate I/O, it receives a target queue
full response from the HP 3PAR StoreServ Storage port. This condition can result in erratic I/O
performance on each host server. If this condition occurs, each host server should be throttled
so that it cannot overrun the HP 3PAR StoreServ Storage port's queues when all host servers
are delivering their maximum number of I/O requests.
HP 3PAR Priority Optimization
The HP 3PAR Priority Optimization feature introduced in HP 3PAR OS versions 3.1.2.MU2 is a
more efficient and dynamic solution for managing server workloads and can be utilized as an
24
Configuring the HP 3PAR StoreServ Storage for iSCSI
alternative to setting host server I/O throttles. Using this feature, a storage administrator is able to
share storage resources more effectively by enforcing quality of service limits on the array. No
special settings are needed on the host side to obtain the benefit of Priority Optimization although
certain per target or per adapter throttle settings may need to be adjusted in rare cases. For
complete details of how to use Priority Optimization (Quality of Service) on HP 3PAR arrays, please
read the HP 3PAR Priority Optimization technical white paper available at http://www.hp.com/
go/bsc
HP 3PAR Priority Optimization
25
4 Configuring the HP 3PAR StoreServ Storage for FCoE
Setting Up the FCoE Switch, FCoE Initiator, and FCoE target ports
Connect the Linux host FCoE initiator port(s) and the HP 3PAR StoreServ Storage FCoE target ports
to the FCoE switch(es).
NOTE: FCoE switch VLANs and routing setup and configuration is beyond the scope of this
document. Consult your switch manufacturer's documentation for instructions of how to set up
VLANs and routing.
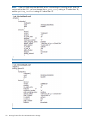
1.
CNA ports on HP 3PAR StoreServ 10000 and HP 3PAR StoreServ 7000 arrays require a one
time configuration using the controlport command. (HP 3PAR T-class, and F-class arrays
do not require this one time setting.)
For Example on a new FCoE config:
# showport
N:S:P Mode State ----Node_WWN---- -Port_WWN/HW_Addr- Type Protocol
0:3:1 suspended config_wait - - cna 0:3:2 suspended config_wait - - cna -
# showport -i
N:S:P Brand Model Rev Firmware Serial HWType
0:3:1 QLOGIC QLE8242 58 0.0.0.0 PCGLT0ARC1K3U4 CNA
0:3:2 QLOGIC QLE8242 58 0.0.0.0 PCGLT0ARC1K3U4 CNA
2.
If State=config_wait or Firmware=0.0.0.0, use the controlport config fcoe
<n:s:p> command to configure. Use the showport and showport -i commands to verify
the configuration setting.
For example:
# controlport config fcoe 0:3:1
# controlport config fcoe 0:3:2
# showport 0:3:1 0:3:2
N:S:P
Mode
State ----Node_WWN---- -Port_WWN/HW_Addr- Type Protocol Label
Partner FailoverState
0:3:1 target
ready 2FF70002AC000121
20310002AC000121 host
FCoE
0:3:2 target
ready 2FF70002AC000121
20320002AC000121 free
FCoE
# showport -i 0:3:1 0:3:2
N:S:P Brand Model
Rev Firmware Serial
HWType
0:3:1 QLOGIC QLE8242 58 4.11.122 PCGLT0ARC1K3U4 CNA
0:3:2 QLOGIC QLE8242 58 4.11.122 PCGLT0ARC1K3U4 CNA
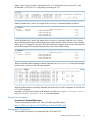
3.
Check the current settings of the FCoE ports by issuing showport -fcoe.
For example:
# showport -fcoe
N:S:P ENode_MAC_Address PFC_Mask
0:3:1 00-02-AC-07-01-21
0x08
0:3:2 00-02-AC-06-01-21
0x00
26
Configuring the HP 3PAR StoreServ Storage for FCoE
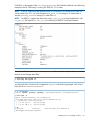
NOTE: If changing the config from iSCSI to FCoE, follow the steps below.
1. Issue the showportcommand.
# showport
0:3:1
target
0:3:2
target
2.
ready
ready
-
000E1E05BEE6 iscsi
000E1E05BEE2 iscsi
iSCSI
iSCSI
-
-
-
Turn off the iSCSI ports:
# controlport offline 0:3:1
# controlport offline 0:3:2
showport
0:3:1 target offline - 000E1E05BEE2 iscsi iSCSI0:3:2 target offline 000E1E05BEE2 iscsi iSCSI
3.
Change the topology to FCoE:
# controlport config fcoe 0:3:1
# controlport config fcoe 0:3:2
controlport rst 0:3:1
controlport rst 0:3:2
0:3:1 target offline - 000E1E05BEE2 iscsi iSCSI0:3:2 target offline 000E1E05BEE2 iscsi iSCSI
showport
0:3:1
target
ready 2FF70002AC000121
20310002AC000121 host
FCoE
0:3:2
target
ready 2FF70002AC000121
20320002AC000121 free
FCoE
-
4.
Check the current settings of the FCoE ports by issuing showport -fcoe.
For example:
# showport -fcoe
N:S:P ENode_MAC_Address PFC_Mask
0:3:1 00-02-AC-07-01-21
0x08
0:3:2 00-02-AC-06-01-21
0x00
Setting Up the FCoE Switch, FCoE Initiator, and FCoE target ports
27
Target Port Limits and Specifications
To avoid overwhelming a target port and ensure continuous I/O operations, observe the following
limitations on a target port:
•
I/O queue depth on each HP 3PAR StoreServ Storage HBA model, as follows:
◦
QLogic CNA: 1748 (HP 3PAR StoreServ 10000 and HP 3PAR StoreServ 7000 systems
only)
•
The I/O queues are shared among the connected host server HBA ports on a first-come,
first-served basis.
•
When all queues are in use and a host HBA port tries to initiate I/O, it receives a target queue
full response from the HP 3PAR StoreServ Storage port. This condition can result in erratic I/O
performance on each host server. If this condition occurs, each host server should be throttled
so that it cannot overrun the HP 3PAR StoreServ Storage port's queues when all host servers
are delivering their maximum number of I/O requests.
NOTE: When host server ports can access multiple targets on fabric zones, the assigned target
number assigned by the host driver for each discovered target can change when the host server
is booted and some targets are not present in the zone. This situation may change the device node
access point for devices during a host server reboot. This issue can occur with any fabric-connected
storage, and is not specific to the HP 3PAR StoreServ Storage.
HP 3PAR Priority Optimization
The HP 3PAR Priority Optimization feature introduced in HP 3PAR OS versions 3.1.2.MU2 is a
more efficient and dynamic solution for managing server workloads and can be utilized as an
alternative to setting host server I/O throttles. Using this feature, a storage administrator is able to
share storage resources more effectively by enforcing quality of service limits on the array. No
special settings are needed on the host side to obtain the benefit of Priority Optimization although
certain per target or per adapter throttle settings may need to be adjusted in rare cases. For
complete details of how to use Priority Optimization (Quality of Service) on HP 3PAR arrays, please
read the HP 3PAR Priority Optimization technical white paper available at http://www.hp.com/
go/bsc.
28
Configuring the HP 3PAR StoreServ Storage for FCoE
5 Configuring a Host Server with Fibre Channel
This chapter describes the tasks necessary for connecting the host to Fibre Channel.
NOTE: For RHEL 6.x, follow the instructions for RHEL 5.x, unless otherwise noted. When tasks
are specific to the version of the RHEL OS, headings refer to RHEL 4, RHEL 5, or RHEL 6.
Checking the Host for Required Packages
If you are installing and building the Emulex driver, make sure the Developmental Tool package
that contains the gcc compiler is installed on the RHEL server. If not, install them from the RHEL
installation CD. After installation, verify the following gcc packages were installed. Some gcc
packages may not be needed.
The following example shows gcc compilers installed for RHEL 4 Update 6 Linux.
# rpm -qa | grep gcc
gcc-java-3.4.6-9
gcc-3.4.6-9
compat-gcc-32-c++-3.2.3-47.3
gcc-c++-3.4.6-9
compat-libgcc-296-2.96-132.7.2
libgcc-3.4.6-9
gcc-g77-3.4.6-9
libgcc-3.4.6-9
Installing the Emulex HBA
Install the Emulex host bus adapter(s) or converged network adapter(s) (CNAs) in the host server
in accordance with the documentation provided with the HBAs or CNAs and host server.
Building the Emulex Driver
NOTE: HP recommends using the Emulex driver, which can be downloaded from the HP Support
& Drivers website:
http://www8.hp.com/us/en/support-drivers.html
If you are using the Emulex driver that was installed by the RHEL installation, skip to “Modifying
the /etc/modprobe.conf File and Building the Ramdisk” (page 30).
(Optional) Use this section only if you are installing and building the Emulex driver from the Emulex
website.
If you are installing the Emulex driver instead of using the in-box Emulex driver that was already
installed by the RHEL installation, follow these steps:
1. Download the driver package from the Emulex website: .
www.emulex.com
2.
Extract the driver contents by issuing tar xvzf lpfc_<kernel
version>_driver_kit-<version>.tar.gz
Example:
# tar xvzf lpfc_2.6_driver_kit-8.2.0.29-1.tar.gz
lpfc_2.6_driver_kit-8.2.0.29-1/
lpfc_2.6_driver_kit-8.2.0.29-1/lpfcdriver_2.6-8.2.0.29-1.noarch.rpm
lpfc_2.6_driver_kit-8.2.0.29-1/lpfc-install
lpfc_2.6_driver_kit-8.2.0.29-1/README
Checking the Host for Required Packages
29
3.
Change to the driver source directory by issuing cd lpfc_<kernel version>
_driver_kit-<version>. For example:
# cd
4.
lpfc_2.6_driver_kit-8.2.0.29-1
Run the lpfc-install script that builds and installs the lpfc driver. Check the installed
README for more details.
# ./lpfc-install
The script performs the following:
a. The driver source is installed at /usr/src/lpfc from the installed rpm packages
lpfcdriver-<kernal version>_<driver version>. For example:
# ls /usr/src/lpfc/lpfcdriver*
lpfcdriver-2.6-8.0.16.40-2
b.
c.
d.
The lpfc driver parameters are added to /etc/modprobe.conf.
The newly built Emulex driver lpfc.ko is copied to /lib/modules/<uname
-r>/kernel/drivers/scsi/lpfc. The current lpfc driver is saved at
/usr/src/lpfc/savedfiles.
A new ramdisk is created and the currently running ramdisk is copied as
/boot/initrd-<uname -r>.img.
CAUTION: The new ramdisk is always created with the name initrd-<uname
-r>.img. Edit the boot loader to add the correct ramdisk name.
Example: For kernel <uname -r>=2.6.18-53.el5 , the ramdisk created by the script
will be initrd.2.6.18-53.el5.img.
NOTE: You can change Emulex driver parameters by modifying the /etc/
modprobe.conf.local configuration file that enables these driver parameter values when
the drivers are loaded during bootup. Only the parameters required for use with the HP 3PAR
StoreServ Storage are discussed here.
The items in bold were added by the lpfc-install script to the /etc/modprobe.conf
configuration file for a dual ported HBA:
# cat
alias
alias
alias
alias
alias
alias
alias
alias
/etc/modprobe.conf
eth0 e1000
eth1 e1000
scsi_hostadapter mptbase
scsi_hostadapter1 mptscsih
usb-controller ehci-hcd
usb-controller1 uhci-hcd
scsi_hostadapter2 lpfc
scsi_hostadapter3 lpfc
Modifying the /etc/modprobe.conf File and Building the Ramdisk
This section describes how to modify the /etc/modprobe.conf file to set Emulex HBA parameters
and build the ramdisk.
30
Configuring a Host Server with Fibre Channel
1.
Before building the ramdisk, add the following HBA parameters to the/etc/modprobe.conf
file, depending on your version of RHEL. These HBA options settings are required for desired
multipath failover/failback operation:
•
For RHEL 6:
NOTE: The /etc/modprobe.conf file has been deprecated in RHEL 6. In order to
make changes to the ramdisk, follow these steps:
1. Create the /etc/modprobe.d/modprobe.conf file.
2. If the HP 3PAR array is running HP 3PAR OS 3.1.1 or later, add the following line:
options lpfc lpfc_devloss_tmo=14
lpfc_discovery_threads=32
•
For RHEL 5:
options lpfc lpfc_devloss_tmo=14
lpfc_discovery_threads=32
•
lpfc_lun_queue_depth=16
lpfc_lun_queue_depth=16
For RHEL 4:
options lpfc lpfc_nodev_tmo=14
lpfc_discovery_threads=32
lpfc_lun_queue_depth=16
NOTE: If the HP 3PAR array is running an HP 3PAR OS version earlier than 3.1.1, set the
lpfc_devloss_tmo or lpfc_nodev_tmo setting to 1 instead of 14 for the corresponding
RHEL version.
2.
To increase or modify maximum number of LUNs the OS can discover, add SCSI layer
parameters to /etc/modprobe.conf.
NOTE: RHEL 6.x does not require this change. The /etc/modprobe.conf file has been
deprecated in RHEL 6.
For example, for the OS to support 256 LUNs per target port:
options scsi_mod max_luns=256
NOTE: The kernel loads the SCSI drivers from ramdisk in the order in which they are defined
in the modprobe.conf file and assigns the SCSI device entries (sda, sdb) in ascending
order starting with the first entry for each entry where a SCSI device exists. If the host has a
SCSI boot disk, it must obtain device entry sda since those entries are hard coded in the
bootloaders. Therefore, the scsi_hostadapter entry that supports the boot disk must appear
first in the /etc/modprobe.conf file.
Installing the Emulex HBA
31
3.
Change the /etc/modprobe.conf file after making the driver topology changes.
The following example is for an RHEL 6.x or RHEL 5.x connected to an HP 3PAR array running
HP 3PAR OS 3.1.1 or later. If the HP 3PAR array is running an older HP 3PAR OS version
(one that is not OS 3.1.1 or later), set the lpfc_devloss_tmo setting to 1.
# cat /etc/modprobe.conf
alias eth0 e1000
alias eth1 e1000
alias scsi_hostadapter mptbase
alias scsi_hostadapter1 mptscsih
alias usb-controller ehci-hcd
alias usb-controller1 uhci-hcd
alias scsi_hostadapter2 lpfc
alias scsi_hostadapter3 lpfc
options lpfc lpfc_devloss_tmo=14
lpfc_discovery_threads=32
options scsi_mod max_luns=256
lpfc_lun_queue_depth=16
If a zoning-by-HBA configuration is used, where an HP 3PAR StoreServ Storage port is
connected to many hosts through a fabric, it is possible that the target port will run out of I/O
buffers and will result in the target port issuing a QUEUE FULL SCSI status message to any
new incoming I/O requests from any other hosts on that port. To prevent this event, you can
throttle the host Port Queue Depth and LUN Queue Depth. For the Emulex driver, the port
queue depth is defined by driver parameter lpfc_hba_queue_depth and the LUN queue
depth by lpfc_lun_queue_depth. Change the default values if any throttling is required.
Required
Storage administrators should carefully consider the number of hosts connected to an HP 3PAR
StoreServ Storage port and the number of LUN exports for calculating the throttling configuration
values. Performance degradation and SCSI timeout issues will result if the values are set too
high.
See the following white paper for a description of calculating queue depth and monitoring
port queues:
http://h20195.www2.hp.com/v2/GetDocument.aspx?docname=4AA4-5094ENW&
doctype=white%20paper&doclang=EN_US&searchquery=Storage|3par%20&cc=us&lc=en
NOTE: The ramdisk image needs to be rebuilt for any changes made to /etc/
modprobe.conf to be effective. The system will pick up the ramdisk changes on bootup.
4.
Rebuild the ramdisk image.
•
For RHEL 4 or RHEL 5, rebuild the ramdisk image using the mkinitrd command:
# /sbin/mkinitrd -v -f /boot/<ramdisk image name> <kernel-version>
•
For Oracle UEK 5.7, add the following options to the mkinitrd command to rebuild
the kernel:
# /sbin/mkinitrd --builtin=ehci-hcd --builtin=ohci-hcd --builtin=uhci-hcd
-f -v /boot/initrd-2.6.32-200.13.1.el5uek.img 2.6.32-200.13.1.el5uek
•
For RHEL 6, rebuild the ramdisk image using the dracut command:
# /sbin/dracut -v -f /boot/<ramdisk image name> <kernel-version>
32
Configuring a Host Server with Fibre Channel
The following example shows a ramdisk build:
# /sbin/dracut -v -f /boot/initrd-2.6.18-53.el5.img 2.6.18-53.el5
Creating initramfs
Looking for deps of module scsi_mod
Looking for deps of module sd_mod scsi_mod
Looking for deps of module scsi_transport_spi: scsi_mod
. . .
copy from `/lib/modules/2.6.18-8.el5/kernel/drivers/scsi/scsi_transport_fc.ko'
[elf64-x86-64] to `/tmp/initrd.l13681/lib/scsi_transport_fc.ko' [elf64-x86-64]
copy from `/lib/modules/2.6.18-8.el5/kernel/drivers/scsi/lpfc/lpfc.ko' [elf64x86-64] to `/tmp/initrd.l13681/lib/lpfc.ko' [elf64-x86-64]
. . .
Loading module jbd
Loading module ext3
Loading module scsi_mod
Loading module scsi_mod with options max_luns=256
Loading module sd_mod
Loading module mptbase
Loading module mptscsih
Loading module scsi_transport_fc
Loading module lpfc with options lpfc_topology=0x02 lpfc_devloss_tmo=14
lpfc_lun_queue_depth=16 lpfc_discovery_threads=32
5.
Check the contents of the /etc/grub.conf or /boot/grub/grub.conf with grub as the
bootloader so that the initrd maps to the correct ramdisk image.
# vi /etc/grub.conf
default=<label number>
timeout=5
…
hiddenmenuf
title RedHat Enterprise Linux Server (2.6.18-8.el5)
root (hd0,2)
kernel /boot/vmlinuz-2.6.18-8.el5 ro root=LABEL=/ rhgb quiet
initrd /boot/initrd-2.6.18-8.el5.img
…
Setting up the NVRAM and BIOS with the Emulex HBA
This section describes setting up the NVRAM and BIOS with the Emulex HBA.
Configure the following NVRAM settings using the Emulex Lightpulse BIOS utility. Access the BIOS
utility by hard booting the server and, when prompted, perform the procedures in this section.
NOTE: The NVRAM settings on Emulex HBAs can be changed by any server in which they are
installed. These settings will persist for an HBA even after it is removed from a server.
Enabling an Adapter to Boot from SAN
1.
To start the BIOS utility, turn on the computer, hold down the Alt or Ctrl key, and press E within
five seconds to display the bootup message.
The adapter listing is displayed.
NOTE: Each HBA port is reported as a host bus adapter. The following settings need to be
applied for each HBA port.
2.
Select a host adapter from the main menu.
Installing the Emulex HBA
33
3.
From the Main configuration menu, select Enable/Disable Boot from SAN.
Adapters are disabled by default. At least one adapter must be enabled to boot from SAN
in order to use remote boot functionality.
Configuring Boot Devices
NOTE: If it is necessary to change the topology, do so before you configure the boot devices.
The default topology is auto topology with loop first.
1.
On the main configuration menu select Configure Boot Devices.
A list of eight boot devices is shown.
2.
3.
4.
Select a boot entry.
Select <00> to clear the selected boot entry, or select a device to configure booting by.
If you select a device, enter the starting LUN. The starting LUN can be any number from 0 to
255.
NOTE: You can define 256 LUNs per adapter, but the screen displays only 16 consecutive
LUNs at a time. In front of each entry, B#D or B#W specifies the boot entry number and
whether the device boots by DID or WWPN. For example, B1D means that boot entry 1 boots
from the DID. B2W means that boot entry 2 boots from WWPN.
5.
6.
7.
8.
Type the two digits corresponding to the entry you are selecting.
Select the boot method you want. If you select to boot the device by WWPN, the WWPN of
the earlier selected entry is saved in the flash memory. If you select to boot this device by DID,
the earlier selected entry is saved in the flash memory.
Press the Esc key until you exit the BIOS utility.
Reboot the system for the new boot path to take effect.
Refer to the Emulex Boot Code User Manual for more detail and additional options.
Configuring the Emulex HBA using the HBACMD Utility
This section describes how to configure the Emulex HBA using the HBACMD utility.
Emulex provides a CLI utility (OneCommand) to configure their HBAs. This is also available as a
GUI. These tools, once installed, can be used to configure many HBA and driver parameters.
To configure many of these parameters you must identify the HBA to work on using its WWPN.
These can be obtained by using the following command:
# hbacmd ListHBAs
This will produce output similar to the following:
Manageable HBA List
Port WWN
Node WWN
Fabric Name
Flags
Host Name
Mfg
Serial No.
Port Number
Mode
PCI Function
Port Type
34
:
:
:
:
:
:
:
:
:
:
:
10:00:00:00:c9:69:d6:cc
20:00:00:00:c9:69:d6:cc
00:00:00:00:00:00:00:00
8000fe0d
dl360g7-16.3pardata.com
Emulex Corporation
VM72838048
0
Initiator
0
FC
Configuring a Host Server with Fibre Channel
Model
: LPe11002-M4
Port WWN
Node WWN
Fabric Name
Flags
Host Name
Mfg
Serial No.
Port Number
Mode
PCI Function
Port Type
Model
:
:
:
:
:
:
:
:
:
:
:
:
10:00:00:00:c9:69:d6:cd
20:00:00:00:c9:69:d6:cd
00:00:00:00:00:00:00:00
8000fe0d
dl360g7-16.3pardata.com
Emulex Corporation
VM72838048
1
Initiator
1
FC
LPe11002-M4
For example, to enable the adapter BIOS type:
# hbacmd EnableBootCode
For full instructions on how to use hbacmd utility and all its features, refer to the Emulex
OneCommand Manager documentation available on their website.
Installing the QLogic HBA
Install the QLogic HBA(s) in the host server in accordance with the documentation provided with
the HBAs and host server.
Building the QLogic Driver
NOTE: If you are using the in-box QLogic driver by the RHEL host installation, skip this section
and go to “Modifying the /etc/modprobe.conf file and Building the Ramdisk” (page 35).
If you are building the QLogic driver, follow these steps:
1. Download the driver package (SANsurfer Linux Installer for RHEL kernel) from
www.qlogic.com and extract the driver contents.
2. Follow the provided README to build the driver.
Modifying the /etc/modprobe.conf file and Building the Ramdisk
NOTE: The /etc/modprobe.conf file has been deprecated in RHEL 6. In order to make
changes to the ramdisk, create the /etc/modprobe.d/modprobe.conf file.
1.
If the HP 3PAR array is running HP 3PAR OS 3.1.1 or later, modify the options qla2xxx
line to include qlport_down_retry=10, as shown below.
The modified output of /etc/modprobe.conf should include the following when the 3PAR
array is running HP 3PAR OS 3.1.1 or later:
NOTE: If the HP 3PAR array is running an HP 3PAR OS version earlier than OS 3.1.1, set
the qlport_down_retry setting to 1 rather than 10.
# cat /etc/modprobe.conf
alias scsi_hostadapter1 qla2xxx
options scsi_mod max_luns=256
options qla2xxx ql2xmaxqdepth=16
qlport_down_retry=10
ql2xloginretrycount=30
Installing the QLogic HBA
35
If a fan-out configuration is used, where an HP 3PAR StoreServ Storage port is connected to
many hosts through the fabric, it is possible that the target port will run out of I/O buffers and
will result in the target port issuing a QUEUE FULL SCSI status message to any new incoming
I/O requests from any host on that port. To prevent this event, you can throttle the host Port
Queue depth and LUN Queue depth. By default, the QLogic driver sets Port Queue depth
(Execution Throttle) to FFFF (65535) (overriding the default BIOS execution value of 32) and
sets the LUN Queue Depth to 32(default). You can throttle the LUN Queue depth value
to a lower value using the ql2xmaxqdepth parameter. QLogic does not offer any driver setting
to change the Port Queue depth or Execution Throttle. Change the default values if any throttling
is required.
In the following example, the output shows the /etc/modprobe.conf when the
ql2xmaxqdepth is set to 16 for an RHEL server that is connected to an HP 3PAR array that
is running HP 3PAR OS 3.1.1 or later.
# cat /etc/modprobe.conf
alias scsi_hostadapter1 qla2xxx
alias scsi_hostadapter2 qla2300
alias scsi_hostadapter3 qla2322
alias scsi_hostadapter4 qla2400
alias scsi_hostadapter5 qla6312
options scsi_mod max_luns=256
options qla2xxx qlport_down_retry=10 ql2xloginretrycount=30 ql2xmaxqdepth=16
ConfigRequired=0
install qla2xxx /sbin/modprobe --ignore-install qla2xxx
remove qla2xxx /sbin/modprobe -r --first-time --ignore-remove qla2xxx
Required
Storage administrators should carefully consider the number of hosts connected to an HP 3PAR
StoreServ Storage port and the number of LUN exports for calculating the throttling configuration
values. Performance degradation and SCSI timeout issues will result if the values are set too
low.
2.
3.
Rebuild the ramdisk image after the /etc/modprobe.conf file entries are modified.
To make the changes, you can issue the mkinitrd command or use the QLogic driver script.
# mkinitrd -f -v /boot/initrd-<uname -r>.img <uname -r>
For example:
# mkinitrd -f -v /boot/initrd-2.6.18-53.el5.img 2.6.18-53.el5
NOTE:
For RHEL 6, rebuild the ramdisk image using the dracut command:
# /sbin/dracut -v -f /boot/<ramdisk image name> <kernel-version>
4.
Perform one of the two following actions to verify that all the required drivers are added to
the ramdisk image:
•
Check the verbose output. For example:
Creating initramfs
. . . .
. . . .
36
Configuring a Host Server with Fibre Channel
Looking
Looking
. . . .
. . . .
Looking
Looking
. . . .
. . . .
•
for deps of module scsi_mod
for deps of module sd_mod: scsi_mod
for deps of module qla2xxx: intermodule scsi_mod
for deps of module intermodule
Check the contents of the /etc/grub.conf or /boot/grub/grub.conf with grub
as the bootloader so that the initrd maps to the correct ramdisk image.
# vi /etc/grub.conf
default=<label number>
timeout=5
…
hiddenmenu
title RedHat Enterprise Linux Server (kernel name)
root (hd0,0)
kernel /<kernel name> ro root=LABEL=/ rhgb quiet
initrd /<RamDisImage>
Setting Up the NVRAM and BIOS with the QLogic HBA
This section describes how to set up the NVRAM and BIOS with the QLogic HBA.
Configure the following NVRAM settings for QLogic 23xx, 24xx and 25xx cards using the QLogic
Fast!UTIL. Access the Fast!UTIL utility by hard booting the server and, when prompted and follow
these steps:
NOTE: The NVRAM settings on QLogic HBAs can be changed by any server in which they are
installed. These settings will persist for an HBA even after it is removed form a server. To obtain
the correct settings for this configuration, you will be instructed to return all NVRAM settings to
their default settings.
1.
Enter Fast!UTIL by pressing Ctrl-Q when prompted.
NOTE: Each HBA port is reported as a host bus adapter and the following settings need to
be made for each of them.
2.
3.
4.
Select a host adapter from the main menu.
Restore the default settings of the HBA as follows: Configuration Settings+Restore Default
Settings.
Make the following setting changes:
NOTE: The parameters provided through these menu options can vary between different
QLogic HBA models.
•
Configuration Settings→Advanced Adapter Settings→Execution Throttle: 256
•
Configuration Settings→Advanced Adapter Settings→LUNs per Target: 256
•
Configuration Settings→Extended Firmware Settings→Data Rate: 2 (AutoNegotiate)
Installing the QLogic HBA
37
5.
6.
Specify the connection option.
•
Specify loop topology for direct-connect configurations: Configuration Settings→Connection
Options: 0 (Loop Only)
•
Specify point-to-point topology for fabric configurations: Configuration Settings→Connection
Options: 1 (Point to Point Only)
Repeat for each port listed as a separate HBA port.
Configuring the QLogic HBA Using the SCLI Utility
This section describes how to configure QLogic HBA settings using the SCLI utility.
CAUTION: If you are running the QLogic inbox driver, ensure that only the utility tool is installed.
The preferred method will be to use the Fast!Util HBA, as the QLogic tool may not be compatible
with all inbox drivers.
NOTE: For Itanium servers, this is the only method available. For other Intel platform servers,
either use the SCLI utility or the Fast!Util HBA BIOS method.
In order to make topology changes to the QLogic cards in the Intel Itanium server which have the
Extensible Firmware Interface (EFI) as the system firmware (BIOS), use the QLogic SANsurfer FC
CLI utility. You can download the latest version of the SCLI utility from the QLogic website or use
the version that is installed as part of the driver package installation.
Once you install the QLogic SANsurfer FC CLI utility for each of the HBA ports, set the correct port
connection type (direct --> loop, fabric --> point) by running the following commands:
•
For fabric connection:
# /opt/QLogic_Corporation/SANsurferCLI/scli -n X CO 1
•
For direct connection:
# /opt/QLogic_Corporation/SANsurferCLI/scli -n X CO 0
where X is equal to the HBA FC port #, the HBA port numbers start with number 0.
For example, to set the HBA ports 1 and 3 to Point to Point/Fabric topology, run the following
commands:
# /opt/Qlogic_Corporation/SANsurferCLI/scli -n 1 CO 1
# /opt/Qlogic_Corporation/SANsurferCLI/scli -n 3 CO 1
To set the same HBA ports 1 and 3 to Direct topology, run the following commands:
# /opt/Qlogic_Corporation/SANsurferCLI/scli -n 1 CO 0
# /opt/Qlogic_Corporation/SANsurferCLI/scli -n 3 CO 0
You can verify the setting by running the following command:
# /opt/Qlogic_Corporation/SANsurferCLI/scli -I 1
# /opt/Qlogic_Corporation/SANsurferCLI/scli -I 3
38
Configuring a Host Server with Fibre Channel
Refer to the SANsurfer FC CLI utility program release notice for other command line options to
change the following settings:
•
LUNs per Target: 256
•
Data Rate: 4 (Auto Negotiate)
Installing the Brocade HBA
Install the Brocade host bus adapter(s) (HBAs) in the host server in accordance with the
documentation provided with the HBAs and host server.
Building the Brocade Driver
NOTE: Use this section only if you are installing and building the Brocade driver. If you are using
the Brocade driver that was installed by the RHEL installation, skip to “Setting up the NVRAM and
BIOS with the Brocade HBA” (page 40).
If you are installing the Brocade driver instead of using the in-box Brocade driver that was already
installed by the RHEL installation, follow these steps:
1. Download the driver package from www.brocade.com and extract the driver contents by
issuing tar xvzf brocade_driver_linux-<version>.tar.gz. Make sure to do this
in a temporary location. For example:
# tar zxvf brocade_driver_linux_rhel6_v3-2-1-0.tar.gz
bfa_driver_linux-3.2.1.0-0.noarch.rpm
bfa_util_linux_noioctl-3.2.1.0-0.noarch.rpm
bna_driver_linux-3.2.1.0-0.noarch.rpm
bna-snmp-3.2.1.0-rhel6.i386.rpm
bna-snmp-3.2.1.0-rhel6.x86_64.rpm
brocade_install_rhel.sh
brocade_install.sh
driver-bld-info.xml
RHEL60/
RHEL61/
RHEL62/
RHEL62/kmod-bna-3.2.1.0-0.el6.x86_64.rpm
RHEL62/kmod-bfa-3.2.1.0-0.el6.i686.rpm
RHEL62/kmod-bfa-3.2.1.0-0.el6.ppc64.rpm
RHEL62/kmod-bna-3.2.1.0-0.el6.i686.rpm
RHEL62/kmod-bna-3.2.1.0-0.el6.ppc64.rpm
RHEL62/kmod-bfa-3.2.1.0-0.el6.x86_64.rpm
RHEL63/
RHEL63/kmod-bna-3.2.1.0-0.el6.x86_64.rpm
RHEL63/kmod-bfa-3.2.1.0-0.el6.i686.rpm
RHEL63/kmod-bna-3.2.1.0-0.el6.i686.rpm
RHEL63/kmod-bfa-3.2.1.0-0.el6.x86_64.rpm
RHEL64/
RHEL64/kmod-bna-3.2.1.0-0.el6.x86_64.rpm
RHEL64/kmod-bfa-3.2.1.0-0.el6.i686.rpm
RHEL64/kmod-bna-3.2.1.0-0.el6.i686.rpm
RHEL64/kmod-bfa-3.2.1.0-0.el6.x86_64.rpm.sh
Installing the Brocade HBA
39
2.
Run the brocade_install.sh script that installs the bfa driver and associated utilites:
# ./brocade_install.sh
Installing the Brocade driver 3.2.1.0 RPM's
initrd backup complete
Backup file name : initramfs-2.6.32-279.el6.x86_64.img.bak
Installing the BFA driver RPM: bfa_driver_linux-3.2.1.0-0.noarch.rpm
Preparing...
########################################### [100%]
1:bfa_driver_linux
########################################### [100%]
Building bfa driver ................ done
initrd update .... done
Installing the util driver RPM
Preparing...
###########################################
[100%]
1:bfa_util_linux_noioctl ########################################### [100%]
Install cli ... done
Install HBAAPI library ... done
Install HBAAGENT ... done
Loading bfa driver ... done
initrd update .... done
Setting up the NVRAM and BIOS with the Brocade HBA
This section describes setting up the NVRAM and BIOS with the Brocade HBA.
Configure the following NVRAM settings using the Brocade BIOS utility
Access the BIOS utility by hard booting the server and, when prompted, perform the procedures
in this section.
NOTE: The NVRAM settings on Brocade HBAs can be changed by any server in which they are
installed. These settings will persist for an HBA even after it is removed from a server.
Enabling an Adapter to Boot from SAN
To start the BIOS utility, turn on the computer, hold down the Alt or Ctrl key, and press B within
five seconds to display the bootup message. The adapter listing is displayed.
NOTE: Each HBA port is reported as a host bus adapter. The following settings need to be
applied for each HBA port.
1.
2.
3.
Proceed into the Adapter Settings and ensure BIOS is set to Enabled.
Press Alt-S to save and exit this section.
If you need to configure boot devices or another adapter choose Return to Brocade Config
Menu otherwise choose Exit Brocade Config Menu.
Configuring Boot Devices
NOTE:
1.
2.
3.
4.
5.
6.
7.
40
If it is necessary to change the topology, do so before you configure the boot devices.
Proceed into the Boot Device Settings.
Select the Boot Device you wish to change and press ENTER.
Select the new Boot Target and press ENTER.
Select the Boot LUN and press ENTER.
Repeat steps 2, 3 and 4 for any additional Boot Devices.
Press Alt-S to save your changes.
If you need to configure more boot devices or another adapter choose Return to Brocade
Config Menu, otherwise choose Exit Brocade Config Menu.
Configuring a Host Server with Fibre Channel
Configuring the Brocade HBA using the BCU Utility
This section describes how to configure the Brocade HBA using the BCU utility.
Brocade provides a CLI utility to configure their HBAs. This is also available as a GUI. These tools,
once installed, can be used to configure many HBA and driver parameters.
Please refer to the documentation at www.brocade.com for instructions on using the BCU CLI and
GUI utilities.
For Brocade FC HBA, the default Path TOV parameter is set to 30 seconds. It is recommended
to change this value to 14 seconds. To change the value of this parameter, it is required to use
Brocade BCU command line utility. For example:
1. This is a per-port setting. List the available ports by issuing the bcu port --list command:
# bcu port --list
------------------------------------------------------------Port# FN Type PWWN/MAC FC Addr/ Media State Spd
Eth dev
------------------------------------------------------------1/0 - fc 10:00:8c:7c:ff:30:41:60 036100 sw Linkup 4G
0 fc 10:00:8c:7c:ff:30:41:60 036100 sw Linkup 4G
1/1 - fc 10:00:8c:7c:ff:30:41:61 036000 sw Linkup 4G
1 fc 10:00:8c:7c:ff:30:41:61 036000 sw Linkup 4G
-------------------------------------------------------------
2.
Set the path_tov value for each port by issuing the bcu fcpim --pathtov <pcifn>
<tov> command:
# bcu fcpim --pathtov 1/0 14
path timeout is set to 14
Setting the SCSI Timeout
The SCSI timeout needs to be set in order for the HP 3PAR StoreServ Storage to operate properly
with RHEL servers. Use the following guidelines depending on your version of RHEL:
•
RHEL 6: The SCSI timeout value is already set to the default value of 30 seconds and does
not need to be changed.
•
RHEL 5: The SCSI timeout value is already set to the default value of 60 seconds and does
not need to be changed.
•
RHEL 4: The SCSI timeout value is 30 seconds and needs to be changed to 60 seconds.
WARNING!
For RHEL 4 and RHEL 5 only: If not set to 60 seconds, the SCSI timeout will result
in host disks being taken offline during HP 3PAR StoreServ Storage rolling upgrades. Furthermore,
Remote Copy requires the SCSI timeout value of 60 seconds, otherwise remote copy operations
will become stale with a node reboot.
Using UDEV Rules to Set the SCSI Timeout
For RHEL 4 configurations, change the timeout from 30 seconds to 60 seconds using the udev
rules or a SCSI timeout script so that the change will be effective only for HP 3PAR devices. The
udev rule method is preferable since it changes the SCSI timeout value dynamically whenever a
SCSI device instance is created (for example: /dev/sda).
If using the timeout script, then run the script manually whenever device instances are created and
the timeout value is lost on reboot or driver reload.
Setting the SCSI Timeout
41
NOTE: The udev rules method has been tested on RHEL Update 5. For RHEL 6, use the default
setting (no modification is required). For RHEL 4 Update 4 and below, check and verify that the
udev rule method works. If it does not work, then use the ql_ch_scsi_timeout script method
in “Using QLogic Scripts to Set the SCSI Timeout” (page 43) to change the SCSI timeout value.
1.
Make sure the udev package is installed on your server. If not, install it from the RHEL CD.
For example:
# rpm -qa | grep udev
udev-039-10.19.el4.x86_64.rpm
2.
Create udev rules 56_3par_timeout.rules under /etc/udev/rules.d with the
following contents:
/etc/udev/rules.d/56-3par.timeout.rules
KERNEL="sd*[!0-9]", SYSFS{vendor}="3PARdata", PROGRAM="/bin/sh -c 'echo 60 >
/sys/block/%k/device/timeout'" NAME="%k"
Required
Make sure there is no break between the two lines in the 56-3par-timeout.rules.
The udev rule number 56-3par-timeout.rules should follow after the 51-by-id.rules.
Change the udev rule number accordingly.
The 56-3par-timeout.rules is selected based on the test system configuration. See
“Using UDEV Rules to Set the SCSI Timeout” (page 41) to verify that the
56-3par-timeout.rulesudev rule is working.
# ls /etc/udev/rules.d/
. . . . .
40-multipath.rules
50-udev.rules
51-by-id.rules
56-3par-timeout.rules
Verifying the SCSI Timeout Settings
Verify the udev rules setting after the HP PAR storage volumes have been exported to the host For
details, see“Allocating Storage for Access by the RHEL Host” (page 85).
# udevinfo -a -p /sys/block/sdx
For example:
# udevinfo -a -p /sys/block/sdn |grep timeout
SYSFS{timeout}="60"
On RHEL 6, you can also verify the SCSI timeout settings as follows:
cat /sys/class/scsi_device/*/device/timeout
42
Configuring a Host Server with Fibre Channel
On RHEL 5 using Emulex HBAs, verify using the following:
/sys/class/scsi_device/*/device/timeout
If the udev rule is created after the host sees HP 3PAR StoreServ Storage volumes, execute the
udevstart command, which runs the udev rules on all devices and sets the timeout to 60. The
time it takes for the udevstart command to complete is based on the number of devices and
I/O throughput, so the recommendation is to run the command during non-peak activity.
# udevstart
Rebooting the host starts the udev rule by default.
Using QLogic Scripts to Set the SCSI Timeout
The following script changes the SCSI timeout value to 60 seconds for LUNs discovered by each
of the QLogic HBA ports. Use this script if you are running Remote Copy.
If you have implemented the timeout value change using the udev method, then do not use this
script.
When you run the script, the SCSI timeout value for each of the current LUNs discovered will be
changed immediately. However, when rebooting the server, the timeout value will revert to the
default value of 30 seconds.
The following example shows the content for Script ql_ch_scsi_timeout.sh:
qlogicname="/sys/class/scsi_host"
timeout=60
ls $qlogicname | grep "[0-9][0-9]*" | while read line
do
fname=${qlogicname}/$line
curr=`pwd`
cd $fname
find . -follow -name "timeout" | grep -v "generic" | while read line2
do
vendorcheck=`cat ${line2%timeout}vendor | grep -c "3PARdata"`
if [ $vendorcheck -gt 0 ] ; then
echo "modifying file: [$fname$line2]"
echo "$timeout" > $line2
fi
done
cd $curr
done
You can have this script run during the OS boot up sequence by adding the contents of the script
into the /etc/rc.local file. Make sure /etc/rc.local file has the permissions values set
to 777.
The following example shows the contents of /etc/rc.local:
# cat /etc./rc.local
!/bin/sh
#
# This script will be executed *after* all the other init scripts.
# You can put your own initialization stuff in here if you don't
# want to do the full Sys V style init stuff.
touch /var/lock/subsys/local
qlogicname="/sys/class/scsi_host"
timeout=60
Setting the SCSI Timeout
43
ls $qlogicname | grep "[0-9][0-9]*" | while read line
do
fname=${qlogicname}/$line
curr=`pwd`
cd $fname
find . -follow -name "timeout" | grep -v "generic" | while read line2
do
vendorcheck=`cat ${line2%timeout}vendor | grep -c "3PARdata"`
if [ $vendorcheck -gt 0 ] ; then
echo "modifying file: [$fname$line2]"
echo "$timeout" > $line2
fi
done
cd $curr
done
Using Emulex Scripts to Set the SCSI Timeout
If the udev rule was not implemented, you can change the SCSI timeout value from 30 seconds
to 60 seconds by running the set_target_timeout.sh. You can download this shell script
from http://www.emulex.com by selecting Linux Tools on the Emulex Linux driver download Web
page. The timeout value is a dynamic variable and can be changed even while I/O is being served
on the devices.
Example: Emulex changing timeout script:
# ./set_target_timeout.sh <host_num> <target_id> <cmd_timeout>
# ls /sys/class/scsi_host/host2/device
… target2:0:0
The SCSI instance number is 2 and target is 0 from the above output:
# ./set_target_timeout 2 0 60
modifying device /sys/class/scsi_device/2:0:0:0/device
found timeout at value 30
new timeout value is 60
modifying device /sys/class/scsi_device/2:0:0:1/device
found timeout at value 30
new timeout value is 60
. . .
You can also manually change the timeout value using the following commands:
# /sys/class/scsi_device/2:0:0:0/device
# echo 60 > timeout
# cat timeout
60
The set_target_timeout script needs to be executed for all the SCSI instances of lpfc driver;
if the operation if performed manually, the command needs to be executed for all the devices.
NOTE: If the Emulex driver is unloaded and reloaded for any reason, the timeout setting will
reset to the default setting of 30 seconds for all Emulex attached devices. If this occurs, set the
timeout value back to 60 seconds using any of the described methods. This is not applicable if the
timeout is changed using the udev rule.
44
Configuring a Host Server with Fibre Channel
Setting Up Multipathing Software
HP supports the following multipath solutions for RHEL:
•
Device-mapper
•
Veritas Volume Manager
Setting Up Device-mapper
Check for installed Device-mapper packages by issuing rpm -qa|grep device-mapper.
NOTE:
If necessary, install the device-mapper-multipath package using the RHEL tools.
You can use the following commands to configure multipath devices:
•
multipath inspects Linux devices to see if there are multiple paths to the same device and
communicates to the kernel device-mapper to set up a device map (dm) device for the device
and is responsible for the path coalescing and device map creation.
•
The multipathd daemon checks path health and will reconfigure the multipath map whenever
a path comes up or goes down so as to maintain correctly the path mapping state.
•
kpartx reads partition tables on specified devices and creates device maps over partition
segments that are detected.
Device-mapper also depends on the udev and sysfsutils filesystem packages. udev is a user
space process which dynamically manages the creation of devices under the /dev/ filesystem.
The sysfsutils package exports the view of the system hardware configuration to udev
userspace process for device node creation. These packages must be present on the system.
For example:
# rpm -qa | grep udev
udev-039-10.19.el4
# rpm -qa | grep sysfs
sysfsutils-devel-1.2.0-1
sysfsutils-1.2.0-1
In RHEL 5.4, the following packages appear after installation:
# rpm -qa | grep udev
udev-095-14.21.el5
# rpm -qa | grep sysfs
libsysfs-2.0.0-6
sysfsutils-2.0.0-6
If /usr is a separate partition and is not part of the root (/) partition in the installed RHEL Operating
System, then copy the shared library libsysfs.so and create the required sysmlinks from
the /usr/lib directory to the /lib directory.
The following examples show partitions for 32-bit and 64-bit operating systems:
•
On a 32-bit installed operating system:
# cp /usr/lib/libsysfs.so.1.0.2 /lib/
# ln -s /lib/libsysfs.so.1.0.2 /lib/libsysfs.so.1
# ln -s /lib/libsysfs.so.1 /lib/libsysfs.so
Setting Up Multipathing Software
45
•
On 64-bit installed operating system:
# cp /usr/lib64/libsysfs.so.1.0.2 /lib64/
# ln -s /lib64/libsysfs.so.1.0.2 /lib64/libsysfs.so.1
# ln -s /lib64/libsysfs.so.1 /lib64/libsysfs.so
CAUTION:
If /usr is a separate partition, there will be a system hang during bootup when
multipath starts and cannot find the shared library libsysfs.so.1 because /usr partition gets
mounted at the later stage of the boot process. So, copying the shared library libsysfs.so.1
to the /lib directory will resolve the issue.
NOTE: The sysfsutils-xx package contains the libsysfs.so.1 library. If any upgrades
are made to this package, the new library file should be copied over to the /lib directory.
Modifying the /etc/multipath.conf File
The /etc/multipath.conf file is used by Device-mapper where the multipathing parameters
have been set. The default installed /etc/multipath.conf file must be edited with the following
changes for a minimum configuration connecting to an HP 3PAR array. Entries listed in
multipath.conf override the default kernel parameters for dm-multipath. In general, the
kernel defaults are sufficient with the exception of the devices entries for HP 3PAR. In the specific
case of booting the host from an HP 3PAR StoreServ Storage volume (a.k.a SAN boot), there are
additional defaults entries required:
NOTE: See “Booting the Host from the HP 3PAR StoreServ Storage” (page 108) for SAN boot
requirements.
See the RHEL document DM Multipath Configuration and Administration for additional options in
multipath.conf entries.
1.
2.
Remove or comment out all entries in the /etc/multipath.conf file except for the devices
section of devices currently in use.
Edit the devices structure to add entries for HP 3PAR array and remove other product entries
that are not needed.
After all of the edits are made, the relevant sections of /etc/multipath.conf should
appear as follows if the HP 3PAR array that the RHEL server is connecting to is running HP 3PAR
OS 3.1.1 or later:
•
For RHEL 4.x through RHEL 5.5:
cat /etc/multipath.conf
defaults {
}
devices {
device {
vendor
"3PARdata"
product
"VV"
no_path_retry
18
features
"0"
hardware_handler
"0"
path_grouping_policy
multibus
getuid_callout
"/sbin/scsi_id -g -u -s
path_selector
"round-robin 0"
rr_weight
uniform
rr_min_io
100
path_checker
tur
failback
immediate
46
Configuring a Host Server with Fibre Channel
/block/%n"
polling_interval
10
}
}
•
For RHEL 5.6 or later:
# cat /etc/multipath.conf
defaults {
polling_interval
}
10
devices {
device {
vendor
product
no_path_retry
features
hardware_handler
path_grouping_policy
getuid_callout
path_selector
rr_weight
rr_min_io
path_checker
failback
"3PARdata"
"VV"
18
"0"
"0"
multibus
"/sbin/scsi_id -g -u -s
"round-robin 0"
uniform
100
tur
immediate
/block/%n"
}
}
•
For RHEL 6.1:
# cat /etc/multipath.conf
defaults {
polling_interval
max_fds
}
10
8192
devices {
device {
vendor
"3PARdata"
product
"VV"
no_path_retry
18
features
"0"
hardware_handler
"0"
path_grouping_policy
multibus
getuid_callout
"/lib/udev/scsi_id --whitelisted
--device=/dev/%n"
path_selector
"round-robin 0"
rr_weight
uniform
rr_min_io
1
path_checker
tur
failback
immediate
}
}
•
For RHEL 6.2 or later:
# cat /etc/multipath.conf
defaults {
polling_interval
max_fds
10
8192
Setting Up Multipathing Software
47
}
devices {
device {
vendor
"3PARdata"
product
"VV"
no_path_retry
18
features
"0"
hardware_handler
"0"
path_grouping_policy
multibus
getuid_callout
"/lib/udev/scsi_id --whitelisted
--device=/dev/%n"
path_selector
"round-robin 0"
rr_weight
uniform
rr_min_io_rq
1
path_checker
tur
failback
immediate
}
}
NOTE: If the HP 3PAR array that the RHEL server is connecting to is running an HP 3PAR
OS version earlier than 3.1.1, you must change the no_path_retry setting to 12 rather
than 18, and the polling_interval setting to 5 rather than 10.
Enabling Multipath
Perform the following actions to enable multipath.
1. Invoke the multipath command for any name changes to be effective.
2. Verify that the multipathd daemon is enabled by the rc script to run on every host boot
up. The following output shows that it is enabled for run-level 3, 4 and 5. Enable it appropriately
for your configuration:
# chkconfig --list multipathd
multipathd 0:off 1:off 2:off 3:on 4:on 5:on 6:off
3.
Check that the appropriate rc scripts have been created for each run level. The start number(s)
may not match those shown here.
# ls /etc/rc3.d/*multi*
/etc/rc3.d/S13multipathd
# ls /etc/rc5.d/*multi*
/etc/rc5.d/S13multipathd
You can also use the chkconfig command to enable multipathing:
# chkconfig multipathd on
Setting Up Veritas DMP Multipathing
For Active/Active multipath load balancing and failover, install Veritas Storage Foundation and
High Availability Software, following the instructions given in the VERITAS Volume Manager
Installation Guide and Administrator Guide available from the following website:
www.symantec.com
48
Configuring a Host Server with Fibre Channel
NOTE:
Veritas Cluster V6.0.1 is supported on RHEL 6.x with HP 3PAR OS 3.1.1 or later.
NOTE: If using the QLogic HBA, the QLogic Non-Failover Driver should have been installed for
Veritas DMP support. Device-mapper (DM) or multipath modules should not be configured or
removed if Veritas DMP is used for multipathing.
When installing the VERITAS Volume Manager, the following Veritas driver modules and file system
modules are included:
/lib/modules/<kernel_version>/veritas/vxvm/dmpaaa.ko
/lib/modules/<kernel_version>/veritas/vxvm/dmpaa.ko /lib/modules/
<kernel_version>/veritas/vxvm/dmpapf.ko
/lib/modules/<kernel_version>/veritas/vxvm/dmpapg.ko
/lib/modules/<kernel_version>/veritas/vxvm/dmpjbod.ko /lib/modules/
<kernel_version>/veritas/vxvm/vxdmp.ko
/lib/modules/<kernel_version>/veritas/vxvm/vxio.ko
/lib/modules/<kernel_version>/veritas/vxvm/vxspec.ko
/lib/modules/<kernel_version>/veritas/vxfs/fdd.ko
/lib/modules/<kernel_version>/veritas/vxfs/vxfs.ko
/lib/modules/<kernel_version>/veritas/vxfs/vxportal.ko
It is required to have the Veritas Array Support Library (ASL) for the HP 3PAR StoreServ Storage
installed on the RHEL host if you are using a Veritas Storage Foundation version prior to 5.0mp3.
To obtain the Veritas ASL for the HP 3PAR StoreServ Storage, complete the following tasks:
1. Download the latest Veritas ASL for the HP 3PAR Storage System from https://
sort.symantec.com/asl/finder. Select 3PAR as the vendor. For ASLs for SFHA versions earlier
than 5.0, refer to this technical note: http://www.symantec.com/business/support/index?
page=content&id=TECH61169.
NOTE: Specific models of HP 3PAR Storage arrays may not be listed on the website, but
the ASL works on all models of HP 3PAR Storage arrays.
2.
3.
To install the ASL, the Veritas vxconfigd daemon must be running. Running vxinstall
will start the daemon. Once you install the ASL package, you must run the vxdctl enable
command to claim the disk array as an HP 3PAR array.
Configure the Veritas vxdmp driver to manage the HP 3PAR StoreServ Storage paths providing
path failure management and dynamic load balancing.
Setting Up Multipathing Software
49
4.
To confirm that the Veritas vxdmp driver has registered and claimed the HP 3PAR StoreServ
Storage, issue the following Veritas command:
# vxddladm listsupport libname=libvx3par.so
ATTR_NAME ATTR_VALUE
=======================================================================
LIBNAME libvx3par.so
VID 3PARdata
PID VV
ARRAY_TYPE A/A
ARRAY_NAME 3PARDATA
If you are using the Veritas Storage Foundation version 5.0mp3 or higher, then you do not
need to install the ASL for the HP 3PAR StoreServ Storage. To verify that the HP 3PAR StoreServ
Storage is recognized and supported by the installation, run the following command:
# vxddladm listsupport libname=libvx3par.so
ATTR_NAME ATTR_VALUE
=======================================================================
LIBNAME libvx3par.so
VID 3PARdata
PID VV
ARRAY_TYPE A/A
ARRAY_NAME 3PARDATA
However, if the output does not show the HP 3PAR StoreServ Storage, perform the following
step to have the storage server added as a 3PARDATA device:
# vxddladm addsupport all
Then verify that the HP 3PAR StoreServ Storage is supported, as shown in the following
example.
# vxddladm listsupport libname=libvx3par.so
ATTR_NAME ATTR_VALUE
=======================================================================
LIBNAME libvx3par.so
VID 3PARdata
PID VV
ARRAY_TYPE A/A
ARRAY_NAME 3PARDATA
WARNING! If the ARRAY_NAME is not designated as 3PARDATA, the multipathing layer
may not discover devices correctly.
Installing the HP 3PAR Host Explorer Package
With HP 3PAR OS 2.3.1 and OS 3.1.x, the Host Explorer daemon running on the RHEL server
can send information about the host configuration to an HP 3PAR StoreServ Storage over the Fibre
Channel link. For installation and activation of this package, see the HP 3PAR Host Explorer User’s
Guide on the HP BSC website:
http://www.hp.com/go/bsc
50
Configuring a Host Server with Fibre Channel
6 Configuring a Host Server with iSCSI
Setting Up the Switch, iSCSI Initiator, and iSCSI target ports
Connect the Linux host iSCSI initiator port(s) and the HP 3PAR StoreServ Storage iSCSI target ports
to the switch(es).
If you are using VLANs, make sure that the switch ports which connect to the HP 3PAR StoreServ
Storage iSCSI target ports and iSCSI initiator ports reside in the same VLANs and/or that you can
route the iSCSI traffic between the iSCSI initiator ports and the HP 3PAR StoreServ Storage iSCSI
target ports. Once the iSCSI initiator and HP 3PAR StoreServ Storage iSCSI target ports are
configured and connected to the switch, you can use the ping command on the iSCSI initiator
host to make sure it sees the HP 3PAR StoreServ Storage iSCSI target ports.
NOTE: Setting up the switch for VLAN and routing configuration is beyond the scope of this
document. Consult your switch manufacturer's guide for instructions about setting up VLANs and
routing.
The procedures in this chapter assume that you have completed the following tasks:
•
Set up and configuration of the host Network Interface Card (NIC) or converged network
adapter (CNA) as Initiator port that will be used by the iSCSI Initiator software to connect to
the HP 3PAR StoreServ Storage iSCSI target ports.
•
Installation of the iSCSI initiator software package.
Configuring RHEL 4 for iSCSI
This section discusses the necessary tasks for setting up iSCSI for RHEL 4.
Installing iSCSI on RHEL 4
Install the software iSCSI initiator software package if it has not been installed. The software
package can be installed from the respective Service Pack distribution CDs of your RHEL 4 OS
version using the RPM tool.
Setting Up a Software iSCSI for RHEL 4
Complete the following steps to setup the RHEL 4 iSCSI host:
1. Check state of the iSCSI service run level information with the chkconfig command.
# chkconfig --list | grep iscsi
iscsi 0:off 1:off 2:off 3:off
2.
4:off
5:off
6:off
Check your system run level.
# runlevel
N 5
3.
Configure the iSCSI service run level the same as your system run level and verify that the
setting for the run level has changed. Now, every time you boot up the system, the iSCSI
service will run.
# chkconfig --level 5 iscsi on
# chkconfig --list | grep iscsi
iscsi 0:off 1:off 2:on 3:on
4:on
5:on
6:off
Setting Up the Switch, iSCSI Initiator, and iSCSI target ports
51
4.
Edit the /etc/iscsi/iscsid.conf file and at the end of the file add the following lines
to configure the HP 3PAR StoreServ Storage iSCSI target port to connect to. In this example
we are adding an iSCSI target port with an IP address of 10.0.0.10 and 10.0.0.20.
ConnFailTimeout=10
DiscoveryAddress=10.0.0.10
DiscoveryAddress=10.0.0.20
5.
Reload the iSCSI service:
# /etc/init.d/iscsi reload
/etc/init.d/iscsi reload
NOTE: Dynamic Driver Reconfiguration: Configuration changes can be made to the iSCSI
driver without having to stop it or to reboot the host system. To dynamically change the
configuration of the driver, insert the /etc/init.d/iscsi reload to the /etc/iscsi/
iscsid.conf file. This will cause the iSCSI daemon to re-read the iscsi.conf file and to
create any new Discovery Address connections it finds. Those discovery sessions will then
discover targets and create new target connections.
6.
Make sure that the multipathd daemon is not running. If it is, you can stop it by running
the script /etc/init.d/multipathd stop.
# /etc/init.d/multipathd status
multipathd is stopped
7.
Verify that the module iscsi_sfnet is not loaded.
# lsmod | grep iscsi_sfnet
8.
Verify that the module iscsi_sfnet has been loaded.
# lsmod | grep iscsi_sfnet
iscsi_sfnet 96093 26
scsi_transport_iscsi 14017 1 iscsi_sfnet
scsi_mod 145297 7
iscsi_sfnet,lpfc,libata,cciss,qla2xxx,scsi_transport_fc,sd_mod
Configuring RHEL 4 iSCSI Settings with Device-mapper Multipathing
The /etc/multipath.conf file is used by Device–mapper where the multipathing parameters
have been set. The default installed /etc/multipath.conf file must be edited with the following
changes for a minimum configuration connecting to an HP 3PAR array. Entries listed in
multipath.conf override the default kernel parameters for dm-multipath. In general, the
kernel defaults are sufficient with the exception of the devices entries for HP 3PAR.
NOTE: Refer to RHEL documentation of DM Multipath Configuration and Administration for
additional options in multipath.conf entries.
NOTE: See “Setting Up Device-mapper” (page 45) for the installation of the Device-mapper rpm
packages.
52
Configuring a Host Server with iSCSI
1.
2.
3.
Remove or comment out all entries in the /etc/multipath.conf file except for the devices
section of devices currently in use.
Edit the devices structure to add entries for HP 3PAR array and remove other product entries
that are not needed.
Verify that the /etc/multipath.conf file contains the following content:
NOTE: The following multipath settings for the RHEL server apply regardless of the HP 3PAR
OS version running on the HP 3PAR array.
# cat /etc/multipath.conf
defaults {
}
devices {
device {
vendor
product
no_path_retry
features
hardware_handler
path_grouping_policy
path_selector
rr_weight
rr_min_io
path_checker
failback
polling_interval
"3PARdata"
"VV"
12
"0"
"0"
multibus
"round-robin 0"
uniform
100
tur
immediate
5
}
}
4.
5.
Run the multipath command for any name changes to be effective.
Verify that the multipathd daemon is enabled by the rc script to run on every host boot
up.
The following output shows that it is enabled for run-level 3, 4 and 5. Enable it appropriately
for your configuration.
# chkconfig --list multipathd
multipathd 0:off 1:off 2:off 3:on 4:on 5:on 6:off
6.
Check that the appropriate rc scripts have been created for each run level. The start numbers
may not match those shown here.
# ls /etc/rc3.d/*multi*
/etc/rc3.d/S13multipathd
# ls /etc/rc5.d/*multi*
/etc/rc5.d/S13multipathd
Alternatively, you can use the chkconfig command to enable multipathing if it is not enabled:
# chkconfig multipathd on
Configuring RHEL 4 for iSCSI
53
Configuring RHEL 5 or RHEL 6 for Software and Hardware iSCSI
Installing iSCSI on RHEL 5 or RHEL 6
iSCSI is installed through the iscsi-initiator-utils driver and rpm package by default
during the RHEL installation. There are a couple of ways to configure and start
iscsi-initiator-utils on RHEL: either by using the various iscsi-initiator-utils
commands available from the RHEL CLI or through the GUI.
This document references the iscsi-initiator-utils commands from the RHEL CLI. The
iscsiadm utility is a command-line tool that allows discovery and login to iSCSI targets. This tool
also provides access and management of the open-iscsi database. The following steps are
required to discover iSCSI sessions:
1. Discover targets at a given IP address.
2. Establish iSCSI login with node record id found in the discovery process.
3. Record iSCSI session statistics information.
Setting Up Software iSCSI for RHEL 5, 6
You can adjust the iSCSI timers for better iSCSI session management and iSCSI I/O path
management. iSCSI timers and session parameters are specified in /etc/iscsi/iscsid.conf
file.
The replacement_timeout iSCSI timeout parameter prevents I/O errors from propagating to
the application by controlling how long the iSCSI layer should wait for a timed-out path/session
to reestablish itself before failing any commands on it. The default replacement_timeout value
is 120 seconds.
To adjust replacement_timeout, complete the following steps:
1. Open /etc/iscsi/iscsid.conf and edit the following line:
node.session.timeo.replacement_timeout = [replacement_timeout]
2.
Set this parameter to 5 seconds for a faster failover.
node.session.timeo.replacement_timeout = 5
3.
To control how often a ping is sent by the iSCSI initiator to the iSCSI target, change the
following parameter.
node.conn[0].timeo.noop_out_interval = [replacement_timeout]
To detect problems quickly in the network, the iSCSI layer sends iSCSI pings to the target. If
the ping times out, the iSCSI layer responds by failing running commands on the path where
the pings failed.
4.
Set this parameter to 10 seconds.
node.conn[0].timeo.noop_out_interval = 10
54
Configuring a Host Server with iSCSI
5.
To set the host log into the iSCSI nodes every time the iSCSI daemon is started or the host is
rebooted, edit the iSCSI configuration in /etc/iscsi/iscsid.conf and change the values
of the following default settings:
node.startup = automatic
node.conn[0].startup = automatic
NOTE: The node.conn[0] .startup variable is optional and not defined in the default
iscsid configuration file.
6.
Check the state of the iSCSI service run level with the chkconfig command:
# chkconfig --list | grep iscsi
iscsi
0:off
1:off
2:off
iscsid
0:off
1:off
2:off
7.
4:off
4:on
5:off
5:on
6:off
6:off
Verify that Run level 5 is turned on. If not turned on, issue the following commands:
# chkconfig iscsi on
# chkconfig --list|grep iscsi
iscsi
0:off
1:off
iscsid
0:off
1:off
8.
3:off
3:on
2:on
2:off
3:on
3:on
4:on
4:on
5:on
5:on
6:off
6:off
Session and device queue depth in /etc/iscsi/iscsid.conf may require tuning
depending on your particular configuration. node.session.cmds_max controls how many
commands the session will queue. node.session.queue_depth controls the device's
queue depth.
If you are deploying HP 3PAR’s Priority Optimization software, you may need to increase or
max out the node.session.cmds_max and node.session.queue_depth values to
ensure the host has sufficient I/O throughput to support this feature. For complete details of
how to use Priority Optimization (Quality of Service) on HP 3PAR arrays, please read the HP
3PAR Priority Optimization technical white paper available at http//www.hp.com/go/bsc.
In a multihost-to-single HP 3PAR StoreServ Storage configuration when HP 3PAR Priority
Optimization is not in use it is possible to overrun the array target port I/O queues or
experience queue starvation for some hosts due to excessive usage by other hosts. This situation
is more likely when using the 1G iSCSi target ports on T-Class and F-Class HP 3PAR arrays
that have a smaller target port queue depth of 512. These situations can be mitigated by
reducing the values for parameters node.session.cmds_max and
node.session.queue_depth on each host that shares the array target port.
9.
As an option, you can also enable the Header and Data Digest for error handling and recovery
within the connection.
Typically, whenever a CRC error occurs, the SCSI layer tries to recover by disabling the
connection and recovering. However, by enabling the header and data digest, individual
iSCSI PDUs will be retried for recovery for those connections missing the data (CRC Error) or
missing a PDU or sequence number (Header Digest). If the recovery does not occur, then the
low level SCSI recovery will be initiated. The Header and Data Digest is optional since the
SCSI layer will still perform CRC error recovery at the session level rather than at the PDU
level.
CAUTION: Enabling Header and Data Digest will cause some I/O performance degradation
due to data checking.
Configuring RHEL 5 or RHEL 6 for Software and Hardware iSCSI
55
You can enable the Header and Data Digest by adding the following lines in iSCSI
configuration file /etc/iscsi/iscsid.conf:
node.conn[0].iscsi.HeaderDigest = CRC32C
node.conn[0].iscsi.DataDigest = CRC32C
NOTE:
In order for the parameter changes to take effect, restart the iSCSI service after the
change.
10. Enable any other configuration changes such as CHAP authentication. For details, see “Setting
the Host CHAP Authentication on the HP 3PAR StoreServ Storage” (page 72).
Setting Up Hardware iSCSI for RHEL 5 or RHEL 6
Use the BIOS to add IP addresses, and use the OneCommand Manager GUI or the hbacmd utility
to configure hardware iSCSI. For information about setting up and configuring hardware iSCSI,
see the OneCommand™Manager Command Line Interface Version 6.1 User Manual, which is
available at the following website:
http://www-dl.emulex.com/support/elx/r32/b16/docs/apps/ocm_cli_manual_elx.pdf
Setting IP Addresses Using BIOS
1.
Using the system BIOS, add the IP addresses:
Figure 2 Adding IP addresses
2.
56
In the Network Configuration pane, select Configure Static IP Address.
Configuring a Host Server with iSCSI
Figure 3 Configuring Static IP Address
3.
In the IP Address field of the Static IP Address pane, enter the IP Address, Subnet Mask, and
Default Gateway.
Configuring RHEL 5 or RHEL 6 for Software and Hardware iSCSI
57
Figure 4 Entering the IP Address, Subnet Mask, and Default Gateway
4.
Save the changes and reboot the server.
Using the OneCommand Manager GUI
To configure hardware iSCSI using the OneCommand Manager GUI, follow these steps:
1. Issue the /usr/sbin/ocmanager/ocmanager & command to open the OneCommand
Manager and configure hardware iSCSI.
58
Configuring a Host Server with iSCSI
Figure 5 Configuring hardware iSCSI
2.
On the Adapter information tab, in the Personality pane, make sure that Personality is set to
iSCSI.
Configuring RHEL 5 or RHEL 6 for Software and Hardware iSCSI
59
Figure 6 Setting Personality to iSCSI
3.
60
Add the target portal on port 0:2:1.
Configuring a Host Server with iSCSI
Figure 7 Adding the Target Portal
NOTE:
4.
To list the HP 3PAR StoreServ target ports, issue the showport -iscsi command:
Highlight the target.
Configuring RHEL 5 or RHEL 6 for Software and Hardware iSCSI
61
Figure 8 Highlighting the Target
5.
62
Click Target Login... and accept the default settings.
Configuring a Host Server with iSCSI
Figure 9 Selecting the Default
6.
Highlight the now-connected target.
Configuring RHEL 5 or RHEL 6 for Software and Hardware iSCSI
63
Figure 10 Highlighting the Connected Target
7.
64
To view the established sessions, click Target Sessions....
Configuring a Host Server with iSCSI
Figure 11 Listing the Target Session
Use the initiator name to create the host definition by issuing the HP 3PAR OS CLI createhost
— iscsi <host name> <iSCSI Initiator name> command:
# createhost -iscsi -persona 1 redhathost iqn.1990-07.com.emulex:28-92-4a-af-f5-61
LUNs can now be presented to the initiator's iSCSI IQN:
iqn.1990-07.com.emulex:28-92-4a-af-f5-61
(See “Listing the Target Session” (page 65).)
Using the hbacmd Utility
Use the following hbacmd command to discover version information and a list of iSCSI commands.
Make sure to use the correct hbacmd utility version to configure hardware iSCSI.
Configuring RHEL 5 or RHEL 6 for Software and Hardware iSCSI
65
NOTE:
Check the HP Support & Drivers website for the hardware support for hardware iSCSI:
http://www8.hp.com/us/en/support-drivers.html
For information about hardware iSCSI usage, issue the hbacmd help command:
# hbacmd help
To make sure the personality is set to active and configured on the iSCSI, issue the following
command:
To list the IP address of the hardware iSCSI, issue the following command:
To list the hardware iSCSI session, issue the following command:
To check the hardware iSCSI session information, issue the following command:
66
Configuring a Host Server with iSCSI
Configuring RHEL 5 or RHEL 6 iSCSI Settings with Device-mapper Multipathing
The /etc/multipath.conf file is used by Device-mapper where the multipathing parameters
have been set. The default installed /etc/multipath.conf file must be edited with the following
changes for a minimum configuration connecting to an HP 3PAR array. Entries listed in
multipath.conf override the default kernel parameters for dm-multipath. In general, the
kernel defaults are sufficient with the exception of the devices entries for HP 3PAR.
NOTE: See RHEL documentation of DM Multipath Configuration and Administration for additional
options in multipath.conf entries.
1.
Remove or comment out all entries in the /etc/multipath.conf file except for the devices
section of devices currently in use.
Configuring RHEL 5 or RHEL 6 for Software and Hardware iSCSI
67
2.
Edit the devices structure to add entries for HP 3PAR array and remove other product entries
that are not needed.
For RHEL 5.0 through RHEL 5.5:
NOTE: The following multipath settings for the RHEL server apply regardless of the HP 3PAR
OS version running on the HP 3PAR array:
# cat /etc/multipath.conf
defaults {
}
devices {
device {
vendor
product
no_path_retry
features
hardware_handler
path_grouping_policy
path_selector
rr_weight
rr_min_io
path_checker
failback
polling_interval
"3PARdata"
"VV"
12
"0"
"0"
multibus
"round-robin 0"
uniform
100
tur
immediate
5
}
}}
For RHEL 5.6 or later:
# cat /etc/multipath.conf
defaults {
polling_interval
}
5
devices {
device {
vendor
product
no_path_retry
features
hardware_handler
path_grouping_policy
path_selector
rr_weight
rr_min_io
path_checker
failback
}
}
For RHEL 6.1:
# cat /etc/multipath.conf
defaults {
polling_interval
}
68
Configuring a Host Server with iSCSI
5
"3PARdata"
"VV"
12
"0"
"0"
multibus
"round-robin 0"
uniform
100
tur
immediate
devices {
device {
vendor
product
no_path_retry
features
hardware_handler
path_grouping_policy
path_selector
rr_weight
rr_min_io
path_checker
failback
"3PARdata"
"VV"
12
"0"
"0"
multibus
"round-robin 0"
uniform
1
tur
immediate
}
}
For RHEL 6.2 or later:
# cat /etc/multipath.conf
defaults {
polling_interval
max_fds
}
5
8192
devices {
device {
vendor
product
no_path_retry
features
hardware_handler
path_grouping_policy
path_selector
rr_weight
rr_min_io_rq
path_checker
failback
"3PARdata"
"VV"
12
"0"
"0"
multibus
"round-robin 0"
uniform
1
tur
immediate
}
}
3.
4.
Restart the multipathd daemon for any changes to be effective.
Verify that the multipathd daemon is enabled by the rc script to run on every host boot
up.
The following output shows that it is enabled for run-level 3, 4 and 5. Enable it appropriately
for your configuration:
# chkconfig --list multipathd
multipathd 0:off 1:off 2:off 3:on 4:on 5:on 6:off
Configuring RHEL 5 or RHEL 6 for Software and Hardware iSCSI
69
5.
Check that the appropriate rc scripts have been created for each run level. The start number(s)
may not match those shown here.
# ls /etc/rc3.d/*multi*
/etc/rc3.d/S13multipathd
# ls /etc/rc5.d/*multi*
/etc/rc5.d/S13multipathd
Alternatively, you can use the chkconfig command to enable multipathing if it is not enabled:
# chkconfig multipathd on
Starting the iSCSI Daemon for RHEL 5 or RHEL 6
To start the iSCSI daemon for the RHEL host, complete the following steps:
1. To start the open-iscsi module, issue the following command:
# /etc/init.d/iscsi start
Starting iSCSI daemon:
[ OK ]
[ OK ]
2.
You can check the state of the open-iSCSI service run level information with the chkconfig
command. Run level 5 should be on.
# chkconfig --list | grep iscsi
iscsi 0:off 1:off 2:off 3:off 4:off 5:on 6:off
# chkconfig --list | grep iscsid
iscsid 0:off 1:off 2:off 3:off 4:off 5:on 6:off
To turn on iSCSI, use the following commands:
# chkconfig iscsi on
# chkconfig iscsid on
To verify iSCSI status:
# chkconfig --list iscsi
iscsi 0:off 1:off 2:off 3:on 4:on 5:on 6:off
# chkconfig --list iscsid
iscsid 0:off 1:off 2:off 3:on 4:on 5:on 6:off
3.
Verify that the iscsi module is loaded.
# lsmod | grep iscsi
iscsi_tcp
56897 2
libiscsi
59329 2 ib_iser,iscsi_tcp
scsi_transport_iscsi 63569 4 ib_iser,iscsi_tcp,libiscsi
scsi_mod
184057 10
sg,ib_iser,iscsi_tcp,libiscsi,scsi_transport_iscsi,qla2xxx,lpfc,scsi_transport
_fc,cciss,sd_mod
70
Configuring a Host Server with iSCSI
Creating the Software iSCSI Connection in RHEL 5 or RHEL 6 Using the iscsiadm
Command
NOTE: To set up a hardware ISCSI connection, see “Setting Up Hardware iSCSI for RHEL 5 or
RHEL 6” (page 56).
After connecting the host to the HP 3PAR StoreServ Storage iSCSI target port, use the iscsiadm
command to create the iSCSI connection, complete following steps:
1. Discover the target node using the iscsiadm command in discovery mode:
iscsiadm -m discovery -t sendtargets -p <target ip address>:<iscsi port>.
For example:
# iscsiadm -m discovery -t sendtargets -p 10.100.0.101:3260
10.100.0.101:3260,31 iqn.2000-05.com.3pardata:20310002ac000079
2.
The contents of the discovery can be viewed using the iscsiadm -m discovery command.
For example:
# iscsiadm -m discovery
10.100.0.101:3260 via sendtargets
3.
Issue the iscsiadm -m node command:
# iscsiadm -m node
10.100.1.101:3260,31 iqn.2000-05.com.3pardata:20320002ac000121
4.
Identify the iSCSI node login that record has been discovered from the discovery process.
iscsiadm -m node -T <targetname> -p <target ip address>:<iscisport>
-l.
For example:
# iscsiadm -m node -T iqn.2000-05.com.3pardata:20310002ac000079 -p 10.100.0.101:3260 -l
Logging in to [iface: default, target: iqn.2000-05.com.3pardata:20310002ac000079, portal: 10.100.0.101,3260]
Login to [iface: default, target: iqn.2000-05.com.3pardata:20310002ac000079, portal: 10.100.0.101,3260]: successful
5.
The content of the login node can be viewed using the iscsiadm command.
For example:
# iscsiadm -m node -T iqn.2000-05.com.3pardata:20310002ac000079 -p 10.100.0.101:3260
10.100.0.101:3260,31 iqn.2000-05.com.3pardata:20310002ac000079
6.
Now examine the iSCSI session and content session of the node info by issuing iscsiadm
-m session.
For example:
# iscsiadm -m session
tcp: [1] 10.100.0.101:3260,31 iqn.2000-05.com.3pardata:20310002ac000079
Configuring RHEL 5 or RHEL 6 for Software and Hardware iSCSI
71
See “RHEL iscsiadm Utility Usage” (page 23) for more RHEL iscsiadm command usage.
In RHEL 5.4, the open-iSCSI persistent configuration is implemented as a DBM database
available during the Linux iSCSI installation.
•
Discovery table (/var/lib/iscsi/send_targets)
•
Node table (/var/lib/iscsi/nodes)
The following example shows settings for send_targets and node tables:
send_targets/
drw------- 2 root root 4096 Feb 26 16:51 10.102.2.131,3260
drw------- 2 root root 4096 Feb 26 10:22 10.102.2.31,3260
nodes/
drw------- 3 root root 4096 Feb 26 10:22 iqn.2000-05.com.3pardata:20310002ac0000b1
drw------- 3 root root 4096 Feb 26 10:58 iqn.2000-05.com.3pardata:21310002ac0000b1
To change or modify the send_targets or nodes, remove the above entry first to use the
iscsiadm utility to add the new send_targets or nodes, after which the persistent tables
will update.
NOTE: The RHEL 5 iSCSI iface setup describes how to bind a session to a NIC port using
iSCSI software. Running iscsiadm -m iface reports iface configurations setup in /var/
lib/iscsi/ifaces.
For more details, refer to the RHEL 5 U4 open-iscsi release note.
Configuring CHAP for the iSCSI Host
Two CHAP authentication configurations are available: Host CHAP authentication, where the
HP 3PAR StoreServ Storage iSCSI target port authenticates the iSCSI Initiator host when it tries to
connect to it, and bidirectional (mutual) CHAP authentication, where both the iSCSI target and
host authenticate each other when the host tries to connect to the target.
You must create an iSCSI host definition on the HP 3PAR StoreServ Storage before setting and
configuring CHAP for the iSCSI host. See “Creating the Software iSCSI Host Definition” (page 20).
Setting the Host CHAP Authentication on the HP 3PAR StoreServ Storage
To set the host CHAP authentication, an iSCSI host definition must have been created on the
HP 3PAR StoreServ Storage, and the HP 3PAR OS CLI sethost initchap command must be
used to set the host CHAP secret.
For HP 3PAR OS 3.1.x and OS 2.3.x, the output shows:
# showhost
Id Name
0 redhatlinux
Persona ----------WWN/iSCSI_Name----------- Port
Generic iqn.1994-05.com.redhat:a3df53b0a32d ---
For HP 3PAR OS 2.2.x, the output shows:
# showhost
Id Name -----------WWN/iSCSI_Name------------ Port
0 linux
iqn.1994-05.com.redhat:a3df53b0a32d -iqn.1994-05.com.redhat:a3df53b0a32d
72
Configuring a Host Server with iSCSI
The following example uses the host CHAP password host_secret0 for the host. Be aware that
CHAP secret must be at least 12 characters long.
•
Set the host CHAP secret.
# sethost initchap -f host_secret0 redhatlinux
•
Verify the host CHAP secret.
# showhost -chap
Id Name
-Initiator_CHAP_Name0 redhatlinux
redhatlinux
-Target_CHAP_Name--
Setting the Host CHAP for RHEL 5 or RHEL 6 on the Host
To set the host CHAP for RHEL 5 or RHEL 6, complete the following steps:
1. Go to the iSCSI Initiator host console, or, at a terminal, edit the /etc/iscsi/iscsid.conf
file and enable CHAP authentication:
#To enable CHAP authentication set node.session.auth.authmethod
#to CHAP. The default is None.
node.session.auth.authmethod = CHAP
2.
Configure the host CHAP password for the discovery and login session by again editing the
configuration file /etc/iscsi/iscsid.conf file.
#To set a discovery session CHAP username and password for the initiator
#authentication by the target(s), uncomment the following lines:
discovery.sendtargets.auth.username = redhatlinux
discovery.sendtargets.auth.password = host_secret0
#To set a CHAP username and password for initiator
#authentication by the target(s), uncomment the following lines:
node.session.auth.username = redhatlinux
node.session.auth.password = host_secret0
NOTE: The OutgoingUsername variable can be set to anything you want, but the
OutgoingPassword has to be the same as the host CHAP secret configured on the HP 3PAR
StoreServ Storage.
Configuring CHAP for the iSCSI Host
73
3.
Perform discovery and login as described in “Discovering Devices with a Software iSCSI
Connection” (page 94).
If the targets have been discovered previously, you must logout of the iSCSI sessions, delete
the node and send target records before performing discovery and logins by completing the
following steps:
a. Perform an iSCSI Logout:
# iscsiadm -m node --logoutall=all
b.
Remove the iSCSI Node:
# iscsiadm -m node -o delete -T iqn.2000-05.com.3pardata:20310002ac000079 -p
10.100.0.101,3260
c.
Remove the SendTarget iSCSI Discovery:
# iscsiadm -m discovery -o delete -p 10.100.0.101
d.
Stop and start the iSCSI daemon:
# /etc/init.d/iscsid stop
Stopping iSCSI daemon:
# /etc/init.d/iscsid start
Turning off network shutdown. Starting iSCSI daemon: [
[ OK ]
e.
OK
]
Repeat the steps as described in “Creating the Software iSCSI Connection in RHEL 5 or
RHEL 6 Using the iscsiadm Command” (page 71) to rediscover the iSCSI target nodes
and create the iSCSI login sessions.
Setting the Host CHAP for RHEL 4
To set the host CHAP for RHEL 4, complete the following steps:
1. Go to the iSCSI Initiator host console, or, at a terminal, edit the /etc/iscsi/iscsid.conf
file and configure the host CHAP password.
DiscoveryAddress=10.0.0.10
DiscoveryAddress=10.0.0.20
OutgoingUsername=redhatlinux
OutgoingPassword=host_secret0
NOTE: You must have the OutgoingUsername and OutgoingPassword variables under
the DiscoveryAddress variable.
NOTE: The OutgoingUsername variable can be set to anything you want, but the
OutgoingPassword has to be the same as the host CHAP secret configured on the HP 3PAR
StoreServ Storage.
74
Configuring a Host Server with iSCSI
2.
Check to see if the iscsid daemon is running by using the script /etc/init.d/iscsi
status.
# /etc/init.d/iscsi status
iscsid (pid 30532 30529) is running... (RedHat 4)
Checking for service iSCSI driver is loaded
Setting Up the Bidirectional CHAP on the HP 3PAR StoreServ Storage
To set bidirectional CHAP (mutual), complete the following steps. The HP 3PAR OS CLI sethost
initchap and sethost targetchap commands must be used to set bidirectional CHAP on
the HP 3PAR StoreServ Storage.
1. Verify that a host definition has been created on the HP 3PAR StoreServ Storage. The following
example uses host_secret0 for the host CHAP password and target_secret0 for the
target CHAP password.
For HP 3PAR OS 3.1.x or OS 2.3.x, the output shows:
# showhost
Id Name
0 redhatlinux
Persona ----------WWN/iSCSI_Name----------Generic iqn.1994-05.com.redhat:a3df53b0a32d
Port
---
For HP 3PAR OS 2.2.x, the showhost command shows the host definition on the HP 3PAR
StoreServ Storage for the iSCSI host:
# showhost
Id Name -----------WWN/iSCSI_Name------------ Port
0 linux iqn.1994-05.com.redhat:a3df53b0a32d
-iqn.1994-05.com.redhat:a3df53b0a32d
--
NOTE: The following example uses the host CHAP password host_secret0 for the host.
Be aware that CHAP secret must be at least 12 characters long.
2.
Set the host CHAP secret.
# sethost initchap -f host_secret0 redhatlinux
3.
Set the target CHAP secret.
# sethost targetchap -f target_secret0 redhatlinux
4.
Verify the host and target CHAP secret.
# showhost -chap
Id Name
-Initiator_CHAP_Name0 redhatlinux redhatlinux
-Target_CHAP_NameS121
Setting the Bidirectional CHAP for RHEL 5 or RHEL 6
To configure the bidirectional CHAP for RHEL 5 or RHEL 6, go to the iSCSI Initiator host console,
or, at a terminal, edit the /etc/iscsi/iscsid.conf and configure the host and target CHAP
passwords for discovery and login sessions by completing the following steps.
Configuring CHAP for the iSCSI Host
75
NOTE: Notice that two DiscoveryAddress variables with the same IP address for the HP 3PAR
StoreServ Storage iSCSI target port are required. One for the host CHAP username and password
variables (OutgoingUsername and OutgoingPassword) and another one for target CHAP
username and password variables (IncomingUsername and IncomingPassword).
1.
Perform the CHAP configuration settings for the host initiator:
# To enable CHAP authentication set node.session.auth.authmethod
# to CHAP. The default is None.
node.session.auth.authmethod = CHAP
# To set a discovery session CHAP username and password for the initiator
# authentication by the target(s), uncomment the following lines:
discovery.sendtargets.auth.username = redhatlinux
discovery.sendtargets.auth.password = host_secret0
# To set a CHAP username and password for initiator
# authentication by the target(s), uncomment the following lines:
node.session.auth.username = redhatlinux
node.session.auth.password = host_secret0
2.
Perform the CHAP configuration setting for the target:
#To set a discovery session CHAP username and password for target(s)
# authentication by the initiator, uncomment the following lines:
discovery.sendtargets.auth.username_in = S121
discovery.sendtargets.auth.password_in = target_secret0
# To set a CHAP username and password for target(s)
# authentication by the initiator, uncomment the following lines:
node.session.auth.username_in = S121
node.session.auth.password_in = target_secret0
NOTE: S121 is the target CHAP name, which can be displayed on the HP 3PAR StoreServ
Storage by running the command showhost -chap.
NOTE: The OutgoingUsername and IncomingUsername variables can be set to anything
you want, but the OutgoingPassword and IncomingPassword must match the host CHAP
password and target CHAP password configured on the HP 3PAR StoreServ Storage.
76
Configuring a Host Server with iSCSI
3.
Perform discovery and login as describe in “Discovering Devices with a Software iSCSI
Connection” (page 94).
If the targets have been discovered previously, you must logout of the iSCSI sessions, delete
the node and send target records before performing discovery and logins by completing the
following steps:
a. Perform an iSCSI Logout.
# iscsiadm -m node --logoutall=all
b.
Remove the iSCSI Node.
# iscsiadm -m node -o delete -T iqn.2000-05.com.3pardata:20310002ac000079 -p
10.100.0.101,3260
c.
Remove the SendTarget iSCSI Discovery.
# iscsiadm -m discovery -o delete -p 10.100.0.101
d.
Stop and start the iSCSI daemon.
# /etc/init.d/iscsid stop
Stopping iSCSI daemon:
# /etc/init.d/iscsid start
Turning off network shutdown. Starting iSCSI daemon: [
[ OK ]
e.
OK
]
Make sure to remove the iSCSI persistent files under these directories:
/var/lib/iscsi/send_targets/
/var/lib/iscsi/nodes/
For example:
#
#
#
#
f.
ls
ls
rm
rm
-l /var/lib/iscsi/send_targets/*
-l /var/lib/iscsi/nodes/*
-rf /var/lib/iscsi/send_targets/*
-rf /var/lib/iscsi/nodes/*
Repeat the steps as described in “Creating the Software iSCSI Connection in RHEL 5 or
RHEL 6 Using the iscsiadm Command” (page 71) to rediscover the iSCSI target nodes
and create the iSCSI login sessions.
Setting the Bidirectional CHAP for RHEL 4
To configure the bidirectional CHAP for RHEL 4, complete the following steps.
Configuring CHAP for the iSCSI Host
77
1.
Go to the iSCSI Initiator host console, or, at a terminal, edit the /etc/iscsi/iscsid.conf
file and configure the host and target CHAP passwords.
DiscoveryAddress=10.0.0.10
DiscoveryAddress=10.0.0.20
OutgoingUsername=redhatlinux
OutgoingPassword=host_secret0
DiscoveryAddress=10.0.0.10
DiscoveryAddress=10.0.0.20
IncomingUsername=S4121
IncomingPassword=target_secret0
NOTE: Notice that two DiscoveryAddress variables with the same IP address for the
HP 3PAR StoreServ Storage iSCSI target port are required: one for the host CHAP username
and password variables (OutgoingUsername and OutgoingPassword) and another one
for target CHAP username and password variables (IncomingUsername and
IncomingPassword).
NOTE: You can choose the OutgoingUsername and IncomingUsername variables, but
the OutgoingPassword and IncomingPassword must match the host CHAP password
and target CHAP password configured on the HP 3PAR StoreServ Storage.
Required
The variables under the DiscoveryAddress variable must be offset with a space in order
for the variables not to be global and to apply only to the specific DiscoveryAddress
above them.
2.
3.
Start or restart the iscsid daemon with the script /etc/init.d/iscsi.
Check to see if the iscsid daemon is running by using the script /etc/init.d/iscsi
status.
# /etc/init.d/iscsi status
iscsid (pid 30532 30529) is running... (RedHat 4)
Checking for service iSCSI iSCSI driver is loaded
NOTE: RHEL has documented a bug that can prevent an iSCSI host from rebooting (bug#
583218). RHEL has published a patch for the bug at the following location:
http://rhn.redhat.com/errata/RHBA-2011-0075.html
Configuring and Using Internet Storage Name Server
A dedicated IP network is preferable in configuring Internet Storage Name Server (ISNS).
NOTE:
Secondary ISNS servers are not supported.
DHCP is not supported on iSCSI configurations.
Using a Microsoft iSNS Server to Discover Registrations
A Microsoft iSNS Server can be used to discover the iSCSI initiator and iSCSI targets on a dedicated
network.
Use the Windows 2008 Add Features wizard to add the iSNS feature, and then use the iSNS to
discover registrations.
78
Configuring a Host Server with iSCSI
Using the iSNS Server to Create a Discovery Domain
Follow these steps:
1. Click Start→Administrative Tools→ISNS Server+Discovery Domains tab.
2. In the window that appears, click the Create button.
3. In the Create Discovery Domain popup, enter the discovery domain or select the default, and
then click OK.
Configuring the iSCSI Initiator and Target for iSNS Server Usage
Configuring the HP 3PAR StoreServ Storage
Follow these steps to configure the HP 3PAR StoreServ Storage:
1. Issue the showport -iscsi command to verify whether the iSCSI target ports are configured
for the iSNS server. For example:
2.
Set up the IP addresses for iSNS.
# controliscsiport isns <ISNS Server IP><HP 3PAR StoreServ Storage iSCSI port>
Example:
# controliscsiport isns 10.107.66.11 0:3:2
# controliscsiport isns 10.107.66.11 1:3:2
3.
Verify the configuration setting for iSNS. For example:
Configuring the iSNS Client (RHEL Host)
Install the isns-utils package using yum.
# yum --nogpgcheck install isns-utils
Switch the service on by issuing the following command:
# chkconfig isnsd on
Configuring and Using Internet Storage Name Server
79
Start the service by issuing the following command:
# service isnsd start
Create a new ISNS interface by issuing the following command
# iscsiadm -m iface -o new -I isns_iface
Update the interface to use TCP/IP by issuing the following command:
# iscsiadm -m iface -o update -I isns_iface -n iface.transport_name -v tcp
Discover the ISNS server by issuing the following commands.
Example:
# iscsiadm -m discoverydb -t isns -p <ISNS server IP> : <port> -o new
# iscsiadm -m discoverydb -t isns -p 10.107.66.11:3205 -o update -n
discovery.isns.use_discoveryd -v Yes
Edit the file /var/lib/iscsi/isns/<ISNS server IP>,<port>/isns_config and set
the polling interval to 30:
# vi /var/lib/iscsi/isns/10.107.66.11,3205/isns_config
Restart the iSCSI service by issuing the following command:
# service iscsid restart
Restart the iSNS service by issuing the following command
# service isnsd restart
Confirm the configuration. For example:
80
Configuring a Host Server with iSCSI
7 Configuring a Host Server with FCoE
This chapter describes the procedures that are required to set up a Linux host to communicate with
an HP 3PAR StoreServ Storage server over an FCoE initiator on a Linux host to a FCoE target on
the HP 3PAR StoreServ Storage server.
Linux Host Server Requirements
The Linux host needs to meet the following software requirements. For specific details of supported
configurations, consult the HP SPOCK website:
http://www.hp.com/storage/spock
•
Obtain the supported level of HBA BIOS and firmware from: http://www.hp.com/go/
spp
•
Obtain the supported level of HBA drivers from: http://www8.hp.com/us/en/
support-drivers.html
•
Install the Emulex OneCommand Manager: (/usr/sbin/ocmanager/hbacmd) or the QLogic
QConvergeConsole Manager
(/opt/QLogic_Corporation/QConvergeConsoleCLI/qaucli) for helping with setting
up FCoE configurations. Visit the vendors's websites for download instructions.
Configuring the FCoE Switch
Connect the RHEL (FCoE Initiator) host ports and HP 3PAR StoreServ Storage server (FCoE target)
ports to an FCoE-enabled switch.
NOTE: FCoE switch VLANs and routing setup and configuration is beyond the scope of this
document. Consult your switch manufacturer's documentation for instructions of how to set up
VLANs and routing.
Using system BIOS to configure FCoE
1.
Using the system BIOS, configure FCoE. In this example, F9 was pressed to enter the Setup
menu:
Linux Host Server Requirements
81
Figure 12 Configuring FCoE
2.
In the System Options pane, select NIC Personality Options.
Figure 13 NIC Personality Options
3.
82
In the PCI Slot 2 Pane, select FCoE for both Port 1 and Port 2.
Configuring a Host Server with FCoE
Figure 14 Configuring the PCI Slots
4.
PCI Slot 2 Port 1 and Port 2 now display FCoE.
Figure 15 PCI Slot 1 and Slot 2 Configured for FCoE
5.
Save the changes and exit the BIOS.
Using system BIOS to configure FCoE
83
Figure 16 Exiting the BIOS Utility
84
Configuring a Host Server with FCoE
8 Allocating Storage for Access by the RHEL Host
Creating Storage on the HP 3PAR StoreServ Storage
This section describes the general steps and commands that are required to create the virtual
volumes (VVs) that can then be exported for discovery by the RHEL host.
For additional information, see the HP 3PAR Command Line Interface Administrator’s Manual. For
a comprehensive description of HP 3PAR OS commands, see the HP 3PAR Command Line Interface
Reference. To obtain a copy of this documentation, go to http://www.hp.com/go/3par/, navigate
to your product page, click HP Support & Drivers, and then click Manuals.
Creating Virtual Volumes
Virtual volumes are the only data layer visible to hosts. After devising a plan for allocating space
for host servers on the HP 3PAR StoreServ Storage, create the virtual volumes.
After devising a plan for allocating space for the RHEL host, you need to create the required virtual
volumes on the HP 3PAR StoreServ Storage.
You can create volumes that are provisioned from one or more common provisioning groups
(CPGs). Volumes can be fully provisioned from a CPG or can be thinly provisioned. You can
optionally specify a CPG for snapshot space for fully-provisioned volumes.
Using the HP 3PAR Management Console:
1.
From the menu bar, select:
Actions→Provisioning→Virtual Volume→Create Virtual Volume
2.
3.
Use the Create Virtual Volume wizard to create a base volume.
Select one of the following options from the Allocation list:
•
Fully Provisioned
•
Thinly Provisioned
Using the HP 3PAR OS CLI:
To create a fully-provisioned or thinly-provisioned virtual volume, issue the following HP 3PAR OS
CLI command:
# createvv [options] <usr_CPG> <VV_name> [.<index>] <size>[g|G|t|T]
Here is an example:
# createvv -cnt 5 TESTLUNS 5G
NOTE: To create thinly-provisioned virtual volumes, an HP 3PAR Thin Provisioning license is
required.
Consult the HP 3PAR Management Console Help and the HP 3PAR Command Line Interface
Reference for complete details on creating volumes for the HP 3PAR OS version that is being used
on the HP 3PAR StoreServ Storage.
These documents are available on the HP BSC website:
http://www.hp.com/go/bsc
NOTE: The commands and options available for creating a virtual volume may vary for earlier
versions of the HP 3PAR OS.
Creating Storage on the HP 3PAR StoreServ Storage
85
Creating Thinly-provisioned Virtual Volumes
To create thinly-provisioned virtual volumes (TPVVs), see the following documents:
•
HP 3PAR StoreServ Storage Concepts Guide
•
HP 3PAR Command Line Interface Administrator’s Manual
•
HP 3PAR Command Line Interface Reference
These documents are available on the HP BSC website:
http://www.hp.com/go/bsc
Exporting LUNs to the Host
This section explains how to export LUNs to the host server as VVs, referred to as virtual LUNs
(VLUNs).
To export VVs as VLUNs, issue the following command:
createvlun [–cnt] <number of LUNs> <name_of_virtual_LUNs.int> <starting_LUN_number>
<hostname/hostdefinition>
where:
•
[–cnt] specifies the number of identical VVs to create using an integer from 1 through 999.
If not specified, one virtual volume is created.
•
<name_of_virtual_LUNs> specifies name of the VV being exported as a virtual LUN.
•
<starting_LUN_number> indicates that is the starting LUN number.
•
.int is the integer value. For every LUN created, the .int suffix of the VV name gets
incremented by one.
•
<hostname/hostdefinition> indicates that hostname is the name of the host created in
“Creating the Host Definition” (page 11) or “Creating the Host Definition” (page 12).
Example:
# createvlun –cnt 5 TESTLUNS.0 0 hostname/hostdefinition
To verify that VLUNs have been created, issue the showvlun command:
# showvlun
Active VLUNs
Lun VVName
0 TESTLUNS.0
1 TESTLUNS.1
2 TESTLUNS.2
3 TESTLUNS.3
4 TESTLUNS.4
5 TESTLUNS.5
6 TESTLUNS.6
7 TESTLUNS.7
8 TESTLUNS.8
9 TESTLUNS.9
0 TESTLUNS.0
1 TESTLUNS.1
2 TESTLUNS.2
3 TESTLUNS.3
4 TESTLUNS.4
5 TESTLUNS.5
86
HostName
sqa-dl380g5-05
sqa-dl380g5-05
sqa-dl380g5-05
sqa-dl380g5-05
sqa-dl380g5-05
sqa-dl380g5-05
sqa-dl380g5-05
sqa-dl380g5-05
sqa-dl380g5-05
sqa-dl380g5-05
sqa-dl380g5-05
sqa-dl380g5-05
sqa-dl380g5-05
sqa-dl380g5-05
sqa-dl380g5-05
sqa-dl380g5-05
Allocating Storage for Access by the RHEL Host
--------Host_WWN/iSCSI_Name-------iqn.1994-05.com.redhat:33853dd5ab2e
iqn.1994-05.com.redhat:33853dd5ab2e
iqn.1994-05.com.redhat:33853dd5ab2e
iqn.1994-05.com.redhat:33853dd5ab2e
iqn.1994-05.com.redhat:33853dd5ab2e
iqn.1994-05.com.redhat:33853dd5ab2e
iqn.1994-05.com.redhat:33853dd5ab2e
iqn.1994-05.com.redhat:33853dd5ab2e
iqn.1994-05.com.redhat:33853dd5ab2e
iqn.1994-05.com.redhat:33853dd5ab2e
iqn.1994-05.com.redhat:33853dd5ab2e
iqn.1994-05.com.redhat:33853dd5ab2e
iqn.1994-05.com.redhat:33853dd5ab2e
iqn.1994-05.com.redhat:33853dd5ab2e
iqn.1994-05.com.redhat:33853dd5ab2e
iqn.1994-05.com.redhat:33853dd5ab2e
Port
0:3:1
0:3:1
0:3:1
0:3:1
0:3:1
0:3:1
0:3:1
0:3:1
0:3:1
0:3:1
1:3:1
1:3:1
1:3:1
1:3:1
1:3:1
1:3:1
Type
host
host
host
host
host
host
host
host
host
host
host
host
host
host
host
host
6 TESTLUNS.6 sqa-dl380g5-05 iqn.1994-05.com.redhat:33853dd5ab2e 1:3:1 host
7 TESTLUNS.7 sqa-dl380g5-05 iqn.1994-05.com.redhat:33853dd5ab2e 1:3:1 host
8 TESTLUNS.8 sqa-dl380g5-05 iqn.1994-05.com.redhat:33853dd5ab2e 1:3:1 host
9 TESTLUNS.9 sqa-dl380g5-05 iqn.1994-05.com.redhat:33853dd5ab2e 1:3:1 host
---------------------------------------------------------------------------20 total
VLUN Templates
Lun VVName
HostName
-Host_WWN/iSCSI_Name- Port Type
0 TESTLUNS.0 sqa-dl380g5-05 ------------------ host
1 TESTLUNS.1 sqa-dl380g5-05 ------------------ host
2 TESTLUNS.2 sqa-dl380g5-05 ------------------ host
3 TESTLUNS.3 sqa-dl380g5-05 ------------------ host
4 TESTLUNS.4 sqa-dl380g5-05 ------------------ host
5 TESTLUNS.5 sqa-dl380g5-05 ------------------ host
6 TESTLUNS.6 sqa-dl380g5-05 ------------------ host
7 TESTLUNS.7 sqa-dl380g5-05 ------------------ host
8 TESTLUNS.8 sqa-dl380g5-05 ------------------ host
9 TESTLUNS.9 sqa-dl380g5-05 ------------------ host
------------------------------------------------------------10 total
Restrictions on Volume Size and Number
Follow the guidelines for creating virtual volumes (VVs) and Virtual LUNs (VLUNs) in the HP 3PAR
Command Line Interface Administrator’s Manual while adhering to these cautions and guidelines:
•
This configuration supports sparse LUNs (meaning that LUNs may be skipped). LUNs may
also be exported in non-ascending order (e.g. 0, 5, 7, 3).
•
The HP 3PAR StoreServ Storage supports the exportation of VLUNs with LUNs in the range
from 0 to 65535.
•
The maximum LUN size that can be exported to an RHEL host is 16 TB when the installed
HP 3PAR OS version is 2.3.x or 3.1.x. A LUN size of 16 TB on an RHEL host is dependent
on the installed RHEL version and update since some older versions of RHEL will not support
a volume greater than 2 TB.
Discovering Devices with an Emulex HBA
Use one of the following methods to dynamically add new LUNs:
•
Use the echo statement.
•
Use the echo scsi add statement.
HP recommends that you use the echo statement method where the scan is performed using the
sys device tree.
Scan Methods for LUN Discovery
You can use the following methods to discover LUNs from the RHEL host.
•
Method 1: Uses sysfs scan for scanning multiple devices at once
•
Method 2: Uses adding single devices for adding single devices one at a time
Method 1 - sysfs Scan
After exporting VLUNs to the host using the createvlun command in “Exporting LUNs to the
Host” (page 86), use the echo statement on the sysfs file system to scan for devices. Use the
Restrictions on Volume Size and Number
87
cat/proc/scsi/scsi command, or other useful commands such as lsscsi -g or sginfo
-l option, to get a list of device path information:
# echo “- <target number> <lun number>” > <device scan path>
Example:
The device path is /sys/class/scsi_host/host2 and the target is 0 (target2:0:0) and
the exported device is LUN 1. The following is the echo command to be used.
# echo "- 0 1" > /sys/class/scsi_host/host2/scan
The following message log provides and example of the resulting output:
kernel: Vendor: 3PARdata Model: VV Rev: 0000
kernel: Type: Direct-Access ANSI SCSI revision: 03
kernel: SCSI device sdv: 524288 512-byte hdwr sectors (268 MB)
kernel: SCSI device sdv: drive cache: write back
kernel: sdv: unknown partition table
kernel: Attached scsi disk sdv at scsi2, channel 0, id 0, lun 1
kernel: Attached scsi generic sg22 at scsi2, channel 0, id 0, lun 1, type 0
scsi.agent[12915]: disk at /devices/pci0000:00/0000:00:02.0/0000:01:00.2/
0000:03:0b.0/0000:04:04.0/host2/target2:0:0/2:0:0:1
Alternatively, you can scan for all LUNs and targets for a given lpfc instance using the following
command:
# echo "- - -" > /sys/class/scsi_host/host2/scan
OR use the following script to scan for all LUNs for all the lpfc instances:
# /usr/bin/rescan-scsi-bus.sh -r --nooptscan
If the device has changed its size, then issue the following command to obtain the new disk size:
# echo 1 > /sys/class/scsi_device/2:0:0:1/device/rescan
The rescan must be performed on all device paths to the host. To see the change in size, issue the
following command for Device-mapper multipath:
# multipathd -k
multipathd> resize map 350002ac000350102
ok
multipathd> exit
Method 2 - Adding Single Devices
To add LUNs by using the echo scsi add statement, run the following commands:
# echo "scsi add-single-device 0 1 2 3" >/proc/scsi/scsi
88
Allocating Storage for Access by the RHEL Host
where:
•
0 specifies the host
•
1 specifies the channel
•
2 specifies the ID
•
3 specifies the LUN
(The SCSI midlayer will re-scan.)
# echo "scsi add-single-device 2 0 0 14" > /proc/scsi/scsi
You can see the new LUN presented to the OS by the SCSI Mid-Layer in the /var/log/messages
file.
kernel: Vendor: 3PARdata Model: VV Rev: 0000
kernel: Type: Direct-Access ANSI SCSI revision: 03
kernel: SCSI device sdac: 524288 512-byte hdwr sectors (268 MB)
kernel: SCSI device sdac: drive cache: write back
kernel: sdac: unknown partition table
kernel: Attached scsi disk sdac at scsi2, channel 0, id 0, lun 14
kernel: Attached scsi generic sg29 at scsi2, channel 0, id 0, lun 14, type 0
Dec 12 14:08:50 sqa-dell2850-01 scsi.agent[14234]: disk at /devices/pci0000:00/
0000:00:02.0/0000:01:00.2/0000:03:0b.0/0000:04:04.0/host2/target2:0:0/2:0:0:14
NOTE: The echo command needs to be executed on multiple host lpfc HBA SCSI instances
where LUNs have been exported.
Verifying Devices Found by the Host Using the Emulex HBA
To verify that the RHEL host has discovered the exported devices, look at the contents of the
/proc/scsi/scsi file. In this example, we have LUN 0 exported to the RHEL host through eight
paths (four HP 3PAR StoreServ Storage ports connecting to two Emulex HBA ports). This file should
contain entries for the attached devices:
HP 3PAR StoreServ Storage
# cat /proc/scsi/scsi
[root@sqa-dl380g5-05 ~]# cat /proc/scsi/scsi
Attached devices:
Host: scsi4 Channel: 00 Id: 00 Lun: 00
Vendor: 3PARdata Model: VV
Rev:
Type:
Direct-Access
ANSI
Host: scsi5 Channel: 00 Id: 00 Lun: 00
Vendor: 3PARdata Model: VV
Rev:
Type:
Direct-Access
ANSI
3110
SCSI revision: 05
3110
SCSI revision: 05
scsi4 and scsi5 refer to the HBA adapter instances (/sys/class/scsi_host/host4 and
/sys/class/scsi_host/host5), respectively. Alternatively, use Isscsi -g for RedHat
5 or 6.
Discovering Devices with a QLogic HBA
Use one of the following methods to dynamically add new LUNs:
Discovering Devices with a QLogic HBA
89
The method of echo statement following the QLogic scan scsi-qlascan and the method of
echo scsi add statement. .
•
Use the scsi-qlascan command.
•
Use the echo statement following the QLogic scan scsi-qlascan
•
Use the echo scsi add statement
HP recommends that you use the echo statement method where the scan is performed using the
sys device tree
Scan Methods for LUN Discovery
Use one of the following methods to discover LUNs from the RHEL host:
•
Method 1: Uses sysfs scan through the echo statement for adding multiple devices at once
•
Method 2: Uses add single device for adding a single device at a time
Method 1 - sysfs Scan Using the echo Statement
After exporting VLUNs to the host using the createvlun command in “Exporting LUNs to the
Host” (page 86), use the QLogic scan scsi-qlascan command to discover devices by completing
the following steps:
NOTE: If you are using the QLogic driver that is installed during the OS installation, you can
skip performing the scsi -qlascan script and scan for devices using the following echo
command:
# echo " - <target number> <LUN number>" > <device scan path>
1.
Run the scsi-qlascan script by issuing the following command:
# echo "scsi-qlascan" > /proc/scsi/qla2xxx/<adapter-id>
NOTE: The scsi-qlascan command works only if the QLogic driver was installed from
the QLogic website. A limited number of QLogic drivers are available on the QLogic website
for older versions of Linux.
In the following example, 0 is the HBA instance created by qla2xxx driver module:
# echo "scsi-qlascan" > /proc/scsi/qla2xxx/0
2.
Repeat for any other HBA instances created by the driver module. The QLogic scan will allow
the driver layer to discover the HP 3PAR StoreServ Storage.
NOTE: The qla2xxx directory instance is created only if the QLogic driver was installed
from the QLogic website for older versions of Linux.
Example:
# cat /proc/scsi/qla2xxx/0
QLogic PCI to Fibre Channel Host Adapter for QLA2462:
Firmware version 4.06.03 [IP] [84XX] , Driver version 8.02.23
BIOS version 1.29
FCODE version 1.27
EFI version 1.09
90
Allocating Storage for Access by the RHEL Host
Flash FW version 4.00.30 0082
ISP: ISP2422, Serial# RFC0823R29292
Request Queue = 0x12a100000, Response Queue = 0x12a690000
Request Queue count = 4096, Response Queue count = 512
Total number of active commands = 0
Total number of interrupts = 12368
Device queue depth = 0x20
Number of free request entries = 282
Number of mailbox timeouts = 0
Number of ISP aborts = 0
Number of loop resyncs = 0
Number of retries for empty slots = 0
Number of reqs in pending_q= 0, retry_q= 0, done_q= 0, scsi_retry_q= 0
Host adapter:loop state = <READY>, flags = 0x5a43
Dpc flags = 0x0
MBX flags = 0x0
Link down Timeout = 030
Port down retry = 001
Login retry count = 008
Commands retried with dropped frame(s) = 0
Product ID = 0000 0000 0000 0000
SCSI Device Information:
scsi-qla0-adapter-node=2000001b321a0c63;
scsi-qla0-adapter-port=2100001b321a0c63;
scsi-qla0-target-0=20410002ac000031;
scsi-qla0-target-1=20510002ac000031;
scsi-qla0-target-2=21410002ac000031;
scsi-qla0-target-4=21510002ac000031;
FC Port Information:
scsi-qla0-port-0=2ff70002ac000031:20410002ac000031:090800:81;
scsi-qla0-port-1=2ff70002ac000031:20510002ac000031:050100:82;
scsi-qla0-port-2=2ff70002ac000031:21410002ac000031:030000:83;
scsi-qla0-port-4=2ff70002ac000031:21510002ac000031:6b0600:84;
SCSI LUN
(Id:Lun)
( 0: 0):
( 1: 0):
( 2: 0):
( 4: 0):
Information:
* - indicates lun is not registered with the OS.
Total reqs 156, Pending reqs 0, flags 0x0, Dflags
Total reqs 158, Pending reqs 0, flags 0x0, Dflags
Total reqs 174, Pending reqs 0, flags 0x0, Dflags
Total reqs 140, Pending reqs 0, flags 0x0, Dflags
0x0,
0x0,
0x0,
0x0,
0:0:81
0:0:82
0:0:83
0:0:84
00
00
00
00
Discovering Devices with a QLogic HBA
91
3.
Once the driver layer has discovered the device, run the echo statement for the RHEL OS
layer to discover the HP 3PAR devices. This command should also be used for a QLogic driver
installed as part of the OS install to initiate LUN discovery from both the driver and SCSI layer
together:
# echo " - <target number> <lun number>" > <device scan path>
If the device path is /sys/class/scsi_host/host2, the target is 0 (target 2:0:0), and
the exported device is LUN 1, then the echo statement would appear as the following example:
# echo "- 0 1" > /sys/class/scsi_host/host2/scan
The following message log provides an example of the resulting output:
kernel: Vendor: 3PARdata Model: VV Rev: 0000
kernel: Type: Direct-Access ANSI SCSI revision: 03
kernel: SCSI device sdv: 524288 512-byte hdwr sectors (268 MB)
kernel: SCSI device sdv: drive cache: write back
kernel: sdv: unknown partition table
kernel: Attached scsi disk sdv at scsi2, channel 0, id 0, lun 1
kernel: Attached scsi generic sg22 at scsi2, channel 0, id 0, lun 1, type 0
scsi.agent[12915]: disk at /devices/pci0000:00/0000:00:02.0/0000:01:00.2/
0000:03:0b.0/0000:04:04.0/host2/target2:0:0/2:0:0:1
•
Alternatively, you can scan for all LUNs and targets for a given qla2xxx instance using
the following command:
# echo "- - -" > /sys/class/scsi_host/host2/scan
•
If the device has changed its size, then issue the following command to obtain the new
disk size:
# echo 1 > /sys/class/scsi_device/2:0:0:1/device/rescan
Alternatively, you can use the rescan-scsi-bus.sh script, with the -r –nooptscan
options, to scan and discover LUNs.
Method 2 - Scan using add single device
This method involves performing a QLogic driver scan scsi-qlascan followed by adding LUNs
using the echo scsi add statement. To scan using add single device method, complete
the following steps.
NOTE: If you are using the QLogic driver that is installed during the OS installation, you can
skip performing the scsi -qlascan script and scan for devices using the following echo
command:
# echo " - <target number> <LUN number>" > <device scan path>
92
Allocating Storage for Access by the RHEL Host
1.
Issue scsi-qlascan to discover devices:
# echo "scsi-qlascan" > /proc/scsi/qla2xxx/<adapter-id>
2.
Once the new LUN is visible to the QLogic driver layer, force the SCSI mid-layer to do its own
scan and build the device table entry for the new device:
# echo "scsi add-single-device 0 1 2 3" >/proc/scsi/scsi
The SCSI midlayer will re-scan, where 0 1 2 3 is replaced by your host, channel, ID, and
LUN.
Example:
# echo "scsi add-single-device 4 0 0 1" > /proc/scsi/scsi
NOTE: You must run the scsi add-single-device command individually for all the
newly discovered LUNs and on all host ports to which the LUNs were exported.
You can see the new LUN presented to the OS by the SCSI mid-Layer in the
/var/log/messages file.
kernel: qla2300 0000:03:08.0: scsi(4:0:0:1): Enabled tagged queuing, queue
depth 32.
kernel: SCSI device sdh: 14680064 512-byte hdwr sectors (7516 MB)
kernel: SCSI device sdh: drive cache: write back
kernel: sdh: sdh1
kernel: Attached scsi disk sdh at scsi4, channel 0, id 0, lun 1
kernel: Attached scsi generic sg8 at scsi4, channel 0, id 0, lun 2, type
0scsi.agent[1203]: disk at /devices/pci0000:03/0000:03:08.0/host4/target4:0:0/
4:0
Verifying Devices Found by the Host Using the QLogic HBA
NOTE: If you are running RHEL 4.x with QLogic In-Box driver after presenting new LUNs, the
following commands need to be executed on the host system to see the new LUNs. For example:
#
#
#
#
echo
echo
echo
echo
"1" > /sys/class/fc_host/host0/issue_lip
"1" > /sys/class/fc_host/host1/issue_lip
"- - -" > /sys/class/scsi_host/host0/scan
"- - -" > /sys/class/scsi_host/host1/scan
In the above example, host0 and host1 are adapter instances.
To verify that the RHEL host has discovered the exported devices, look at the contents of the file
/proc/scsi/scsi. In this example, LUN 0 is exported to the RHEL host through eight paths (four
HP 3PAR StoreServ Storage ports connecting to two QLogic HBA ports). This file should contain
entries for the attached devices:
Discovering Devices with a QLogic HBA
93
NOTE:
The example shows other LUNs besides the eight instances of LUN 0.
# cat /proc/scsi/scsi
Attached devices:
Host: scsi0 Channel: 00 Id: 00
Vendor: 3PARdata Model: VV
Type:
Direct-Access
Host: scsi0 Channel: 00 Id: 01
Vendor: 3PARdata Model: VV
Type:
Direct-Access
Host: scsi0 Channel: 00 Id: 02
Vendor: 3PARdata Model: VV
Type:
Direct-Access
Host: scsi0 Channel: 00 Id: 04
Vendor: 3PARdata Model: VV
Type:
Direct-Access
Host: scsi0 Channel: 00 Id: 04
Vendor: 3PARdata Model: VV
Type:
Direct-Access
Host: scsi0 Channel: 00 Id: 04
Vendor: 3PARdata Model: VV
Type:
Direct-Access
Host: scsi0 Channel: 00 Id: 04
Vendor: 3PARdata Model: VV
Type:
Direct-Access
Host: scsi0 Channel: 00 Id: 04
Vendor: 3PARdata Model: VV
Type:
Direct-Access
Host: scsi1 Channel: 00 Id: 00
Vendor: 3PARdata Model: VV
Type:
Direct-Access
Host: scsi1 Channel: 00 Id: 01
Vendor: 3PARdata Model: VV
Type:
Direct-Access
Host: scsi1 Channel: 00 Id: 02
Vendor: 3PARdata Model: VV
Type:
Direct-Access
Host: scsi1 Channel: 00 Id: 04
Vendor: 3PARdata Model: VV
Type:
Direct-Access
Lun: 00
Rev: 0000
ANSI SCSI revision: 05
Lun: 00
Rev: 0000
ANSI SCSI revision: 05
Lun: 00
Rev: 0000
ANSI SCSI revision: 05
Lun: 00
Rev: 0000
ANSI SCSI revision: 05
Lun: 01
Rev: 0000
ANSI SCSI revision: 05
Lun: 02
Rev: 0000
ANSI SCSI revision: 05
Lun: 03
Rev: 0000
ANSI SCSI revision: 05
Lun: 04
Rev: 0000
ANSI SCSI revision: 05
Lun: 00
Rev: 0000
ANSI SCSI revision: 05
Lun: 00
Rev: 0000
ANSI SCSI revision: 05
Lun: 00
Rev: 0000
ANSI SCSI revision: 05
Lun: 00
Rev: 0000
ANSI SCSI revision: 05
scsi0 and scsi1 refer to the HBA adapter instances (/proc/scsi/qla2xxx/0 and
/proc/scsi/qla2xxx/1), respectively. The Id refers to the HP 3PAR StoreServ Storage target
port (there are four HP 3PAR StoreServ Storage target ports: Id 0, 1, 2, 4).
Discovering Devices with a Software iSCSI Connection
The methods for discovering LUNs with an iSCSI connection differ between RHEL 4 on the one
hand and RHEL 5 or RHEL 6 on the other.
For information about discovering devices with a hardware iSCSI connection, see “Setting Up
Hardware iSCSI for RHEL 5 or RHEL 6” (page 56).
Discovering Devices with RHEL 5 or RHEL 6
Complete the following steps to discover devices with an iSCSI connection on the RHEL 5 or RHEL 6
host:
NOTE: When VLUNs are exported, they will not appear on the host automatically. After a new
VLUN is exported from an HP 3PAR StoreServ Storage iSCSI port, rescan for new LUNs.
1.
94
Scan for new LUNs using the iscsiadm -m node -R or iscsiadm -m session -R.
Allocating Storage for Access by the RHEL Host
2.
Verify that the iSCSI exported volumes have been discovered.
# cat /proc/scsi/scsi
Attached devices:
Host: scsi1 Channel: 00 Id: 00 Lun: 00
Vendor: 3PARdata Model: VV
Type:
Direct-Access
3.
Rev: 0000
ANSI SCSI revision: 05
To verify device-mapper-multipath, run the multipath -ll command.
# multipath -ll
350002ac00021014b dm-3 3PARdata,VV
[size=20G][features=1 queue_if_no_path][hwhandler=0][rw]
\_ round-robin 0 [prio=2][active]
\_ 8:0:0:3 sdc 8:32
[active][ready]
\_ 9:0:0:3 sdd 8:48
[active][ready]
350002ac00027014b dm-9 3PARdata,VV
[size=5.0G][features=1 queue_if_no_path][hwhandler=0][rw]
\_ round-robin 0 [prio=2][active]
\_ 8:0:0:12 sdo 8:224 [active][ready]
\_ 9:0:0:12 sdp 8:240 [active][ready]
350002ac00022014b dm-4 3PARdata,VV
[size=20G][features=1 queue_if_no_path][hwhandler=0][rw]
\_ round-robin 0 [prio=2][active]
\_ 8:0:0:4 sde 8:64
[active][ready]
\_ 9:0:0:4 sdf 8:80
[active][ready]
350002ac00028014b dm-11 3PARdata,VV
[size=5.0G][features=1 queue_if_no_path][hwhandler=0][rw]
\_ round-robin 0 [prio=2][active]
\_ 8:0:0:13 sdq 65:0
[active][ready]
\_ 9:0:0:13 sdr 65:16 [active][ready]
Discovering Devices with RHEL 4
Complete the following steps to discover devices with an iSCSI connection on the RHEL 4 Host:
1. On the RHEL 4 iSCSI Initiator host, use the iscsi-rescan command to rescan for the newly
exported LUN:
# iscsi-rescan
Rescanning host10
Rescanning host11
2.
3.
Use the iscsi -ls command to display the scanned iSCSI devices.
Verify the contents of /proc/scsi/scsi for the new device:
# cat /proc/scsi/scsi
Attached devices:
Host: scsi2 Channel: 00 Id: 00 Lun: 00
Vendor: 3PARdata Model: VV Rev: 0000
Type: Direct-Access ANSI SCSI revision: 05
Discovering Devices with a Software iSCSI Connection
95
4.
Check the block device files created in the system:
# ls /sys/block/sd*
/sys/block/sda:
dev device queue range removable sda1 size stat
5.
Verify which block device files are HP 3PAR volumes:
# cat /sys/block/sd*/device/vendor
ATA
ATA
3PARdata
6.
You can verify an iSCSI device with the following command:
# iscsi-device /dev/sdc
/dev/sdc is an iSCSI device
WARNING! The current RHEL 4 Update 5 iSCSI implementation does not properly handle
the mounting of file systems on iSCSI devices bootup time and does NOT properly handle the
unmounting of file systems on iSCSI devices while shutting down and/or rebooting the host.
A workaround is to have scripts to mount the file systems after the host has booted and the
proper devices have been created and have scripts to unmount them before shutting down or
rebooting the host.
96
Allocating Storage for Access by the RHEL Host
9 Modifying HP 3PAR Devices on the Host Server
Creating Device-mapper Devices
Complete the following steps to create Device-mapper devices.
1. Run the multipath command to create new Device-mapper nodes under the /dev/mapper
directory.
# multipath
2.
Verify that the Device-mapper devices have been created by issuing multipath -11.
For example, in the following RHEL 4 host output, the /dev/mapper/350002ac0000c003e
Device-mapper node is seen from device sda on driver instance (0:0:0:0) and from sdb on
driver instance (1:0:0:0).
NOTE: RHEL 5.5 and later, including RHEL 6.x, have the user_friendly_names option
for dm multipathing turned on by default. This means that instead of device names like
350002ac001b40031 they will appear as mpathX, giving paths of /dev/mapper/mpathX
in kpartx and other tools as per the RHEL documentation.
# multipath -ll
350002ac001b40031
[size=5 GB][features="1 queue_if_no_path"][hwhandler="0"]
\_ round-robin 0 [active]
\_ 0:0:0:0 sda 8:0 [active][ready]
\_ 1:0:0:0 sdb 8:16 [active][ready]
3.
After creating the devices, use the multipath -v 3 command to retrieve more detailed
information about Device-mapper nodes and their associated paths. Make sure of the following
settings:
•
The path checker is set to tur for each of the devices.
•
The no_path_retry is set to a value of 12 for iSCSI and 18 for Fibre Channel if the
HP 3PAR array is running HP 3PAR OS 3.1.1 or later. However, if the HP 3PAR array is
running an HP 3PAR OS version earlier than 3.1.1, then the no_path_retry is set to
12 for iSCSI and 12 for Fibre Channel.
Output from the multipath -v 3 command differs in RHEL 4 on the one hand and RHEL
5 or RHEL 6 on the other; however, the information displayed on the Device-mapper remains
the same.
Example using RHEL 5:
# multipath -v 3
sdc: not found in pathvec
sdc: mask = 0x1f
sdc: bus = 1
sdc: dev_t = 8:32
sdc: size = 10485760
sdc: vendor = 3PARdata
sdc: product = VV
sdc: rev = 0000
sdc: h:b:t:l = 2:0:0:0
sdc: serial = 004B0079
sdc: path checker = tur (controller setting)
sdc: state = 2
Creating Device-mapper Devices
97
sdc: getprio = /bin/true (config file default)
sdc: prio = 0
sdc: getuid = /sbin/scsi_id -g -u -s /block/%n (config file default)
sdc: uid = 350002ac0004b0079 (callout)
sdd: not found in pathvec
sdd: mask = 0x1f
sdd: bus = 1
sdd: dev_t = 8:48
sdd: size = 10485760
sdd: vendor = 3PARdata
sdd: product = VV
sdd: rev = 0000
sdd: h:b:t:l = 3:0:0:0
sdd: serial = 004B0079
sdd: path checker = tur (controller setting)
sdd: state = 2
sdd: getprio = /bin/true (config file default)
sdd: prio = 0
sdd: getuid = /sbin/scsi_id -g -u -s /block/%n (config file default)
sdd: uid = 350002ac0004b0079 (callout)
===== paths list =====
uuid
hcil
dev dev_t pri dm_st chk_st vend/prod/r
350002ac0004b0079
2:0:0:0 sdc 8:32 0
[undef][ready] 3PARdata,VV
350002ac0004b0079
3:0:0:0 sdd 8:48 0
[undef][ready] 3PARdata,VV
params = 1 queue_if_no_path 0 1 1 round-robin 0 2 1 8:32 100 8:48 100
status = 2 0 0 0 1 1 E 0 2 0 8:32 A 0 8:48 A 0
sdc: mask = 0x8
sdc: prio = 0
sdd: mask = 0x8
sdd: prio = 0
sdc: ownership set to 350002ac0004b0079
sdc: not found in pathvec
sdc: mask = 0xc
sdc: state = 2
sdc: prio = 0
sdd: ownership set to 350002ac0004b0079
sdd: not found in pathvec
sdd: mask = 0xc
sdd: state = 2
sdd: prio = 0
350002ac0004b0079: pgfailback = -2 (config file default)
350002ac0004b0079: pgpolicy = multibus (controller setting)
350002ac0004b0079: selector = round-robin 0 (internal default)
350002ac0004b0079: features = 0 (internal default)
350002ac0004b0079: hwhandler = 0 (internal default)
350002ac0004b0079: rr_weight = 2 (config file default)
350002ac0004b0079: minio = 100 (config file default)
350002ac0004b0079: no_path_retry = 60 (controller setting)
pg_timeout = NONE (internal default)
350002ac0004b0079: set ACT_NOTHING (map unchanged)
Example using RHEL 4:
# multipath -v 3
load path identifiers cache
#
# all paths in cache :
#
350002ac001b40031 0:0:0:0 sda 8:0 [active] 3PARdata/VV
350002ac001b40031 1:0:0:0 sdb 8:16 [active] 3PARdata/VV
===== path info sda (mask 0x1f) =====
bus = 1
dev_t = 8:0
size = 10485760
98
Modifying HP 3PAR Devices on the Host Server
/0000
/0000
vendor = 3PARdata
product = VV
rev = 0000
h:b:t:l = 0:0:0:0
tgt_node_name =
serial = 01B40031
path checker = tur (controler setting)
state = 2
getprio = /bin/true (internal default)
prio = 0
uid = 350002ac001b40031 (cache)
===== path info sdb (mask 0x1f) =====
bus = 1
dev_t = 8:16
size = 10485760
vendor = 3PARdata
product = VV
rev = 0000
h:b:t:l = 1:0:0:0
tgt_node_name =
serial = 01B40031
path checker = tur (controler setting)
state = 2
getprio = /bin/true (internal default)
prio = 0
uid = 350002ac001b40031 (cache)
#
# all paths :
#
350002ac001b40031 0:0:0:0 sda 8:0 [active][ready] 3PARdata/VV
350002ac001b40031 1:0:0:0 sdb 8:16 [active][ready] 3PARdata/VV
params = 1 queue_if_no_path 0 1 1 round-robin 0 2 1 8:0 100 8:16 100
status = 2 0 0 0 1 1 A 0 2 0 8:0 A 0 8:16 A 0
===== path info sda (mask 0x8) =====
prio = 0
uid = 350002ac001b40031 (cache)
===== path info sdb (mask 0x8) =====
prio = 0
uid = 350002ac001b40031 (cache)
pgpolicy = multibus (controler setting)
selector = round-robin 0 (internal default)
features = 0 (internal default)
hwhandler = 0 (internal default)
rr_weight = 2 (config file default)
rr_min_io = 100 (config file default)
no_path_retry = 12 (controler setting)
pg_timeout = NONE (internal default)
0 10485760 multipath 0 0 1 1 round-robin 0 2 1 8:0 100 8:16 100
set ACT_NOTHING: map unchanged
/
Displaying Detailed Device-mapper Node Information
Use the multipath -l to list devices and the dmsetup command to get detailed Device-mapper
node information.
NOTE: With no_path_retry set to a value other than 0 in the /etc/multipath.conf file,
I/O will be queued for the period of the retries and features=1 queue_if_no_path will be
shown in multipath -l command output.
Example:
Displaying Detailed Device-mapper Node Information
99
NOTE: If you see the device status as [undef] in the output, this is an RHEL defect that has
been raised with RHEL to be fixed. Instead, use the multipath -ll command, which shows the
correct device status as ready.
The dmsetup command can be used with various options to get more information on Device-mapper
mappings.
Example:
# dmsetup table
350002ac001b40031: 0 10485760 multipath 1 queue_if_no_path 0 1 1 round-robin 0 2 1
8:0 100 8:16 100
# dmsetup ls --target multipath
350002ac0004b0079
(253, 7)
# dmsetup info 350002ac0004b0079
Name:
350002ac0004b0079
State:
ACTIVE
Read Ahead:
256
Tables present:
LIVE
Open count:
1
Event number:
0
Major, minor:
253, 7
Number of targets: 1
UUID: mpath-350002ac0004b0079
# dmsetup table --target multipath
350002ac0004b0079: 0 10485760 multipath 1 queue_if_no_path 0 1 1 round-robin 0 2 1
8:32 100 8:48 100
Partitioning Device-mapper Nodes
The following section provides guidelines for partitioning Device-mapper nodes.
When partitioning a Device-mapper node, do not use fdisk on the /dev/mapper/XXX nodes.
The following error output may be seen as a result of using fdisk.
WARNING! Rereading the partition table failed with error 22: Invalid argument. The kernel still
uses the old table. The new table will be used at the next reboot. Syncing disks
NOTE:
Do not use the fdisk command with /dev/mapper/XXX devices to create partitions.
Use fdisk on the underlying disks /dev/sdXX and execute the following command when
Device-mapper multipath maps the device to create a /dev/mapper/<device node> partition.
# multipath -l
50002ac001b40031
[size=5 GB][features="1 queue_if_no_path"][hwhandler="0"]
\_ round-robin 0 [active]
\_ 0:0:0:0 sda 8:0 [active]
\_ 1:0:0:0 sdb 8:16 [active]
Device-mapper node 350002ac001b40031 is formed from underlying devices sda and sdb
representing two paths from the same storage volume.
# fdisk /dev/sda -- create a partition
100 Modifying HP 3PAR Devices on the Host Server
After the fdisk command completes, use the kpartx command to list and create DM devices
for the partitions on the device:
# kpartx -a -p p /dev/mapper/350002ac001b40031
350002ac001b40031p1 : 0 10477194 /dev/mapper/350002ac001b40031 62
# kpartx -a -p p /dev/mapper/350002ac001b40031 -- will add a partition mapping
# ls /dev/mapper
350002ac001b40031 350002ac001b40031p1
where 350002ac001b40031p1 is a partition device of whole disk 350002ac001b40031.
fdisk or Parted Usage on RHEL 6.x for Disk Alignment
HP 3PAR StoreServ Storage cache pages are 16 KB (16384 bytes), which means read and write
operations are performed in terms of 16 k cache pages. In accordance with the JEDEC memory
standards, HP 3PAR OS 3.1.1 or later supports block limits pages (bl), which tell the host the
optimal transfer blocks that are supported, and which the OS can use for the creation of partitioning
to align with the cache page for performance improvements. RHEL 6 with HP 3PAR OS 3.1.1 or
later uses these bits with specific fdisk and parted options.
Example: On RHEL 6.x, if you have installed the sg3_utils, the following command displays the
block limits VPD page (SBC). The optimal transfer length granularity is 32 blocks (16 k).
# sg_vpd -p bl /dev/sdh
Block limits VPD page (SBC):
Optimal transfer length granularity: 32 blocks
Maximum transfer length: 32768 blocks
Optimal transfer length: 32768 blocks
Maximum prefetch, xdread, xdwrite transfer length: 0 blocks
Maximum unmap LBA count: 65536
Maximum unmap block descriptor count: 10
Optimal unmap granularity: 32
Unmap granularity alignment valid: 0
Unmap granularity alignment: 0
If you are running RHEL 6.x with HP 3PAR OS 3.1.1 or later, you can take advantage of the SBC
bits in the fdisk command to properly align the starting sector of the partition with the cache
page alignment (16 k) by passing the -c flag (switch off DOS-compatible mode) to the fdisk
command along with the -u option, which shows the output in sectors.
# fdisk -c -u /dev/sdh
Command (m for help): p
Partition number (1-4): 1
First sector (32768-10485759, default 32768):
Using default value 32768
The foregoing command shows that the partition start sector begins at sector 32768 (with a proper
16 k offset), which is properly aligned.
# fdisk -l -u /dev/sdh
Disk /dev/sdh: 5368 MB, 5368709120 bytes
52 heads, 10 sectors/track, 20164 cylinders, total 10485760 sectors
Units = sectors of 1 * 512 = 512 bytes
Sector size (logical/physical): 512 bytes / 512 bytes
I/O size (minimum/optimal): 16384 bytes / 16777216 bytes
Disk identifier: 0x0004b8d4
Partitioning Device-mapper Nodes
101
Device Boot
/dev/sdh1
Start
32768
End
10485759
Blocks
5226496
Id
83
System
Linux
If the -c or -u flag is not used during the creation of the partition, then the start sector is 30876,
and a warning "Partition 1 does not start on physical sector boundary" appears after the partition
is created.
Example without the -c flag or -u flag:
# fdisk /dev/sdh
WARNING: DOS-compatible mode is deprecated. It's strongly recommended to
switch off the mode (command 'c') and change display units to
sectors (command 'u').
Command (m for help): n
Command action
e
extended
p
primary partition (1-4)
p
Partition number (1-4): 1
First cylinder (1-1018, default 4):
Using default value 4
Last cylinder, +cylinders or +size{K,M,G} (4-1018, default 1018):
Using default value 1018
#
fdisk
-l -u /dev/sdh
Disk /dev/sdh: 5368 MB, 5368709120 bytes
166 heads, 62 sectors/track, 1018 cylinders, total 10485760 sectors
Units = sectors of 1 * 512 = 512 bytes
Sector size (logical/physical): 512 bytes / 512 bytes
I/O size (minimum/optimal): 16384 bytes / 16777216 bytes
Disk identifier: 0x2d8b4dbe
Device Boot
/dev/sdh1
Start
30876
End
10477255
Blocks
5223190
Id
83
System
Linux
Partition 1 does not start on physical sector boundary.
Also, if the alignment is not proper, the following warning about poor performance during the
creation of ext filesystems appears.
# mkfs.ext4 /dev/mapper/350002ac000020121p1
mke2fs 1.41.12 (17-May-2010)
/dev/mapper/350002ac000020121p1 alignment is offset by 2048 bytes.
This may result in very poor performance, (re)-partitioning suggested.
The same result can be achieved using the parted command, with the units in GB so that proper
alignment occurs on HP 3PAR OS 3.1.1 or later. The following example shows alignment starting
at sector 32768:
# parted /dev/sdh
GNU Parted 2.1
Using /dev/sdh
Welcome to GNU Parted! Type 'help' to view a list of commands.
(parted) mklabel
New disk label type? msdos
(parted) unit gb
(parted) mkpart primary
102 Modifying HP 3PAR Devices on the Host Server
File system type? [ext2]? ext4
Start? 0
End? -0
(parted) p
Model: 3PARdata VV (scsi)
Disk /dev/sdh: 5.37GB
Sector size (logical/physical): 512B/512B
Partition Table: msdos
Number
1
Start
0.02GB
End
5.37GB
Size
5.35GB
Type
primary
File system
ext4
Flags
(parted) unit s
(parted) p
Model: 3PARdata VV (scsi)
Disk /dev/sdh: 10485760s
Sector size (logical/physical): 512B/512B
Partition Table: msdos
Number
1
Start
32768s
End
10485759s
Size
10452992s
Type
primary
File system
ext4
Flags
(parted) unit mb
(parted) print
Model: 3PARdata VV (scsi)
Disk /dev/sdh: 5369MB
Sector size (logical/physical): 512B/512B
Partition Table: msdos
Number
1
Start
16.8MB
End
5369MB
Size
5352MB
Type
primary
File system
ext4
Flags
If you are running HP 3PAR OS 2.3.1 with RHEL 6.x, then for proper alignment, make sure to pass
sector 32768 as the start sector with the fdisk -c -u option, or use the appropriate unit to start
with (such as 16.8 MB) in a parted command.
WARNING! While using fdisk, make sure the correct underlying device is used. Use the
multipath command to identify the underlying device.
WARNING! All I/O creating the file system and mount points needs to be done using the
Device-mapper device nodes /dev/mapper/XXX.
Data corruption will occur if any I/O is attempted on /dev/sdX device nodes.
WARNING! Issuing the multipath -F command will flush out all the Device-mapper mapping
and can be very destructive if I/O is being served to any of the existing devices. Avoid using the
-F option.
Use kpartx to delete a Device-mapper instance and then use fdisk to delete the partition.
The Device-mapper node name represents the storage volume ID (excluding the first digit 3). Use
the HP 3PAR OS CLI showvv or showvlun commands to get the volume name it represents.
Example:
1. On your FC connected host run ls /dev/mapper.
# ls /dev/mapper
350002ac001b40031
Partitioning Device-mapper Nodes 103
2.
Run the showvlun command on the HP 3PAR StoreServ Storage using the output above
(minus first digit).
# showvlun -lvw -a |grep -i 50002ac001b40031
0 testvlun 50002AC001B40031 redhathost 2100001B321A0C63
0 testvlun 50002AC001B40031 redhathost 2101001B323A0C63
3.
0:4:1 host
1:5:1 host
On the iSCSI host, run ls /dev/mapper.
# ls /dev/mapper
350002AC0004B0079
4.
On the iSCSI host, run showvlun -lvw -a |grep -i <LUN>.
# showvlun -lvw -a |grep -i 50002ac0004b0079
0 testvlun 50002AC0004B0079 redhathost iqn.1994-05.com.redhat:a3df53b0a32d 1:3:1 host
0 testvlun 50002AC0004B0079 redhathost iqn.1994-05.com.redhat:a3df53b0a32d 0:3:1 host
Creating Veritas Volume Manager Devices
If the Veritas Volume Manager is being used for multipathing, and new VLUNs are exported from
the storage server, complete the following steps to add new VLUNs without disrupting the I/O on
the existing VLUNs:
1. Add the new exported VLUN using any of the Discovery methods.
2. After verifying that the new VLUN is detected and the device instance is created, force the
Veritas layer to scan for new devices.
# vxdctl enable
3.
Check that the new devices are seen by the Veritas Volume Manager.
# vxdisk list
DEVICE
TYPE
3PARDATA1_0 auto:cdsdisk
3PARDATA1_1 auto
DISK
GROUP
STATUS
testdg testdg online
error
The VLUNs discovered on the Linux host should be labeled using the Linux fdisk command
before they can be used by the Veritas Volume Manager.
If disks are admitted to the Volume Manager, never use the raw device paths /dev/sdX for
performing I/O, and instead use Veritas volume device paths /dev/vx/.
Removing a Storage Volume from the Host
Use one of the two following methods to remove a storage volume from the host if using
Device-mapper.
•
Method 1
Issue the following commands:
# kpartx -d /dev/mapper/<device node>
# dmsetup remove <device node>
# echo "1" > /sys/class/scsi_device/<device instance>device/delete
104 Modifying HP 3PAR Devices on the Host Server
For example, to remove target 0, LUN 2:
# kpartx -d /dev/mapper/350002ac001b40031
# dmsetup remove 350002ac001b40031
# echo "1" > /sys/class/scsi_device/0:0:0:2/device/delete
NOTE: When using the echo command, make sure the devices are removed from each of
the host HBA instances.
•
Method 2
Issue the following commands:
# kpartx -d /dev/mapper/<device node>
# dmsetup remove <device node>
echo "scsi remove-single-device <h> <c> <t> <l>" > /proc/scsi/scsi
where <h> is the HBA number, <c> is the channel on the HBA, <t> is the SCSI target ID,
and <l> is the LUN.
Example: Remove LUN 2
# multipath -ll
350002ac000160121 dm-3 3PARdata,VV
size=5.0G features='1 queue_if_no_path' hwhandler='0' wp=rw
`-+- policy='round-robin 0' prio=1 status=active
|- 0:0:0:2 sdb 8:16
active ready running
|- 0:0:1:2 sdk 8:160 active ready running
|- 1:0:0:2 sdt 65:48 active ready running
`- 1:0:1:2 sdac 65:192 active ready running
# kpartx -d /dev/mapper/350002ac000160121
# dmsetup remove 350002ac000160121
#
#
#
#
echo
echo
echo
echo
"scsi
"scsi
"scsi
"scsi
remove-single-device
remove-single-device
remove-single-device
remove-single-device
0
0
1
1
0
0
0
0
0
1
0
1
2"
2"
2"
2"
>
>
>
>
/proc/scsi/scsi
/proc/scsi/scsi
/proc/scsi/scsi
/proc/scsi/scsi
NOTE: When using the echo command, make sure the devices are removed from each of
the host HBA instances.
After removing the storage volume from the host using one of the two methods, remove the VLUN
from the HP 3PAR StoreServ Storage by issuing removevlun <VVname> <LUN> <host>.
# removevlun testvlun 0 redhathost
Removing a Storage Volume from the Host 105
WARNING! While removing the device, make sure the correct underlying device is used. Use
the multipath command to identify the underlying device.
CAUTION: For iSCSI devices, do not remove the last iSCSI device in / proc/scsi/scsi
without first stopping multipathing, and then stopping the iSCSI daemon ( /etc/init.d/iscsi
stop). Otherwise, data corruption can occur and the host will hang.
Any change to the /etc/multipath configuration file requires running the multipathd
command to be effective. If the change is not reflected, try stopping and starting the multipathd
script.
# /etc/init.d/multipathd stop
# /etc/init.d/multipathd start
NOTE: The removed SCSI device is updated in /proc/scsi/scsi, /proc/partitions,
and /sys/device path.
UNMAP Storage Hardware Primitive Support for RHEL 6.x
HP 3PAR OS 3.1.1 or later supports the UNMAP storage primitive (operation code 42h) which is
supported by RHEL 6.x OS with the ext4 file system. UNMAP causes to free up space on a
thinly-provisioned virtual volume (TPVV) storage volume when data or files are deleted on the ext4
file system, and requires that the file system be mounted with the -o discard option. This feature
is useful in maintaining the volume as a thin volume with no storage disk space allocated for files
that are deleted. Space is released on the TPVV storage volume when minimum deletions of 16
kilobytes occur in the file system.
Example:
# mount -t ext4 -o discard /dev/mapper/350002ac000020121p1 /mnt
This will cause the RHEL 6.x OS to issue the UNMAP command, which in turn causes space to be
released back to the array from the TPVV volumes for any deletions in that ext4 file system. This
is not applicable for fully-provisioned virtual volumes.
In RHEL 6.x, the default option for creating the ext2/ext3/ext4 file system has the -E discard
option enabled for thinly-provisioned virtual volumes (TPVV). This discard option basically causes
the host to issue the UNMAP command to unmap all the blocks on the storage volume before the
file system is created.
Because the UNMAP commands are issued sequentially, and because there is no need to release
blocks on a newly created TPVV (since the storage will not have allocated any space on a TPVV),
these UNMAP commands do not serve any purpose for initial file system creation on a new TPVV.
Because of the sequential nature of the UNMAP commands issued from the host, file system creation
takes a long time on a TPVV by comparison to a fully-provisioned volume.
Therefore, to create the ext2/ext3/ext4 file system quickly on a newly created TPVV, use the
nodiscard option. Testing has shown that on a 100 G TPVV, it takes around 3 minutes 30
seconds with a default discard option, and only about 10-12 seconds with nodiscard option
for the ext4 default file system.
For example, on a newly created TPVV, use the -E nodiscard option:
# mkfs.ext4 -E nodiscard /dev/mapper/350002ac000020121p1
106 Modifying HP 3PAR Devices on the Host Server
NOTE: Even though the default discard option for creating filesystem is performed on ext2, ext3,
or ext4 filesystems, the mount option -o discard is supported only on the ext4 filesystem, so the
space reclaim operation is also supported only on the ext4 filesystem.
If you are recreating a file system on an existing TPVV, HP recommends that you use the default
discard option, as it will free up space on the HP 3PAR StoreServ Storage storage volume for data
that was not deleted before recreation.
Example:
# mkfs.ext4
/dev/mapper/350002ac000020121p1
Use the showvv -s <VV> command to get the space details on the storage volume. Here, the
Used column under Usr is the space used by the file system, Tot_Rsvd is the space allocated
on the storage volume, and VSize is the actual size that the file system can grow to, or total
volume size. Tot_Rsvd will be higher than the Used space because of additional space allocated
by the system to accommodate new writes and to avoid I/O delays due to volume growth.
In the following example, the host had 60 GB of data on an ext4 file system and files were
deleted, causing UNMAP to be issued. Consequently, the file system space is now 25 G and
allocated storage space is 60 G.
cli % showvv -s rhvol.3
---Adm--- ---------Snp---------- ----------Usr------------(MB)--- --(MB)--- -(% VSize)-- ---(MB)---- -(% VSize)-- ------(MB)-----Id Name
Prov Type Rsvd Used Rsvd Used Used Wrn Lim Rsvd Used Used Wrn Lim Tot_Rsvd
VSize
96 rhvol.3 tpvv base 256
66
0
0 0.0 -- -- 60928 25172 1.6 0 0
61184
1536000
--------------------------------------------------------------------------------------------1 total
256
66
0
0
60928 25172
61184
1536000
After space reclaim and defrag operations are run in the system, the Tot_Rsvd space is nearly
equal to the Used space.
root@inoded1062:S289_1# showvv -s rhvol.3
---Adm--- ---------Snp---------- ----------Usr------------(MB)--- --(MB)--- -(% VSize)-- ---(MB)---- -(% VSize)-- ------(MB)-----Id Name Prov Type Rsvd Used Rsvd Used Used Wrn Lim Rsvd Used Used Wrn Lim Tot_Rsvd
VSize
96 rhvol.3 tpvv base 384 148
0
0 0.0 -- -- 28928 25172 1.6 0 0
29312 1536000
--------------------------------------------------------------------------------------------1 total
384 148
0
0
28928 25172
29312 1536000
The space-reclaim and defrag operations are automatically throttled and run at different time
intervals in the system, and space is reclaimed over a given interval of time rather than immediately
upon receiving the UNMAP command. The Used space will not be the same as is shown in the df
-k output because of file fragmentation and the way the inode table uses blocks on the system.
UNMAP Storage Hardware Primitive Support for RHEL 6.x 107
10 Booting the Host from the HP 3PAR StoreServ Storage
HP 3PAR StoreServ Storage Setup Requirements
Booting from the HP 3PAR StoreServ Storage is supported in fabric and direct connect modes.
During the RHEL installation process, you will specify the correct argument that will take into account
multipathing during the installation process.
Make sure you have allocated enough space when creating your virtual volumes to be able to
install your RHEL 5 or RHEL 6 OS.
After creating your first virtual volume, you must export it to your RHEL host as VLUN 0, since RHEL
requires the root/boot volume LUN to be 0 when booting from the SAN.
RHEL Host HBA BIOS Setup Considerations
The HBA BIOS needs to be set up properly to handle booting from the HP 3PAR StoreServ Storage.
Booting from the HP 3PAR StoreServ Storage Using QLogic HBAs
When booting from the HP 3PAR StoreServ Storage using a QLogic HBA, complete the following
steps:
1. During the host boot, press Ctrl-C or Alt-Q when prompted for the QLogic Fast!UTIL HBA utility.
2. From the QLogic Fast!UTIL screen, choose Select Host Adapter menu and select the host adapter
from which you want to boot.
3. When the Fast!UTIL Options menu appears, select Configuration Settings.
4. Select Adapter Settings.
5. Select Host Adapter BIOS→Enabled, and then press ESC.
6. From the Configuration Settings menu, select Selectable Boot Settings.
7. From the Selectable Boot Settings menu, select Selectable Boot>Enabled.
8. Arrow down to the next field, (Primary) Boot Port Name→LUN, and then press Enter.
9. From the Select Fibre Channel Device menu, you should see the HP 3PAR device under ID0
with its Rev, Port Name, and Port ID shown. Press Enter.
10. From the Select LUN menu, select the first line LUN 0 with a status of Supported, and press
ENTER.
11. Press Esc twice to return to the Configuration Settings Modified dialogue box.
12. Select Save changes.
13. Return to the Fast!UTIL Options menu and select Select host Adapter.
14. Select your next HBA port to boot from and repeat these steps.
15. When done, from the Fast!UTIL Options menu:
a. Select Exit Fast!UTIL
b. Select Reboot system
The settings will be saved and the host is rebooted.
Booting from the HP 3PAR StoreServ Storage Using Emulex HBAs
When booting from the HP 3PAR StoreServ Storage using an Emulex HBA, complete the following
steps:
108 Booting the Host from the HP 3PAR StoreServ Storage
1.
During the host boot, press Alt-E or Ctrl-E when prompted by the Emulex HBA Utility, a screen
appears that will show the Emulex adapters in the system. Select <Adapter #> and press Enter.
a. After that, if a screen is being displayed that says: The BIOS of the Adapter is Disabled.
If the screen says, The BIOS of the Adapter is Enabled, then skip to Step 2.
b. Select option 2 Configure This Adapter's Parameters and press Enter.
c. From the next screen Select option 1 Enable or Disable BIOS and press Enter. The following
message appears:
The BIOS is Disabled!!
d.
e.
Enable Press 1, Disable Press 2:
Select 1 and press Enter. The following message appears:
The BIOS is Enabled!!
f.
2.
Press Esc twice.
Select option 1 Configure Boot Devices press Enter. The following list appears:
List of Saved Boot Devices
3.
Select option 1. Unused DID:<all zeros> WWPN: <all zeros> LUN:00 Primary Boot and press
Enter. The following dialog box appears:
01. DID:<did_value> WWPN:<3PAR Port WWPN> Lun:00 3PARdataVV 0000
4.
Select the two digit number of the Desired Boot Device 01 and press Enter. The following
dialogue box appears:
Enter two digits of starting LUN (Hex):
5.
Type 00 and press Enter.
The following dialog box appears:
DID: XXXXXX WWPN: <3PAR port WWPN>
01. Lun:00 3PARdataVV 0000
a. Select 01 and press Enter.
Another dialogue box will appear:
1. Boot this device via WWPN
2. Boot this device via DID
b.
Select 1 and press Enter. The following screen appears:
List of saved boot devices
1 Used DID:000000 WWPN:<3PAR Port WWPN> Lun:00 Primary Boot
6.
7.
8.
9.
Press Esc twice to return to the Emulex Adapters in the System menu.
Select the next HBA port to boot from and repeat these steps.
When done, press x to exit.
You will be prompted to reboot the system. Select Y.
After the system comes up, make sure the RHEL installation CD is in the drive tray to continue
with the next steps.
Installation from RHEL Linux CDs or DVD
Use the following procedure to install from the RHEL 5 or RHEL 6 CDs or DVDs.
Required
To ensure the root or boot disk is protected by multipath, the multipath option must be enabled at
the beginning of the RHEL 5 installation.
Installation from RHEL Linux CDs or DVD 109
1.
For RHEL 5.x, when prompted by the install CDs or DVD after the host comes up, at the boot
prompt, type the following command:
boot: linux mpath
This command communicates that multiple paths are connected from the storage to the host.
2.
Respond to all the prompts during the install process by selecting the default settings.
When the installation completes, the host is rebooted.
Modifying the /etc/multipath.conf File
NOTE:
RHEL 6 uses the default install for a SAN boot.
During an RHEL SAN boot install using the mpath option, the /etc/multipath.conf file is
automatically edited by the install processes. As part of the /etc/multipath.conf edits
performed during install, the global multipath option user_friendly_names enabled.
Note that using the user_friendly_names option can be problematic in the following situations:
If the system root device is using multipath and you use the user_friendly_names option, the
user-friendly settings in the /var/lib/multipath/bindings file are included in the initrd.
If you later change the storage setup, such as by adding or removing devices, there is a mismatch
between the bindings setting inside the initrd and the bindings settings in
/var/lib/multipath/bindings.
CAUTION: A bindings mismatch between initrd and /var/lib/multipath/bindings
can lead to a wrong assignment of mount points to devices, which can result in file system corruption
and data loss.
Use the alias option to override the user_friendly_names option for the system root device
in the /etc/multipath.conf file.
Verify that the SAN boot disk created is /dev/sda.
# fdisk -l -u /dev/sda
Disk /dev/sda: 32.2 GB, 32212254720 bytes
255 heads, 63 sectors/track, 3916 cylinders, total 62914560 sectors
Units = sectors of 1 * 512 = 512 bytes
Device Boot
/dev/sda1
*
/dev/sda2
Start
63
208845
End
208844
62910539
Blocks
104391
31350847+
Id
83
8e
System
Linux
Linux LVM
Identify the scsi_id of the boot disk via:
# scsi_id -g -u -s /block/sda
350002ac001b90031
This identified that 350002ac001b90031 is the WWID of the boot disk in the above example.
Establish an alias name of mpath0 for the WWID of the boot disk using multipath entries in
/etc/multipath.conf.
For RHEL 5.0 through RHEL 5.5, the contents of /etc/multipath.conf file should be edited
as in the following example if the HP 3PAR array is running HP 3PAR OS 3.1.1 or later.
110
Booting the Host from the HP 3PAR StoreServ Storage
NOTE: If the HP 3PAR array that the RHEL server is connecting to is running an HP 3PAR OS
version earlier than 3.1.1, you must change the no_path_retry setting to 12 rather than 18,
and the polling_interval setting to 5 rather than 10.
For RHEL 5.6 or later, the contents of /etc/multipath.conf file should be edited as in the
following example if the HP 3PAR array is running HP 3PAR OS 3.1.1 or later.
Modifying the /etc/multipath.conf File
111
NOTE: If the HP 3PAR array that the RHEL server is connecting to is running an HP 3PAR OS
version earlier than 3.1.1, you must change the no_path_retry setting to 12 rather than 18,
and the polling_interval setting to 5 rather than 10.
112
Booting the Host from the HP 3PAR StoreServ Storage
For RHEL 6.x, the contents of the /etc/multipath.conf file should be edited as in the following
example if the HP 3PAR array is running HP 3PAR OS 3.1.1 or later.
NOTE: If the HP 3PAR array that the RHEL server is connecting to is running an HP 3PAR OS
version earlier than 3.1.1, you must change the no_path_retry setting to 12 rather than 18,
and the polling_interval setting to 5 rather than 10.
NOTE: For RHEL 6.1, replace the device keyword rr_min_io_rq in the example below with
rr_min_io. The keyword rr_min_io_rq is valid only for RHEL 6.2 and later releases.
After the modifications to the /etc/multipath.conf file, restart the multipath daemon or reboot
the host so the changes take effect.
# chkconfig multipathd off
# chkconfig multipathd on
You should find the SAN boot LUN mapped as mpath0. In the following example, with a SAN
boot LUN ID of 350002ac001b90031:
# ls /dev/mapper
control mpath0 mpath0p1
mpath0p2
VolGroup00-LogVol00
VolGroup00-LogVol01
# multipath -ll
mpath0 (350002ac001b90031) dm-0 3PARdata,VV
[size=20G][features=1 queue_if_no_path][hwhandler=0][rw]
\_ round-robin 0 [prio=2][active]
\_ 0:0:0:0 sda 8:0
[active][ready]
\_ 1:0:0:0 sdb 8:16 [active][ready]
# df
Filesystem
1K-blocks
/dev/mapper/VolGroup00-LogVol00
Used Available Use% Mounted on
Modifying the /etc/multipath.conf File
113
/dev/mapper/mpath0p1
tmpfs
14283576
101086
2023232
3632732
16002
0
9913564
79865
2023232
27% /
17% /boot
0% /dev/shm
Changing the Emulex HBA Inbox Driver Parameters
See “Modifying the /etc/modprobe.conf File and Building the Ramdisk” (page 30) of this document
for changing the Emulex HBA parameters and rebuilding the ramdisk.
Installing the New QLogic Driver
To install a new QLogic driver to replace the Linux inbox driver, complete the following steps:
1. Go to http://www.qlogic.com and download the driver package
qlafc-linux-<version>-install.tgz to the RHEL host.
2. To extract the files, run the following command:
# tar xvzf qlafc-linux-<version>-install.tgz
3.
From the directory where the file was extracted, change to the driver directory:
# cd qlafc-linux-<version>-install
4.
Run qlinstall --upgrade to install the new driver:
# ./qlinstall --upgrade
Required
You must use the --upgrade requirement for a successful driver installation.
NOTE: You can also use the -up option with the qlinstall command. Make sure the
-up or the -upgrade option is used when installing the new driver. Upgrade builds and
installs the QLogic HBA driver, installs the SNIA HBA API library, creates ramdisk to load
driver at boot time, does not load and unload current drivers and does not do persistent
binding.
5.
After the installation completes, reboot the RHEL host. When the host comes back up, check
the driver version:
# modinfo qla2xxx |grep version
version:
xx.yy.zz
NOTE: Modify the HBA parameter to set qlport_down_retry to 10 if the HP 3PAR array
is running HP 3PAR OS 3.1.1 or later. But if the HP 3PAR array is running an HP 3PAR OS
version earlier than 3.1.1, set qlport_down_retry to 1 rather than 10. However, do NOT
use the procedure to rebuild the ramdisk as described in “Building the QLogic Driver”
(page 35). Instead, use the scli utility that was installed during the driver install process to
change this HBA parameter value.
To change the qlport_down_retry parameter, issue the following command:
# scli
114
Booting the Host from the HP 3PAR StoreServ Storage
After the main menu comes up, select 3: HBA Parameters.
6.
7.
8.
9.
10.
11.
12.
13.
14.
15.
Then, from the HBA Parameters Menu, select the HBA that you want to change.
Then, from the HBA Parameters Menu, select 2: Configure HBA Parameters.
From the Configure Parameters Menu, select 13: Port Down Retry Count.
Then enter the value 10 for the Down Retry Count: if the HP 3PAR array is running HP 3PAR
OS 3.1.1 or later. However, if the HP 3PAR array is running an HP 3PAR OS version earlier
than 3.1.1, enter 1.
Enter Port Down Retry Count [0-255] [30]: 10
From the Configure Parameters Menu, select 19: Commit Changes.
From the HBA Parameters Menu, select 4: Return to Previous Menu.
From the HBA Parameters Menu, you can select the next HBA port to repeat the steps to modify
its parameter.
After finishing, exit the scli utility.
To ensure that the change has taken effect, run the following command:
# cat /proc/scsi/qla2xxx/<hba instance> |grep "Port down retry"
Port down retry = 10
WARNING! Modifying the /etc/modprobe.conf file to make the QLogic HBA
qlport_down_retry parameter change and using the mkinitrd command to rebuild the
ramdisk as described in section 3.3.4 will cause the driver not to load and boot properly after
rebooting the host.
NOTE: The example above shows the QLogic port down retry setting when the RHEL
server is connecting to an HP 3PAR array running HP 3PAR OS 3.1.1 or later.
NOTE:
Command to rebuild the new ramdisk:
•
For RHEL 6.x: dracut command
•
For RHEL 5.x: mkinitrd command
Installing the New QLogic Driver
115
11 Using Veritas Cluster Servers
HP supports use with Veritas Cluster Server.
There are no special setup considerations for the HP 3PAR StoreServ Storage.
Refer to Veritas Cluster Server Installation Guide and Veritas Cluster Server User's Guide at http://
www.symantec.com for installation and setup instructions.
CAUTION:
software.
NOTE:
116
Make sure Device-mapper is disabled if using the Veritas DMP for multipathing
Veritas Cluster V6.0.1 is supported on RHEL 6 with HP 3PAR OS 3.1.1 or later.
Using Veritas Cluster Servers
12 Using RHEL Xen Virtualization
HP supports the use of RHEL 5 Xen Virtualization.
There are no special setup considerations for the HP 3PAR StoreServ Storage.
See the RHEL 5 Xen Virtualization Guide for installation and setup instructions:
http://www.redhat.com
117
13 Using RHEL Cluster Services
HP supports RHEL Cluster services for RHEL 4, RHEL 5, and RHEL 6.
For installation and administration RHEL Cluster services, refer to the RHEL Linux Installation Guide
and Configuring and Managing an RHEL Cluster on the following website:
http://www.redhat.com
To manage an RHEL 6.x cluster using the new luci and ricci method you must set a password
for the ricci user account created during installation. See the Red Hat Cluster Deployment Guide
for further information.
There are no special considerations for the HP 3PAR StoreServ Storage besides the standard setup
procedures described in this implementation guide.
118
Using RHEL Cluster Services
14 Using Red Hat Enterprise Virtualization (KVM/RHEV-H)
The Red Hat Enterprise Virtualization Hypervisor (RHEV-H), based on Kernel Virtual Machine (KVM)
technology, can be deployed either as a bare metal hypervisor or as an RHEL hypervisor host. The
KVM hypervisor requires a processor with the Intel-VT or AMD-V virtualization extensions. The RHEL
KVM package is limited to 64-processor cores. A guest OS can be used only on the hypervisor
type that they were created on.
For installation, administration, and OS support by the RHEL KVM, refer to the RHEL virtualization
guide on the following website:
https://www.redhat.com/virtualization/rhev/server/
There are no special considerations for the HP 3PAR StoreServ Storage besides the standard setup
procedures described in this implementation guide.
119
15 Using Oracle Linux
HP supports Oracle Linux with both the RHEL-compatible kernel and with an unbreakable kernel.
Oracle Linux with RHEL-Compatible Kernel
When using Oracle Linux with the RHEL-compatible kernel, follow the procedures in this guide for
the corresponding version of RHEL.
Using Oracle Linux with Unbreakable Kernel
Oracle Linux Unbreakable Enterprise Kernel (UEK) is an optimized package for Oracle software
and hardware. The Oracle Linux UEK is built upon the RHEL 6 kernel and is optimized specifically
for Oracle software.
When using Oracle Linux UEK, follow the usage guide as outlined for the corresponding version
of RHEL Linux.
NOTE: At the time this guide was released, there was an issue with software iSCSI such that, if
iSCSI sessions were opened to exported LUNs from the array, the Oracle Linux host would hang
when a system reboot was attempted. A workaround for this issue is to log out of all iSCSI sessions
before rebooting the host. Use this command to log out of open iSCSI sessions:
# iscsiadm -m node --logout
There are no special considerations for the HP 3PAR StoreServ Storage when using Oracle Linux
V6.x UEK besides the standard setup procedures described in this implementation guide for RHEL
6.
Oracle VM Server
The HP 3PAR OS can work with Oracle VM Server with inbox driver and multipath software. The
driver and multipath configuration is the same as for Oracle Linux.
NOTE:
For TPD 2.3.1, use host persona 6 when setting up the Oracle VM Server.
Oracle Linux Creating Partitions
When creating Linux-type partitions on exported LUNs using either fdisk or parted, make sure
the correct partitions are listed as partition numbers p1 or other number. For example, here is an
exported LUN displayed using multipath -ll:
360002ac00000000000000265000185db dm-3 3PARdata,VV
size=15G features='1 queue_if_no_path' hwhandler='0' wp=rw
`-+- policy='round-robin 0' prio=1 status=active
|- 0:0:0:32 sdd 8:48 active ready running
|- 1:0:0:32 sdh 8:112 active ready running
The following examle uses parted to create the partition on the exported LUN:
parted /dev/skl
GNU Parted 2.1
Using /dev/skl
Welcome to GNU Parte! Type 'help' to view a list of commands.
(parted) mklabel gpt
(parted) unit gb
120 Using Oracle Linux
(parted mkpart primary
File system type? [ext2]? ext4
Start? 0
End? -0
(parted) p
Modewl: 3APRdata VV (scsi)
Disk /dev/skl: 16.1GB
Sector size (logical/physical): 512B/512B
Partition Table: gpt
Number Start End Size File System Name Flags
1
0.02GB 16.1GB 16.1GB Primary
(parted) q
The following example uses kpartx to set the device name partition number delimiter:
# kpartx -a -p p /dev/mapper/360002ac00000000000000265000185db
dev/mapper/360002ac00000000000000265000185dbp1: mknod for
360002ac00000000000000265000185dbp1 failed: File exists
In the preceding example, ignore the message failed: File exists. The command merely places or
changes the partition delimiter character from possibly coming up as only a “1”.
If the value were to come up as a “1” and the partition name delimiter value was not set, and then
the host was rebooted, the partition might then change to a value of “P1”, causing issues with any
mounts to that specific LUN.
Oracle Linux Creating Partitions
121
16 Support and Other Resources
Contacting HP
For worldwide technical support information, see the HP support website:
http://www.hp.com/support
Before contacting HP, collect the following information:
•
Product model names and numbers
•
Technical support registration number (if applicable)
•
Product serial numbers
•
Error messages
•
Operating system type and revision level
•
Detailed questions
Specify the type of support you are requesting:
HP 3PAR storage system
Support request
HP 3PAR StoreServ 7200, 7400, and 7450 Storage
systems
StoreServ 7000 Storage
HP 3PAR StoreServ 10000 Storage systems
3PAR or 3PAR Storage
HP 3PAR T-Class storage systems
HP 3PAR F-Class storage systems
HP 3PAR documentation
For information about:
See:
Supported hardware and software platforms
The Single Point of Connectivity Knowledge for HP
Storage Products (SPOCK) website:
http://www.hp.com/storage/spock
Locating HP 3PAR documents
The HP 3PAR StoreServ Storage site:
http://www.hp.com/go/3par
To access HP 3PAR documents, click the Support link for
your product.
HP 3PAR storage system software
Storage concepts and terminology
HP 3PAR StoreServ Storage Concepts Guide
Using the HP 3PAR Management Console (GUI) to configure HP 3PAR Management Console User's Guide
and administer HP 3PAR storage systems
Using the HP 3PAR CLI to configure and administer storage
systems
HP 3PAR Command Line Interface Administrator’s
Manual
CLI commands
HP 3PAR Command Line Interface Reference
Analyzing system performance
HP 3PAR System Reporter Software User's Guide
Installing and maintaining the Host Explorer agent in order
to manage host configuration and connectivity information
HP 3PAR Host Explorer User’s Guide
Creating applications compliant with the Common Information HP 3PAR CIM API Programming Reference
Model (CIM) to manage HP 3PAR storage systems
122
Support and Other Resources
For information about:
See:
Migrating data from one HP 3PAR storage system to another HP 3PAR-to-3PAR Storage Peer Motion Guide
Configuring the Secure Service Custodian server in order to
monitor and control HP 3PAR storage systems
HP 3PAR Secure Service Custodian Configuration Utility
Reference
Using the CLI to configure and manage HP 3PAR Remote
Copy
HP 3PAR Remote Copy Software User’s Guide
Updating HP 3PAR operating systems
HP 3PAR Upgrade Pre-Planning Guide
Identifying storage system components, troubleshooting
information, and detailed alert information
HP 3PAR F-Class, T-Class, and StoreServ 10000 Storage
Troubleshooting Guide
Installing, configuring, and maintaining the HP 3PAR Policy
Server
HP 3PAR Policy Server Installation and Setup Guide
HP 3PAR Policy Server Administration Guide
HP 3PAR documentation
123
For information about:
See:
Planning for HP 3PAR storage system setup
Hardware specifications, installation considerations, power requirements, networking options, and cabling information
for HP 3PAR storage systems
HP 3PAR 7200, 7400, and 7450 storage systems
HP 3PAR StoreServ 7000 Storage Site Planning Manual
HP 3PAR StoreServ 7450 Storage Site Planning Manual
HP 3PAR 10000 storage systems
HP 3PAR StoreServ 10000 Storage Physical Planning
Manual
HP 3PAR StoreServ 10000 Storage Third-Party Rack
Physical Planning Manual
Installing and maintaining HP 3PAR 7200, 7400, and 7450 storage systems
Installing 7200, 7400, and 7450 storage systems and
initializing the Service Processor
HP 3PAR StoreServ 7000 Storage Installation Guide
HP 3PAR StoreServ 7450 Storage Installation Guide
HP 3PAR StoreServ 7000 Storage SmartStart Software
User’s Guide
Maintaining, servicing, and upgrading 7200, 7400, and
7450 storage systems
HP 3PAR StoreServ 7000 Storage Service Guide
Troubleshooting 7200, 7400, and 7450 storage systems
HP 3PAR StoreServ 7000 Storage Troubleshooting Guide
HP 3PAR StoreServ 7450 Storage Service Guide
HP 3PAR StoreServ 7450 Storage Troubleshooting Guide
Maintaining the Service Processor
HP 3PAR Service Processor Software User Guide
HP 3PAR Service Processor Onsite Customer Care
(SPOCC) User's Guide
HP 3PAR host application solutions
Backing up Oracle databases and using backups for disaster HP 3PAR Recovery Manager Software for Oracle User's
recovery
Guide
Backing up Exchange databases and using backups for
disaster recovery
HP 3PAR Recovery Manager Software for Microsoft
Exchange 2007 and 2010 User's Guide
Backing up SQL databases and using backups for disaster
recovery
HP 3PAR Recovery Manager Software for Microsoft SQL
Server User’s Guide
Backing up VMware databases and using backups for
disaster recovery
HP 3PAR Management Plug-in and Recovery Manager
Software for VMware vSphere User's Guide
Installing and using the HP 3PAR VSS (Volume Shadow Copy HP 3PAR VSS Provider Software for Microsoft Windows
Service) Provider software for Microsoft Windows
User's Guide
Best practices for setting up the Storage Replication Adapter HP 3PAR Storage Replication Adapter for VMware
for VMware vCenter
vCenter Site Recovery Manager Implementation Guide
Troubleshooting the Storage Replication Adapter for VMware HP 3PAR Storage Replication Adapter for VMware
vCenter Site Recovery Manager
vCenter Site Recovery Manager Troubleshooting Guide
Installing and using vSphere Storage APIs for Array
Integration (VAAI) plug-in software for VMware vSphere
124
Support and Other Resources
HP 3PAR VAAI Plug-in Software for VMware vSphere
User's Guide
Typographic conventions
Table 3 Document conventions
Convention
Element
Bold text
• Keys that you press
• Text you typed into a GUI element, such as a text box
• GUI elements that you click or select, such as menu items, buttons,
and so on
Monospace text
• File and directory names
• System output
• Code
• Commands, their arguments, and argument values
<Monospace text in angle brackets> • Code variables
• Command variables
Bold monospace text
• Commands you enter into a command line interface
• System output emphasized for scannability
WARNING! Indicates that failure to follow directions could result in bodily harm or death, or in
irreversible damage to data or to the operating system.
CAUTION:
NOTE:
Indicates that failure to follow directions could result in damage to equipment or data.
Provides additional information.
Required
Indicates that a procedure must be followed as directed in order to achieve a functional and
supported implementation based on testing at HP.
HP 3PAR branding information
•
The server previously referred to as the "InServ" is now referred to as the "HP 3PAR StoreServ
Storage system."
•
The operating system previously referred to as the "InForm OS" is now referred to as the "HP
3PAR OS."
•
The user interface previously referred to as the "InForm Management Console (IMC)" is now
referred to as the "HP 3PAR Management Console."
•
All products previously referred to as “3PAR” products are now referred to as "HP 3PAR"
products.
Typographic conventions
125
17 Documentation feedback
HP is committed to providing documentation that meets your needs. To help us improve the
documentation, send any errors, suggestions, or comments to Documentation Feedback
([email protected]). Include the document title and part number, version number, or the URL
when submitting your feedback.
126
Documentation feedback