1
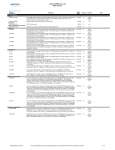
CTF Digital Cameras Description and Operation
Henning Back, Virginia Tech, Blacksburg VA
Introduction:
The cameras in CTF are regular consumer grade Kodak DC290 Digital Zoom camera equipped
with an optional wide-angle lens. They can take still images at various resolutions and image
compressions. Lights, humidity sensor, and a gas tube are also part of the complete camera system. Both a
manual interface and a computer interface control them. These are located in the first room of the
cleanroom on top of the CTF water tank. The interfaces will be described below, as well as the camera
features.
Each camera is mounted in a stainless steel can with a 1-inch (25.4-mm) flat acrylic window.
Also in the can is a humidity sensor to measure when the humidity gets too high. To expel this humidity
there is a small plastic tube that runs in to the can. Nitrogen can then be flushed through the can, and
expelled to Hall C. There are two of these cans mounted on the vertical ribs of the open structure between
rings 5 and 6 (cameras 2 and 3), and one mounted high on the side of the water tank between ring 2 and 3
(camera 1).
Manual Interface:
The manual interface controls the power to the camera and lights, and also has the switches for
turning them on and off. There are also LED indicators that signal when the humidity is too high. The
diagram below shows the lay out of the manual interface.
Camera 1
Camera 2
Camera 3
ON
ON
ON
Camera
Master
Power
ON
Camera Current
Humidity
Alarm
Camera 1
Camera 1
Camera 2
Camera 3
Push to Activate
Camera 2
Push Button once to power up camera
OFF
ON
Lighting
Enable
Push Button once again to power down
Camera 3
-Lighting
The Lighting Enable switch controls the power to the lights. This switch is a key switch, so that
the lights cannot be turned on when the PMT high voltage is on. This switch, however, does not turn the
lights on. It only provides the power to do so. In other words it enables the lighting system for use. The
toggle switches above the Lighting Enable switch let you decide which cans you would like lights to turn
on in. To actually turn on the lights one must push and hold down the Push to Activate push button switch.
The lights get hot, and to avoid damaging the acrylic by leaving the lights on the lights are only active
while the Push to Activate button switch is depressed. When this switch is pushed LEDs above the toggle
switches will illuminate. This tells you that the lights are on. If this LED is not illuminated then either it is
burned out, or both lights in the can are burned out.
Taking pictures with the lights on in the same can as the camera taking the picture is not advised.
The lights reflect off the window, and will not produce a good image. You may try if you like, but I suggest
using the lights in the two other cans where you are not taking pictures from.
-Cameras
The cameras are not designed to be turned on and off remotely; therefore, we have hard wired the
switch. The Master Power switch supplies power to the camera, but to turn them on or off one must push
the push button switches. The camera on/off switch is push once briefly to turn it on, and pushed again for
a second or more to turn it off. The Camera Current meter measures the current that all the cameras draw.
This tells you if the cameras are on or not.
It is suggested that only the camera being used be on. In the future if all the cameras can be
connected to the computer at the same time then they can all be on, but there may be troubles connecting to
the computer since a switch box is used at the moment.
The master power should not be turned off unless all the cameras are off. Turning the master
power off when a camera is on causes the cameras internal clock to be reset. When this happens the next
time the camera is turned on it will ask for the date and time. It does this by turning on the LCD screen on
back of the camera. Since the camera is inaccessible one cannot set the clock this way. If this does happen
you will notice that on the current meter the camera draws more than 2 amps for about a second or so,
because the LCD screen draws much more current than the camera in normal operation. A small spike
above 2 amps is normal. The camera also will not connect to the computer. To fix this, one must once again
turn off the camera, wait a few moments, and then turn it on again. This will set the clock on the camera to
01/01/01 00:00. The clock on the camera can then be set to the computers time using the computer
interface. This will be described later.
-Humidity Alarm
The Humidity Alarm are just LEDs for now. When an LED turns on the humidity is higher than
the threshold set in the electronics. Right now the threshold is set to be about 85% relative humidity. This
can easily be changed by adjust the comparison voltage with the potentiometer connected to the voltage
comparator. The humidity sensor outputs a voltage that is a function of both the supply voltage and the
relative humidity. The function is in general:
Vout = Vsupply (0.0062 (%relative humidity) + 0.16)
The specification of each humidity sensor in each can is given at the end of the description and procedure.
The threshold is controlled using a voltage comparator (LM311). Review the schematic of the manual
interface box if you would like to change this.
If the humidity alarm does go off, then nitrogen should be flushed through the can. There are three
valves near the feed-through for the camera cables. These valves control the gas to the camera cans. As of
April 5, 2001 gas was not connected to these valves, but there is a tube provided to do this. It is labeled and
also near the cable feed-through. The feed-through is on the side of the water tank near the PMT cable
feed-throughs on to of the tank.
Computer Interface:
The computer interface is a Windows PC equipped with Kodak software for controlling the
camera, and PolyView for viewing the picture. Both have shortcuts on the desktop. After the camera is
turned on and the serial port switch box is turn to the correct camera, the camera will automatically connect
to the computer. The camera will now be seen as another drive on the computer. This make file transfer
easy (cut and paste).
The Kodak software is called “DC290 Camera Properties”. When it is opened it will ask which
camera to connect to. Since the cameras are on a serial port switch box, and not all connected to the
computer there will only be one camera to choose. When this is chosen the Camera Properties interface will
open. A list of what the Camera Properties controls is below, but this is unfortunately not all the camera
properties. Some of them can only be changed on the camera. These have been preset before installation,
and there is no reason to change them.
List of camera properties controlled by Kodak software:
Capture Settings tab
-
Self-timer
Flash
Advanced Focus Mode
Advanced Exposure Mode
White Balance
Picture Type tab
- Picture Type
- Picture Quality
- Resolution
Camera Settings tab
-
Camera Date and Time
Time-Out Settings
Video Out Format
Default Settings
Picture Capture tab
- Preview On
- Take Picture
- Zoom
Some of these properties can only be set to a particular setting, because the environment they are
being used in is not where they were intended to be used. There is no reason to use the Self-timer. Leave
the self-timer off. The Flash should always be off as well. It is blacked out and blocked, so it will not help
take picture. If the camera is being used for calibration purposes or for any purpose where the PMT high
voltage is on, then the flash should absolutely not be used. Because the optics have changed, and the
infrared LED that is used to measure the distance is blocked, Manual Focus should be chosen and a desired
focal distance should be set. The Long-time exposure should also be chosen, because the light levels are so
low. The exposure time should be set so to optimize the image. PolyView is also capable of changing the
Brightness of the picture, and the RGB values. The White Balance can also be set to a desired position to
get desired affect.
Picture type should always be set to Still. If a Burst or Time Lapse picture is what you would like I
ask that you read the software help and the DC290 User’s Guide to make should you understand what to
do. Picture Quality sets the type of Jpeg compression. There are three Jpeg compressions and an
uncompressed image type. There are also four types of resolution: 720x480, 1440x960, 1792x1200, and
2240x1500. The last one is called ultra resolution. This is an interpolated resolution, so an uncompressed
picture quality cannot be used. The Picture Quality and Resolution affect not only the image but also the
file size. Downloading very large images can take several minutes. This should be kept in mind when
taking pictures.
The only thing that should ever be set in the Camera Setting tab is the Date and Time of the
camera, which can only be set to the computers time and date. We cannot use the video out, and time-out
settings do not need to be changed. THE DEFAULT SETTINGS BUTTON MUST NEVER BE
PUSHED. This will reset the camera to its default settings. Some of these settings have been changed on
the camera and cannot be changed through the computer.
On the Picture Capture tab you can take a picture. Set the zoom to the desired setting and click on
take picture. It will take a few moments for the camera to process the picture. I do not suggest selecting
Preview ON. Since we are communicating with the camera through a serial line the date transfer is slow. I
have noticed a few problems when the preview is on. I suggest taking low resolution/low quality pictures if
a preview is desired before taking a high resolution, high quality, large file size picture.
Taking a Picture:
When all the desired settings are set with the Kodak software you will then be ready to take a
picture. Push and hold the “Push to Activate” button on the manual interface box after the needed lights
have been selected, if lights are needed. Then click on the “Take Picture” button on the Kodak software.
Release the button when the camera is finished taking the picture, in other words as long as you have set
the long-time exposure to. After the camera has processed the picture it will show in the preview screen in
the Picture Capture tab. The picture is now ready to be viewed or downloaded on the hard drive, or on to
the network if needed. Please do not leave pictures on the camera. The memory card on the camera has
limit space. If you find that the camera does not have any room on the memory card then delete some or all
of the pictures on the camera.
The Kodak DC290 User’s Manual should be kept with the control system in the CTF cleanroom
on top of the water tank. Review this manual to understand all the capabilities of the DC290. I have only
described them briefly. There is also more information available on the Web. The address is:
http://www.kodak.com/global/en/service/digCam/dc290/dc290.shtml
The DC290 computer software also has a help menu for further information. I also suggest reviewing this.
You can also contact Henning Back for any questions or comments.
Henning Back
Virginia Tech
Physics Department
+540-231-3078
[email protected]
Humidity sensor information
The humidity sensors came with calibration data. An exact duplicate of this calibration data is
below.
Camera 1
Model: IH-3605A
Wafer: thunder1
Channel:
117
MRP: thunder1
------ 3
------ 2
------ 1
HYCAL Sensing Products
Honeywell Inc.
24B Concord Street
El Paso TX 79906
Calculated values at 5V:
Vout @0% = 0.790 @75.3% = 3.188
File: 00090115
3: +5 VOLTS PRECISION SUPPLY
2: E+ SIGNAL OUTPUT
1: NEGATIVE or POWER COMMON
Linear output for 2% RH accy @25C:
Zero offset = 0.790V
Slope = 31.852 mV / %RH
RH = (Vout – 0.790) / 0.0319
Ratiometric response for 0 to 100%RH:
Vout = Vsupply * (0.1579 to 0.7949)
Camera 2
Model: IH-3605A
Wafer: thunder1
Channel:
101
MRP: thunder1
------ 3
------ 2
------ 1
HYCAL Sensing Products
Honeywell Inc.
24B Concord Street
El Paso TX 79906
Calculated values at 5V:
Vout @0% = 0.787 @75.3% = 3.188
File: 00090115
3: +5 VOLTS PRECISION SUPPLY
2: E+ SIGNAL OUTPUT
1: NEGATIVE or POWER COMMON
Linear output for 2% RH accy @25C:
Zero offset = 0.787V
Slope = 31.887 mV / %RH
RH = (Vout – 0.787) / 0.0319
Ratiometric response for 0 to 100%RH:
Vout = Vsupply * (0.1574 to 0.7952)
Camera 3
Model: IH-3605A
Wafer: thunder1
Channel:
100
MRP: thunder1
------ 3
------ 2
------ 1
HYCAL Sensing Products
Honeywell Inc.
24B Concord Street
El Paso TX 79906
Calculated values at 5V:
Vout @0% = 0.786 @75.3% = 3.188
File: 00090115
3: +5 VOLTS PRECISION SUPPLY
2: E+ SIGNAL OUTPUT
1: NEGATIVE or POWER COMMON
Linear output for 2% RH accy @25C:
Zero offset = 0.786V
Slope = 31.906 mV / %RH
RH = (Vout – 0.786) / 0.0319
Ratiometric response for 0 to 100%RH:
Vout = Vsupply * (0.1571 to 0.7952)
Manual Interface Schematic
CTF Digital Camera Quick Reference
Turning on the Cameras
1. Turn “Camera Master Power” switch on.
2. Set serial port switch to desired camera.
3. Push the push button switch for the selected camera briefly to turn on that camera.
4. Watch “Camera Current” meter. Momentary spikes about 2 amps are normal, but if the meter
jumps above 2 amps for a moment and does not connect to the computer, then the camera was not
properly shut down when previously used. Turn off camera by pushing the push button switch
again for a second or more, and then start from step 3 again.
5. Camera should connect to computer automatically. A “connecting to camera” status bar should
appear on the computer. If you do not notice this try to start the Kodak software by double
clicking on the “DC290 Camera Properties” icon. The camera selected should appear in the “Open
Camera” menu. If it does not appear, then the camera has not connected to the computer. Make
sure that the correct camera is selected on the serial port switch box, and start again from step 3.
Taking Pictures
1. After the computer has connected to the computer, and the “DC290 Camera Properties” icon has
been double clicked, then an “Open Camera” menu will appear. Select the camera to be opened,
and click Open.
2. The DC290 camera control software will now start.
Important Note: NEVER CLICK THE DEFAULTS BUTTON UNDER THE “CAMERA
SETTINGS” TAB.
3.
4.
5.
6.
7.
8.
9.
10.
11.
12.
Select Flash Off
Select Manual Focus, and the desired focal distance.
Select Long-time Exposure, and the desired exposure time.
Select the desired White Balance.
Select the “Picture Type” tab
Select Still picture.
Select picture quality and resolution needed.
Click on the “Picture Capture” tab.
Select desired Zoom
You are now ready to take a picture. If lights are needed follow the steps below for “Taking
Pictures with Lights”, otherwise click “Take Picture”.
Taking Pictures with Lights
1. Follow steps 1 through 11 above.
2. Use key to enable the lights. This should only be done if the PMT high voltage is off.
3. Select which camera cans you would like light to come from by switching on the desired lights
with the toggle switches. One should not turn on the lights in the same can as the camera that is
taking the picture.
4. When ready to take a picture, hold down the “Push to Activate” button, while also clicking on the
“Take Picture” button on the DC290 software.
5. Release the button when the picture has been taken. This depends on the exposure time selected.
One does not need to wait for the picture to be finished processing.
Viewing Pictures
1. When the picture is finished processing it is ready to be handled.
2. Picture can be viewed by any Jpeg viewer. I recommend PolyView. The picture is stored on the
camera picture disk. The camera is viewed by the computer as another drive so pictures can be
opened directly from the camera.
3. If you want to keep the picture then transfer it to a disk or to the network.
4. Delete any unwanted pictures from the Camera picture disk.