1
Project no. 027087
TENCompetence
Building the European Network for Lifelong Competence Development
Project acronym: Integrated Project TENCompetence
Thematic Priority: 2.4.10
ID3.8 Release 2.0 of the TENCompetence integrative software
Due date of internal deliverable: 01-02-2008
Actual submission date: 24-04-2008
Start date of project: 01-12-2005
Duration: 4 years
LOGICACMG
Revision 0.2
Project co-funded by the European Commission within the Sixth Framework Programme (2002-2006)
PU
PP
RE
CO
Dissemination Level
Public
Restricted to other programme participants (including the Commission Services)
Restricted to a group specified by the consortium (including the Commission
Services)
Confidential, only for members of the consortium (including the Commission
Services)
X
Building the European Network
For Lifelong Competence Development
TENCompetence IST-2005-027087
Project Internal Deliverable Report
ID3.8 Release 2.0 of the TENCompetence integrative software
Work Package
Task
Date of delivery
WP 3 – Technical Design & Implementation of the Integrated
System
Contractual: 01-02-2008
Code name
Actual: 24-04-2008
Revision: 0.2
Type of deliverable
Report
Security
(distribution level)
Public
Draft
Final
Contributors
Authors (Partner)
Contact Person
Harrie Martens (OUNL), Hubert Vogten (OUNL), Ruud Lemmers
(LOGICACMG), Roy Cherian (University of Bolton), Sue
Nasiopoulos (LOGICACMG), Roberto Celle (ILABS), Arne Koesling
(UHANN), Paul Sharples (University of Bolton), Phil Beauvoir
(University of Bolton), Michele Dicerto (ILABS)
Ruud Lemmers (LOGICACMG)
WP/Task responsible
WP3 / Ruud Lemmers (LOGICACMG)
EC Project Officer
Mr. M. Májek
Abstract
(for dissemination)
The document explains the installation and configuration steps to
set up instances of the PCM client and the PCM server.
Keywords List
TENCompetence Software installation and configuration
TENCompetence Project Coordination at: Open University of the Netherlands
Valkenburgerweg 177, 6419 AT Heerlen, The Netherlands
Tel: +31 45 5762624 – Fax: +31 45 5762800
ID3.8 - Release 2.0 of the TENCompetence
integrative software
Table of contents
1.
Introduction................................................................................................................................................... 3
2.
PCM client installation & configuration ..................................................................................................... 4
2.1.
2.2.
3.
3.1.
3.2.
3.3.
Installation ................................................................................................................................................ 4
Configuration............................................................................................................................................ 4
PCM server installation & configuration.................................................................................................... 6
Installation ................................................................................................................................................ 6
Standard Configuration............................................................................................................................. 6
Openfire installation & configuration ....................................................................................................... 9
TENCompetence – IST-2005-027087
Page 1 / 12
ID3.8 - Release 2.0 of the TENCompetence
integrative software
Version history
Version
0.1
0.2
Date
21-04-2008
24-04-2008
Description
Initial version.
Review by Ruud Lemmers.
TENCompetence – IST-2005-027087
Editor(s)
Arne Koesling (UHANN)
Ruud Lemmers (LCMG)
Page 2 / 12
ID3.8 - Release 2.0 of the TENCompetence
integrative software
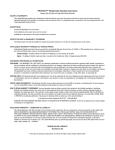
1. Introduction
The TENCompetence software consists to date of several tools, but the main ones are the
Personal Competence Manager (PCM) applications. This includes the PCM server and the
PCM client. The server application provides the different services, the storage space for
learning material and the meeting point for learners. The PCM client is the application to
make use of those services and provide the learner a combined learning and communication
environment for an individualized learning experience. The goal of this document is the
formal delivery of release 2.0 of the TENCompetence integrative software.
This internal deliverable is comprised of three parts:
1. The second version of the actual software.
2. An installation & configuration guide for the PCM client, included in this document.
3. An installation & configuration guide for the PCM server, included in this document.
The software is available on Sourceforge, an open accessible online repository hosting only
software projects under open source license models, at
http://sourceforge.net/projects/tencompetence/. The source files for this release have been tagged
at the end of January 2008 with label tenc-pcm-server-release-1p0p0 (PCM server) and tenc-pcmclient-release-1p0p0 (PCM client). The “1.0.0” label might be unexpected. It’s because the first
release was tagged as “1.0 beta 2”.
Documentation for the software is available in internal deliverables ID3.6 (Architecture
Design) and ID3.7 (Final API definitions for the second release), as JavaDoc in the source
code itself and in the user manual created by the Training work package.
TENCompetence – IST-2005-027087
Page 3 / 12
ID3.8 - Release 2.0 of the TENCompetence
integrative software
2. PCM client installation & configuration
Note: the described steps are targeted at installation & configuration on a Windows system.
The steps for Linux and Mac systems will differ slightly.
2.1. Installation
To install the PCM client on a Windows machine, take the following steps:
1. Download the PCM client software for your operating system from SourceForge:
http://sourceforge.net/projects/tencompetence/:
• Linux: tencomp-pcm-lnx-1.0.tar.gz
• MAC: tencomp-pcm-mac-1.0.tar.gz
The following give the choice between a zip file or an installer which installs the product
automatically via a wizard.
• Windows: if you are sure you have installed the Java Runtime Environment (“JRE”),
select tencomp-pcm-win-1.0.zip. In all other cases select tencomp-pcm-win-jre1.0.zip.
• Windows: installer with JRE; tencomp-pcm-win-jre-1.0.exe
Windows: installer without JRE; tencomp-pcm-win-1.0.exe
2. Unzip the downloaded file to a folder of your personal choice.
2.2. Configuration
1. Run tencomp-pcm.exe from the folder created in installation step 2.
2. The PCM client uses a default public PCM server. In case you need to switch to a special
PCM server: select menu option File => Preferences, then set Discovery Server URL to
the “http address” of your discovery server. Ask your PCM system administrator for this
http address. The regular format is http://{server:port}/TENCDiscovery/servers.
The two figures below illustrate this step.
TENCompetence – IST-2005-027087
Page 4 / 12
ID3.8 - Release 2.0 of the TENCompetence
integrative software
Figure 1: select menu option
Figure 2: set Discovery Server URL
TENCompetence – IST-2005-027087
Page 5 / 12
ID3.8 - Release 2.0 of the TENCompetence
integrative software
3. PCM server installation & configuration
This document covers installation and configuration on Windows and Linux systems.
Installation on Apple machines (Mac) is not incorporated.
3.1. Installation
To install the PCM server on a Windows machine, take the following steps:
1. Download and install the Java Runtime Environment (JRE) 5.0 Update 6 (or a later 5.0
update or a 6.0 version) from http://java.sun.com/javase/downloads/index_jdk5.jsp.
2. Download and install the Core distribution for Apache Tomcat 5.5.23 (or a later 5.5
update) from http://tomcat.apache.org/download-55.cgi.
3. Download and install the MySQL 5.0.41 Community Server (or a later 5.0 update) from
http://dev.mysql.com/downloads/mysql/5.0.html#downloads.
4. Download and install the MySQL GUI Tools Bundle for 5.0 from
http://dev.mysql.com/downloads/gui-tools/5.0.html.
5. Download the PCM server software from SourceForge:
http://sourceforge.net/projects/tencompetence/.
6. Download the Openfire chat server from
http://www.igniterealtime.org/projects/openfire/index.jsp.
3.2. Standard Configuration
Create environment variables for your Java version.
In Windows this is done via Control Panel => System => Advanced => Environment
Variables => System Variables. Create the system variable:
JRE_HOME: if you downloaded a JRE.
JAVA_HOME: if you downloaded a JDK.
And assign it the path to the root folder of your installed Java version to this new
system variable. Example: "C:\java\jdk1.5.0_11".
For Linux installations information on how to do this can be found in your
distributions documentation. If multiple Java versions are installed, it is advised to use
a wrapper script around the Tomcat start/stop script.
Unzip the downloaded PCM server file to a temporary folder.
From the temporary folder, copy the TENCServer.war and TENCDiscovery.war files to
your apache-tomcat-5.5.23\webapps folder.
From the temporary folder, copy the mysql-connector-java-5.0.5-bin.jar file to your
apache-tomcat-5.5.23\common\lib folder.
Run the MySQL Server Instance Config Wizard, to set up an instance of MySQL. Use the
typical installation and accept the defaults. Use user root and password admin for the
root user account as they are the defaults in the TENCompetence installation files. Be
aware that there is no default root password for MySQL on Linux systems. The root
password can be set using MySQL Administrator.
Open the MySQL Query Browser, this shows the screen from Figure 3. Use the username
root and password admin combination you selected during step 5. Because there is no
“Default Schema”, the popup from Figure 4 will be shown next. Select “Ignore” to
continue without selecting a schema.
TENCompetence – IST-2005-027087
Page 6 / 12
ID3.8 - Release 2.0 of the TENCompetence
integrative software
Figure 3: connect to MySQL Server Instance
Figure 4: Connection Dialog - No Default Schema Specified
Select menu option File => Open Script… and open the full_setup_db.sql file from the
temporary folder. Your screen should look like Figure 3 now. After opening the
full_setup_db.sql script, click the green Execute button to create the initial database.
Note: If there is an existing PCM database from PCM v1.0 beta 2 which contains data
that must be reused then use the update_db_competencelevel.sql script. This script will
update the database to PCM v1.0.0.
TENCompetence – IST-2005-027087
Page 7 / 12
ID3.8 - Release 2.0 of the TENCompetence
integrative software
Figure 5: full_setup_db.sql file
For Windows installations move the serverlist.xml file in the temporary folder to folder
c:\data (if the folder does not exist, create it). For Linux installations, move
serverlist.xml to a folder that is reachable for the user running the Tomcat process.
The ....\apache-tomcat-5.5.23\webapps\TENCDiscovery\WEBINF\conf\server.properties file now contains the location (file.path setting) and
filename (file.name) for the serverlist.xml file.
Note: the file.path setting should end with a folder separator.
After these steps, the default configuration for the PCM server is complete. Starting and
stopping the application is done by standard Tomcat scripts:
In Windows:
1. Running ....\apache-tomcat-5.5.23\bin\startup.bat starts the Tomcat server.
2. Running ....\apache-tomcat-5.5.23\bin\shutdown.bat stops the Tomcat server.
In Linux:
3. Running ....\apache-tomcat-5.5.23\bin\catalina.sh start|stop controls the Tomcat server or
alternatively the wrapper script.
TENCompetence – IST-2005-027087
Page 8 / 12
ID3.8 - Release 2.0 of the TENCompetence
integrative software
3.3. Openfire installation & configuration
1. Run the OpenFire installer. After successful installation, it shows the Admin console.
2. Select "Launch Admin" to configure OpenFire. The default settings can be accepted,
except for Database Settings. Set this to "Embedded Database".
3. Open the Openfire.xml file found in the PCM server software package (see section 1, step
5).
4. Add an admin username between <authorizedUsernames> </authorizedUsernames> This
has to be a username which is available in the TENC database.
5. Make sure the following sections contain the right information relating to the TENC
database you want to use.
<database>
<defaultProvider>
<driver>com.mysql.jdbc.Driver</driver>
<serverURL>jdbc:mysql://<host>:<port>/tenc</serverURL>
<username><username></username>
<password><password></password>
<minConnections>5</minConnections>
<maxConnections>15</maxConnections>
<connectionTimeout>1.0</connectionTimeout>
</defaultProvider>
</database>
<setup>true</setup>
<jdbcProvider>
<driver>com.mysql.jdbc.Driver</driver>
<connectionString>jdbc:mysql://<host>/tenc?user=<username>&pa
ssword=<password></connectionString>
</jdbcProvider>
6. When the necessary changes are completed copy the openfire.xml file to Program
Files\Openfire\conf.
7. Restart the Openfire server and click “Launch admin”. This will open up a login screen to
the Openfire administration website. Logon with the user you configured in openfire.xml.
Click Launch Admin
TENCompetence – IST-2005-027087
Page 9 / 12
ID3.8 - Release 2.0 of the TENCompetence
integrative software
Login screen
TENCompetence – IST-2005-027087
Page 10 / 12
ID3.8 - Release 2.0 of the TENCompetence
integrative software
8. In the first screen (Server => Server settings) it will show a Server Name. If this is an IP
address you will need to change it to the publicly resolvable hostname of the server. Click
edit at the bottom of the page to change the Server name.
Check Server Name and edit if necessary.
9. Click HTTP Binding in the left hand menu and check that it is set to enabled. If it is
disabled then enable it and change the port number from 8080 to a free port on the server.
TENCompetence – IST-2005-027087
Page 11 / 12
ID3.8 - Release 2.0 of the TENCompetence
integrative software
Change HTTP binding port if necessary.
10. Restart the Openfire server by clicking stop -> start.
TENCompetence – IST-2005-027087
Page 12 / 12