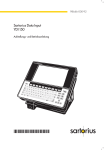
Download Sartorius Data Input YDI150. Port Drivers for YDI 150
Transcript
98647-000-73
Sartorius Data Input
YDI 150
Port Drivers
for YDI 150 Data Input Terminals
2
Contents
Page
Making a Working Copy of Your Driver Disk
The Digital I/O Port Driver “I2CDRV.BIN”
The I/O Port Device Driver
Accessing the I/O Ports
Digital Output Port
Digital Input Port
Dip Switch Port
Turbo Pascal “DeviceMode” Function
5
5
5
6
9
10
11
The Serial Port Device Driver “SER150”
Installation of the “SER150” Driver
Use of the SER150 Driver in an Application Program
OPEN the Driver
WRITE Command (Send Data)
READ Command (Receive Data)
I/O Control WRITE Command
– Function 0: MOUNT Memory for Input Buffer
– Function 1: PURGE Memory for Input Buffer
– Function 2: SET PROTOCOL Parameters
– Function 3: FLUSH INPUT Buffer
– Function 4: FLUSH OUTPUT1 Buffer
– Function 5: FLUSH OUTPUT2 Buffer
– Function 6: FLUSH ALL Buffers
– Function 7: SET UART-LINES
– Function 8: WRITE BUFFER 2
– Function 9: Change UART
– Function 10: Set MUX Channel
I/O Control READ Command
12
12
14
14
15
17
18
22
22
23
26
26
26
26
27
28
29
30
30
The V24_SET Program
SARTONET MASTER Settings
SARTONET SLAVE Settings
All Other Protocol Settings
32
32
32
33
Sartorius Software License Agreement
34
Legal Notice
37
SARTORIUS Registration Card
Enclosure: 31/2-inch program disk
3
4
Making a Working Copy of Your Driver Disk
You should make a working copy of your driver floppy disk.
If this copy is damaged or if the files are inadvertently deleted, you will still
be able to work with the files on the original disk.
The DISKCOPY command is used to copy the contents of one disk to another.
Using “DISKCOPY” is the quickest way to copy disks, since this command copies
the entire contents of a disk in one operation.
Important Note
The DISKCOPY command can be used only if the original disk drive and the target
disk drive have the same capacity.
Insert the driver disk into drive “A”: and then enter the following command...
If you have a PC with one disk drive:
DISKCOPY
If you have a PC with two disk drives:
DISKCOPY A: B:
Next, press the ENTER key.
If your TARGET disk is unformatted, it will be formatted during the copy procedure.
Follow the instructions on the screen to complete the copy procedure.
Keep your original driver disk in a safe place!
From now on, use only the working copies. Keep your original disk in a safe
place, and use it only for making additional working copies.
Complete the Registration Card and return it to us so that you will automatically
receive regular updates.
4
The Digital I/O Port Driver “I2CDRV.BIN”
The information in this section is intended for programmers who want to write
applications to control the digital I/O ports on the YDI 150. All models of the
YDI 150 series are equipped with 8 digital inputs, 4 dip switch inputs,
8 digital outputs and 4 single-pole, double-through relay ports. The ports are
internally connected to an I2C bus and are accessed through the simple - to-use
I2CDVR.BIN device driver.
The I/O Port Device Driver
DOS devices are implemented through reserved file names that have a special
meaning attached to them; e.g., PRN is the default printer device and COM1 or
AUX are the first serial port device names. From the programmer’s point of view, a
device is treated as a file and is operated on through the standard file I/O
functions, e.g.,
READ
WRITE
OPEN
and CLOSE, using the received file name.
The digital input and output ports on the YDI 150 use the device driver
I2CDRV.BIN. Once the driver is installed, the reserved file name “DIGI” is used to
access the I/O ports. To install the driver, include a DEVICE command with a path
to the I2CDRV.BIN file in your CONFIG.SYS file, e.g., DEVICE=D:\I2CDRV.BIN
Note:
If you are chaining control from CONFIG.SYS to HDCONF.SYS, make sure to
include the DEVICE statement in the HDCONF.SYS file instead.
Example:
The following line is added to CONFIG.SYS:
device=c:\util\i2cdrv.bin
Accessing the I/O Ports
The I/O ports are accessed by reading and writing ASCII-formatted control strings
to the port driver after opening the device file “DIGI” in binary mode. Any
programming language that can open, read and write to DOS files may ´be used,
e.g., C, Pascal, Basic…
5
The first character of the control string indicates the port type, whether an input,
output, dip switch, or relay port is addressed. The following characters indicate the
state of the individual I/O lines. Characters 2,3,4… represent the I/O lines
0,1,2… The string length is therefore defined by the number of individual I/O lines
in a port. The input and output ports have 8 I/O lines; the relay and dip switch
ports have 4 I/O lines.
I/O port identifiers: ASCII character “O”
ASCII character “I”
ASCII character “R”
ASCII character “D”
Lines status:
ASCII character “0”
ASCII character “1”
ASCII character “X”
(0x4F)
(0x49)
(0x52)
(0x52)
=
=
=
=
Digital Output port
Digital Input port
Relay output port
Dip switch input port
(0x30) = Logical 0
(031) = Logical 1
(0x58) = No change
Example:
To turn the first 2 relays on and leave the second 2 unchanged, the following string
would be written to the device file DIGI: “R11XX.”
Digital Output Port
The YDI 150 has an output port with 8 open-drain FET output lines. They are
internally connected to +5 volts via pull-up resistors. The output lines are set by
writing a control string to the device file “DIGI.” The control string consists of 9
characters: the output port identifier “0” and 8 characters representing the output
lines 0..7, which are encoded as follows:
Open-Drain Output Control
During execution of the WRITE function, the device driver modifies the control string
so that the “X” is replaced by the current output value.
ASCII character “0” (0×30) → FET is conducting; the output is tied to the
reference potential (0 volts)
ASCII character “1” (0×31) → FET is non-conducting; the output changes
to +5 volts without a load
ASCII character “X” (0×58) → No change. During execution of the WRITE
function, the device driver modifies the control
string so that the “X” is replaced by the current
output value.
Examples:
Say you want to set the FET at “Output line 5” to a conducting state, i.e., to
reference potential. Assume that all the output lines are initially non-conducting,
i.e., tied to +5V via the pull-up resistors. The following control string “OXXXXX0XX”
should be written to the device driver. After the write operation, the control string is
modified to “O11111011”.
6
Turbo-C:
int handle
char ctrl_str[10];
strcpy(ctrl_str,”OXXXXX0XX”);
handle=open (“digi”,O_WRONLY|O_BINARY);
write (handle,9,ctrl_str);
close(handle);
Turbo Pascal:
CONST O_Binary = True;
VAR
Ctrl_Str
:Array[0..8] of Char;
Handle
:File;
BEGIN
Ctrl_Str:="OXXXXX0XX”;
Assign(Handle, ´DIGI`);
ReSet(Handle,1);
DeviceMode(Handle,O_Binary);
BlockWrite(Handle,Ctrl_Str,9);
Close(Handle);
END.
(Does not open files in binary mode)
(See last page in this section for
function listing)
Quick Basic:
OPEN “DIGI” FOR BINARY AS #2
CTRL_STR$=“OXXXXX0XX”
PUT #2, , CTRL_STR$
CLOSE #2
Relay Output Port
The YDI 150 has a relay port with 4 single-pole double-through relays. The relays
are set by writing a control string to the device file “DIGI”. The control string consists
of 5 characters: the relay port identifier “R” and 4 characters representing the
individual relays 0..3, which are encoded as follows:
The desired position of the relay contacts must be coded in the following way:
7
ASCII character “0” (0×30)
→
Relay in ON position
ASCII character “1” (0×31)
→
Relay in OFF position
ASCII character “X” (0×58)
→
No change. During execution of the
“WRITE” function, the device driver
modifies the control string so that
an “X” is replaced with the current
output value.
Examples:
Say you want to switch the relays 1 and 2 to the ON position. Assume that all the
relays are initially in their OFF positions. The following control string “RX00X”
should be written to the device driver. After the write operation, the control string is
modified to “R1001”.
Turbo-C:
int handle
char ctrl_str[6];
strcpy(ctrl_str,”RX00X”);
handle=open (“digi”,O_WRONLY|O_BINARY);
write (handle,5,ctrl_str);
close(handle);
Turbo Pascal:
CONST O_Binary = True;
VAR
Ctrl_Str :Array[0..4] of Char;
Handle
:File;
BEGIN
Ctrl_Str:=´RX00X`;
Assign(Handle,´DIGI`);
ReSet(Handle,1);
DeviceMode(Handle,O_Binary);
BlockWrite(Handle,Ctrl_Str,5);
Close(Handle);
END.
(Does not open files in binary mode)
(See last page in this section for
function listing)
Quick Basic:
OPEN “DIGI” FOR BINARY AS #2
CTRL_STR$=“RX00X”
PUT #2, , CTRL_STR$
CLOSE #2
8
Digital Input Port
The YDI 150 has an input port with 8 TTL input lines. They are internally connected
to +5 volts via pull-up resistors. The input line settings are read from the device file
“DIGI” into a 9- character-long control string. The first character identifies the input
port and must be initialized to “I” before calling the read function. The remaining
8 characters representing the individual input lines 0..7 are returned as follows:
ASCII character “0” (0x30)
The input is short-circuited to the reference potential, or less than 0.8 volts are
applied to the input with respect to the reference potential.
ASCII character “1” (0x31)
The input is not connected, or more than 0.8 volts are applied to the input with
respect to the reference potential, or the input line was left open and set to +5 volts
through the internal pull-up resistors.
Examples:
Assume inputs 3, 4 and 5 are short-circuited to the reference potential. The other
inputs are not connected. After the read operation, the control string is modified to
“I11100011.”
Turbo-C:
int handle
char ctrl_str[10];
ctrl_str[0]=“I”;
handle=open (“digi”,O_RDONLY|O_BINARY);
read (handle,9,ctrl_str);
close(handle);
Turbo Pascal:
CONST O_Binary = True;
VAR
Ctrl_Str :Array[0..8] of Char;
Handle
:File;
BEGIN
Ctrl_Str[0]:="I”;
Assign(Handle,´DIGI`);
ReSet(Handle,1);
DeviceMode(Handle,O_Binary);
BlockRead(Handle,Ctrl_Str,9);
Close(Handle);
END.
9
(Does not open files in binary mode)
(See last page in this section for
function listing)
Quick Basic:
CTRL_STR$=“IXXXXXXXX”:
OPEN “DIGI” FOR BINARY AS #2
GET #2, 1, CTRL_STR$:
CLOSE #2
REM to predefine the string length
REM to read from position 1 in file
Dip Switch Port
The YDI 150 has an input port controlled by 4 internal dip switches located in the
base of the YDI 150. The dip switch settings are read from the device file “DIGI”
into a 5-character-long control string. The first character identifies the dip switch
port and must be initialized to “D” before calling the read function. The remaining
4 characters representing the individual dip switches 0..3 are returned as follows:
ASCII character “0” (0×30)
→
The DIP switch is closed to ground.
ASCII character “1” (0×31)
→
The DIP switch is left open.
Examples:
Assume switches 0 and 1 are closed and switch 2 and 3 are open. After the read
operation, the control string is modified to “D0011”.
Turbo-C:
int handle
char ctrl_str[6];
ctrl_str[0]=´D`;
handle=open (“digi”,O_RDONLY|O_BINARY);
read (handle,5,ctrl_str);
close(handle);
Turbo Pascal:
CONST O_Binary = True;
VAR
Ctrl_Str :Array[0..4] of Char;
Handle
:File;
BEGIN
Ctrl_Str[0]:=´D`;
Assign(Handle,´DIGI`);
ReSet(Handle,1);
DeviceMode(Handle,O_Binary);
BlockRead(Handle,Ctrl_Str,4);
Close(Handle);
END.
(Does not open files in binary mode)
(See last page in this section for
function listing)
10
Quick Basic:
CTRL_STR$=“DXXXX”:
OPEN “DIGI” FOR BINARY AS #2
GET #2, 1, CTRL_STR$:
CLOSE #2
REM to predefine the string length
REM to read from position 1 in file
Turbo Pascal “DeviceMode” Function
When a DOS character device is opened with the standard Turbo PASCAL open
functions (Reset, ReWrite or Append), there is no option to omit I/O filtering by
setting the device to binary mode. The remedy is to call DeviceMode after opening
the device. It makes a call to DOS function $44 (IOCTL) and sets the file passed in
“Handle” to binary mode if the variable “BinMode” is true. DeviceMode returns
TRUE if the mode change was successful.
Function DeviceMode(Var Handle: File; BinMode: Boolean):
Boolean;
VAR Regs: Registers;
(Uses DOS unit)
BEGIN
With Regs DO
BEGIN
AX:= $4400;
BX:= FileRec(Handle).Handle;
IF BX<>0
THEN BEGIN
(Continue if file handle is valid)
MsDos(Regs);
(Read current device settings)
IF (DX AND $0080)<>0
THEN BEGIN
(Only change mode if handle is a
AX:= $4401;
Character Device)
DH:= 0;
IF BinMode
THEN DL:= DL OR $20
(Set Binary mode)
ELSE DL:= DL AND $DF;
(Set character translation mode)
MsDos(Regs);
DeviceMode:= True;
END
ELSE DeviceMode:= False;
END
ELSE DeviceMode:= False;
END;
(with do)
END;
(DeviceMode)
11
The Serial Port Device Driver “SER150”
The serial port device driver “SER150” manages the input and output of data to or
from a serial interface port. This driver is embedded in the operating system (OS) as
an OS device driver. In addition, the driver can be used with the standard input
and output commands of your favorite compiler without requiring the DOS
application program interface (DOS-API). The “SER150” driver supports the
following features:
Different protocol modes (character and block orientation)
– free running (character by character)
– block terminated by special character
– block terminated by block length
– block terminated by timeout between characters
– SARTONET master/slave protocol (with special interface hardware)
Timeout check:
3 programmable values are available for the timeout:
– WRITE timeout
– READ timeout
– Block start timeout
Programmable transmission parameters:
– baud rate (110 baud to 38,400 baud)
– word length
– parity
– stop bits
Individual and automatic checking and setting of handshake lines:
– DTR (Data Terminal Ready)
– RTS (Request To Send)
– DSR (Data Set Ready)
– RI (Ring Indicator)
– CTS (Clear To Send)
– DCD (Data Carrier Detect)
– XON/XOFF protocol
The size of the input and output buffers is programmable.
Installation of the “SER150” Driver
To install the SER150 device driver on an MS-DOS computer, you must enter one of
the following lines in the CONFIG.SYS file in the root directory of your boot device
(usually this file is C:\CONFIG.SYS):
or
or
DEVICE=<path>\SER150.SYS <buffsize>
<port> <interrupt> <name>
DEVICE=<path>\SER150.SYS <name>
DEVICE=<path>\SER150.SYS
12
The parameters have the following meanings:
<path>
The full path for the directory that contains the SER150.SYS file
<buffsize>
The length of the input buffer in 16-byte paragraphs as a hexadecimal value;
e.g.:
800 = 8000 hex bytes = 32 KB
default: 80 = 800 hex bytes = 2 KB
<port>
The I/O address of the serial port you want to use as a hexadecimal value:
for COM1 use 3F8,
for COM2 use 2F8 and
for MUX use 300
default: 3F8 (COM1)
<interrupt>
The number of the interrupt that the serial port is using as a hexadecimal value:
for COM1 use 0C,
for COM2 use 0B and
for MUX use 0F
default: 0C (COM1)
<name>
The name you want to use to open the device driver. The name may be
up to 8 characters long.
Note:
Check to make sure that no other file or directory has the same name (the extension
does not matter). Otherwise, you will accidentally overwrite this file or directory,
and it will no longer be accessible;
e.g.: V24.
default (factory setting): V24SART.
The parameters <buffsize>, <port>, <interrupt> and <name> may be omitted.
In this case, the default value is used.
Example:
CONFIG.SYS:
FILES=20
BUFFERS=20
DEVICE=C:\DRIVERS\SER150.SYS 200 2F8 0B SER2
This CONFIG.SYS file installs the driver SER150.SYS that resides in directory
C:\DRIVERS. An input buffer of 2000 hex (= 8 K) is reserved. The COM2 serial
port is selected, and the name for the OPEN command is “SER2.”
13
Use of the SER150 Driver in an Application Program
Use the driver with the appropriate INT 21h command of the MS-DOS operating
system if you need to write assembler programs or if you use the I/O commands of
a higher level programming language (for example, “C” or “PASCAL”). The
following is an application example for a “C” compiler. If you use a different
compiler, refer to the corresponding manual or to the documentation of the MSDOS operating system for further details.
OPEN the Driver
Before you transmit characters, you must open the device driver with the OPEN
function, e.g.:
void main(void)
{
int v24_handle;
v24_handle = open(“ser1”,O_RDWR | O_BINARY);
/* open for READ and WRITE in
BINARY mode */
if (v24_handle == -1)
{
printf(“Error at OPEN of device ser1\n”);
exit(9); /* error-exit */
}
else
/* Ok, no error during open */
.
.
.
}
With the programming language “C,” you must store a numeric value (2-byte)
for “handle” which is returned by the OPEN function because all I/O functions
refer to this value.
14
WRITE Command (Send Data)
You can use the WRITE function to send characters via the serial interface.
The character string will be sent as an unmodified string (no end-of-block characters
are added). Only the SARTONET protocol mode adds the necessary protocol
headers and trailers to the string. If you have activated the check function for the
modem lines, the SER150 driver will check the lines before every character
transmission and will also check the timeouts. If a timeout occurs, the transmission is
aborted. For this reason, you should check the number of transferred characters that
are returned by the WRITE function.
The following is an example of a function that transmits a string and checks
the results:
int writestring(int v24_handle, char *output)
{
int len = strlen(output);
if ( write(v24_handle, output, len) == len )
return OK;
else
return NOT_OK;
}
15
With the SARTONET master protocol selected, the first byte of the output data is not
sent; rather, it defines the address of the SARTONET slave that should receive the
data. If the WRITE command returns “0 characters sent,” the slave was not
connected. If the WRITE command returns “1 character sent,” the slave responded
but was unable to receive data (receive buffer full).
Example:
int writestring_master(int v24_handle,
int adress, char *output)
{
char buffer[300];
int len = strlen(output);
int status;
buffer[0] = adress;
strcpy(buffer+1, output);
status = write(v24_handle, buffer, len+1)
if (status == 0)
printf(“Slave not connected\n”);
if(status == 1)
printf(“Slave is busy\n”);
if (status == len+1 )
return OK;
else
return NOT_OK;
}
16
READ Command (Receive Data)
Use the READ function to receive characters from the serial port. The character
block remains unchanged during transfer and includes an end-of-block character.
With the READ command, the maximum number of characters to be read is
specified, but the SER150 driver sends only the characters up to the end of the
current block being transferred. If the READ function reads less than the number of
characters in the block, the remaining characters are stored and can be read with
the next READ command. You can program the SER150 driver to recognize the
end of a block by:
– an end-of-block character
– a timeout between two characters
– a fixed block length
– the SARTONET protocol
For example, the following function reads an ASCII “NUL”-terminated string of
a given maximum length:
int readstring(int v24_handle, char *input,
int maxlen)
{
int len;
len = read(v24_handle, input, maxlen);
if (len == -1)
{
printf(“Read error at device SER1\n”);
return NOT_OK;
}
if (len == 0)
{
printf(“No data at device SER1\n”);
return NOT_OK;
}
input[len] = 0; /* terminate string (for C) */
return OK;
}
17
With the SARTONET master protocol mode selected, you must set the first byte of
the input string to the desired SARTONET slave address before activating the READ
function. The READ function returns “0 characters read” if the SARTONET slave
does not respond within 50 milliseconds. The READ function returns “1 character
read” if the slave responds but has no data available. After a successful reading
with the READ function, the first byte of the input buffer contains the SARTONET
slave address.
I/O Control WRITE Command
The I/O control (IOCTL) WRITE command is used to program the characteristics
and the transmission parameters. All settings you make will remain valid even after
closing the device driver file. Because the IOCTL WRITE command is not supported
by the standard MS-DOS device drivers, compilers that are unable to support this
command may exist.
The compiler must be able to support function 44h/subfunction 03h of the interrupt
21h. Otherwise, use the V24_SET program to set the parameters for the device
driver (see the section entitled “The V24_SET Program”). The C function description
refers to the following data structure:
#define
#define
#define
#define
#define
#define
#define
#define
#define
#define
#define
#define
#define
#define
#define
#define
#define
#define
#define
#define
#define
#define
#define
#define
#define
#define
#define
#define
#define
#define
#define
#define
IOCTL_READ
IOCTL_WRITE
IOCTL_INSTAT
IOCTL_OUTSTAT
STOPBIT_1
STOPBIT_2
WORDLEN_5
WORDLEN_6
WORDLEN_7
WORDLEN_8
PAR_EVEN
PAR_ODD
PAR_ZERO
PAR_NONE
BAUD_110
BAUD_150
BAUD_300
BAUD_600
BAUD_1200
BAUD_2400
BAUD_4800
BAUD_9600
BAUD_19200
BAUD_38400
CONTROL_RTS
CONTROL_DTR
CHECK_XONXOFF
CHECK_CTS
CHECK_DSR
CHECK_RI
CHECK_CD
MODE_FREERUN
2
3
6
7
0x0000
0x0001
0x0000
0x0002
0x0004
0x0006
0x0000
0x0008
0x0010
0x0018
0x0000
0x0020
0x0040
0x0060
0x0080
0x00a0
0x00c0
0x00e0
0x0100
0x0120
0x0400
0x0800
0x0200
0x1000
0x2000
0x4000
0x8000
0
18
19
#define
#define
#define
#define
#define
MODE_ENDCHAR
MODE_BLOCKLEN
MODE_TIMEOUT
MODE_SNETSLAVE
MODE_SNETMASTER
1
2
3
4
5
#define
#define
#define
#define
#define
#define
#define
#define
#define
#define
#define
#define
#define
#define
#define
#define
#define
#define
#define
#define
#define
#define
#define
#define
#define
#define
ERR_OVERRUN
ERR_PARITY
ERR_FRAMING
ERR_OVERFLOW
ERR_SENDTIME
ERR_RECTIME
ERR_WAITTIME
ERR_BLKCHECK
STAT_OUTBUFF2
STAT_OUTBUFF1
STAT_INBLOCK
STAT_INBUFFER
STAT_CTS
STAT_DSR
STAT_RI
STAT_DCD
MOUNT
PURGE
SET_PROTOCOL
FLUSH_INPUT
FLUSH_OUTPUT1
FLUSH_OUTPUT2
FLUSH_ALL
SET_UARTLINE
WRITE_BUFFER2
CHANGE_UART
0x0001
0x0002
0x0004
0x0008
0x0010
0x0020
0x0040
0x0080
0x0100
0x0200
0x0400
0x0800
0x1000
0x2000
0x4000
0x8000
0
1
2
3
4
5
6
7
8
9
struct
{
}
io_control
unsigned
unsigned
unsigned
unsigned
unsigned
unsigned
unsigned
unsigned
unsigned
unsigned
unsigned
unsigned
unsigned
unsigned
io_ctrl;
struct s_setline {
unsigned
unsigned
unsigned
unsigned
}
setline;
int
int
int
int
char
char
int
int
int
long
long
long
char
char
dev_status;
dev_len;
dev_bgn;
dev_prm;
protmode;
protmode_2;
endvalue;
obuff_size;
uartset;
timea;
timeb;
timec;
xon_char;
xoff_char;
int
int
int
int
func;
rts;
dtr;
tx_break;
struct s_write_2nd_buff {
unsigned int
char
} buff2;
typedef struct s_change_uart
unsigned int
unsigned int
unsigned char
}
t_change_uart;
int
func;
data[20];
{
func;
port;
int_number;
fh;
20
void main(void)
{
int end;
int error;
int status;
char buffer[100];
fh = open(“V24”,O_RDWR | O_BINARY);
io_ctrl.dev_status = SET_PROTOCOL;
io_ctrl.timea = 50000L;
/* 50 millisecond */
io_ctrl.timeb = 1000000L;
/* 1 second
*/
io_ctrl.timec = 10000000L; /* 10 seconds */
io_ctrl.uartset =
BAUD_9600 | STOPBIT_1 | WORDLEN_7 |
PAR_EVEN;
io_ctrl.protmode= MODE_ENDCHAR;
io_ctrl.endvalue= 10;
/* Block
terminator =
LineFeed */
status = ioctl(fh,IOCTL_WRITE,&io_ctrl,
sizeof(io_ctrl));
printf(“\nIOCTL returns: %d\n”,status);
close(fh);
}
The example program shown sets the protocol parameters of the SER150 driver.
All available IOCTL WRITE commands are documented in the following sections.
The required function is defined in the first 2-byte integer field “dev_status” of
the “io_ctrl” C-language format.
21
Function 0: MOUNT Memory for Input Buffer
With the MS-DOS operating system, the size and location of the input buffer is
defined during the boot process in the “CONFIG.SYS” file. However, you can use
function 0 to relocate the buffer. For this purpose, the function needs the following
information in the “io_ctrl” C-language format:
dev_status
2-byte integer
0 defines function 0 (mount)
dev_len
2-byte integer
Buffer length in paragraphs (16 bytes)
dev_bgn
2-byte integer
Buffer start segment in paragraphs (16 bytes)
dev_prm
2-byte integer
Input buffer size used. This field is only important if you read
the IOCTL information with the IOCTL READ command.
Except with SARTONET, this value is equal to dev_len.
With SARTONET, the value is lowered by the amount of
memory that is used for the output buffer.
All other parameters are not recognized by function 0.
Function 1: PURGE Memory for Input Buffer
You can also use this command in the MS-DOS environment, but it will not
deallocate the buffer memory. The program itself must deallocate the input buffer
memory. The only commands that are available without a mounted buffer are
OPEN, CLOSE, IOCTL WRITE and IOCTL READ.
dev_status
2-byte integer
1 defines function 1 (purge)
All other parameters are not recognized by function 1.
22
Function 2: SET PROTOCOL Parameters
This function is used by the “V24_SET” program and can also be accessed from
your application program to control the operating parameters of the SER150
driver. You can set the baud rate, character format, end-of-block characters and
timeout values.
The parameters used are:
23
dev_status
2-byte integer
2 defines function 2 (set_protocol)
dev_len
2-byte integer
Not used with function 2
dev_bgn
2-byte integer
Not used with function 2
dev_prm
2-byte integer
Not used with function 2
protmode
1-byte integer
Defines the protocol mode for the driver:
0 Free running: blocks are not terminated
1 End character: blocks are terminated by an end
character (see “endvalue”)
2 Block length: blocks are of a fixed length (see “endvalue”)
3 Timeout: blocks are terminated by ‘timeb’, defined as
the timeout variable, after the last character
4 SARTONET slave: the driver acts as a SARTONET
slave device
5 SARTONET master: the driver acts as a SARTONET
master device
protmode_2
1-byte integer
SARTONET address for the SARTONET slave
endvalue
2-byte integer
For protocol mode 1: ASCII value of end-of-block character
For protocol mode 2: Fixed length of the incoming blocks
For protocol mode 4: Length of output buffer #2 in bytes
obuff_size
2-byte integer
Length of output buffer in bytes. If this length is not “0,” the
WRITE command will not wait until characters are written;
instead, it will immediately return a parameter. For the
SARTONET protocol mode a buffer must be defined. In the
SARTONET mode, “obuff_size” also defines the maximum
length of input data.
Important Note:
You must ensure that sufficient buffer memory is MOUNTed to the driver to hold all
of the I/O buffers. Compute this value as follows:
– required buffer [bytes]= 2 * obuff_size + endvalue + 16 (SARTONET mode)
or
– required buffer [bytes] = obuff_size + 16 (for all other protocol modes)
If there is not enough buffer memory space, the IOCTL WRITE command returns the
value for “0 transmitted characters.”
uartset
Bit 0:
Bit 1-2:
Bit 3-4:
Bit 5-8:
Bit 9:
2-byte integer
Stop bits
0
= 1 stop bit
1
= 2 stop bits
Word length
00
= 5 bits
01
= 6 bits
10
= 7 bits
11
= 8 bits
Parity
00
= even parity
01
= odd parity
10
= zero parity
11
= no parity
Baud rate (110..38,400) *
0000
= 110 bits/s
0001
= 150 bits/s
0010
= 300 bits/s
0011
= 600 bits/s
0100
= 1,200 bits/s
0101
= 2,400 bits/s
0110
= 4,800 bits/s
0111
= 9,600 bits/s
1000
= 19,200 bits/s
1001
= 38,400 bits/s
XON/XOFF protocol
0
= disable
1
= enable XON / XOFF
* = The V24_SART driver software supports a transmission speed up to
38,400 bits/s. However, not all hardware is able to respond fast enough
to receive data at all speeds without overrun errors.
24
25
Bit 10:
RTS control
0
1
Bit 11:
DTR control
0
1
Bit 12:
CTS check
0
1
Bit 13:
DSR check
0
1
Bit 14:
RI check
0
1
Bit 15:
CD check
0
1
= no RTS control
= RTS line control is set before
transmission and reset to 0
afterwards
= no DTR control
= DTR line control is set if more than
16 bytes are available in the
input buffer, and is reset if less
than 16 bytes are available in
the input buffer
= no CTS line check
= CTS line check before
transmission
= no DSR line check
= DSR line check before
transmission
= no RI line check
= RI line check before
transmission
= no CD line check
= CD line check before
transmission
timea
4-byte-long integer
Timeout during sending of data in microseconds.
(The resolution of the timer is 1 millisecond.)
timeb
4-byte-long integer
Timeout occurred when a block was received as measured from
the start of the block (first character) to the end of the block.
In protocol mode 3 (timeout), this value defines the timeout
between two characters which terminates the block.
timec
4-byte-long integer
Timeout occurred during a READ command (from the start of a
READ command to the arrival of the first character of the block)
xon_char
1-byte integer
ASCII code of the character that is used as the XON character for
the XON/XOFF protocol
xoff_char 1-byte integer
ASCII code of the character that is used as the XOFF character for
the XON/XOFF protocol
Important Note:
SARTONET Transmission Parameters
Basically, it is possible to combine protocol modes 4 and 5 (SARTONET) with each
of the supported transmission parameters. However, please keep in mind that the
driver will not work with other SARTONET devices unless they have the following
parameter settings:
io_ctrl.timea = 50000L;
/* 50 millisecond */
io_ctrl.timeb = 1000000L; /* 1 second
*/
io_ctrl.uartset =
BAUD_9600 | STOPBIT_1 | WORDLEN_7 | PAR_EVEN;
Function 3: FLUSH INPUT Buffer
Function 3 is used to flush the input buffer. This function deletes all blocks that are
stored in the input buffer.
Function 4: FLUSH OUTPUT1 Buffer
Function 4 clears the output buffer #1. This function can only be used if the output
buffer has been defined.
In the SARTONET protocol mode, this command is not executed if transmission of
the buffer contents has already started.
Function 5: FLUSH OUTPUT2 Buffer
Function 5 clears the output buffer #2. This buffer is only available in the
SARTONET mode. The command is not executed if transmission of the buffer
contents has already started.
Function 6: FLUSH ALL Buffers
The FLUSH ALL function is a combination of functions 3, 4, 5 and 6. You can erase
all I/O data with this single command.
26
Function 7: SET UART-LINES
With function 7, you can set the UART lines manually. If you have chosen DTR
control or RTS control in the “uartset” variables with function 2 “SET PROTOCOL,”
the value that you set with SET UART-LINES will be overwritten during the next READ
or WRITE command.
Important Note:
If you set the DTR line manually with the device driver in the SARTONET mode, the
SARTONET protocol will be disrupted or, in the worst case, the line driver chips will
be destroyed.
Function 7 uses a different control format:
struct s_setline {
unsigned int
unsigned int
unsigned int
unsigned int
}
setline;
func;
rts;
dtr;
tx_break;
void main(void)
{
fh = open(“V24”,O_RDWR | O_BINARY);
....
setline.func =
SET_UARTLINE;
setline.rts =
1;
setline.dtr =
1;
setline.tx_break =
1;
ioctl(fh,IOCTL_WRITE,&setline,
sizeof(setline));
....
}
The fields of “setline” have the following meanings:
27
func
2-byte integer
7 defines function 7 (SET UART-LINES).
rts
2-byte integer
0 set “Request To Send” line (RTS) to 0
1 set RTS to 1
2 leave RTS unchanged
dtr
2-byte integer
0 set “Data Terminal Ready” (DTR) to 0
1 set DTR to 1
2 leave DTR unchanged
tx_break
2-byte integer
0 set “Transmit line” (Tx) to 0 (break condition)
1 set Tx to 1 (standard setting without transmission)
2 leave Tx unchanged
Function 8: WRITE BUFFER 2
This function is used in the SARTONET slave mode to write data in the output buffer
#2. This buffer has a higher priority than output buffer #1. The buffer is written with
the standard WRITE function. The WRITE BUFFER 2 command is executed if the
output buffer #1 already contains data that has not yet been transmitted to
the SARTONET master. For this reason, the data of output buffer #2 are first sent
to the SARTONET master. The example shows a function that writes a character
string in buffer #2:
struct s_write_2nd_buff {
unsigned int
char
} buff2;
func;
data[20];
int writestring_buffer2(int v24_handle,
char *output)
{
int status;
int len=strlen(output);
buff2.func = WRITE_BUFFER2 ;
strcpy(buff2.data,output);
status = ioctl(fh,IOCTL_WRITE,&buff2,
len+2 );
return status;
}
The IOCTL WRITE command returns “0” if buffer #2 is already in use.
28
Function 9: Change UART
This function is only applicable under the MS-DOS operating system. It allows
a change in the UART address without changing the “device=....” line in the
CONFIG.SYS file.
typedef struct s_change_uart
unsigned int
unsigned int
unsigned char
}
t_change_uart;
{
func;
port;
int_number;
t_change_uart change_uart;
void main(void)
{
fh = open(“V24”, O_RDWR | _BINARY);
.
.
change_uart.func = CHANGE_UART;
change_uart.port = 0x2f8;
/* COM2 port
adress */
change_uart.int_number = 0xb; /* COM2
interrupt
number */
ioctl(fh,IOCTL_WRITE, &change_uart,
sizeof(change_uart));
}
29
Function 10: Set MUX Channel
This function only works with the “MUX” ports M1 to M3 of the YDI150 (address
0x300, interrupt 0xF). It is used to switch back and forth among the three channels
of the UART.
Example:
/* definition area of the program.*/
...
...
...
struct { int set_chan_func;
int muxport;
}set_chan;
...
...
...
/* code area of the program */
...
...
...
set_chan.set_chan_func=10; /* function - no */
set_chan.muxport=port; /* allowed: 1...3 */
ioctl ( handle,IOCTL_WRITE,&set_chan,
sizeof(set_chan));
...
...
...
I/O Control READ Command
The IOCTL READ command allows you to read the current status of the SER150
driver. You can read all of the information in the “io_ctrl” C-language convention as
described in the sections “MOUNT buffer” on page 22 and “SET PROTOCOL”
on page 23. You can read all or only part of the information. Nearly all readable
information has usually been set by your application program. For this reason,
it is not really necessary to always read the information except for the first
two bytes. The first two bytes indicate the actual status of the device driver in the
“dev_status” field.
30
The first byte in the “dev_status” field is reset to “0” after every IOCTL READ and
receives the error status. The 2nd byte is updated during every IOCTL READ
command and contains general status information:
dev_status
2-byte integer
Bit 0:
overrun error
Bit 1:
parity error
Bit 2:
framing error
Bit 3:
buffer overflow error
Bit 4:
send timeout (timea)
Bit 5:
receive timeout (timeb)
Bit 6:
wait timeout (timec)
Bit 7:
block check error (SARTONET modes)
Bit 8:
Bit 9:
Bit 10:
Bit 11:
Bit 12:
Bit 13:
Bit 14:
Bit 15:
output buffer #2 in use
output buffer #2 in use
data available in current (unterminated) input block
terminated data block available in input buffer
status of Clear To Send (CTS) line
status of Data Set Ready (DSR) line
status of Ring Indicator (RI) line
status of Data Carrier Detect (DCD) line
The following program example shows two functions that use IOCTL READ. The first
function reads the complete protocol setting; the second function returns the error
status (“0” if no error occurred).
read_protocol_settings(int v24_handle,
struct io_control *io_ctrl)
{
ioctl(v24_handle,IOCTL_READ,
io_ctrl,sizeof(struct io_control));
}
int read_status(int v24_handle)
{
char status;
ioctl(v24_handle,IOCTL_READ,&status,1);
return status;
}
31
The V24_SET Program
The V24_SET.EXE program can be used to set the transmission parameters of the
device driver with an MS-DOS command line (e.g., in a batch file) without having
to activate the IOCTL function within an application. There are three different forms
of settings possible:
SARTONET MASTER Settings
To set the interface port as a SARTONET master, use the following command:
V24_SET name SNET_MASTER [OBUF=len]
name
gives the name of the MS-DOS device driver
len
gives the length of the SARTONET output and input buffers
(default setting is 256 bytes)
SARTONET SLAVE Settings
To set the interface port as a SARTONET slave, use the following command:
V24_SET name SNET_SLAVE=addr [tc]
name
gives the name of the MS-DOS device driver
addr
gives the SARTONET slave address (0..31)
tc
“timec” receive timeout in milliseconds
32
All Other Protocol Settings
To operate the interface port with another protocol mode, use the following
command:
V24_SET name baud parity wordlen stopbit
ta tb tc mode [ctl]
name
gives the name of the MS-DOS driver
baud
baud rate (110;150;300;600;1,200;2,400;4,800;9,600;
19,200;38,400 baud)
parity
parity, O = odd, E = even, Z = zero, N = none
wordlen
word length (5 to 8 bits)
stopbit
number of stop bits (1 to 2 bits)
ta
“timer a” send timeout in milliseconds
tb
“timer b” end of block receive timeout in milliseconds
tc
“timer c” start of block receive timeout in milliseconds
mode
gives the block transfer mode:
ctl
NONE
no block transfer
CHAR=ccc
ccc is the end-of-block character
TIMEOUT
block terminated by timeout “tb” between
two characters
LEN=len
block has a fixed length of len
control parameters:
RI, CTS, DSR, CD, RTS, DTR enable checking/control of the
handshake lines XON=ccc, XOFF=ccc sets XON/XOFF
for software handshake OBUF=len sets the length “len” of an
output buffer
The following example enables driver “ser2” with 9,600 baud, hardware
handshake and blocks terminated by LF (0Ahex):
V24_SET SER2 9600 E 7 1 800 1000 1000 CHAR=/0x0a
DTR RTS CTS
33
Sartorius Software License Agreement
The terms of this Agreement governing the use of Sartorius software by you, the
end user (also referred to hereinafter as “the LICENSEE”), are described below.
By opening this sealed disk package and by signing the registration card, you are
agreeing to become bound by the terms of this Agreement.
For this reason, please read the following text carefully in its entirety.
If you do not agree to the terms of this Agreement, do not open the disk package.
In this case, promptly return the unopened disk package and any other items
(including all written materials, hardware supplied along with the software and the
packaging) which are part of this product to the place where you obtained them
for a full refund.
Sartorius software license
1. Subject Matter of the Agreement
1. The subject matter of this Agreement is the data medium (floppy disk) containing
the computer program, the user’s manual and the accompanying written
material. In the following, these will also be referred to as “the SOFTWARE.”
Sartorius hereby calls your attention to the fact that, based on the present state of
the art, it is impossible to produce computer software which will operate without
error for all applications and in all combinations. The subject matter of the
Agreement is thus only a software program which can be used in principle as
described in the user’s manual.
2. Extent of Use
2. For the term of the Agreement, Sartorius grants you a nonexclusive right
(hereinafter the “LICENSE”) to use and display this copy of a Sartorius software
program on a single computer (i.e., with a single CPU) at a single location. If
you would like to use the SOFTWARE on a single computer which is a multiuser
system, please contact your Sartorius dealer or office about applying for a
multiuser license. As the LICENSEE, you may physically transfer the SOFTWARE
(i.e., stored on a data medium) from one computer to another provided that the
SOFTWARE is used on only one computer at a time.
More extensive use is not permitted.
3. Special Restrictions
3. The LICENSEE is prohibited from:
a) giving the SOFTWARE, or the accompanying written material, to a third
party, or making the SOFTWARE available in any way to a third party,
without the prior written consent of Sartorius;
. b) transferring the SOFTWARE from one computer to another via a network or
a data transmission channel;
34
. c) modifying, reverse engineering, or de-assembling the SOFTWARE without the
prior written consent of Sartorius;
. d) creating derivative works based on the SOFTWARE, or copying the written
materials;
. e) changing the SOFTWARE, or creating derivative works based on the written
materials.
4. Ownership of Software
By purchasing the product, you have obtained ownership only of the physical
data medium on which the SOFTWARE has been recorded. This does not
constitute the purchase of rights to the SOFTWARE itself. In particular, Sartorius
retains title to the SOFTWARE and all rights with respect to the publication,
copying, processing and usage of the SOFTWARE.
5. Copy Restrictions
The SOFTWARE and the accompanying written material are copyrighted. If the
SOFTWARE is not copy-protected, you are permitted to make a single working
copy for backup purposes. The removal of copyright symbols or registration
numbers from the SOFTWARE is prohibited.
It is expressly forbidden to copy, or duplicate in any other manner, either in
whole or in part, the original SOFTWARE, any altered form of the SOFTWARE,
or the written material – or any of these in combination with other software or
incorportated in other software.
6. Transfer of the Right to Use
The LICENSEE’s right to use the SOFTWARE can be transferred to a third party
only with the prior written consent of Sartorius; such transfer shall be bound by
the terms of this Agreement.
Giving the SOFTWARE away, as well as renting or leasing it to third parties, is
expressly forbidden.
7. Term of the Agreement
This LICENSE is effective until terminated.
This LICENSE will terminate automatically without notice from Sartorius
if you fail to comply with any provision of this LICENSE. Upon termination,
you shall destroy the written materials and all copies of the SOFTWARE,
including modified copies, if any.
8. Compensation for Damages in the Event of Breach of Contract
Sartorius draws your attention to the fact that you are liable for all damages
resulting from copyright violations which are incurred by Sartorius through
violation of the provisions of this Agreement by you.
35
9. Modifications and Updates
Sartorius is entitled to create updated versions of the SOFTWARE
at its own discretion.
10. Warranty and Liability of Sartorius
a) Sartorius warrants to their original LICENSEE that, at the time the
SOFTWARE is furnished to the LICENSEE, the data medium (floppy disk) on
which the SOFTWARE has been recorded and the hardware supplied
along with the SOFTWARE are free from defects in materials and
workmanship under normal use and service.
10. b) If the data medium (floppy disk) or the hardware supplied along with the
SOFTWARE is defective, the purchaser is entitled to demand a
replacement during the warranty period. To obtain this replacement, he or
she must return the floppy disk, any hardware which may have been
supplied along with the SOFTWARE, the working copy, the written material
and a copy of the bill to Sartorius or to the dealer from whom he or she
bought the product.
10. c) For the reasons explained under provision 1, Sartorius shall not assume
any liability for the SOFTWARE being free from defects. In particular,
Sartorius provides no guarantee that the SOFTWARE will satisfy the
requirements or objectives of the purchaser or that it will function in
connection with other programs selected by the purchaser. The purchaser
shall bear the responsibility for the correct choice of software as well as for
the consequences of using this SOFTWARE; he or she shall also be
responsible for the results intended or actually obtained. The same applies
to the written material accompanying the SOFTWARE.
10. d) Sartorius is not liable for damages, unless such damages have been
caused by deliberate or gross negligence on the part of Sartorius.
Any liability for characteristics expressly warranted by Sartorius remains
unaffected. Any liability for consequential damages resulting from defects
which are not covered by the express warranty is excluded.
36
Legal Notice
Important Information for the Purchaser and User of the Software
Program Hereunder
The purchaser and/or acquirer of the software program hereunder hereby
recognizes the fact that this program is subject to ownership, copyright, patent and
other protected rights and that he or she will not at any time acquire any of these
aforementioned rights by purchasing or using the program hereunder.
The entire program, as well as parts of the program or the user’s manual entitled
“Port Drivers for YDI 150 Data Input Terminals,” may not be reproduced or copied,
except for the purposes of making a backup disk. The said purchaser and/or
acquirer may use the program only for his or her own purposes; he or she may not
make it available to third parties, either for a fee or free of charge. By using and
operating the program, the purchaser/acquirer acknowledges the Sartorius
License Agreement enclosed with the original program.
37
Sartorius AG
b 37070 Goettingen, Germany
p Weender Landstrasse 94–108, 37075 Goettingen, Germany
t (+49/551) 308-0, f (+49/551) 308-32 89
Internet: http://www.sartorius.com
Copyright by Sartorius AG, Goettingen, Germany.
All rights reserved. No part of this publication
may be reprinted or translated in any form or by any means
without the prior written permission of Sartorius AG.
The status of the information, specifications and
illustrations in this manual is indicated by the date
given below. Sartorius AG reserves the right to
make changes to the technology, features,
specifications and design of the equipment
without notice.
Status: April 1993, Sartorius AG, Goettingen, Germany
Printed in Germany on paper that has been bleached without any use of chlorine · W1A130 · KT
Publication No.: WYD6046-t93041


