1
USER MANUAL
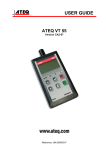
ATEQ VT 55
Version CA1-01
Reference: UM-28500B-U
REVISION OF THE ATEQ VT55 MANUAL
Edition/
Revision
Reference
Date
(week/year)
Chapters updated
First edition
UM-28500A-U
23/2007
-----
Second edition
UM-28500B-U
37/2007
Modification of the VT55 front face.
0723/CE-28500A-U
DECLARATION OF
CONFORMITY 00
We the undersigned, ATEQ, manufacturers of the ATEQ VT55 REF : 285.00 declare that it
complies with the requirements of :
- LOW VOLTAGE Directive 93/68/CEE regarding :
•
standard EN 61 010-1 « Safety requirements for electrical equipment for
measurement, control and laboratory use »,
- Directive CEM 89/336/CEE partially modified by Directive CEM 92/31/CEE regarding :
•
•
•
•
standard EN 50 081-2 « Industrial environment emission generic standard »,
except in the 95 MHz to 140 MHz range.
standard EN 50 082-2 « Industrial environment immunity generic standard »,
standard EN 61 000-4-2 « Test for immunity to electrostatic discharges »,
standard EN 61 000-4-3 « Test for immunity to electromagnetic fields radiated at
radio frequencies »,
This enables ATEQ to guarantee that this instrument may be used in complete safety under
the following environmental conditions :
•
•
•
•
•
indoor use,
altitude up to 3000 metres,
ambient operating temperature from 5°C to 45 °C,
70 % maximum relative humidity without condensation,
degree of pollution 2 as in CEI 664 (only non-conductive pollution. However a
temporary conductivity caused by condensation may occasionally be expected ).
Chairman and Managing Director.
Mr. Jacques MOUCHET
Tél. : +33 (0) 1 30 80 10 20 - Fax : +33 (0) 1 30 54 11 00
15, rue des Dames - 78340 LES CLAYES SOUS BOIS – France
www.ateq.com
PREFACE
Dear Customer,
You have just purchased an ATEQ instrument, we thank you for the trust you have
placed on our brand. This instrument has been designed to ensure a long and
unparalleled life expectancy, and we are convinced that it will give you complete
satisfaction during many long years of operation.
In order to maximise the life expectancy and reliability of your ATEQ instrument, we
recommend that you install this instrument on a secured workbench and advise you to
consult this manual in order to familiarise yourself with the functions and capabilities of
the instrument.
Our ATEQ After Sales Service centre can give you recommendations based on your
specific operation requirements.
ATEQ
0650/PREFd-U
Table of contents
TABLE OF CONTENTS
User guide
VT55
1. VT55 DESCRIPTION ...........................................................................................................................3
1.1. Front face .....................................................................................................................................3
1.2. Connectors ...................................................................................................................................4
1.3. Power Supply connector ..............................................................................................................4
1.4. USB connector .............................................................................................................................4
1.5. RS232 connector .........................................................................................................................4
2. LIGHT INDICATORS ...........................................................................................................................5
3. KEYS....................................................................................................................................................6
3.1. Power on key................................................................................................................................6
3.2. Power off key................................................................................................................................7
3.3. Cycle key......................................................................................................................................7
3.4. Navigations keys ..........................................................................................................................8
3.5. Validation key ...............................................................................................................................8
3.6. Key Pad summary........................................................................................................................8
4. TESTING A TPM VALVE.....................................................................................................................9
4.1. Launch a test................................................................................................................................9
4.2. Results explanation....................................................................................................................10
4.3. No valve response .....................................................................................................................10
5. TESTING A REMOTE KEYLESS ENTRY.........................................................................................11
6. SETTING ADJUSTMENT FOR VT55................................................................................................12
7. PARAMETERS SETTING..................................................................................................................13
7.1. Pressure unit ..............................................................................................................................13
7.2. Buzzer ........................................................................................................................................14
7.3. Back light....................................................................................................................................15
7.4. Stand by parameter....................................................................................................................16
7.5. Zone ...........................................................................................................................................17
8. FEATURES ........................................................................................................................................18
8.1. Radio frequencies ......................................................................................................................18
8.2. Type of valve ..............................................................................................................................18
9. PROGRAM AND DRIVERS INSTALLATION ...................................................................................19
9.1. RS232 connection......................................................................................................................19
9.2. USB connection..........................................................................................................................21
10. PROGRAM USE ..............................................................................................................................23
Appendices
ATEQ VT55
1. TECHNICAL CHARACTERISTICS ...................................................................................................27
2. SECURITY, CARE AND RECYCLING..............................................................................................28
2.1. Security ......................................................................................................................................28
2.2. Care and maintenance...............................................................................................................29
2.3. Certification information (sar) .....................................................................................................29
2.4. Safety informations ....................................................................................................................30
2.5. Recycling....................................................................................................................................31
Index
UM-28500B-U
33
User manual ATEQ VT55 Page 1/34
Table of contents
UM-28500B-U
User manual ATEQ VT55 Page 2/34
User guide
User guide
VT55
See appendices for the security, care, maintenance and
recycling information.
1. VT55 DESCRIPTION
The purpose of the VT55 is to:
• Test the RKE signal strength
• Retrieve data from the tire pressure sensor.
• Verify the identities of each tire pressure sensor mounted on vehicle wheels
• Assist a technician to reset TPM system on vehicle.
The instrument interacts with the tire pressure sensor without contact through wireless
communication.
1.1. FRONT FACE
Antenna
Lights
indicators
Keypad
LCD
display
UM-28500B-U
User manual ATEQ VT55 Page 3/34
User guide
1.2. CONNECTORS
USB
connector
24 V DC
supply
connector
RS232
connector
1.3. POWER SUPPLY CONNECTOR
Power supply connection to the tool for charging the internal battery.
The voltage of the charger is a 24 V DC.
1.4. USB CONNECTOR
The USB connector allows software updates to be installed onto the
tool.
1.5. RS232 CONNECTOR
The RS232 connector allows software updates to be installed onto the
tool. Not typically used.
UM-28500B-U
User manual ATEQ VT55 Page 4/34
User guide
2. LIGHT INDICATORS
Four lights indicate the status of the instrument and the
results of the measurement.
CHRYSLER
00103399
32 PSI
70°F
BAT:OK
READY
They are placed under the LCD display.
Low Batt
Low Bat
Pass
Low Bat
Pass
Low Bat
Low Bat
Fail
Fail
Pass
Pass
Tx
Tx
Fail
Fail
Tx
Tx
Low Bat
Pass
Fail
Tx
Battery level light: When this light is
on the battery level is low.
Connect the power supply to charge
the battery.
Pass
Pass test light: When this light is on
the tool has correctly received the
information from the valve or the
remote keyless entry unit.
Fail
Fail test light: When this light is on the
tool has not received the information
from the valve or the remote keyless
entry unit.
Tx
Transmission light: When this light is
flashing the tool is currently transmitting
a signal to activate a valve.
Note: light may illuminate continuously
and will not always flash.
Charge indicator on the bottom of the front face:
Charge
Charge
UM-28500B-U
Battery charging light: When this light is on in red the power supply
is currently charging the tool.
When this light goes to green the tool battery is filled.
User manual ATEQ VT55 Page 5/34
User guide
3. KEYS
3.1. POWER ON KEY
KEY
FUNCTION
First function: Power on: starts the instrument, press the I key
to power on the tool.
Second function: Indicates the battery level. Press and hold to
see the battery status
3.1.1. First function
At power on, it displays the ATEQ logo.
Then it displays the software revision number.
And after it displays the main menu.
ATEQ VT55
Version CA1.01
MAIN MENU
>VEHICLE SELECTION
RKE TEST
SETTINGS
3.1.2. Second function
When the instrument is on, keep pressing this key
BATTERY
STATUS
and the battery level is displayed.
When the "LOW BATT" light flashes the instrument
will turn off.
Low Bat
Pass
Fail
Tx
Connect the power supply to charge the battery.
UM-28500B-U
User manual ATEQ VT55 Page 6/34
User guide
3.2. POWER OFF KEY
KEY
FUNCTION
First function: Power off: press and hold the C key for more
than 3 seconds to power off the tool.
Second function: "C" for CANCEL return to the previous menu
or function without modifying a parameter.
3.3. CYCLE KEY
KEY
FUNCTION
Starts the acquisition cycle for a valve.
3.3.1. Measurement
When the instrument indicates "READY", press the
acquisition key.
During the test cycle, the message
"TRIGGER PROCESSING" is displayed, and the "TX"
light will illuminate.
CHRYSLER
[C ] RETURN TO MENU
[TEST] START
READY
CHRYSLER
STEP: 1 of 3
[C] : STOP
TRIGGER PROCESSING
Low Bat
After a few seconds, the instrument vibrates and the
valve data is displayed.
Fail
Tx
CHRYSLER
00103399
32 PSI
70°F
BAT:OK
Low Bat
UM-28500B-U
Pass
Pass
Fail
Tx
User manual ATEQ VT55 Page 7/34
User guide
3.4. NAVIGATIONS KEYS
KEY
FUNCTION
Scroll up or increase numerical values.
Scroll down or decrease numerical values.
3.5. VALIDATION KEY
KEY
FUNCTION
Press the ENTER key to open a menu, enter a parameter and
confirm a parameter.
3.6. KEY PAD SUMMARY
Power on and battery status.
Test key, to force a test cycle.
Navigation through menu
adjust a parameter "up".
or
Navigation through menu
adjust a parameter "down".
or
UM-28500B-U
Selection key, press to enter the
chosen function or validate a
parameter.
Cancel key, return to the previous
menu or function without parameter
validation.
User manual ATEQ VT55 Page 8/34
User guide
4. TESTING A TPM VALVE
4.1. LAUNCH A TEST
Step 1 – Select the "VEHICLE SELECTION" menu and
key.
validate with the
Step 2 – Select the vehicle brand by using the
or
keys and validate with the
key.
Step 4 - Hold the tool with in a few inches from the
TPM sensor and press the
button. The tool will
begin to transmit some frames and search step by step
between the several valves types of the selected brand.
Step 5 – The tool will vibrate after receiving the sensor
information. The tool will display the sensor ID,
pressure, and sensor state of the valve that is triggered.
If the tool does not receive the correct information, the
fail LED will illuminate and you can restart the trigger
sequence by pressing the
Step 6 - Press the
button to return to the
return to the main menu.
UM-28500B-U
SELECTION
PONTIAC
PORSCHE
>RENAULT
RENAULT
STEP: 1 of 3
[C] : STOP
TRIGGER PROCESSING
Low Bat
to
Pass
Fail
Tx
RENAULT
00103399
21 kPa
26°C
BAT:OK
READY
Low Bat
button again.
"VEHICLE SELECTION" menu and on the
MAIN MENU
>VEHICLE SELECTION
RKE TEST
SETTINGS
Pass
Fail
Tx
RENAULT
[C ] RETURN TO MENU
[TEST] START
READY
User manual ATEQ VT55 Page 9/34
User guide
4.2. RESULTS EXPLANATION
The picture below is an example of a valve data communication result:
Vehicle brand
Valve
identifier
Tyre internal
pressure
CHRYSLER
21 kPa
00103399
26°C
BAT:OK
READY
Internal wheel
temperature
Valve battery
status
Instrument is ready
to test
4.3. NO VALVE RESPONSE
If the instrument doesn't receive any information from the valve, or if the valve is not
compatible with the parameters, after a time out the instrument stops its cycle and the
"FAIL" light is switched on.
UM-28500B-U
User manual ATEQ VT55 Page 10/34
User guide
5. TESTING A REMOTE KEYLESS ENTRY
To test a Key FOB:
Step 1 - Select this mode in the main menu with the
or
keys and validate with the
key.
Step 2 - The tool prompts you to launch the test by
pressing the
key.
Step 3 - Wait a few seconds until a horizontal bar is
displayed.
MAIN MENU
VEHICLE SELECTION
>RKE TEST
SETTINGS
RKE TEST
[ ] RETURN TO MENU
[ ] START
READY
RKE TEST
PLEASE WAIT...
Step 4 – When the horizontal bar is displayed, hold the
Key FOB approximately 3 to 6 inches from the nose
(antenna) of the VT55. Press any button on the Key
FOB.
RKE TEST
Step 5 - The intensity of the RF signal force is indicated
on the scale of the horizontal bar. The greater the RF
signal power, the greater the horizontal bar is filled.
RKE TEST
Step 6 - Press the
button to return to the RKE
TEST menu and on the
to return to the main
HIGH 315 MHz SIGNAL
RKE TEST
[ ] RETURN TO MENU
[ ] START
READY
menu.
UM-28500B-U
User manual ATEQ VT55 Page 11/34
User guide
6. SETTING ADJUSTMENT FOR VT55
Step 1 – press the select button on settings in the main
menu.
MAIN MENU
VEHICLE SELECTION
RKE TEST
>SETTINGS
Step 2 – Press the up or down keys until you are ready
to select the feature you would like to adjust.
SETTINGS
>UNITS : kPa/°C
BUZZER ON: YES
BACK LIGHT: 100 %
¾ Units: User can change the unit of result
display among kPa and ° C or PSI and ° F.
SETTINGS
>UNITS : kPa/°C
BUZZER ON: YES
BACK LIGHT: 100 %
¾ Buzzer on: The user can select if the tool is
vibrating after receiving the sensor information.
SETTINGS
UNITS : kPa/°C
>BUZZER ON: YES
BACK LIGHT: 100 %
¾ Back light: The user can adjust the light
intensity of the display. The back light increases
the battery consumption.
SETTINGS
UNITS : kPa/°C
BUZZER ON: YES
>BACK LIGHT: 100 %
¾ Auto Off: The VT55 tool will turn off
automatically after a preset number of minutes
since the tool has been last used. This feature
can be disabled.
¾ Zone: User can change the choice between:
America, Europe, Asia and others.
SETTINGS
BUZZER ON: YES
BACK LIGHT: 100 %
>AUTO OFF: DISABLED
SETTINGS
BUZZER ON: YES
BACK LIGHT: 100 %
AUTO OFF: 3 mn
<
SETTINGS
BACK LIGHT: 100 %
AUTO OFF: DISABLED
>ZONE : OTHER
BATTERY STATUS
¾ Battery Level: press and hold the
key to
check the battery status.
UM-28500B-U
User manual ATEQ VT55 Page 12/34
User guide
7. PARAMETERS SETTING
7.1. PRESSURE UNIT
This parameter allows the operator to choose the pressure unit displayed by the
instrument.
You have a choice among kPa/°C or PSI/°F.
From the main menu, access to the settings menu
key.
by pressing the
MAIN MENU
VEHICLE SELECTION
RKE TEST
>SETTINGS
SETTINGS
>UNITS : kPa/°C
BUZZER ON: YES
BACK LIGHT: 100 %
Select UNITS menu and confirm with the
key.
Mocve the cursor in front of the unit to use by using
the up and down arrows
with
and confirm
Key.
SETTINGS
>UNITS : PSI/°F
BUZZER ON: YES
BACK LIGHT: 100 %
The new units are selected.
Return to the main menu by pressing the
UM-28500B-U
UNITS SELECTION
kPa/°C
>PSI/°F
key.
MAIN MENU
VEHICLE SELECTION
RKE TEST
>SETTINGS
User manual ATEQ VT55 Page 13/34
User guide
7.2. BUZZER
This parameter allows the user to select if the tool will vibrate after receiving the sensor
information.
You have a choice among YES or NO.
From the main menu, access to the settings menu
by pressing the
key.
SETTINGS
UNITS : kPa/°C
>BUZZER ON: YES
BACK LIGHT: 100 %
Select BUZZER menu and confirm with the
key (the cursor goes on the right side).
Select YES or NO by using the up and down arrows
and confirm with
Key (the
cursor return to the left side).
UM-28500B-U
SETTINGS
UNITS : kPa/°C
BUZZER ON: YES
<
BACK LIGHT: 100 %
SETTINGS
UNITS : PSI/°F
>BUZZER ON: NO
BACK LIGHT: 100 %
The new option is selected.
Return to the main menu by pressing the
MAIN MENU
VEHICLE SELECTION
RKE TEST
>SETTINGS
key.
MAIN MENU
VEHICLE SELECTION
RKE TEST
>SETTINGS
User manual ATEQ VT55 Page 14/34
User guide
7.3. BACK LIGHT
The "BACK LIGHT" function allows the user to adjust the light intensity of the display.
The back light increases the battery consumption.
Step 1 - Select the "SETTINGS" menu by using the
and
keys and press the
key.
Step 2 - Select the "BACK LIGHT" parameter and
press the
key.
MAIN MENU
VEHICLE SELECTION
RKE TEST
>SETTINGS
SETTINGS
UNITS : kPa/°C
BUZZER ON: YES
>BACK LIGHT: 100 %
Step 3 - The cursor position moves to the right of the
screen and by using the
and
keys,
adjust the back light intensity. Choose between 1 to
100 percent in 1 percent increments and then press the
SETTINGS
UNITS : kPa/°C
BUZZER ON: YES
BACK LIGHT: 70 % <
key.
Step 4 - Press the
button to return to the main
menu.
UM-28500B-U
MAIN MENU
VEHICLE SELECTION
RKE TEST
>SETTINGS
User manual ATEQ VT55 Page 15/34
User guide
7.4. STAND BY PARAMETER
This function is used to switch off the instrument after a programmed time without use.
The programmed time is between 1 and 60 minutes or never.
From the main menu, access to the settings menu
by pressing the
key.
Select AUTO OFF menu and confirm with the
key (the cursor goes on the right side).
MAIN MENU
VEHICLE SELECTION
RKE TEST
>SETTINGS
SETTINGS
BUZZER ON: YES
BACK LIGHT: 100 %
>AUTO OFF: DISABLED
Configure a new timing for the auto off by using the
up and down arrows
and confirm with
Key (the cursor return to the left side).
The new timing is validated.
Note: to have a disable AUTO OFF function,
configure the timing under 1 minute then DISABLE
is displayed.
Return to the main menu by pressing the
UM-28500B-U
key.
SETTINGS
BUZZER ON: YES
BACK LIGHT: 100 %
AUTO OFF: DISABLED <
SETTINGS
BUZZER ON: NO
BACK LIGHT: 100 %
AUTO OFF: 10 mn
<
MAIN MENU
VEHICLE SELECTION
RKE TEST
>SETTINGS
User manual ATEQ VT55 Page 16/34
User guide
7.5. ZONE
The parameter "ZONE" allows the user to select the geographic location of the vehicles
being tested.
Step 1 - Select the "SETTINGS" menu by using the
and
keys and press the
key.
Step 2 - Select the "COUNTRY" parameter and press
the
key.
Step 3 - Then select the region between AMERICA,
EUROPE, ASIA or OTHER.
Step 4 - Press the
button to return to the main
menu.
UM-28500B-U
MAIN MENU
VEHICLE SELECTION
RKE TEST
>SETTINGS
SETTINGS
BACK LIGHT: 100 %
AUTO OFF: DISABLED
>ZONE : EUROPE
SELECTION
AMERICA
>EUROPE
ASIA
MAIN MENU
VEHICLE SELECTION
RKE TEST
>SETTINGS
User manual ATEQ VT55 Page 17/34
User guide
8. FEATURES
8.1. RADIO FREQUENCIES
The awakening transmission frequency is: 125 kHz (LF).
The reception frequencies are: 433 MHz or 315 MHz (RF).
8.2. TYPE OF VALVE
This instrument is designed and can be used for the measurement of any requested
valves.
UM-28500B-U
User manual ATEQ VT55 Page 18/34
User guide
9. PROGRAM AND DRIVERS INSTALLATION
For this device, the connections for update can be carried out by two ways, RS232 or
USB following the user preferences.
9.1. RS232 CONNECTION
1) Connect the USB cable to your VT55 and
the other end to the USB connector of your
PC.
2) Insert the CDROM into your computer, the installation program will start
automatically.
If not, open tWindows© then double click on
"Setup.exe" to start the application.
3) The installation program will start.
4) Follow the instruction on the screen and
click on the "Next >" button.
UM-28500B-U
User manual ATEQ VT55 Page 19/34
User guide
5) The program ask the folder to install the
program, if you don't want to change it
(recommended) click on the "Next > " button.
6) Congratulations, the VT55 is installed on
your computer.
7) The VT55 drivers installation start
automatically, click on the "Next >" button and
follow the instructions.
8) Click on the "Install" key to continue the
installation.
UM-28500B-U
User manual ATEQ VT55 Page 20/34
User guide
9.2. USB CONNECTION
1) Connect the USB wire to the USB connector of your PC and on the VT55 device.
2) Switch on the device.
3) The following window appears, select "No,
not this time" and click on the "Next >" button.
4)
Select the "Install the software
automatically (recommended)" option and
click on the "Next >" button.
5) When this window appears, click on the
"Continue anyway" button.
6) Insert the supplied CD into your CDROM
reader.
UM-28500B-U
User manual ATEQ VT55 Page 21/34
User guide
8) Then drivers are installed.
9) Congratulations, the VT55 device is ready
to be updated. Click on the "Finish" button.
UM-28500B-U
User manual ATEQ VT55 Page 22/34
User guide
10. PROGRAM USE
1) To start the VT55 update program double
click on the "WEB VT55" icon.
2) The icon appears on the task bar to indicate
that the program is running and waiting for a
VT55 connection.
3) Connect a VT55 to the USB to SERIAL Bridge wire, switch it on. When connected the
following screen appears.
Reminder: to run the updating software it's important to have a valid internet
connection.
The serial number and the software
version of the current VT55 are
displayed.
In the "Events report" window are
displayed all the events information.
If the VT55 is not detected, go to the
step 9.
4) To know if a new version of software of the VT55 is available, click on the "UPDATE
VT55"
button.
Then the software is connecting to internet
server to check for an update.
If a new software version is available, this
message appears.
UM-28500B-U
User manual ATEQ VT55 Page 23/34
User guide
5) To update the tool. Click on the "OK"
button.
The left hand progress bar is the web download, the right one is the VT55 upload.
Please DO NOT DISCONNECT the VT55 during these steps; this can cause tool
failure.
When the transfer is finished, the following
message is displayed:
6) The VT55 is updated, remove the instrument and press the "OK" button.
The "HIDE" button allows you to hide the
software and keep it on the Windows© task
bar, when a new VT55 is connected, the
software starts automatically.
The "EXIT" button allows you to quit the
software program.
7) The date
displayed:
subscription
validation
is
The VT55 can be updated for no additional fee for 1 year. The subscription period
begins from the first time you try to update the instrument.
If the subscription is not available or if the date
is expired, it's possible to get a new
subscription on line by clicking on: "Modify
subscription" link.
UM-28500B-U
User manual ATEQ VT55 Page 24/34
User guide
8) Follow the instructions displayed.
9) If the VT55 is not detected the
following message appears:
The software by default is configured on automatic search device.
10) Then configure the software to be on
the automatic mode or on manual mode,
press on the
key. The
following window appears.
When this box is active it's for use the
connection with the USB/RS232 adapter
(USB to SERIAL Bridge wire)
To use the RS232 COM1 port directly
on the PC, deactivate the box.
UM-28500B-U
User manual ATEQ VT55 Page 25/34
User guide
Then choose the communication port (in the list) COM1.
Test the connection by pressing the
1st case
key.
2nd case
The connection is OK, it's possible to The connection is not OK. Verify if the
return to step 4.
VT55 is connected to the COM1 port and
switched on.
Press on the
key and wait a
few seconds.
The VT55 is ready to communicate.
UM-28500B-U
User manual ATEQ VT55 Page 26/34
Appendices
Appendices
ATEQ VT55
1. TECHNICAL CHARACTERISTICS
VT 55
Case dimensions
H x L x P (mm) :
Power supply:
Battery:
Autonomy:
Electrical connections:
Display:
Weight (kg):
152 x 82 x 34
(184 x 82 x 34 with antenna)
24 V DC power supply
Rechargeable Lithium-Ion Battery
About 8 hours following standard use
and about 3 hours following intensive
use.
RS232 or USB
4 lines L.C.D. 65 mm x 32 mm
About 310 g.
Temperatures:
Operational:
+ 5°C to + 45°C
Storage:
0°C to + 60 °C
Relative humidity:
UM-28500B-U
70 to 80 %
User manual ATEQ VT55 Page 27/34
Appendices
2. SECURITY, CARE AND RECYCLING
2.1. SECURITY
This device is a radio transmitter and receiver.
SWITCH ON SAFELY
Do not switch on the device when wireless tool is prohibited or when it may cause
interference or danger.
SWITCH OFF WHEN REFUELLING
Do not use the device at a refuelling point. Do not use near fuel or chemicals.
SWITCH OFF NEAR BLASTING
Follow any restrictions. Do not use the device where blasting is in progress.
USE SENSIBLY
Use only in the normal position as explained in the product documentation. Do not
touch the antenna unnecessarily.
QUALIFIED SERVICE
Only qualified personnel may install or repair this device.
EHANCEMENTS AND BATTERIES
Use only approved enhancements and batteries. Do not connect incompatible
products.
WATER-RESISTANCE
The device is not water-resistant. Keep it dry.
CONNECTING TO OTHER DEVICES
When connecting to any other device, read its user guide for detailed safety
instructions. Do not connect incompatible products.
UM-28500B-U
User manual ATEQ VT55 Page 28/34
Appendices
2.2. CARE AND MAINTENANCE
This device is a product of superior design and craftsmanship and should be treated with care. The
suggestions below will help you protect your warranty coverage
• Keep the device dry. Precipitations, humidity and all types of liquids or moisture can contain
minerals that will corrode electronic circuits. If your device does get wet, remove the battery and
allow the device to dry completely before replacing it.
• Do not use or store the device in dusty, dirty areas. Its electronic components can be damage.
• Do not store the device in hot areas. High temperatures can shorten the life of electronic
devices, damage batteries and warp or melt certain plastics.
• Do not store the device in cold areas. When the device returns to its normal temperature,
moisture can form inside the device and damage electronic circuit boards.
• Do not attempt to open the device other than instructed in this guide.
• Do not drop, knock or shake the device. Rough handling can break internal circuit boards and
fine mechanics.
• Do not use harsh chemicals, cleaning solvent or strong detergent to clean the device.
• Do not paint the device. Paint can clog the moving parts and prevent proper operation.
• Do not touch the main display with hard or angular materials. Objects like earrings or jewellery
may scratch the display.
• Use a soft, clean, dry cloth to clean the device.
• Use only the supplied antenna. Unauthorized antennas, modifications or attachments could
damage the device and may violate regulations governing radio devices.
All of the above suggestions apply equally to your device, battery or any enhancements. If any
device is not working properly, take it the nearest ATEQ service facility for service.
2.3. CERTIFICATION INFORMATION (SAR)
This device meets guidelines for exposure to radio waves.
This device is a radio transmitter and receiver. It is designed not to exceed the limits for exposure
to radio waves recommended by international guidelines. These guidelines were developed by the
independent scientific organization ICNIRP and include safety margins designed to assure the
protection off all persons, regardless of age and health.
For further information see ICNIRP "guidelines for limiting exposure to time-varying electric,
magnetic and electromagnetic fields (up to 300 GHz)" or contact ATEQ.
The SAR value for this device is less than 5A/m. This value is the reference level for general public
exposure to time varying electric and magnetic fields (unperturbed rms values) for the 3 – 150 kHz
frequency range.
UM-28500B-U
User manual ATEQ VT55 Page 29/34
Appendices
2.4. SAFETY INFORMATIONS
Your device and its enhancements may contain small part. Keep them out of the reach of small
children.
Operating environment
Remember to follow any special regulations in force in any area, and always switch off your device
when its use is prohibited or when it may cause interference or danger. Use the device only in its
normal operating positions.
Potentially explosive environments
Switch of the device in any area with a potentially explosive atmosphere and obey all signs and
instructions. Potentially explosives atmospheres include areas where you would normally be
advised to turn of vehicles engines. Sparks in such areas could cause an explosion or fire resulting
in bodily injury or even death. Switch of the device at refuelling points such as near gas pumps at
service stations. Observe restrictions on the use of radio equipments in fuel depots, storage, and
distribution areas; chemicals plants; or where blasting operation are in progress. Areas with
potentially explosive atmosphere are often but not always clearly marked. They included chemicals
transfer or storage facilities, vehicle using liquefied petroleum gas (such as butane or propane),
and areas where the air contains chemicals or particles such as grain, dust or metal powders.
About Charging
Use only the charger supplied with your device. Use of another type of charger will result in
malfunction and/or danger.
Use a specified battery in the equipment.
About the Charger
Do not use the charger in a high moisture environment. Never touch the charger when your hands
or feet are wet.
Allow adequate ventilation around the charger when using it to operate the device or charge the
battery. Do not cover the charger with paper or other objects that will reduce cooling. Do not use
the charger while it is inside a carrying case.
Connect the charger to a proper power source. The voltage requirements are found on the product
case and/or packaging.
Do not use the charger if the cord becomes damaged.
Do not attempt to service the unit. There are no serviceable parts inside. Replace the unit if it is
damaged or exposed to excess moisture.
About the Battery
CAUTION: This unit contains an internal Lithium Ion battery, it is replaceable only by the
competent ATEQ personnel. The battery can burst or explode, releasing hazardous chemicals. To
reduce the risk of fire or burns, do not disassemble, crush, puncture, or dispose of in fire or water,
do not short-circuit or connect the contacts with a metal object.
Use a specified charger approved by the ATEQ manufacturer.
Important instructions (for service personnel only)
CAUTION: Risk of explosion if battery is replaced by an incorrect type. Dispose of used batteries
according to the instructions.
Replace only with the same or equivalent type recommended by the manufacturer.
Use the battery only in the specified equipment.
The battery must be recycled or disposed of properly.
UM-28500B-U
User manual ATEQ VT55 Page 30/34
Appendices
2.5. RECYCLING
Do not dispose of the rechargeable Lithium-Ion battery or the tool to the
dustbin.
These components must be collected and recycled.
The crossed-out wheeled dustbin means that within the EU the product must be taken to
separate collection at the product end-of life. This applies to your tool but also to any
enhancements marked with this symbol. Do not dispose of these products as unsorted
municipal waste. For further information, please contact ATEQ.
UM-28500B-U
User manual ATEQ VT55 Page 31/34
Appendices
UM-28500B-U
User manual ATEQ VT55 Page 32/34
Index
Index
2
24 V DC connector ...............................4
B
Back light ............................................15
Battery ................................................30
Buzzer ................................................14
C
Cancel key............................................7
Care....................................................29
Characteristics....................................27
Charger ..............................................30
Charging .............................................30
Communication port ...........................26
Connector .............................................4
Crossed-out wheeled dustbin .............31
Cycle key ..............................................7
D
Description............................................3
Drivers installation ..............................19
E
Environment .......................................30
F
Features .............................................18
Front face .............................................3
K
Key pad ................................................8
L
Launch a test ........................................9
Lights indicator .....................................5
M
Maintenance .......................................29
Measurement........................................7
N
Navigation key ......................................8
UM-28500B-U
No response .......................................10
O
OFF key................................................7
P
Parameters setting..............................13
Precaution ..........................................30
Pressure unit.......................................13
Program installation ............................19
Program use .......................................23
R
Recycling ......................................27, 31
Remote key test..................................11
Results explanation ............................10
RS232 connector ..................................4
S
SAR ....................................................29
Security.........................................28, 30
Service................................................29
Settings...............................................12
Stand by .............................................16
Start key ...............................................6
Subscription ........................................24
Supply connector ..................................4
U
Up dating ............................................23
USB connector......................................4
V
Validation key .......................................8
Valve test ..............................................9
Valve types .........................................18
Z
Zone ...................................................17
User manual ATEQ VT55 Page 33/34
Index
UM-28500B-U
User manual ATEQ VT55 Page 34/34
This document is the exclusive property of ATEQ.
It may not be communicated, reproduced or used without prior consent.