1
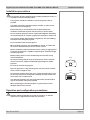
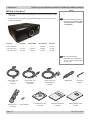
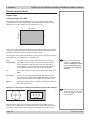
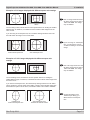
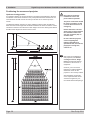
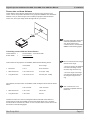
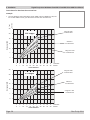
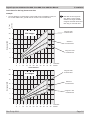
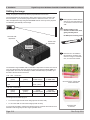
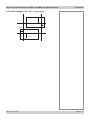
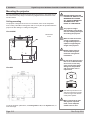
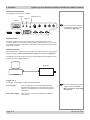
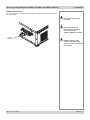
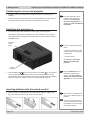
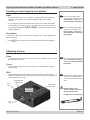
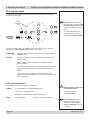
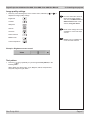
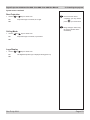
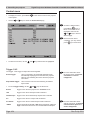
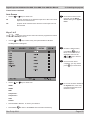
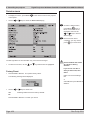
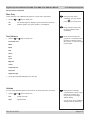
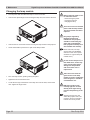
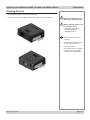
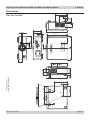
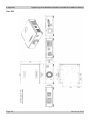
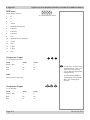
2. Installation
Digital Projection M-Vision
Cine 230, Cine 260, Cine 400 User Manual
Mounting the projector
Notes
The four adjustable feet under the chassis allow the projector to be lowered onto a
flat surface without any danger of hands being trapped between the bottom frame
and the surface.
Ceiling mounting
The projector is designed to be used on a flat surface, but it can be suspended
from a ceiling. Three M4 mounting holes with a 0.7mm pitch are provided under the
projector to allow bolting to a ceiling mounting plate.
Cine 230/260
Dimensions
in mm
BEFORE INSTALLING THE
PROJECTOR, READ ALL THE
WARNINGS BELOW AND
ALL THOSE IN IMPORTANT
INFORMATION AT THE
FRONT OF THIS MANUAL.
The projector weighs
approximately 13 kg (29 lbs).
Use safe handling techniques
when lifting the projector.
Make sure that the surface,
ceiling or rigging that is
to support the projector is
capable of supporting the
weight of the projector.
Backup safety chains or
wires should always be
used with ceiling mount
installations.
Cine 400
Do not tilt the projector more
than ±12° in either direction
when in use, as this may
cause serious lamp failure,
damage the lamp module
and cause extra cost on
replacement.
±12°
±12°
Cine 400 may be tilted to one
side and positioned in portrait
mode as long as the exhaust
outlet points upward.
To use the projector upside down, set Ceiling mode to On, in the System menu, to
invert the image.
Page 2.12
When positioning the Cine
400 projector in portrait
mode, ensure adequate
airflow to the air inlet.
Rev E July 2014