1
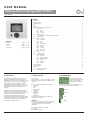
U SER M AN U AL
Warmup Thermostat type WA-TSTAT-V
57628 09/06 (BJ)
Contents
1.
2.
3.
4.
5.
6.
Language
English .
German .
French .
Portuguese
.
.
.
.
.
.
.
.
.
.
.
.
.
.
.
.
.
.
.
.
page
1-4
page
5-8
page 9 - 12
page 13 - 16
Introduction
. . . . . . . . . .
Getting started . . . . . . . . . .
General Display . . . . . . . . . .
LED
. . . . . . . . . .
Buttons
. . . . . . . . . .
Menus for Setting Up the Thermostat . . . .
6.1.
Operation . . . . . . . . . .
6.1.1. Auto . . . . . . . . .
6.1.2. Manual
. . . . . . . .
6.1.3. Comfort . . . . . . . .
6.2.
Setting 4-event . . . . . . . .
6.2.1. Example of Scheduling 4-event Set-up
6.3.
Programming . . . . . . . . .
6.4.
General Settings . . . . . . . .
6.4.1. Language . . . . . . . .
6.4.2. Time . . . . . . . . .
6.4.3. Day
. . . . . . . . .
6.4.4. Temperature . . . . . . .
6.4.5. Child lock . . . . . . . .
6.4.6. Heater . . . . . . . . .
6.4.7. Covering . . . . . . . .
6.4.8. Sub Floor . . . . . . . .
6.4.9. Application
. . . . . . .
6.5.
Service
. . . . . . . . . .
6.6.
Contact Details . . . . . . . .
6.7.
Engineer Settings . . . . . . . .
6.7.1. Readout . . . . . . . .
6.7.2. Temp. Settings
. . . . . .
6.7.3. Adaptive function . . . . . .
6.7.4. Offset . . . . . . . . .
6.7.5. Fil Pilote* . . . . . . . .
6.7.6. Reset . . . . . . . . .
7. Error Messages . . . . . . . . . .
8. Factory settings . . . . . . . . . .
9. Appendix
. . . . . . . . . .
9.1.
Table of Compatibility . . . . . . .
9.2.
Heat Definitions . . . . . . . .
1. Introduction
2. Getting started
The NewStar thermostat can switch on your
heating system at pre-determined times on
different days of the week. It is possible to set 4
periods called events each day with different
temperatures. The thermostat comes with a
default schedule that is suitable for most
installations. Unless you change these settings,
the thermostat will operate to this default
program.
Quick set-up:
The first time you connect the power or after a
reset, the display will show you “Welcome to
Warmup”.
Working with lower temperatures during times
that the room is unoccupied will lower your
energy costs without reducing the comfort. The
thermostat has an adaptive function that
automatically changes the start time of a
heating period so that the desired temperature
is reached at the time that you set. After 3 days
the adaptive function has learned when the
heating must be switched on.
Push accept button. Then you can select:
• Language
• Time
• Day
• Temperature
• Child lock
• Heater?
• Covering?
• Sub floor
• Application
Use the navigation buttons for selecting /
changing in the menus.
Important:
You have, as minimum, to select “Heater” and
“covering” to define the type of heater and
covering, before you can start up the
thermostat.
For further information, see point:
5. Buttons.
6.4. General settings.
Type: WA-TSTAT-V
.
.
.
.
.
.
.
.
.
.
.
.
.
.
.
.
.
.
.
.
.
.
.
.
.
.
.
.
.
.
.
.
.
.
.
.
.
.
.
.
.
.
.
.
.
.
.
.
.
.
.
.
.
.
.
.
.
.
.
.
.
.
.
.
.
.
.
.
.
.
.
.
.
.
.
.
.
.
.
.
.
.
.
.
.
.
.
.
.
.
.
.
.
.
.
.
.
.
.
.
.
.
.
.
.
.
.
.
.
.
.
.
.
.
.
.
.
.
.
.
.
.
.
.
.
.
.
.
.
.
.
.
.
.
.
.
.
.
.
.
.
.
.
.
.
.
.
.
.
.
.
.
.
.
.
.
.
.
.
.
.
.
.
.
.
.
.
.
.
.
.
.
.
.
.
.
.
.
.
.
.
.
.
.
.
.
.
.
.
.
.
.
.
.
.
.
.
.
.
.
.
.
.
.
.
.
.
.
.
.
.
.
.
.
.
.
.
.
.
.
.
.
.
.
.
.
.
.
.
.
.
.
.
.
.
.
.
.
.
.
.
.
.
.
.
.
.
.
.
.
.
.
.
.
.
.
.
.
.
.
.
.
.
.
.
.
.
.
.
.
.
.
.
.
.
.
.
.
.
.
.
.
.
.
.
.
.
.
.
.
.
.
.
.
.
.
.
.
.
.
.
.
.
.
.
.
.
.
.
.
.
.
.
.
.
.
.
.
.
.
.
.
.
.
.
.
.
.
.
.
.
.
.
.
.
.
.
.
.
.
.
.
.
.
.
.
.
.
.
.
.
.
.
.
.
.
.
.
.
.
.
.
.
.
.
.
.
.
.
.
.
.
.
.
.
.
.
.
.
.
.
.
.
.
.
.
.
.
.
.
.
.
.
.
.
.
.
.
.
.
.
.
.
.
.
.
.
.
.
.
.
.
.
.
.
.
.
.
.
.
.
.
.
.
.
.
.
.
.
.
.
.
.
.
.
.
.
.
.
.
.
.
.
.
.
.
.
.
.
.
.
.
.
.
.
.
.
.
.
.
.
.
.
.
.
.
.
.
.
.
.
.
.
.
.
.
.
.
.
.
.
1
1
1
2
2
2
2
2
2
2
2
2
2
2
2
2
3
3
3
3
3
3
3
3
3
3
3
3
3
4
4
4
4
4
4
4
4
3. General Display
The display will normally
show the period (day, night,
home, out), the current
temperature, and the time.
The period is indicated by a symbol. Below you
can see a list of some of the symbols:
At work
At home
Day
Night
4. LED
ways of setting the temperature(s):
The LED is placed in the top right corner above
the display.
6.1.1. Auto
Select Auto if you want the temperature to be
controlled and operated automatically via the 4event system.
LED signal
Constant red light
Blinks
No light
Indicates
Relay is active
System failure. (see error
messages)
Relay not active or
thermostat turned off
LED
Reset
Standby
5. Buttons
6.1.2. Manual
Here you can cancel the scheduled 4-event
program (e.g. during holidays) and set the
wanted temperature manually. You may want to
adjust the temperature to for example 5°C for
frost protection while you are away.
To set the temperature, do the following:
1. Select Manual.
2. Use the up/down button to raise/lower the
temperature.
3. Press the Accept button to finish.
Please note: The temperature that you set
manually will be valid until you cancel the
manual mode again by selecting Auto.
Navigation
You can use the standby button to turn display
and regulation of temperature on/off. When the
thermostat is switched off, the relay
disengages. The clock will keep going, though.
6.1.3. Comfort
Here you can set a temporary Comfort
temperature (so-called party mode) for a single
event.
When you press the Reset button (use pen to
activate) for 3 seconds, a "Confirm factory
reset" text will be shown on the display. Then
press the Accept button to reset the thermostat,
which will then start up with default values and
display the installation menu.
To set the temperature, do the following:
1. Select Comfort.
2. Use the up/down button to raise/lower the
temperature.
3. Press the Accept button to finish.
The buttons for navigating in the menus and
selecting/changing settings are placed in the
middle.
Up
Back/Cancel
Accept
Forward
Down
Back/Cancel
• Go back in the menus (i.e.
upwards in the menu
hierarchy).
• Cancel changes of current
value.
Forward
• Move forward in the menus
(i.e. downwards in the
menu hierarchy).
• Quick steps upwards when
specifying values, e.g.
temperature.
Up
• Move up in menu.
• Raise current value, e.g.
temperature.
Down
• Move down in menu.
• Lower current value, e.g.
temperature.
Accept/Change • Select item from menu to
see/change/set value.
• Accept new/changed
setting.
6. Menus for Setting Up
the Thermostat
You can program the thermostat and make
various settings by using the menu system. To
open the main menu, press the Accept button.
In the sections below every item on the main
menu will be described in more detail.
6.1. Operation
Here you can choose between three different
Please note: Comfort mode is a temporary,
manual setting that will be automatically
cancelled by the next event in the scheduled 4event system.
6.2. Setting 4-event
If Auto has been selected in the Operation
menu, the 4-event system can be set to
automatically control the temperature settings
for each day in a period of 7 days.
You can select the wanted temperature for Day
and Night, for when you are Out and at Home,
and for the Weekend Day and Weekend Night.
Moreover, you can define when you want each
time period (Day, Night, Out, Home, Weekend
Day, and Weekend Night) to begin.
Please note: You need to use the Down button
to move to the end of the menu.
wanted time.
Press the Accept button to finish.
• Specify the wanted Day temperature.
Use the up/down button to raise/lower the
temperature.
Press the Accept button to finish.
2. Choose Out.
• Specify when Out time begins.
• Specify the wanted temperature when you
are out and away from home (Out temp).
3. Choose Home.
• Specify when Home time begins.
• Specify the wanted temperature when you
are at home (Home temp).
4. Choose Night.
• Specify when Night time begins.
• Specify the wanted Night temperature.
5. Choose Weekend Day.
• Specify when Day time begins on
weekends.
• Specify the wanted Day temperature on
weekends.
6. Choose Weekend Night.
• Specify when Night time begins on
weekends.
• Specify the wanted Night temperature on
weekends.
6.3. Programming
Here you can choose between various
programming options that are used in
connection with scheduling the 4-event system:
• Mon-Fri, Sat-Sun
Will be shown as 5:2 on the display. This
setting allows you to have 5 days with the
same 4-events, and 2 days with the same 2
events. The days 1-5 are controlled by the
settings for Day, Night, Out, Home and
day 6-7 is controlled by the settings for
Weekend Day and Weekend Night.
• Mon-Sat, Sun
Will be shown as 6:1 on the display. This
setting allows you to have 6 days with the
same 4-events, and 1 day with 2 events.
The days 1-6 are controlled by the settings
for Day, Night, Out, Home and day 7 is
controlled by the settings for Weekend Day
and Weekend Night.
• Mon-Sun, 4-events
Will be shown as 7:0 on the display. This
setting allows you to have 7 days with 4
different events (Day, Night, Out, Home).
The days 1-7 are controlled by individual
day settings (Monday – Sunday).
6.4. General Settings
Finally you can specify temperatures and
periods (Day, Night, Out, Home) for each day of
the week (Monday, Tuesday, Wednesday,
Thursday, Friday, Saturday, and Sunday). This
requires, though, that the Mon-Sun, 4-events
option has been selected in the Programming
menu (will be shown as Programming: 7:0 on
the display). Please refer to section about
Programming on page 8.
6.2.1. Example of Scheduling 4-event Set-up
If you in the Programming menu have selected
Mon-Fri, Sat-Sun (shown as Programming: 5:2
on the display) you can set up the 4 periods
(called events) in the following way:
1. Choose Day.
• Specify when Day time begins.
Use the up/down button to mark the
6.4.1. Language
Here you can select the language you want to
be used on the display. You can choose
between the following languages:
• English
• German (Deutsch)
• French (Francais)
• Spanish (Espanol)
• Portuguese (Portogese)
6.4.2. Time
• Here you can select whether 12- or 24-hour
clock should be used.
• Further, you can set the time here. To set
the time, select Set time. Then use the
up/down buttons to adjust the time, and
press the Accept button to finish.
6.4.3. Day
Here you can set the day of the week:
• Monday
• Tuesday
• Wednesday
• Thursday
• Friday
• Saturday
• Sunday
Please note: You need to use the Down button
to move to the end of the list of weekdays.
6.4.8. Sub Floor
Here you can enter the type of sub floor:
• Concrete
• Screed
• WBP Ply
• Ins. Backer Board
• Backer Board
6.4.9. Application
Here you can select the type of regulator
application:
You can also get readouts of some statistics:
• Min daily: A percentage indicating the
minimum activated period within 24 hours
over the last 14 days.
• Max daily: A percentage indicating the
maximum activated period within 24 hours
over the last 14 days.
• 2 Days: Indicates how many % the heater
has been turned on for the last two days.
• Floor Temp. Cont.: A floor sensor is used.
6.4.4. Temperature
Scale
Here you can specify what temperature unit
should be used in the display:
• °C (Celsius, with a resolution of 0.5 degree)
• °F (Fahrenheit, with a resolution of 1
degree)
• A scale from 1-10 (in steps of about 10°).
Display shows
Here you can decide whether the display shall
show the time, set point and/or air temperature.
• Time (On/Off)
• Set point (On/Off) (The current temperature
that the thermostat has been set to, for
instance in the 4-event settings.)
• Air Temp. (On/Off). The room/air
temperature currently registered by the
sensor.
Air temperature
Set point
Time
6.4.5. Child lock
By switching on the child lock you can lock the
menus (marked with a padlock symbol on the
display). Then it will no longer be possible to
select the sub-menus and change the settings.
You can still set a comfort temperature and the
time, though.
Please note: You can still use the Reset button
to return to factory settings, if the child lock has
been switched on.
6.4.6. Heater
Here you can define the type of heater that the
thermostat is attached to:
• Wire
• Ribbon
• Carbon
• Radiator
• Type A
• Type B
• Type C
• User Defined
Please refer to Appendix for configuration table
showing combinations of heater type and
covering.
6.4.7. Covering
Here you can enter the type of floor covering:
• Ceramic Tiles
• Stone
• Laminate
• Wood
• Carpet
• Vinyl
• Other
Please refer to Appendix for configuration table
showing combinations of heater type and
covering.
• Fl. Cont. 2 sensors: Both floor sensor and
limit sensor are used. A maximum
temperature limit can be set for the limit
sensor, so the thermostat will switch off if
the temperature at the place of the limit
sensor reaches the maximum temperature.
This set-up with a limit sensor can, for
instance, be used to avoid damage to some
delicate floor covering.
• Air Temp. Control: The sensor is placed in
the thermostat.
• Air Cont. Floor limit: Apart from the sensor
inside the thermostat an extra limit sensor
is used. A maximum temperature limit can
be set for the limit sensor, so the thermostat
will switch off if the temperature at the
position of the limit sensor reaches the
maximum temperature. This set-up with an
extra limit sensor can, for instance, be used
to avoid damage to some delicate floor
covering.
• Regulator Control: No sensor is used here.
The thermostat will turn on in sequences of
20 minutes, and you can specify the length
of the sequences as a percentage of 20
minutes. If you, for example, set the
regulator to 50, the thermostat will turn on
for 10 minutes, switch off for 10 minutes,
and then turn on again for 10 minutes.
• External Control: Used in case of a set-up
with several thermostats being controlled
by an external master thermostat. Then the
thermostat will work as a slave, and you
cannot apply any settings at all since the
master thermostat controls it.
6.5. Service
If you need tecnical help then select Service
from the main menu to see the contact
information.
6.6. Contact Details
Select Contact Details from the main menu to
see the contact information.
Warmup plc
www.warmup.com
GB +442084536868
USA +12037910072
ES +34800099988
PT +351800812080
F +33080563990
6.7. Engineer Settings
To select Engineer settings, press the up and
down button at the same time for 5 seconds.
Note: Changes may invalidate warranty.
6.7.1. Readout
Here you see readouts of the following current
temperatures:
• Room temp
• Floor temp
• Floor limit temp
• 30 Days: Indicates how many % the heater
has been turned on for the last 30 days.
• 360 Days: Indicates how many % the
heater has been turned on for the last 360
days.
• Min Air: Minimum room temperature within
the last 48 hours.
• Mean Air: Average room temperature
within the last 48 hours.
• Max Air: Maximum room temperature
within the last 48 hours.
• Min Floor: Minimum floor temperature
within the last 48 hours.
• Mean Floor: Average floor temperature
within the last 48 hours.
• Max Floor: Maximum floor temperature
within the last 48 hours.
• Cut out cnt: Number of relay connections
in the service life of the thermostat. This
value is never reset.
• Application: Here you can get readout for
the current application type that has been
selected in the General settings
- Floor
- Floor-2
- Air
- Air-Limit
- Reg.
- Ext.
• Software ver.: Indicates the current version
of the software.
6.7.2. Temp. Settings
Here you can specify the wanted minimum and
maximum temperatures for air, floor, or external
limit sensor.
Before you can select minimum and maximum
limits for air, floor or limit sensor, the application
for the regulator type in question must be
chosen. Please refer to section about General
Settings – Application on page 11 for more
details.
Please note: If you do not specify any settings
here, the factory settings will be used.
• Air Temp. Range
Max Temp
Min Temp
• Floor Temp. Range
Max Temp
Min Temp
• Limit Sensor
Max Temp
Min Temp
6.7.3. Adaptive function
Here you can activate/deactivate (On/Off) the
adaptive function. This function is only related
to the 4-event timer and only works in
connection with going from one event to
another where the temperature is going to be
raised. The adaptive function finds out when the
thermostat shall start heating to ensure that the
right temperature is reached at the time that it
has been programmed for.
8. Factory settings
The thermostat is delivered with factory set programs as follows:
Day 1-5
6.7.4. Offset
Offset is used to compensate for any difference
between the thermostat and a room
thermometer. If the thermometer, for instance,
shows 1°C more than the thermostat, it is
possible to adjust the offset by +/- 5°C. Then
the thermostat will show the same temperature
as the thermometer. If the thermostat for
example shows 1 degree too much, offset
should be set to +1. Then the temperature will
be set 1 degree lower.
Offset applies to both built-in and external
sensors whereas the limit sensor, if any, is not
affected.
6.7.5. Fil Pilote*
Here you can specify temperature settings that
will depend on which signal is received from the
Fil pilote input.
Event
Time
With floor sensor
With air sensor
Day
06:00-08:00
25°C
20°C
Out
08:00-16:00
20°C
15°C
Home
16:00-22:30
27°C
22°C
Night
22:30-06:00
20°C
15°C
Day 6-7
Event
Time
With floor sensor
With air sensor
Day
08:00-23:00
27°C
22°C
Night
23:00-08:00
20°C
15°C
9. Appendix
9.1. Table of Compatibility
*Please note: The Fil pilote menu is only
available in type WA-STAT-VB. It is primarily for
usage in France.
• Eco Temp: Economic temperature
• Frost Prt T: Frost protection
• Fil Pilote: On/Off
6.7.6. Reset
• Reset 2: Reset values defined in Engineer
settings to factory settings.
• Reset 3: Equal to Reset 2, except history
data are deleted. The number of relay
connections is not deleted, though.
Tiles
Stone
Laminate
Wood
Carpet
Vinyl
Other
Wire
YES
YES
NO
NO
NO
NO
n/a
Ribbon Wire
YES
YES
YES
YES
NO
NO
n/a
Carbon
YES
YES
YES
YES
YES
YES
n/a
Central heating
n/a
n/a
n/a
n/a
n/a
n/a
n/a
Type A
YES
YES
NO
NO
NO
NO
n/a
Type B
NO
NO
YES
YES
NO
NO
n/a
Type C
NO
NO
NO
NO
YES
YES
n/a
User Defined
n/a
n/a
n/a
n/a
n/a
n/a
n/a
Tiles
Stone
Laminate
Wood
Carpet
Vinyl
Other
Wire
A
A
n/a
n/a
n/a
n/a
H
Ribbon Wire
A
A
B
B
n/a
n/a
H
Carbon
A
A
B
B
C
C
H
Central heating
G
G
G
G
G
G
H
7. Error Messages
If you get an error the LED is flashing red.
9.2. Heat Definitions
Internal
failure
Contact Warmup
External
failure
Contact Warmup
Type A
D
D
n/a
n/a
n/a
n/a
H
Type B
n/a
n/a
E
E
n/a
n/a
H
Type C
n/a
n/a
n/a
n/a
F
F
H
H
H
H
H
H
H
H
User Defined
Configuration
Overheat
Room
Floor
Min. Max.
Min. Max.
Max.
A
5
40
5
40
40
B
5
27
5
27
30
C
5
25
5
25
30
D
5
40
5
50
55
E
5
27
5
45
50
F
5
25
5
35
40
G
5
45
H
5 7 6 2 8
Control temperature
n/a = not available
prog
n/a
n/a
prog
prog